How do I combine multiple images in Windows 11/10 PDF? What is the best way to save multiple images into a single PDF? Windows 11/10 comes with several features, and out of those, one is Microsoft Print to PDF. In this gearupwindows article, we will take the help of this PDF printer to merge multiple images or pictures on Windows 10 PC. That means we will combine multiple images in a single PDF without any third-party software.
Why should I Join Multiple Pictures into a Single PDF in Windows 11/10?
There may be several reasons to join pictures into a single PDF file. Assume you want to share a collection of pictures with your friends or co-workers. There is nothing wrong with uploading images one by one to share with someone else. But, if you share a single file, that will be much easier to manage you and the others also.
How to Mix Various Pictures into Single PDF in Windows 11/10?
Many free online applications are available to merge several files into one, but we will not use them in this post. Why should we use third-party software when it’s possible to combine pictures into one PDF using built-in features in Windows 11/10? As said above, to combine several images in a single PDF file, we will use the built-in tool Microsoft Print to PDF. Let us see how it is possible.
Step 1. Open the File Explorer. Create a new folder. Copy all the pictures into the newly created folder you want to merge and create a single PDF file.
Step 2. Select all the pictures that you want to blend into one PDF.
To select all pictures, select an image and press Ctrl + A keyboard shortcut. Or, select an image, then hold down the Ctrl key, and then click (one by one) on all the pictures you want to select.
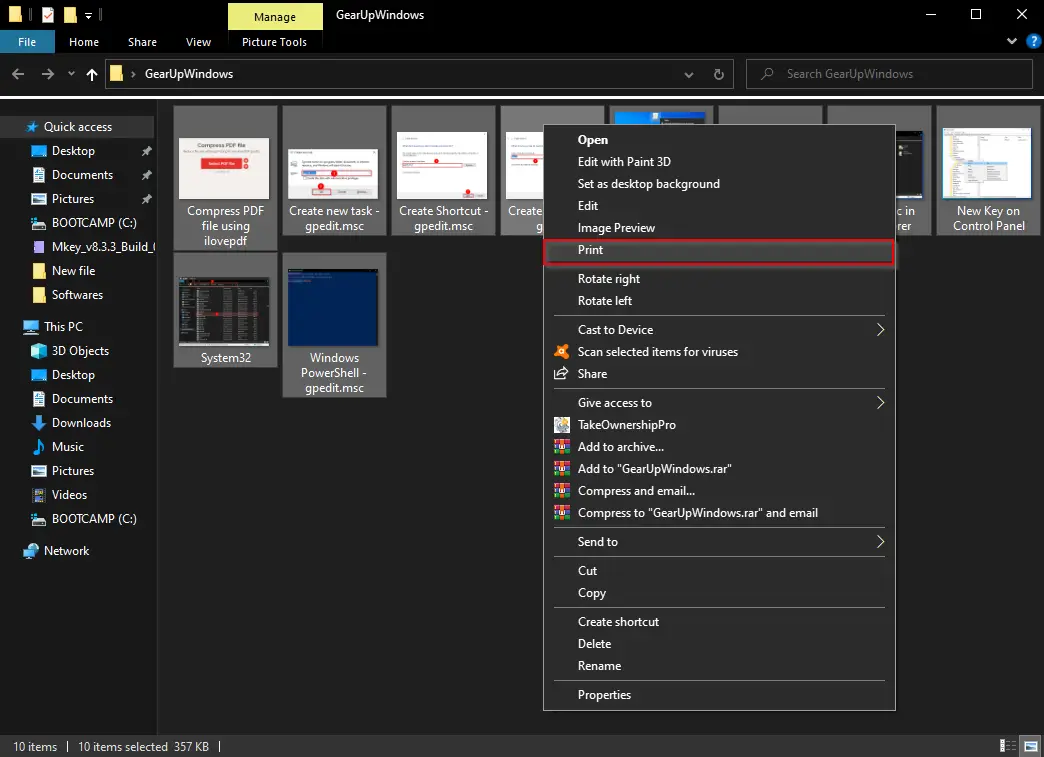
Step 3. While the images are selected, perform a right-click and then click the Print option.
Gentle Reminder: Please note that if you select more than 15 images at once when you perform the right-click on it, you will not see the Print option. However, it is possible to rectify the missing Print option on right-click context menu by editing the Windows Registry.
Step 4. After executing the above steps, the Print dialog box will open.
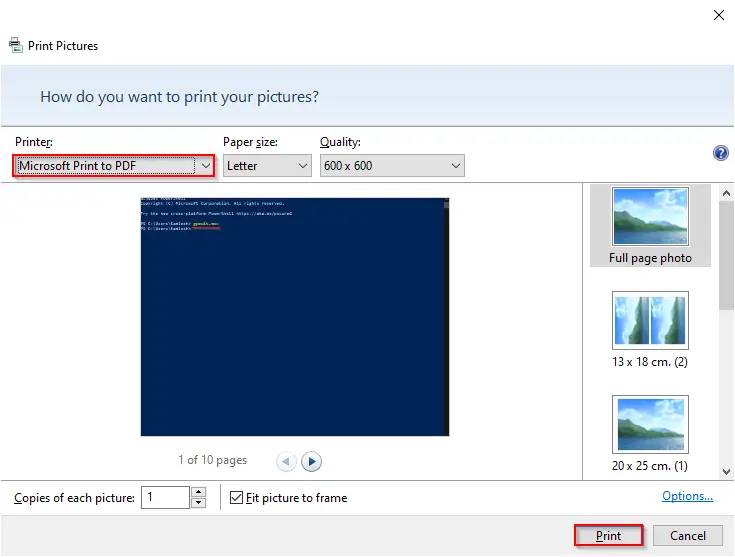
Step 5. Here, select the Printer as Microsoft Print to PDF and then click on the Print button. If you wish, you can change the picture quality and other settings.
Step 6. Now, the “Save Print Output As” dialog box will open. In the “File name” field, type the file’s name and click on the Save button.
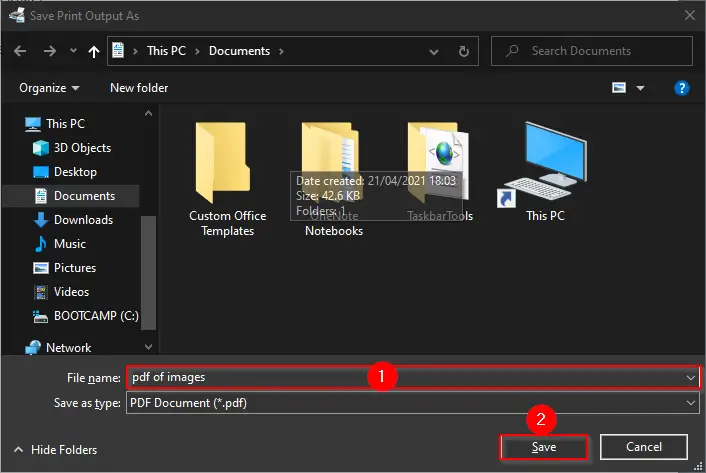
Once you execute the above steps, you will have a PDF file of several images on your PC.
Conclusion
In conclusion, merging multiple images into a single PDF file can be a useful way to manage and share collections of pictures. Windows 11/10 users can accomplish this task without using third-party software by using the built-in tool Microsoft Print to PDF. By following the simple steps outlined in this article, users can easily create a PDF file containing multiple images.