For your PC or notebook to function properly, all the hardware components that are connected to it require the appropriate drivers. This also holds true for graphics and video, which require the correct drivers that are compatible with the Windows operating system. In the event of experiencing BSOD (Blue Screen of Death) errors, it is highly likely that outdated or incompatible graphics drivers are installed on your PC. Although updating your graphic card drivers, which are also referred to as video or GPU drivers, may not improve your system’s speed, installing the latest graphics or video drivers can undoubtedly enhance the performance of graphics-intensive tasks.
Graphics or video cards are manufactured by popular companies such as NVIDIA, Intel, and AMD. These companies not only produce graphics cards but also release regular updates to their graphics drivers. These driver updates are released several times a year. If you are using Windows 10, the operating system automatically downloads and installs the latest drivers through Windows Update. Alternatively, graphics card manufacturers also provide tools for the automatic downloading and installation of the latest drivers. However, it can be challenging to find an official uninstall tool for these drivers in case of errors.
The Display Driver Uninstaller is a free and lightweight software that allows you to easily and completely uninstall AMD, Intel, and NVIDIA driver files from your Windows operating system. With just a few clicks, you can remove these drivers using this tool, and the process is fast and immediate. The developer of this software recommends that you boot your PC into safe mode to uninstall the drivers. The interface of this application is simple and user-friendly, and you don’t need any technical expertise to use it. This freeware is a useful tool if you want to completely uninstall a driver from your PC.
Display Driver Uninstaller for Windows 10
Completely uninstall AMD, Intel, and NVIDIA drivers.
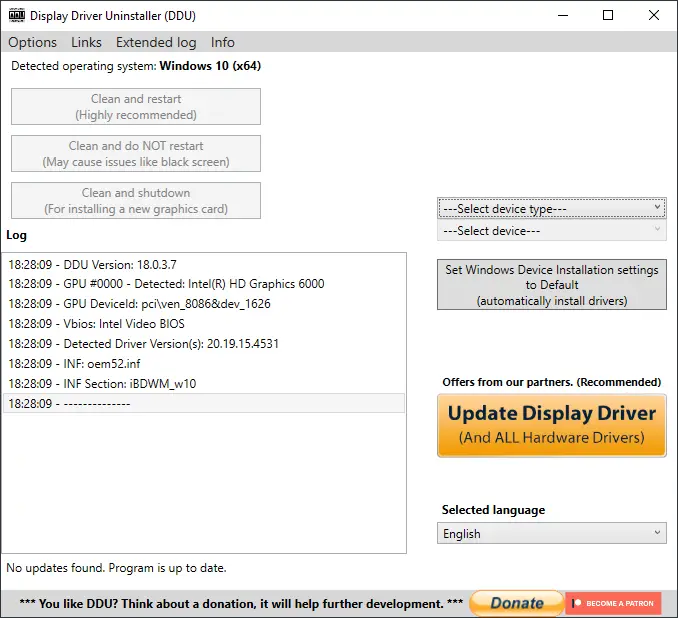
After booting your PC in safe mode, launch the Display Driver Uninstaller (DDU). From there, you have the choice of selecting one of three options: Clean and restart, Clean and do not restart, or Clean and shutdown. The developer of the software suggests choosing the first option, Clean and restart, to avoid any potential issues. Opting for the second option, Clean and do not restart, may result in black screen problems. After uninstalling the graphics card drivers and restarting your PC, the correct drivers will be downloaded and installed by Windows automatically. However, if you want to install the drivers manually on Windows 10, you can stop drivers update automatically.
Why is Display Driver Uninstaller required to Uninstall Graphics drivers?
You can use the standard uninstaller of Windows 10 from Control Panel or uninstall drivers through the Device Manager of the Windows operating system. Still, it is handy if the standard uninstaller fails to uninstall the graphics driver from your PC.
Download Display Driver Uninstaller
Driver Uninstaller is compatible with Windows XP, Win Vista, Win 7, Win 8, Win 8.1, and Windows 10 (32-bit and 64-bit). You can download the Display Driver Uninstaller free software from its official website.