If you plan to install a fresh copy of Windows 10 on your computer, it is better to create a bootable USB flash drive. USB flash drive is also useful when it comes to storage. It can handle a lot of data on a small USB disk.
If you have a computer that features a UEFI (Unified Extensible Firmware Interface) BIOS instead of the legacy Basic Input/Output System (BIOS), you have to be more careful in choosing the appropriate media for the motherboard firmware type.
On Windows 10, you can use two methods to create bootable media to install the OS from USB on a UEFI-based computer. You can either use the Microsoft Media Creation Tool to download the files onto removable storage with support for both firmware types (UEFI and legacy BIOS) or use a third-party tool, Rufus.
Both of the software allow downloading the latest Windows 10 ISO file directly from the Microsoft server. This week Microsoft updated Windows 10 to the 20H2 version. Hence, if you plan to install a fresh copy of Windows 10, it is better to download an updated version of Windows 10 from the Microsoft Store.
This post will go through the steps, including downloading and installing the latest version of Windows 10 20H2.
How to download and create a Windows 10 UEFI boot media using the Media Creation Tool?
Follow these steps to download and create a Windows 10 UEFI boot media using the Media Creation Tool:-
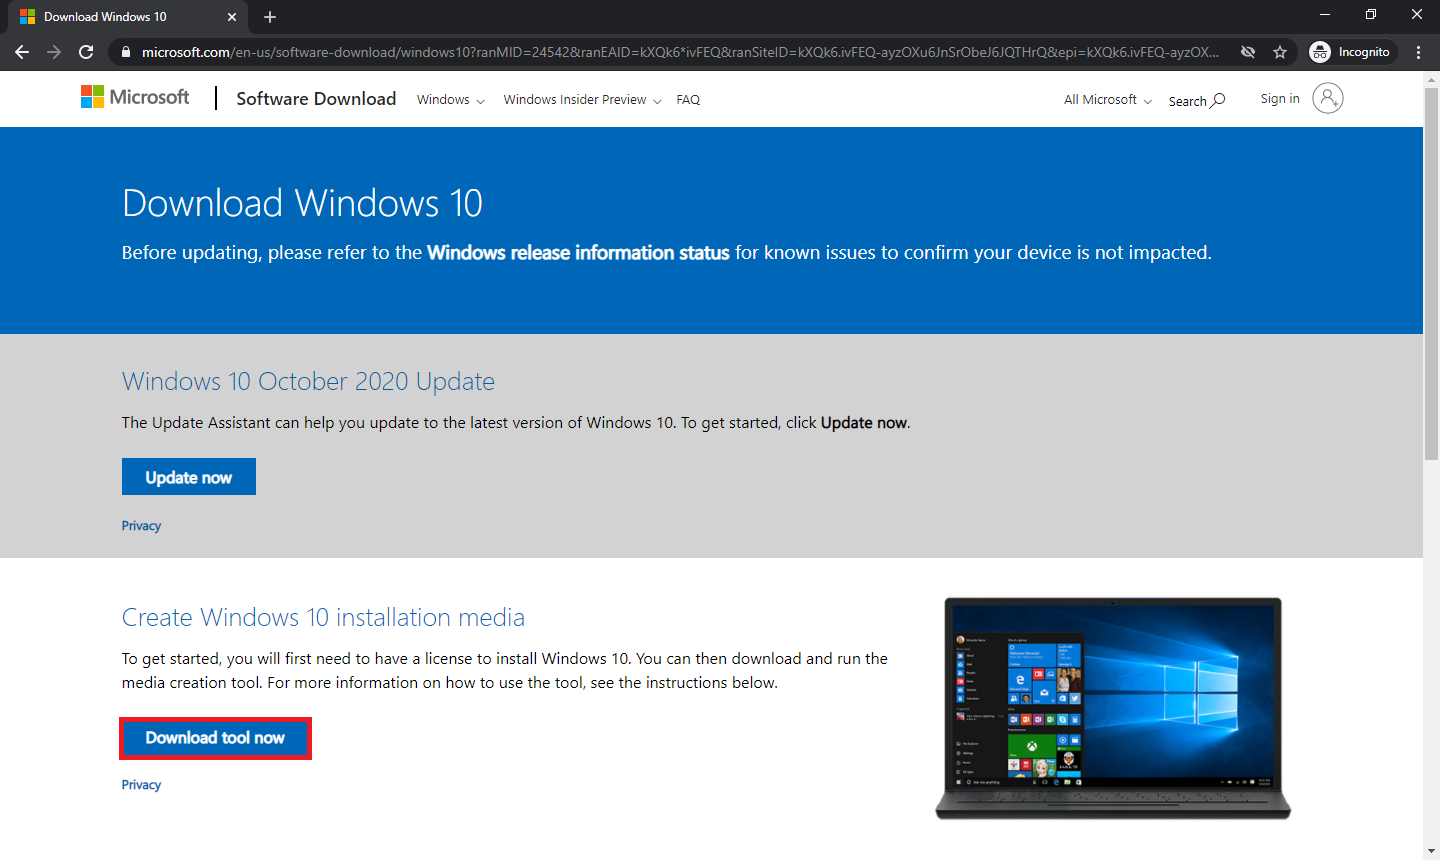
Step 1. Browse the Windows 10 download page.
Step 2. Under the “Create Windows 10 installation media” section, click the Download tool now button to save the file on your computer.
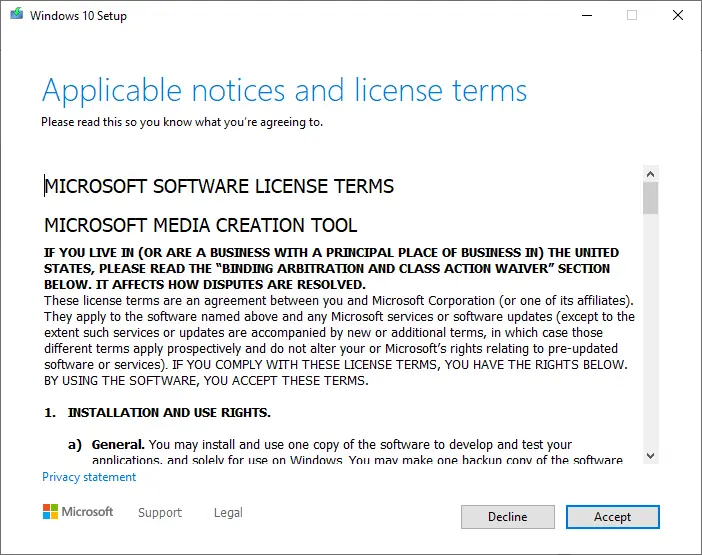
Step 3. Double-click the downloaded MediaCreationTool file to launch it.
Step 4. It may take a few minutes to get ready. Click the Accept button to agree to the Microsoft terms and conditions.
Step 5. Select the option “Create installation media (USB flash drive, DVD, or ISO file) for another PC.”
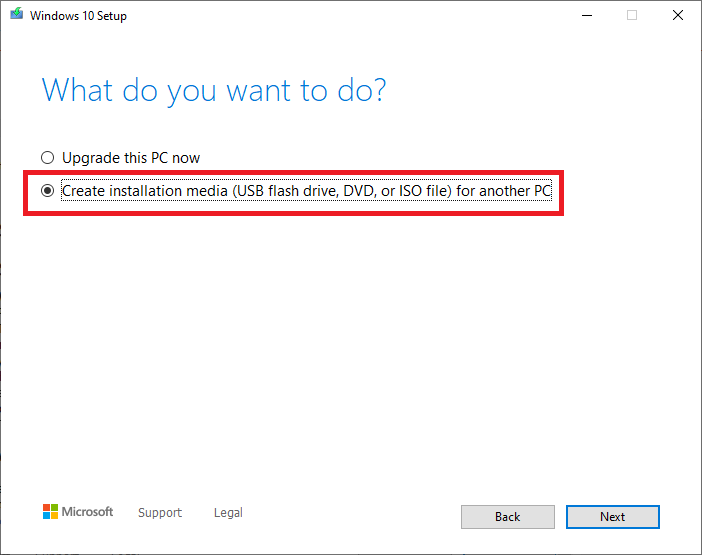
Step 6. Click on the Next button.
Step 7. Uncheck the Use the recommended options for this PC option.
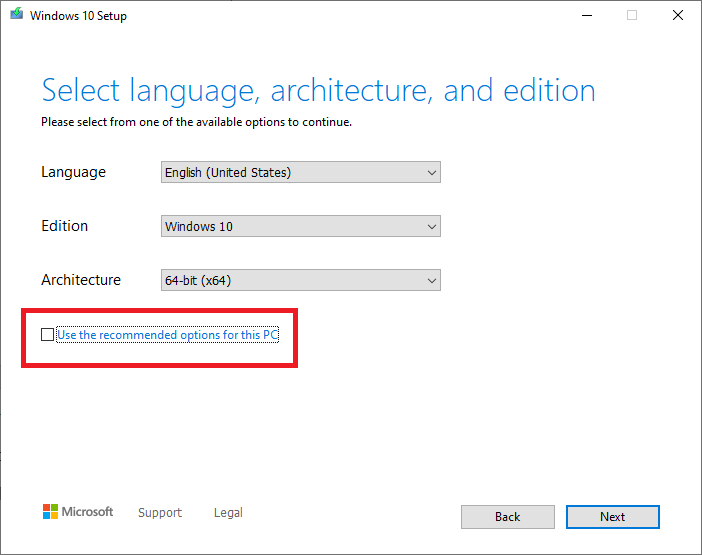
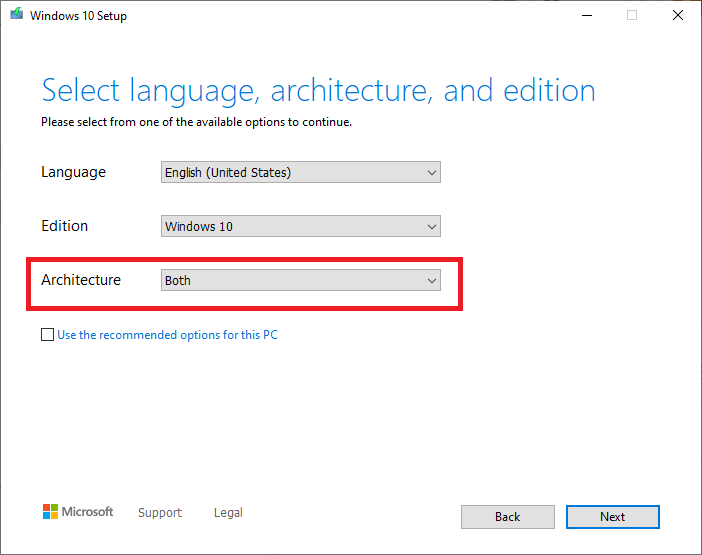
Step 8. Select the language, architecture, and edition of Windows 10 for which you want to create a bootable USB flash drive.
Note: If you plan to install both 32-bit and 64-bit versions of Windows 10 on different PCs, then select the Architecture as Both.
Step 9. Once you have selected the correct options, click the Next button.
Step 10. Select the USB flash drive option (depending upon the selection, it may require up to 16GB of free space on the hard disk).
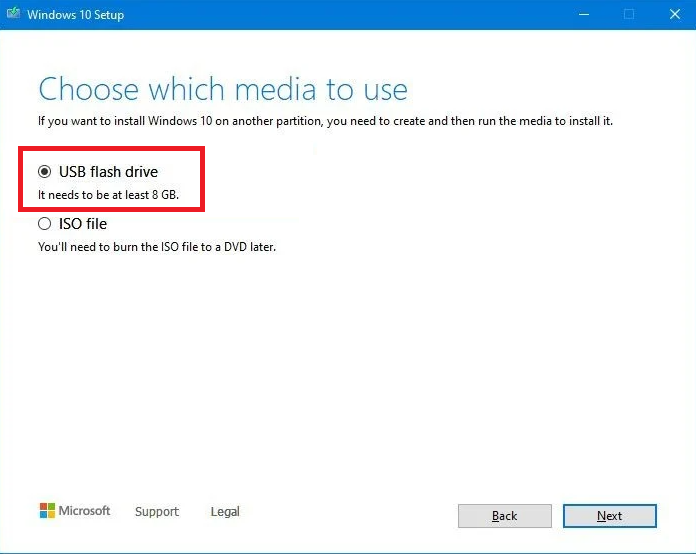
Step 11. Click the Next button.
Step 12. Select your USB flash drive.
Step 13. Click the Next button.
Step 14. Click the Finish button.
Once the above-mentioned steps are completed, the tool will start downloading the required files from the Microsoft servers, and it’ll create a bootable USB flash drive with support for UEFI and BIOS.
How to download and create a Windows 10 UEFI bootable USB flash drive using Rufus?
If you prefer to use a third-party freeware tool, then Rufus is the best option for you. The latest version of Rufus lets you download and create a bootable USB flash drive with UEFI support.
To download and create a Windows 10 UEFI bootable USB flash drive using Rufus, do the following:-
Step 1. Download the latest version of the Rufus utility from this page.
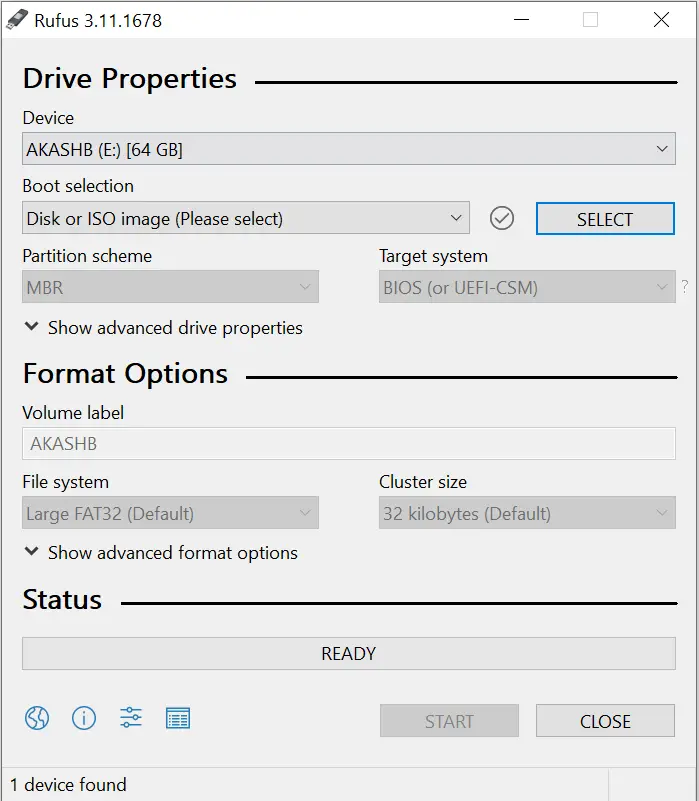
Step 2. Run the Rufus tool.
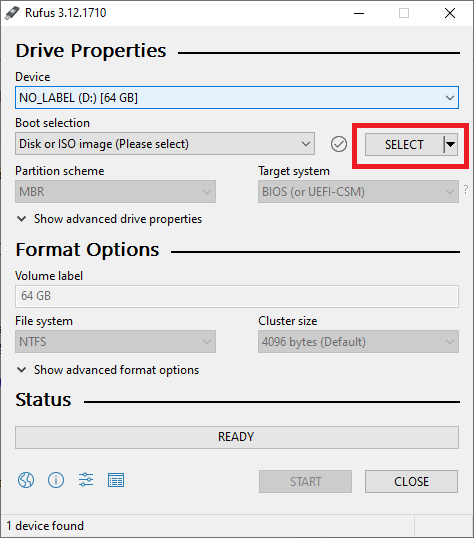
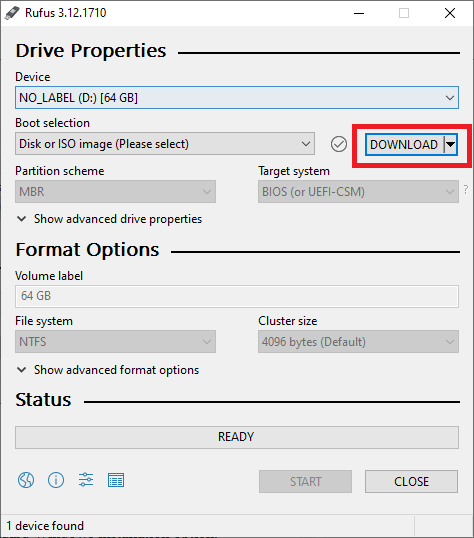
Step 3. Under the Device section, select the USB flash drive.
Step 4. Under the Boot selection section, click the SELECT drop-down and select the DOWNLOAD option. Then click on the DOWNLOAD option to download a fresh copy of Windows ISO.
Step 5. Download ISO Image window opens; you can select here Windows 10 or Windows 8.1.
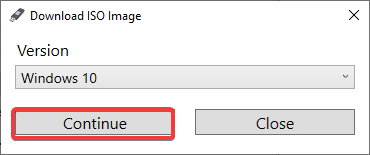
Step 6. Once you have selected the correct Windows, click on the Continue button.
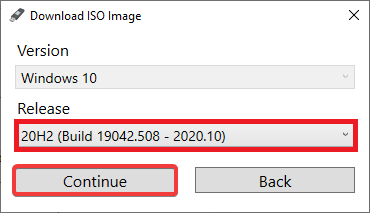
Step 7. Select the latest release of Windows OS and click on the Continue button.
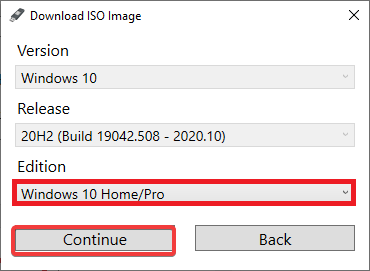
Step 8. Now select the Edition of Windows and click on the Continue button.
Step 9. Now select the correct language of Windows and click on the Continue button.
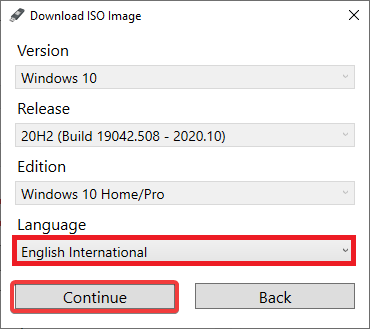
Step 10. Select the Architecture (32-bit or 64-bit) of Windows.
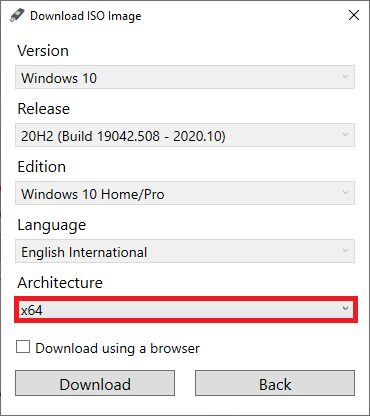
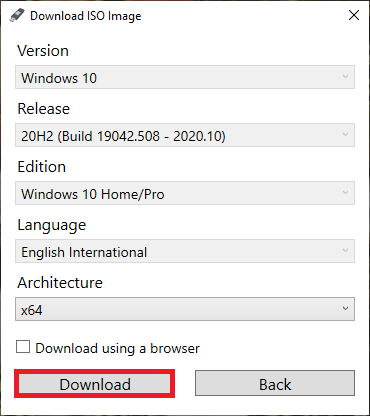
Step 11. Click on the Download button to save the Windows 10 ISO file on your PC.
Step 12. Once you are ready with Windows 10 ISO file, select the Windows ISO file under Boot Selection.
Step 13. Under the Image Option, select the Standard Windows installation option.
Step 14. Use the “Partition scheme” drop-down menu, and select the GPT option.
Step 15. Under the Target system drop-down menu, select the UEFI (non CSM) option.
Step 16. Leave other settings as default; it should look something like this:-
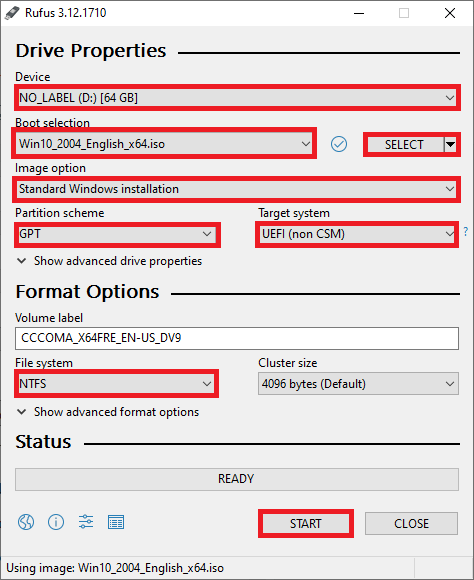
Step 17. Once you are ready with the above-mentioned options, click on the START button.
Your USB flash drive will be formatted to make it bootable.
Once you are ready with a bootable USB flash drive, make the changes in BIOS and install a fresh Windows 10 on your machine.
Above are the two methods through which you can download the latest version of Windows 10 to create a bootable USB flash drive with UEFI support.
Once you have created a bootable USB flash drive, you can test it without installing it on your computer or laptop.
Conclusion
In conclusion, creating a bootable USB flash drive with UEFI support is the best option for installing a fresh copy of Windows 10 on a computer. Both Microsoft Media Creation Tool and Rufus are effective methods to download and create bootable media. It is important to choose the appropriate firmware type for the motherboard, especially when using a UEFI BIOS. By following the steps mentioned in this post, you can easily download and create a bootable USB flash drive with UEFI support for installing the latest version of Windows 10. With a bootable USB flash drive, you can also test the operating system without installing it on your machine.