Are you looking to extract specific pages from a PDF document in Windows 11? Well, you’re in luck! In this user-friendly guide, we’ll walk you through a simple method to extract pages from a PDF file without the need for any third-party tools. With the native capabilities of Windows 11, you can perform this task quickly and effortlessly. So let’s dive right in!
How to Extract Pages from PDF in Windows 11?
Windows 11 comes with a built-in Microsoft Print to PDF that lets you extract pages from PDF. Here is how:-
Step 1. Start by locating and opening the PDF file from which you want to extract specific pages. Simply double-click the file to open it in the default PDF viewer on your Windows 11 system.
Step 2. Once the PDF file is open, go to the “File” menu at the top-left corner of the window. From the dropdown menu, select the “Print” option. Alternatively, you can use the keyboard shortcut Ctrl + P.
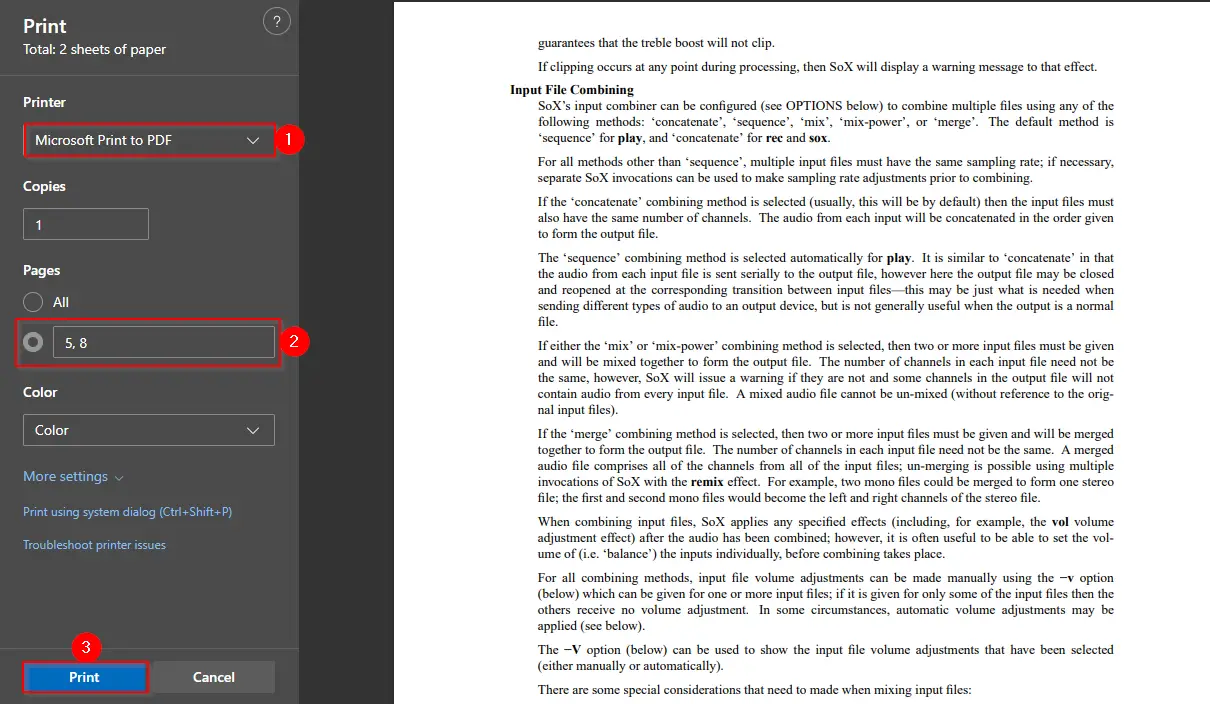
Step 3. In the Print menu, you’ll see a list of available printers. Look for an option called “Microsoft Print to PDF” and select it as your printer choice. This virtual printer allows you to save the PDF pages as separate files.
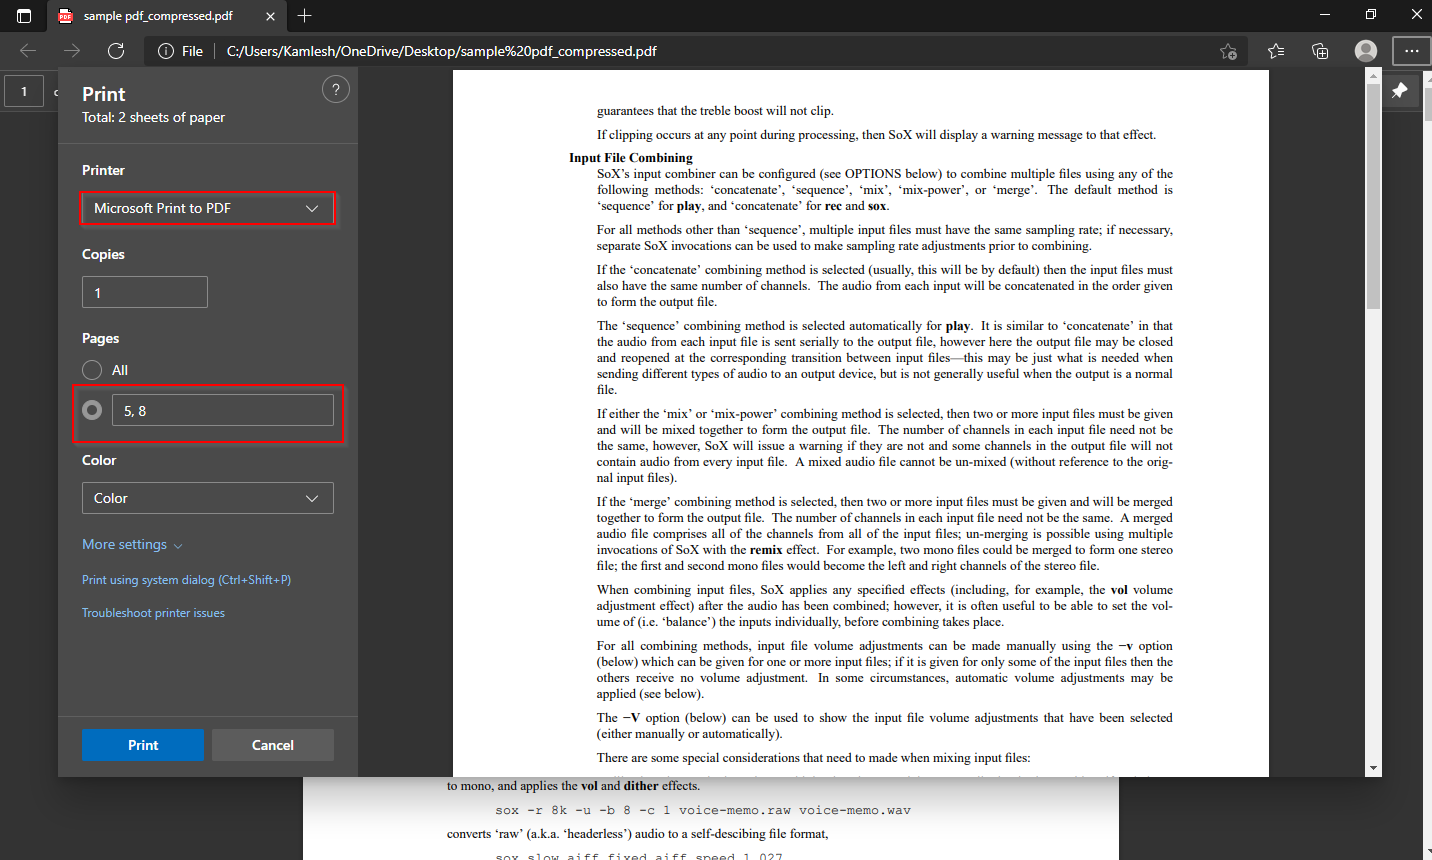
Step 4. Next, you need to specify the pages you want to extract from the PDF document. Look for the “Pages” section within the Print menu. By default, it is set to “All,” but you can change it to “Pages” and enter the page numbers you wish to extract. For example, if you want to extract pages 3, 5, and 7, enter “3, 5, 7” in the provided field.
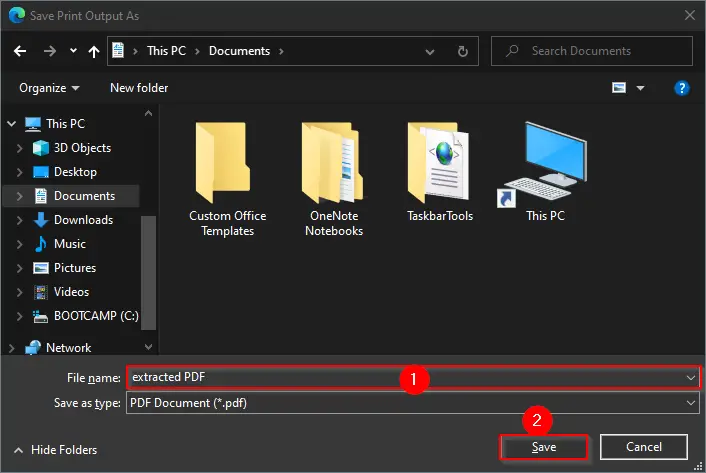
Step 5. To save the extracted pages, click on the “Print” button within the Print menu. A dialog box will appear, allowing you to select the destination folder where you want to save the extracted pages. Choose a suitable location on your Windows 11 system and click “Save” to continue.
Step 6. Once you’ve chosen the destination folder, the extraction process will begin. Windows 11 will create separate PDF files for each of the specified pages, saving them in the designated folder. The extraction progress will be indicated by a progress bar or a loading animation.
Once the extraction process is complete, you can navigate to the destination folder you selected earlier. You will find individual PDF files corresponding to the pages you extracted from the original document. Feel free to open and use them as needed.
Conclusion
Extracting pages from a PDF document in Windows 11 is a straightforward process that doesn’t require any third-party tools. By following the simple steps outlined in this guide, you can effortlessly extract specific pages from a PDF file using the native capabilities of Windows 11. Whether you need to extract important information or share specific sections, this method ensures you have full control over the extraction process. Give it a try and streamline your PDF management tasks in Windows 11!