In Windows 10, a context menu is a convenient tool that allows users to quickly access various options and commands by right-clicking on an item. One of the useful features of the context menu is the ability to preview an image without opening it in a separate program. However, some Windows 10 users have reported that the image preview option is missing from the context menu. This can be frustrating, especially if you need to quickly view an image without opening it. In this guide, we’ll show you how to fix the issue of missing image preview in the context menu in Windows 10.
We’ll start by explaining why the image preview option may be missing from the context menu. One possible reason is a malfunctioning or outdated graphics driver, which can cause conflicts with Windows 10’s built-in image preview feature. Another reason could be a corrupt system file or a misconfiguration in the registry settings. Whatever the cause, we’ll provide step-by-step instructions on how to troubleshoot and fix the issue so that you can easily preview images from the context menu in Windows 10.
To fix the Preview issue on Windows 10, we will help the Registry Editor; hence, it is recommended to take the backup of the Windows Registry and create a system restore point.
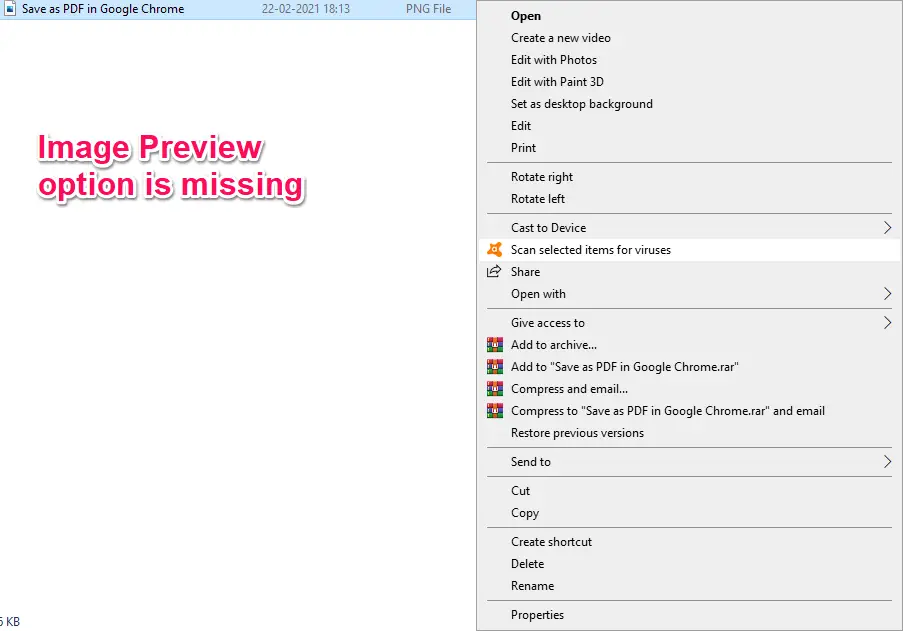
Image Preview missing from the Context Menu in Windows 10
As said above, by right-clicking on an image, the Preview option is not showing up; it’s because the Windows Photo Viewer is not set as the default picture viewer for the image file type. It can be fixed by doing some registry changes. To resolve the issue, do the following steps:-
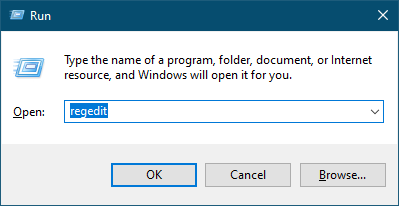
Step 1. Press the Windows logo + R keys to open the Run dialog box.
Step 2. Type regedit in the Run dialog box and hit Enter from the keyboard to open the Registry Editor.
Step 3. Once the Registry Editor opens, navigate to the following path:–
HKEY_CLASSES_ROOT\SystemFileAssociations\image\shell

Step 4. Right-click on the shell key and select the New > Key option.
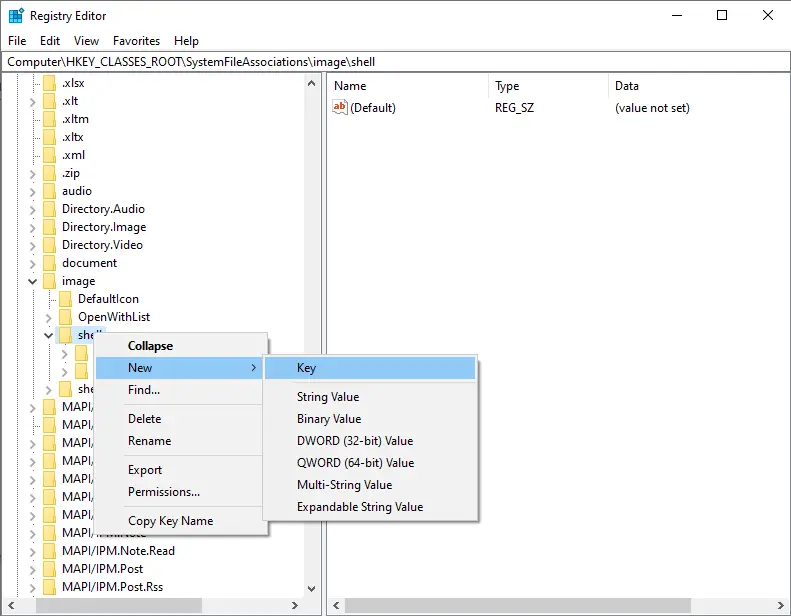
Step 5. Right-click on the newly created key and name it “Image Preview.”
Step 6. Now, right-click on the “Image Preview” key, and select New > Key.
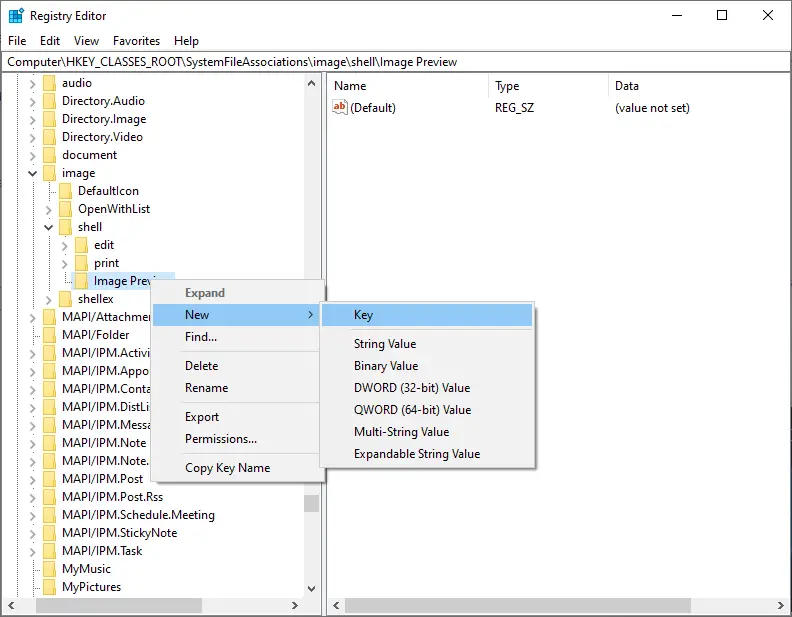
Step 7. Rename the newly created key as Command.
Step 8. On the Command key, double-click on the (default) string from the right side.

Step 9. On the “Value data” text box, copy and paste the following:-
%SystemRoot%\System32\rundll32.exe "%ProgramFiles%\Windows Photo Viewer\PhotoViewer.dll", ImageView_Fullscreen %1
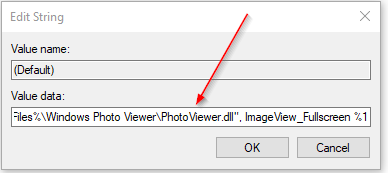
Step 10. Once you have filled the above data in the string, click the OK button.
Step 11. Close the Registry Editor window.
Step 12. Restart your PC.
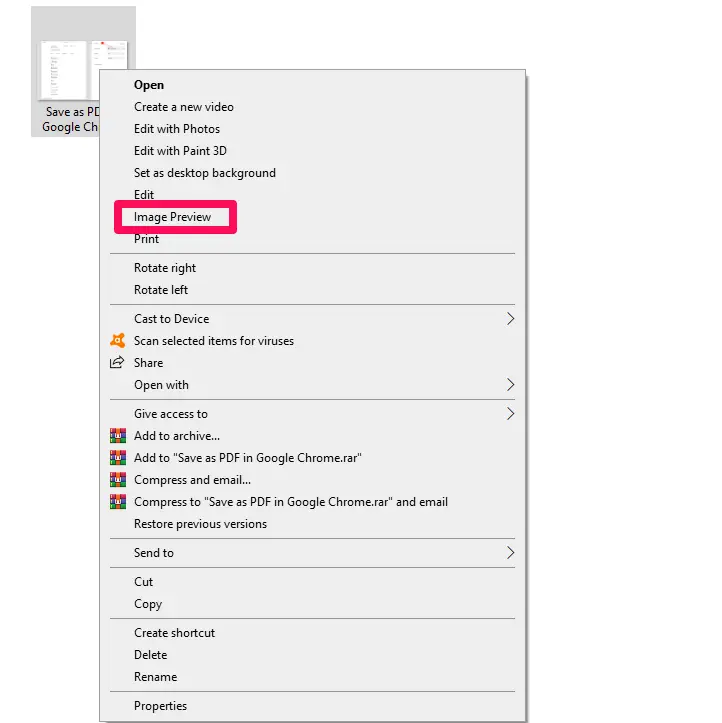
Step 13. Right-click on any image, and you should see a new entry, ‘Image Preview.’
If you don’t want to follow the above-mentioned procedures, download the ready-made registry file from the forum—double-click on the registry file to merge it into your Windows 10 PC.
Conclusion
In conclusion, the missing image preview option in the context menu of Windows 10 can be a frustrating issue for users who need to quickly view an image without opening it in a separate program. There could be several reasons for this problem, such as a malfunctioning or outdated graphics driver or a misconfiguration in the registry settings. In this guide, we have provided step-by-step instructions on how to fix the issue by using the Registry Editor to modify the registry settings. It is essential to take a backup of the Windows Registry and create a system restore point before making any changes. Users who do not want to modify the registry manually can download a ready-made registry file and merge it into their Windows 10 PC. By following these steps, users can quickly restore the missing image preview option in the context menu and enjoy the convenience of accessing various options and commands with just a right-click on an item.