By default, Windows 11/10 downloads all the available updates automatically when your computer is connected to the internet. There are no issues if you have unlimited bandwidth. However, downloading significant updates might get you into trouble if you have a limited data connection. Apart from that, you might not want to download updates due to personal reasons. Although it is not recommended to stop or pause Windows automatic updates, many people often pause Windows updates.

Windows 11/10 allows you to pause automatic updates through Settings. But what will you do if the “Pause updates” option is grayed out in Windows 11/10 Settings panel? You need to go through the Local Group Policy Editor or the Registry Editor to make the option available in Windows Settings > Windows Update to get this option back.
How do I Fix Grayed-out “Pause updates” option in Windows 11/10?
The Local Group Policy Editor and the Registry Editor offer some settings to disable the “Pause updates” option. By mistake, if you enabled such a setting in either tool, you might get this problem in Windows Settings. Therefore, it is requested to check and verify the corresponding settings.
How to Fix Grayed-out “Pause updates” option in Windows 11/10 using Group Policy?
If you find that the “Pause updates” option is grayed out in Windows 11/10, use the following steps to fix it:-
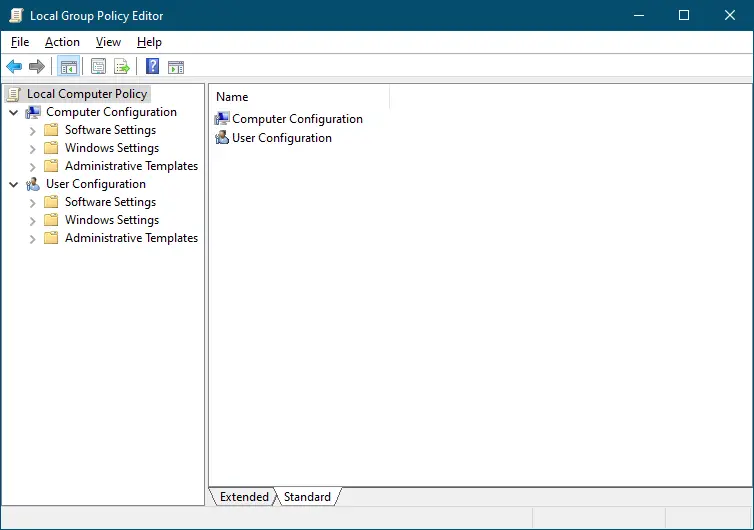
Step 1. First, open Local Group Policy Editor.
Quick Reminder: Local Group Policy Editor is not a part of Windows 11/10 Home Edition. First, enable gpedit.msc or alternate methods to fix the “Pause updates.”
Step 2. When the “Local Group Policy Editor” window opens, navigate or steer for the following path in the left side pane:-
Computer Configuration > Administrative Templates > Windows Components > Windows Update > Manage end user experience
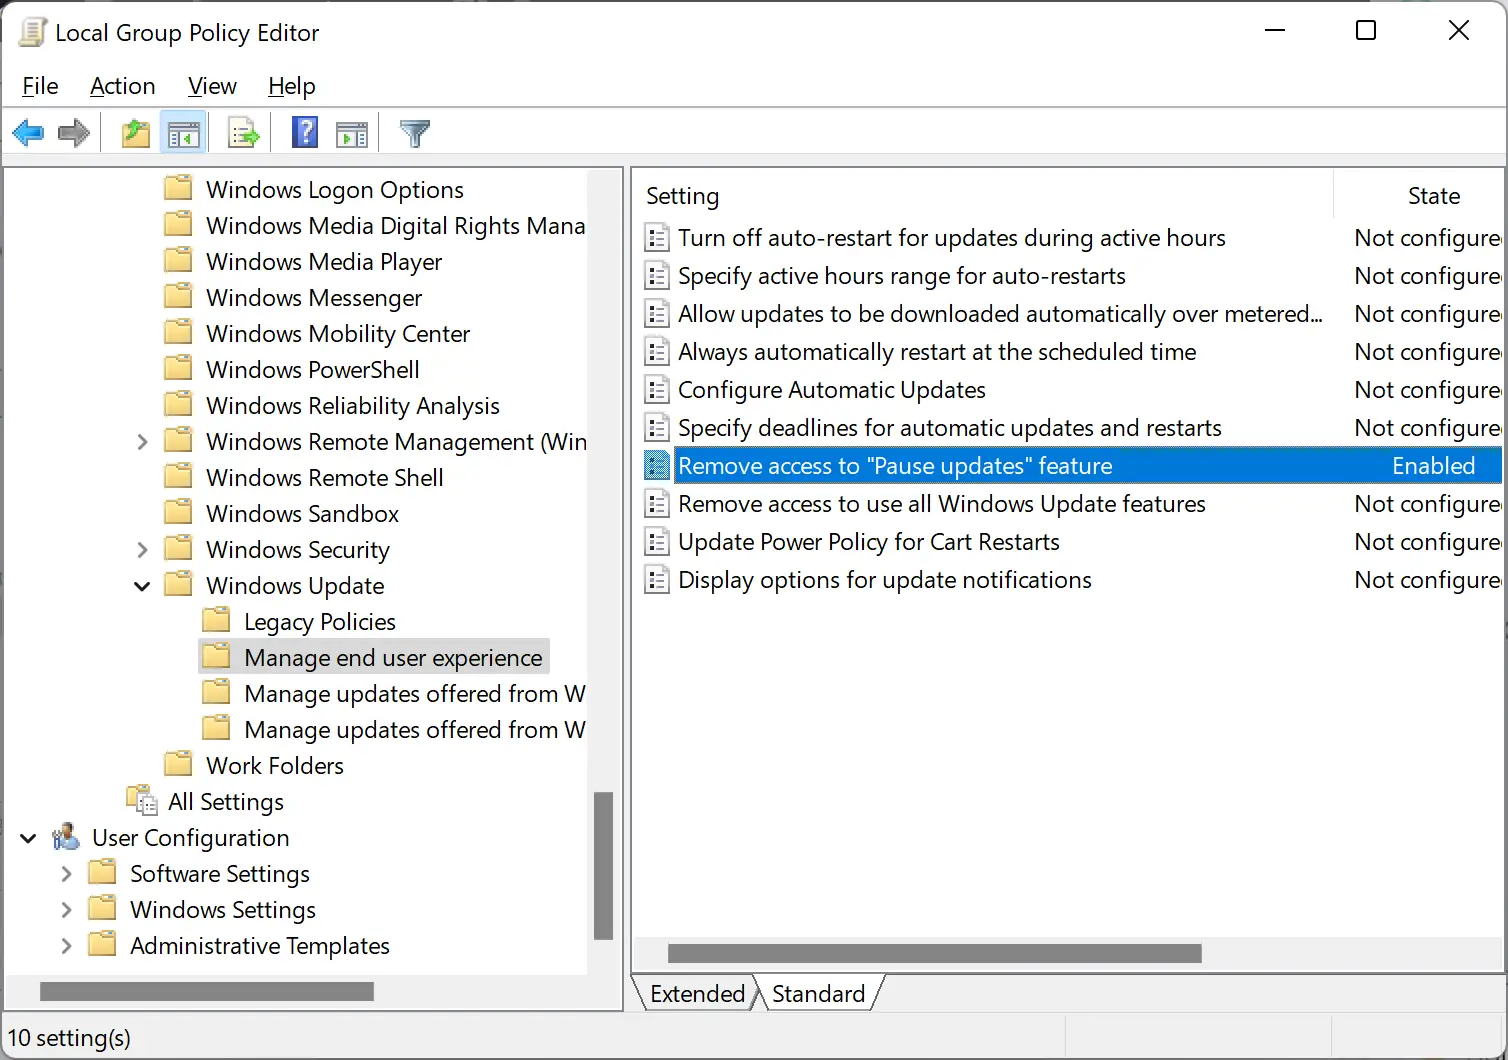
Step 3. Then, on the right-side pane of “Manage end-user experience,” you will see several policies. Locate and double click on the policy name, Remove access to “Pause updates” feature.
Step 4. After that, select the Not Configured option in the Remove access to “Pause updates” feature window.
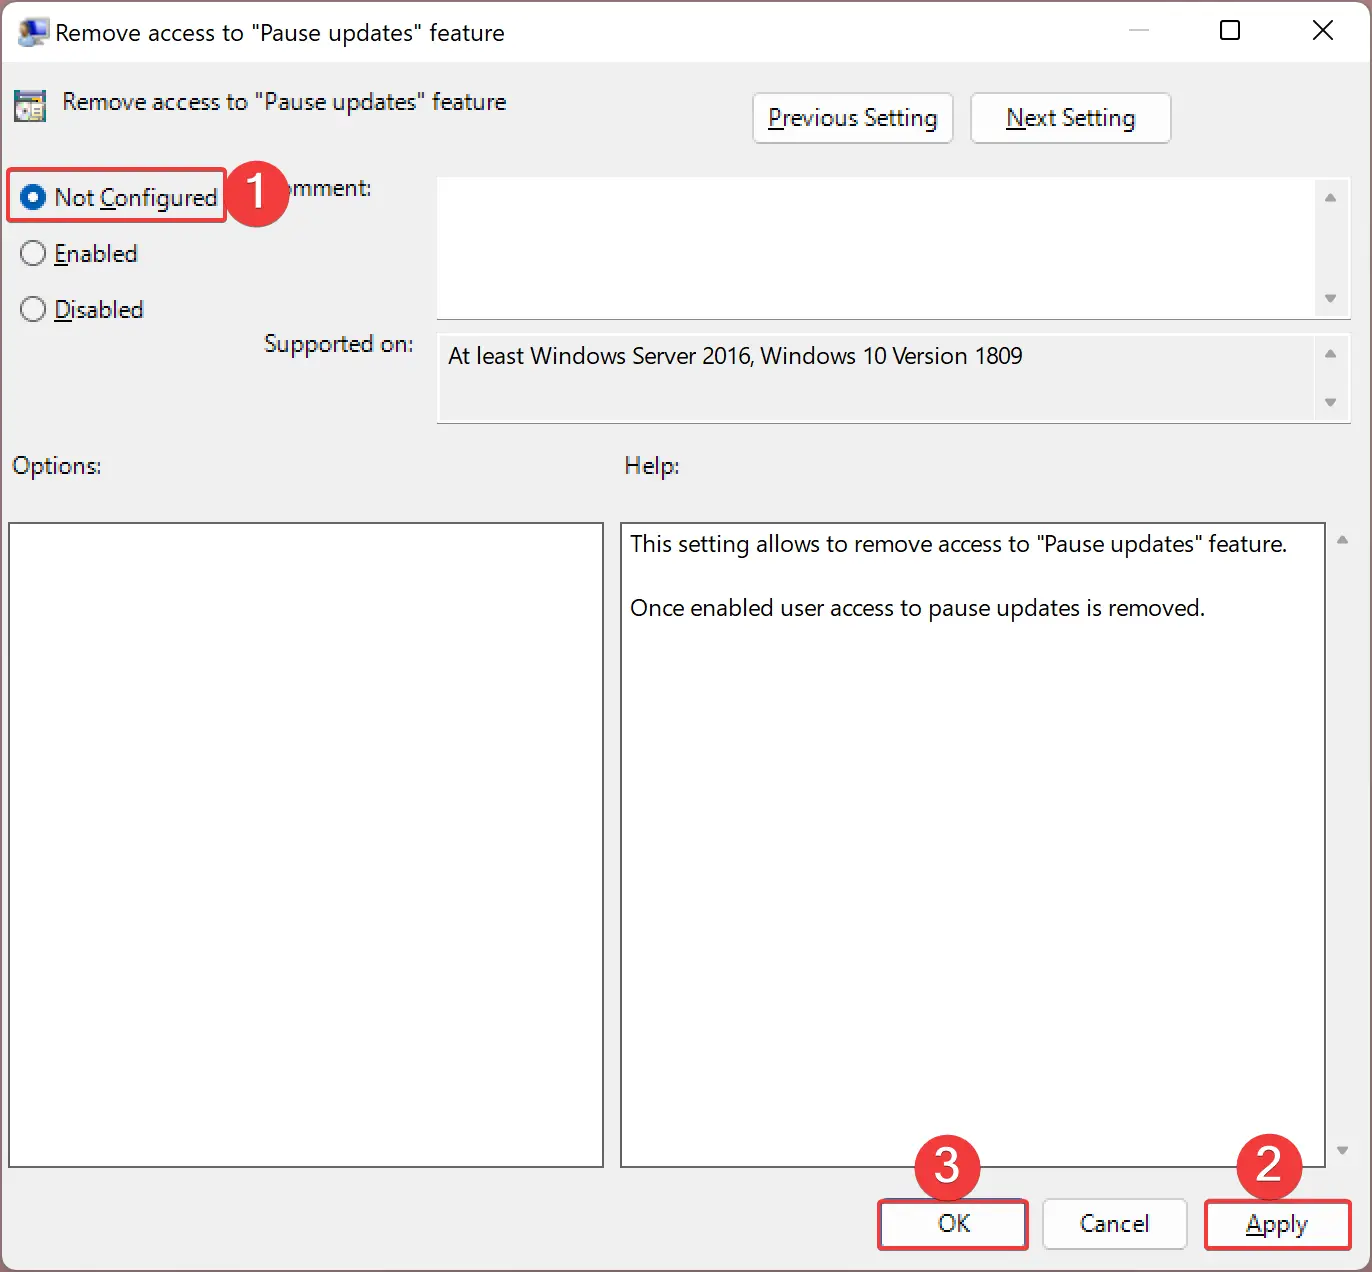
Step 5. Next, click the Apply button.
Step 6. Click OK to exit.
Step 7. Finally, reboot your computer to apply the changes.
Once you complete the above steps, the “Pause updates” option will not be grayed out anymore. That means you can pause “Windows updates” if you wish.
How to Fix Grayed-out “Pause updates” option in Windows 11/10 through Registry Editor?
Those users who cannot fix the “Pause updates” option in Windows 11/10 can use this method. Use the following recommended steps:-
Step 1. Very first, open Registry Editor.

Step 2. After that, in the left side pane of the Registry Editor window, browse to the following key:-
Computer\HKEY_LOCAL_MACHINE\SOFTWARE\Policies\Microsoft\Windows\WindowsUpdate
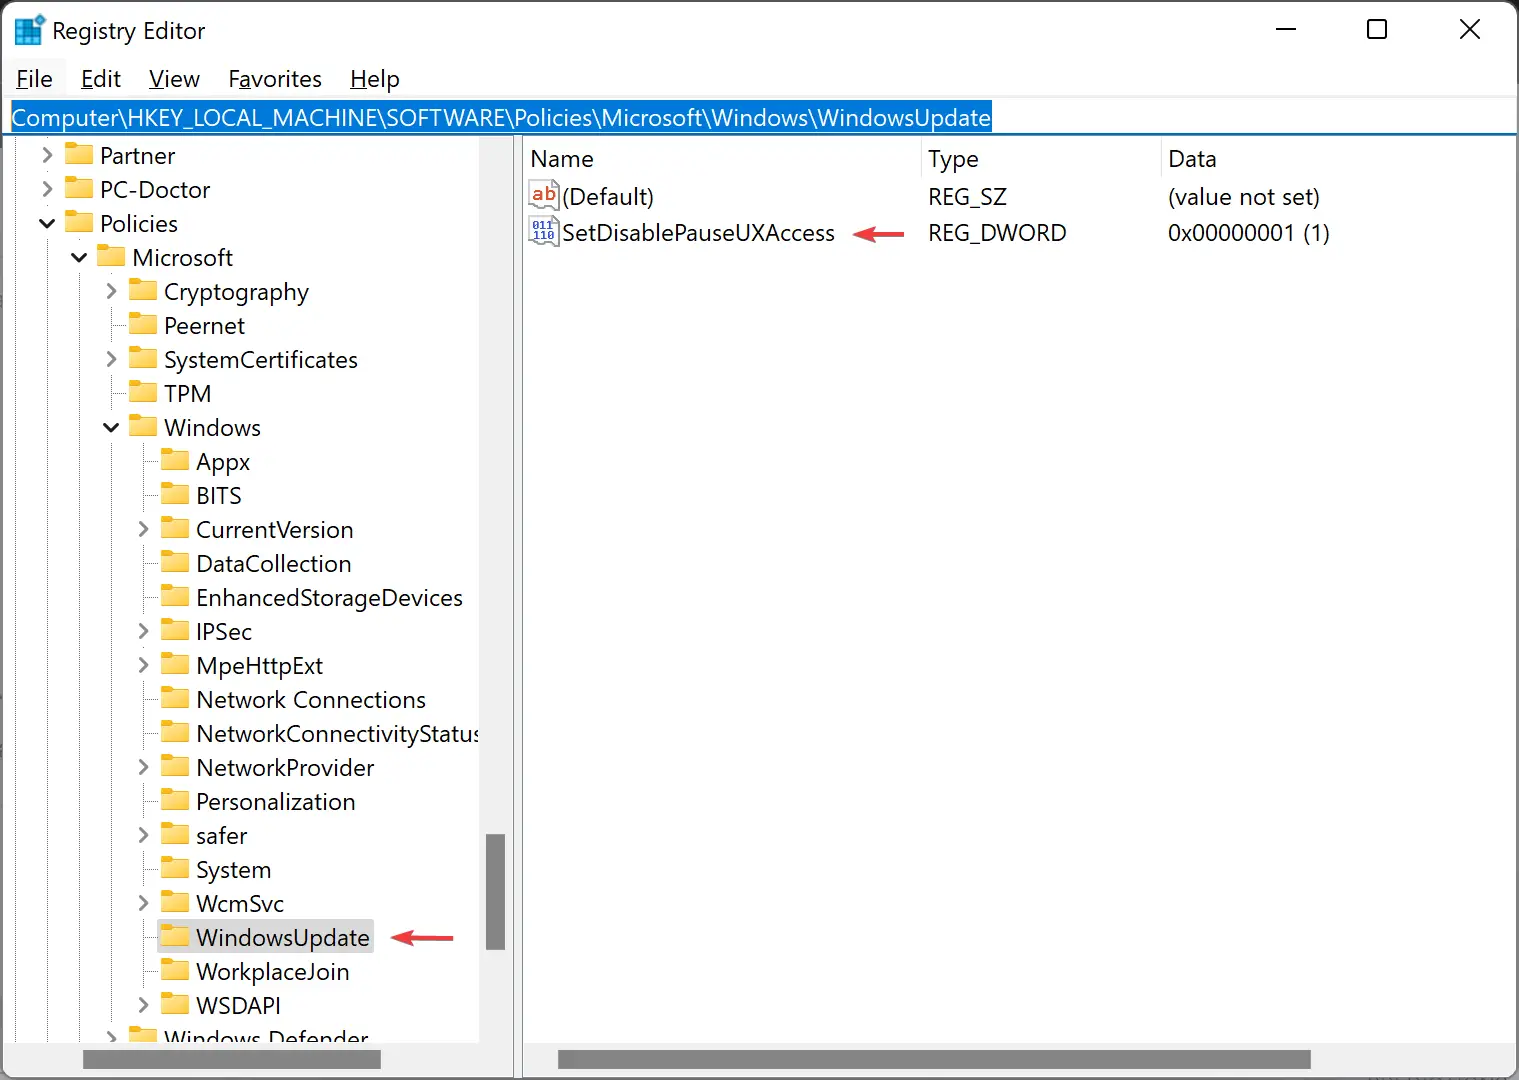
Step 3. On the right side pane of “WindowsUpdate,” you will see the “SetDisablePauseUXAccess” DWORD. Right-click on it and select the Delete option.
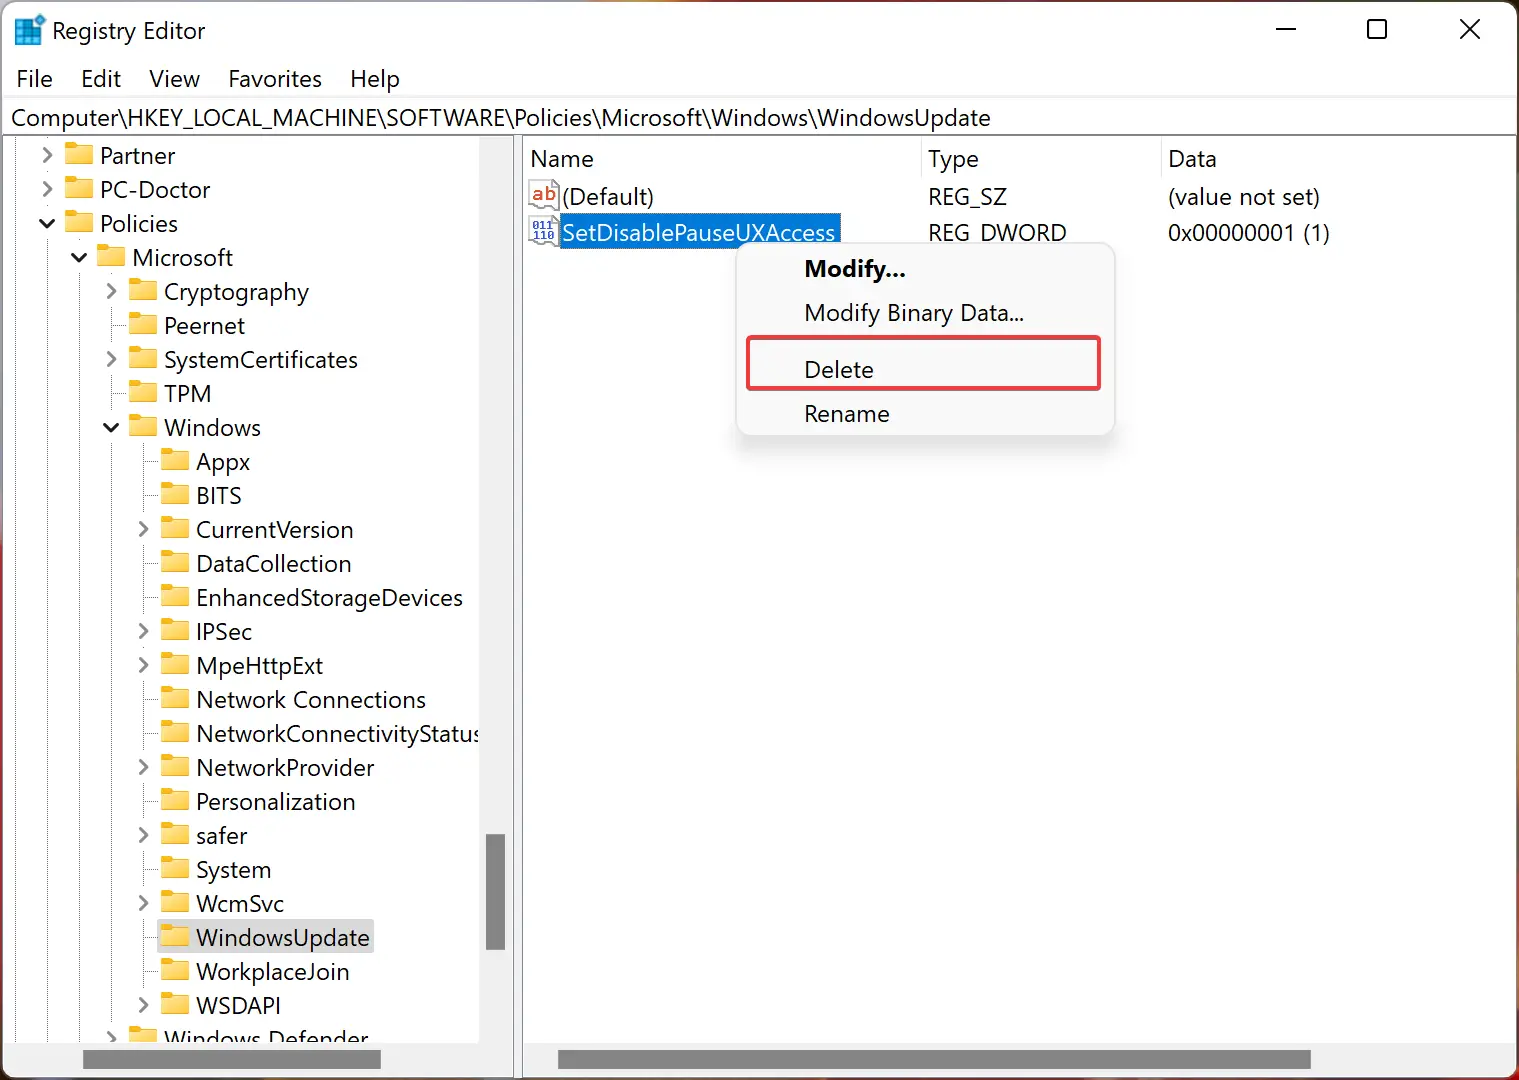
Step 4. Click the Yes button when prompted.

That’s it. Restart your computer to apply the changes. After completing the above steps, you should pause Windows automatic updates on Windows 11/10 computers.
Conclusion
In conclusion, while Windows 11/10 is designed to automatically download and install updates, it may not always be convenient for users with limited data connections or personal preferences. However, if the “Pause updates” option is grayed out in the Windows Settings panel, it can be fixed using either the Local Group Policy Editor or the Registry Editor. Users should verify the corresponding settings to ensure that the “Pause updates” option is not disabled. By following the steps outlined in this guide, users can regain access to the “Pause updates” option and pause Windows automatic updates on their Windows 11/10 computers.