How do I hide the Windows 11 Taskbar? Do you want to autohide the Windows 11 Taskbar? Similar to the Auto Hide Taskbar feature of Windows 10, Windows 11 also comes with an auto-hide function. However, it is buried under the Settings app, and you have to dig it out. The autohide is a handy feature of the Windows 11 taskbar when full-screen applications run and you want to hide the taskbar if not in use. You should note that this feature will only mask the taskbar when your mouse cursor is away from them. When you place the cursor on the taskbar again, the Taskbar will become visible. That means while working with an application, if you want to open your favorite program from the Taskbar, just move your cursor to the Taskbar, and it will become visible. Move the cursor away from the taskbar to hide it automatically.
In this gearupwindows article, we will guide you on showing and hiding the Taskbar of Windows 11.
How to Automatically Show or Hide the Windows 11 Taskbar using Settings?
With the default settings of Windows 11, the taskbar always remains visible. To enable or disable the auto-hide taskbar feature, you need to perform the following steps:-
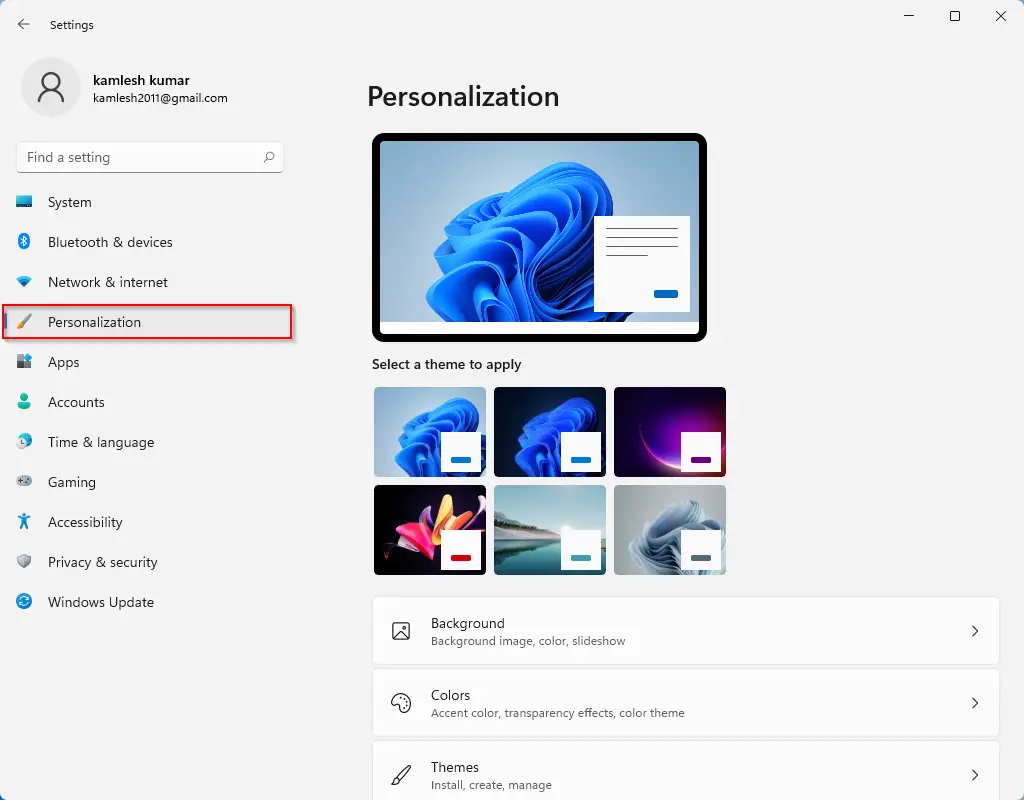
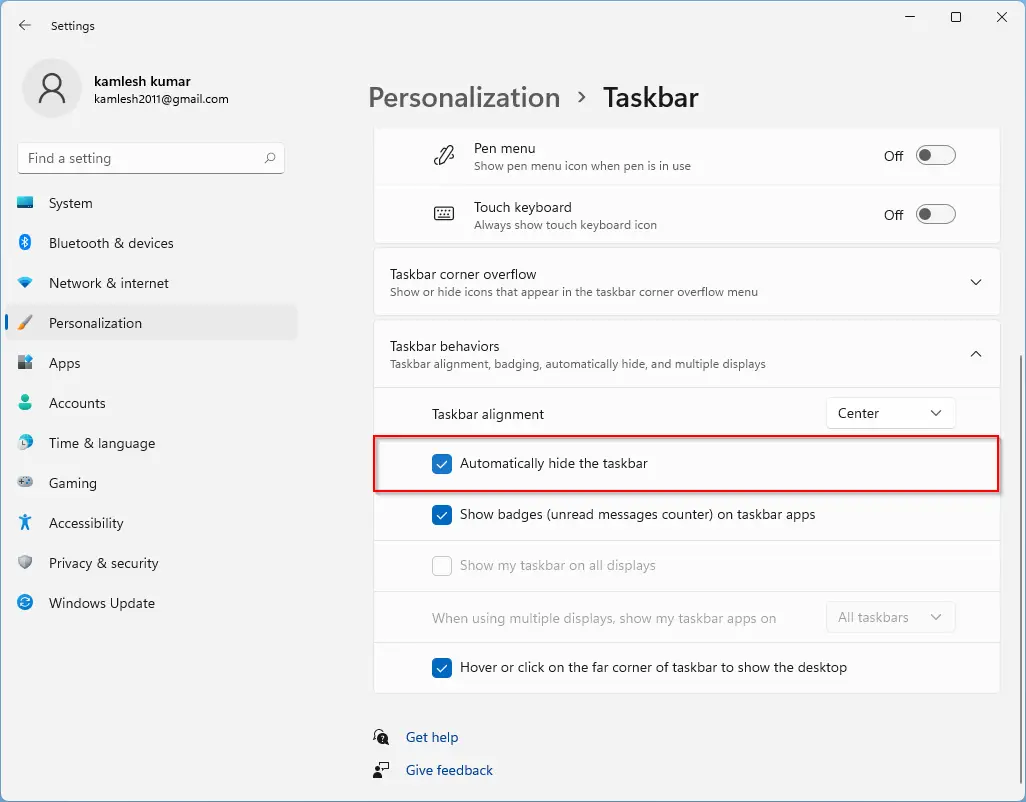
Step 1. Launch the Settings app by pressing the Windows logo + I keys altogether and then click on the Personalization category.
Step 2. On the right side of Personalization, click on the Taskbar tab to open it.
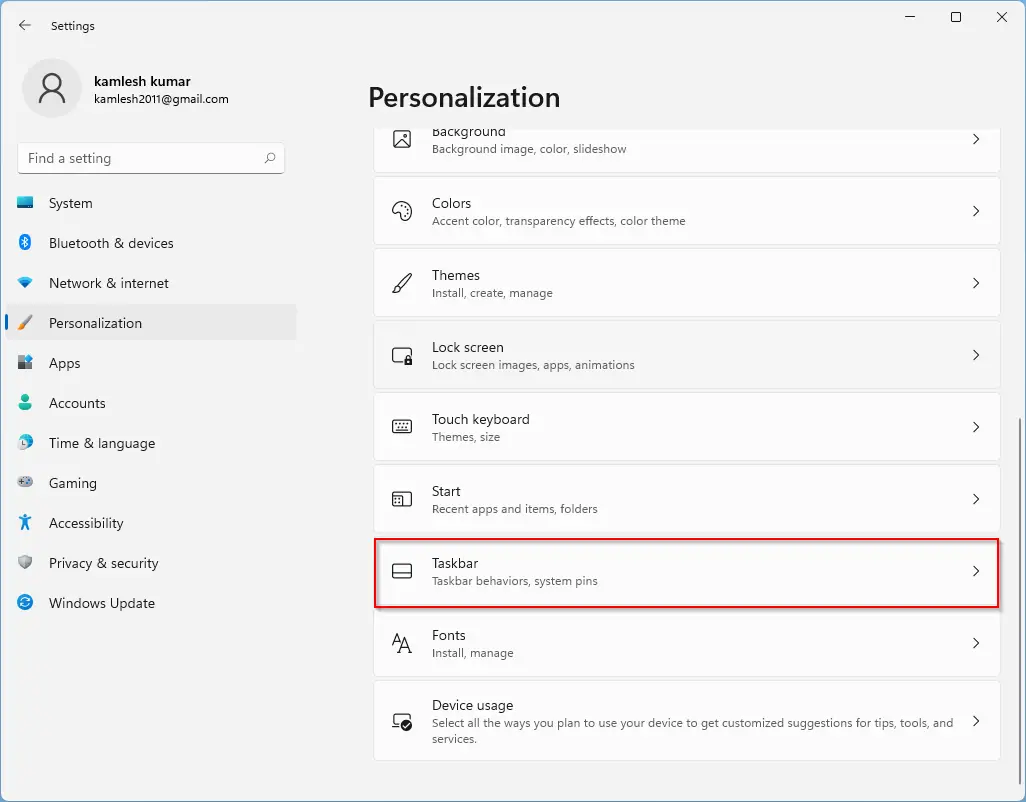
Step 3. Click the down arrow under Taskbar behaviors to expand it.
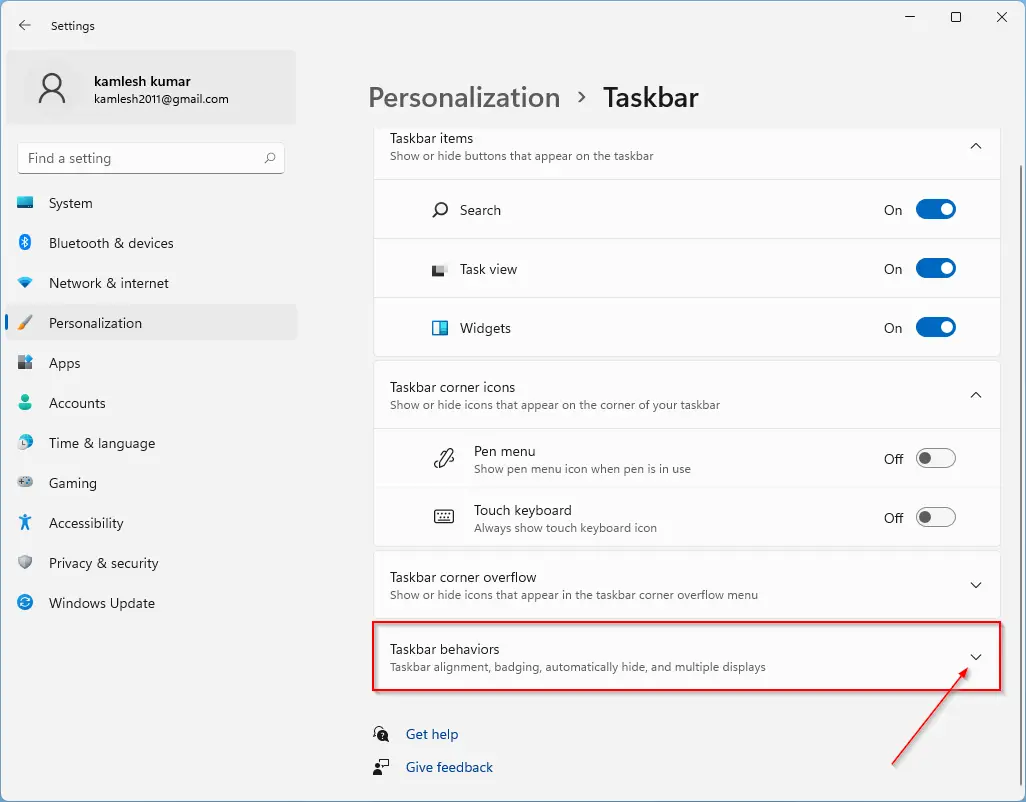
Step 4. Here, check the option “Automatically hide the taskbar” under the “Taskbar alignment” section.
That’s it. You can now close the Settings app. If you wish to disable the automatically hide taskbar feature on Windows 11, repeat the above steps. Now, in step 4, uncheck the option “Automatically hide the taskbar.”
How to Automatically Show or Hide Windows 11 Taskbar through Registry Editor?
To automatically hide or unhide the Windows 11 Taskbar using Registry Editor, do the following:-
Step 1. Open Registry Editor.
Step 2. Then, navigate to the following key in the left sidebar of Registry Editor:-
HKEY_CURRENT_USER\Software\Microsoft\Windows\CurrentVersion\Explorer\StuckRects3
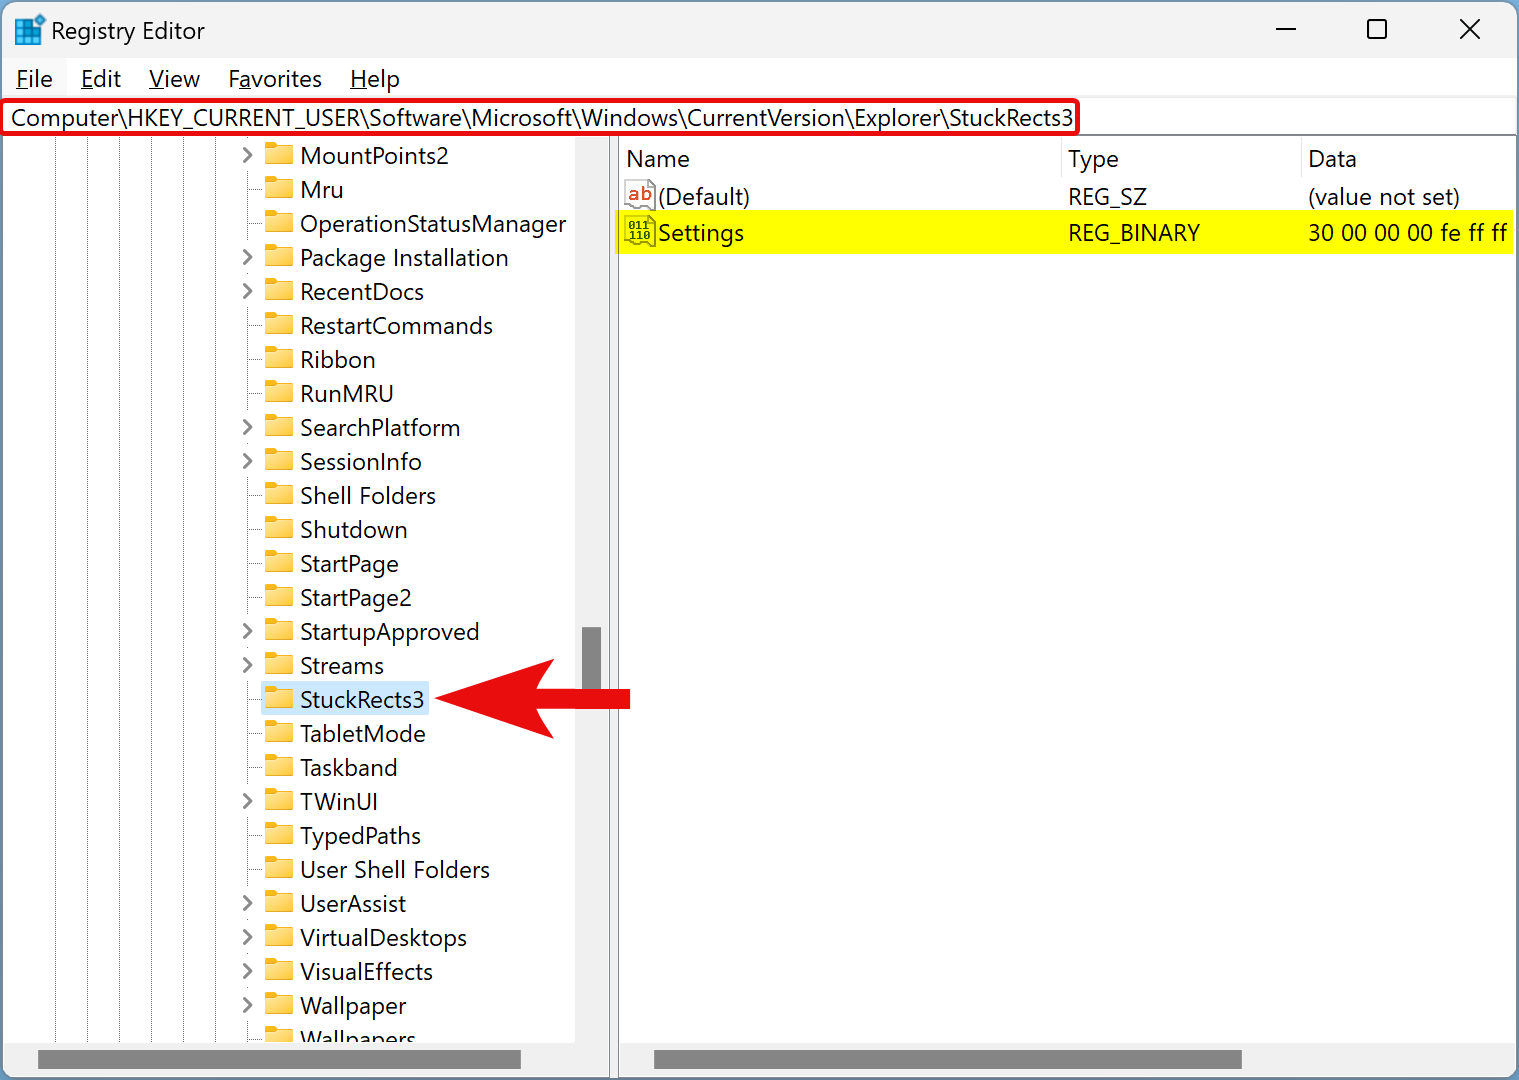
Step 3. On the right side of the StuckRects3 key, double-click on the Settings REG_BINARY to edit it.
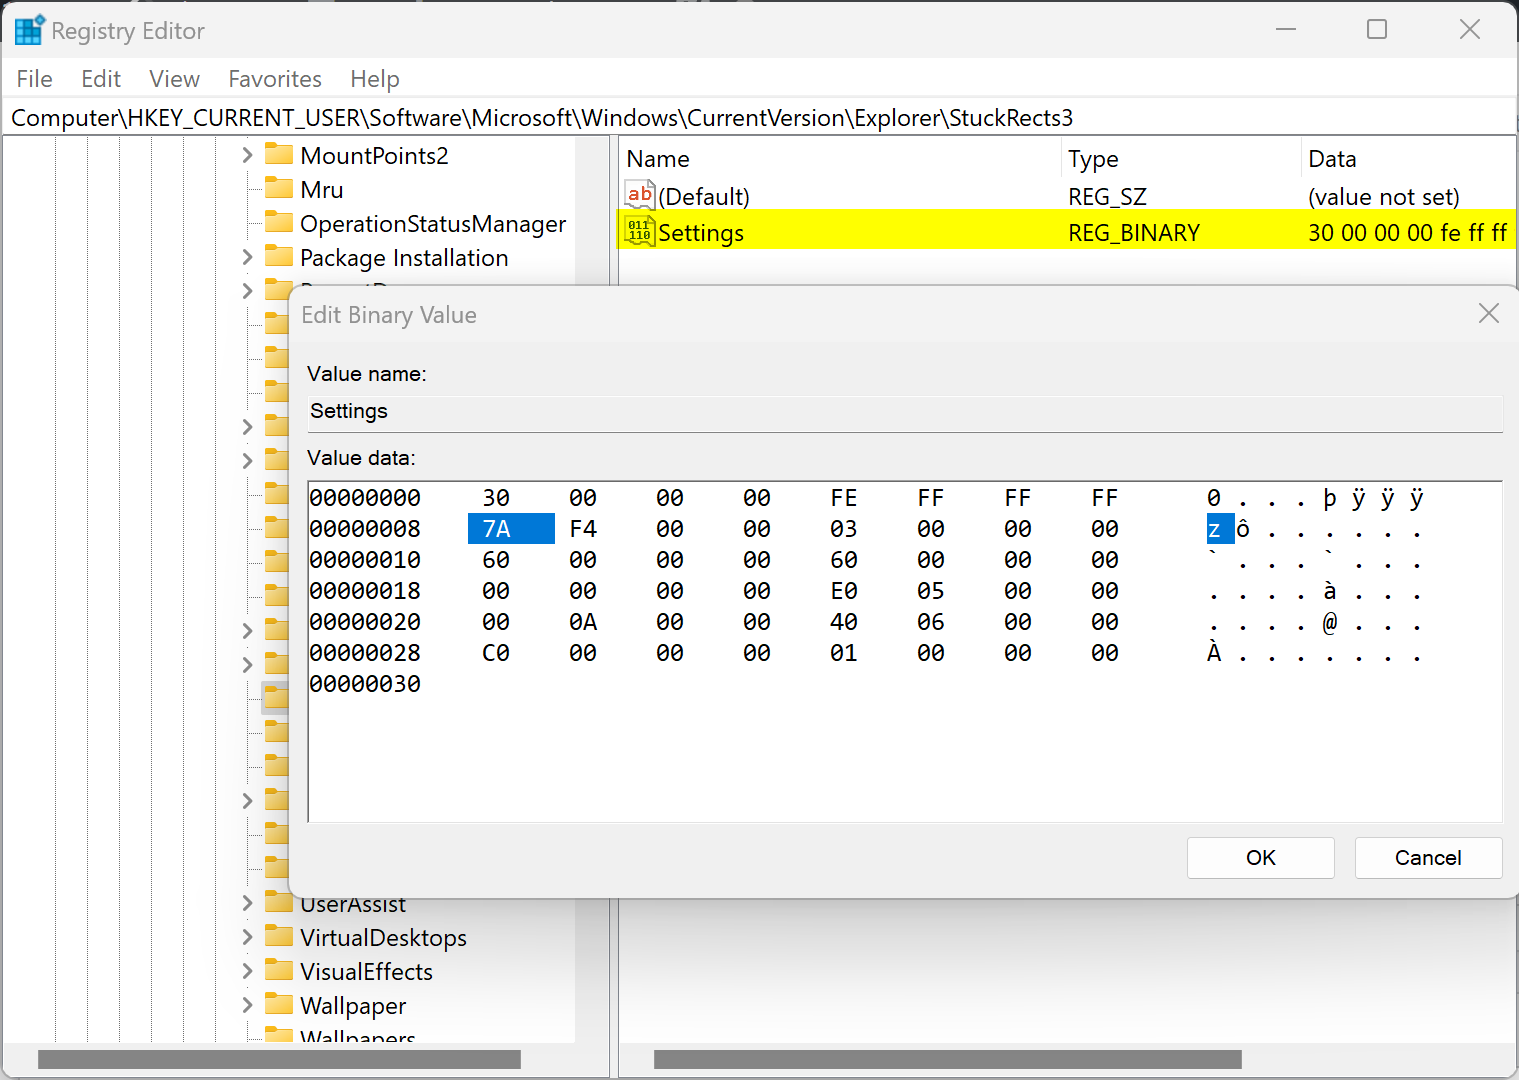
Step 4. In the “Edit Binary Value” pop-up window, double-click the first entry in front of the 00000008 and replace 7A with 7B.
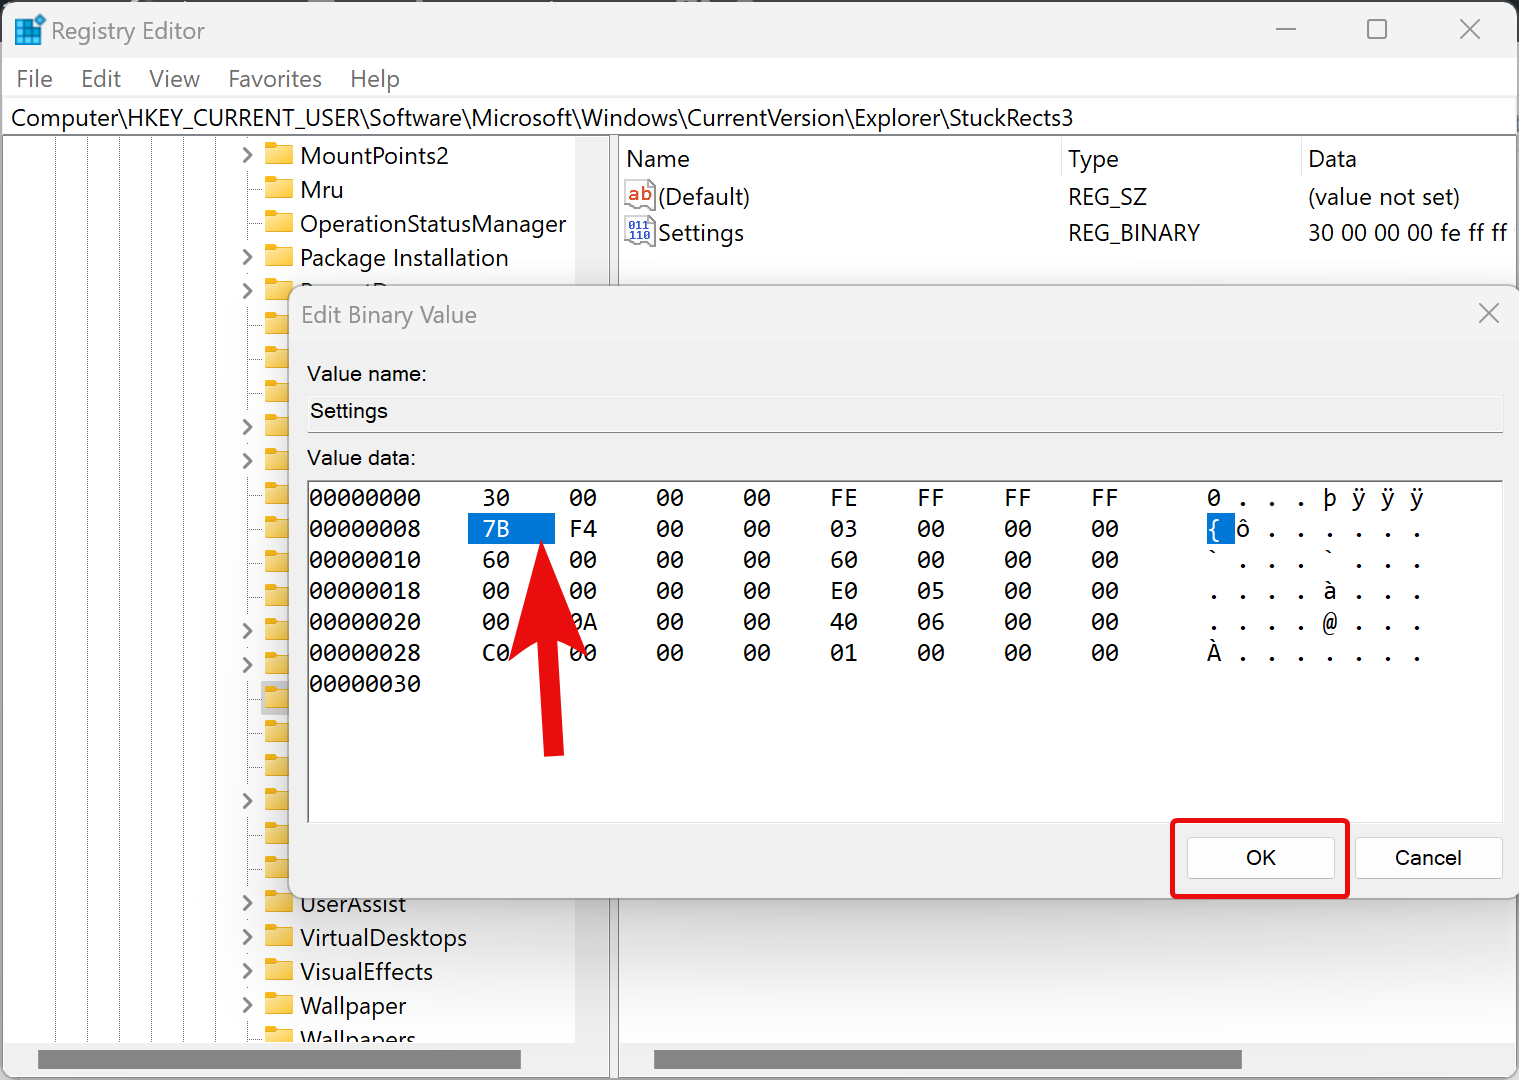
Step 5. Click OK.
Step 6. At last, reboot your computer to apply the changes.
If you wish to disable the taskbar’s auto-hide feature, repeat the above steps, and in step 4 above, replace the 7B entry with 7A.
How to Enable or Disable Auto-Hide Taskbar in Windows 11 using Command Prompt?
To enable or disable the auto-hide taskbar in Windows 11 through Command Prompt, use these steps:-
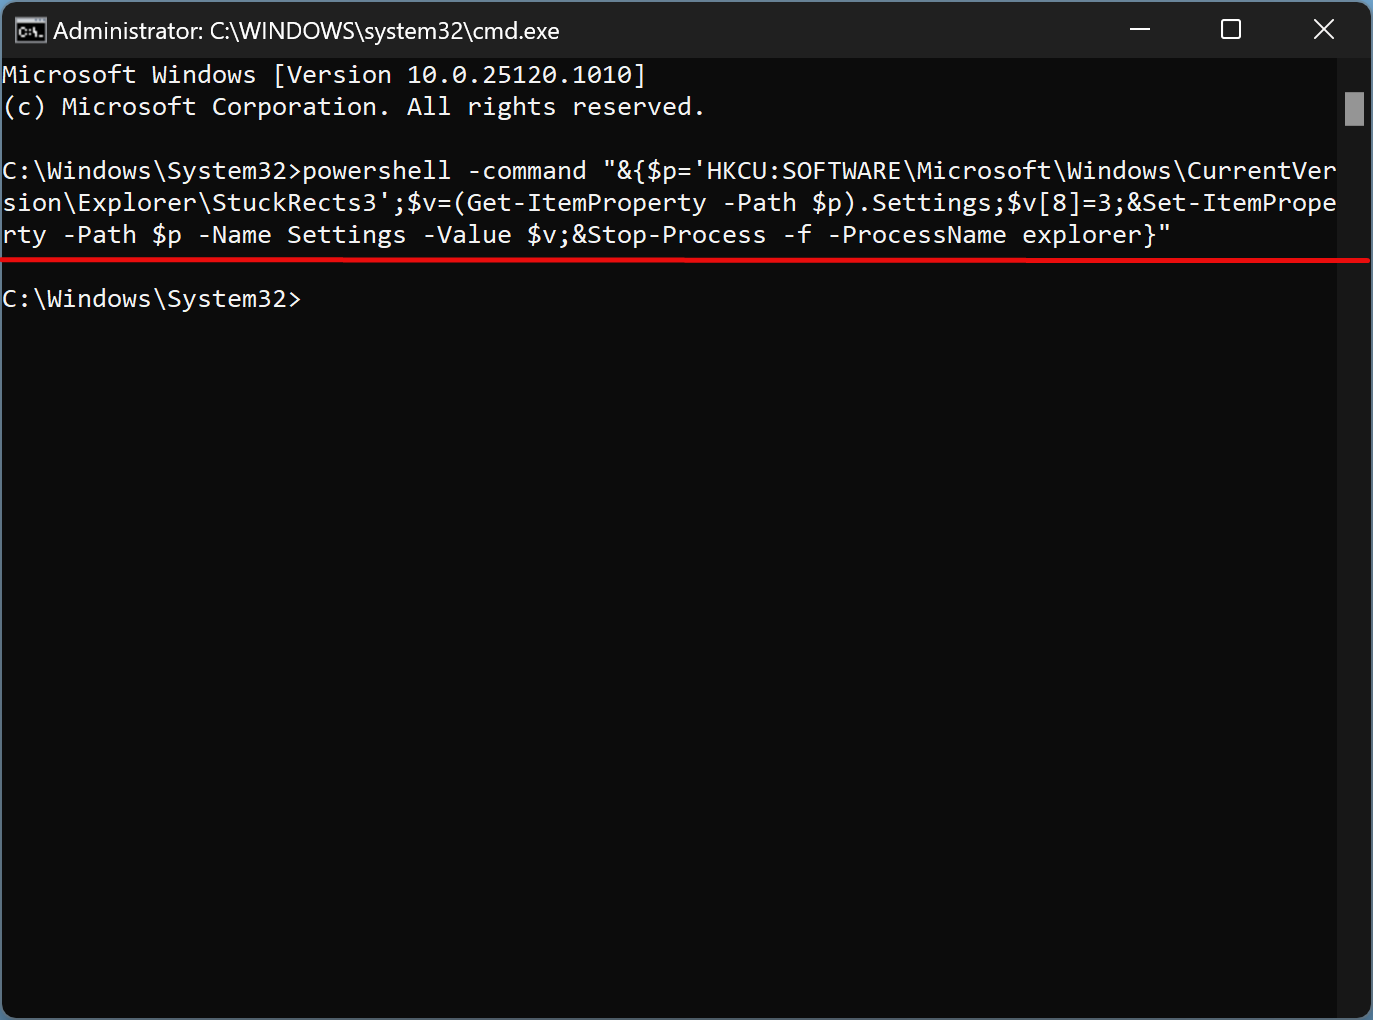
Step 1. First, open the elevated Command Prompt.
Step 2. Then, copy and paste the following and hit the Enter key on the keyboard:-
powershell -command "&{$p='HKCU:SOFTWARE\Microsoft\Windows\CurrentVersion\Explorer\StuckRects3';$v=(Get-ItemProperty -Path $p).Settings;$v[8]=3;&Set-ItemProperty -Path $p -Name Settings -Value $v;&Stop-Process -f -ProcessName explorer}"
Once you complete the above steps, Windows 11 Taskbar will auto-hide if not in use.
In the future, if you want to disable the auto-hide taskbar feature of Windows 11, run the following command in the elevated command prompt:-
powershell -command "&{$p='HKCU:SOFTWARE\Microsoft\Windows\CurrentVersion\Explorer\StuckRects3';$v=(Get-ItemProperty -Path $p).Settings;$v[8]=2;&Set-ItemProperty -Path $p -Name Settings -Value $v;&Stop-Process -f -ProcessName explorer}"
The changes are immediate, so there is no need to restart your PC or log off from your account.
How to Enable or Disable Auto-Hide Taskbar in Windows 11 using PowerShell?
To turn on or off the auto-hide taskbar feature in Windows 11 using PowerShell, do the following:-
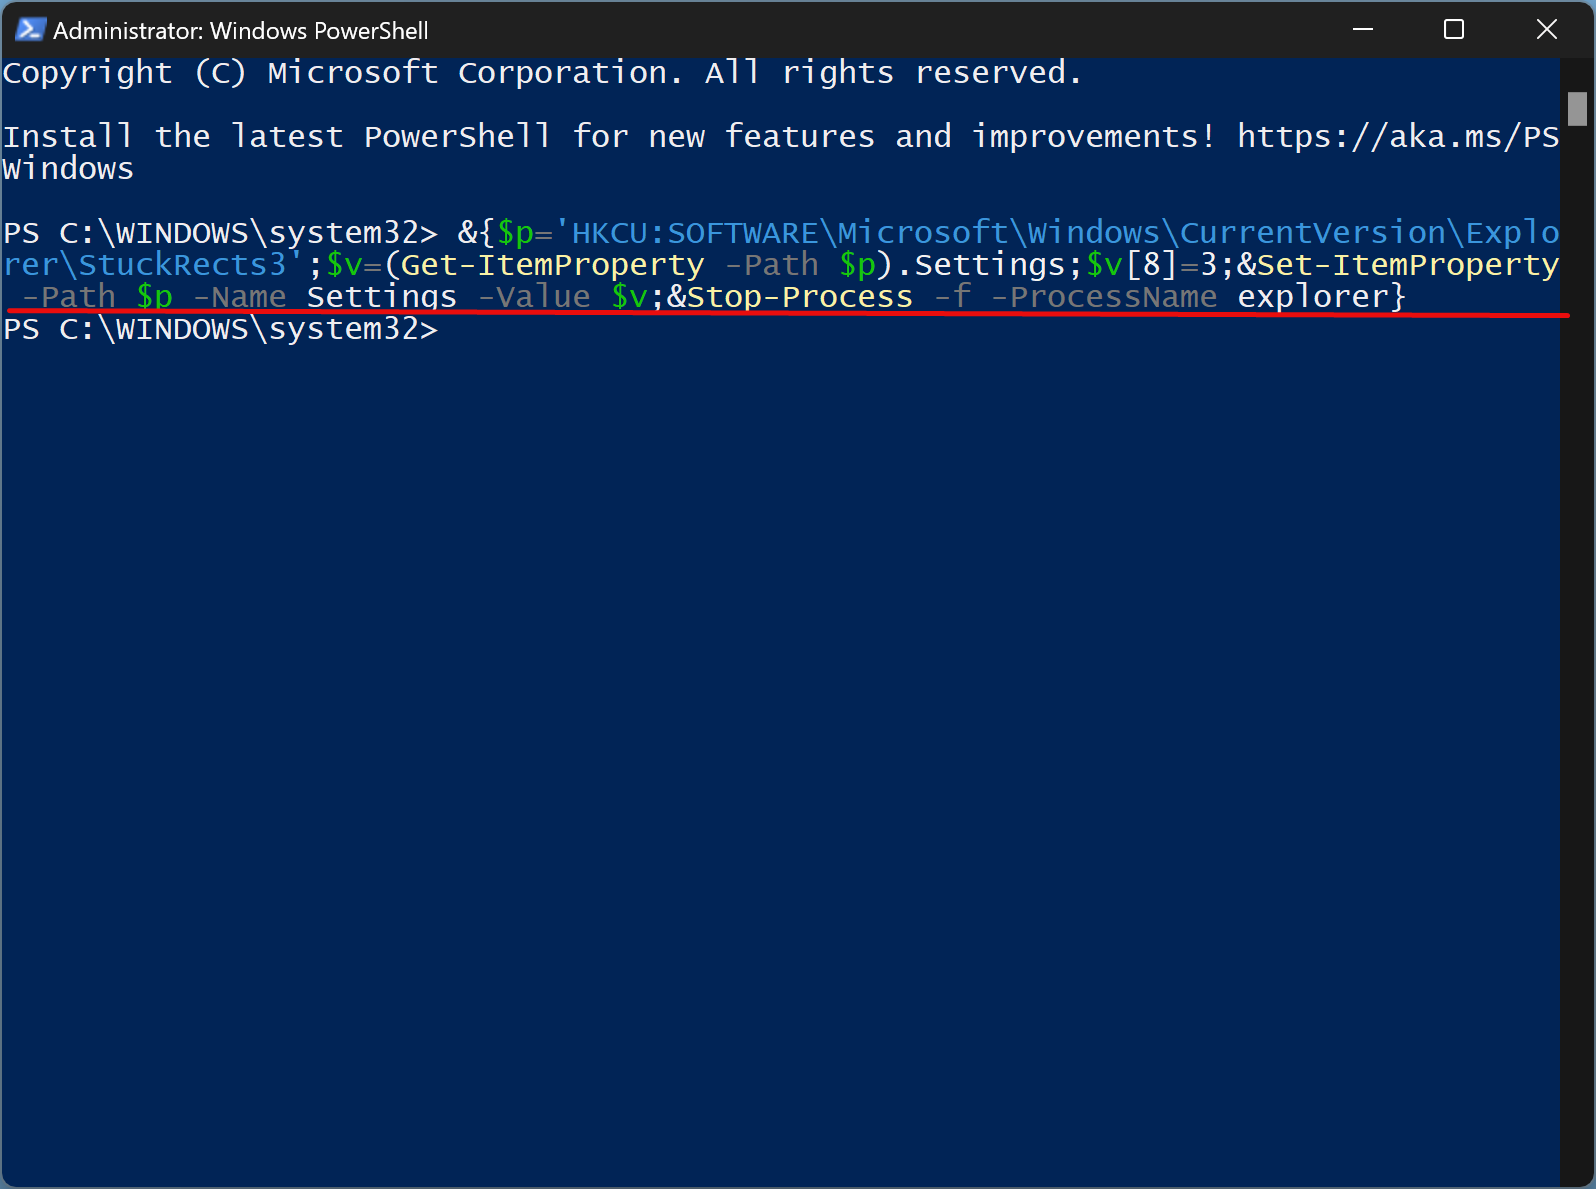
Step 1. First, open an elevated PowerShell window.
Step 2. Then, copy and paste the following in the PowerShell window and then hit Enter key on the keyboard:-
&{$p='HKCU:SOFTWARE\Microsoft\Windows\CurrentVersion\Explorer\StuckRects3';$v=(Get-ItemProperty -Path $p).Settings;$v[8]=3;&Set-ItemProperty -Path $p -Name Settings -Value $v;&Stop-Process -f -ProcessName explorer}
Once you complete the above steps, Windows 11 Taskbar will automatically hide when your mouse cursor is away from it.
To unhide the Windows 11 Taskbar, execute the following cmdlet in Windows PowerShell:-
&{$p='HKCU:SOFTWARE\Microsoft\Windows\CurrentVersion\Explorer\StuckRects3';$v=(Get-ItemProperty -Path $p).Settings;$v[8]=2;&Set-ItemProperty -Path $p -Name Settings -Value $v;&Stop-Process -f -ProcessName explorer}
Good luck.
Conclusion
In conclusion, the auto-hide feature of the Windows 11 taskbar is a convenient way to hide the taskbar when it is not in use, particularly when running full-screen applications. This feature can be enabled or disabled in several ways, including through the Settings app, Registry Editor, Command Prompt, and PowerShell. With just a few simple steps, users can customize their Windows 11 experience by choosing to show or hide the taskbar automatically. Whether you prefer a clutter-free desktop or quick access to your favorite programs, the auto-hide feature of the Windows 11 taskbar can help streamline your workflow.