
By default, when you delete a file or folder in Windows 11 or 10, it accumulates in the Recycle Bin until you empty it if you want them permanently deleted. You can, however, bypass the Recycle Bin while deleting a file or folder by selecting the file and pressing Shift + Delete. Doing so will delete the file or folder immediately and permanently, bypassing the Recycle Bin.
Whenever you use your computer regularly, so many files and folders accumulate on your system. The Shift + Delete hotkey can be used to remove these items permanently. However, tweaking the registry can also add this function to the context menu if you prefer.
You can use several commands in the right-click context menu, including open, save, copy, paste, share, and delete. If you add the command “Permanently Delete” to the right-click menu, you can delete files with one click. Unfortunately, the Windows context menu has no “Permanently Delete” option. However, you can add it there.
This gearupwindows article explains how to add a “Permanently Delete” context menu to Windows 11 or 10.
How to Add a “Permanently Delete” Option to the Context Menu?
Use these steps to include a “Permanently Delete” option in the Windows 11 or 10 context menu:-
Step 1. First, open Registry Editor.
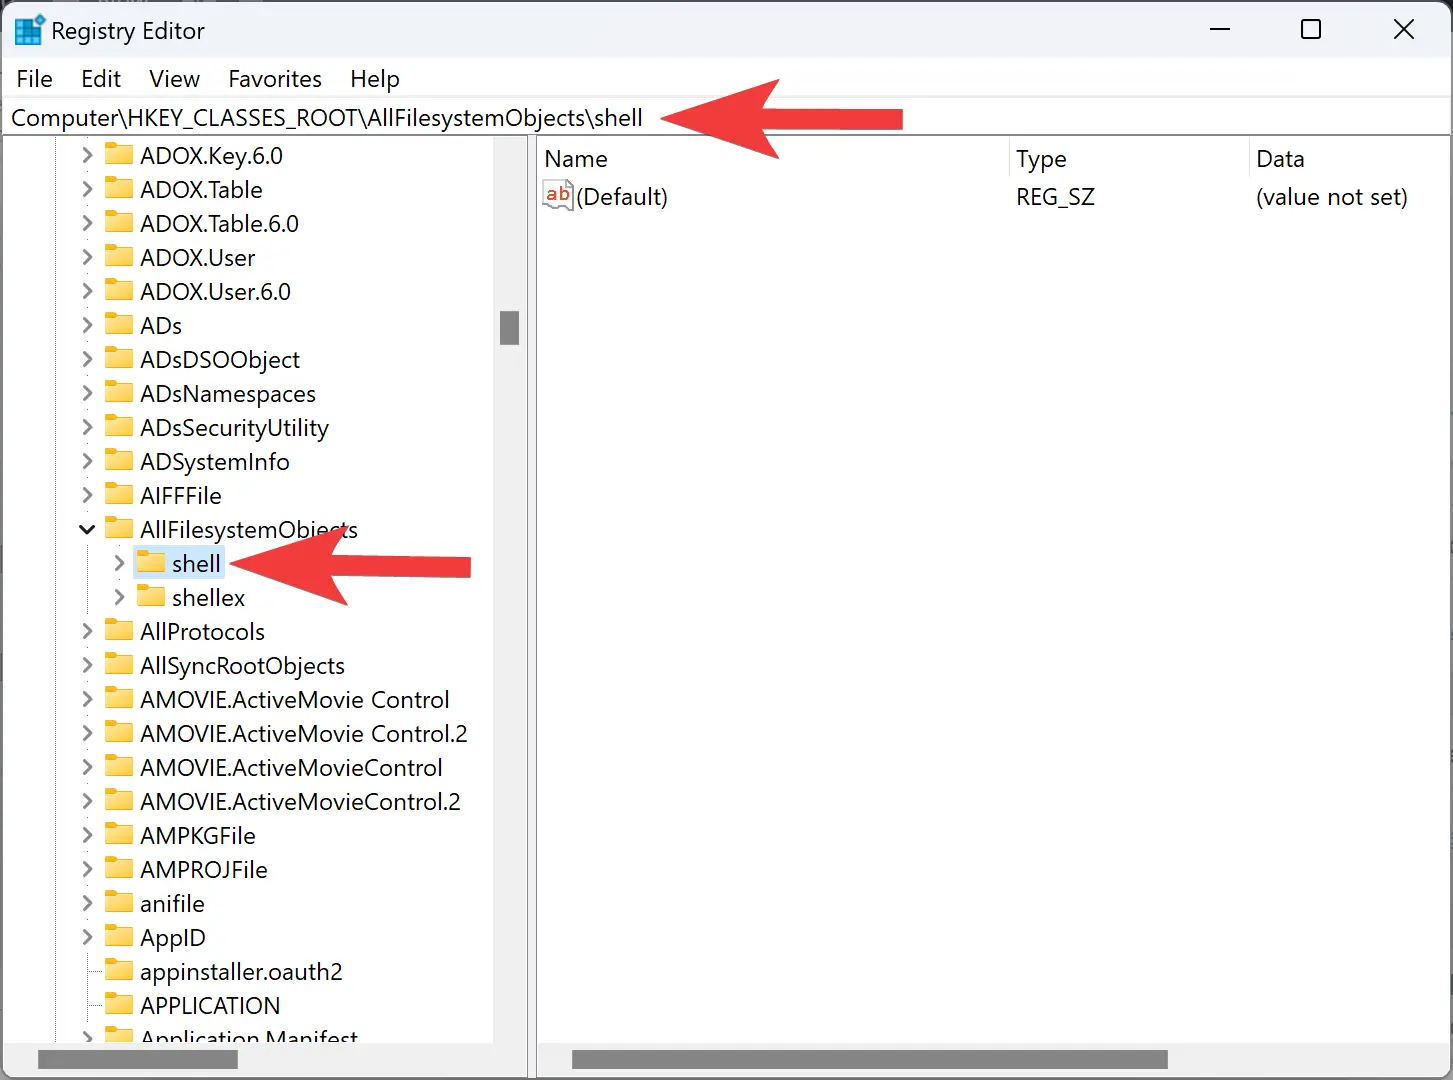
Step 2. Next, navigate to the following key in the left sidebar:-
Computer\HKEY_CLASSES_ROOT\AllFilesystemObjects\shell
Step 3. Now, right-click on the shell and select New > Key.
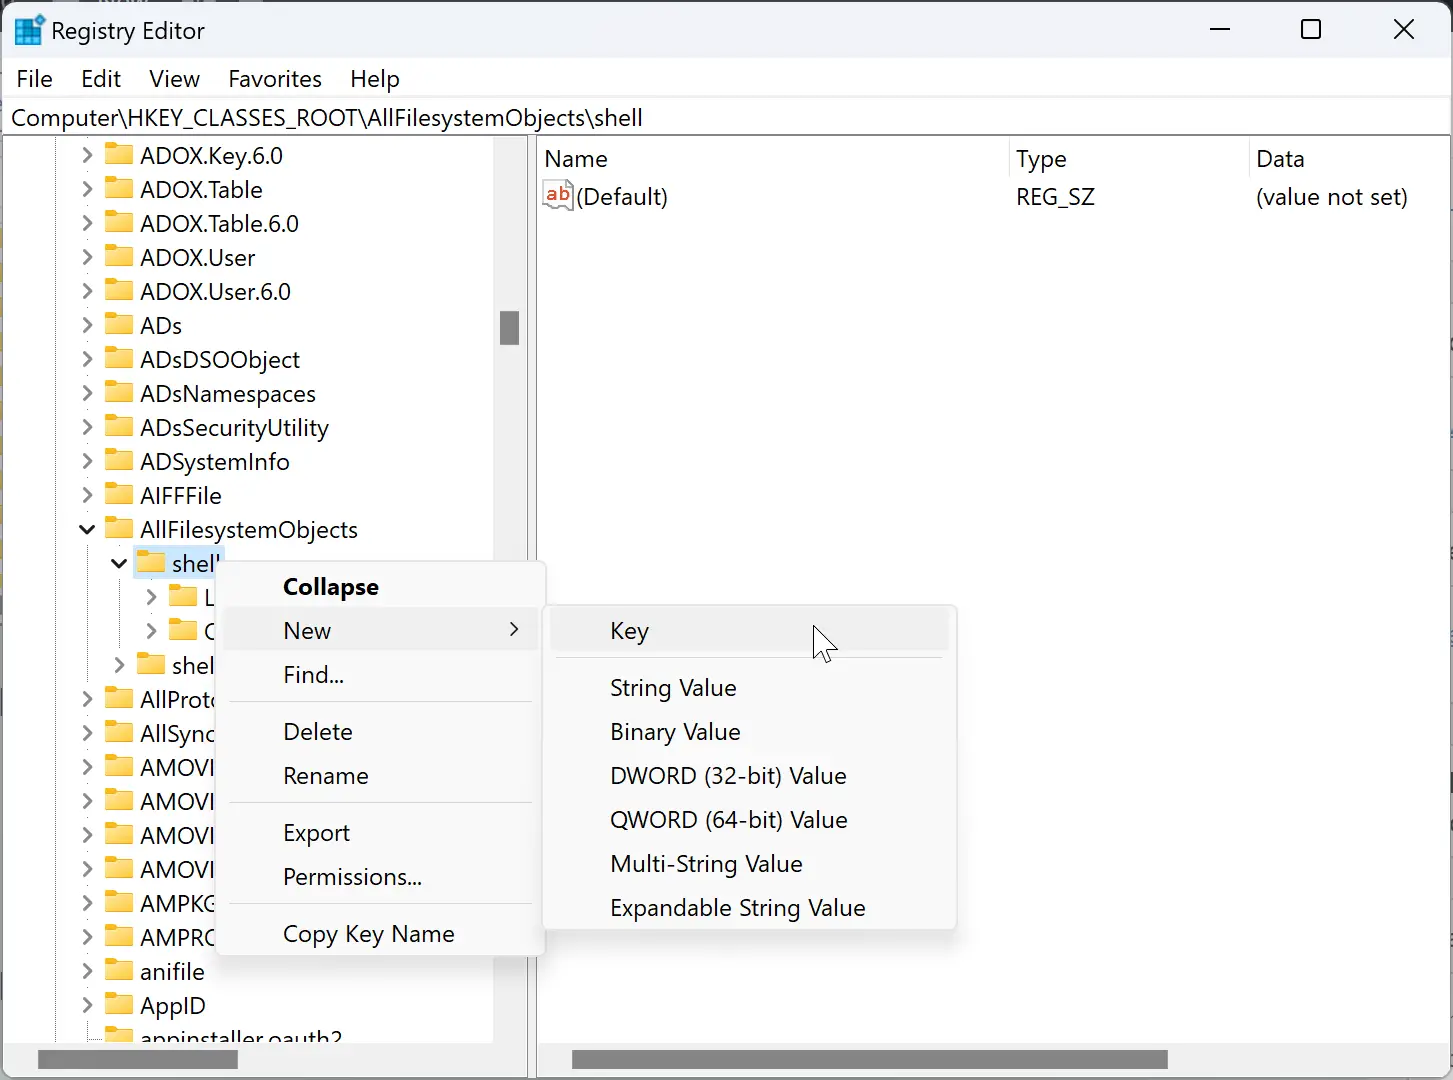
Step 4. Name this new key Windows.PermanentDelete.
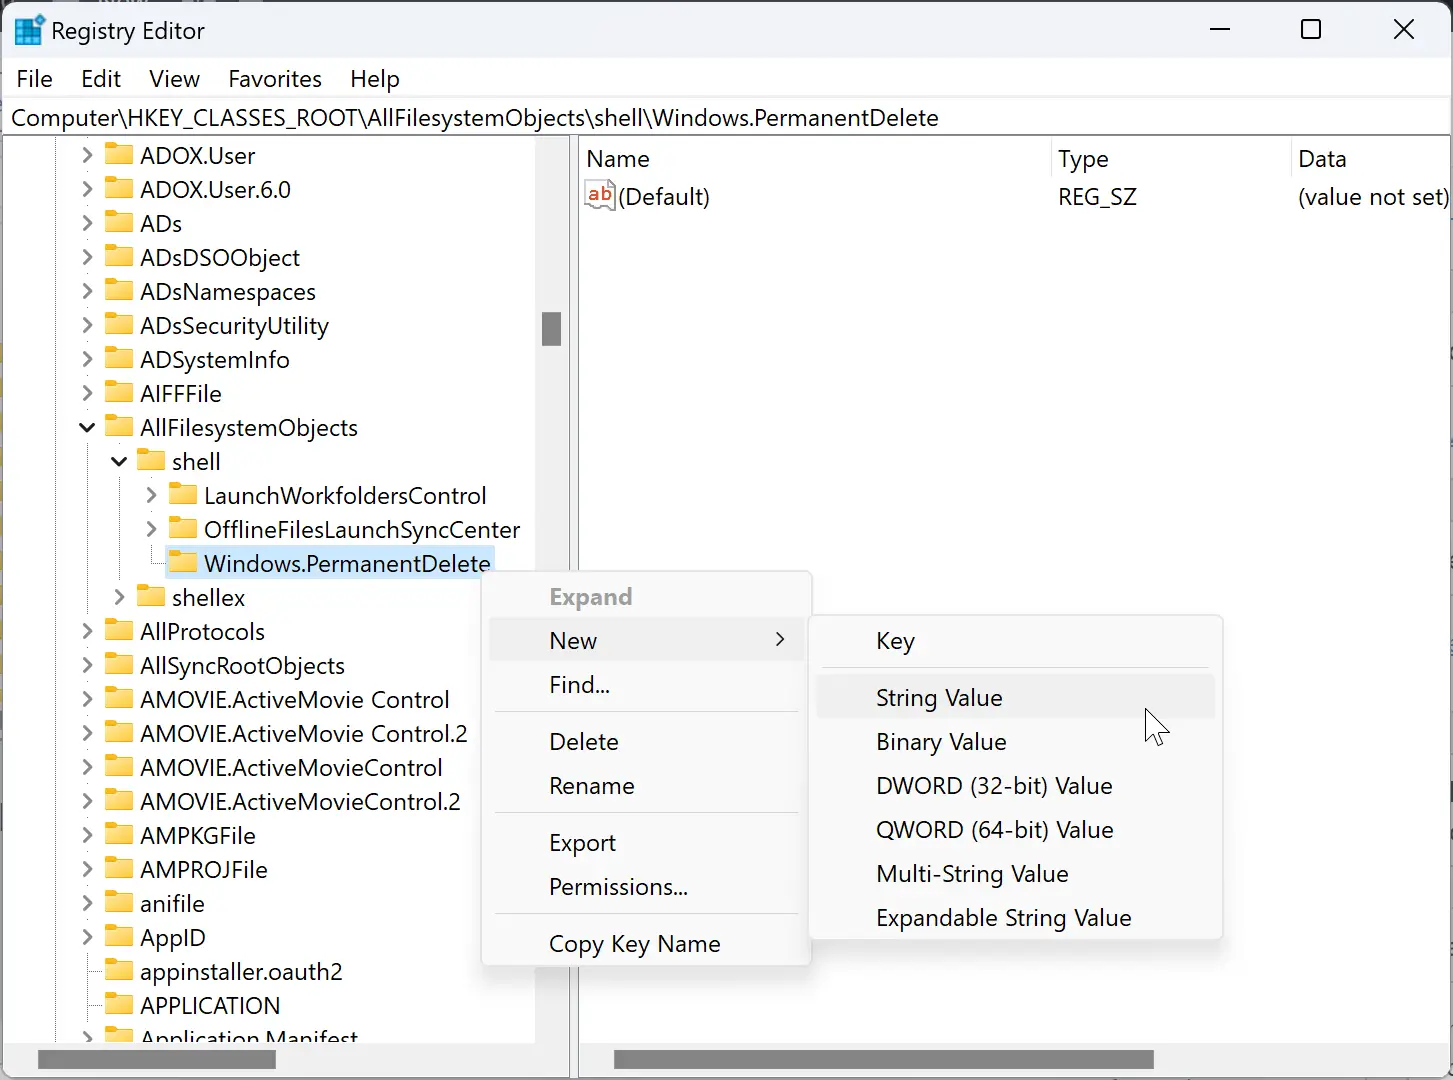
Step 5. Next, right-click on Windows.PermanentDelete key and choose New > String Value.
Step 6. Set the name to CommandStateSync.
Step 7. Again, right-click on Windows.PermanentDelete key and select New > String Value.
Step 8. Set the name to ExplorerCommandHandler.
Step 9. Now, double-click on the ExplorerCommandHandler REG_SZ and set its “Value data” to the following:-
{E9571AB2-AD92-4ec6-8924-4E5AD33790F5}
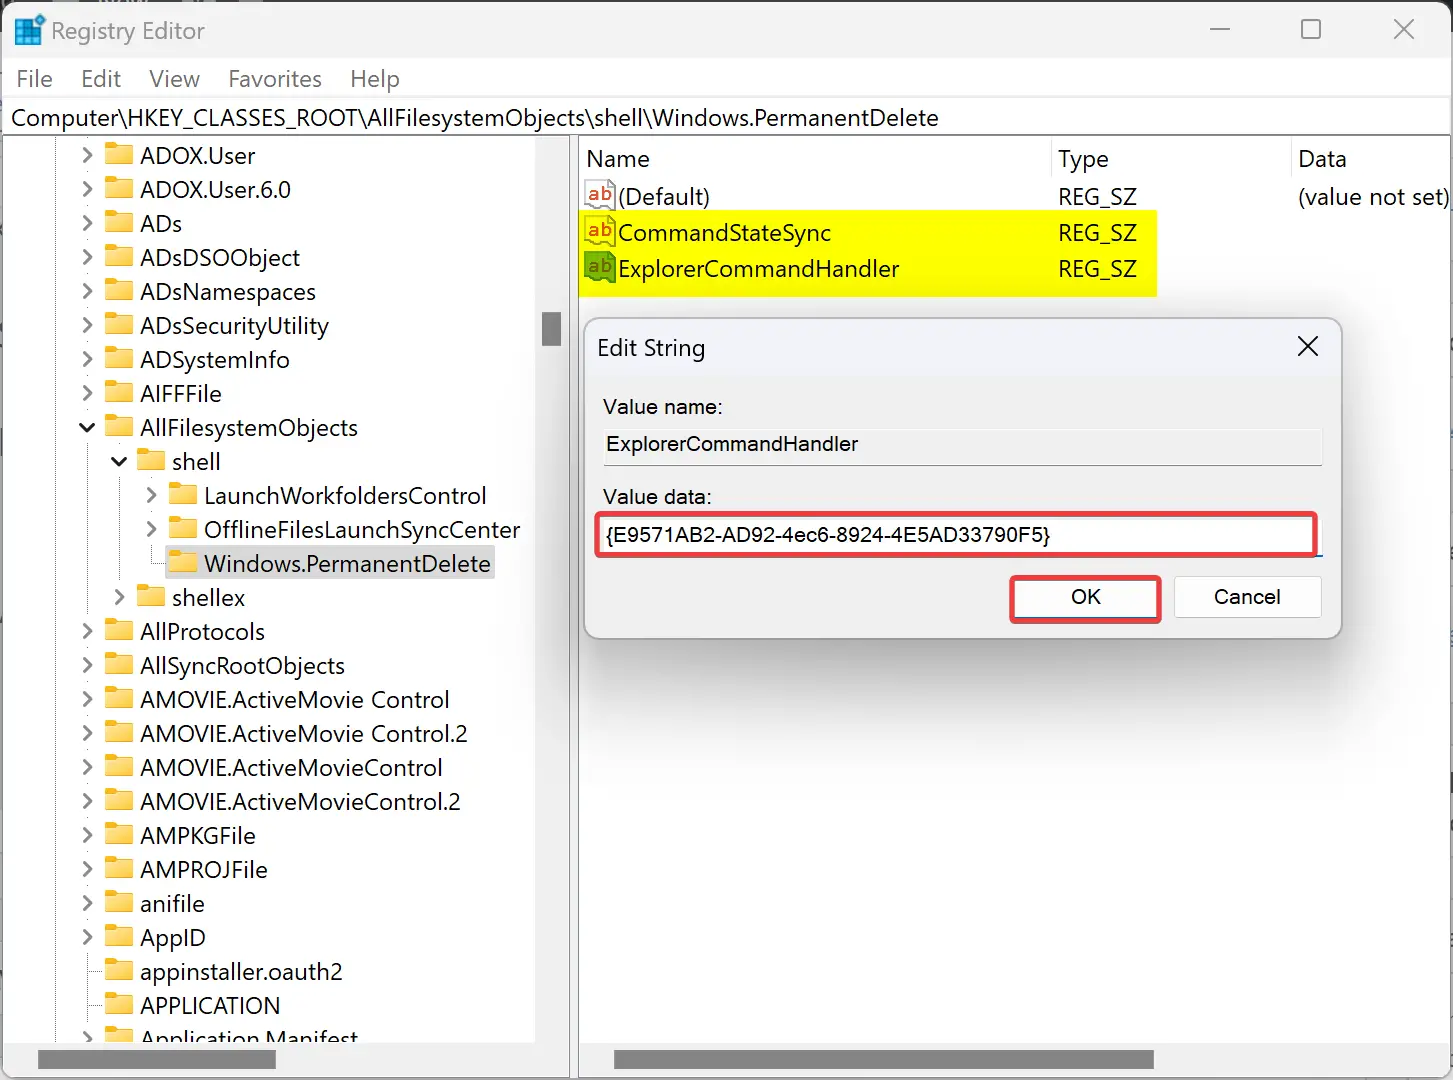
Step 10. Then, click the OK button.
Step 11. Again, right-click on Windows.PermanentDelete key and select New > String Value.
Step 12. Set the name to Icon.
Step 13. Now, double-click on the Icon REG_SZ and set its “Value data” to the following:-
shell32.dll,-240
![]()
Step 14. Click the OK button.
Step 15. Again, right-click on Windows.PermanentDelete key and select New > String Value.
Step 16. Name the newly created REG_SZ to Position.
Step 17. Now, double-click on the Position REG_SZ and set its “Value data” to the following:-
- Top: Set the “Permanently Delete” location to the top of the context menu.
- Bottom: Set the “Permanently Delete” location at the context menu’s bottom.
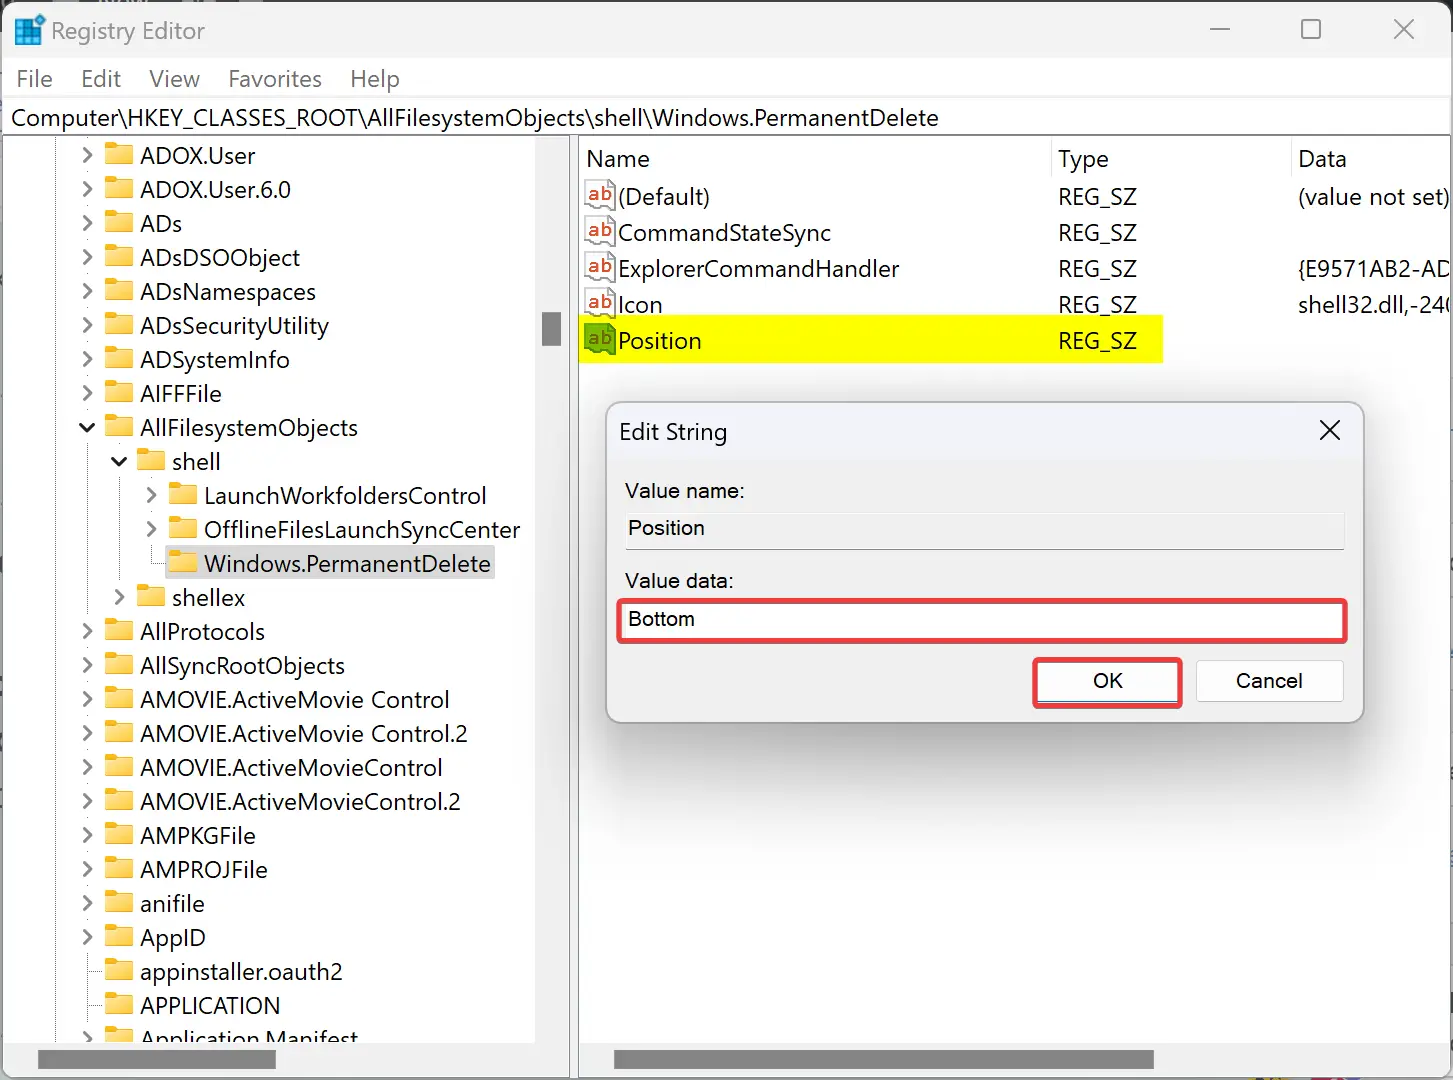
Step 18. Then, click the OK button.
That’s it. The changes are immediate, meaning there is no computer restart.

To test that everything is working fine, right-click on a file or folder you want to delete permanently and click on the Permanently delete option. Of course, if you use Windows 11, you need to select Show more options to appear the Permanently delete option.
Depending on your Recycle Bin configuration, it may prompt you to confirm whether you want to delete the file or folder permanently.
Conclusion
In conclusion, the default behavior of Windows 11 and 10 is to move deleted files and folders to the Recycle Bin until it’s emptied. However, if you want to delete files permanently without using the Recycle Bin, you can use the Shift + Delete hotkey. Alternatively, you can add a “Permanently Delete” option to the right-click context menu using the steps outlined above. This can be a useful feature for those who regularly want to delete files without sending them to the Recycle Bin. With just a few steps, you can customize your Windows 11 or 10 experience and have more control over your system.