Windows allows you to enable and disable the auto-hide taskbar feature using the built-in Settings app. However, if you want to access this feature more frequently on your Windows 11 or 10 PCs, you might consider adding “Automatically hide taskbar” in the context menu. Once you add “Automatically Hide Taskbar” to the right-click menu, you can use enable or disable this from the desktop. No need to dive into the Settings app anymore.
In this gearupwindows article, we will guide you on how to add “Automatically hide taskbar” to the context menu in Windows 11 or 10.
How to Include “Automatically Hide Taskbar” to Context Menu in Windows 11 or 10?
To add the “Automatically hide taskbar” option to the context menu in Windows 11 or 10, use these steps:-
Step 1. First, open Registry Editor.
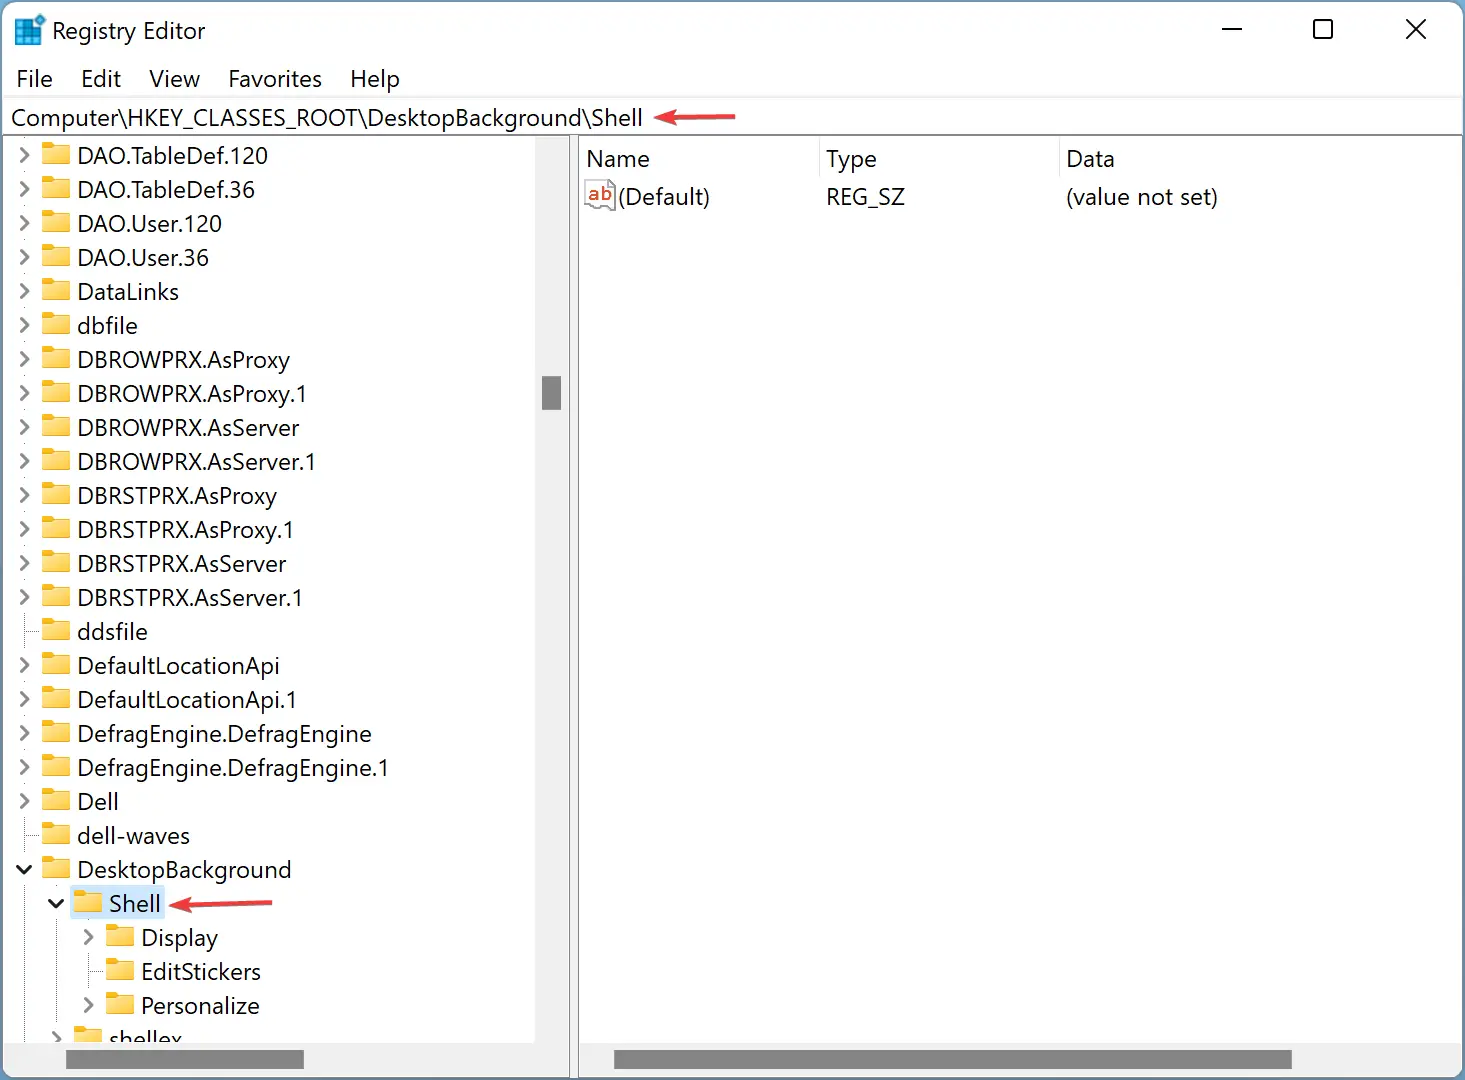
Step 2. Then, browse or navigate to the following key in the left sidebar of the Registry Editor window:-
HKEY_CLASSES_ROOT\DesktopBackground\Shell
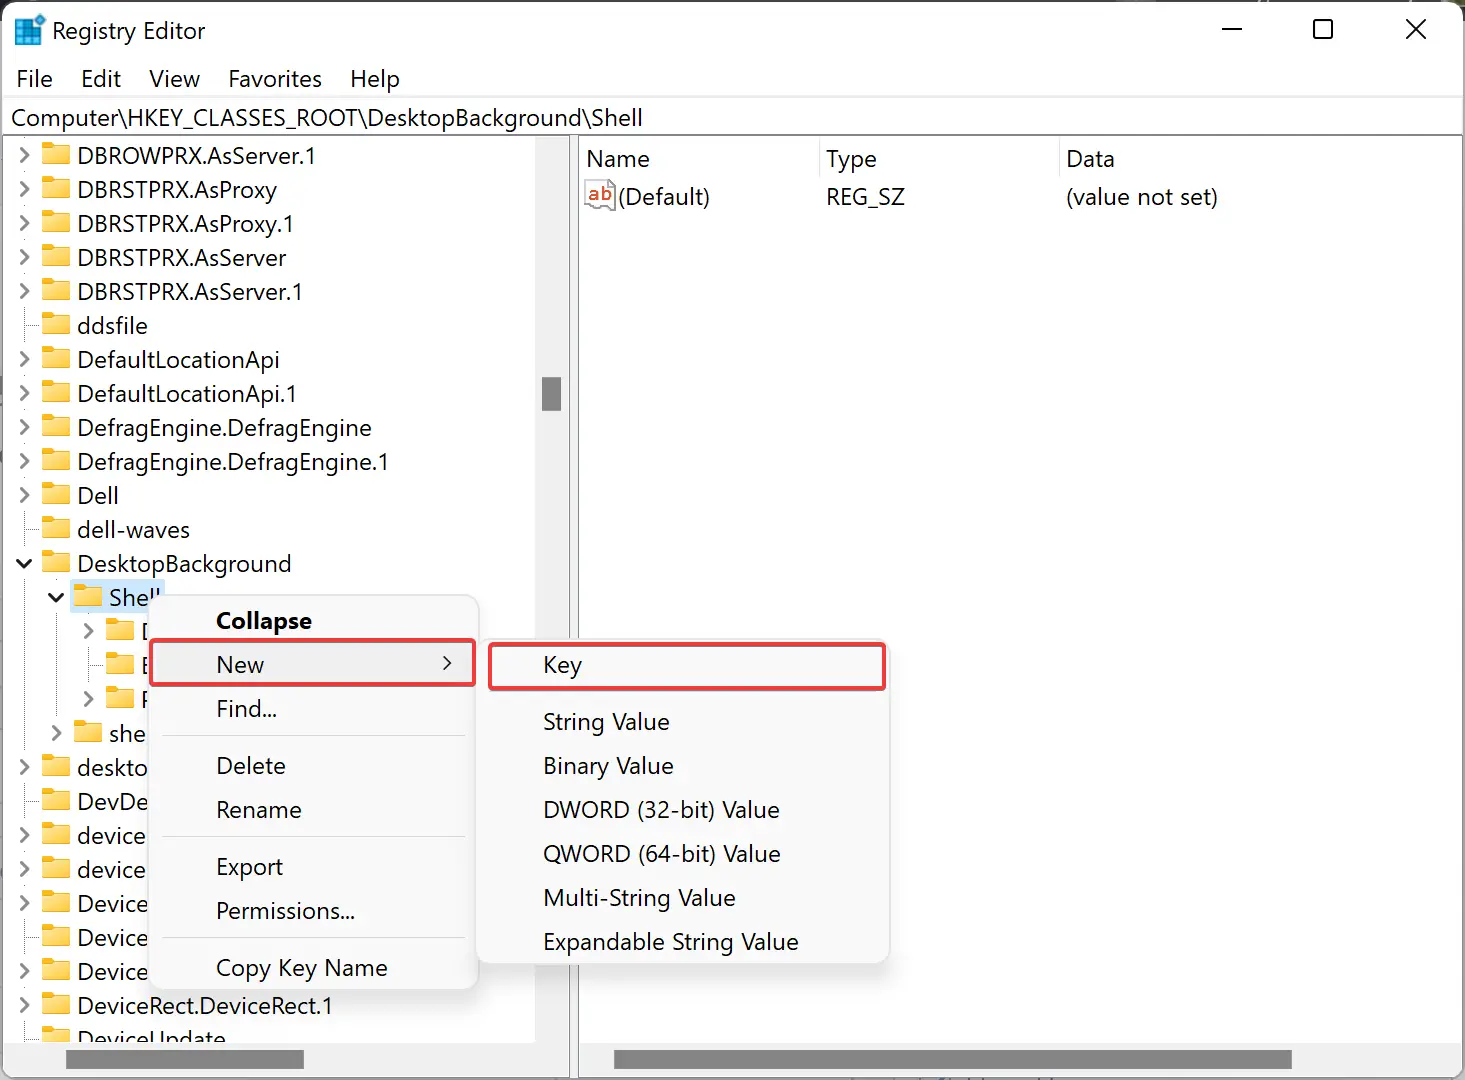
Step 3. Now, right-click on the Shell key and select New > Key.
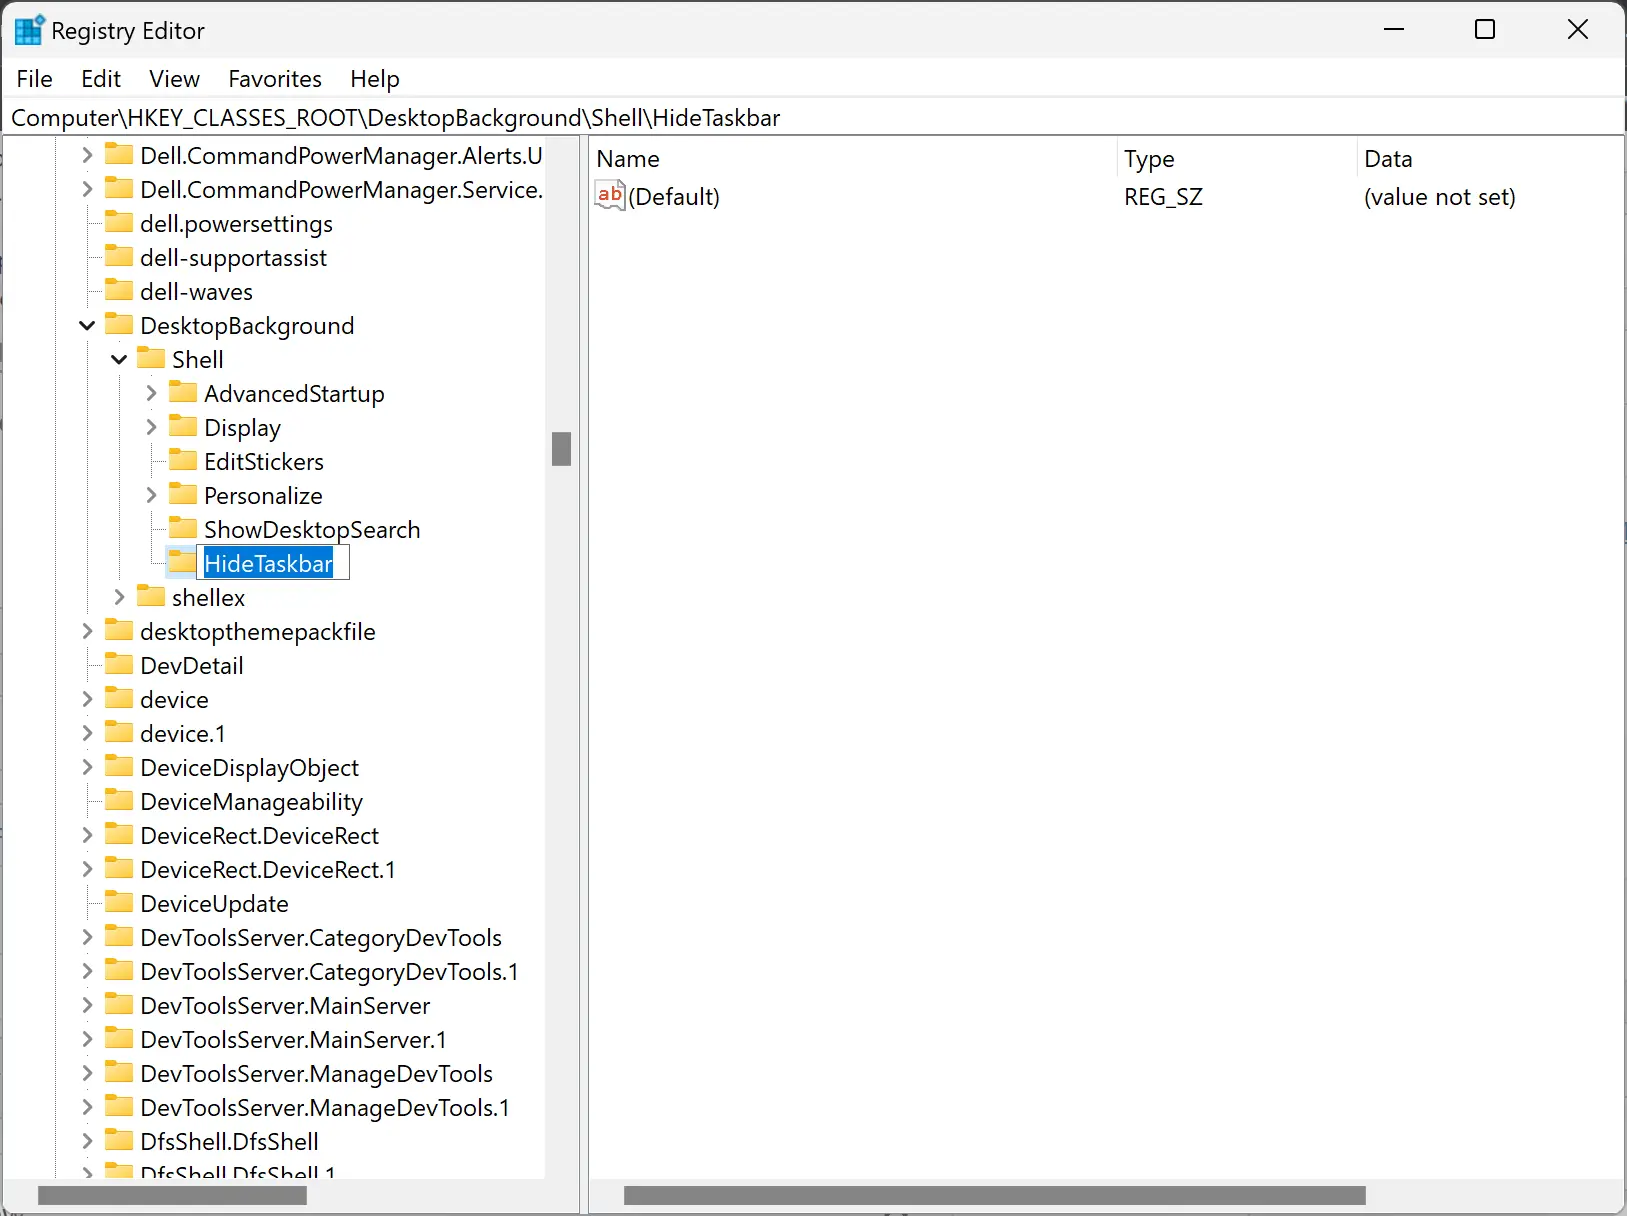
Step 4. Name the newly created key to HideTaskbar.
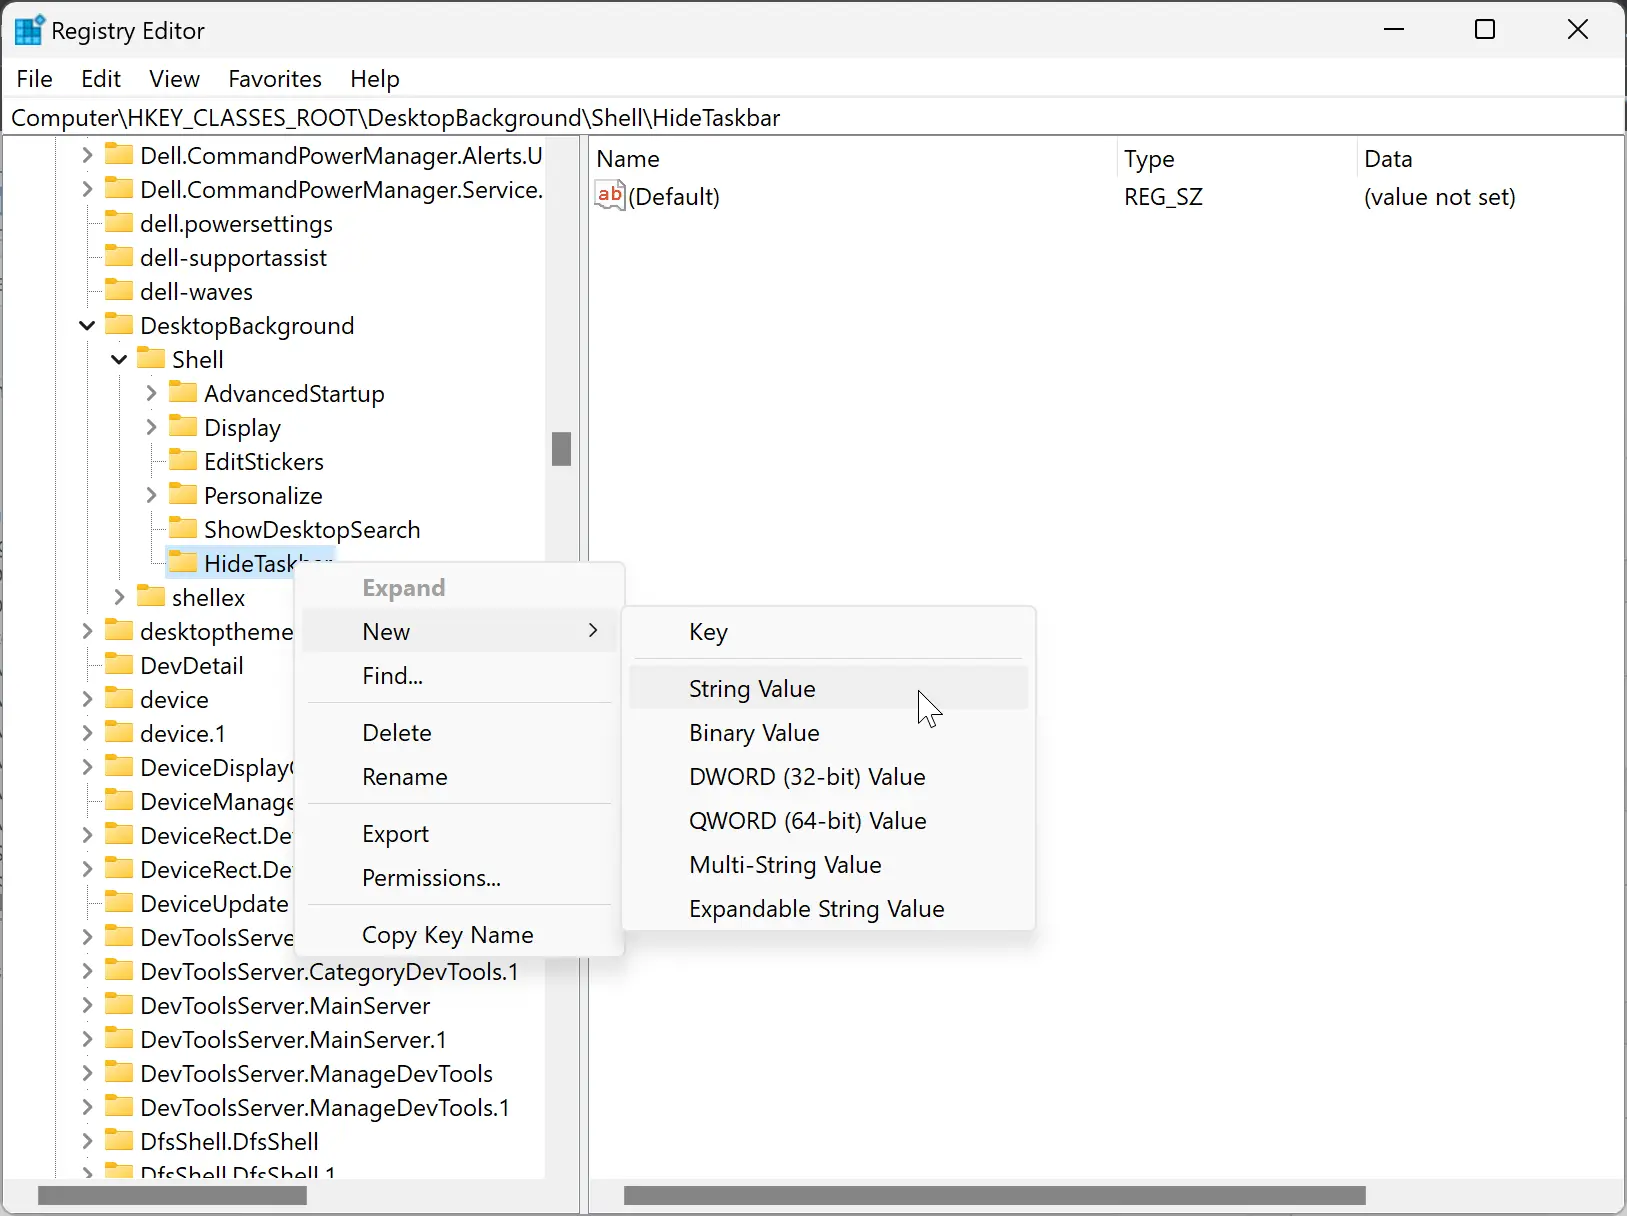
Step 5. Now, right-click on the HideTaskbar folder and select New > String Value.
Step 6. Name the newly created REG_SZ to Icon.
Step 7. Similarly, create three more String Values under this HideTaskbar key and rename them to MUIVerb, Position, and SubCommands.
Once done, it will look like the below screenshot:-
![]()
Step 8. Then, double-click on the Icon REG_SZ and set its “Value data” to imageres.dll,-80.
![]()
Step 9. Click OK.
Step 10. Next, double-click on MUIVerb REG_SZ and set its “Value data” to Automatically hide taskbar.
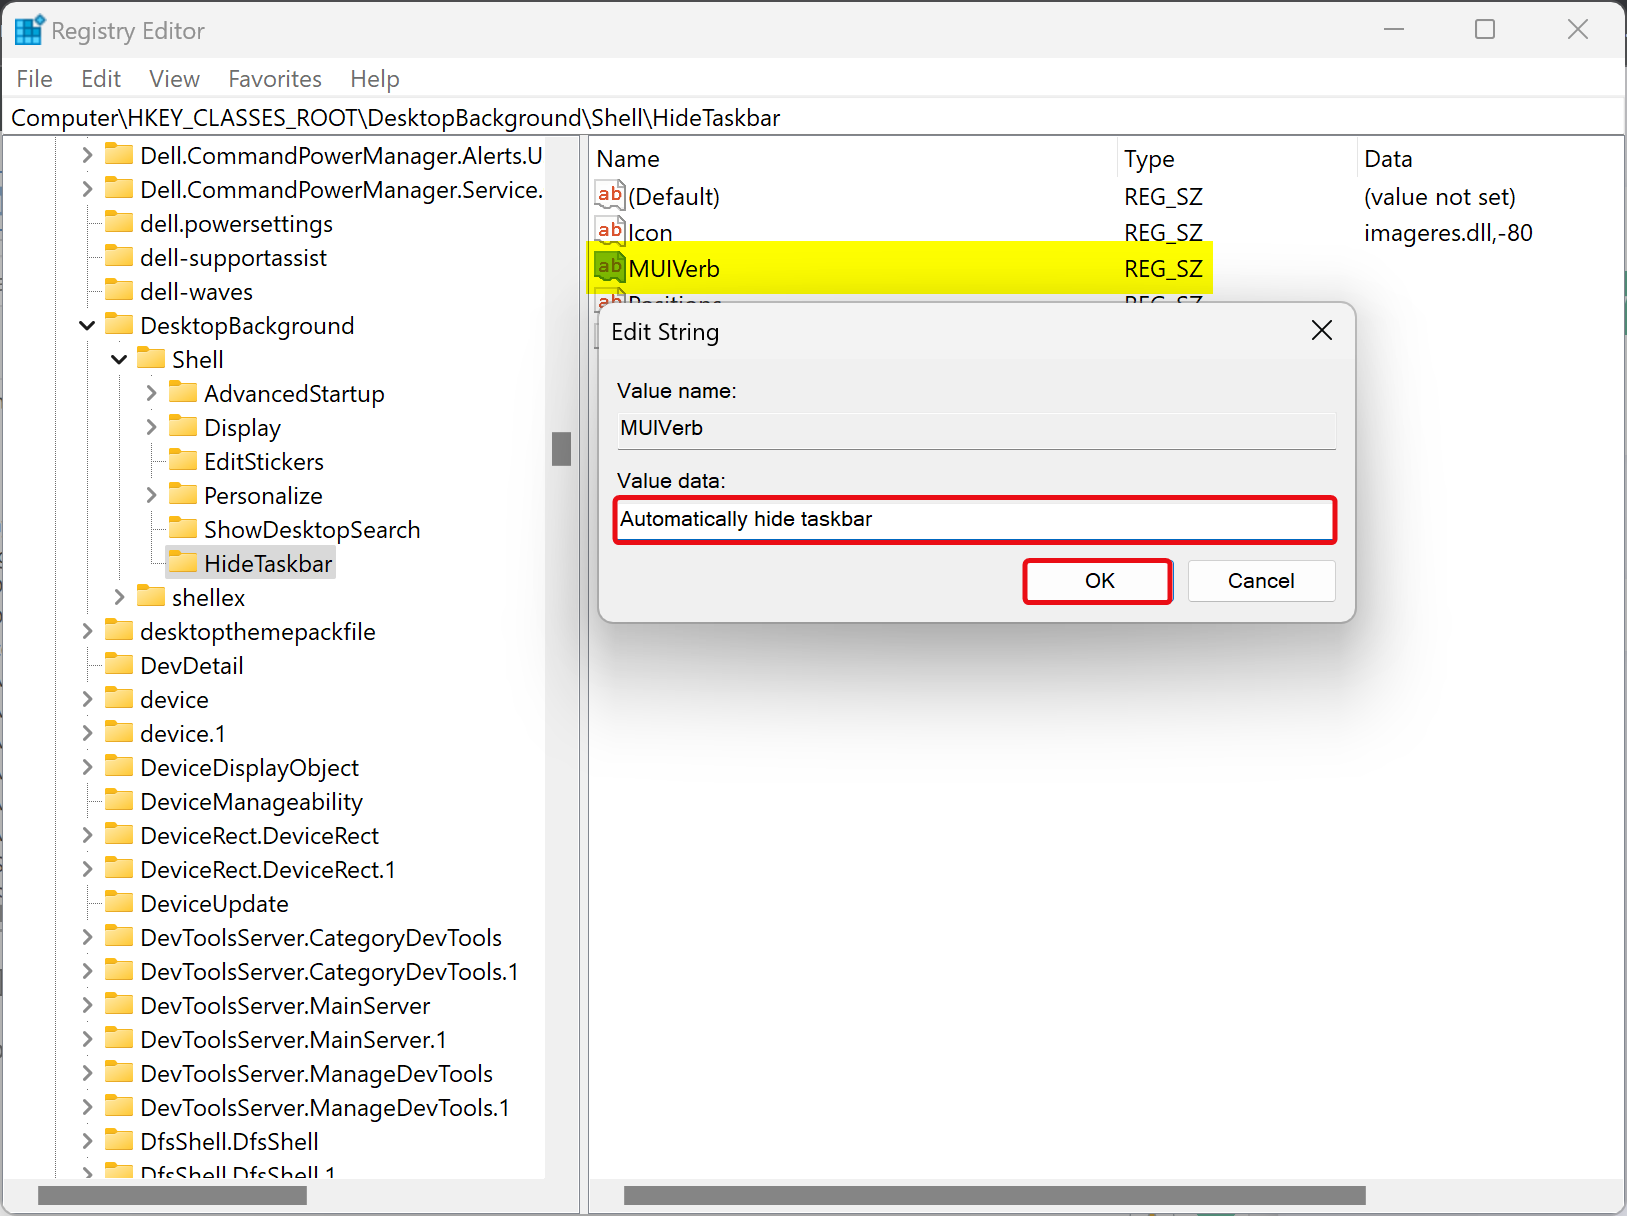
Step 11. Click OK.
Step 12. After that, double-click on the Position REG_SZ and set its “Value data” to Bottom or Up.
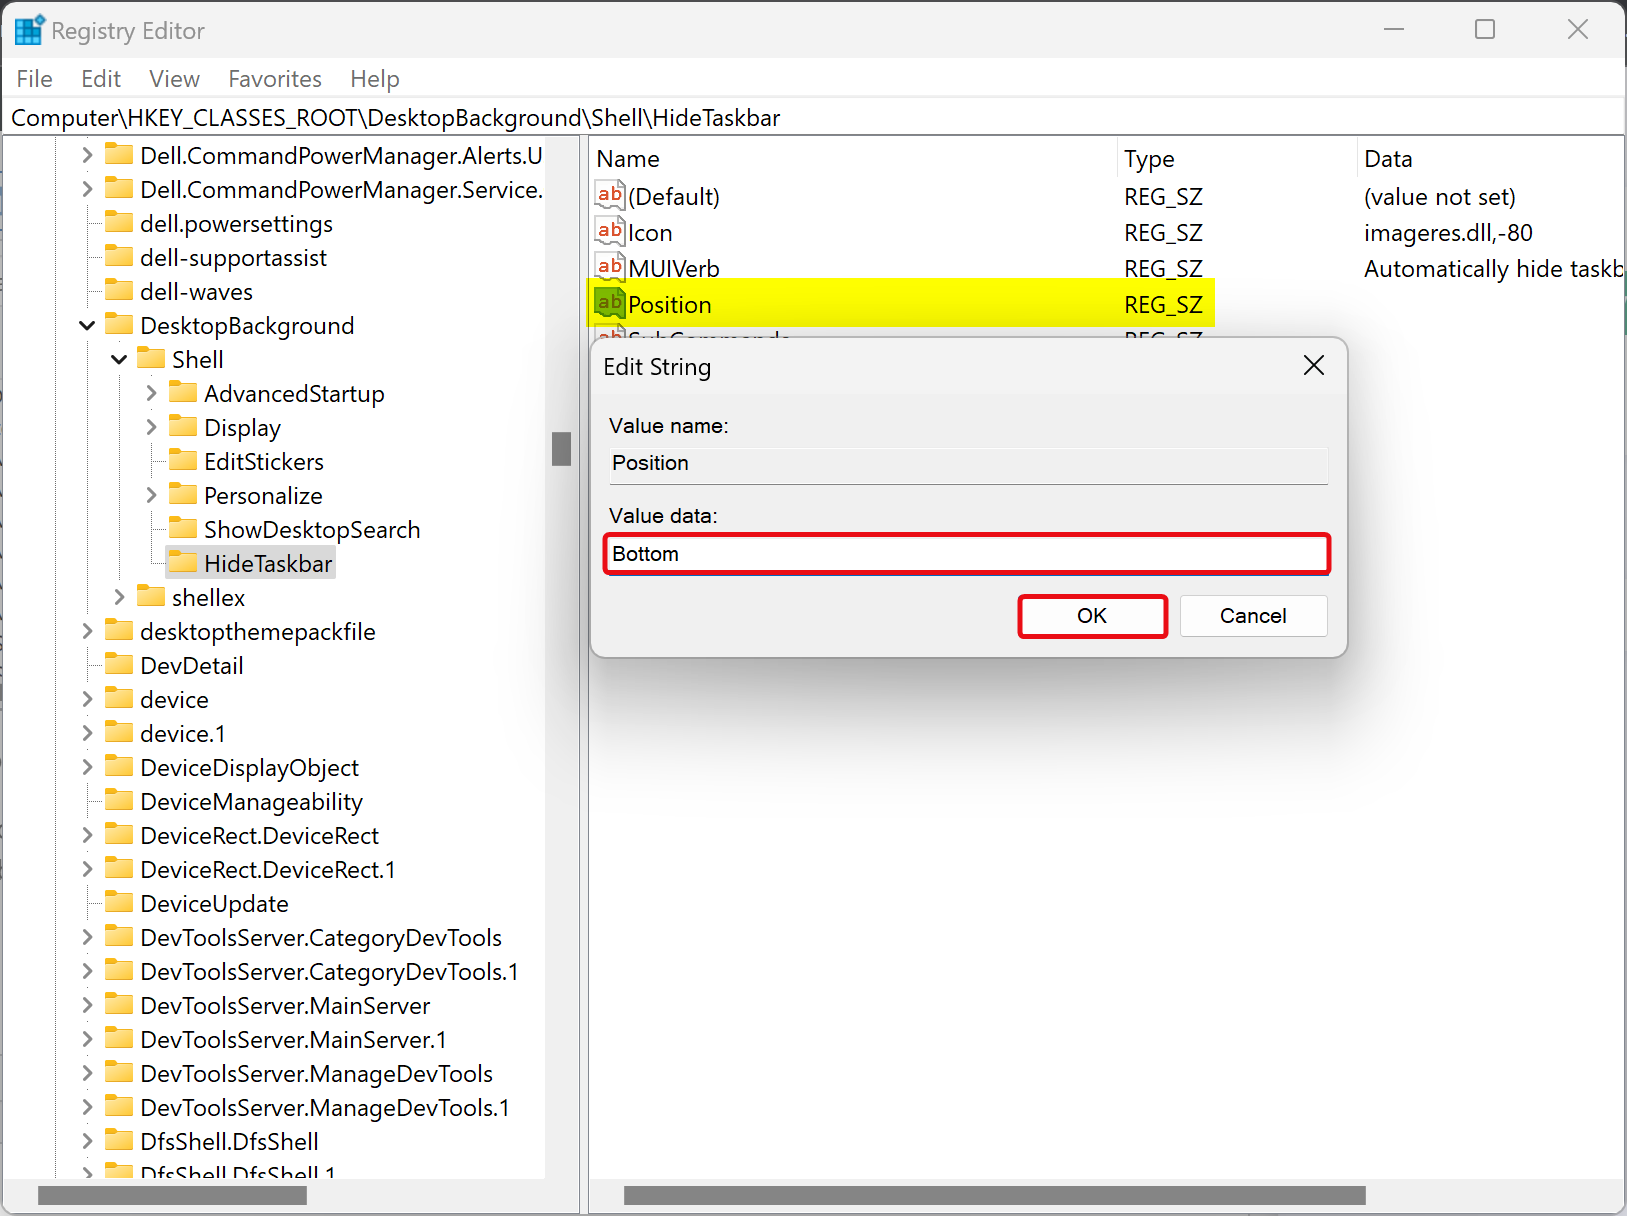
Step 13. Click OK.
Step 14. Leave the SubCommands “Value data” blank. You don’t need to set its “Value data.”
Step 15. Now, right-click on the HideTaskbar folder and select New > Key.
Step 16. Name the newly created key as shell.
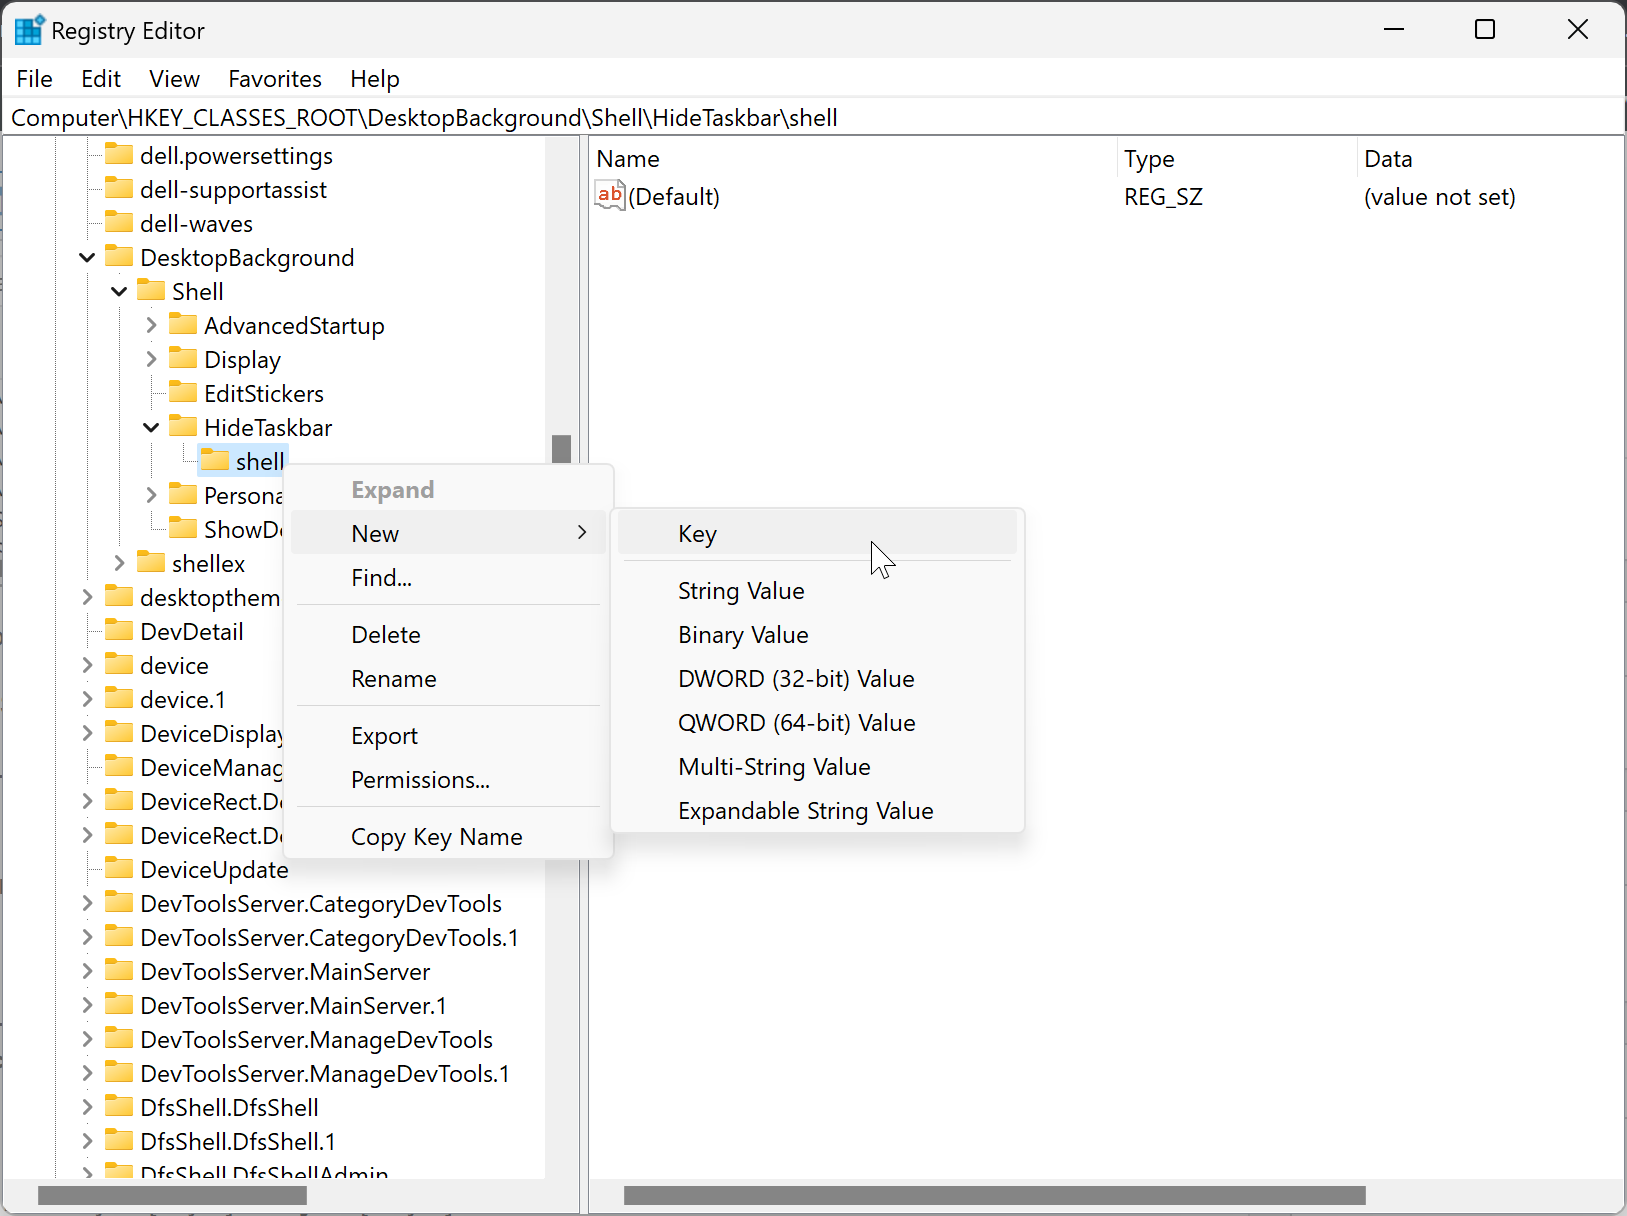
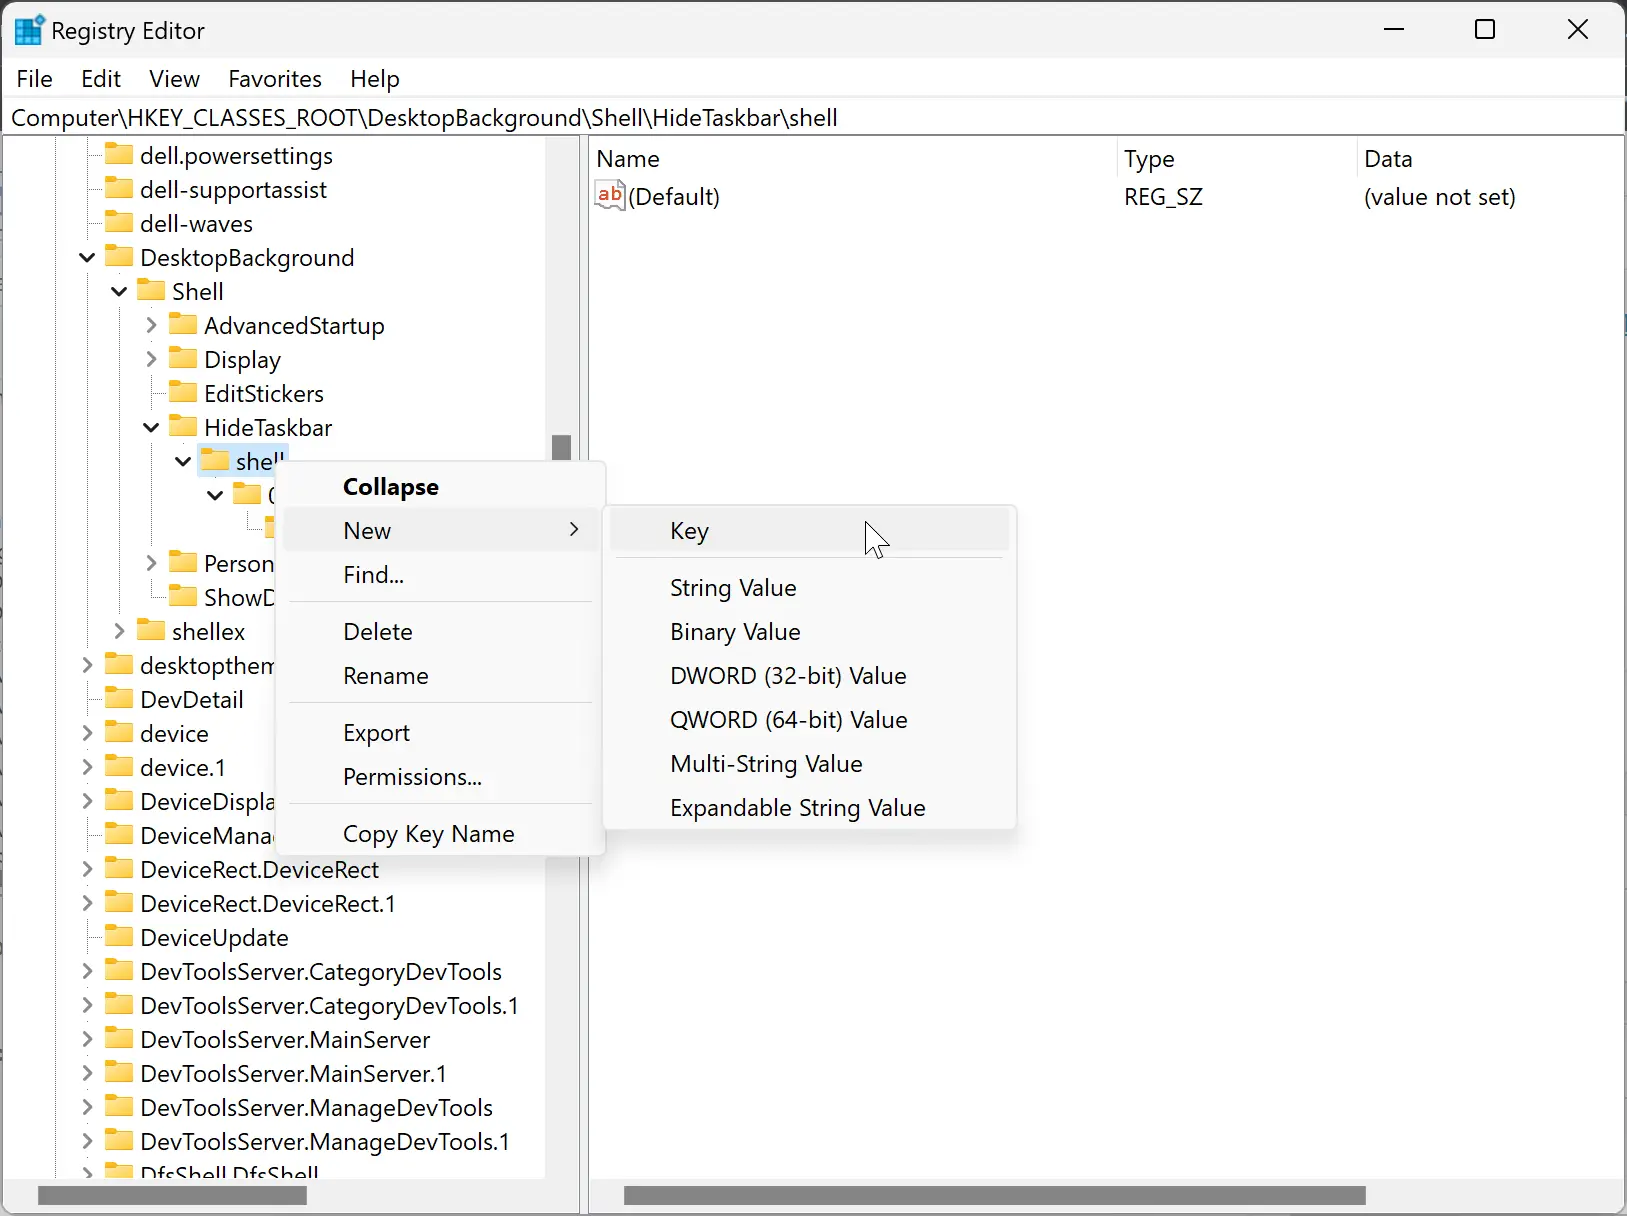
Step 17. Now, right-click on the shell key and select New > Key. Name this new key 001flyout.
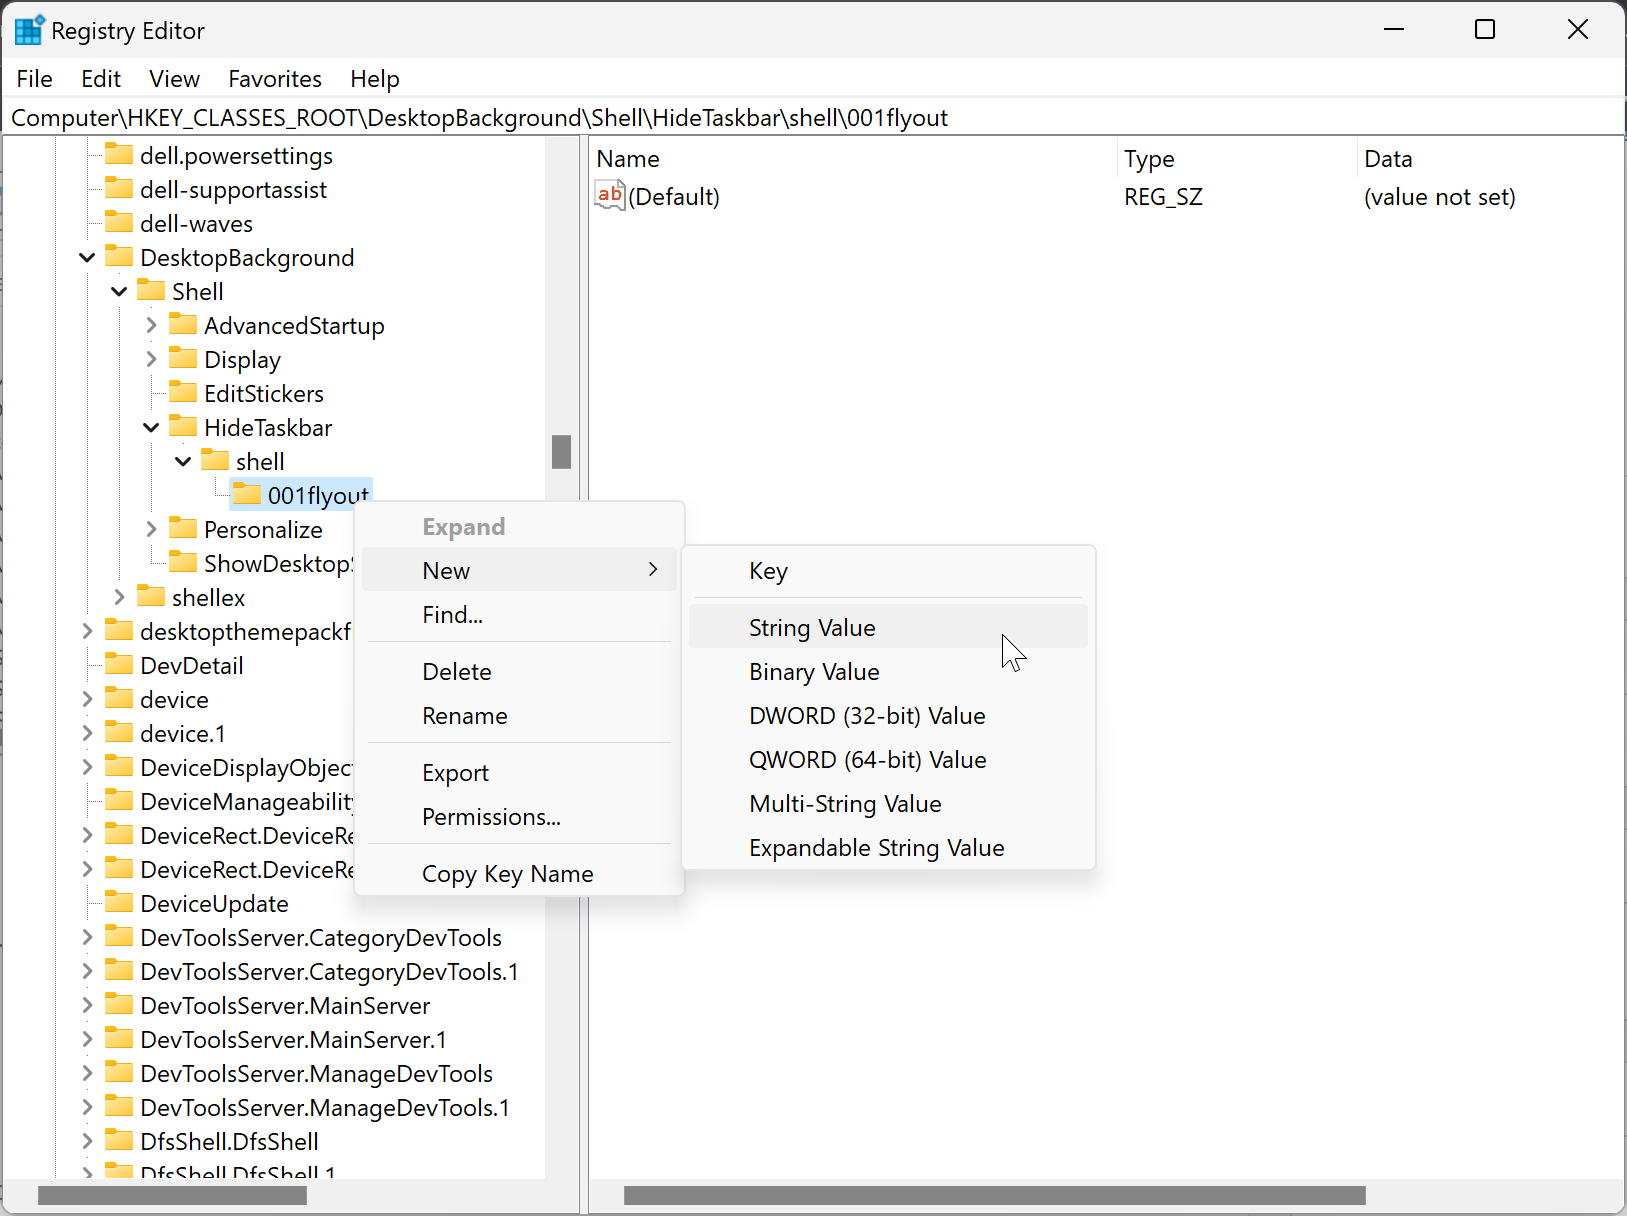
Step 18. Next, right-click on the 001flyout folder and select New > String Value.
Step 19. Name this newly created REG_SZ to MUIVerb.
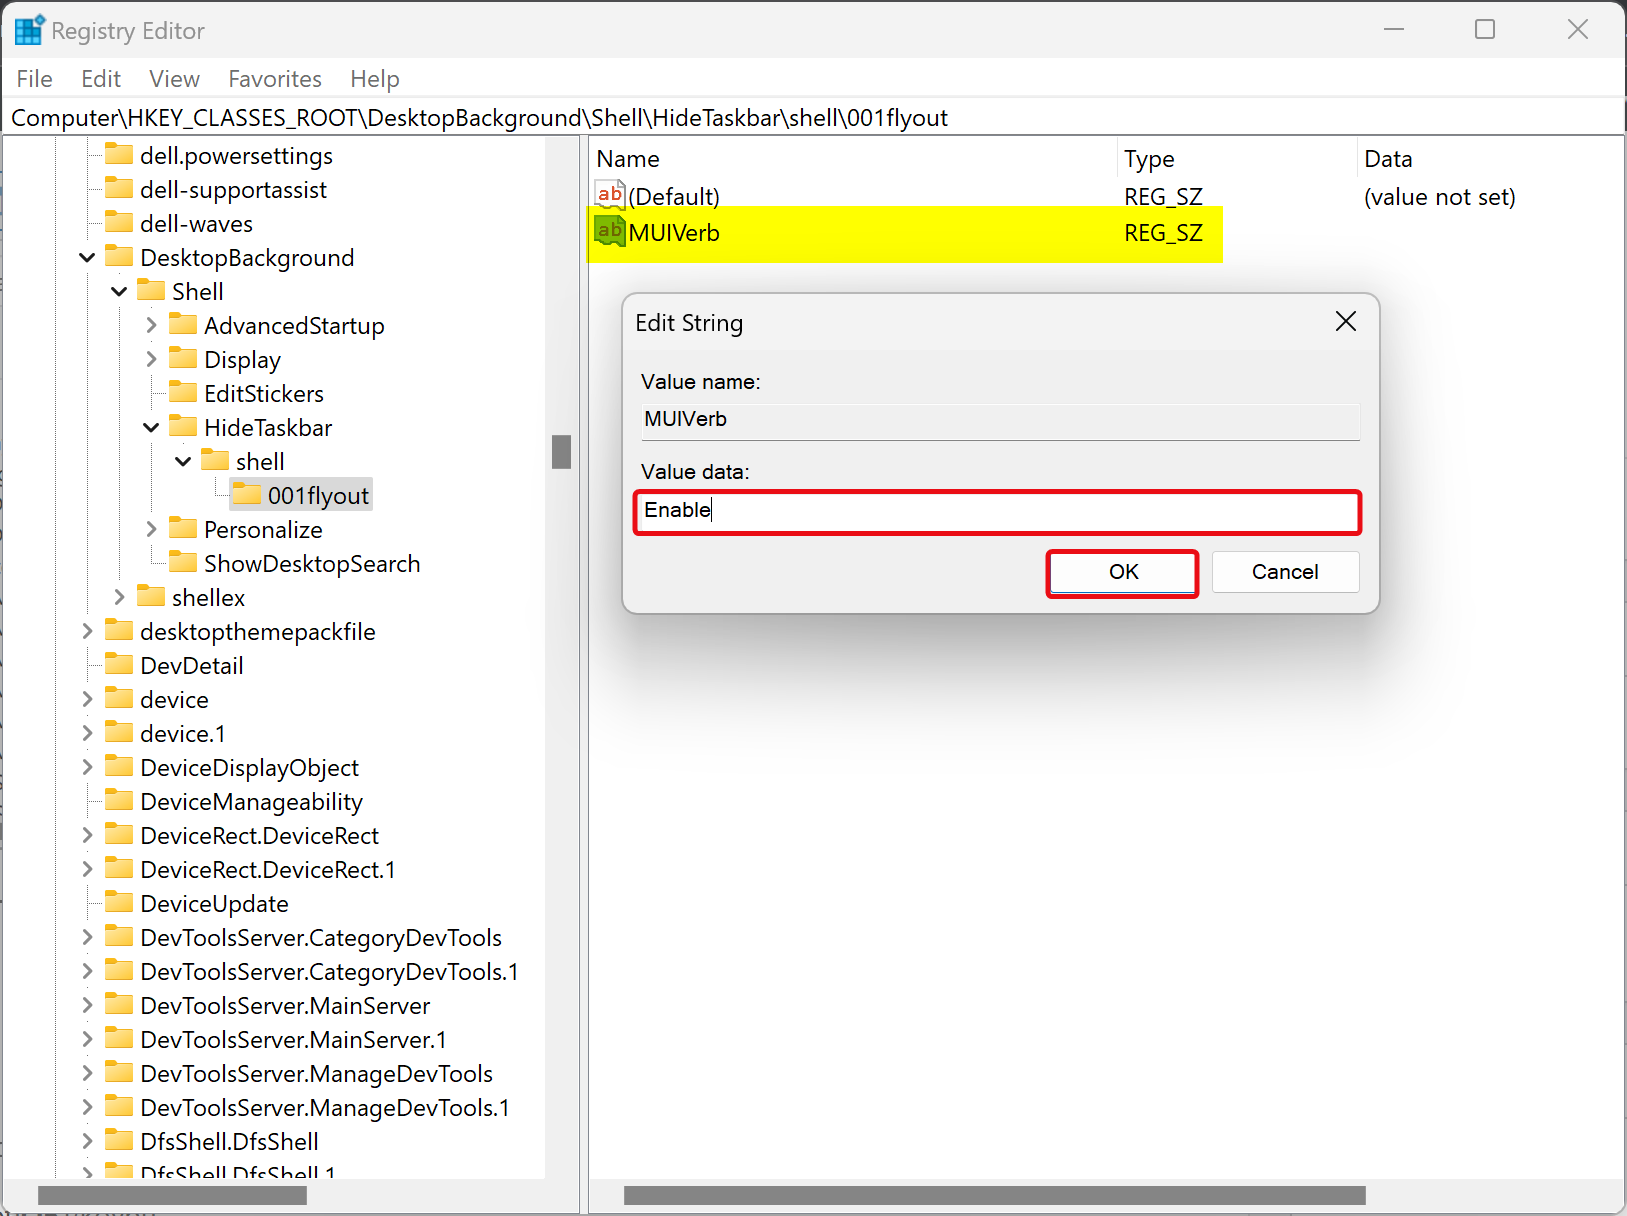
Step 20. Double-click on the MUIVerb REG_SZ and set its “Value data” to Enable.
Step 21. Click OK.
Step 22. Now, right-click on the 001flyout REG_SZ and select New > Key.
Step 23. Name the newly created key command.
Step 24. On the right side of the command key, you will find the (Default) string. Double-click on the (Default) REG_SZ and set its “Value data” to the following:-
powershell -command "&{$p='HKCU:SOFTWARE\Microsoft\Windows\CurrentVersion\Explorer\StuckRects3';$v=(Get-ItemProperty -Path $p).Settings;$v[8]=3;&Set-ItemProperty -Path $p -Name Settings -Value $v;&Stop-Process -f -ProcessName explorer}"
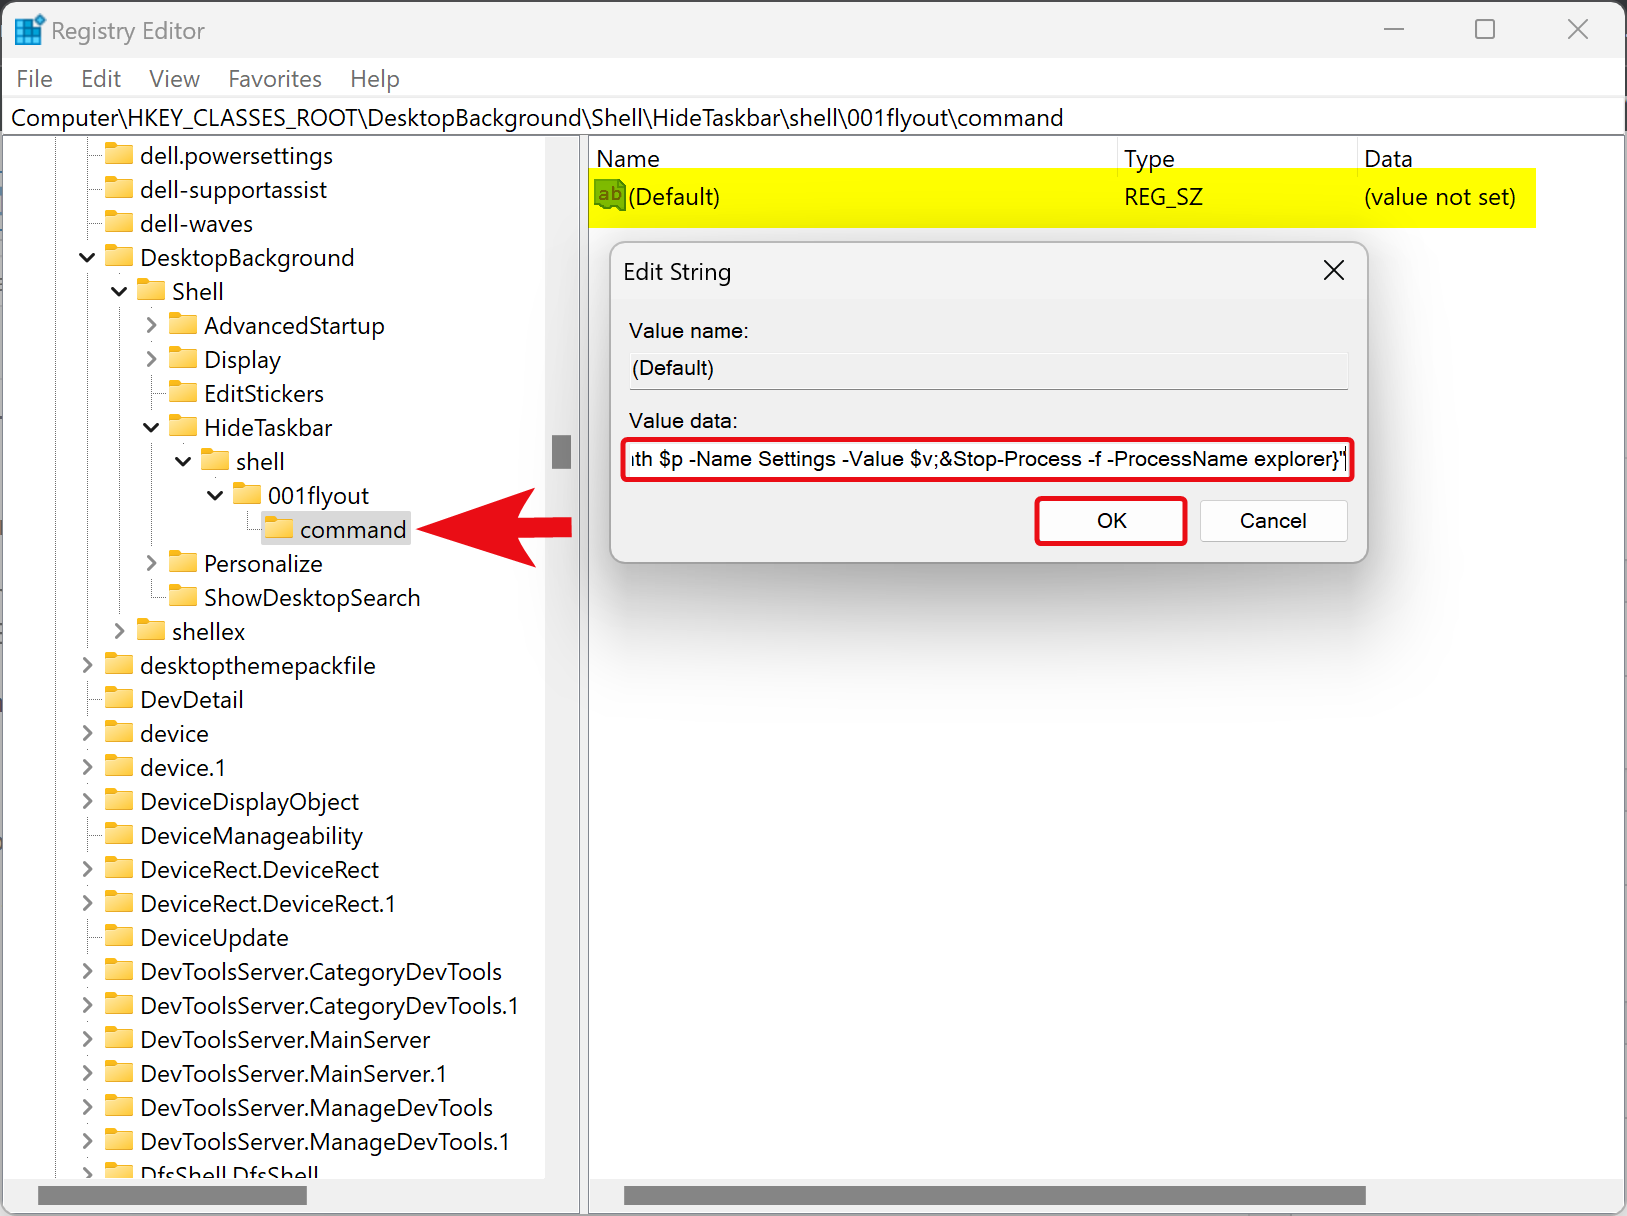
Step 25. Click OK.
Step 26. Again, right-click the shell key under “HideTaskbar” in the left sidebar and select New > Key.
Step 27. Name this key 002flyout.
Step 28. Right-click on the 002flyout key and select New > DWORD (32-bit) Value.
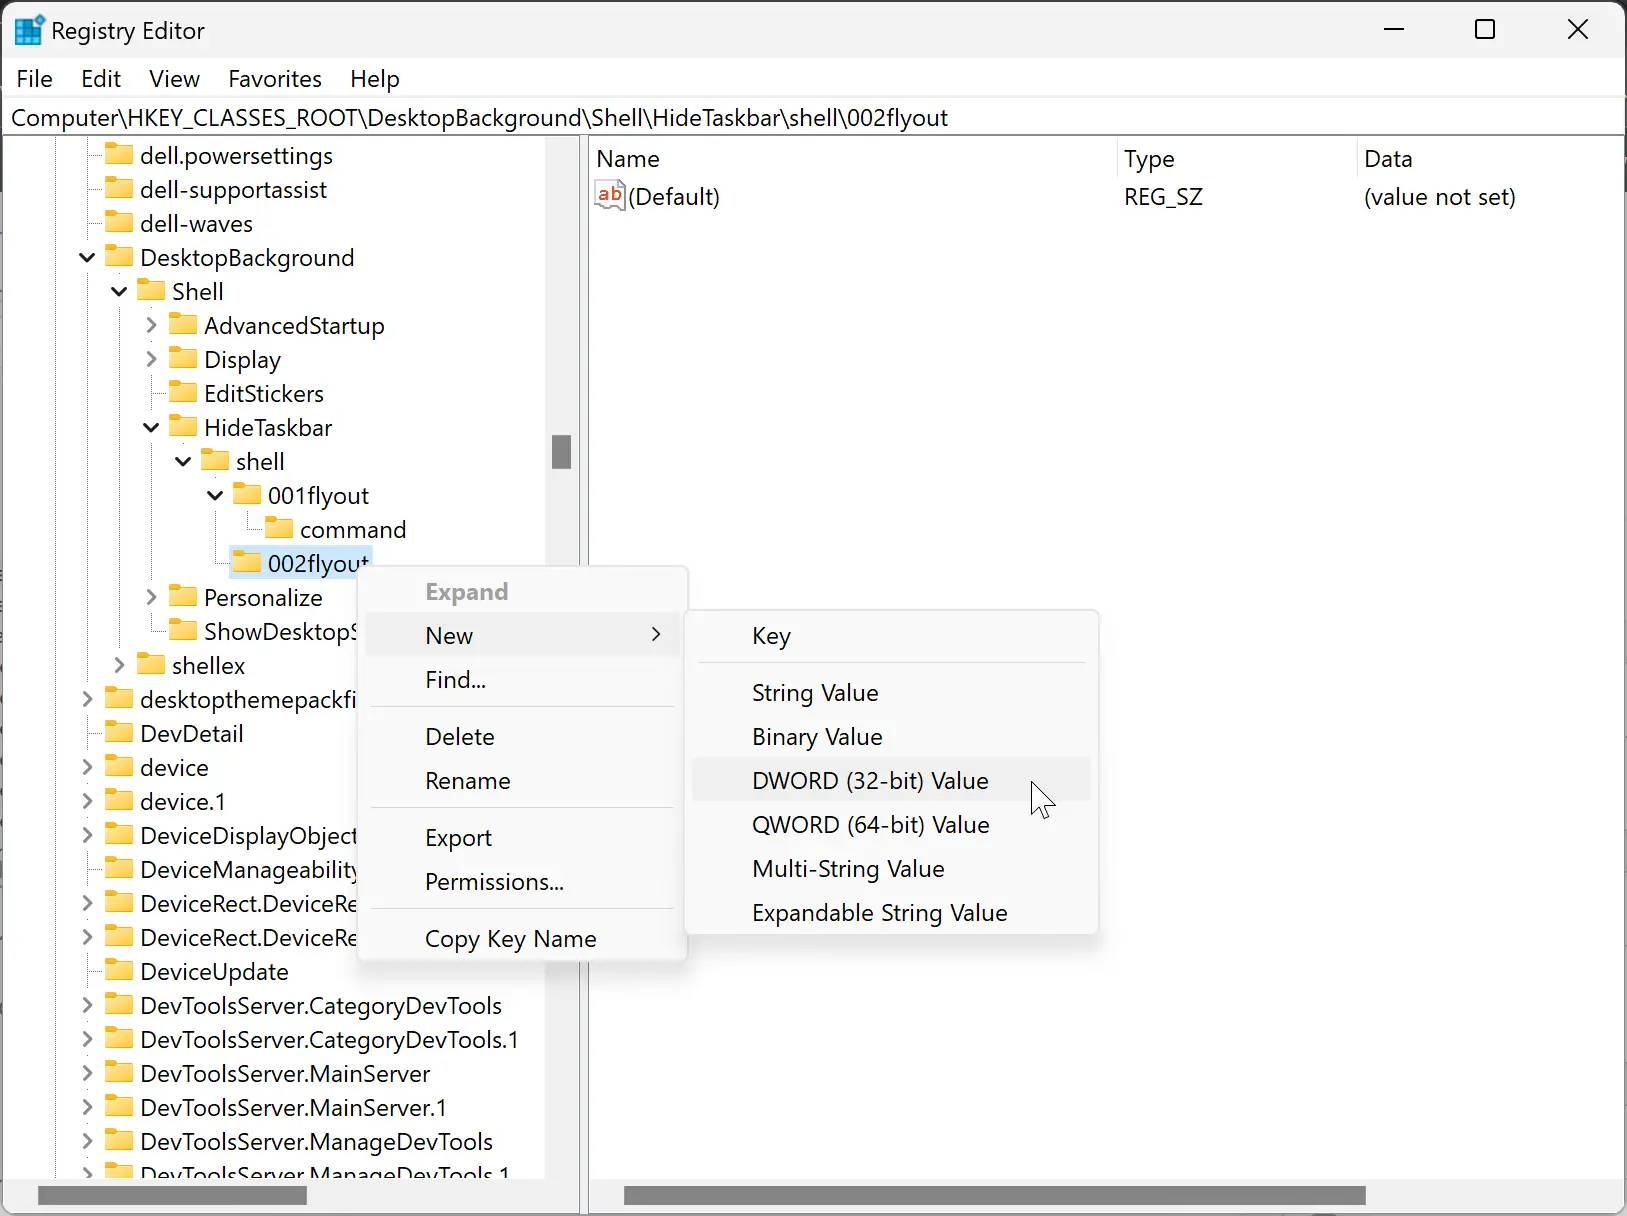
Step 29. Name this new REG_DWORD to CommandFlags.
Step 30. Double-click on the CommandFlags REG_DWORD and set its “Value data” to 20.
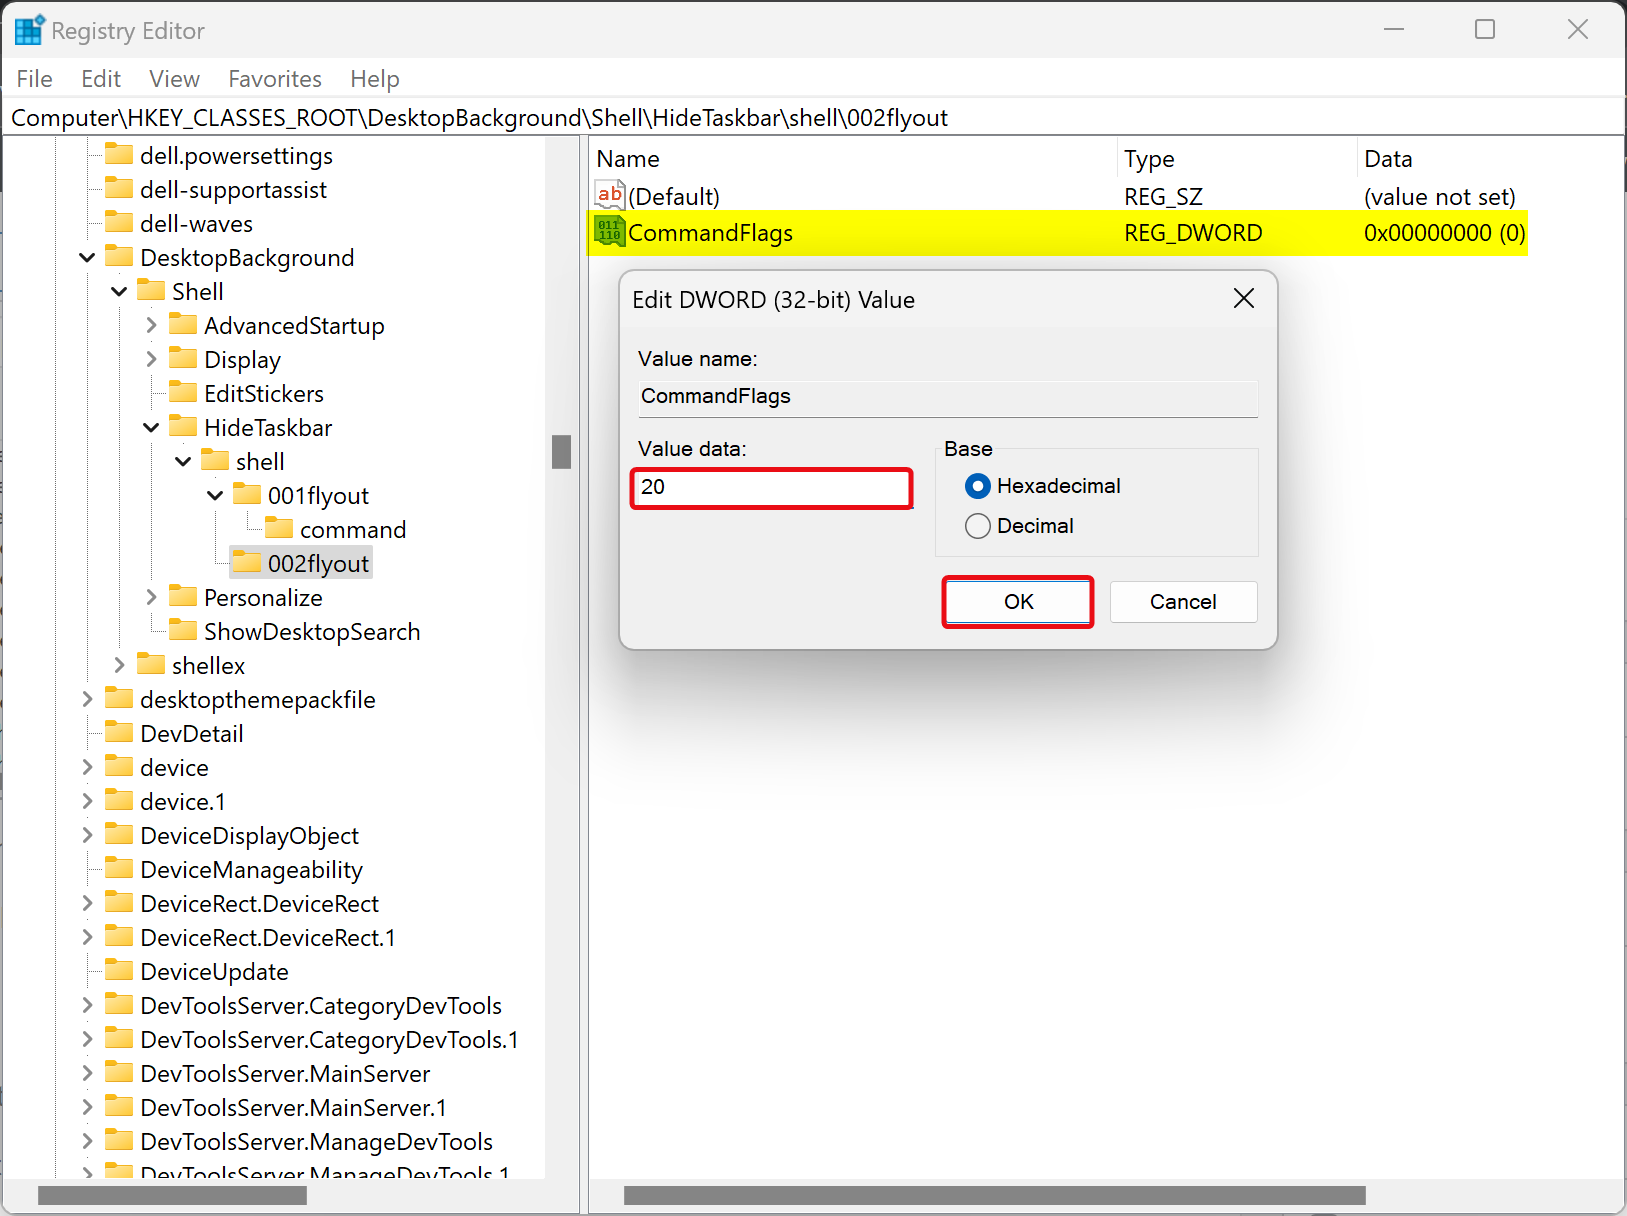
Step 31. Click OK.
Step 32. Again, right-click on the 002flyout key and select New > String Value.
Step 33. Name this newly created REG_SZ to MUIVerb.
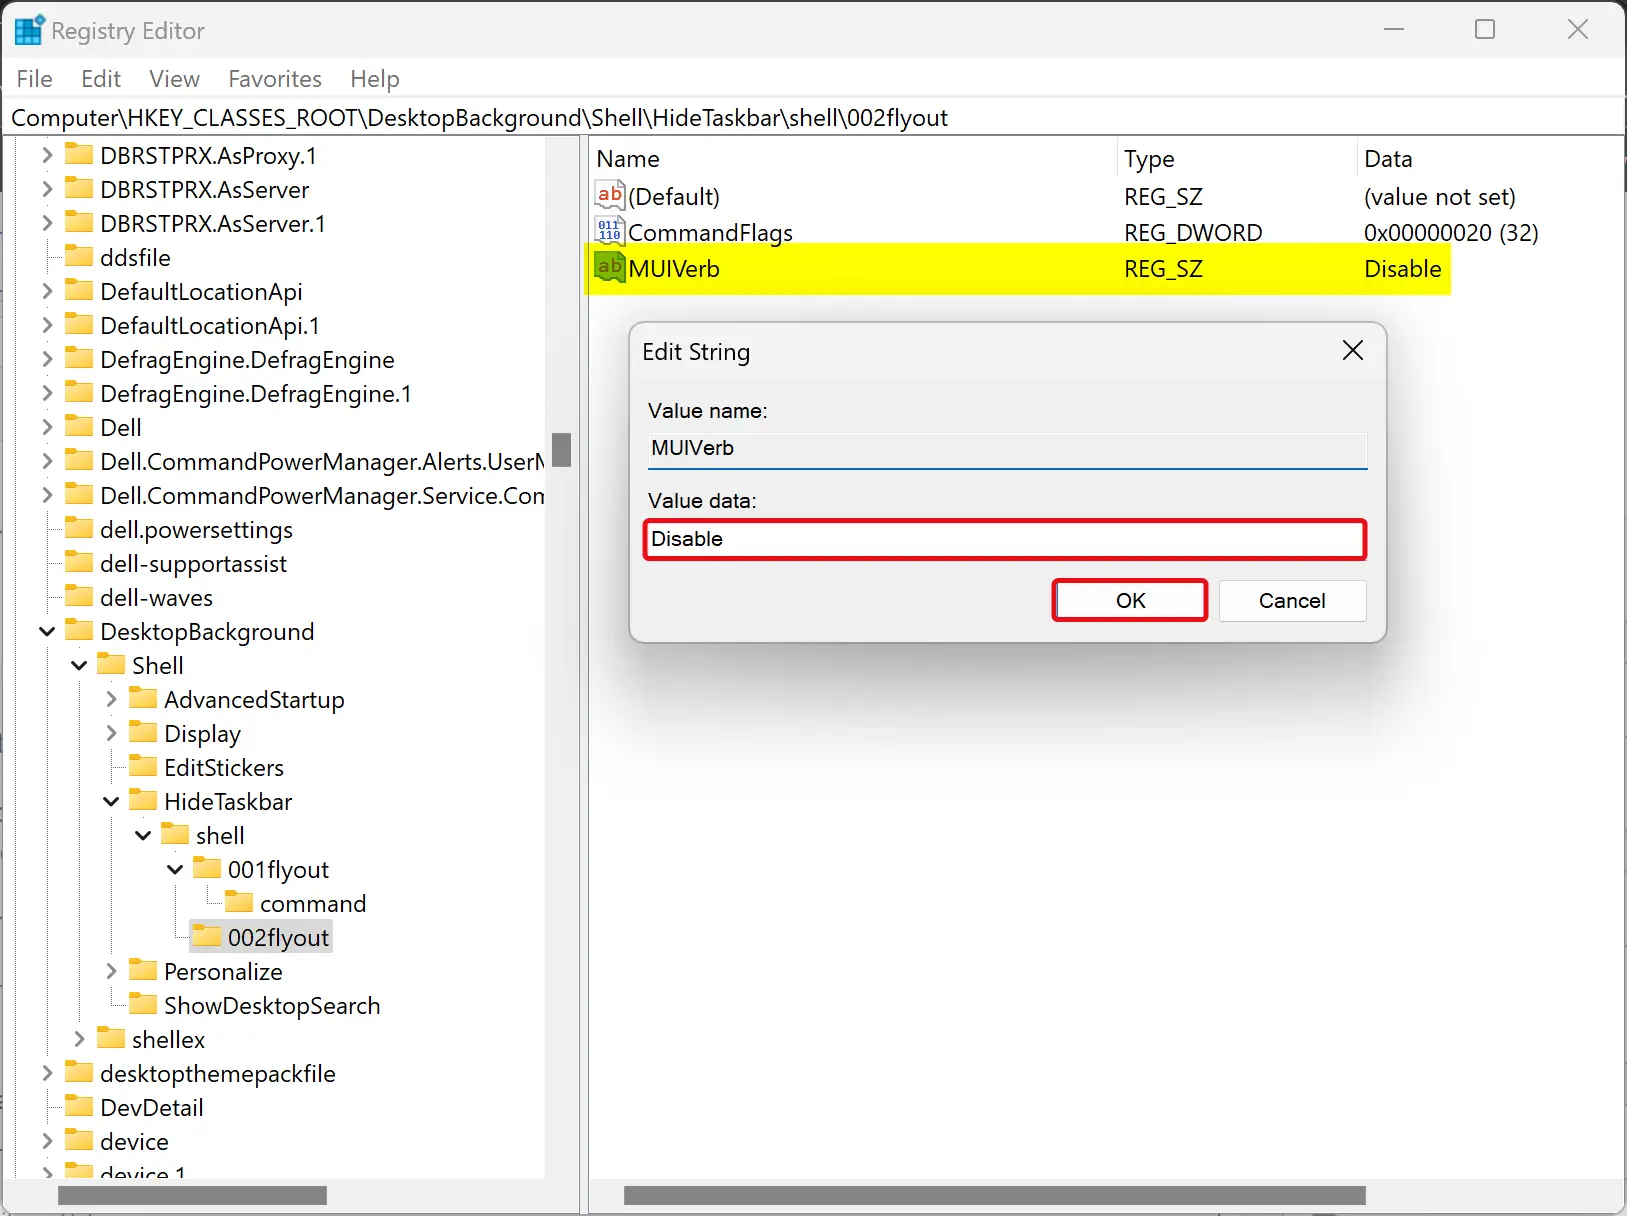
Step 34. Double-click on the MUIVerb REG_SZ and set its “Value data” to Disable.
Step 35. Click OK.
Step 36. Now, right-click on the 002flyout key in the left sidebar and select the New > Key option.
Step 37. Name this newly created key command.
Step 38. On the right sidebar, you will see a (Default) REG_SZ. Double-click on the (Default) REG_SZ and set its “Value data” to the following:-
powershell -command "&{$p= 'HKCU:SOFTWARE\Microsoft\Windows\CurrentVersion\Explorer\StuckRects3' ;$v=(Get-ItemProperty -Path $p).Settings;$v[8]=2;&Set-ItemProperty -Path $p -Name Settings -Value $v;&Stop-Process -f -ProcessName explorer}"
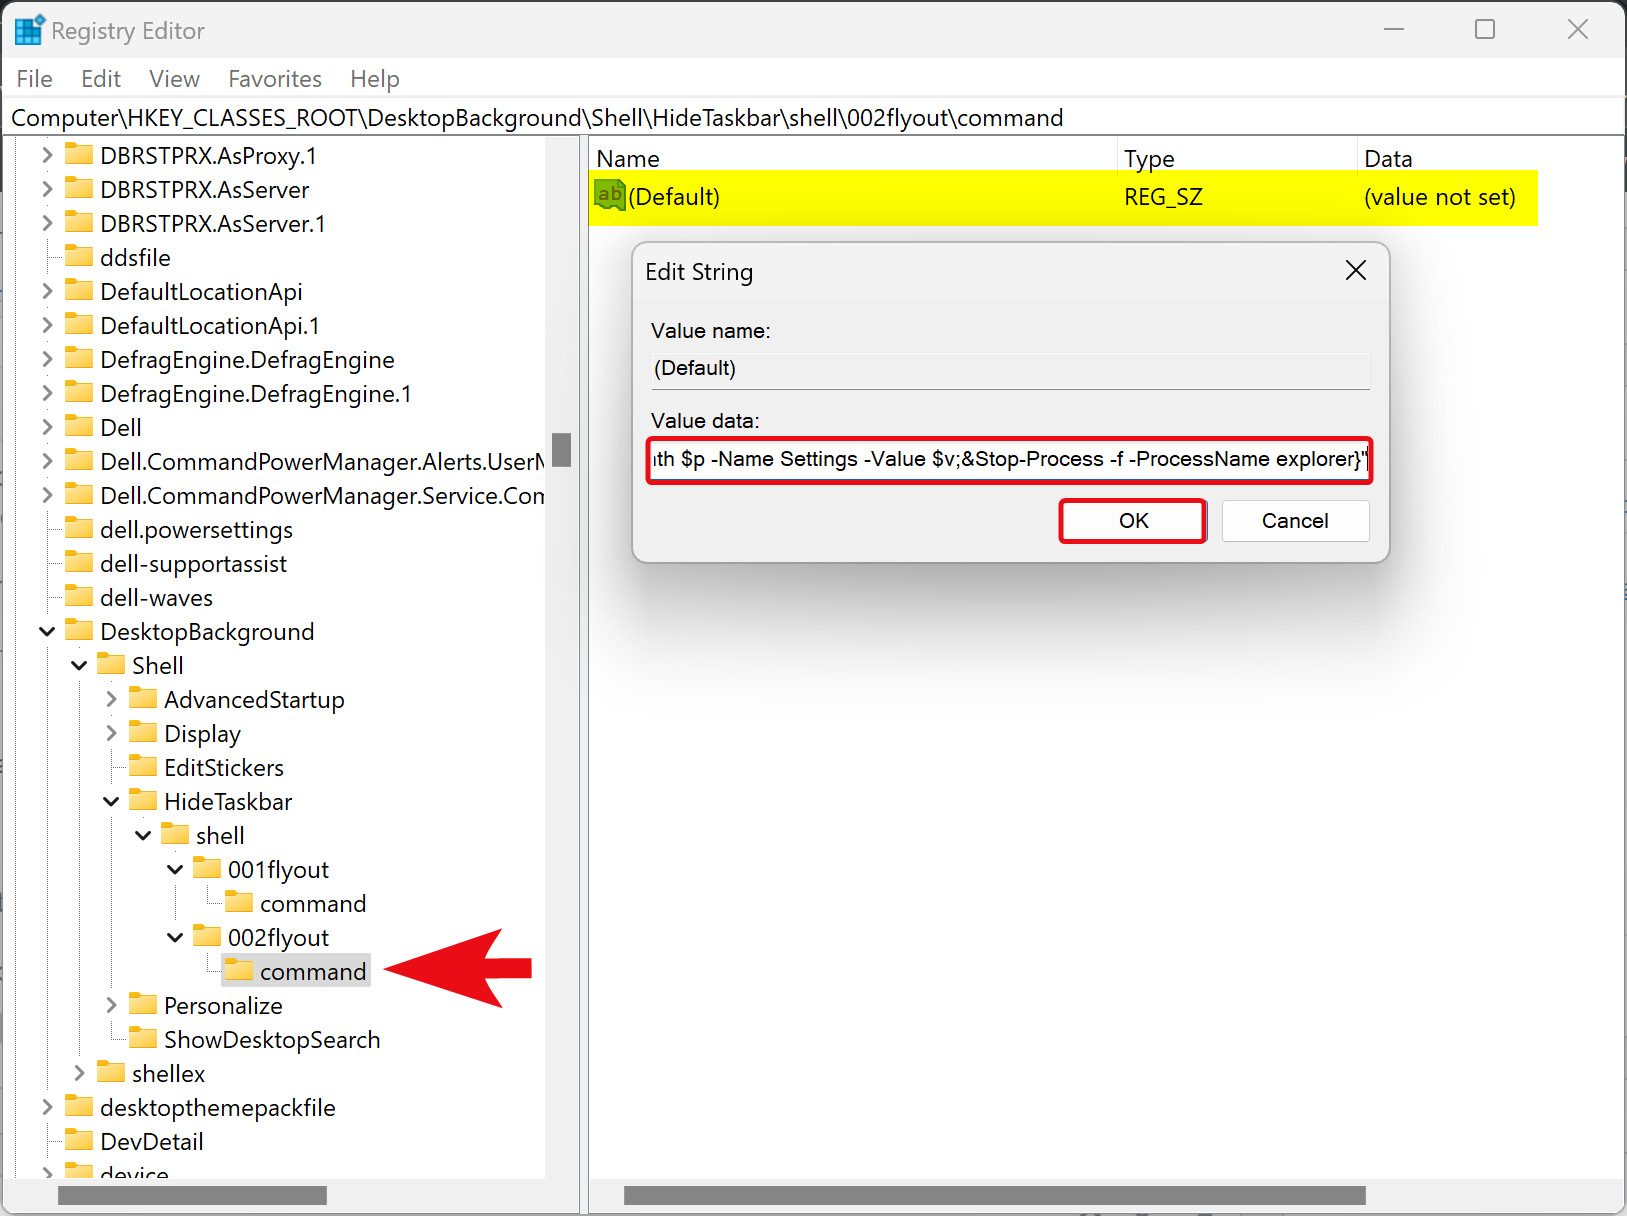
Step 39. Click OK.
Step 40. Finally, reboot your PC to apply the changes.
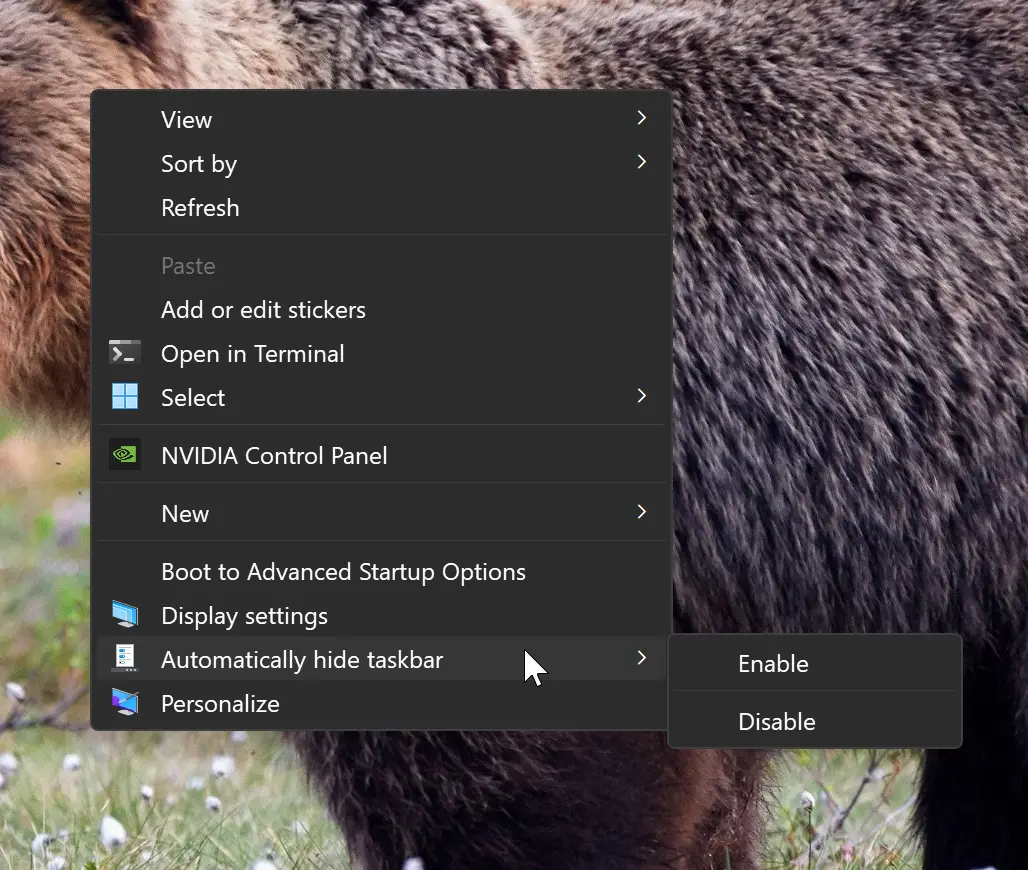
Once you complete the above steps, right-click on the free space on the Desktop. Click “Show more options” (in Windows 11). You will see a new context menu Automatically hide taskbar. Accessing that option, you will find Enable and Disable options that you can use as per your necessities.
Conclusion
In conclusion, adding the “Automatically Hide Taskbar” option to the context menu in Windows 11 or 10 can be a useful customization for those who frequently toggle the auto-hide taskbar feature. While it requires modifying the registry, the steps are straightforward and can be followed easily. Once the customization is applied, users can access the Enable and Disable options for automatically hiding the taskbar from the right-click menu on the desktop, eliminating the need to navigate to the Settings app. It is important to note that modifying the registry can be risky and should be done carefully to avoid any potential issues. Always create a backup of the registry before making any changes, and if you’re not comfortable with modifying the registry, it’s best to seek help from an expert.