In Microsoft Defender antivirus, there is an option, “Controlled folder access” that helps protect your valuable data from malicious apps and threats, such as ransomware. By default, Microsoft Defender Controlled folder access protects many system folders and default locations. Microsoft does not allow you to remove these system folders but enables you to add other folders in this list you want to protect.
Adding other folders to this Controlled folder access can be useful if you don’t store files in the default Windows libraries. It also allows you to add network shares and mapped drives. Furthermore, Environment variables and wildcards are supported. Controlled folder access is handy for protecting your files and data from ransomware since only trusted apps and services can access your protected folders. Here is the list of Windows default-protected folders:-
- C:\Users\<username>\Documents
- C:\Users\Public\Documents
- C:\Users\<username>\Pictures
- C:\Users\Public\Pictures
- C:\Users\Public\Videos
- C:\Users\<username>\Videos
- C:\Users\<username>\Music
- C:\Users\Public\Music
- C:\Users\<username>\Favorites
How to Add Folders to Microsoft Defender Controlled folder access in Windows 11?
To add additional folders to Microsoft Defender Controlled folder access in Windows 11, use the following steps:-
Step 1. First, click on the Start button (or Search button in Windows 11) and type in Windows Security.
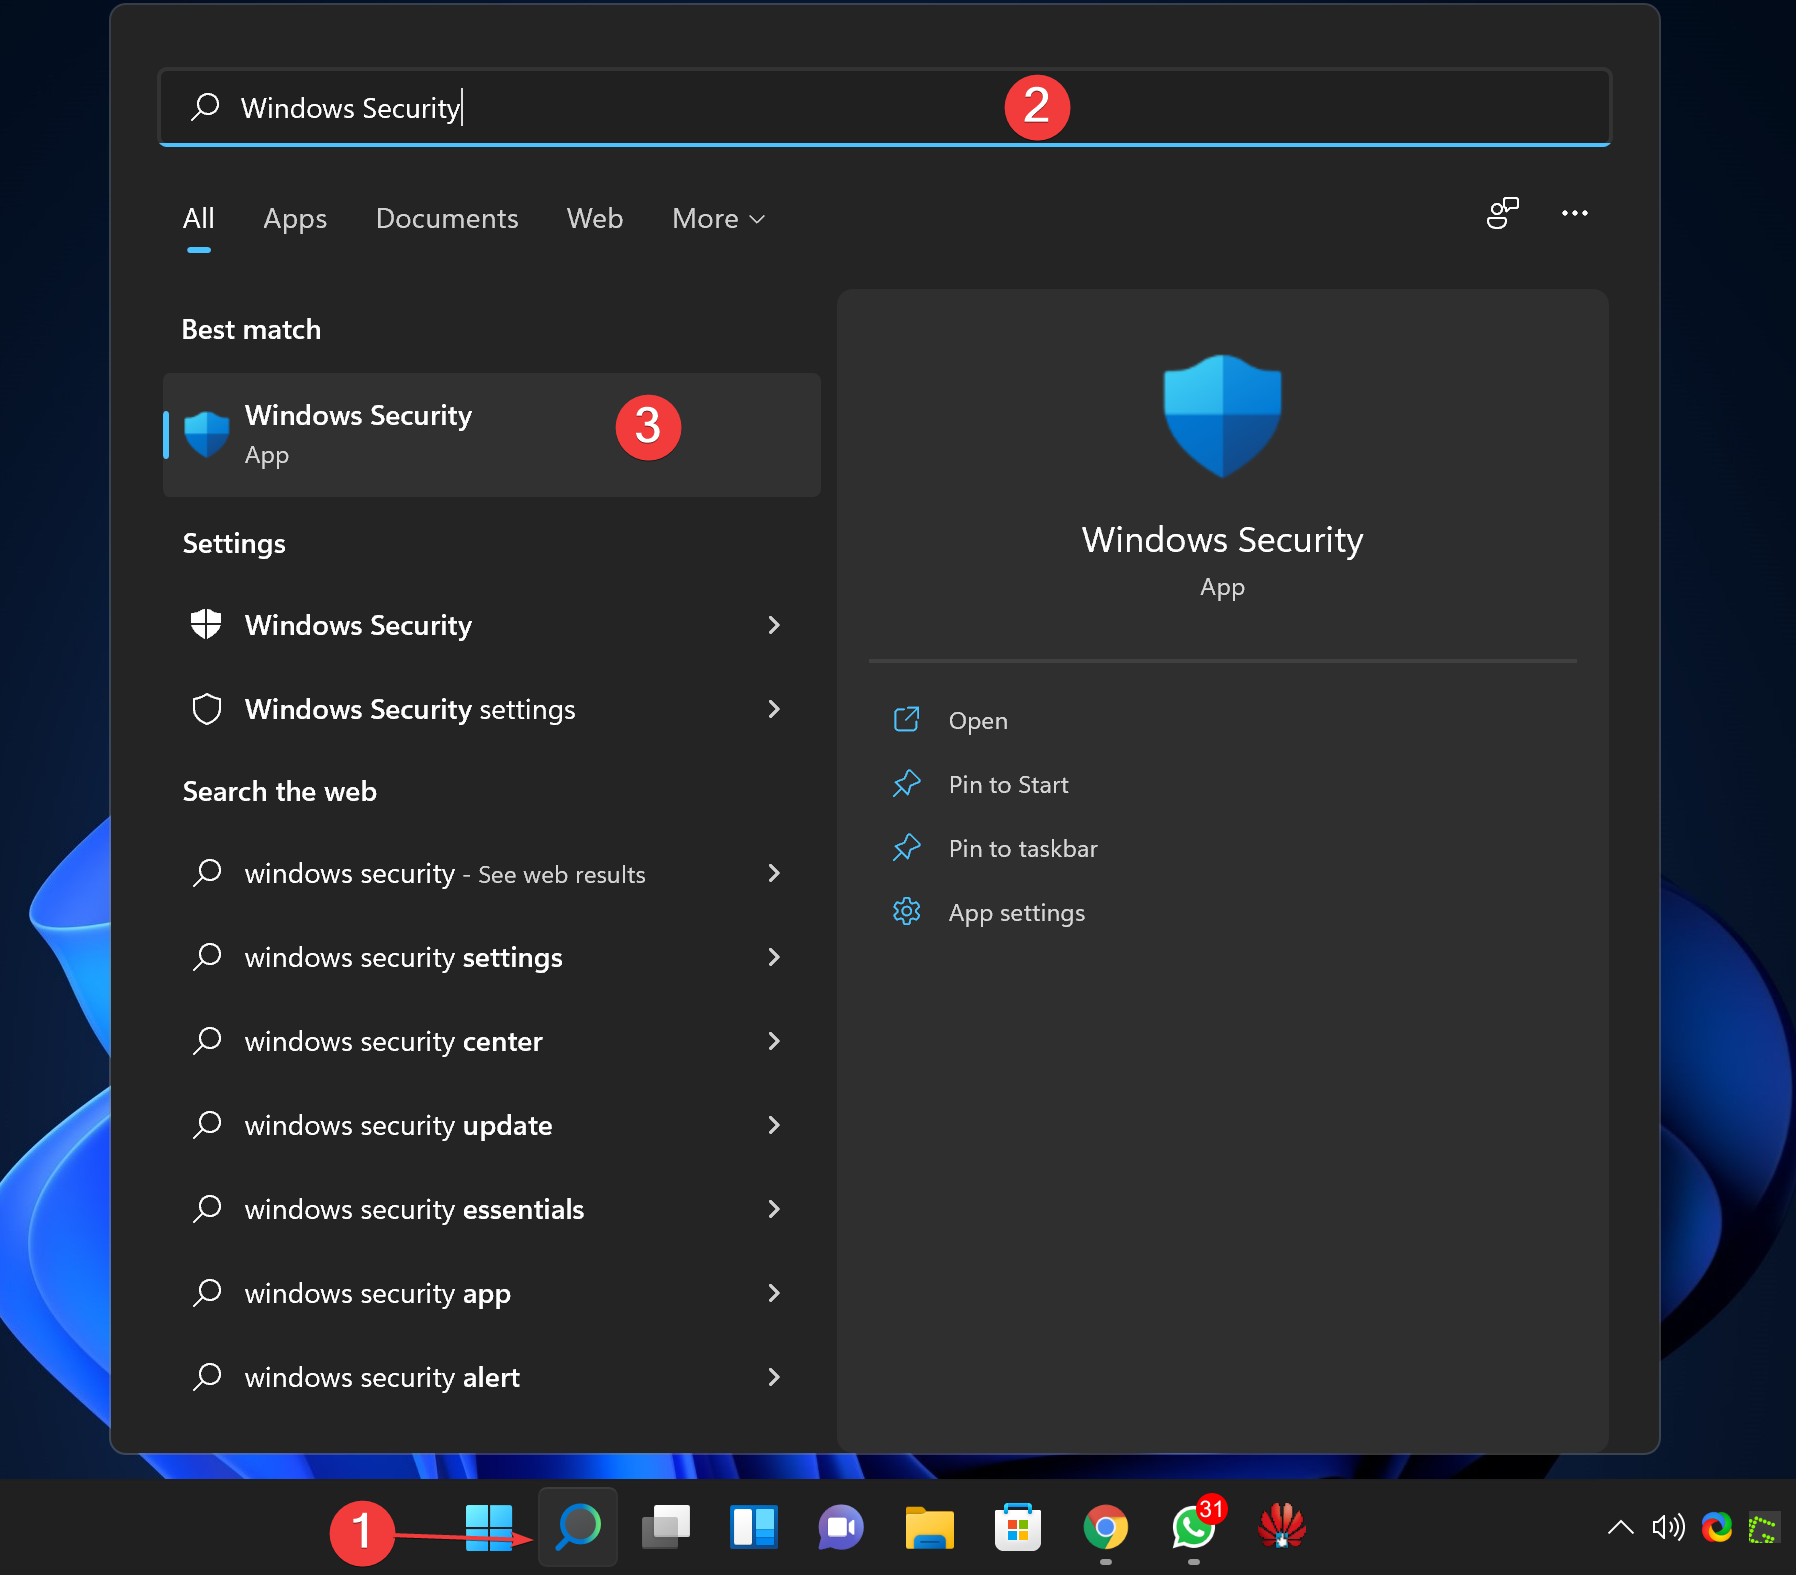
Step 2. Then, click on the “Windows Security” app in the available search results to open it.
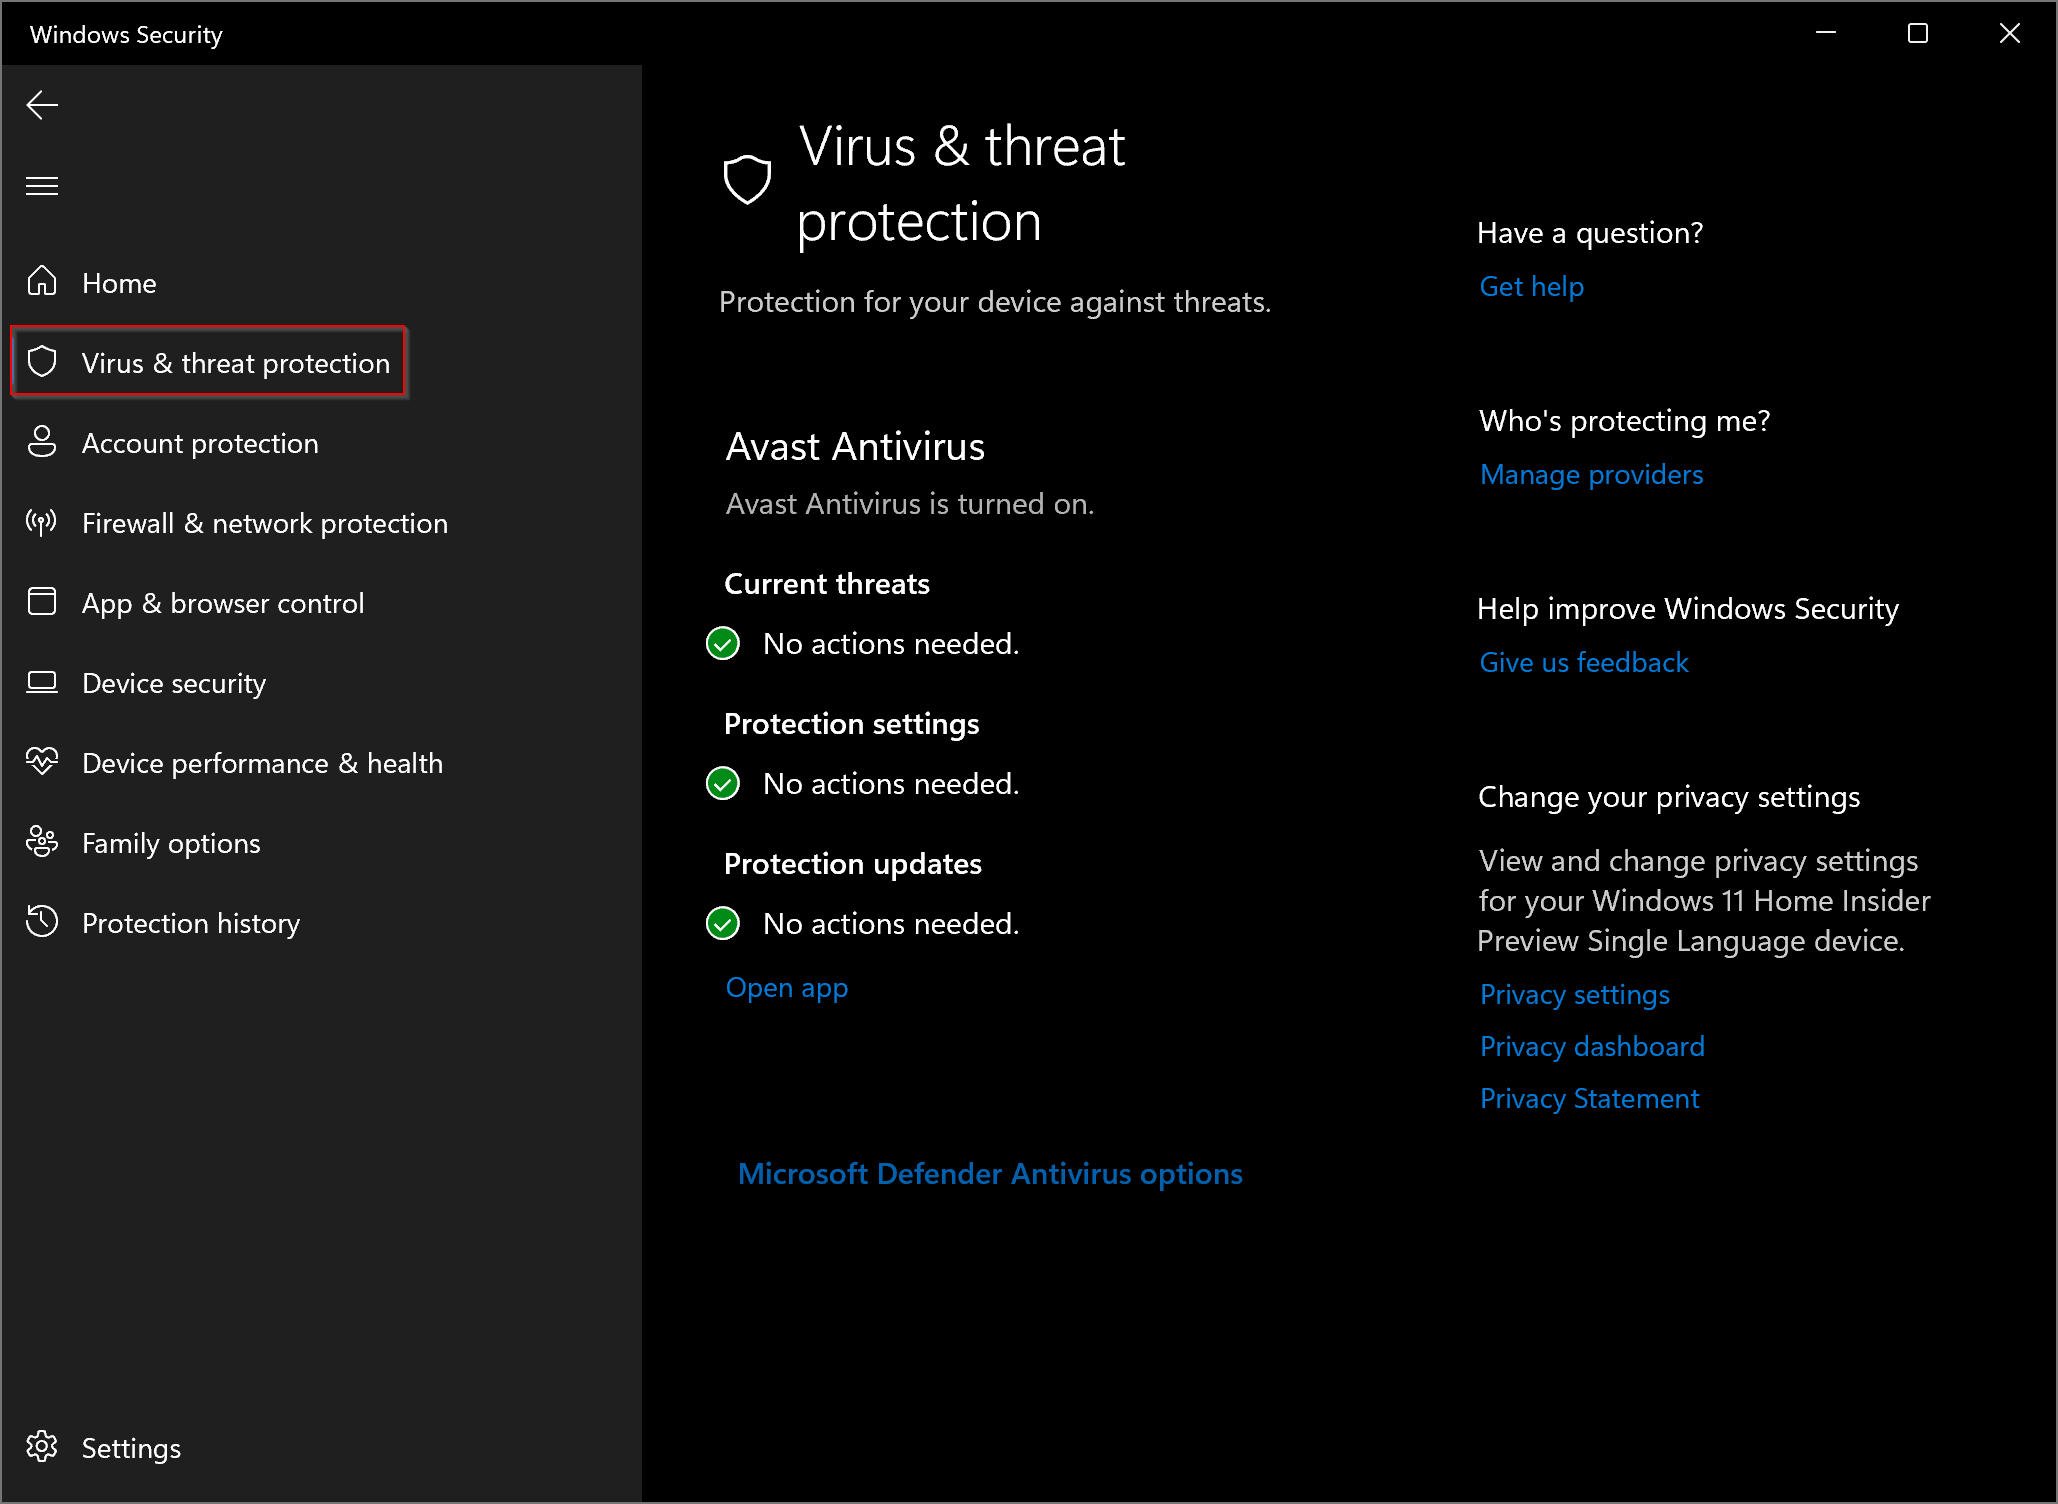
Step 3. When the Windows Security window appears on your computer, click on the Virus & threat protection option in the left sidebar.
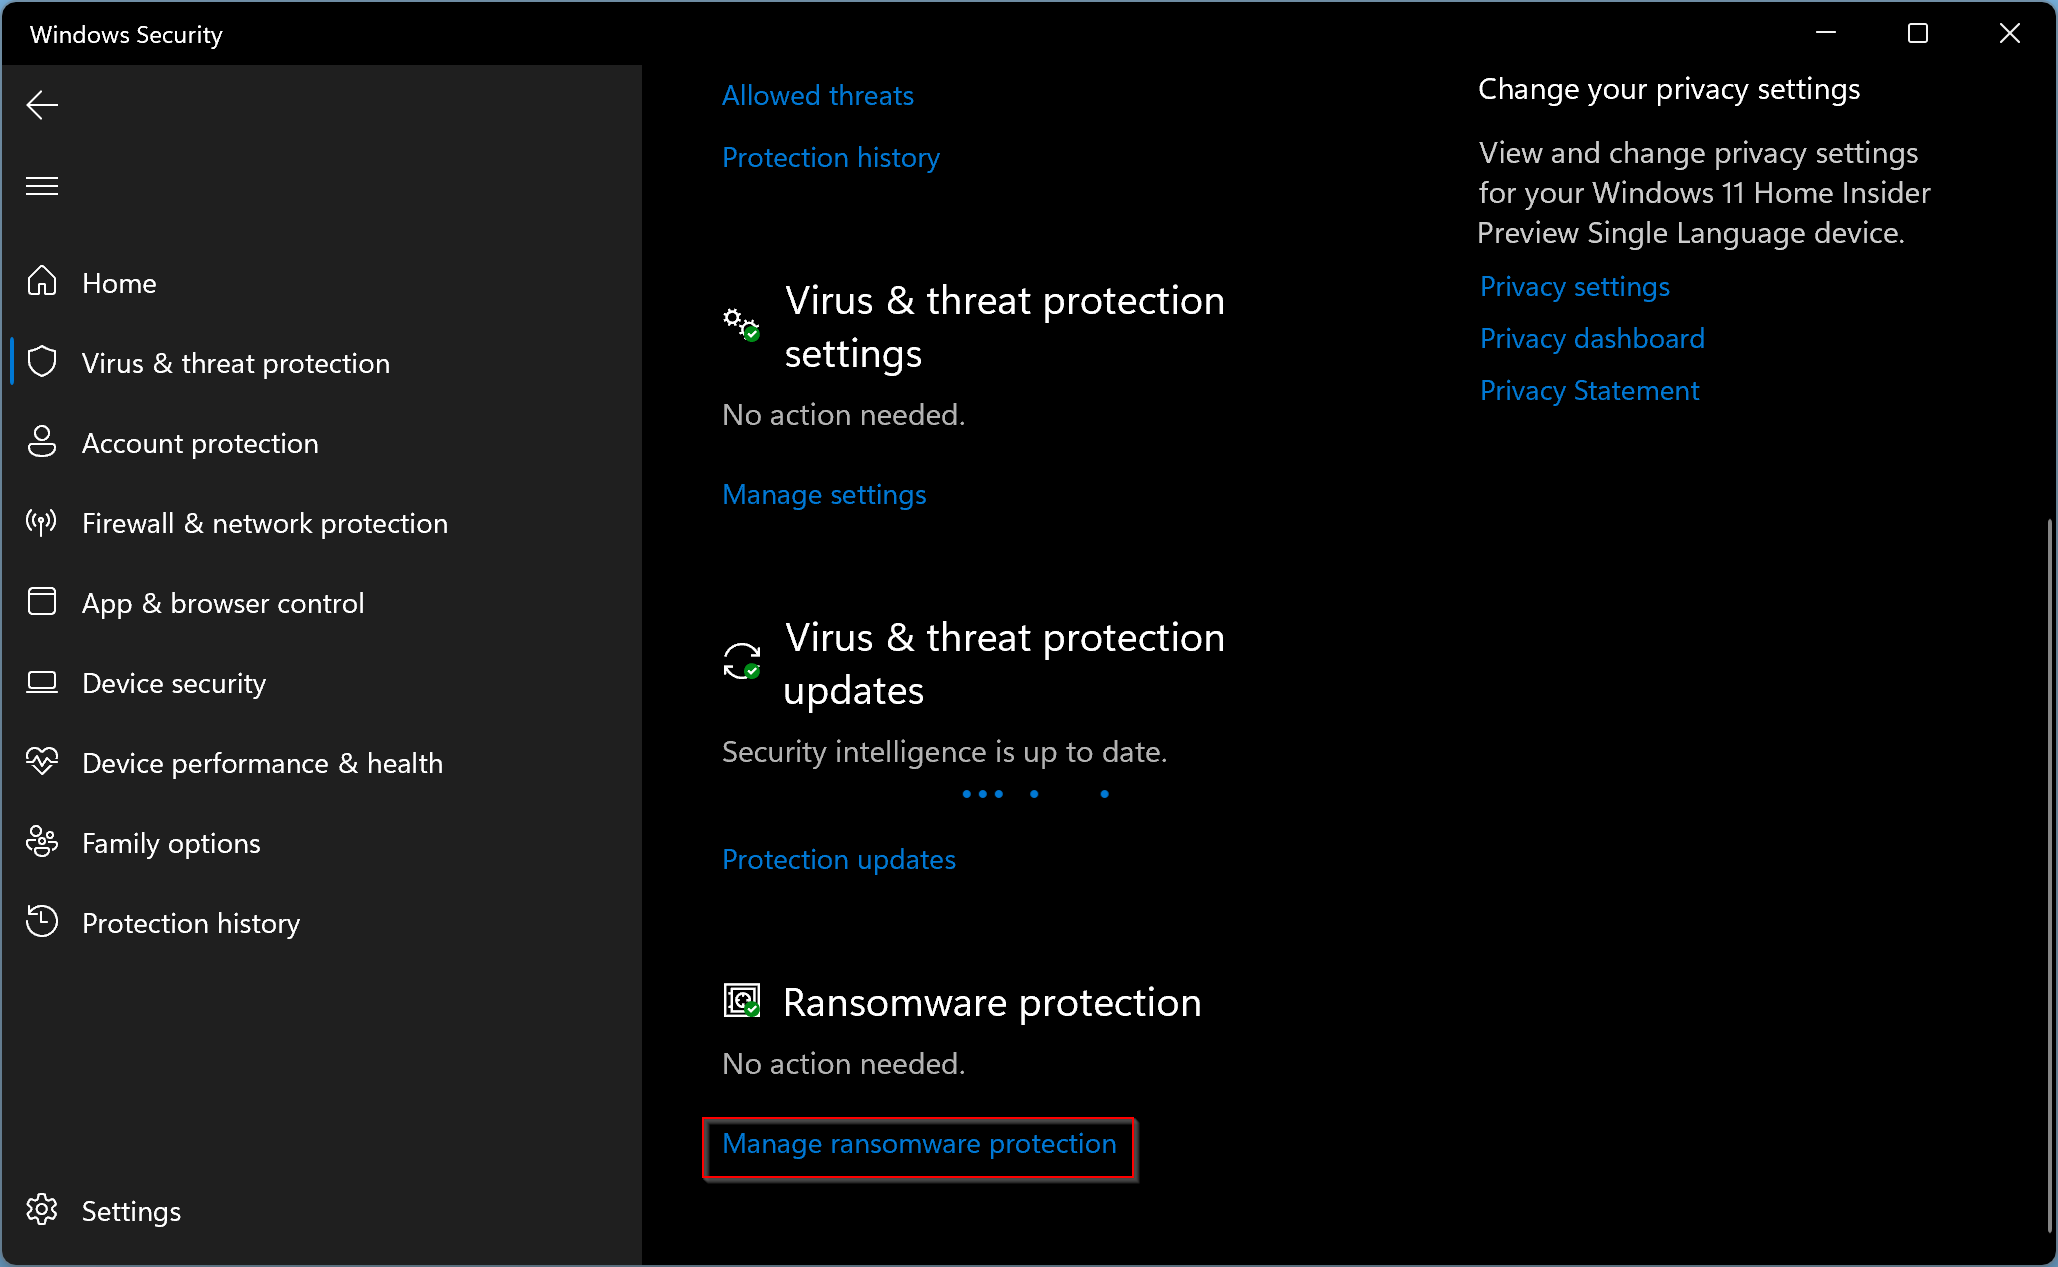
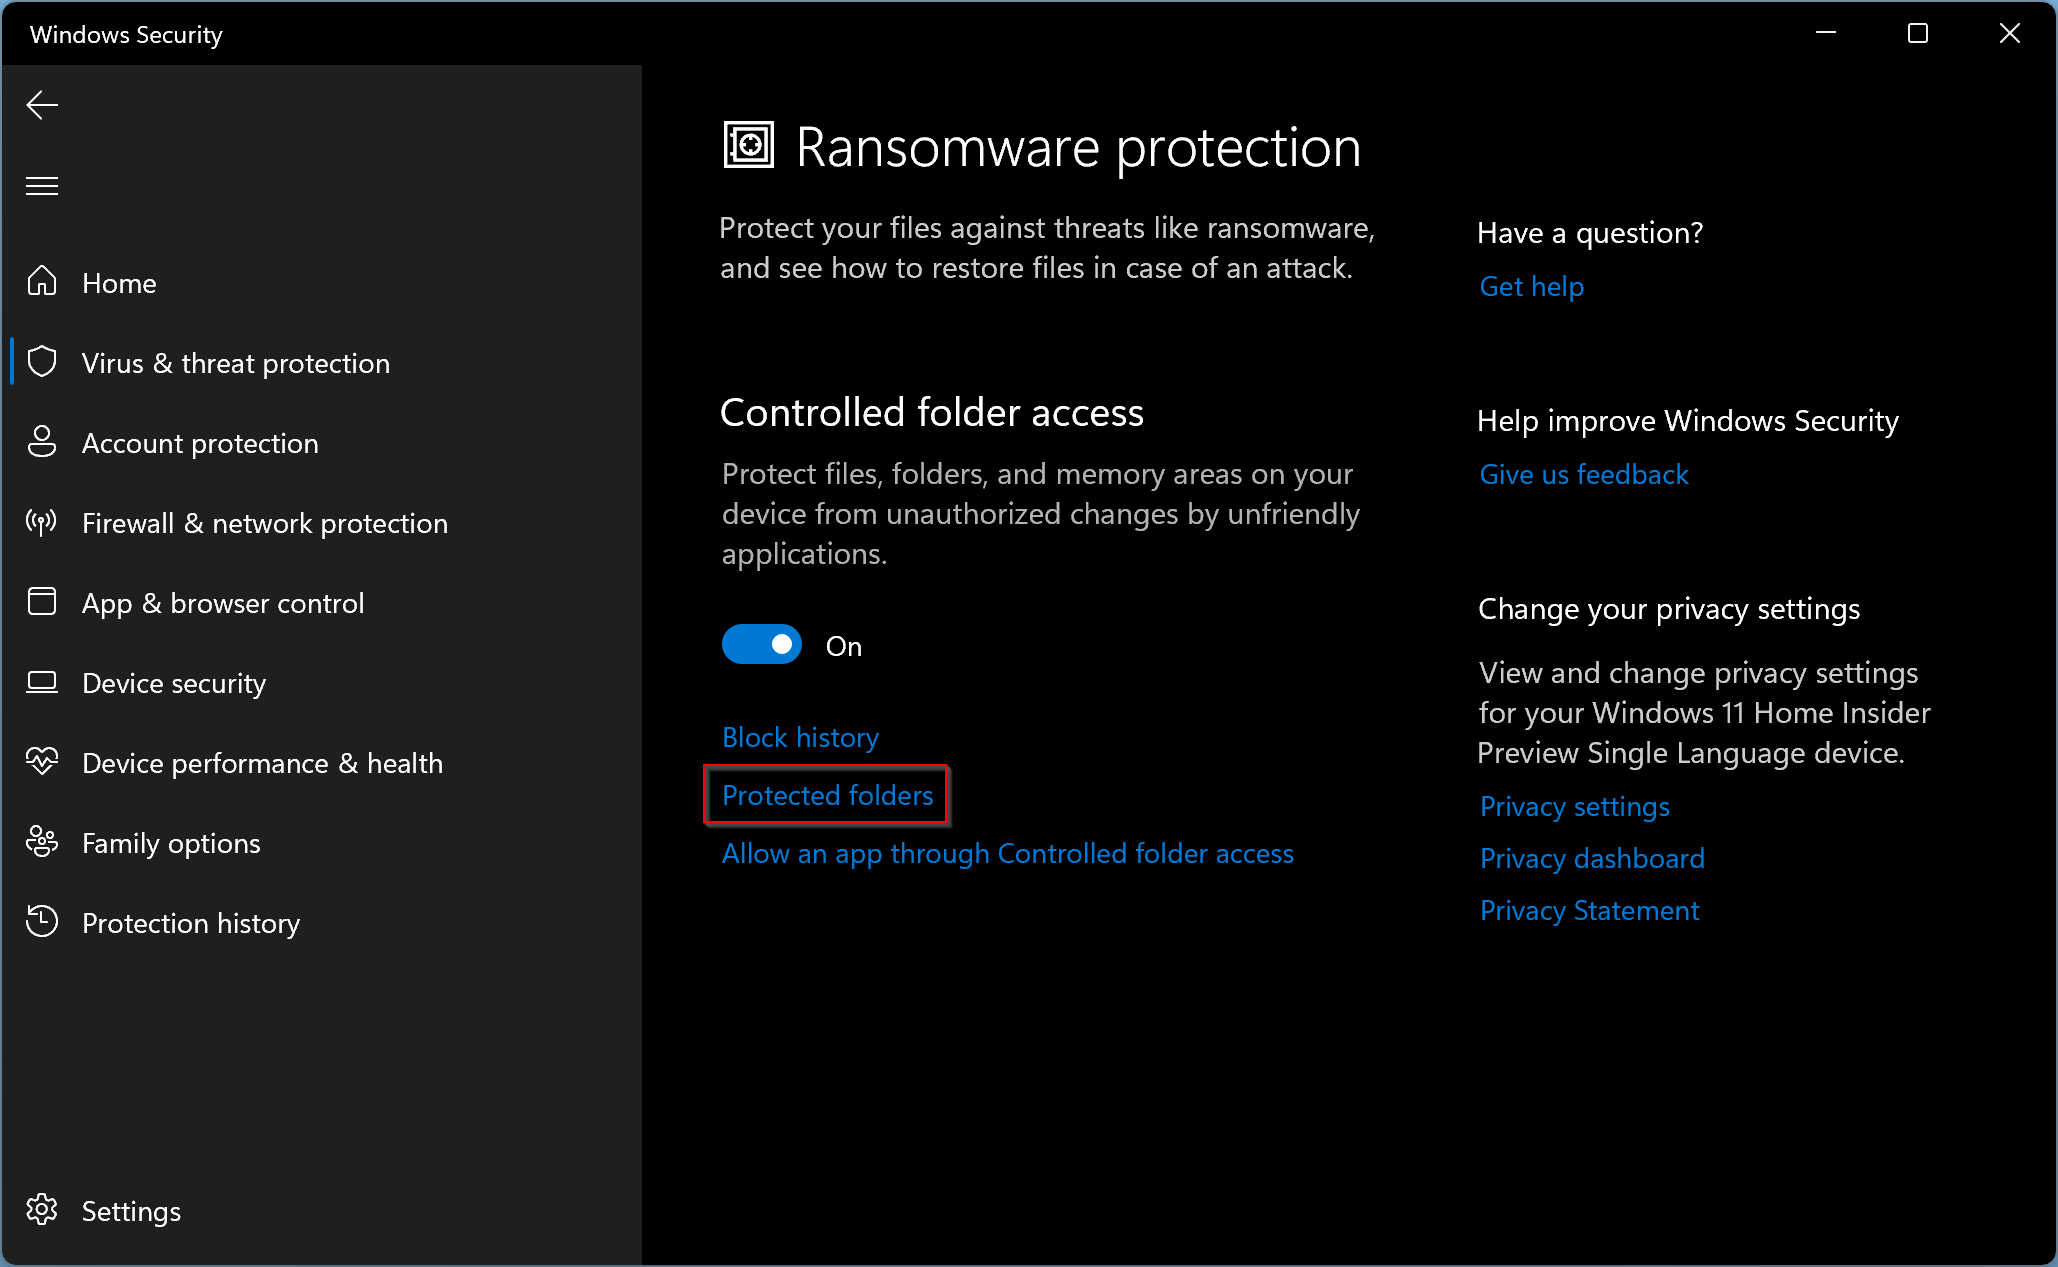
Step 4. On the right side pane, scroll down and click the Manage ransomware protection link under the “Ransomware protection” section.
Step 5. Next, turn on the Controlled folder access toggle, if not already enabled.
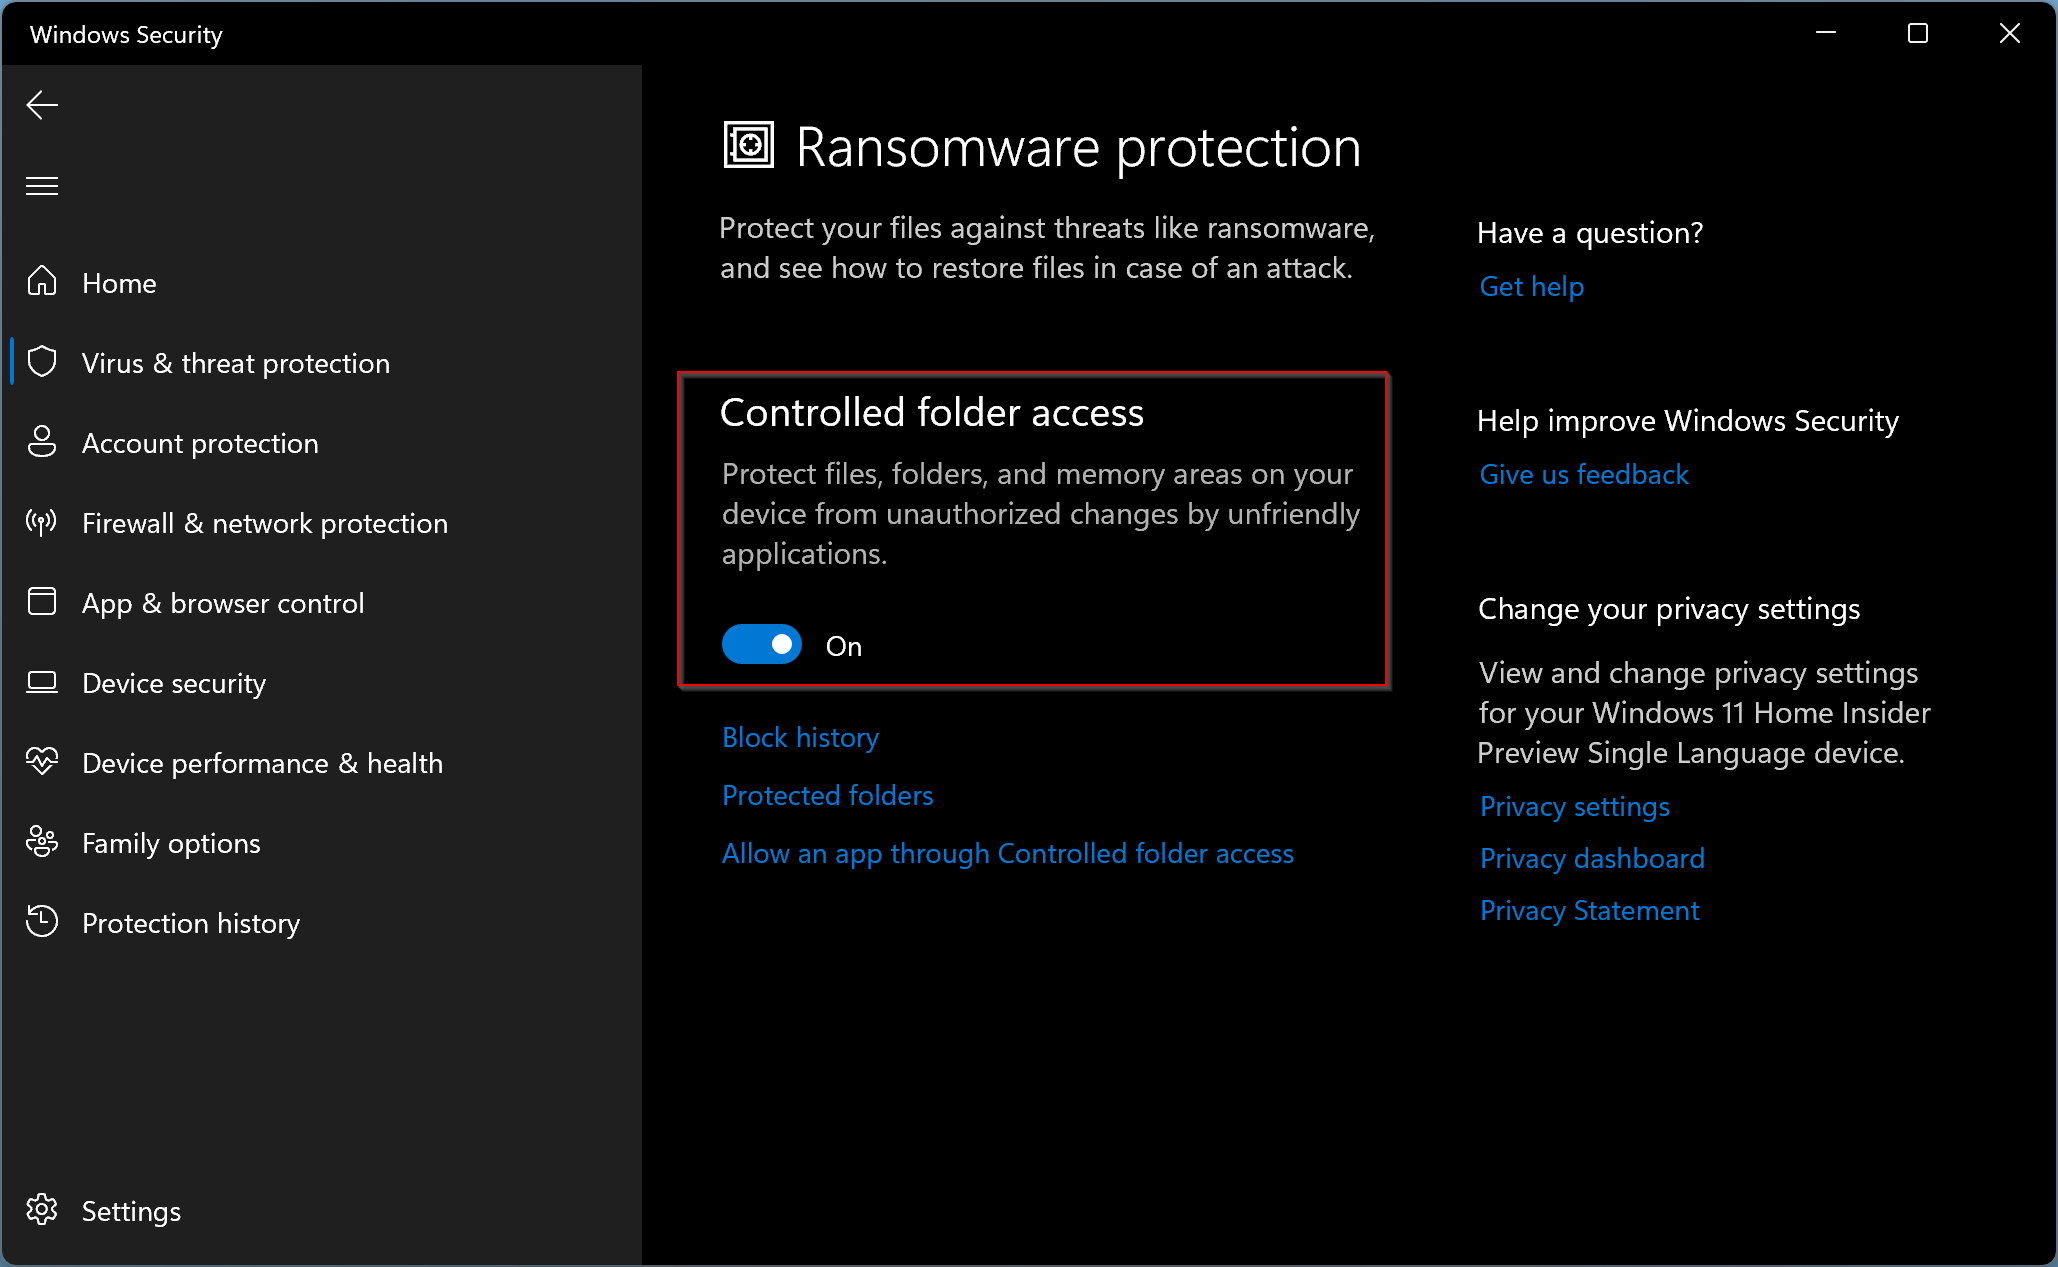
Step 6. Once you turn on “Controlled folder access,” more links will appear below. Click the Protected folders link to manage the folders you want to protect.
Step 7. In the following screen, click Add a protected folder to add additional folders.
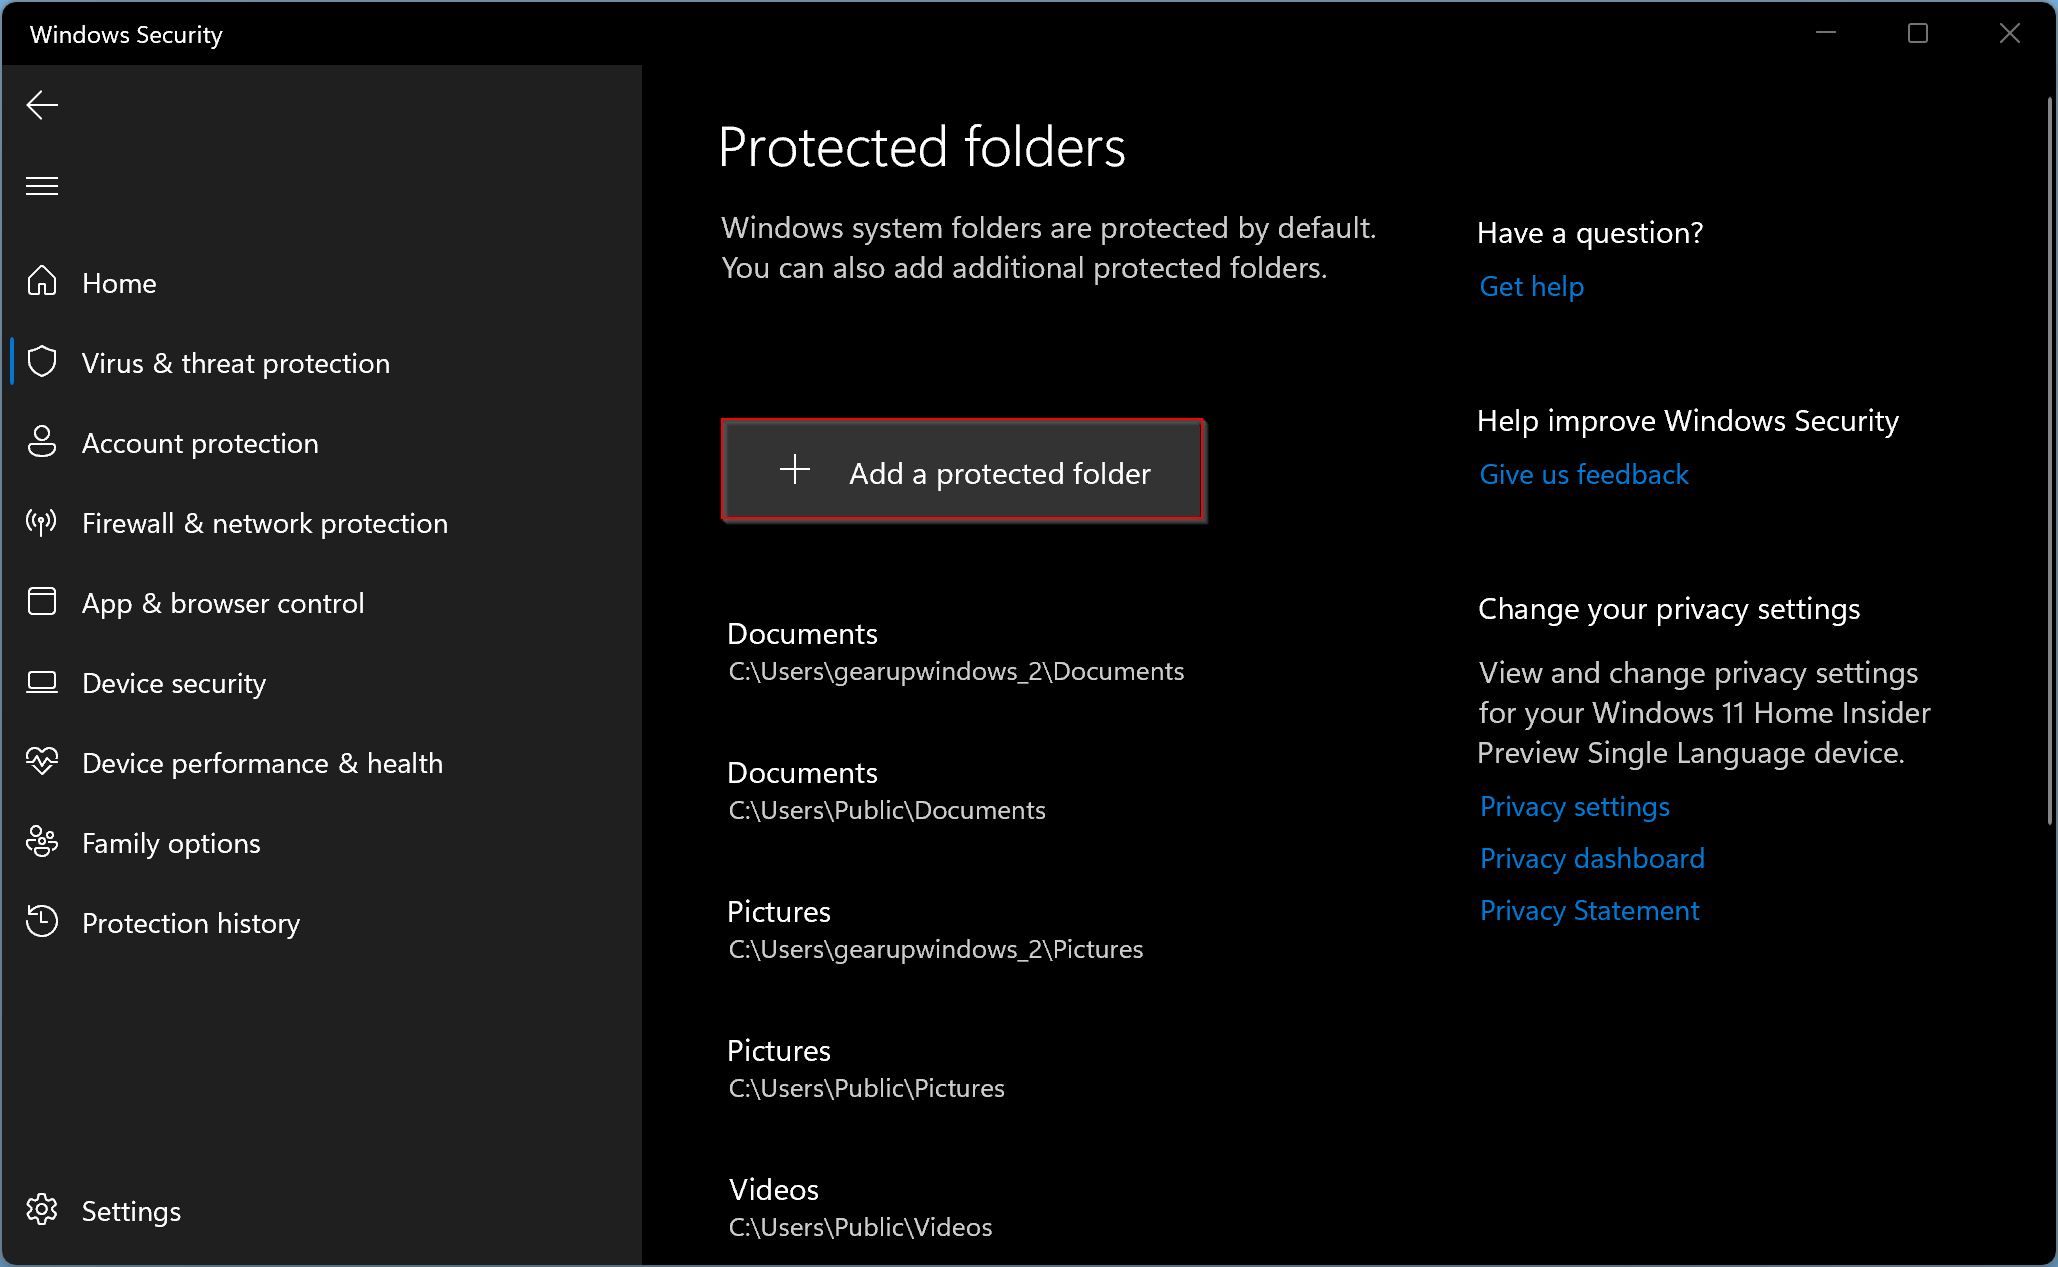
Step 8. When you’re done, the File Explorer window will open. Select a folder you want to protect and click the Select Folder button.

That’s all. You have successfully added your folders to the “Controlled folder access” list. Now, Windows Defender will watch all programs and applications that will try to access your protected folders.
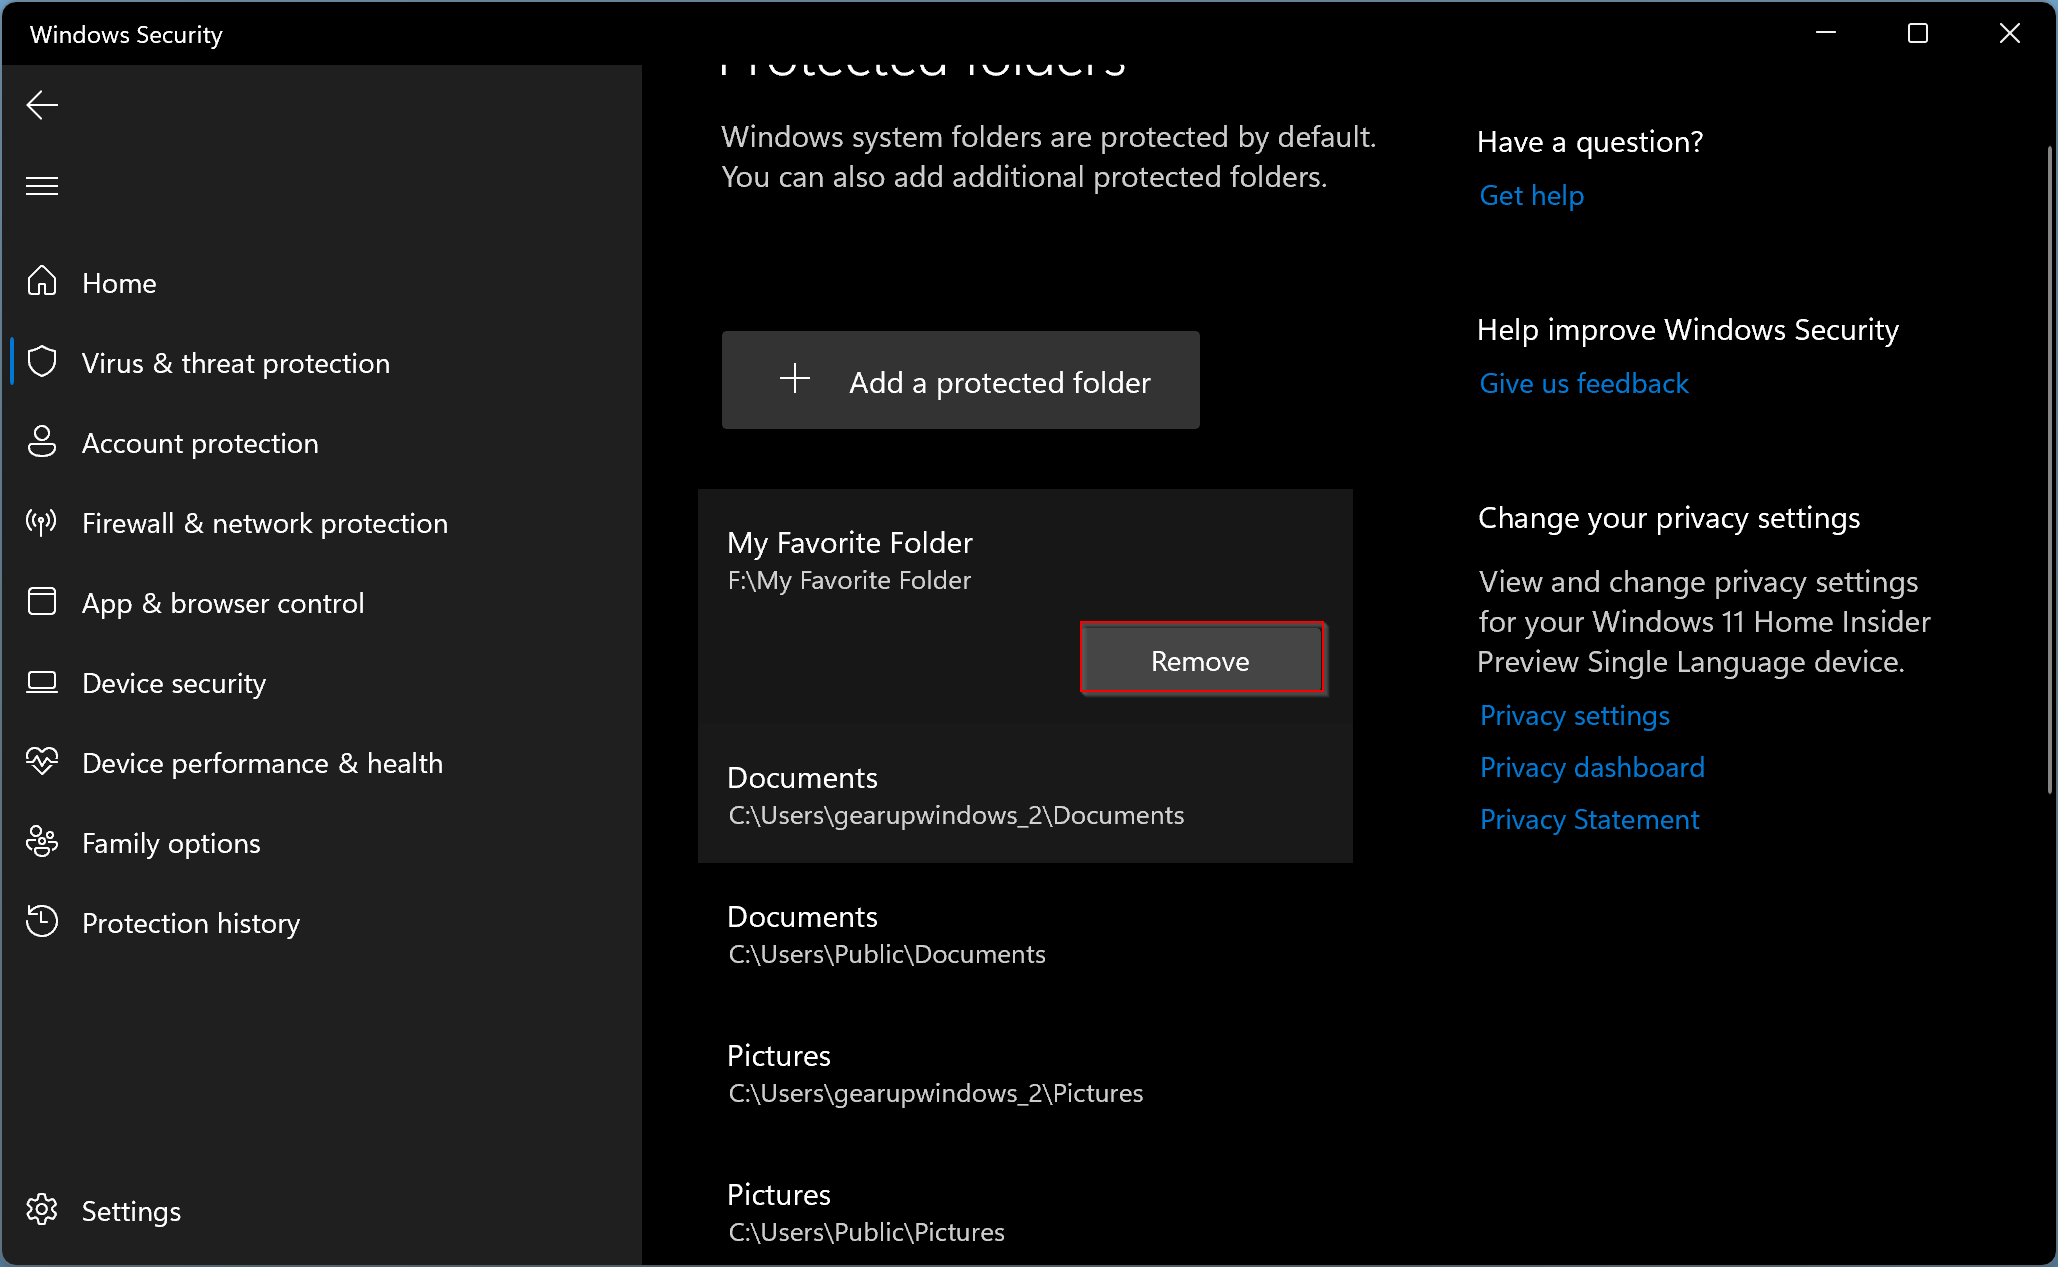
If you want to remove a folder from the “Controlled folder access” list, repeat the steps above from 1 to 6. Then, click the folder path you want to remove from the list. Click on the Remove button and then the OK button when prompted.
Conclusion
In conclusion, Microsoft Defender’s Controlled folder access feature is a powerful tool that can help protect your valuable data from malicious apps and threats like ransomware. While it protects many system folders and default locations by default, you can also add other folders to the list that you want to protect. Adding folders is straightforward and can be accomplished by following the steps outlined above. With Controlled folder access, only trusted apps and services can access your protected folders, making it an essential security feature for Windows 11 users.