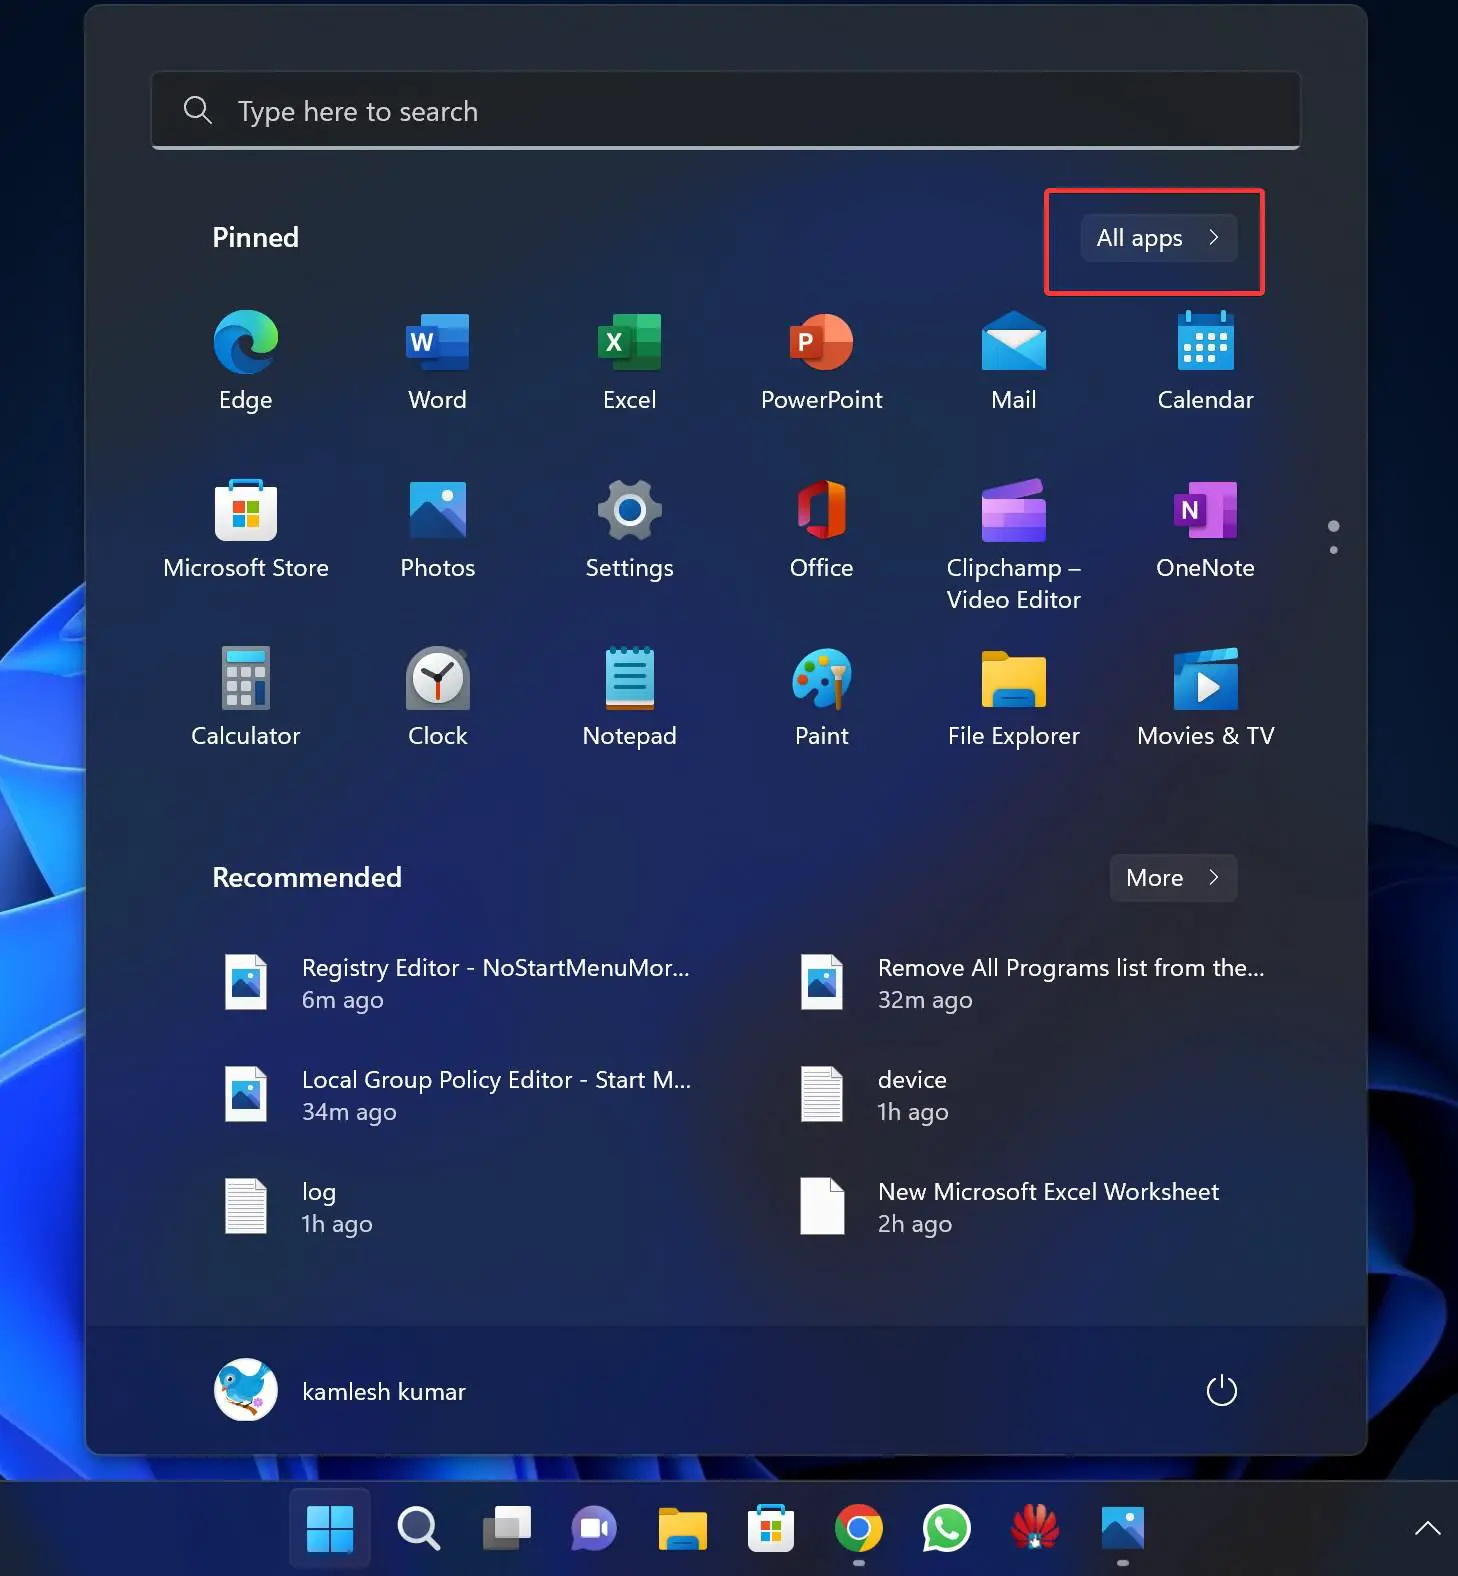
By default, your installed Windows apps and desktop apps are listed alphabetically in the Start menu on Windows 11 or 10. Some apps are grouped into folders with their names in the alphabetical list. You can enable a policy to either collapse or remove the list of all apps from the Start menu if you like.
How to Add or Remove All Apps List in Start Menu in Local Group Policy Editor?
Follow these steps to show or hide the “All apps” list in the Start menu through the Local Group Policy Editor:-
Step 1. Open Local Group Policy Editor.
Step 2. Then, navigate to the following path in the left sidebar:-
User Configuration > Administrative Templates > Start Menu and Taskbar
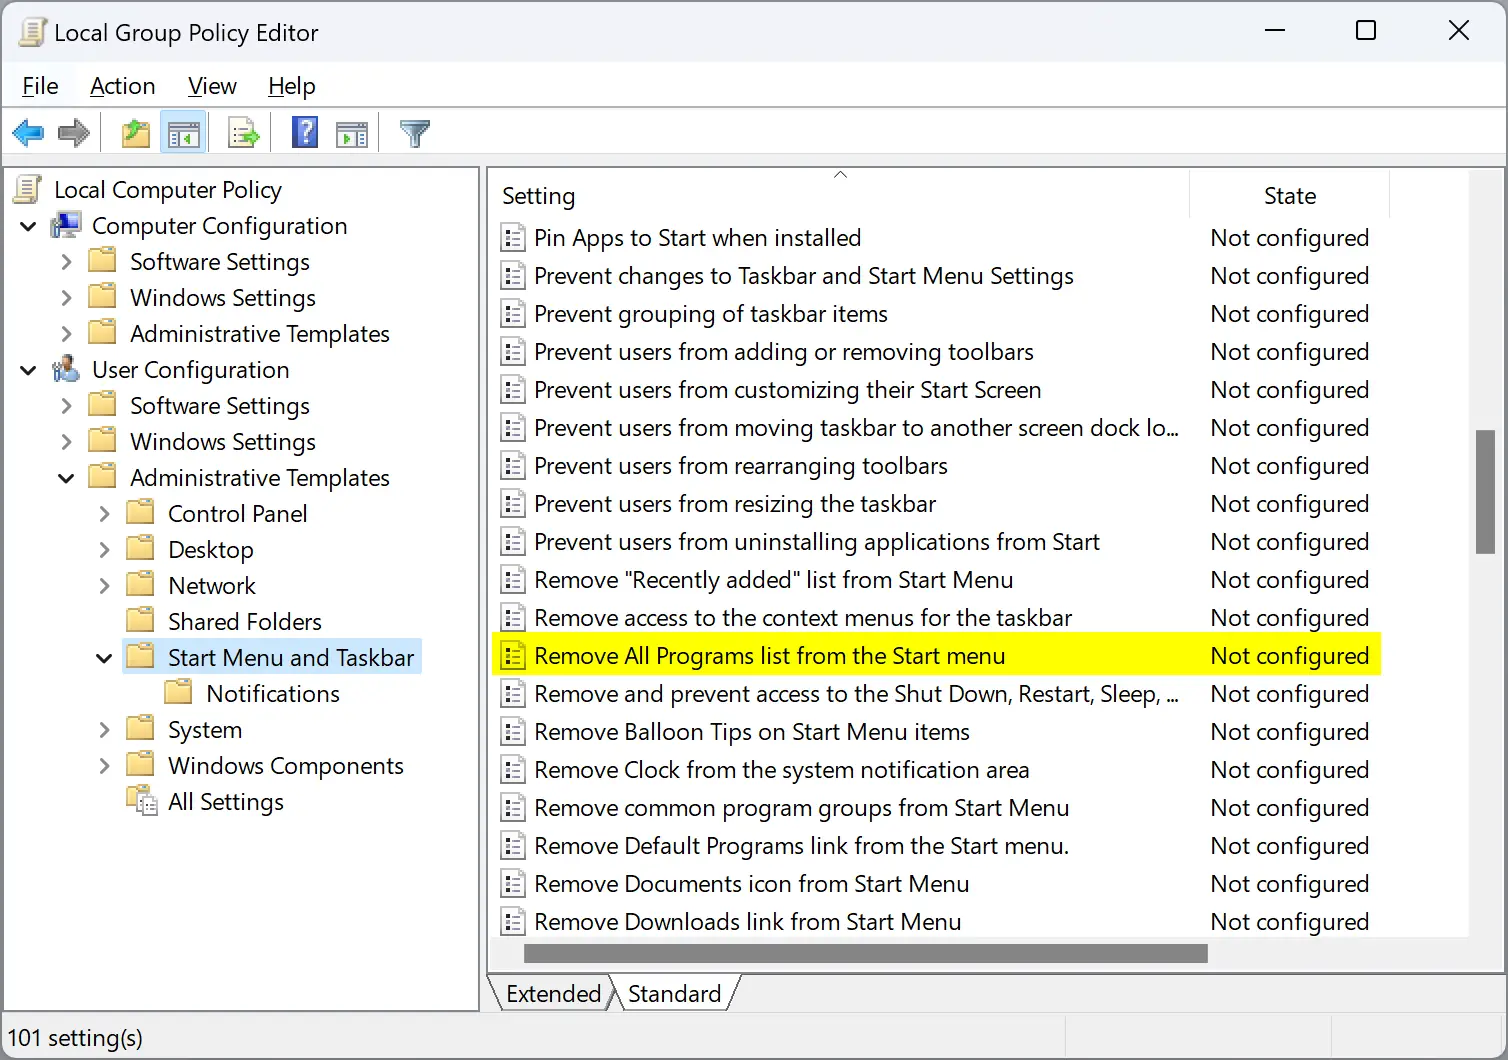
Step 3. On the right pane, double-click on the “Remove All Programs list from the Start menu” setting to edit it.
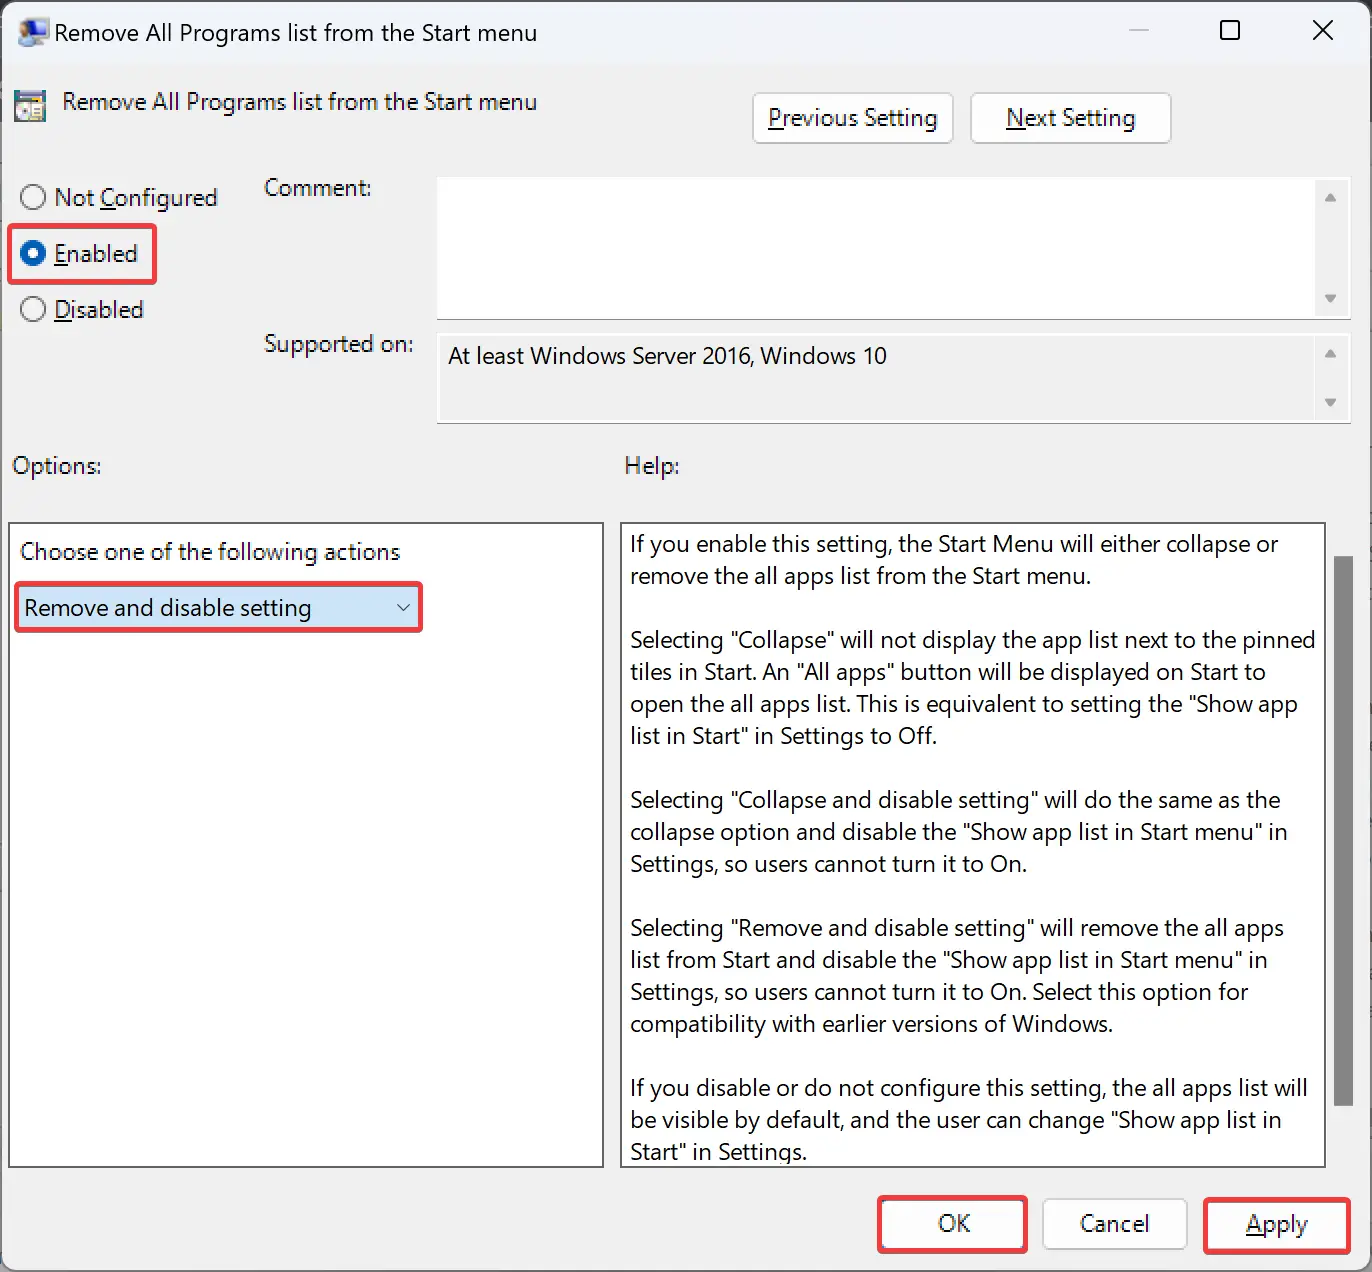
Step 4. Select Enabled.
Step 5. Select one of the following actions in the drop-down menu:-
- None: Default settings will be applied, and an “All apps” button will be displayed on the Start menu to open the All apps list.
- Collapse: Selecting this will also display an “All apps” button on Start to open the All apps list.
- Collapse and disable setting: This will do the same as the collapse option and disable related settings in the Settings app so users cannot turn it On.
- Remove and disable setting: This will remove the “All apps” list from the Start menu and disable related settings in the Settings app, so users cannot turn it On.
Step 6. Click Apply.
Step 7. Click OK.
Step 8. Finally, reboot your PC to apply the changes.
How to Show or Hide the All Apps List in Start Menu using Registry Editor?
Follow these steps to add or remove the “All apps” list in the Start menu using Registry Editor:-
Step 1. Open Registry Editor.
Step 2. Then, navigate to the following path in the left sidebar:-
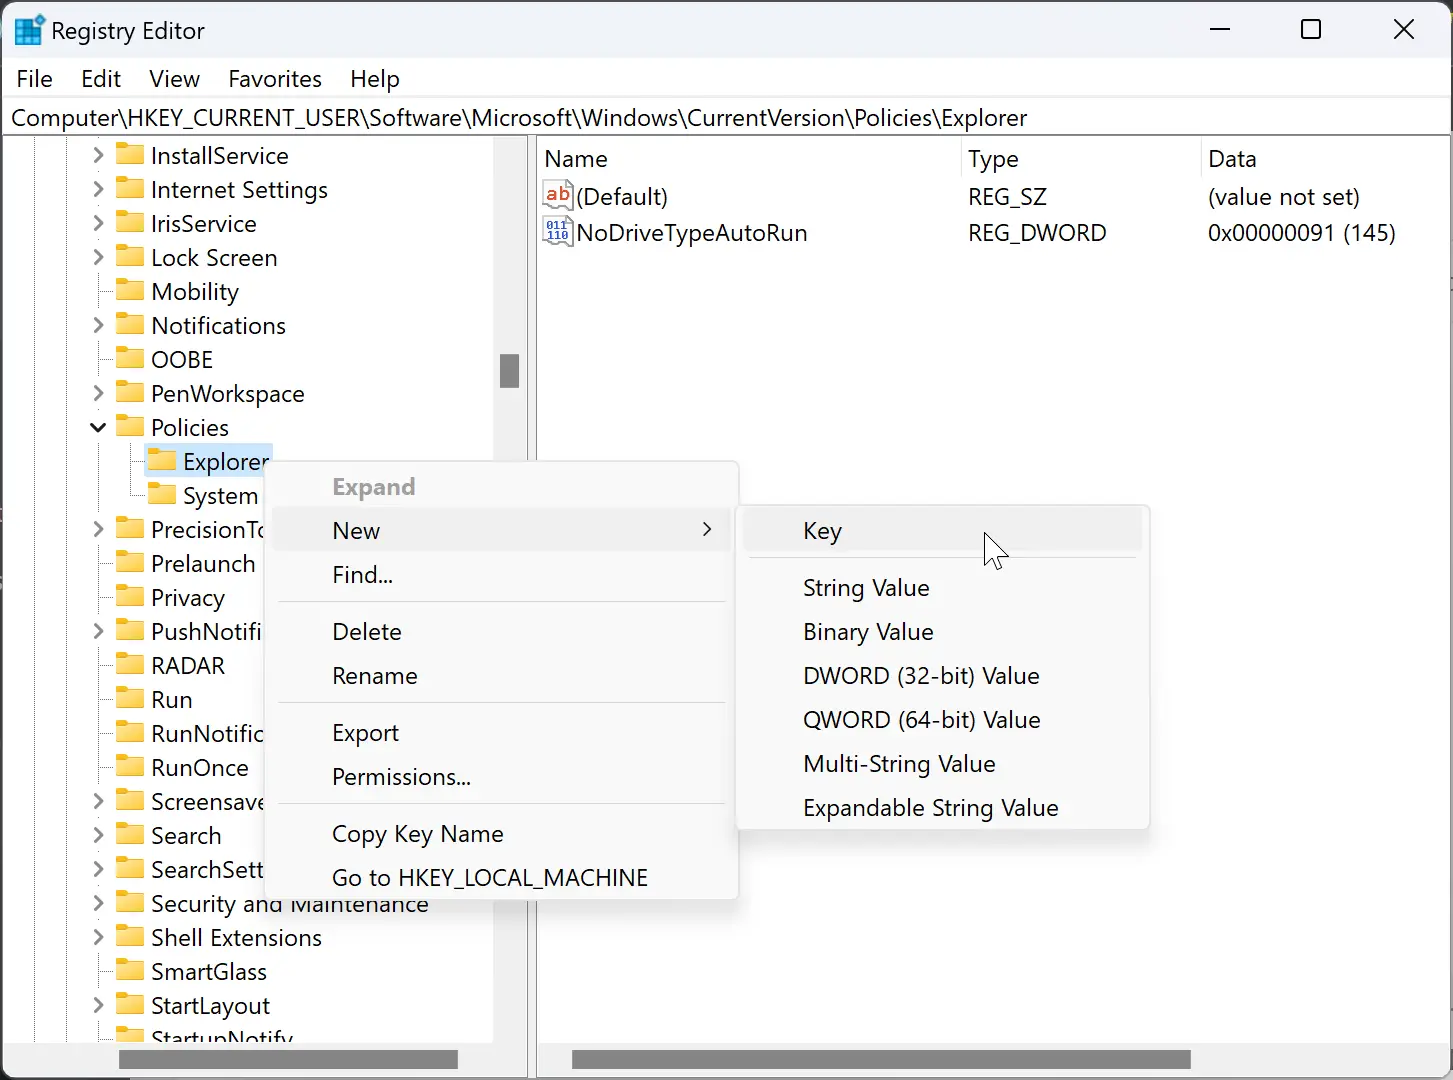
HKEY_CURRENT_USER\Software\Microsoft\Windows\CurrentVersion\Policies\Explorer

Step 3. Now, right-click on the Explorer key and select New > DWORD (32-bit) Value.
Step 4. Name the newly created REG_DWORD to NoStartMenuMorePrograms.
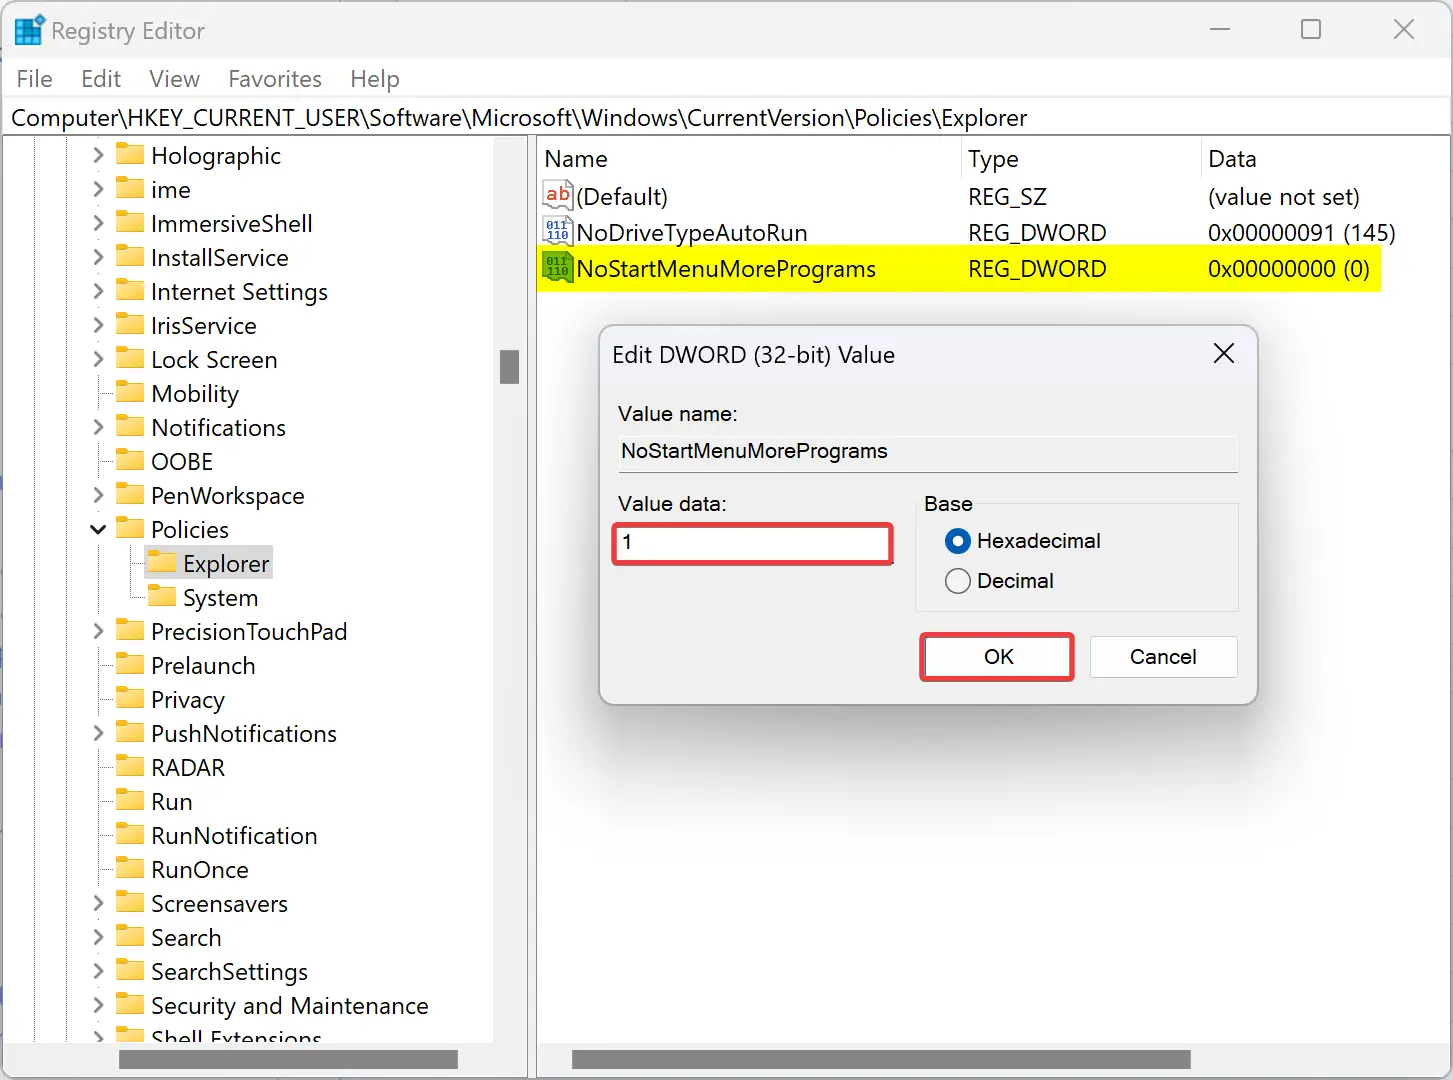
Step 5. Next, double-click on NoStartMenuMorePrograms REG_DWORD and set its “Value data” to the following:-
- 0: None
- 1: Remove and disable setting
- 2: Collapse and disable setting
- 3: Collapse
Step 6. Click OK.
Step 7. Now, repeat the above steps in the following path again:-
HKEY_LOCAL_MACHINE\SOFTWARE\Microsoft\Windows\CurrentVersion\Policies\Explorer
Step 8. At last, reboot your PC to apply the changes.
Conclusion
In summary, you can add or remove the “All apps” list from the Start menu in Windows 11 or 10 using either the Local Group Policy Editor or the Registry Editor. In the Local Group Policy Editor, you need to navigate to the Start Menu and Taskbar settings, select the “Remove All Programs list from the Start menu” option, and choose one of the available actions. In the Registry Editor, you need to navigate to the Explorer key under the Policies folder, create a new DWORD value named “NoStartMenuMorePrograms,” set its value data to one of the available options, and repeat the process in the same key under the Local Machine folder. Finally, you need to reboot your PC to apply the changes.