Windows 10 comes with a lot of new features, and one of them is “Pin to Start.” This is a handy functionality of Windows 10 that lets you pin a program, apps, files, and settings to the Start menu with a single click. Those who have installed a lot of programs on their PC can Pin selective programs to the Start menu for easy and quick access. However, if you don’t use this “Pin to Start” functionality and want to obliterate it, this gearupwindows article will help you. It may also happen right-click context menu is cluttered, and you want to eliminate the Pin to Start feature from your PC.
The reason may be several, but the whole thing is that you want to get rid of the default right-click context menu “Pin to Start.” In this gearupwindows, we will guide you to remove the “Pin to Start” context menu using Registry Editor.
How to Remove “Pin to Start” from Context Menu in Windows 10 using Registry Editor?
Gentle Reminder: Since you will modify the default Registry values, it is recommended to fully back up Windows Registry and create a system restore point. If something goes wrong, you can restore your PC to its previous working state.
To remove the “Pin to Start” from the right-click context menu in Windows 10, do the following:-
Step 1. Press the Windows logo + R keys to invoke the Run dialog box.
Step 2. In the Run command box, type the following and hit Enter from the keyboard:-
regedit
If the User Account Control dialog prompts, click the Yes button.
A Registry Editor window will open.

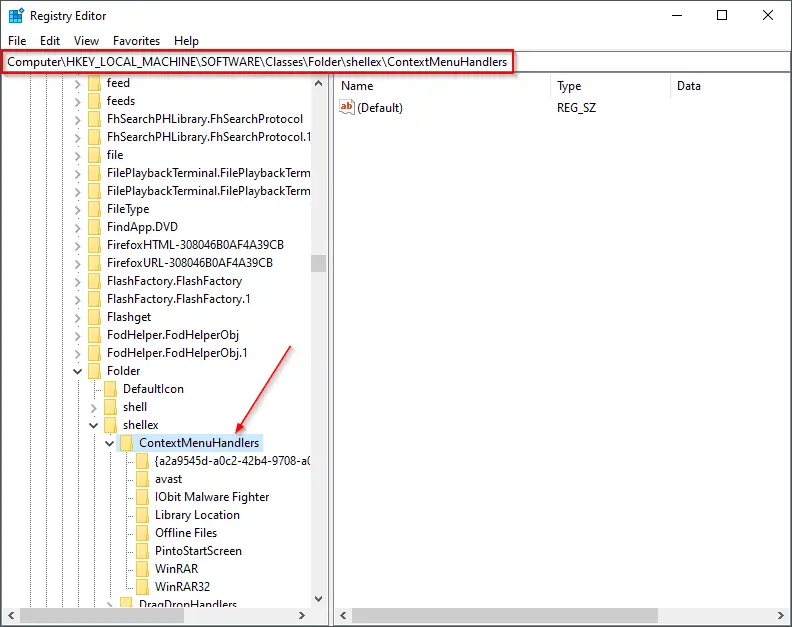
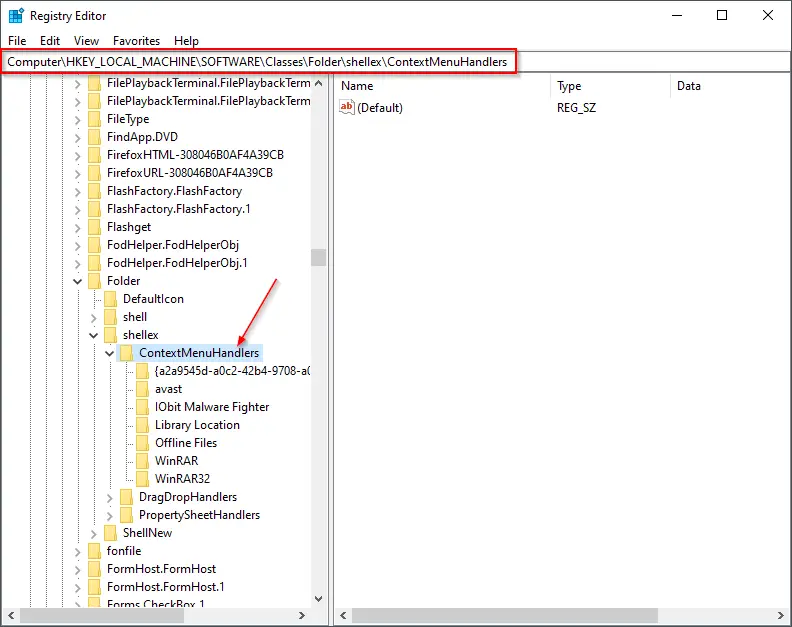
Step 3. On the left side of Windows Registry, navigate to the following registry key:-
HKEY_LOCAL_MACHINE\SOFTWARE\Classes\Folder\shellex\ContextMenuHandlers
Step 4. Under the ContextMenuHandlers key on the left navigation pane, right-click on the PintoStartScreen folder. Select the Delete option.
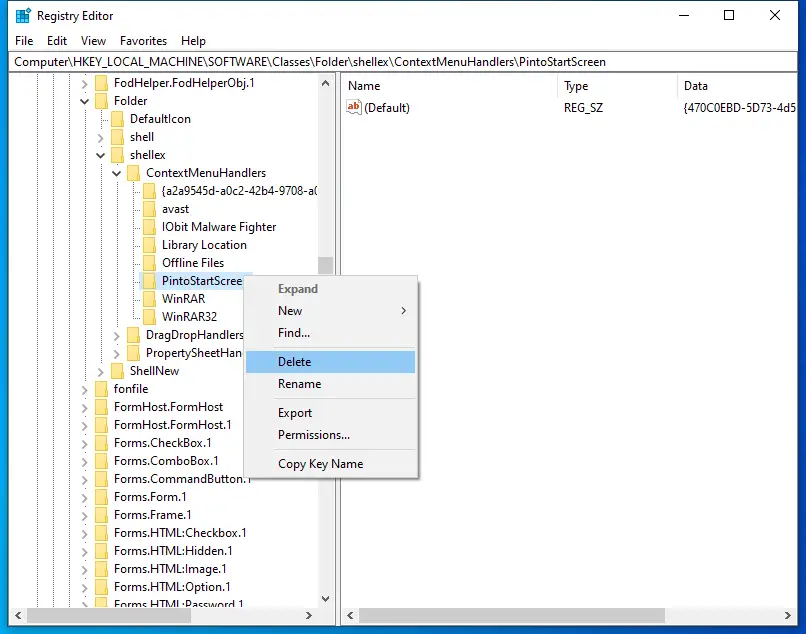
Once you complete the above steps, the “Pin to Start” context menu is immediately removed.
How to Add “Pin to Start” from Context Menu in Windows 10 using Registry Editor?
If you change your mind and wish to add “Pin to Start” in the right-click context menu on Windows 10 again, perform the following actions:-
Step 1. Press the Windows logo + R keys to summon the Run dialog box.
Step 2. In the Run command box, type the following and hit Enter from the keyboard:-
regedit
If the User Account Control dialog prompts, click the Yes button.
A Registry Editor window will open.
Step 3. On the left side of Windows Registry, navigate to the following registry key:-
HKEY_LOCAL_MACHINE\SOFTWARE\Classes\Folder\shellex\ContextMenuHandlers
Step 4. On the left navigation pane, right-click on the folder ContextMenuHandlers, select New, and then the Key option.

Step 5. Rename the newly created key as PintoStartScreen.
Step 6. On the right side pane of the PintoStartScreen folder, double-click on the default string to open its settings.
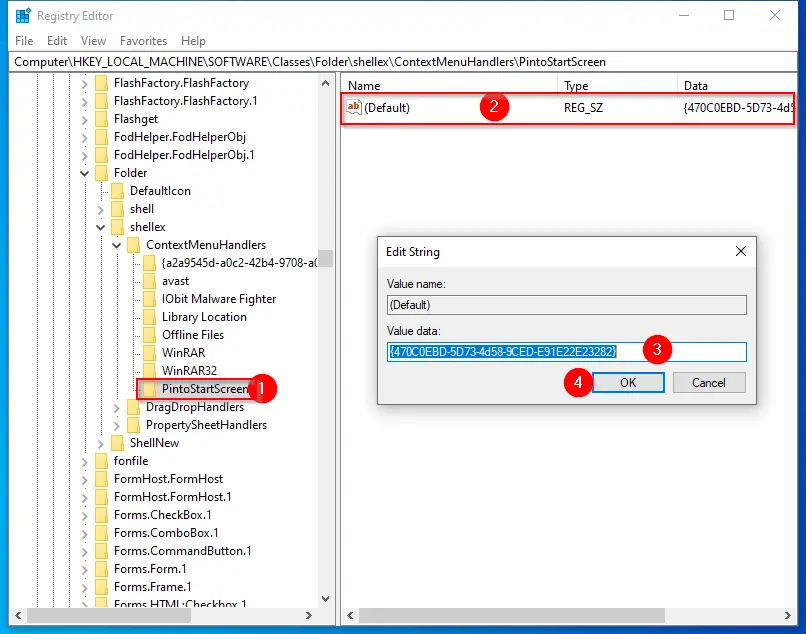
Step 7. Set its Value data to the following:-
{470C0EBD-5D73-4d58-9CED-E91E22E23282}
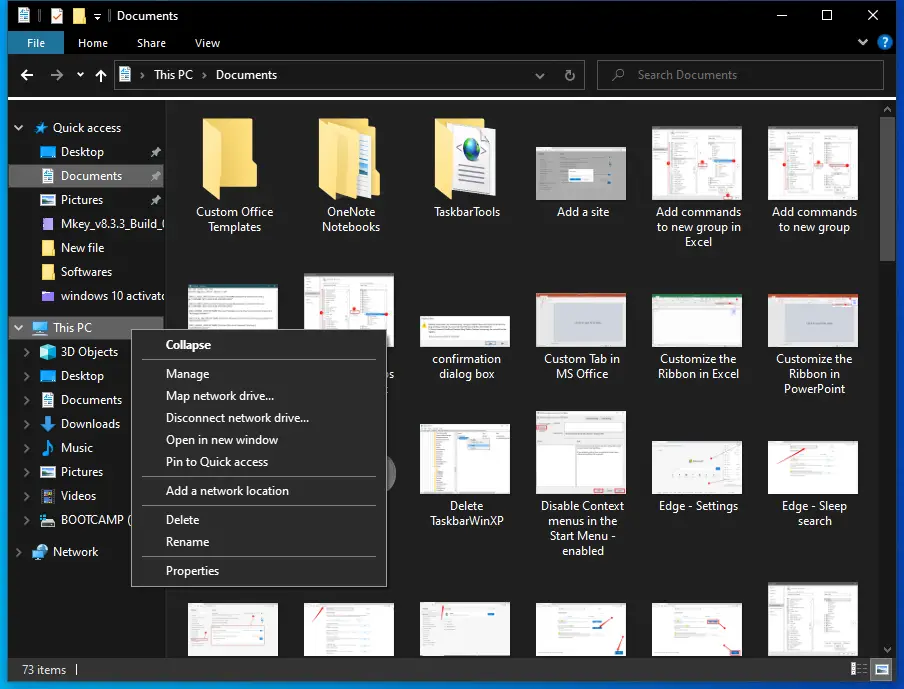
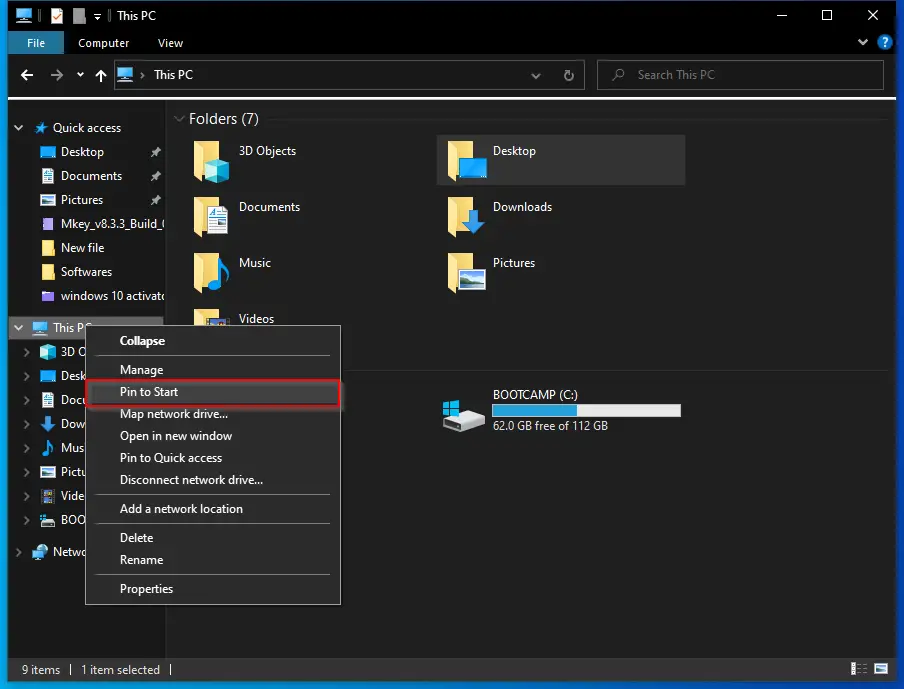
Once you complete the above steps, the “Pin to Start” context menu will add immediately to the right-click context menu, and you can start pinning your favorite application or program to the start menu.
Conclusion
In conclusion, the “Pin to Start” functionality in Windows 10 provides a convenient way to access frequently used programs, apps, files, and settings from the Start menu. However, if you don’t find this feature useful or want to remove it for any reason, you can follow the steps provided in this gearupwindows article to remove “Pin to Start” from the context menu using Registry Editor. As always, it is recommended to back up Windows Registry and create a system restore point before making any changes to the default Registry values. Additionally, if you change your mind and want to add “Pin to Start” back to the context menu, the same article provides steps to do so using Registry Editor.