To select all files/folders inside a folder or the Desktop, you use the CTRL + A keyboard shortcut. However, if you don’t prefer to use a keyboard shortcut, you can add the “Select all” functionality in the right-click menu in Windows 11 and 10. Using a registry tweak, you can add the “Select all” option in the context menu for folder background and desktop.

This gearupwindows article will guide you through adding and removing the “Select all” option in Windows 11 or 10 Context Menu.
How to Add the “Select all” Option to Windows 11 or 10 Context Menu?
To add the “Select all” option to Windows 11 or 10 Context Menu, use these steps:-
Step 1. Open a Notepad file on your PC.
To do that, click on the Start button and type Notepad. In the available results, click on the Notepad to open the same.
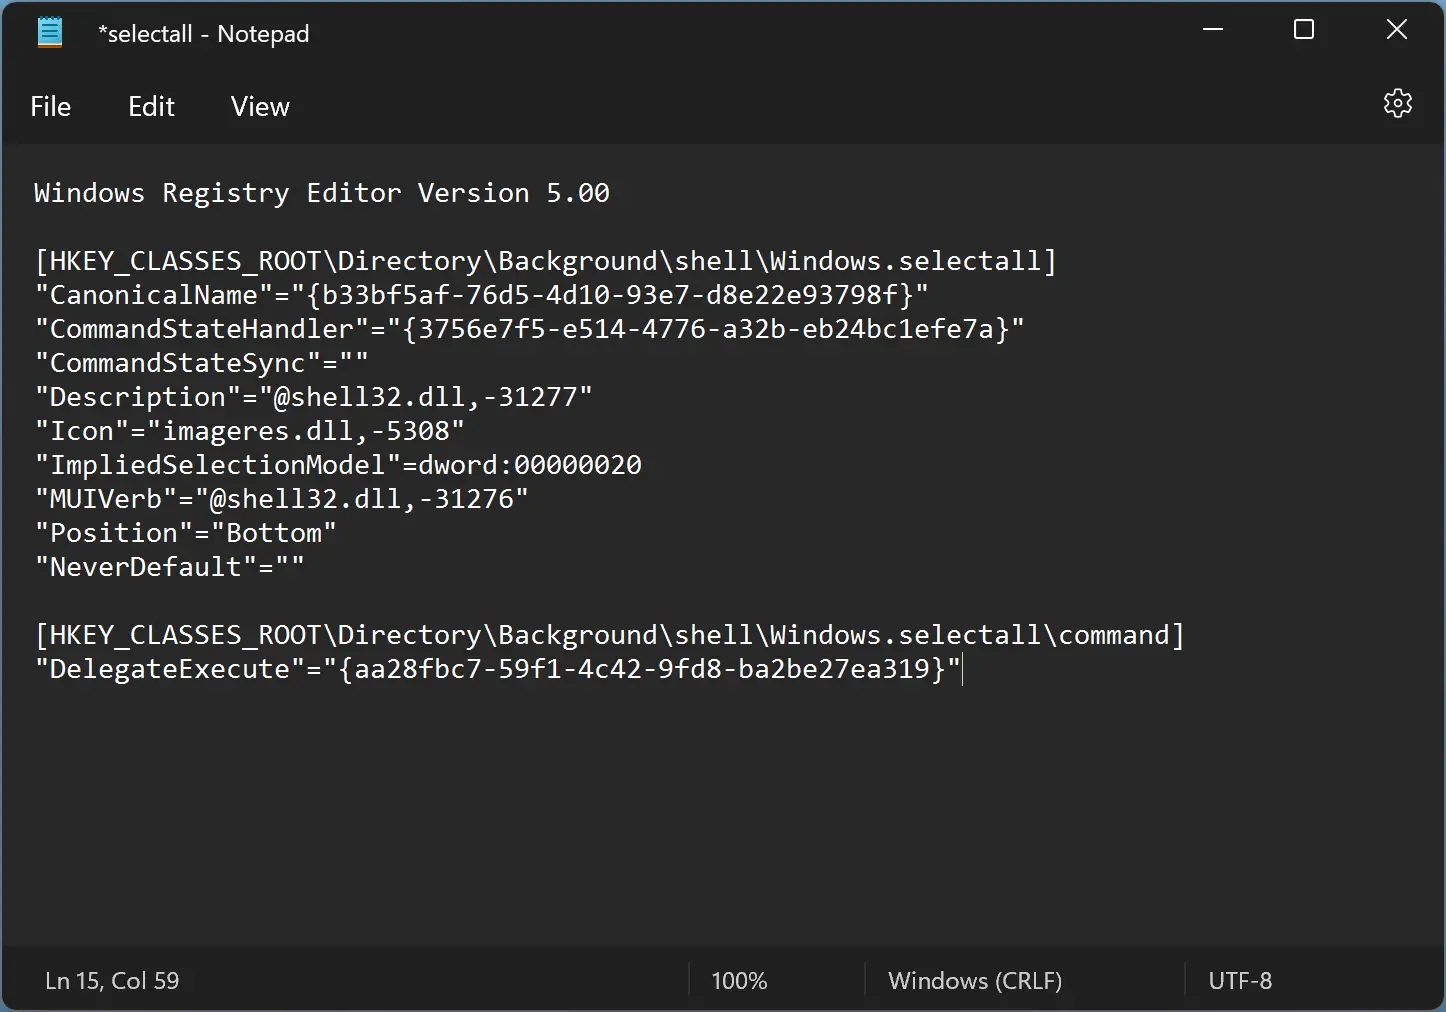
Step 2. In the Notepad file, copy and paste the following:-
Windows Registry Editor Version 5.00

[HKEY_CLASSES_ROOT\Directory\Background\shell\Windows.selectall]
"CanonicalName"="{b33bf5af-76d5-4d10-93e7-d8e22e93798f}"
"CommandStateHandler"="{3756e7f5-e514-4776-a32b-eb24bc1efe7a}"
"CommandStateSync"=""
"Description"="@shell32.dll,-31277"
"Icon"="imageres.dll,-5308"
"ImpliedSelectionModel"=dword:00000020
"MUIVerb"="@shell32.dll,-31276"
"Position"="Bottom"
"NeverDefault"=""

[HKEY_CLASSES_ROOT\Directory\Background\shell\Windows.selectall\command]
"DelegateExecute"="{aa28fbc7-59f1-4c42-9fd8-ba2be27ea319}"
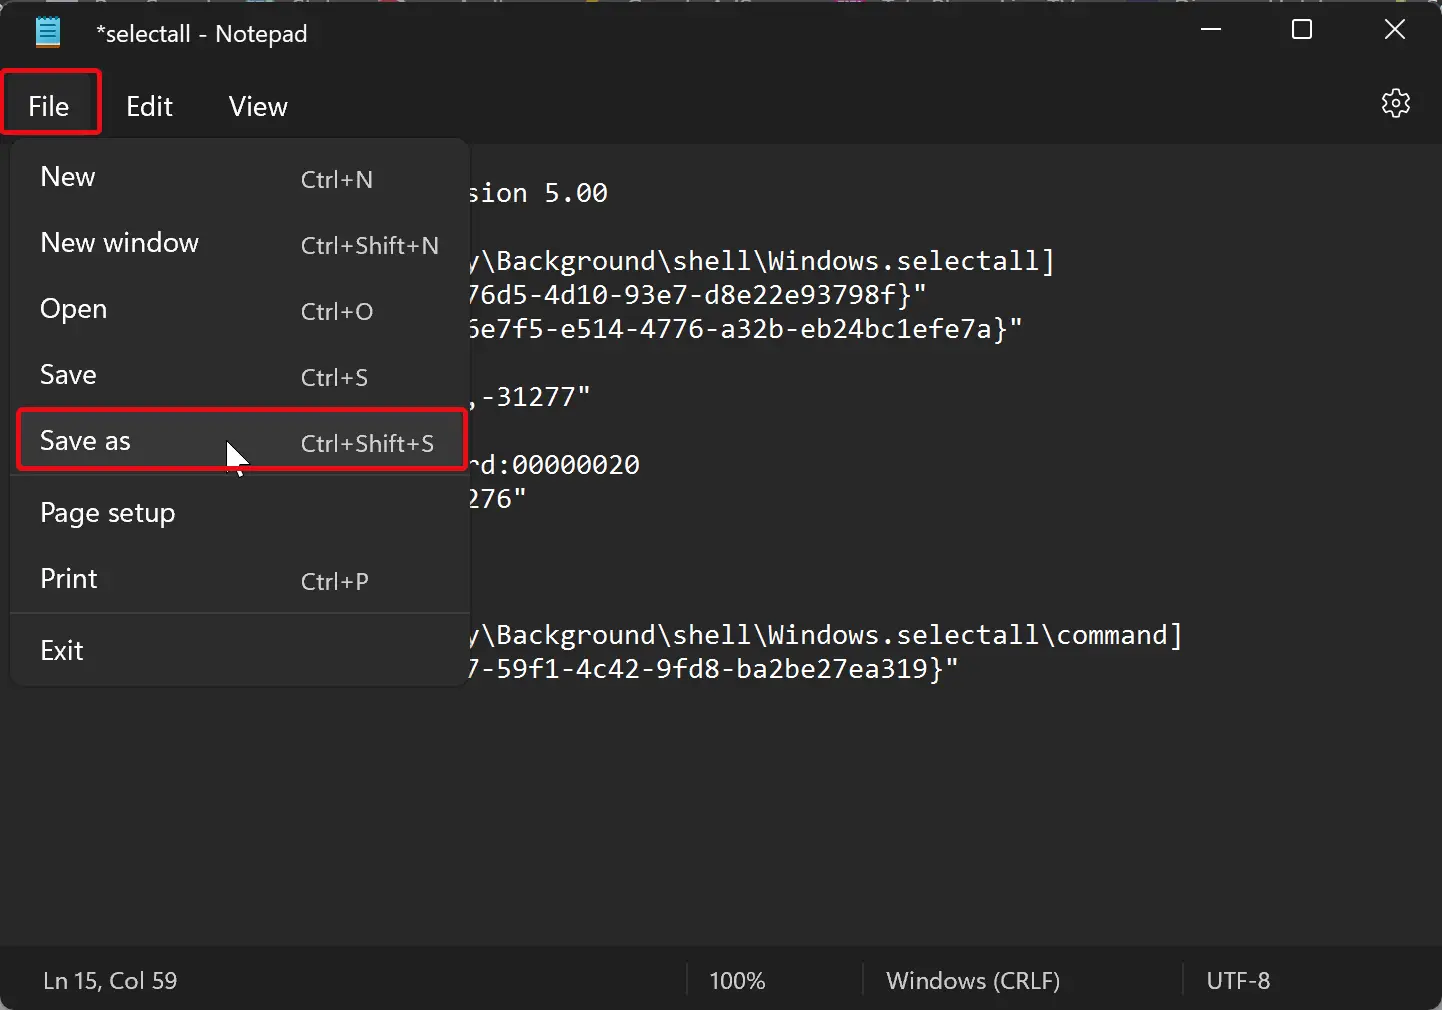
Step 3. Then, click on the File menu and select Save as option.
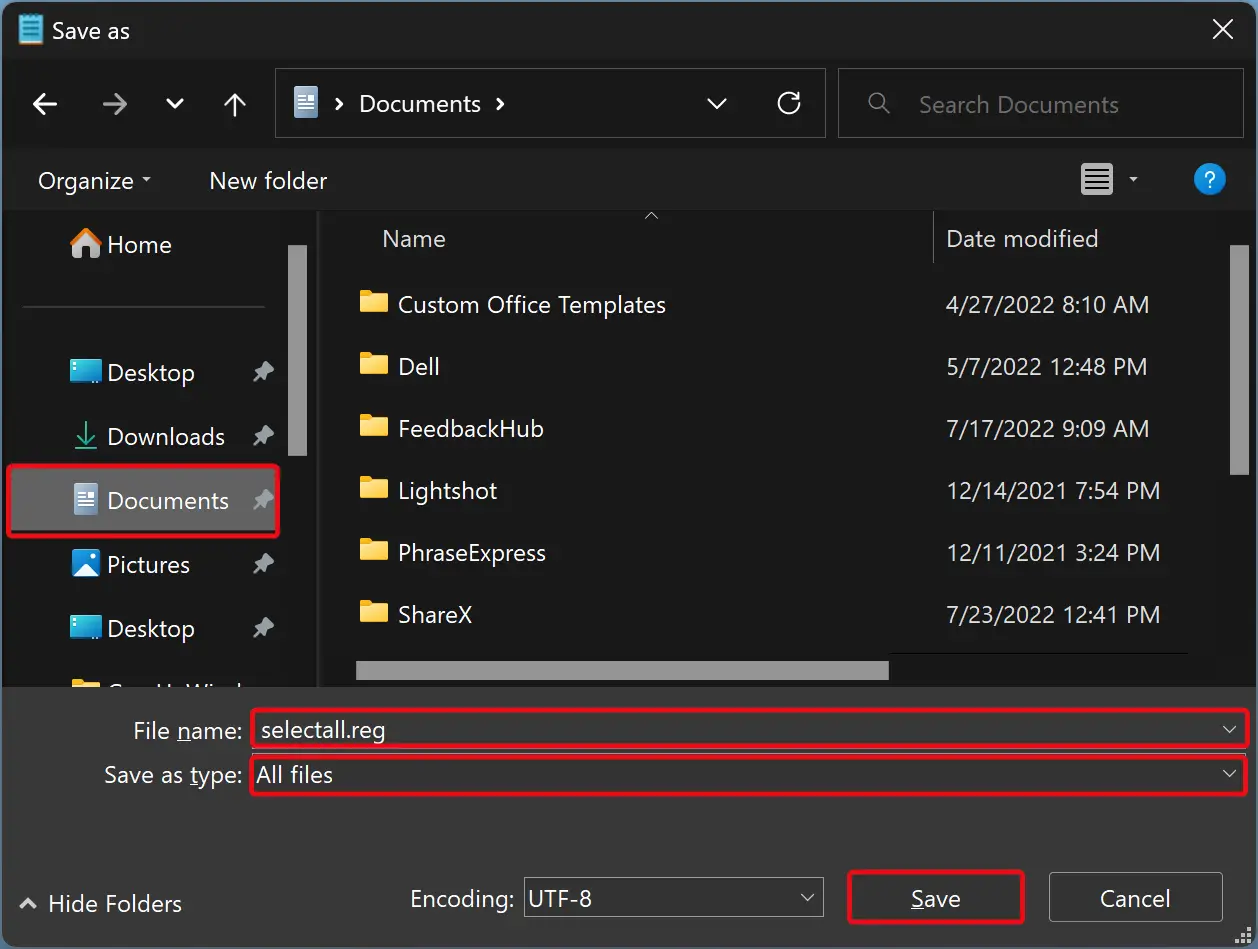
Step 4. In the “Save as” dialog, select a location to save your file. Name the file as selectall.reg. Select All files in the “Save as type” drop-down menu. At last, hit the Save button.
Step 5. When you’re done, you’ll see a new file with selectall.reg name in your specified location.
Step 6. Double-click on this file and click the Yes button when prompted.
Step 7. Click OK.
Once you complete the above steps, the “Select all” option will appear in Windows 11 or 10 context menu when you right-click on a blank space in a folder or on the desktop.
How to Remove the “Select all” Option from Windows 11 or 10 Context Menu?
If you don’t need the “Select all” option and want to remove it from Windows 11 or 10 context menu, use these steps:-
Step 1. Open a Notepad file on your PC.
To do that, click on the Start button and type Notepad. In the available results, click on the Notepad to open the same.
Step 2. In the Notepad file, copy and paste the following:-
Windows Registry Editor Version 5.00

[-HKEY_CLASSES_ROOT\Directory\Background\shell\Windows.selectall]
Step 3. Then, click on the File menu and select Save as option.
Step 4. In the “Save as” dialog, select a location to save your file. Name the file as removeselectall.reg. Select All files in the “Save as type” drop-down menu. At last, hit the Save button.
Step 5. When you’re done, you’ll see a new file with removeselectall.reg name in your specified location.
Step 6. Double-click on this file and click the Yes button when prompted.
Step 7. Click OK.
Once you complete the above steps, the “Select all” option will disappear from Windows 11 or 10 context menu when you right-click on a blank space in a folder or on the desktop.
Conclusion
In conclusion, adding or removing the “Select all” option from the Windows 11 or 10 context menu is a simple process that can be done using a few registry tweaks. By following the steps outlined in this article, you can easily customize your context menu and streamline your file management workflow. Whether you prefer to use keyboard shortcuts or right-click options, Windows 11 and 10 provide various ways to select all files and folders within a directory or on the desktop.
This didn’t work for me on Windows 11 Home 22H2.