You can select all items, invert selected items, and clear all the selections through the built-in options present in the Ribbon menu of Windows 10 and See more section of Windows 11 File Explorer. If you want to access these options more frequently, you can add them in right-click context menu.
Apart from that, you can also use these hotkeys:-
- Select all (Ctrl+A) – Select all items in view.
- Select none (Ctrl+R) – Clear all your selections.
Using the Select context menu, you can select all files or folders, invert selected items, and even deselect all the selected items in the Desktop or a folder. With a minor registry tweak, you can create “Select all,” “Invert selection,” and “Select none” options under the “Select” context menu.
In this gearupwindows article, we will guide you on adding or creating a Select context menu on Windows 11 and 10.
How to Add Select Context Menu in Windows 11 or 10?
To add or create a select context menu in Windows 11 or 10, use these steps:-
Step 1. Open Registry Editor.
Step 2. Here, you need to access the shell key in four different paths, and these are the following:-
HKEY_CLASSES_ROOT\*\shell
HKEY_CLASSES_ROOT\Folder\shell
HKEY_CLASSES_ROOT\Directory\Background\shell
HKEY_CLASSES_ROOT\LibraryFolder\background\shell
In each location, you need to create a new Key named Select.
To do that, right-click on the shell key and select the New > Key option.
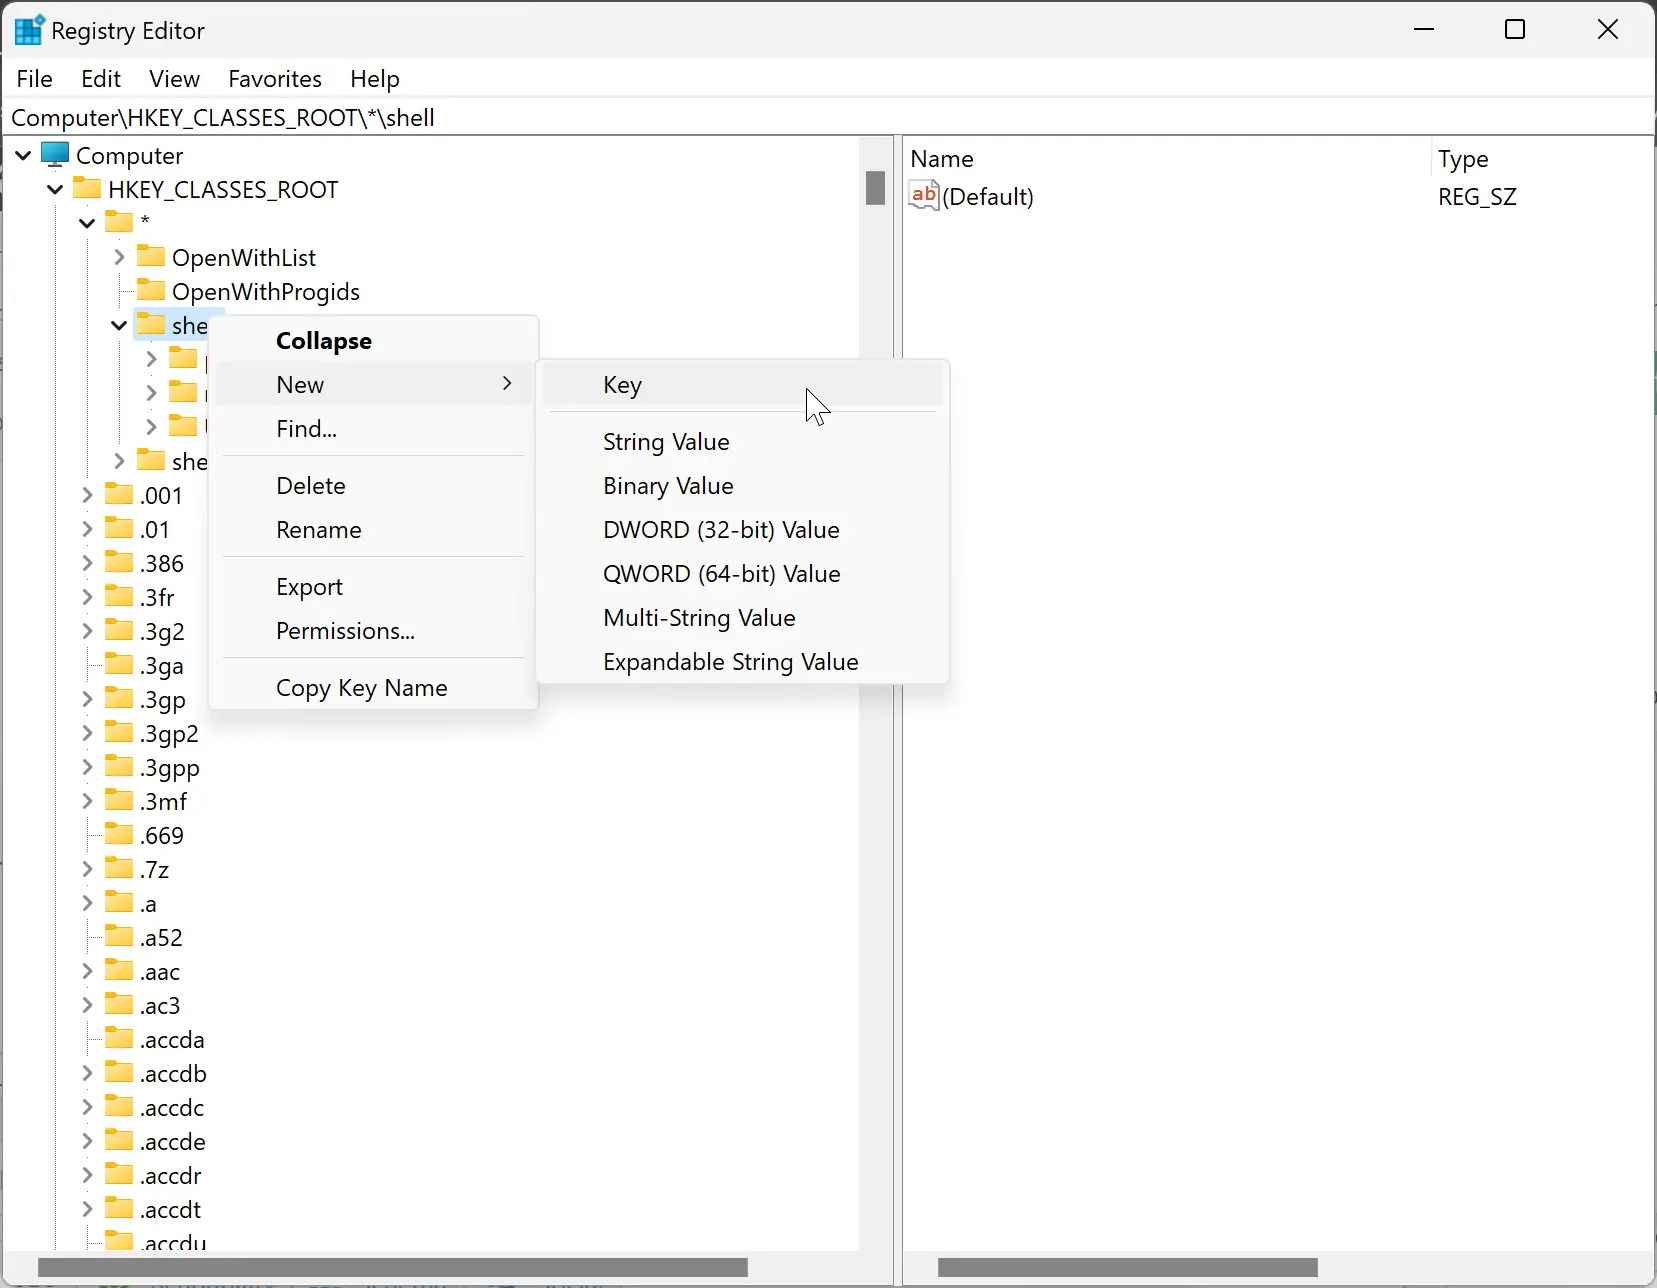
Then, name the newly created key Select.
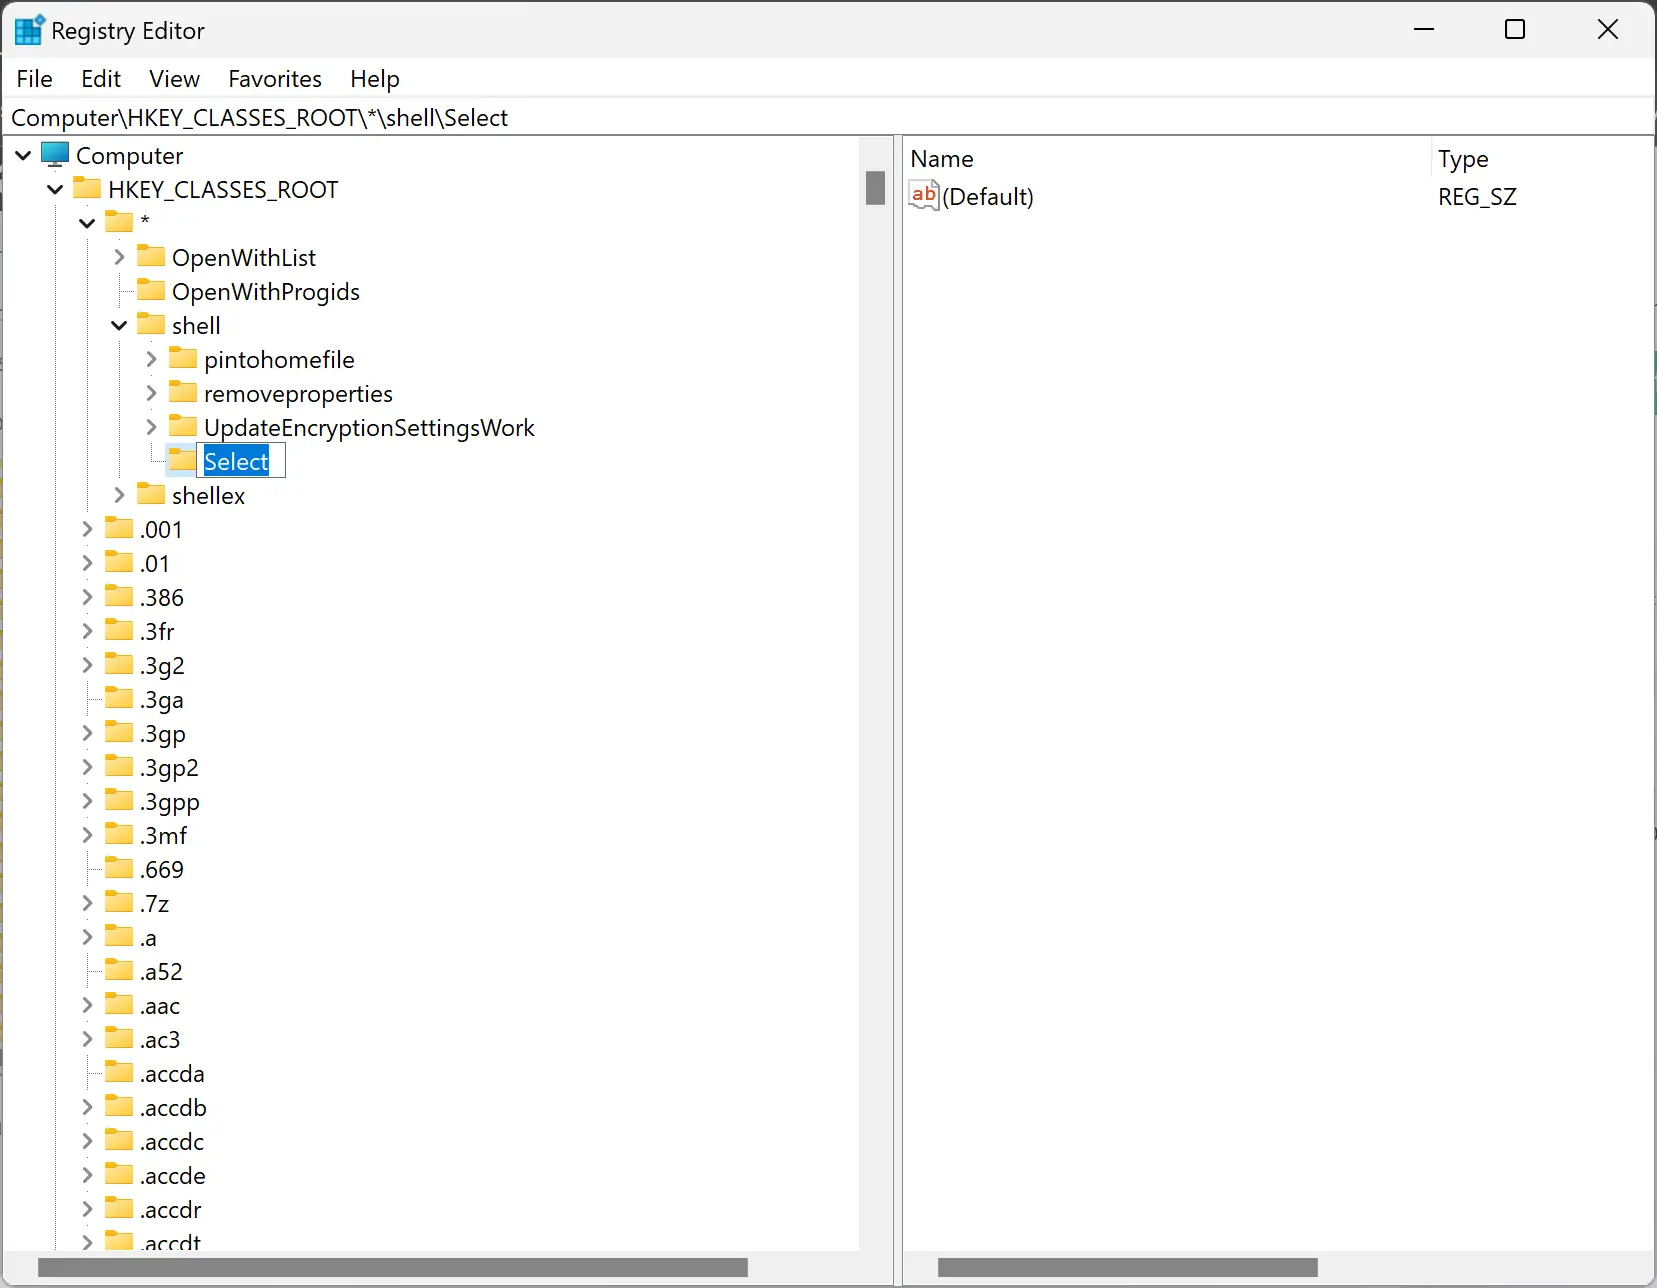
Step 3. Once you have created the Select key in all four locations under the shell key, create three different string values named icon, MUIVerb, and SubCommands under the Select key for each location.
To do that, right-click on the Select key, and choose New > String Value.
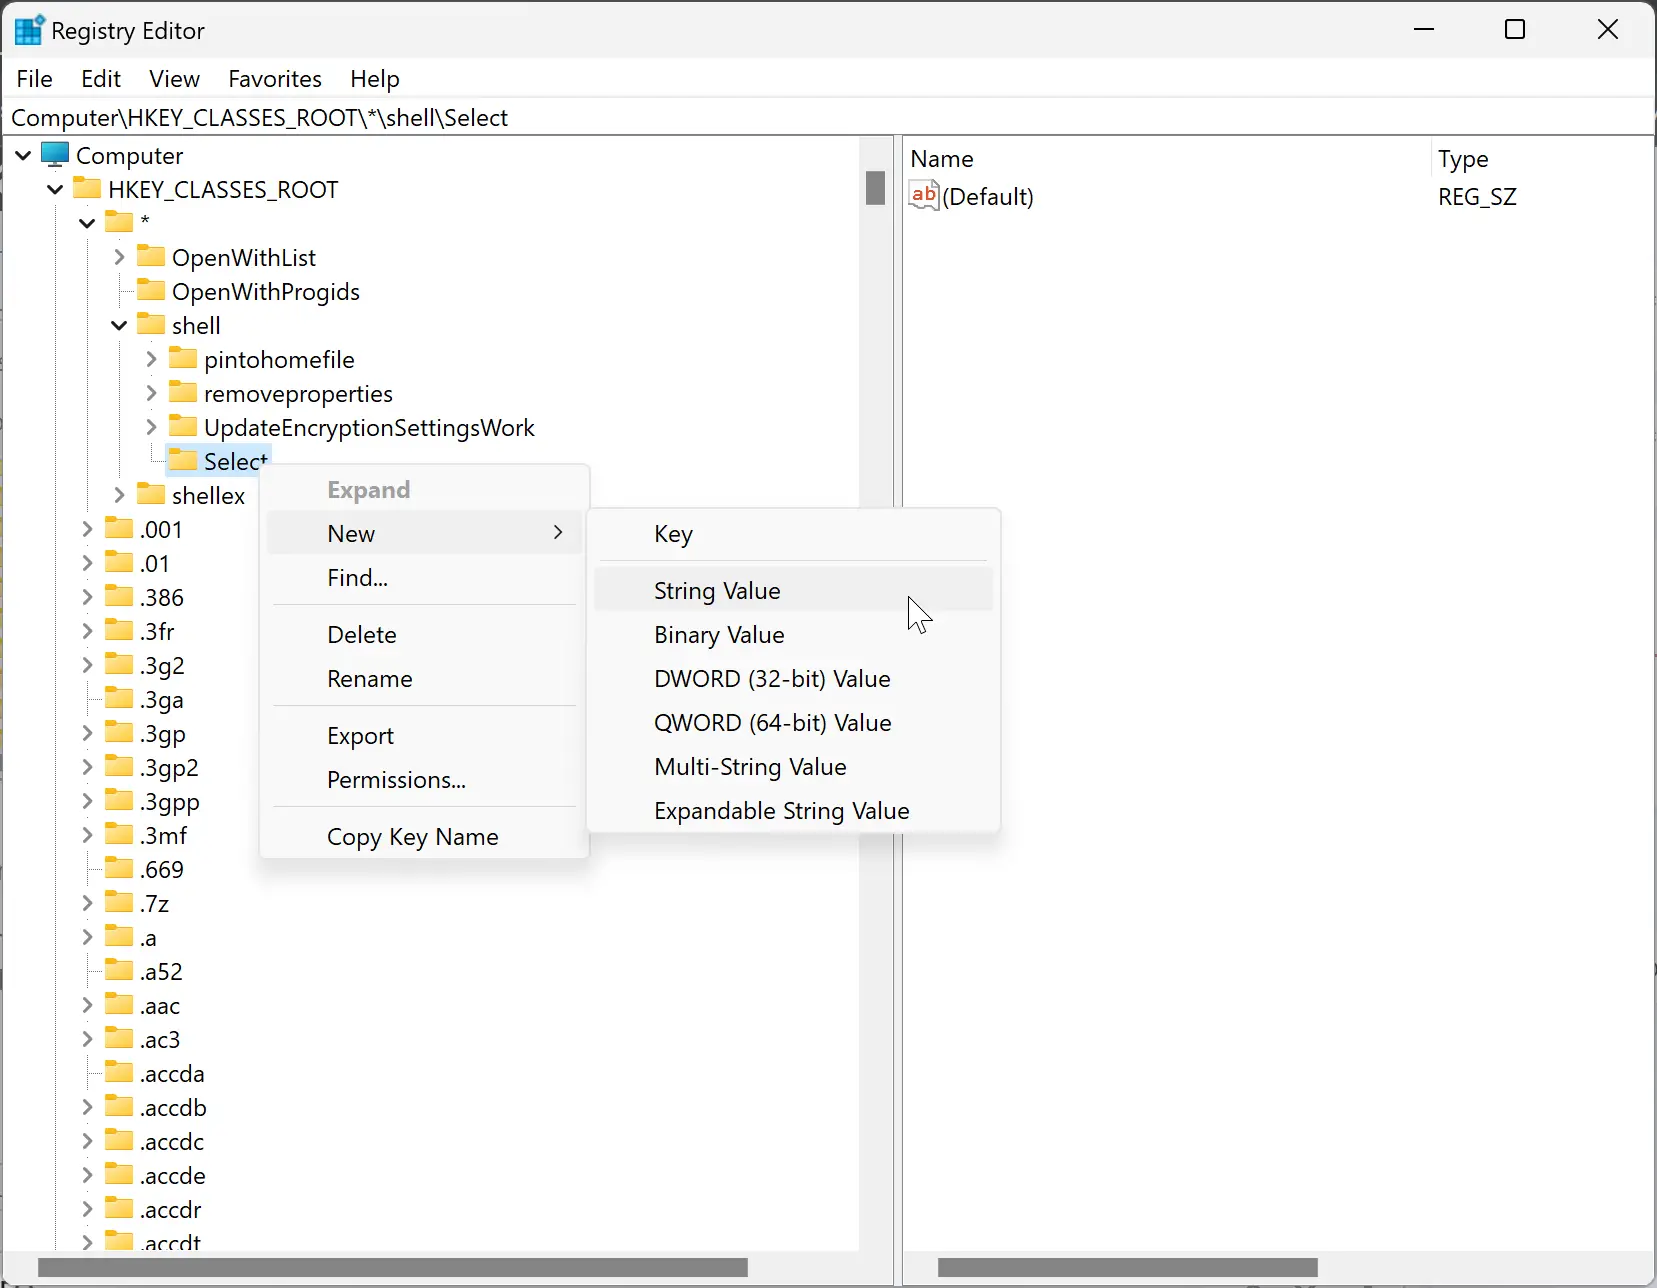
Create three REG_SZ in each location by repeating the above step and name these as icon, MUIVerb, and SubCommands.
![]()
Step 4. When the String Values are created, you need to set the “Value data” for each REG_SZ.
To do that, double-click on each REG_SZ and set “Value data” to the following:-
- icon: imageres.dll,-5308
- MUIVerb: Select
- SubCommands: Windows.selectall;Windows.selectnone;Windows.invertselection
![]()
Step 5. Click OK.
Now, each string will look like the below image:-
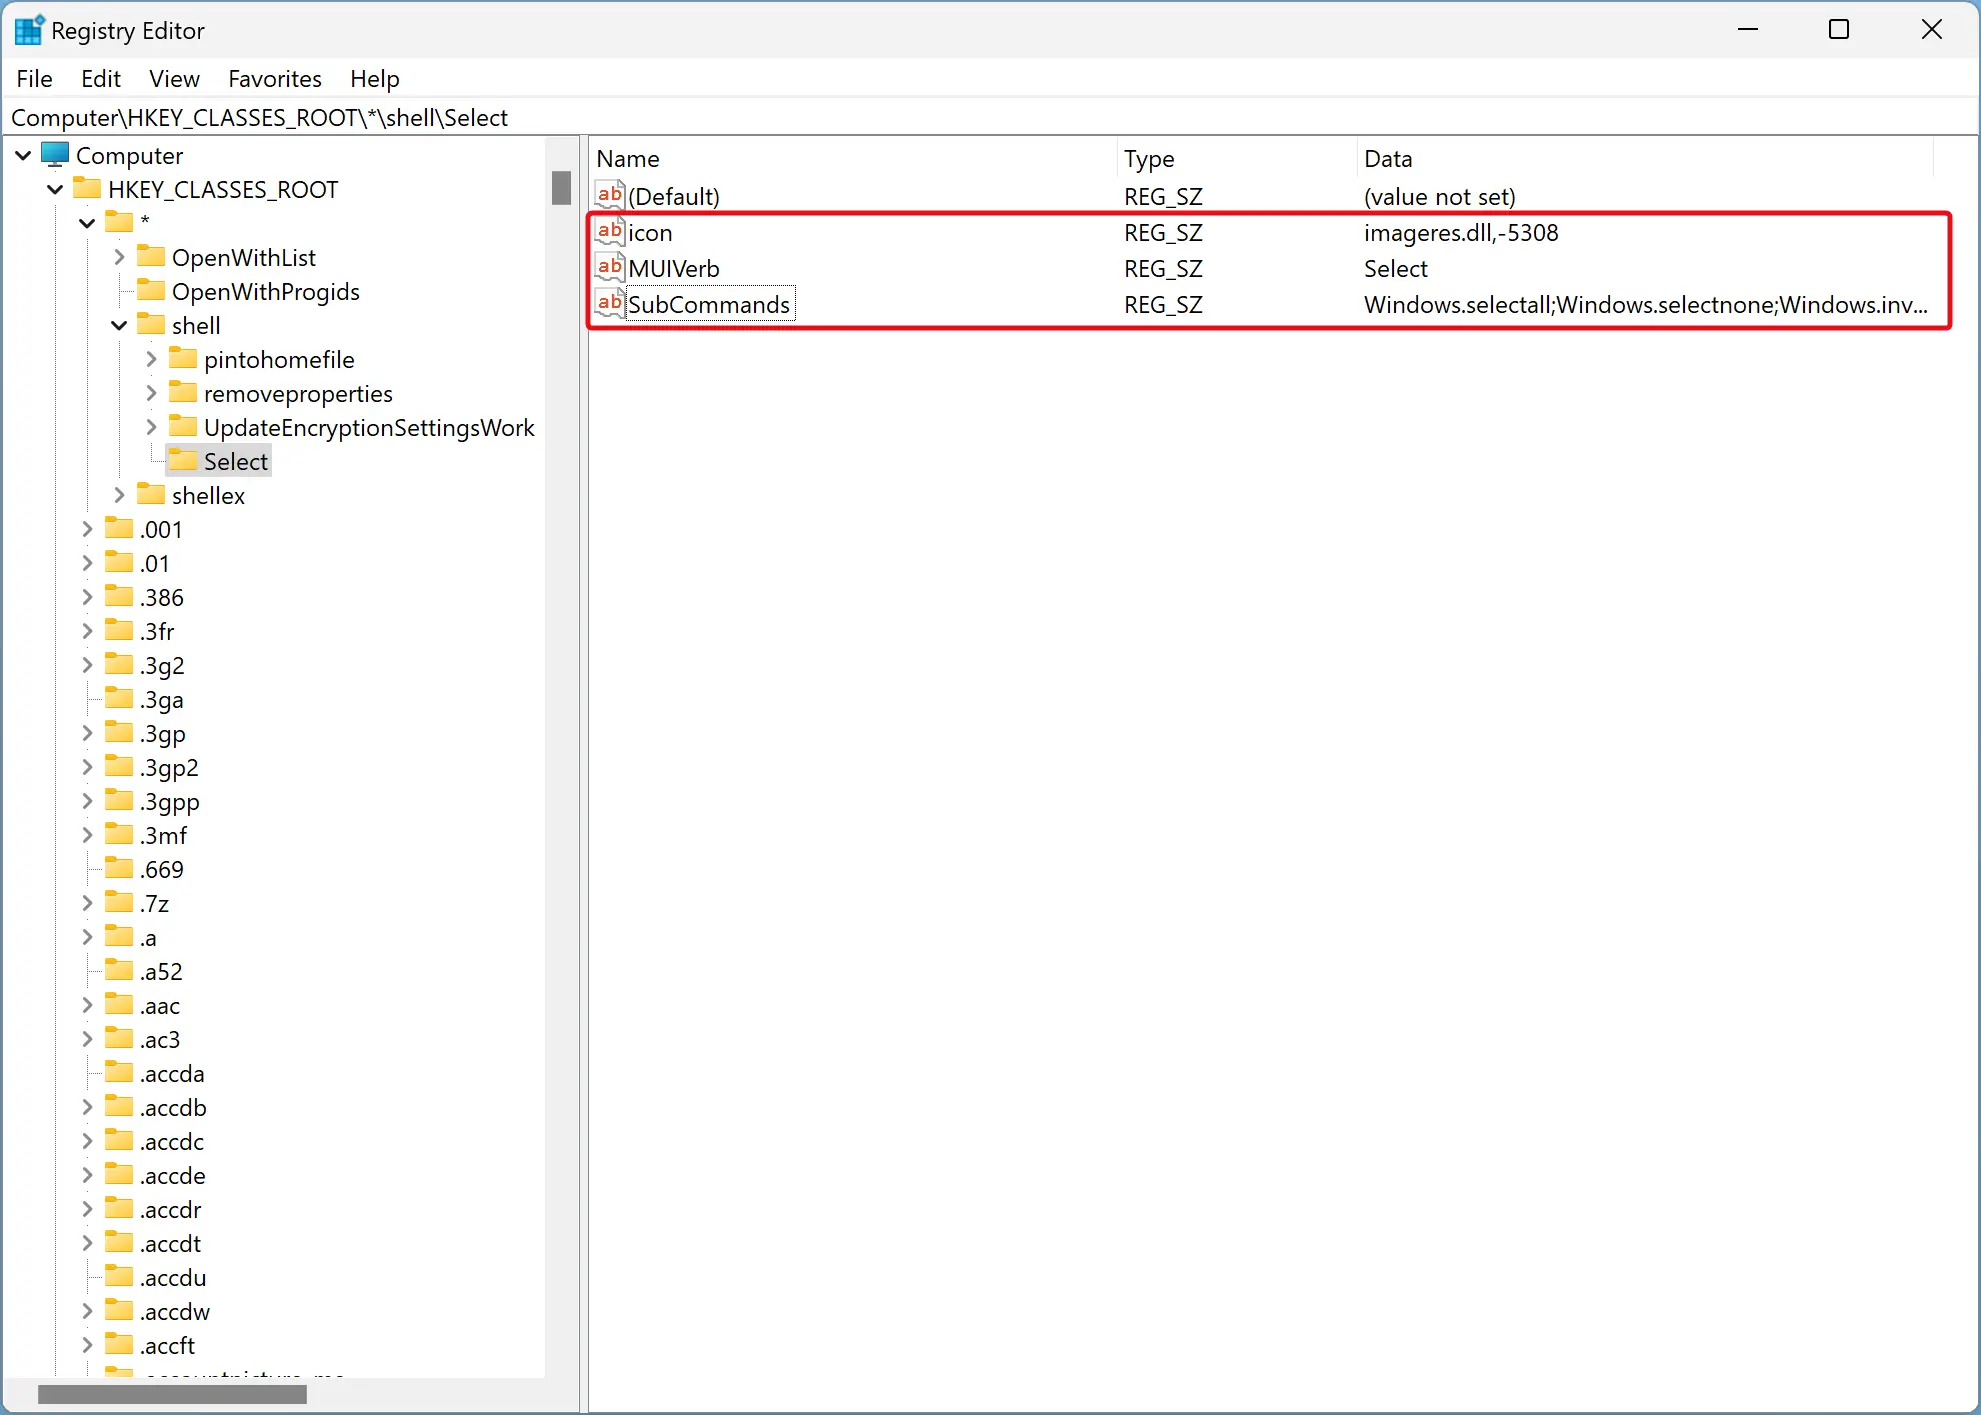
Once you have filled the “Value data” of all String values in the Select key on all four locations, close the Registry Editor, and restart your PC to apply the changes.
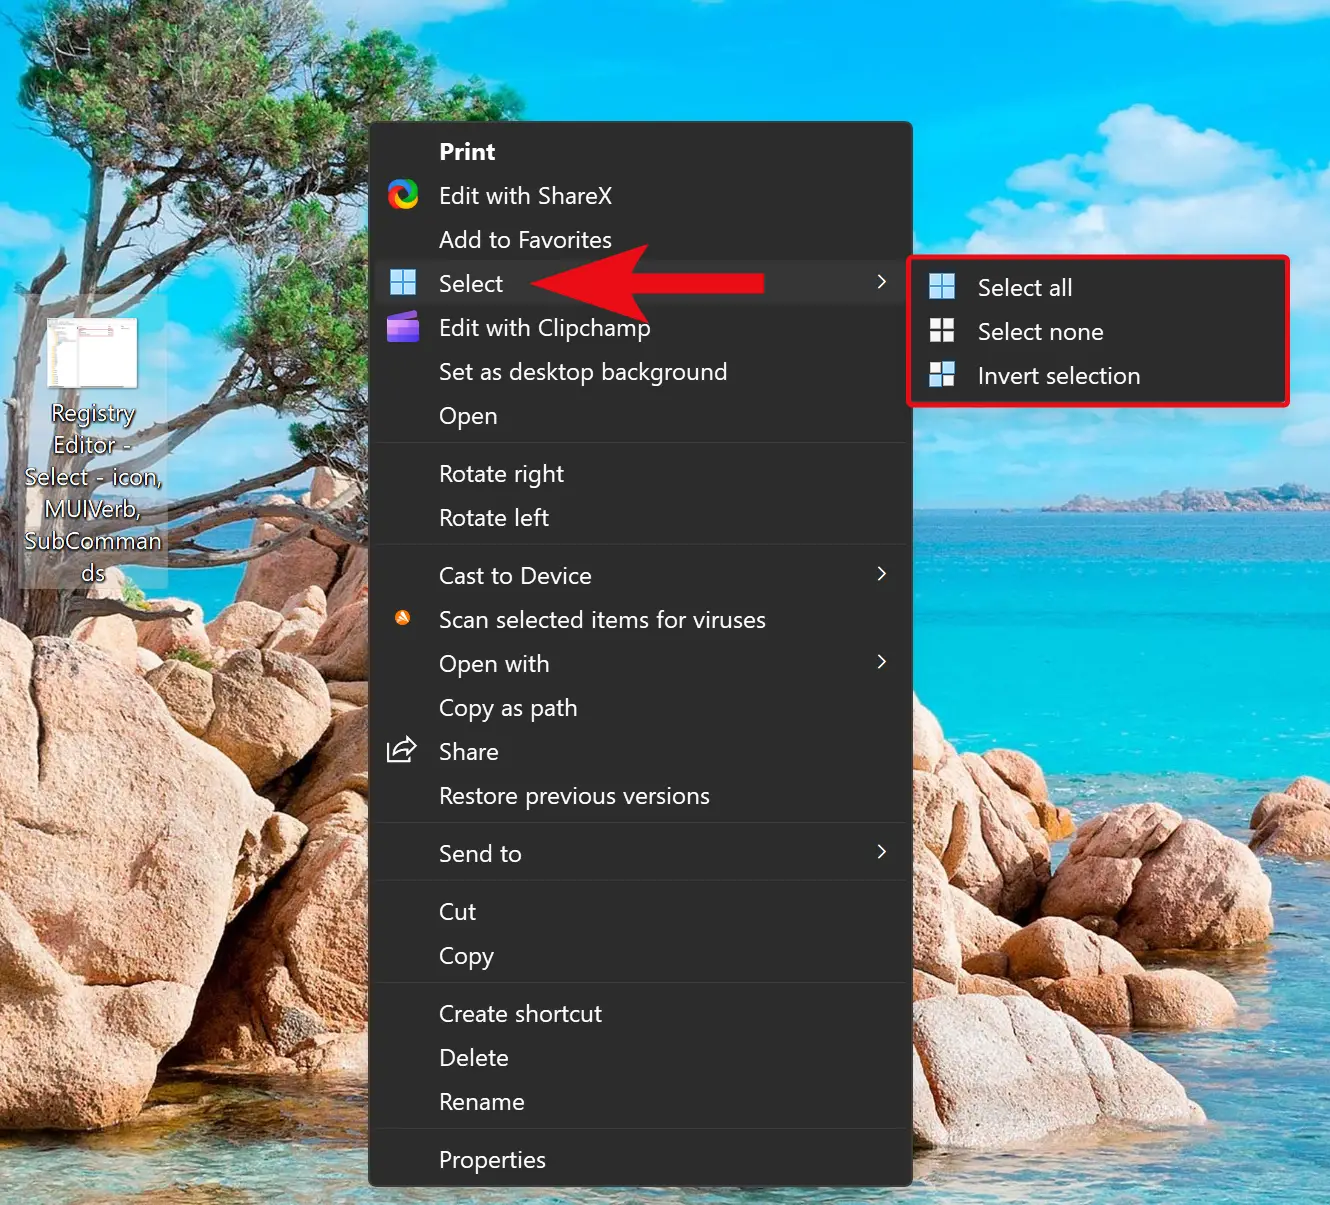
Now, when you select some item or right-click on an empty area on the Desktop or a folder, you will see the Select context menu. Accessing that menu, you will find “Select all,” “Select none,” and “Invert selection” options that you can use as per your needs.
If the above steps look difficult, open a Notepad file on your Windows 11 or 10 PC. To do that, click on the aStart button and type Notepad. Click on Notepad in the available search result to open the same.
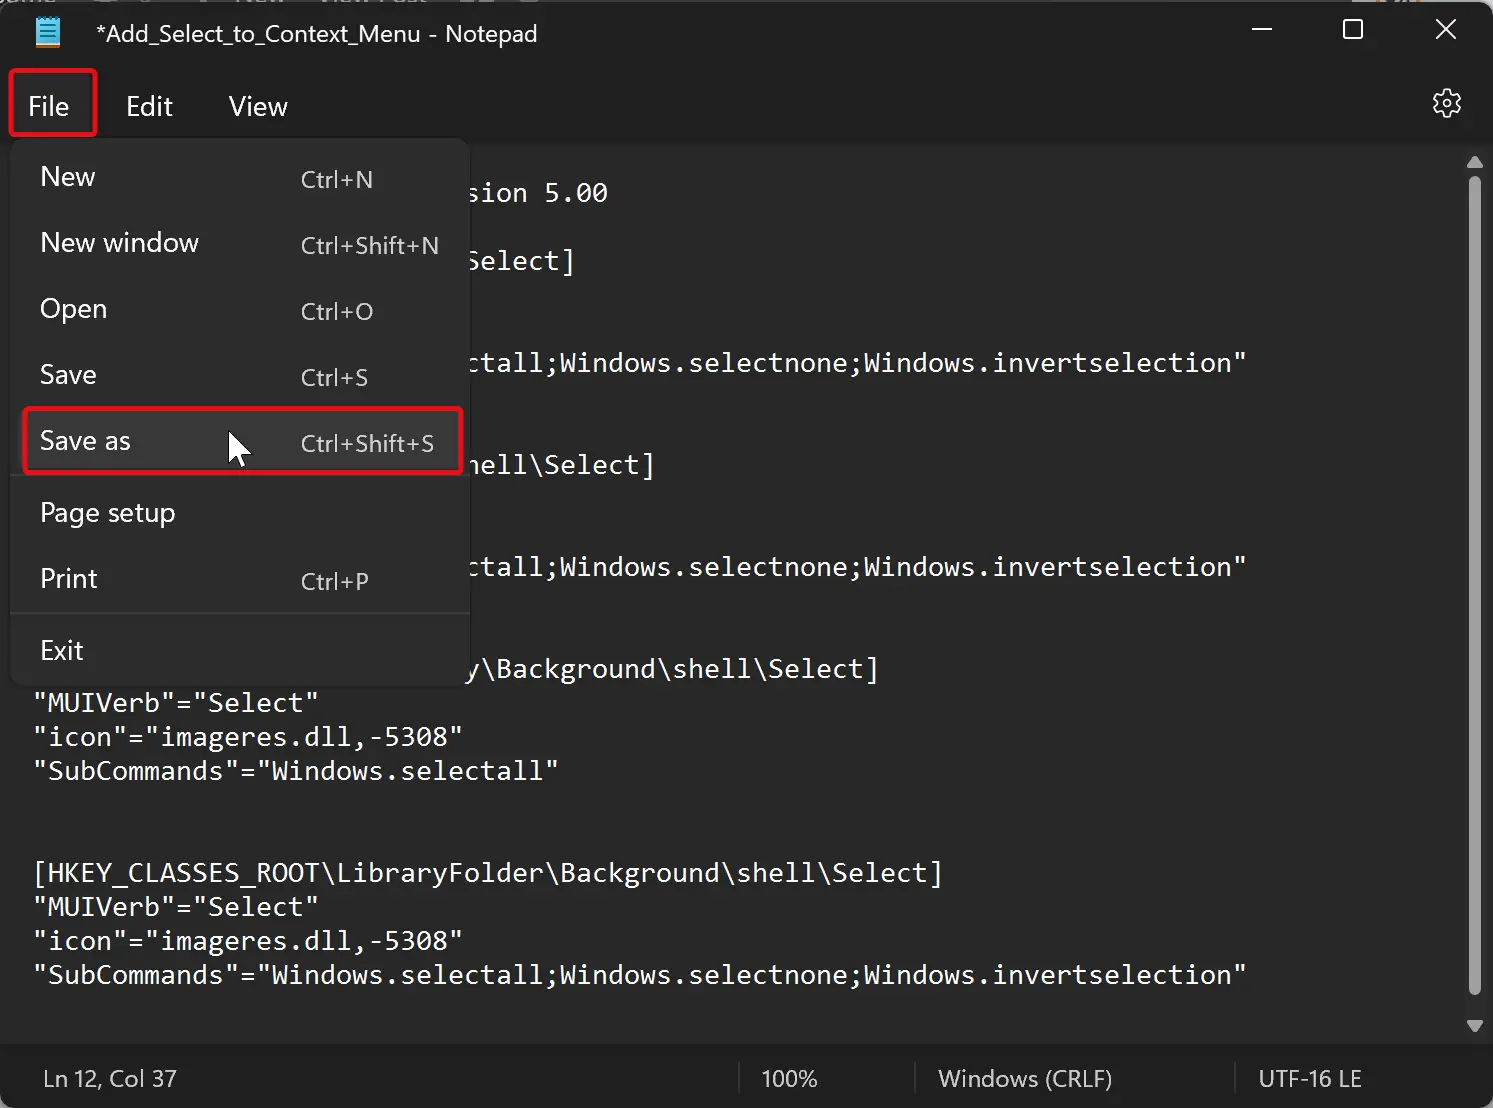
When Notepad opens on your computer, copy and paste the following:-
Windows Registry Editor Version 5.00


[HKEY_CLASSES_ROOT\*\shell\Select]

"MUIVerb"="Select"

"icon"="imageres.dll,-5308"

"SubCommands"="Windows.selectall;Windows.selectnone;Windows.invertselection"


[HKEY_CLASSES_ROOT\Folder\shell\Select]

"MUIVerb"="Select"

"icon"="imageres.dll,-5308"

"SubCommands"="Windows.selectall;Windows.selectnone;Windows.invertselection"


[HKEY_CLASSES_ROOT\Directory\Background\shell\Select]

"MUIVerb"="Select"

"icon"="imageres.dll,-5308"

"SubCommands"="Windows.selectall"


[HKEY_CLASSES_ROOT\LibraryFolder\Background\shell\Select]

"MUIVerb"="Select"

"icon"="imageres.dll,-5308"

"SubCommands"="Windows.selectall;Windows.selectnone;Windows.invertselection"

Then, click the File menu and select Save as option.
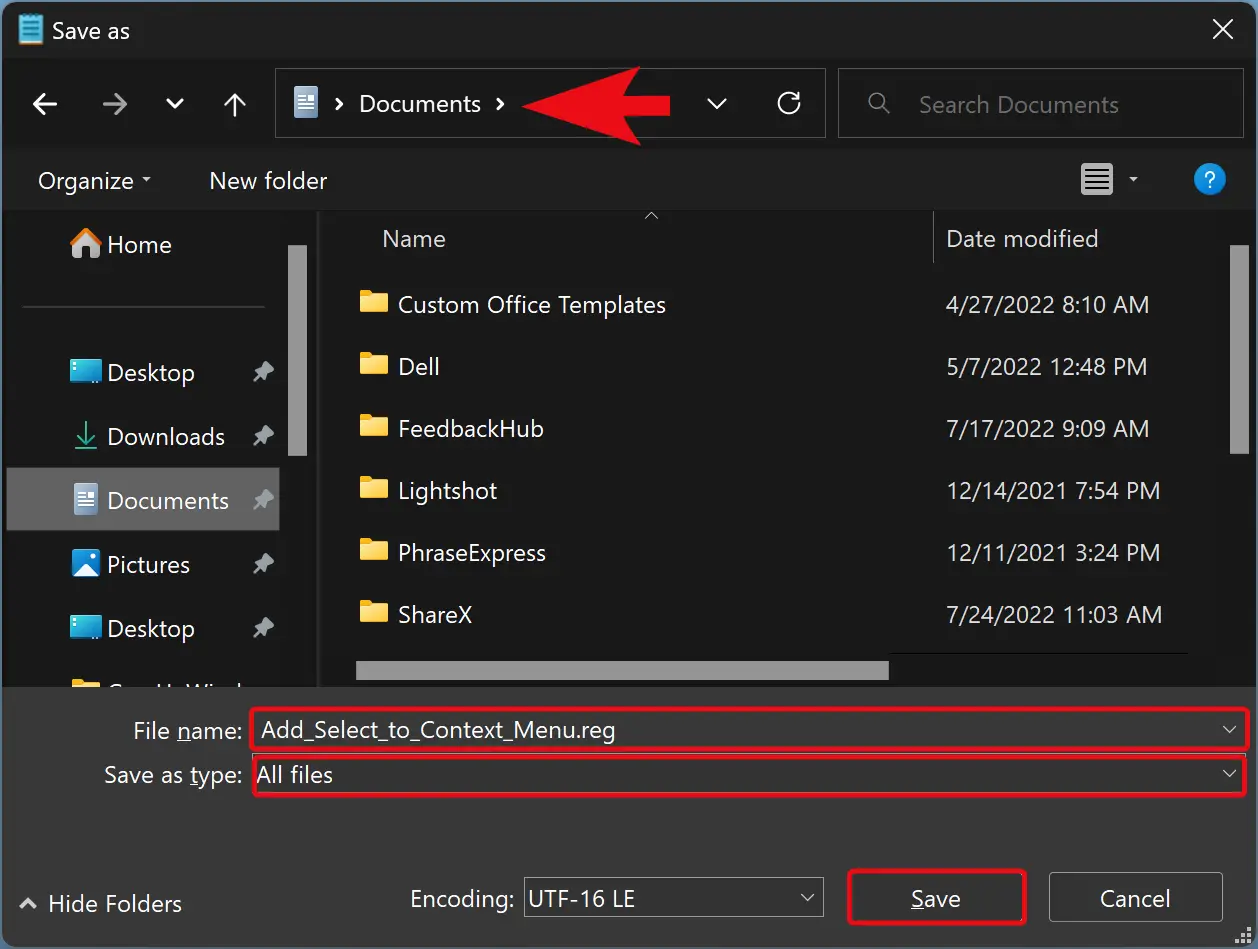
In the “Save as” dialog, select a location where you want to save the registry file. Then, name the file and put the “.reg” extension after the file name. Select All files in the “Save as type” drop-down menu. Finally, click the Save button.
Once you complete the above steps, you will find a “.reg” file in your chosen location.
To add the “Select” context menu, just double-click on the newly created “.reg” file and click the Yes button when prompted.
That’s it.
If you want to remove the Select context menu, open the Notepad file and paste the following text:-
Windows Registry Editor Version 5.00


[-HKEY_CLASSES_ROOT\*\shell\Select]


[-HKEY_CLASSES_ROOT\Folder\shell\Select]


[-HKEY_CLASSES_ROOT\Directory\Background\shell\Select]


[-HKEY_CLASSES_ROOT\LibraryFolder\Background\shell\Select]
Next, save the notepad file with a “.reg” extension and double-click on this file to remove the “Select” context menu from your PC.
Conclusion
In conclusion, selecting multiple files and folders in Windows 11 and Windows 10 can be done easily through the built-in options in the Ribbon menu or by using hotkeys. However, if you want to access these options more frequently, you can add them to the right-click context menu by following the steps outlined in this article. By creating a “Select” context menu, you can select all files or folders, invert selected items, and deselect all selected items. These options can be added using the Registry Editor or by creating and executing a “.reg” file. Removing the “Select” context menu is also possible by following the steps outlined in the article. Overall, these options can greatly improve your file management and organization in Windows 11 and Windows 10.