Local Group Policy Editor is a useful console of the Windows 10 operating system that lets you customize advanced system settings to system administrators and tech-savvy users. With the help of the Local Group Policy Editor, you can apply specific administrative policies for all users at a time.
The only caveat using this Microsoft Management Console (MMC) snap-in is that any policy you change will affect every user configured on the device because the built-in editor does not offer an option to apply the changes for a specific user. In other words, whatever policy you make through Local Group Policy Editor will apply to every user of your Windows 10 PC.
The problem arises when you share a computer with other users but want to create a Local Group Policy for a specific user or group. This post will share the steps to apply Windows 10 Local Group Policy settings to specific users.
How to apply Group Policy settings for a specific user on Windows 10?
To configure or apply administrative policies for a specific user on Windows 10, perform the following steps:-
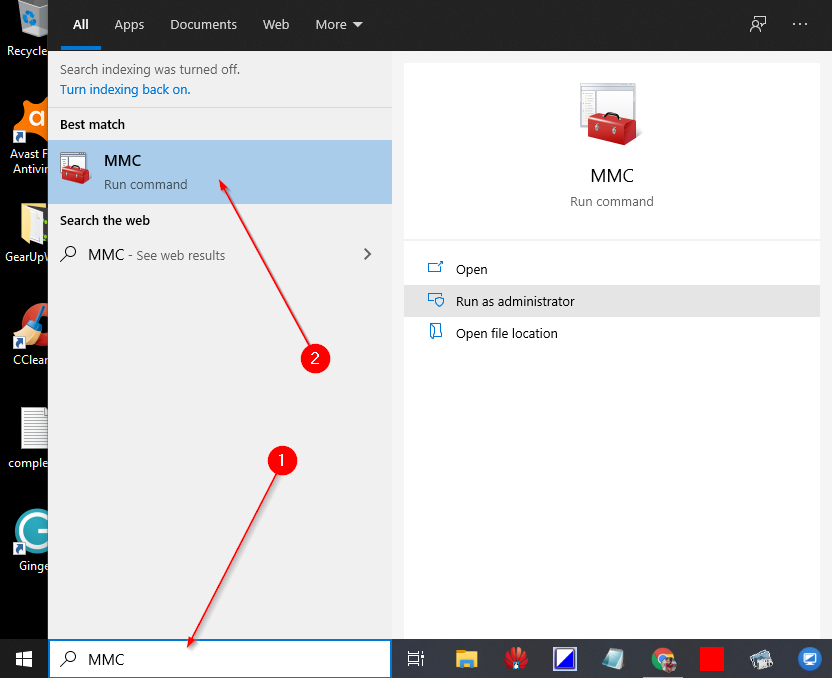
Step 1. Click on the Start button and type MMC.
Step 2. From the available results, click the MMC run command to launch the Microsoft Management Console.
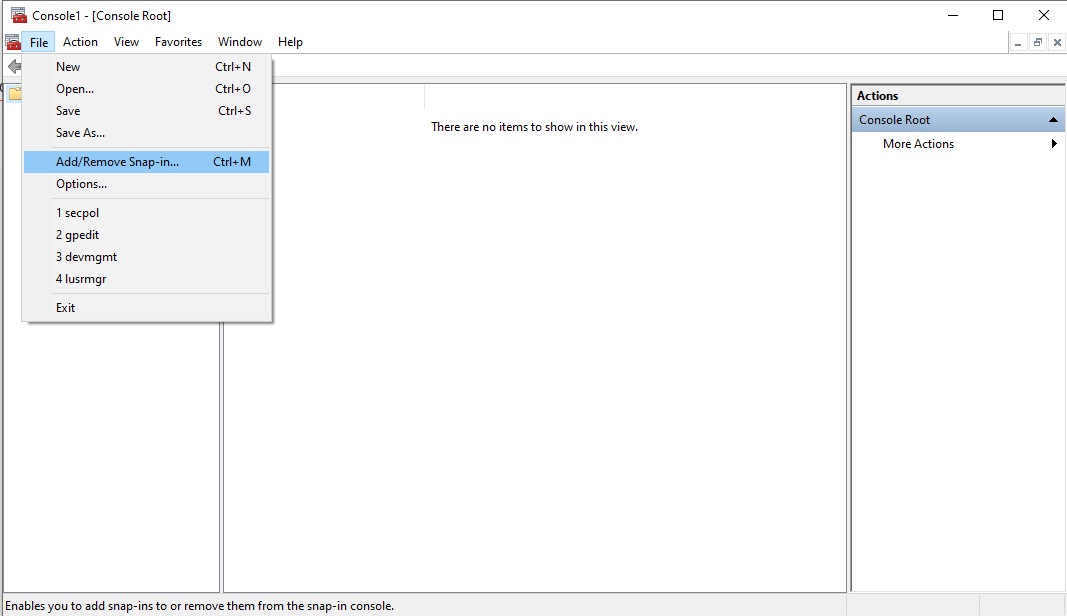
Step 3. On the console that opens, click the File menu and select the Add/Remove Snap-in option.
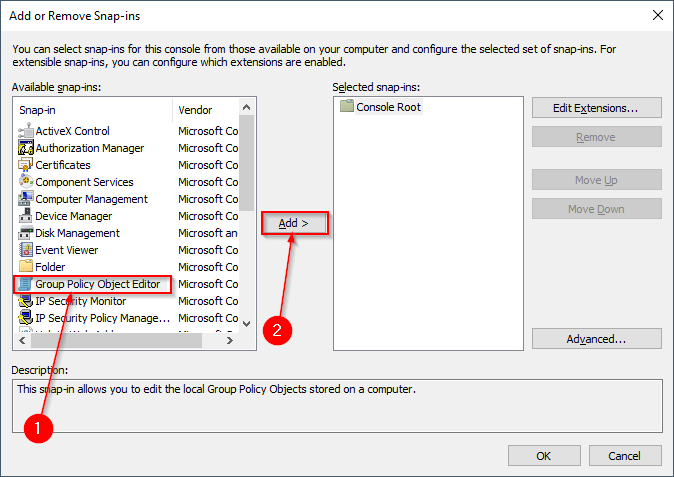
Step 4. In the “Available snap-ins” section, select the Group Policy Object Editor snap-in and then click the Add button.
Step 5. Select Group Policy Editor window will open.
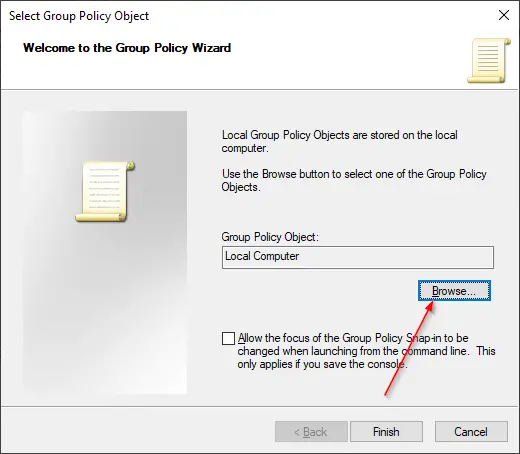
Step 6. Click the Browse button.
Step 7. Click the Users tab to list all the local groups and users on your PC.
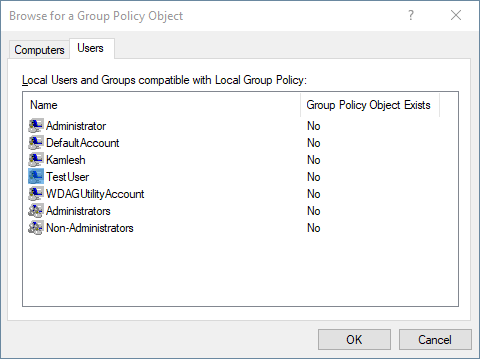
Step 8. Select the user or group for which you want to apply a specific set of rules or configurations.
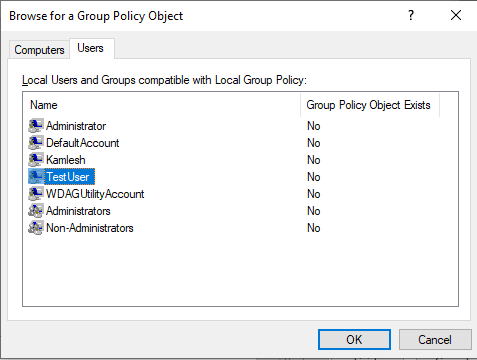
Step 9. Click the OK button.
Note: To change settings for users with a Standard User account, select Non-Administrators from the list.
Step 10. Click the OK button.
Step 11. Click the Finish button.
Step 12. Click the OK button.
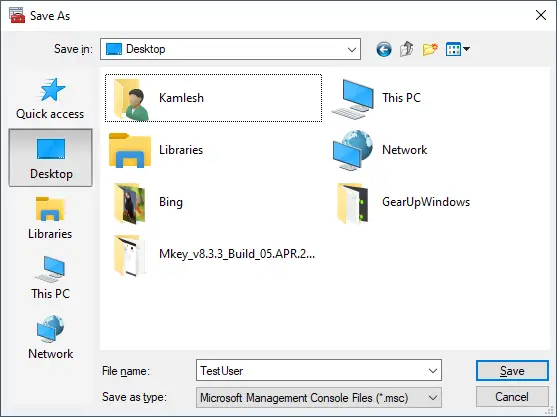
Step 13. Again, click the File menu and select the Save As option.
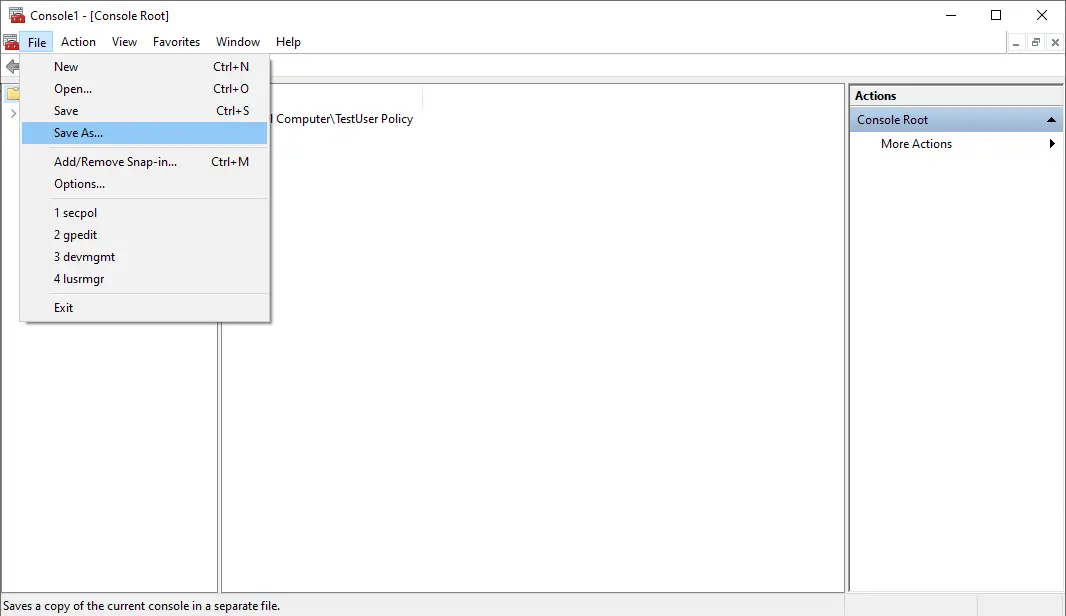
Step 14. Confirm a name for the snap-in. Select a location to store the console. Finally, click the Save button.
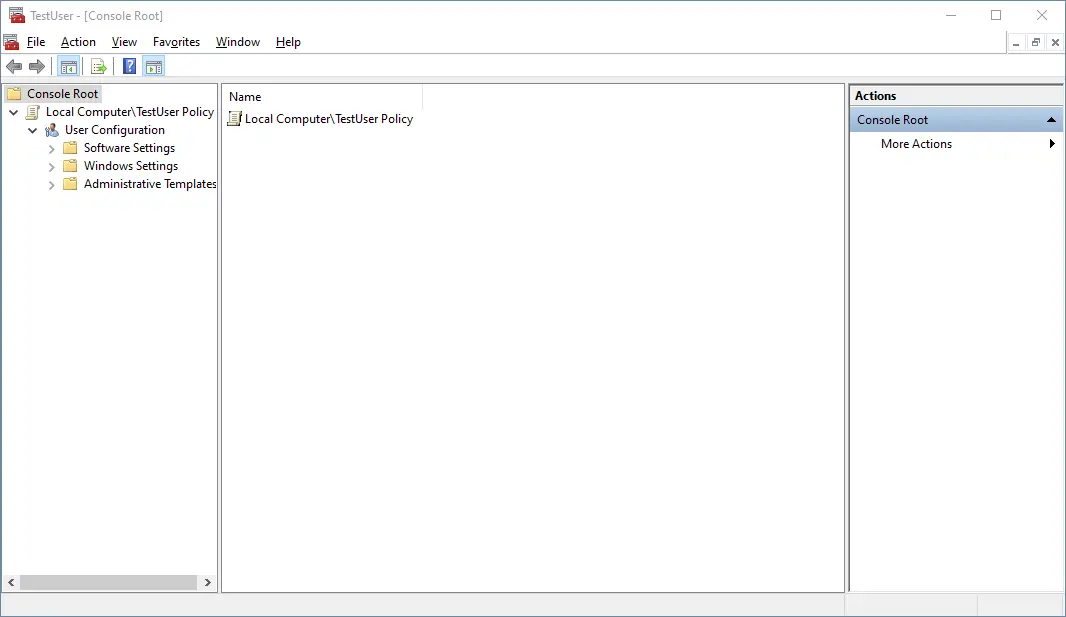
Once you have complete the above steps, you can use the new console (which you have saved in the above step) to set custom policies that will not affect other users or groups of users.