How do I associate an app with a file type? How do I associate a file type with an app in Windows 11/10? A default program is an application that Windows uses automatically when you open a particular file type. For instance, when you double-click a file with .txt, the Notepad application opens up. This is because the extension name .txt is associated with Notepad by default.
If you’ve ever tried to run a file in the wrong application, that file type gets associated with that app. However, there is a workaround to associate an application with the correct file extension. The “Open With” command will help you to fix it. After associating a particular file type with an app, you are good to go. You don’t have to repeat these steps again and again.
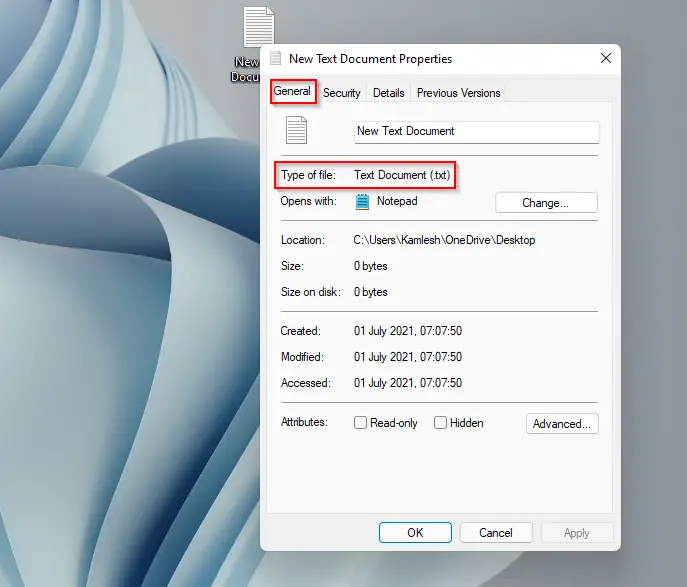
If you aren’t sure which file type you want to change the association of, right-click your desired file and select the Properties option from the context menu. Head over to the General tab in the properties dialog box that opens. Next to “Type of file,” you will see a three-letter designation that is its file type. You can do it on an individual file type basis or change all of them from one location.
Sometimes, you might want to change file association from the default program to your favorite app. For instance, Windows 11/10 opens a photo (.png) with the Photos application when you double-click on a .png image. But you have installed the Greenshot application and want to open all the .png images with the greenshot application and not with the Windows default Photos application. Here, the re-association of files becomes handy.
There are two methods to re-associate the file with a favorite program on Windows 11/10. These are the following:-
- Using Control Panel
- From Context Menu
Using these methods, you can also re-associate any file type on Windows 8.1/8/7 too.
How to Associate a File Type with a Specific App Using Control Panel?
To associate a file type with a specific app through Control Panel, do these steps:-
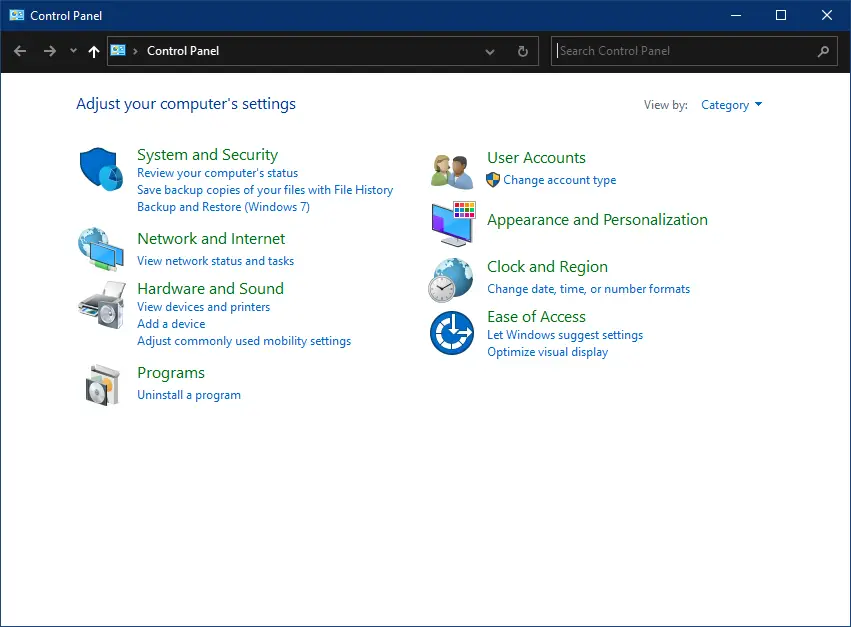
Step 1. Open Control Panel.
To access Control Panel, click on the Start button and search for it by typing its name.
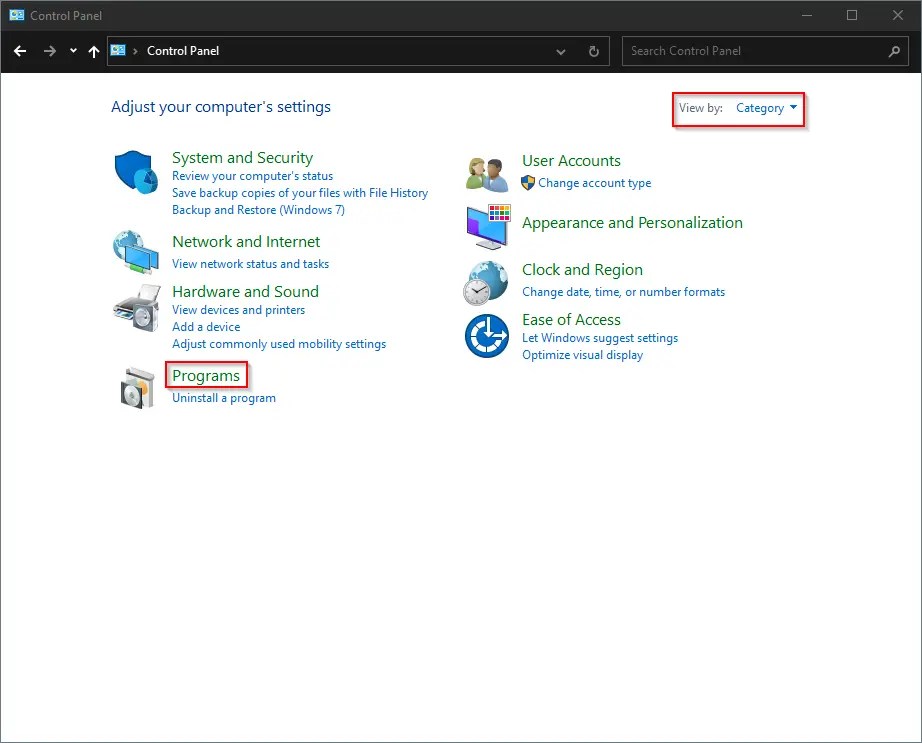
Step 2. Ensure “View by” is set to Category and then click on the Programs.
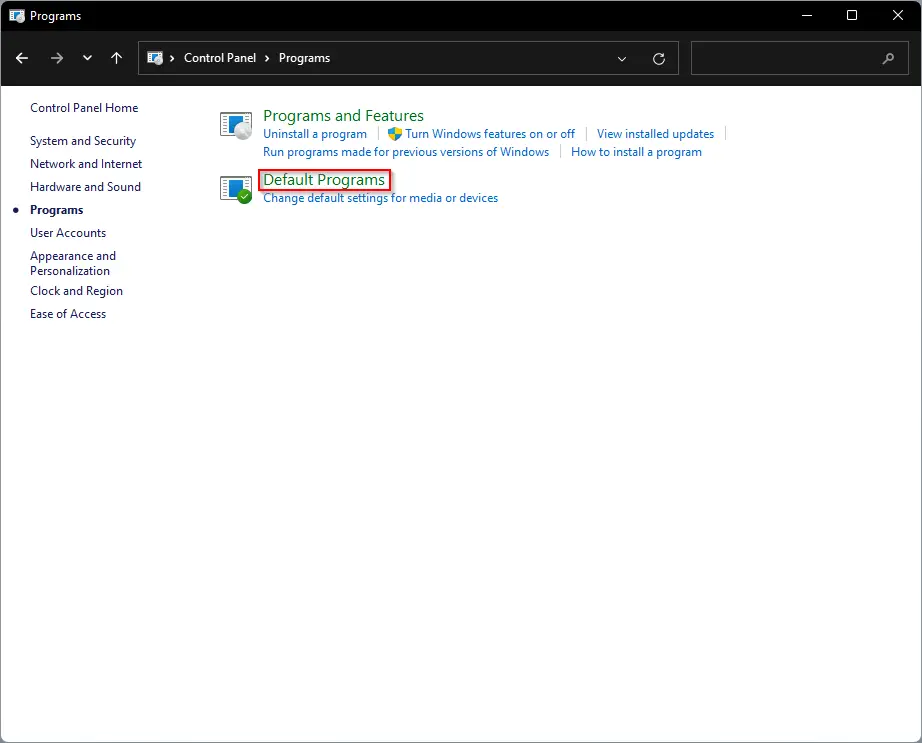
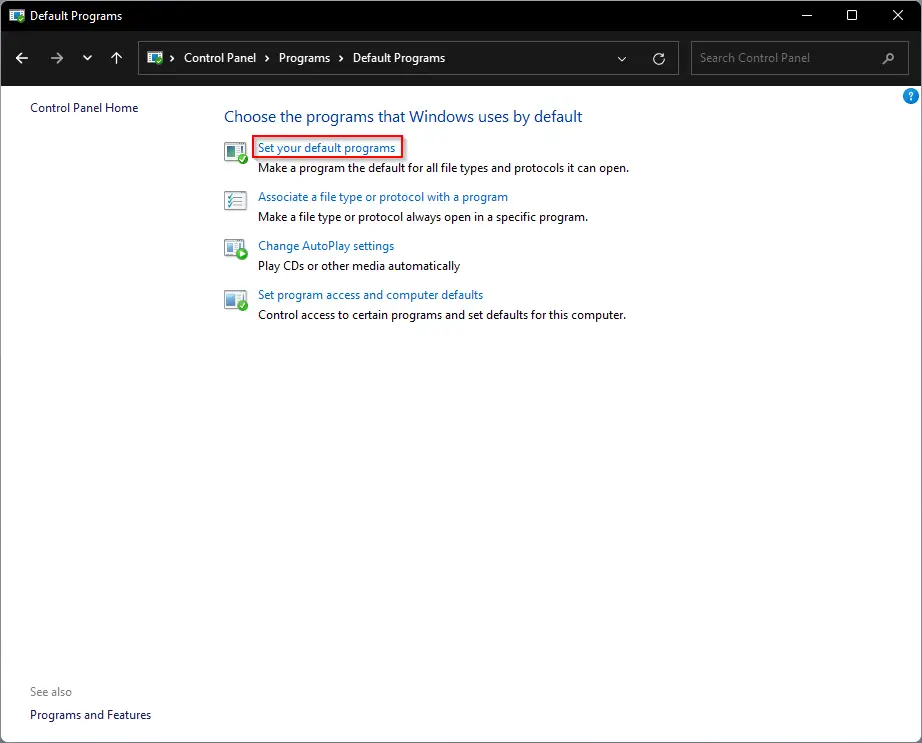
Step 3. In the resulting window, click on the Default Programs.
Step 4. Next, click on the Set your favorite programs option.
In Windows 11 and 10, now Settings app will open. In Windows 7/8/8/1, you can continue in the same window.
On Windows 10
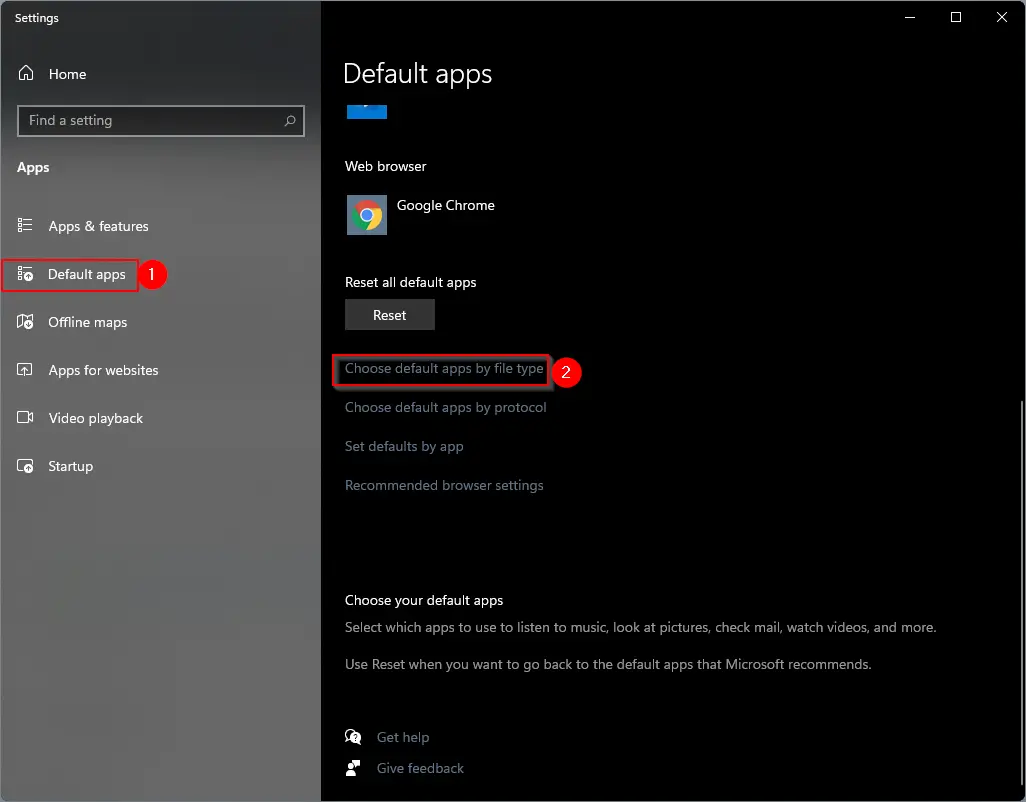
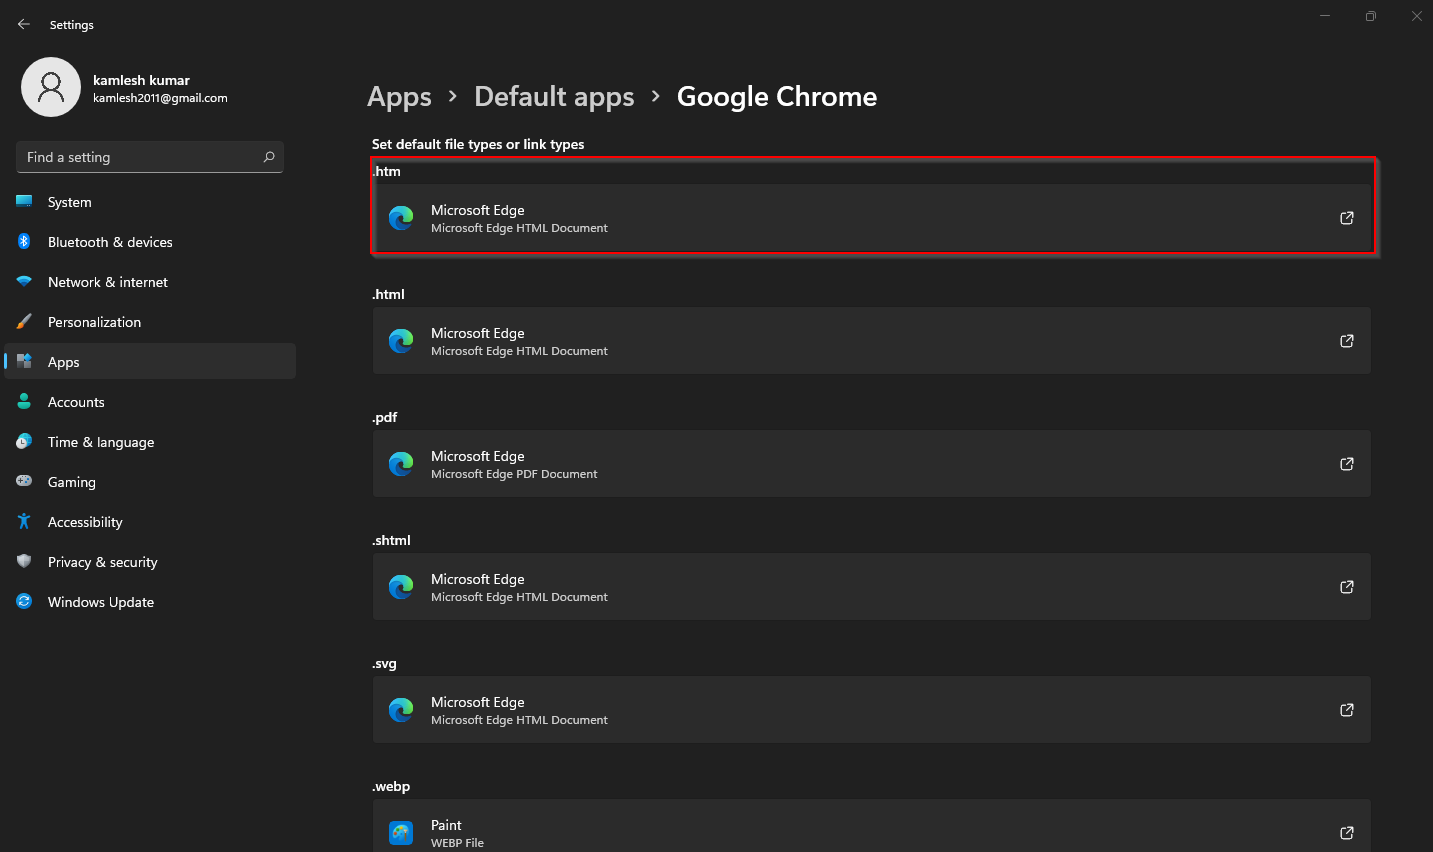
Step 5. On the left side of the Settings window, click the Default apps tab. On the right side of it, scroll down to see the link “Choose default apps by file type.” Click on this link to open the next window.
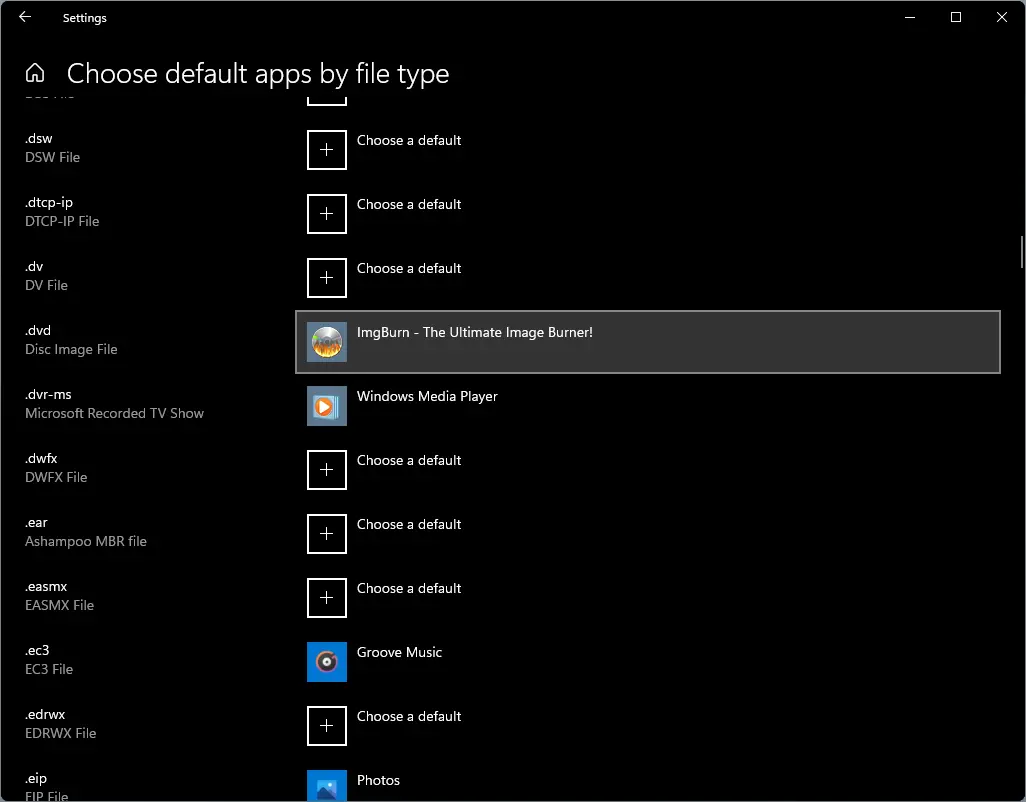
Step 6. Here, you will see all file extensions available on your PC and the default program name with which it is associated. Click on the program name next to the file association to set your favorite app as the default program.
That’s all. When you double-click on the file, that will open with your favorite default program.
On Windows 11
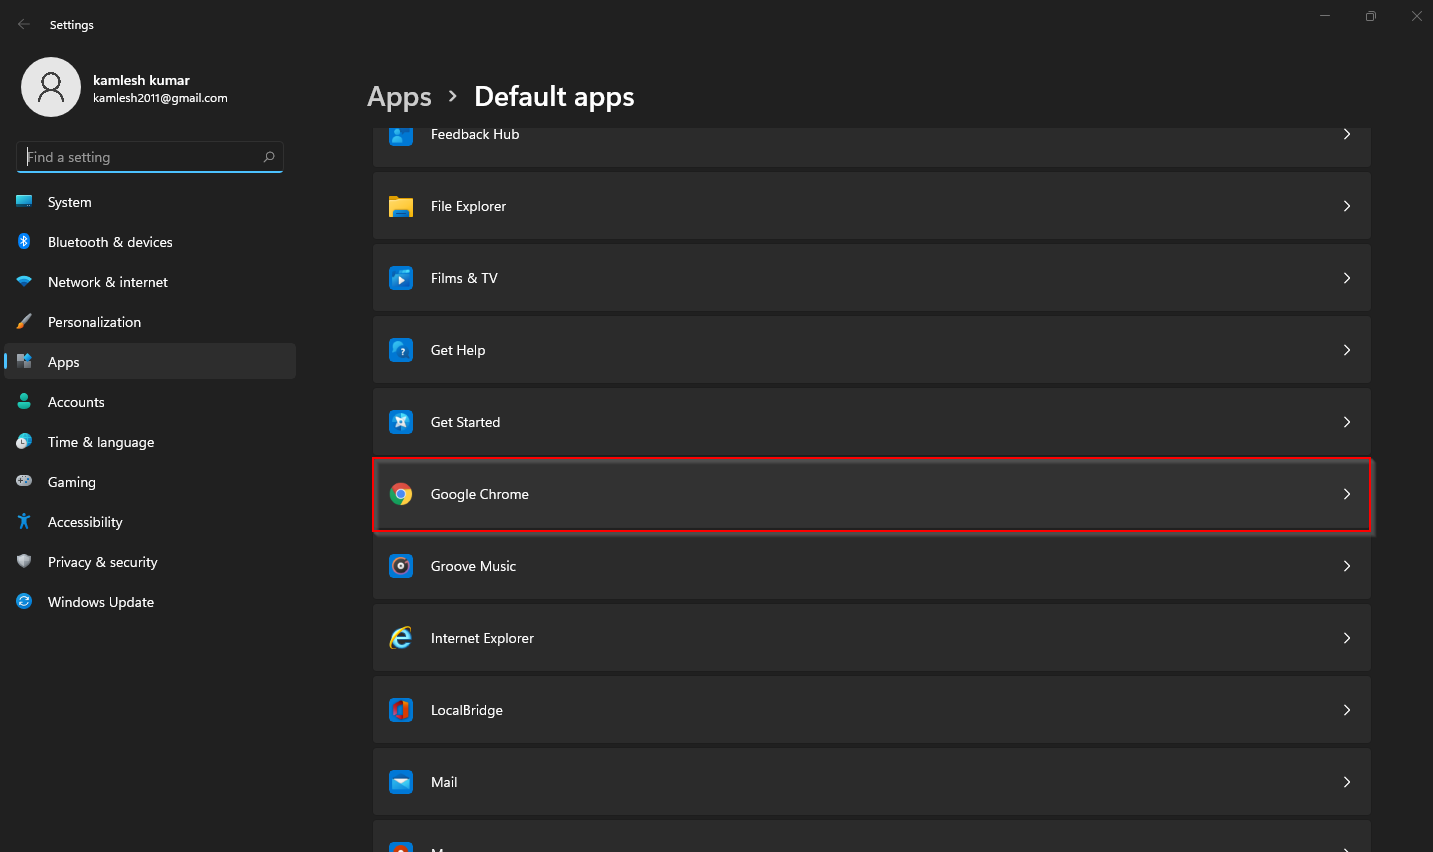
Step 5. Click on the installed application name you want to assign as default for any specific file type.
Step 6. You will see a list of extensions of files, for that your application can be used as the default program. Click on the specific file extension that you want to set your favorite program as the default application.
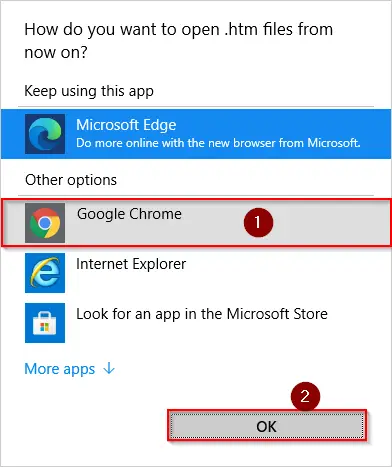
Step 7. From the pop-up window, select the desired program and then click the OK button.
How to Associate a File Type with a Specific App Using Context Menu?
Using Context Menu allows you to quickly set a default program for a specific file type on Windows PC. Perform the following steps:-
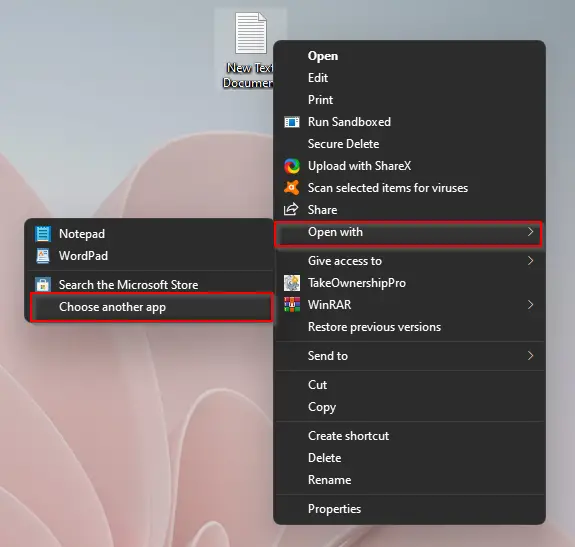
Step 1. Right-click on the file you want to change the file association with and select Open with and then Choose another app option from the pop-up menu.
Step 2. In the pop-up window that appears, you will see the default program as well as other app lists. If still, you do not find your favorite app, then click the More apps option to see an even more programs list.
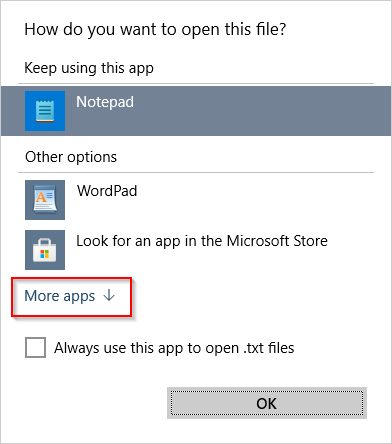
Step 3. Select your desired program through which you want to open the specific file type and then check the option Always use this app to open files. Finally, click OK to apply the changes.
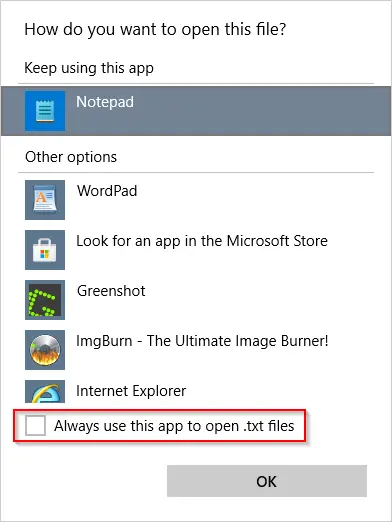
Now, when you double-click on that type of file, it will open with your selected application by default. There is no need to right-click and select the desired program again and again when you want to open that type of file on your Windows 11 or 10 PC.
Conclusion
In conclusion, associating a file type with a specific app on Windows 11/10 is a useful feature that allows users to open files with their preferred applications. Windows 11/10 comes with default programs that are automatically used when opening certain file types. However, if you prefer a different app to open a particular file type, you can easily re-associate the file type with your preferred app using Control Panel or the Context Menu. By following the steps outlined in this article, you can quickly and easily set your default program for any file type on your Windows PC, saving time and making your work more efficient.
The method on this page (https://gearupwindows.com/how-to-associate-a-file-type-with-a-specific-app-on-windows-11-10/) DOES NOT work on Windows 11. .JPG, PNG, GIF, etc. etc. are not presented for IRFANVIEW (image viewer avilable free via good search)