Microsoft has added a new account lockout policy in Windows 11 to help protect users against password brute-force attacks. If you are using Windows 11 Insider build version 22H2, you can avail of this feature. The rest of the Windows users need to wait for updates.
When someone tries to access your account remotely or locally, this new policy will block the user account for 10 minutes.
The new lockout policy will protect all user accounts, including the built-in Administrator account. If you or someone else tries to access your computer after ten failed login attempts, the account will be locked for 10 minutes. After the 10 minutes lockout, the counter will automatically be reset by default.
The “account lockout duration” policy determines the number of minutes a locked-out account remains locked before automatically unlocking. By default, this policy is set to 10 minutes. However, if you need, you can change this duration from 1 to 99,999 minutes. While a value of 0 specifies that the account will be locked out until an administrator explicitly unlocks it.
In this gearupwindows article, we will guide you on changing Account Lockout Duration in Windows 11.
How to Change Account Lockout Duration in Windows 11 using Group Policy?
To change or set account lockout duration in Windows 11 using Group Policy, use these steps:-
Step 1. Open Local Group Policy Editor.
Step 2. Then, browse or navigate to the following path in the left sidebar of the Local Group Policy Editor window:-
Computer Configuration > Windows Settings > Security Settings > Account Policies > Account Lockout Policy
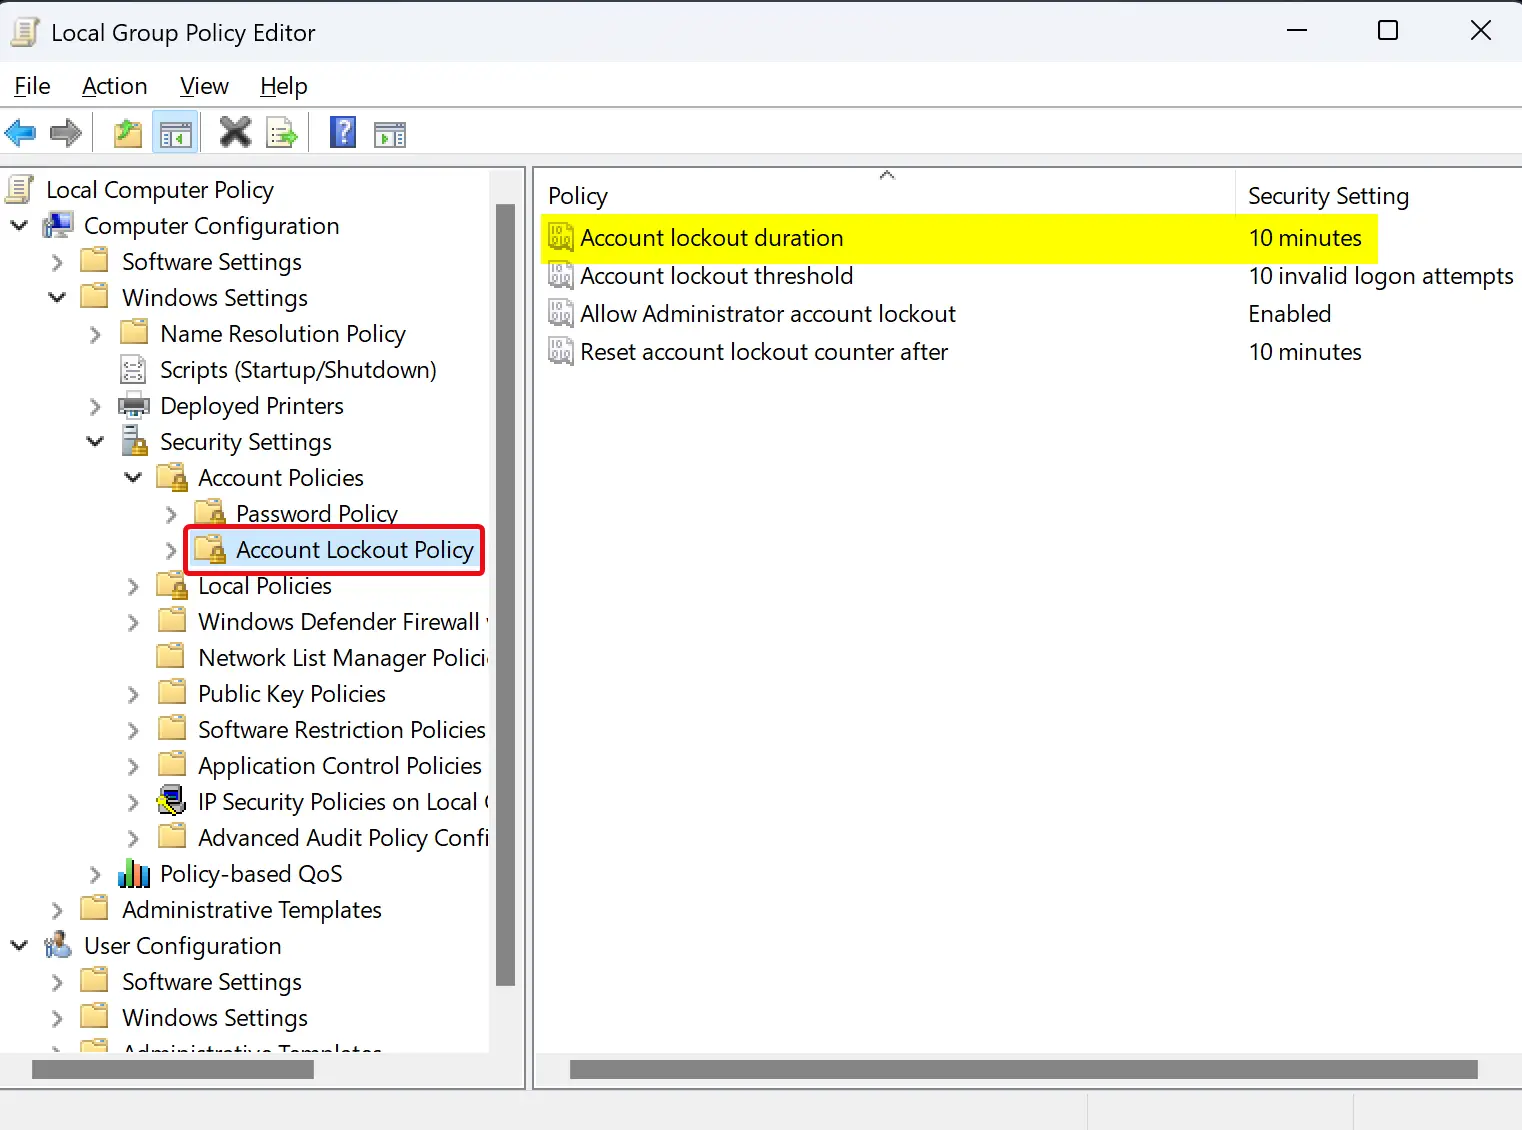
Step 3. On the right side of the “Account Lockout Policy” folder, double-click on the policy name Account lockout duration.
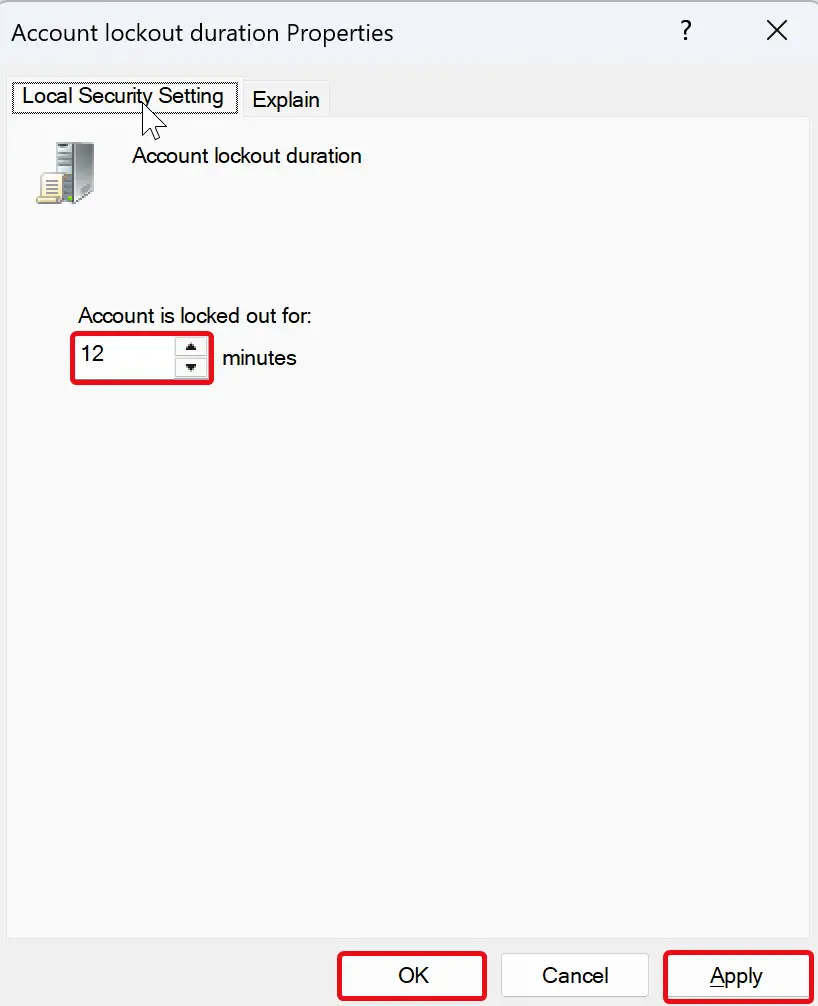
Step 4. Switch to the “Local Security Setting” tab and set the “Account is locked out for” time in minutes.
Step 5. Click Apply.
Step 6. Click OK.
Step 7. Finally, reboot your computer to apply the changes.
Once you complete the above steps, when someone remotely or locally tries to access your account with the wrong password ten times, your account will be locked out and automatically unlocked after your set time.
How to Change Account Lockout Duration in Windows 11 through Command Prompt?
If you prefer to use Command Prompt for various administrative tasks, use these steps to change account lockout duration in Windows 11:-
Step 1. Open an elevated Command Prompt window.
Step 2. Then, type the following command and press the Enter key to view the current Lockout duration (in minutes):-
net accounts
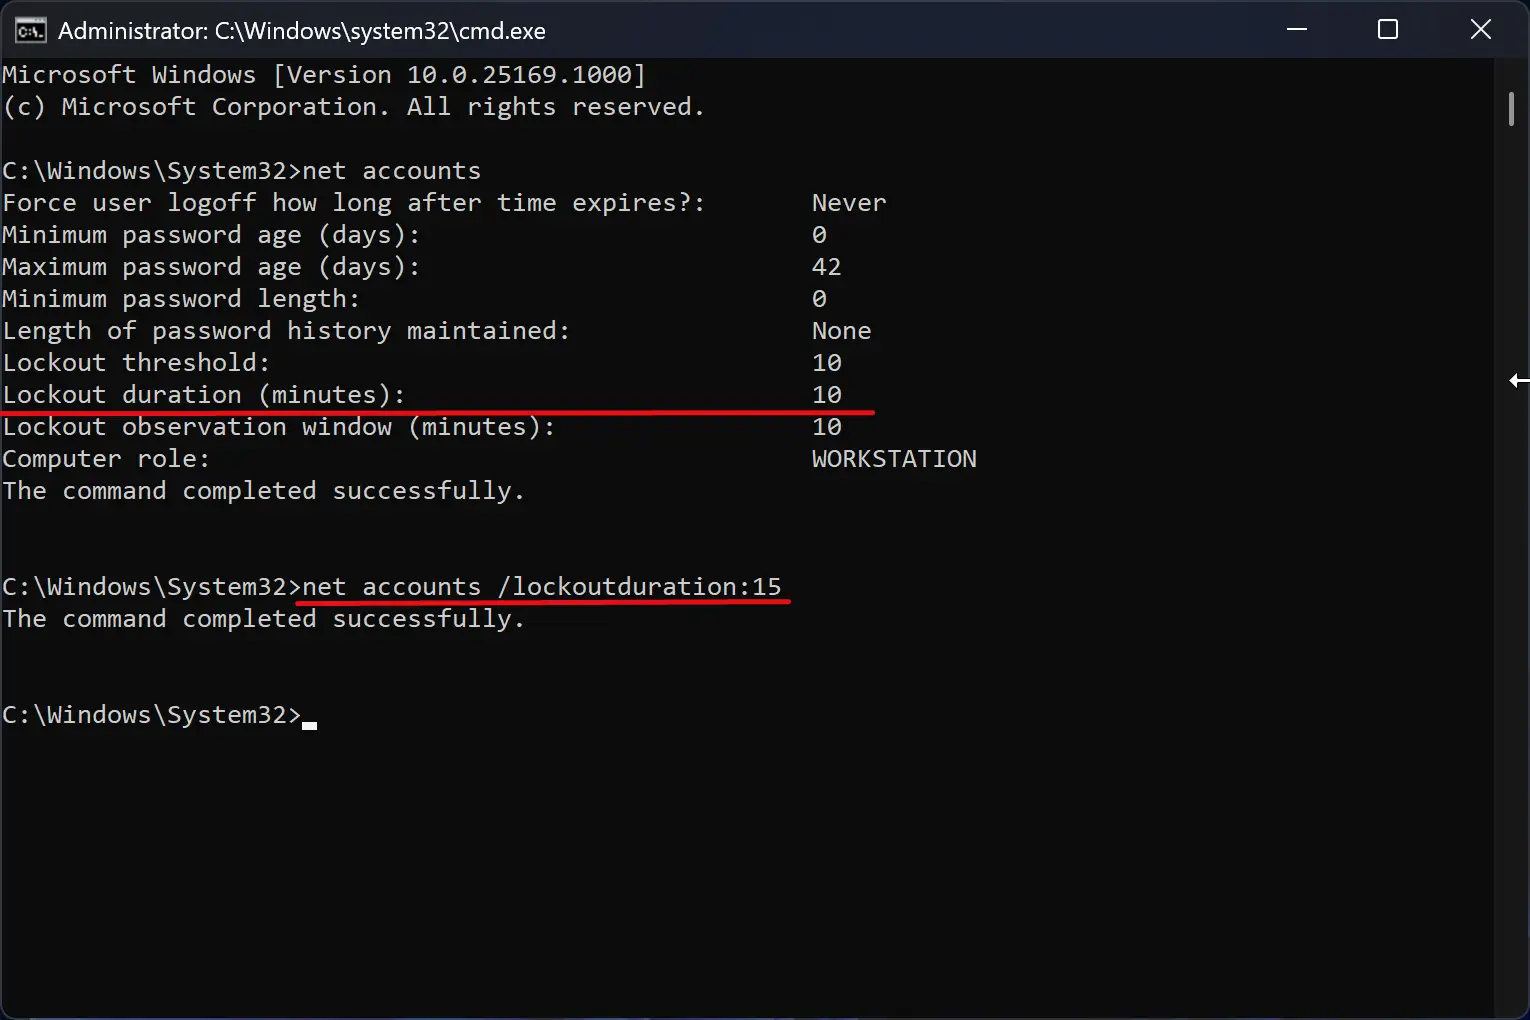
Step 3. Next, type the command and press the Enter key on the keyboard:-
net accounts /lockoutduration:<number>
Note: Replace <number> in the above command with a number between 0 and 99999 minutes you want for how long an account should be locked out before automatically unlocking.
Conclusion
In conclusion, Microsoft has introduced a new account lockout policy in Windows 11 to protect users from password brute-force attacks. This policy automatically blocks user accounts for 10 minutes after ten failed login attempts, including the built-in Administrator account. The “account lockout duration” policy determines the duration of a locked-out account before automatically unlocking, which can be changed from 1 to 99,999 minutes or set to 0 for an indefinite lockout.
In this Gearupwindows article, we have provided step-by-step instructions on how to change the account lockout duration in Windows 11 using the Local Group Policy Editor or the Command Prompt. By following these steps, you can customize the lockout duration to suit your needs and enhance your system’s security.