When someone attempts to log in to your Windows 11 PC with more than ten unsuccessful passwords, Windows will lock your account for security. Windows keep a record of unsuccessful login attempts until you reset it manually, or Windows does it automatically after 10 minutes.
The “Account lockout threshold” policy determines the number of failed sign-in attempts and then locks the user account. A locked account cannot be used until the administrator resets it manually or Windows resets it automatically after a set time. You can set a value from 1 to 999 failed sign-in attempts or specify that the account will never be locked by setting the value to 0. By default, this value is set to 10. If the “Account lockout threshold” is set to a number greater than 0, the “Account lockout duration” must be greater than or equal to the value of the “Reset account lockout counter after.”
How to Change Account Lockout Threshold in Windows 11 using Group Policy?
To change the account lockout threshold in Windows 11, use these steps:-
Step 1. Open Local Group Policy Editor.
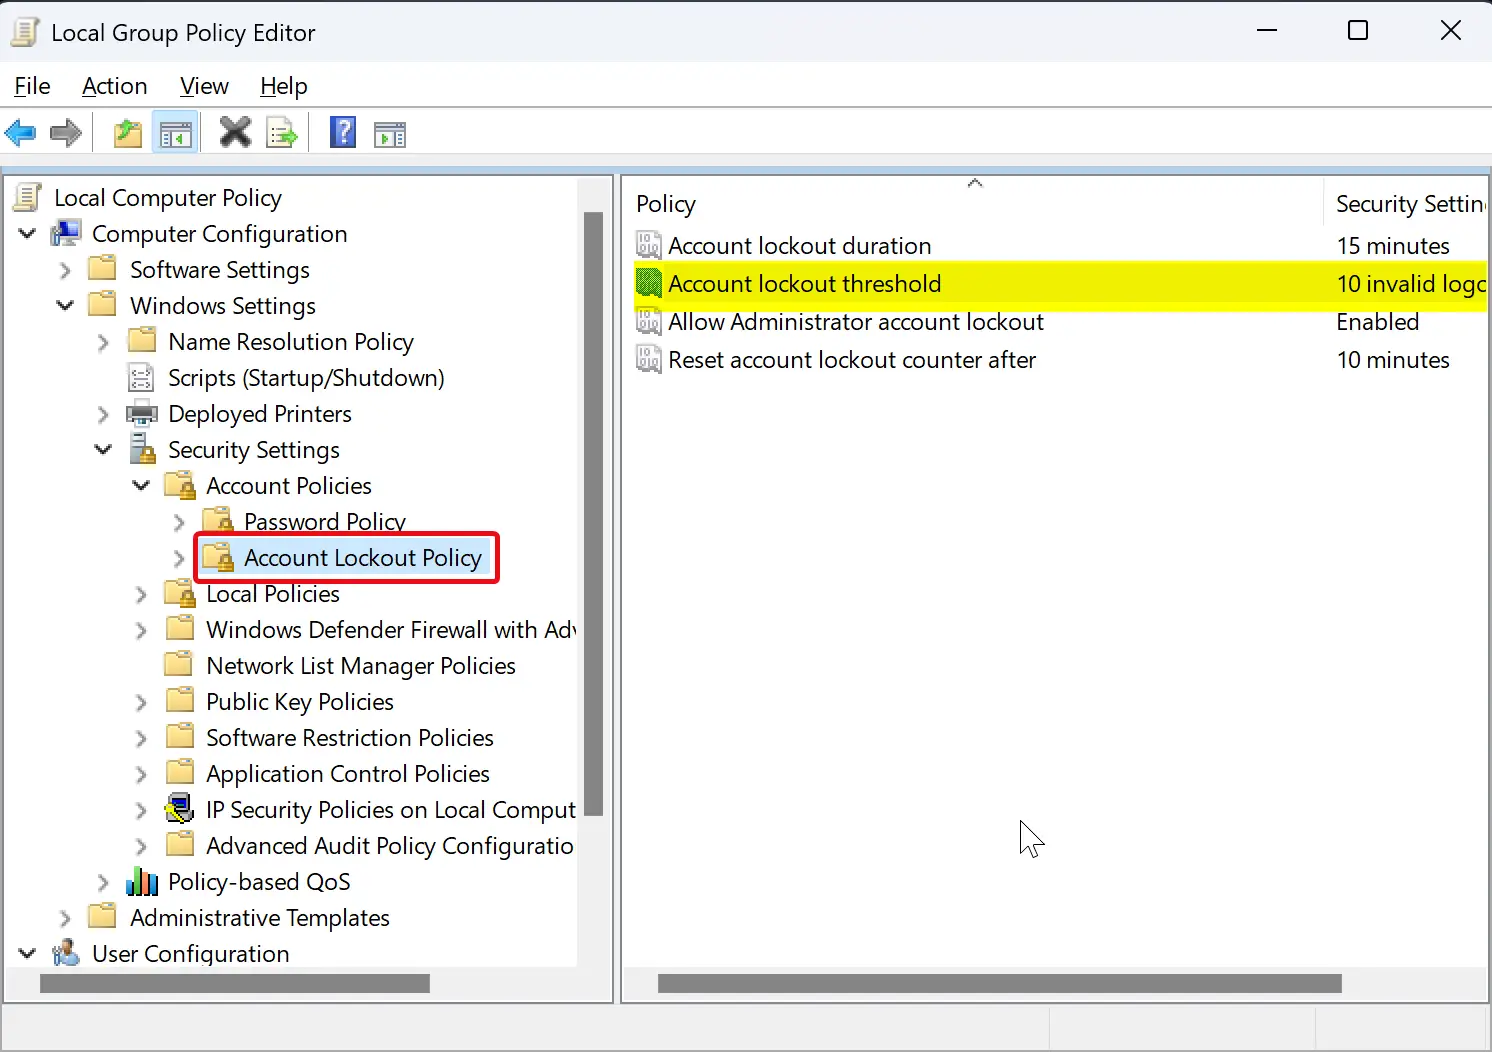
Step 2. Then, browse or navigate to the following path in the left sidebar of the Local Group Policy Editor window:-
Computer Configuration > Windows Settings > Security Settings > Account Policies > Account Lockout Policy

Step 3. On the right side of the “Account Lockout Policy” folder, double-click on the policy name Account lockout threshold.

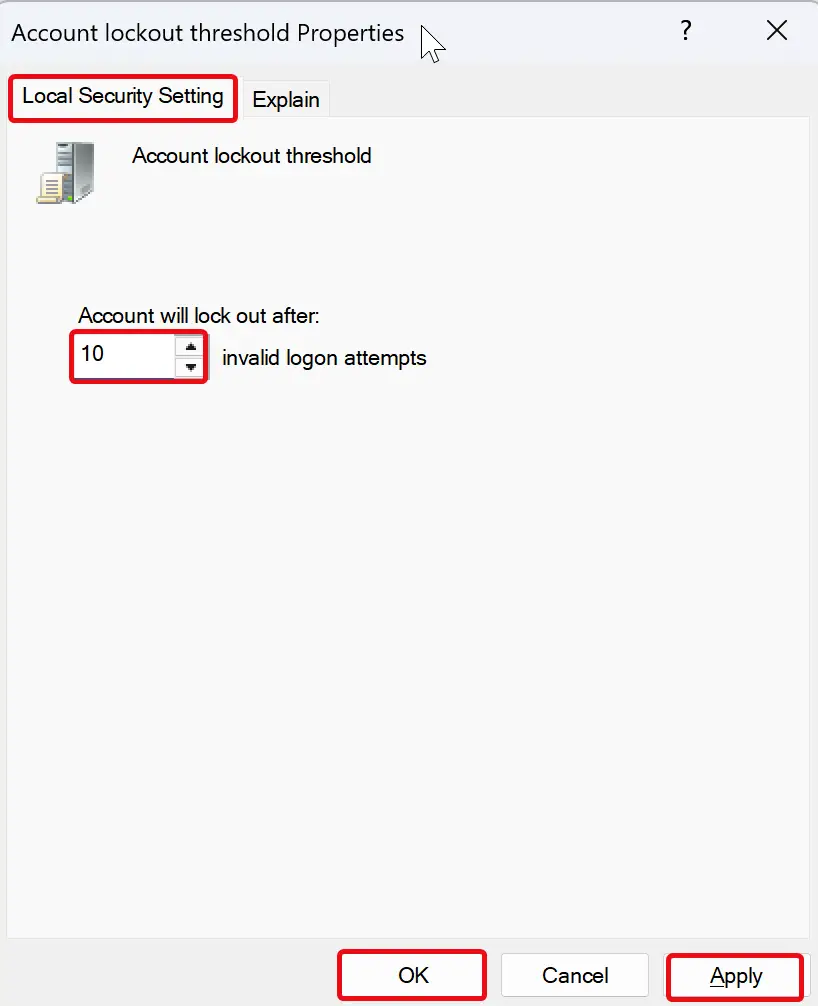
Step 4. In the “Account lockout threshold Properties” dialog, switch to “Local Securing Setting.”
Step 5. Set a new number of invalid logon attempts before an account is locked.
Step 6. Click Apply.
Step 7. Click OK.
How to Change Account Lockout Threshold in Windows 11 through Command Prompt?
To change the account lockout threshold in Windows 11 using Command Prompt, do these steps:-
Step 1. Open an elevated Command Prompt window.
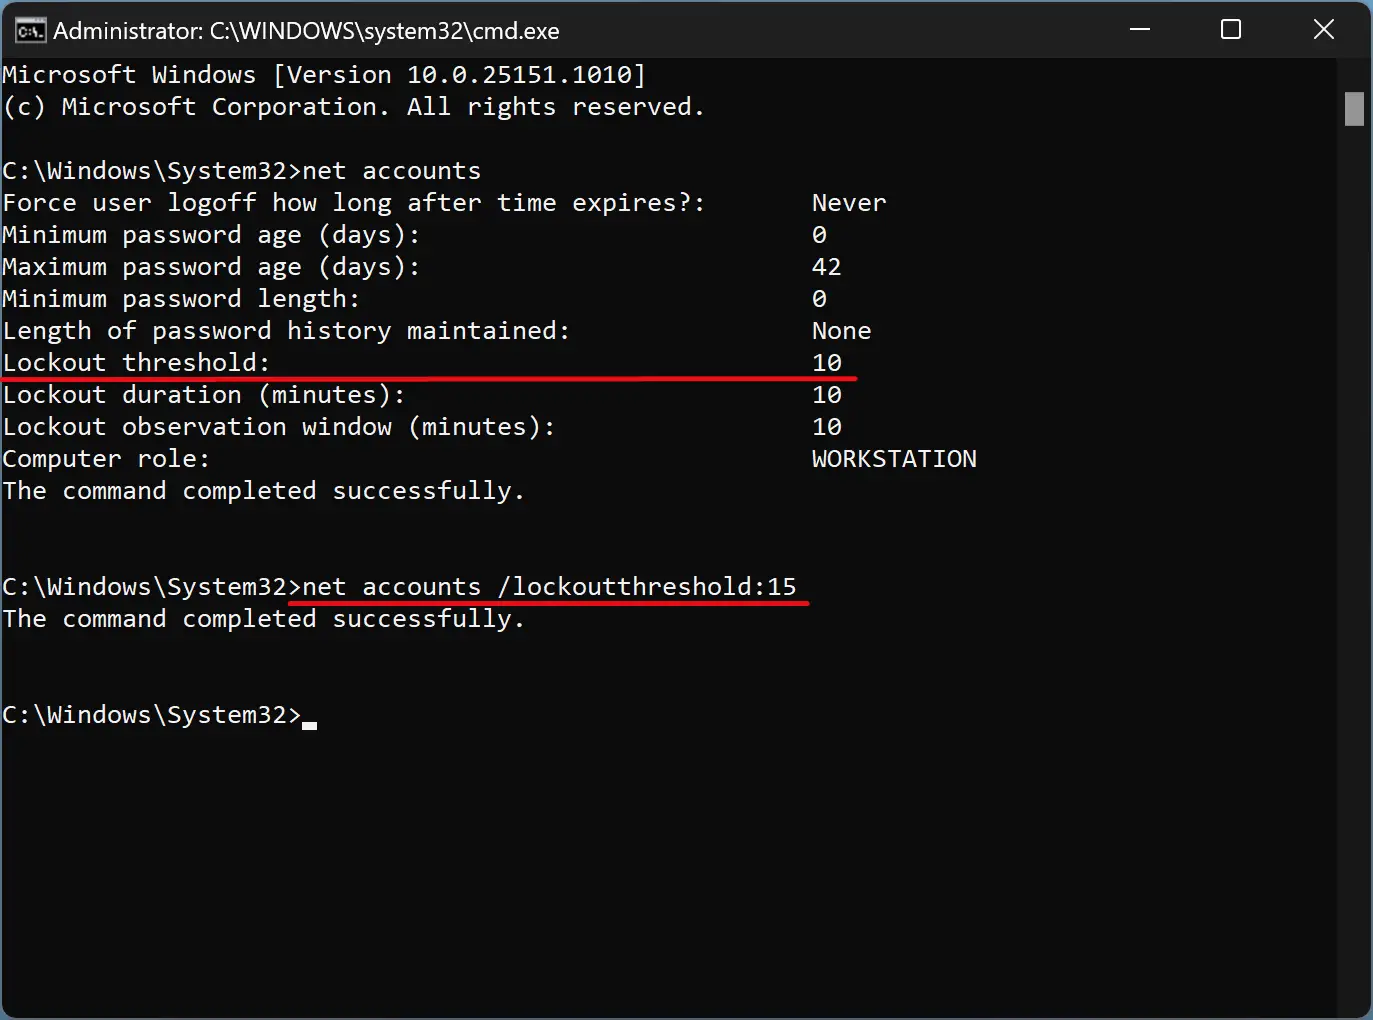
Step 2. Then, type the following command and press the Enter key to view the current settings for the Lockout threshold:-
net accounts

Step 3. Next, type the following and press the Enter key on the keyboard to set a new lockout threshold:-
net accounts /lockoutthreshold:<number>
Note: Replace the <number> in the above command line with a number between 0 and 999 for how many invalid login attempts you want until locked out after.
Once you complete the above steps, a new lockout threshold will be set for your user account on your Windows 11 machine.
Conclusion
Account lockout threshold policy is a security measure that prevents unauthorized access to your Windows 11 PC. It locks the user account after a certain number of failed login attempts, and it cannot be used until an administrator manually resets it or the account lockout duration policy setting expires. In this article, we have shown you two methods to change the account lockout threshold in Windows 11, using Local Group Policy Editor and Command Prompt. By following the steps provided, you can set a new value for the number of invalid login attempts before the account is locked. It is recommended to set a value that suits your security needs while ensuring that it doesn’t cause inconvenience to legitimate users.