Windows 11 allows you to choose your system region and country during the initial setup process, but what if you want to change it later? There could be several reasons why you might need to change the system region or country in Windows 11, such as testing Android apps that are only available in certain regions or simply moving to a new country. This guide will show you how to change the country or region in Windows 11 through the Settings app, so you can access the features and content that are specific to your desired location.
How to Change Country or Region in Windows 11?
Since the Android app’s support is limited only to the US for now, you might want to change the current region to the US to install the Android app if you are based out of the country. To set up a new country or region in Windows 11, do the following:-
Step 1. First, open the Settings app by pressing the Windows + I keys.
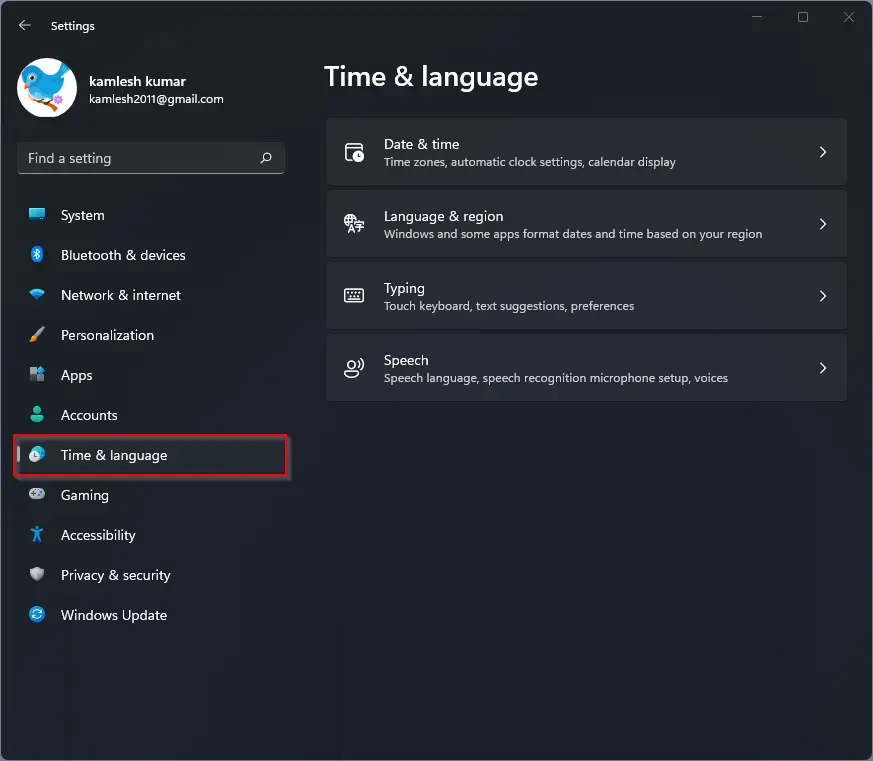
Step 2. Select Time & language category from the left side pane in the Windows Settings.
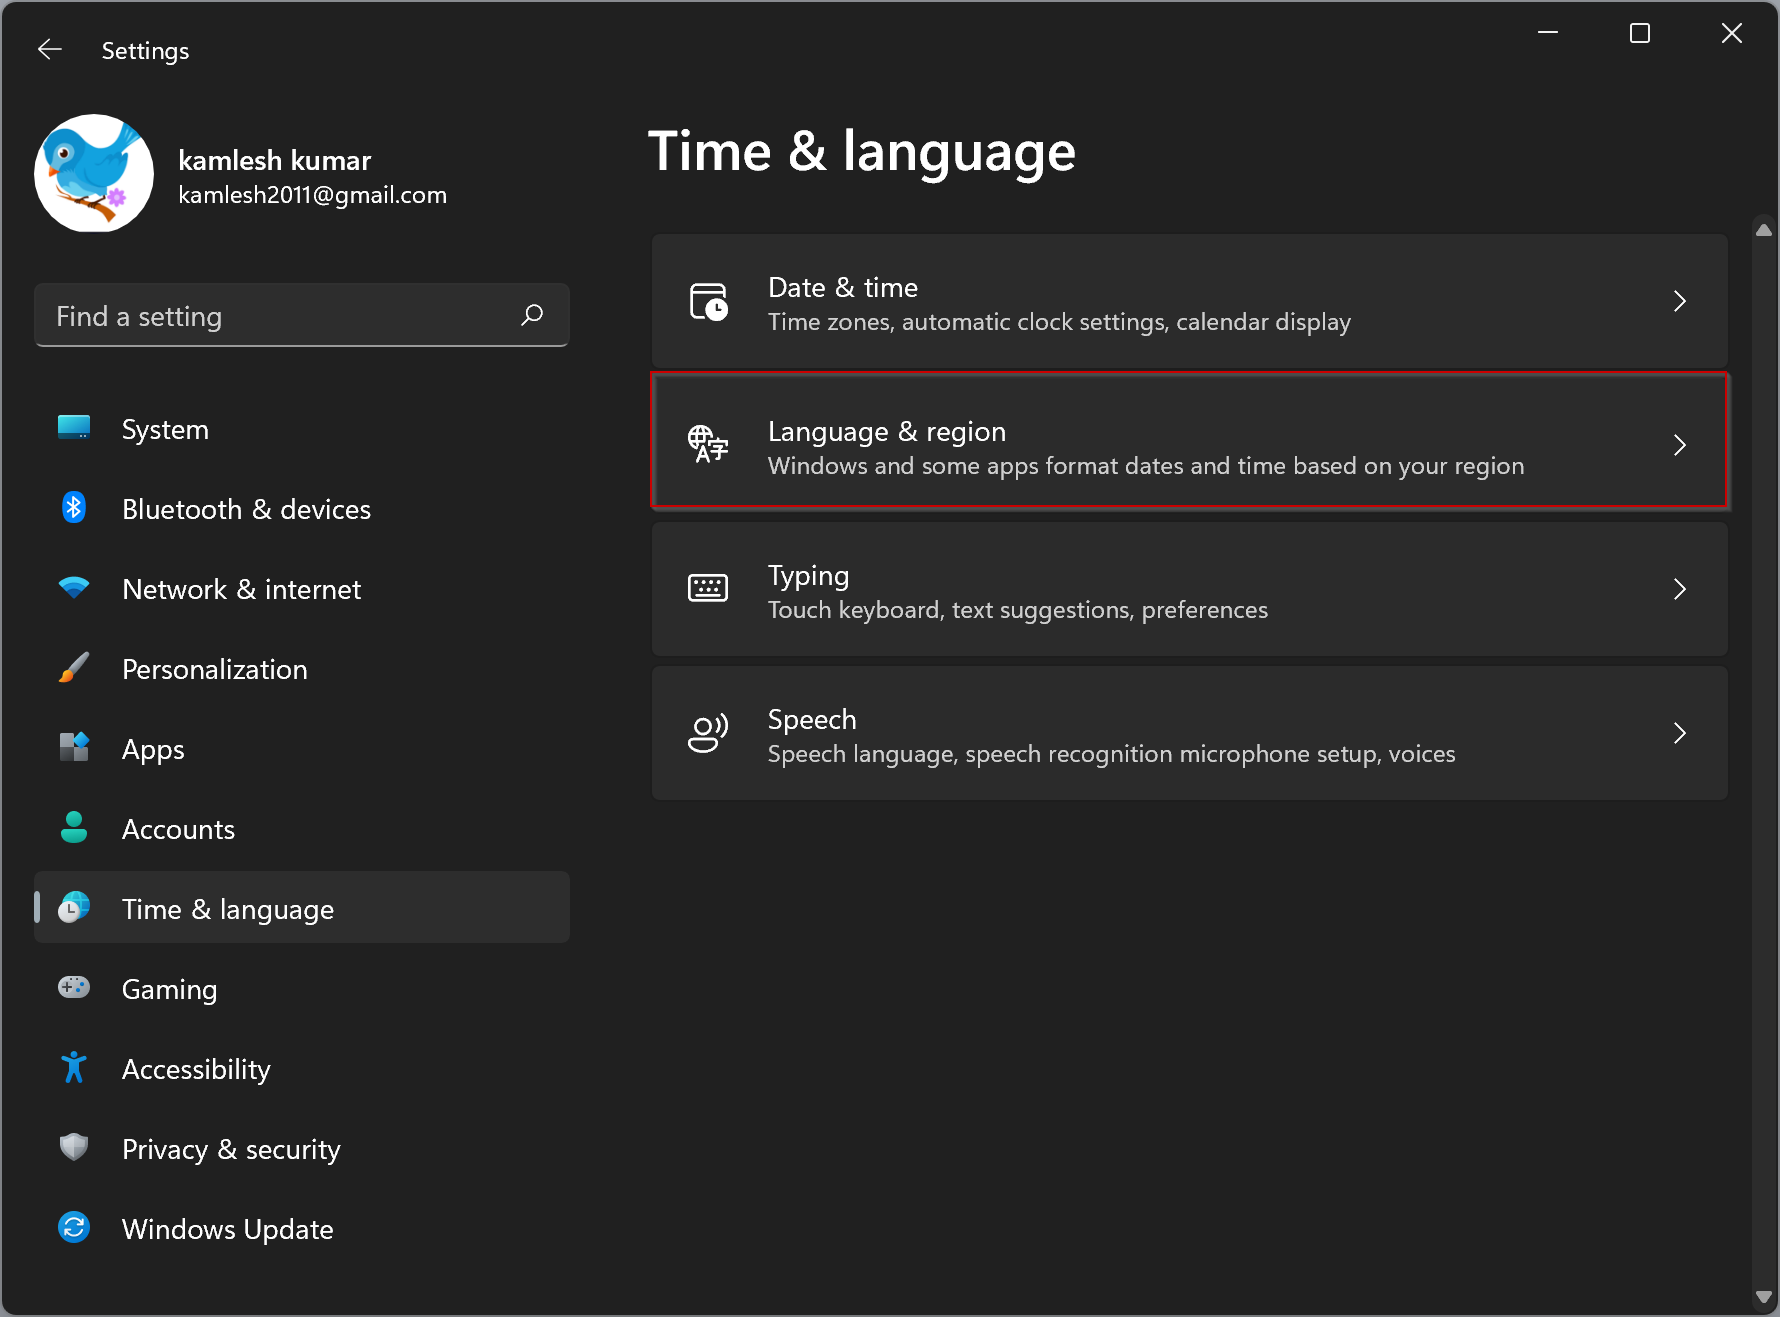
Step 3. Then on the right-side pane, click Language & region.
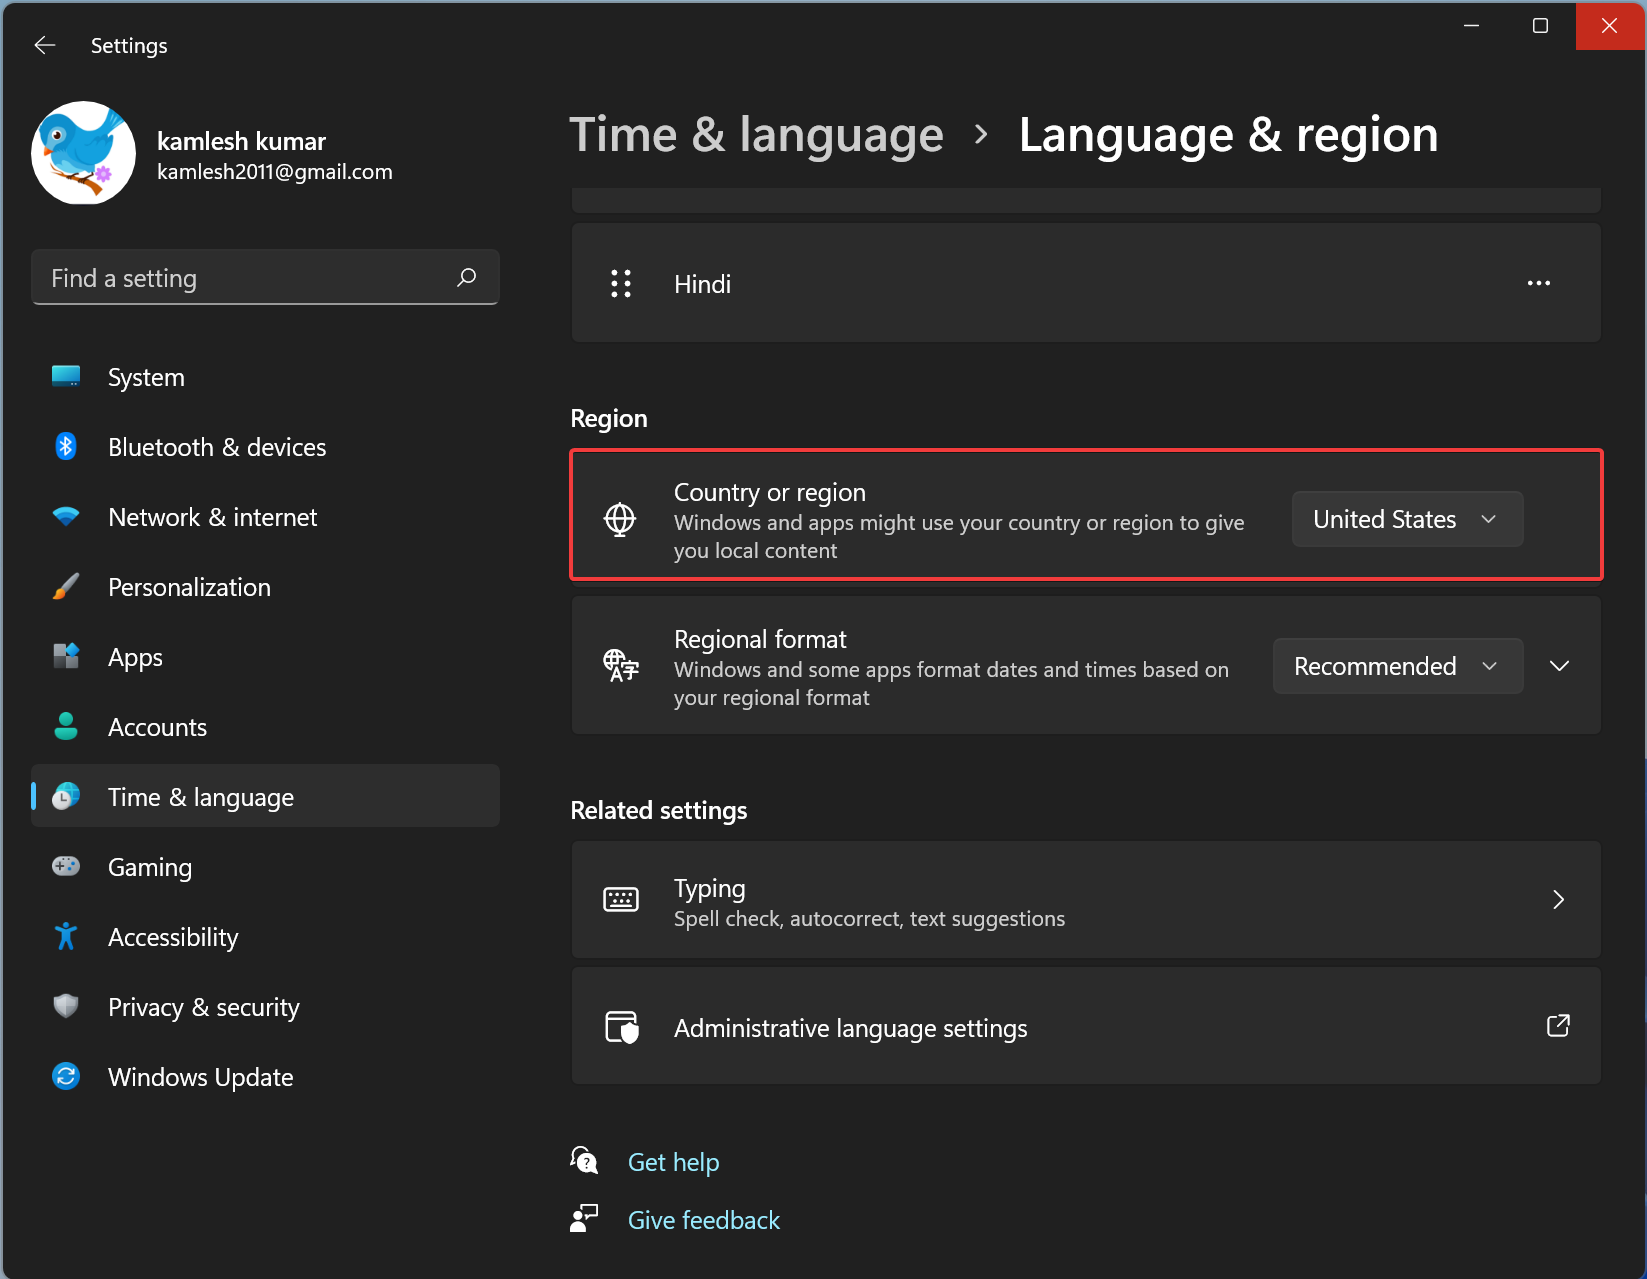
Step 4. After that, in the Language & region settings page, under the “Region” section, select your preferred country besides the “Country or region” option.
When you’re done, you can close the settings app safely. All the changes will be saved automatically.
That’s it!
Conclusion
To sum up, changing the country or region in Windows 11 is a simple process that can help you access region-specific features and content. By following the easy steps outlined in this guide, you can change your Windows 11 system region or country quickly and easily. Whether you need to test Android apps or simply want to switch to a different location, the Settings app in Windows 11 has got you covered. So go ahead and change your country or region in Windows 11 today and enjoy all the benefits of your desired location!