By default, Windows 11 and 10 automatically update the date and time based on your time zone from the internet-based time server. However, you can also adjust the date and time manually if you need.
In this gearupwindows article, we will guide you on changing or adjusting the date and time on Windows 11/10.
How to Manually Change the Date & Time on Windows 11?
To manually adjust the date and time on Windows 11, use the following steps:-
Step 1. At first, open Settings.
To do that, press the Windows + I keyboard shortcut. Or, right-click on the Start button and select Settings in the pop-up menu.
Step 2. Next, choose Time & language in the left sidebar of the Settings window.
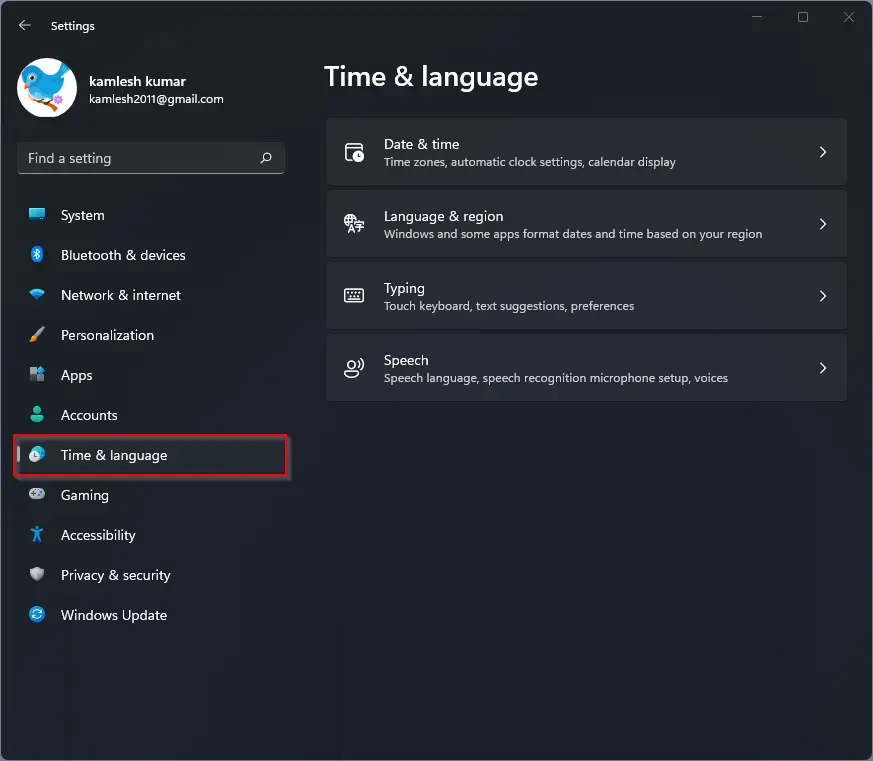
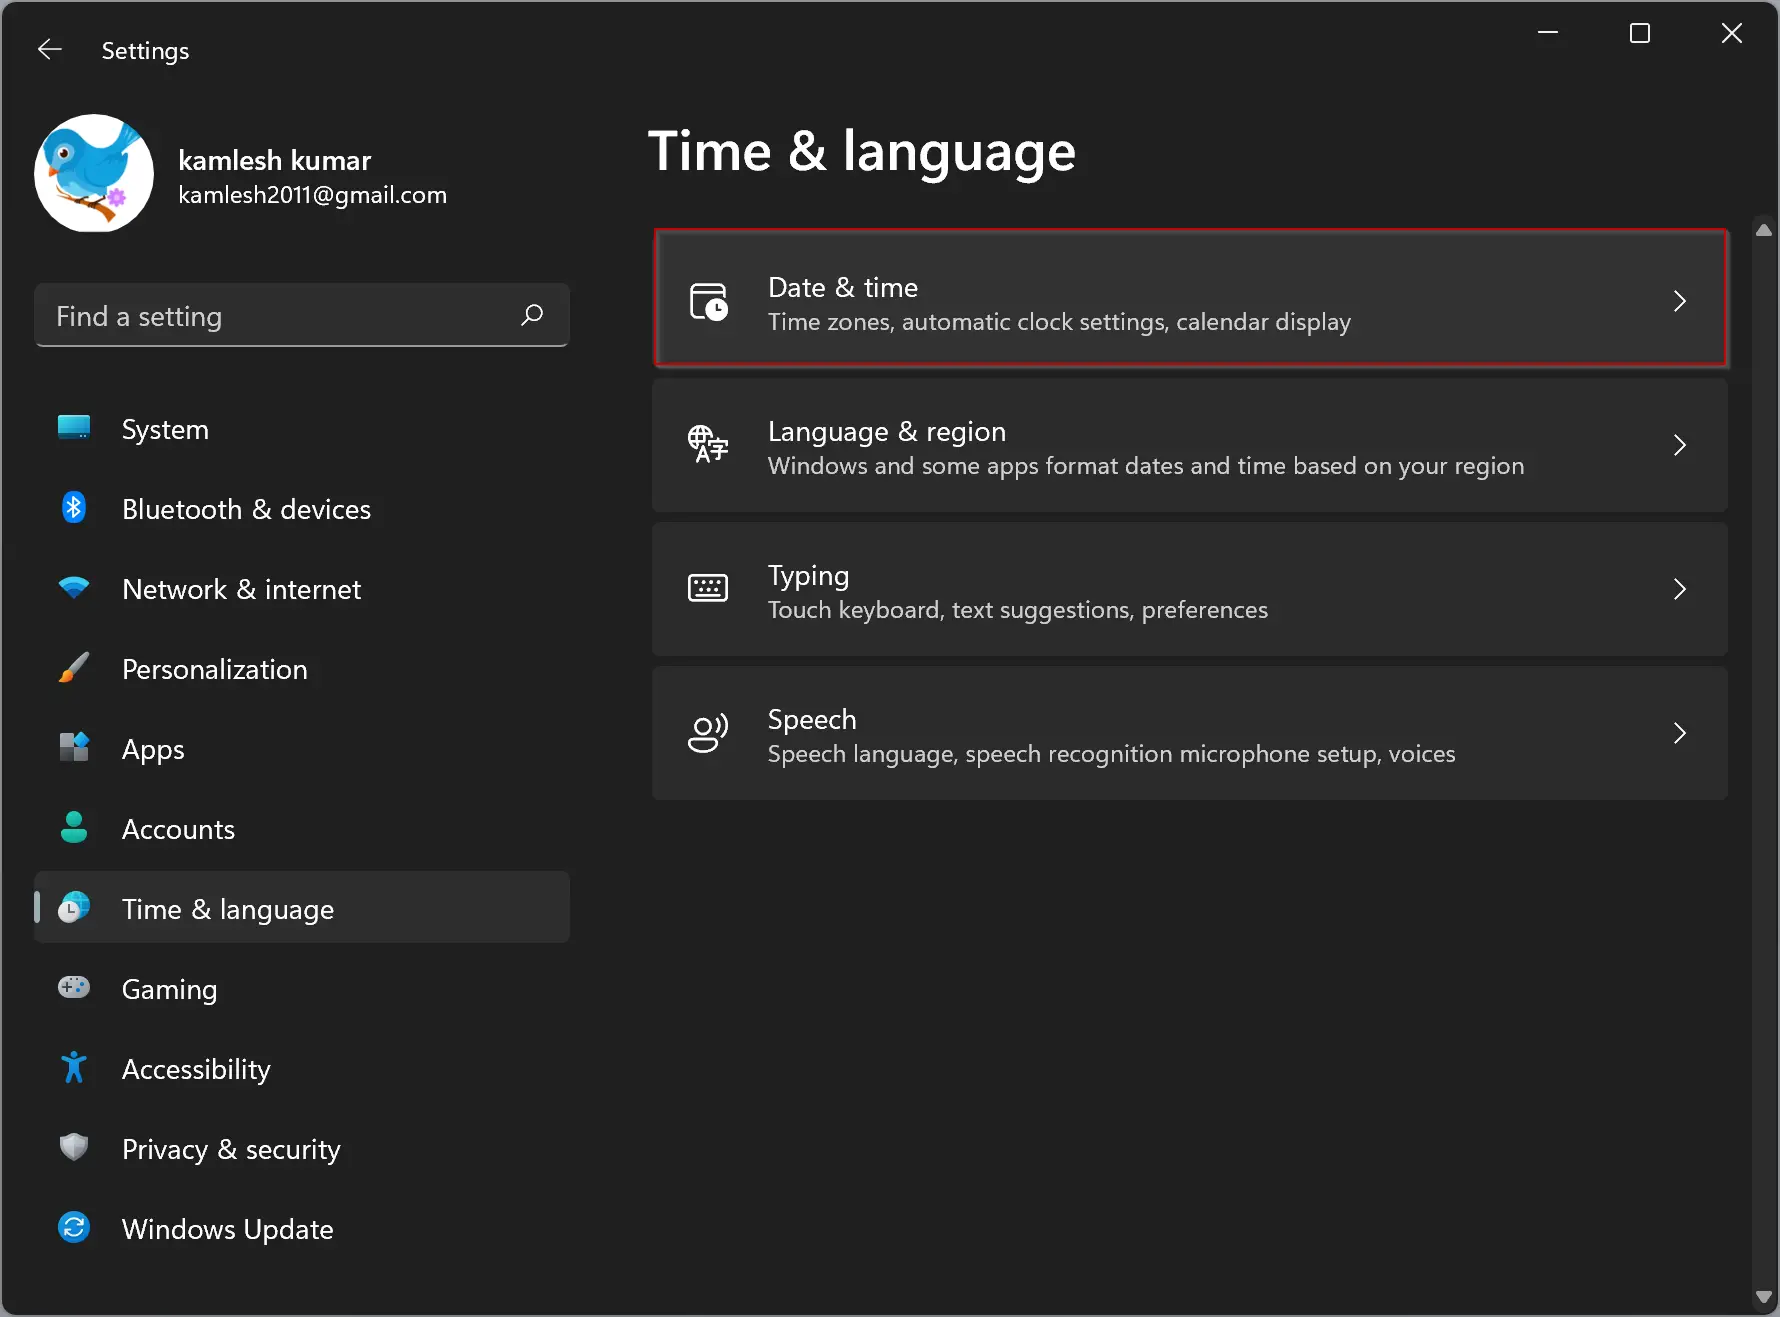
Step 3. In the “Time & language” settings page, click the Date & time tile.
Step 4. Then, turn off the toggle switch “Set time automatically.”

Step 5. After that, click the Change button beside the “Set the date and time manually” option.
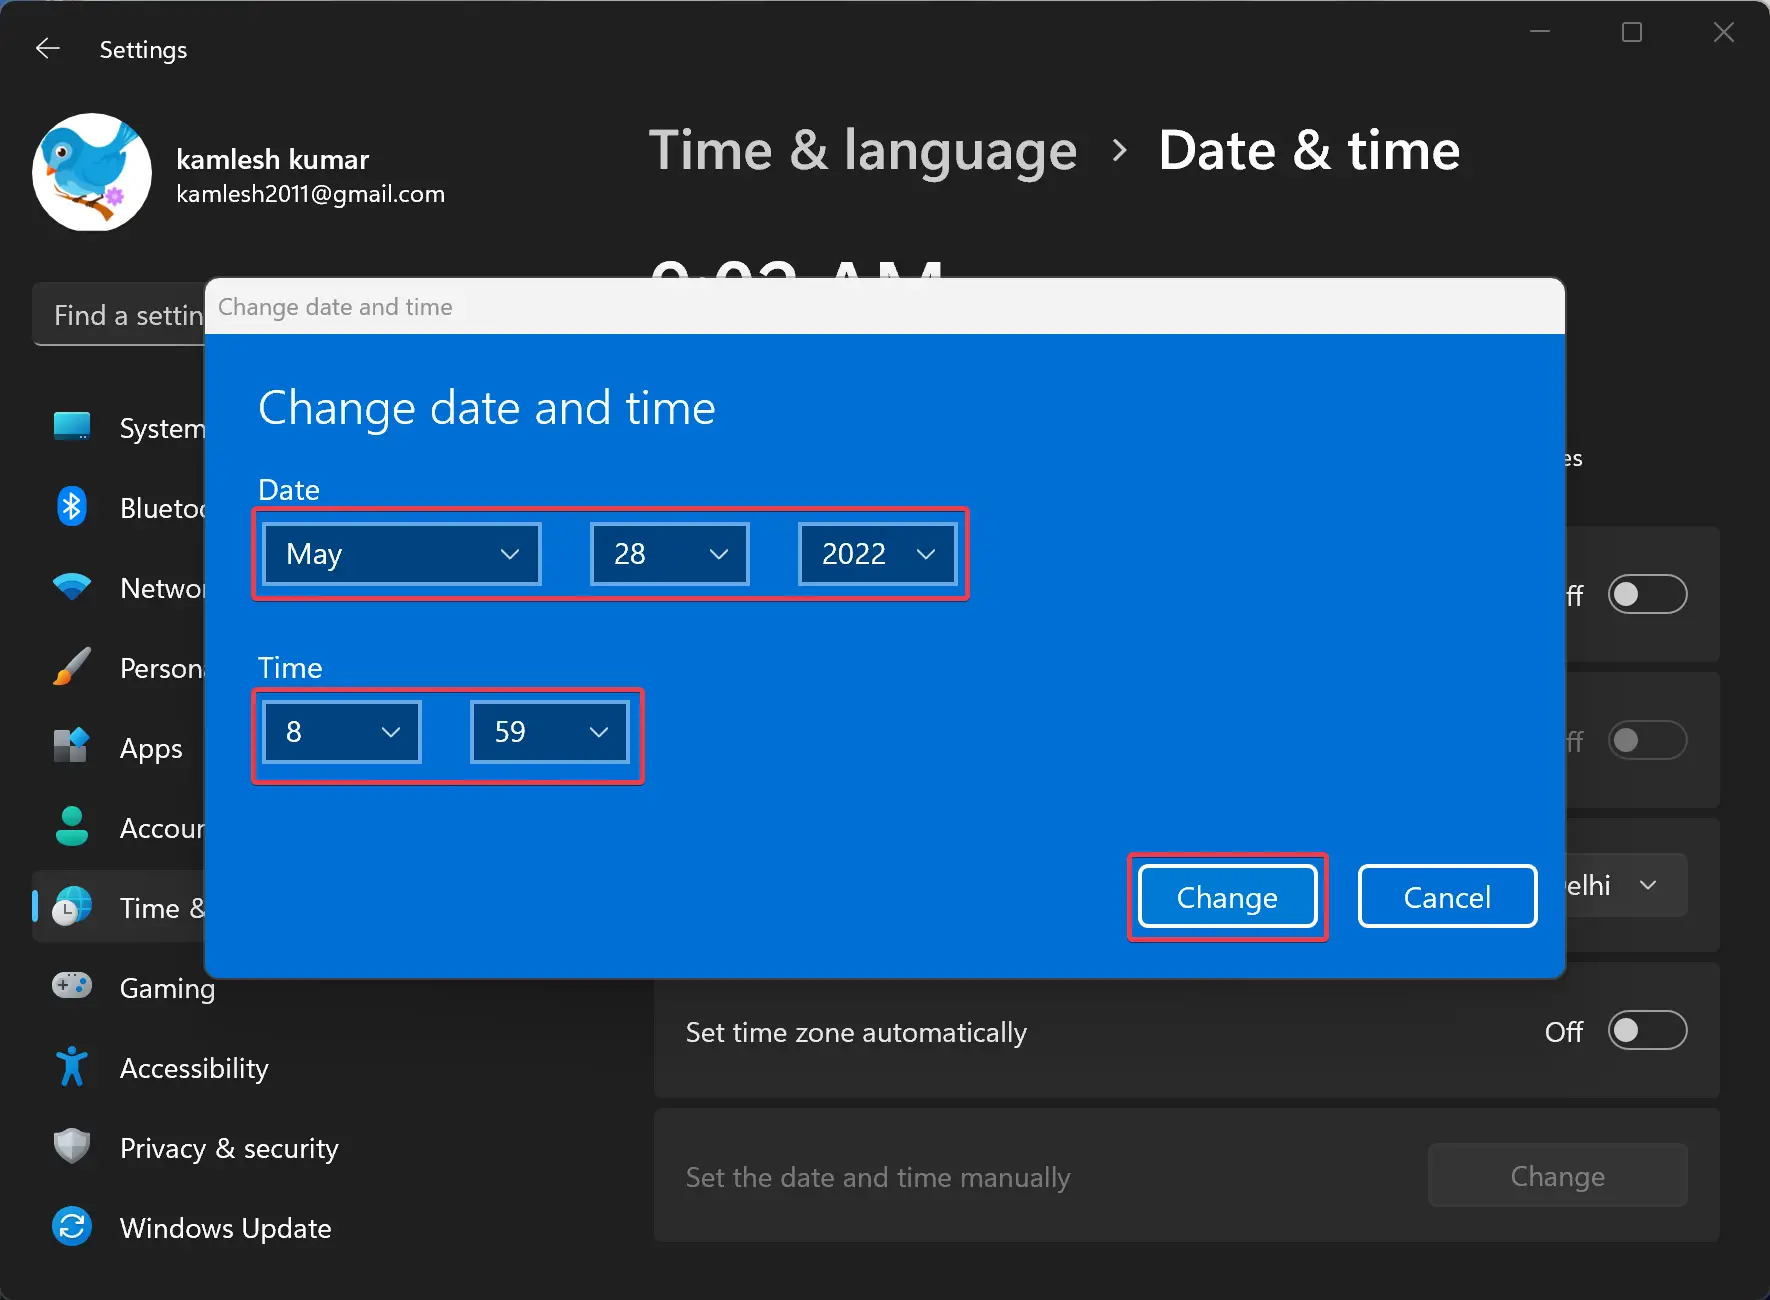
Step 6. When you’re done, a “Change date and time” window will appear. Use the drop-down menus to set the desired date and time, then click the Change button.
Once you complete the above steps, your PC date and time will change immediately.
How to Automatically Set Date & Time in Windows 11?
By default, Windows 11 automatically syncs date and time from the internet. But if you’ve previously disabled that, you can now turn it on.
To automatically set the date & time in Windows 11, do the following:-
Step 1. At first, open Settings.
To do that, press the Windows + I keyboard shortcut. Or, right-click on the Start button and select Settings in the pop-up menu.
Step 2. Next, choose Time & language in the left sidebar of the Settings window.
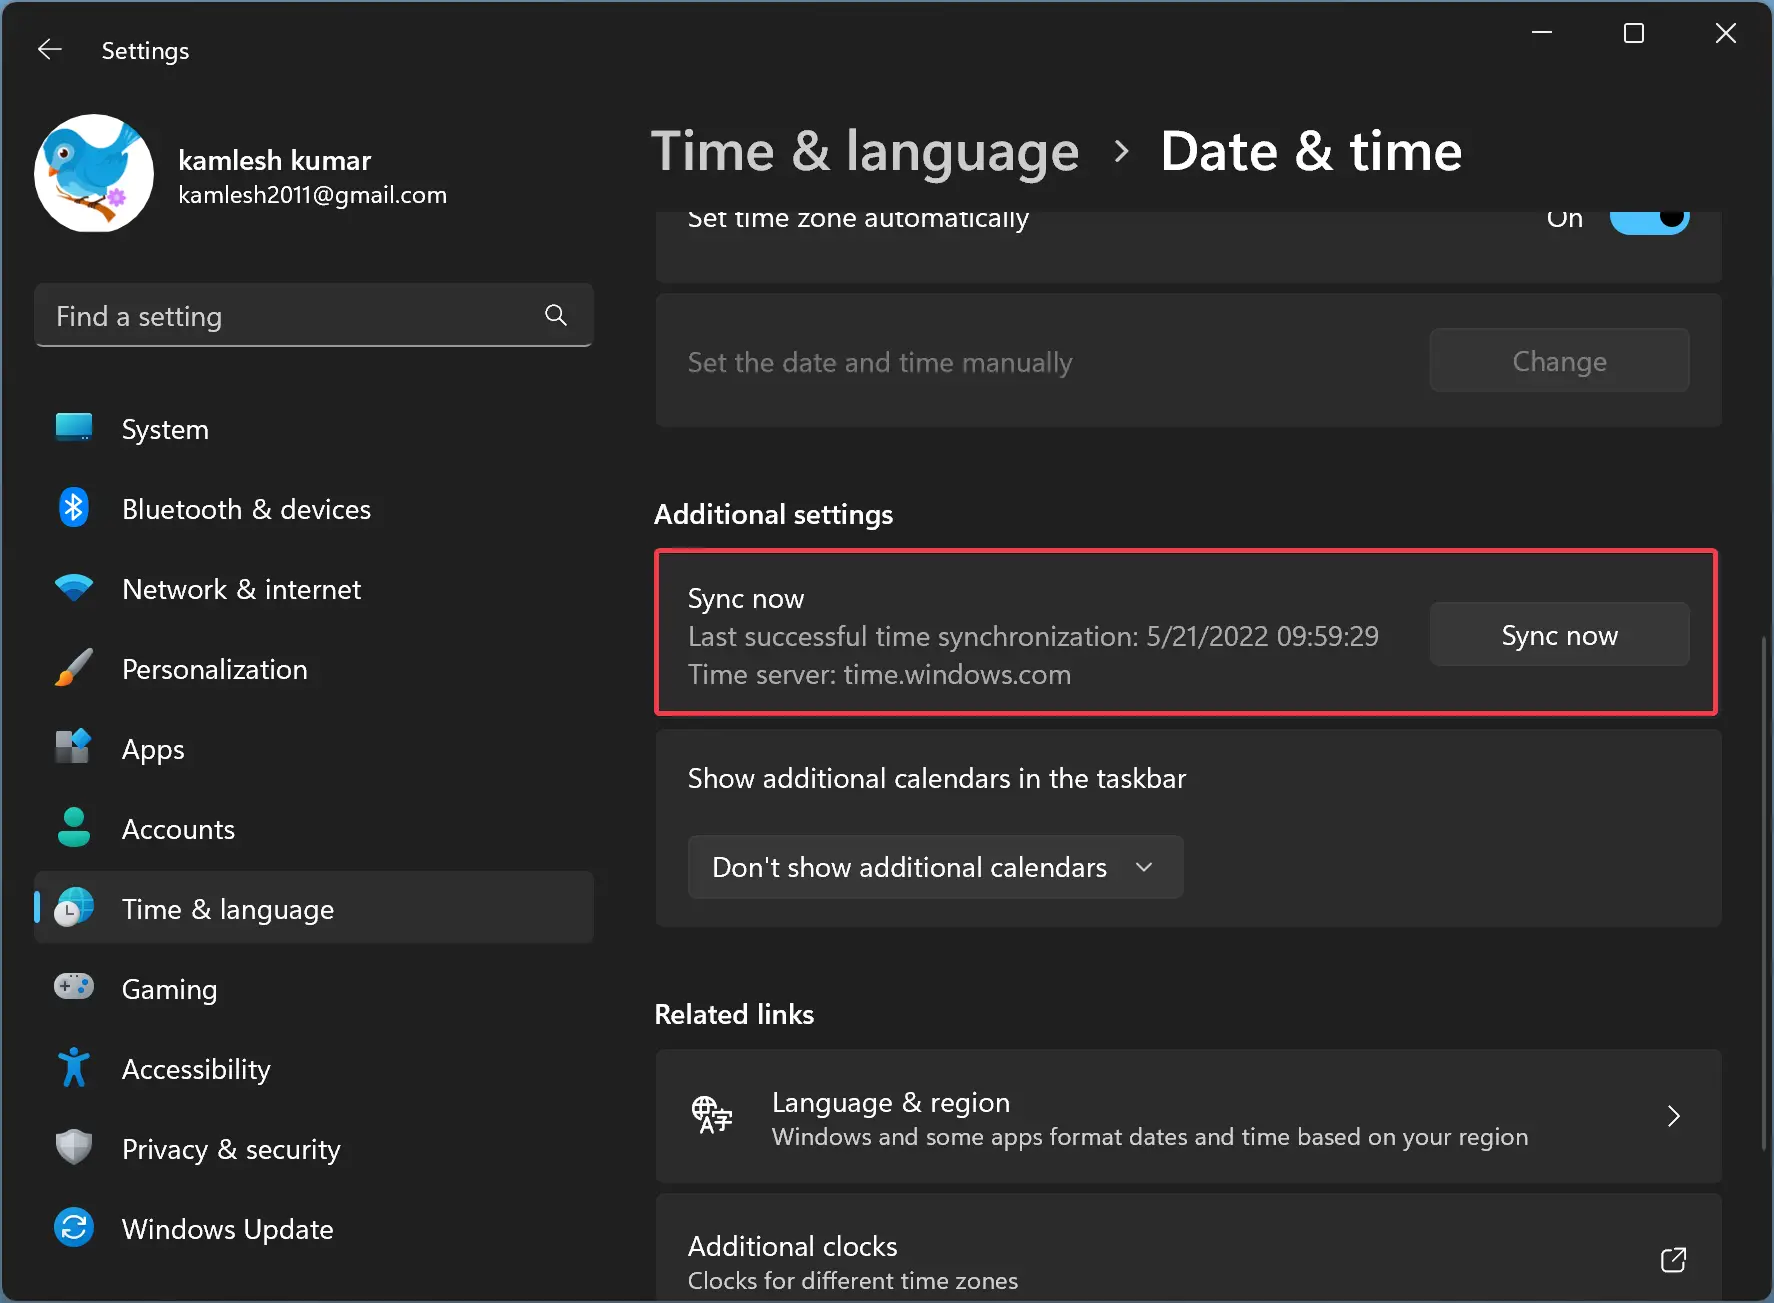
Step 3. In the “Time & language” settings page, click the Date & time tile.
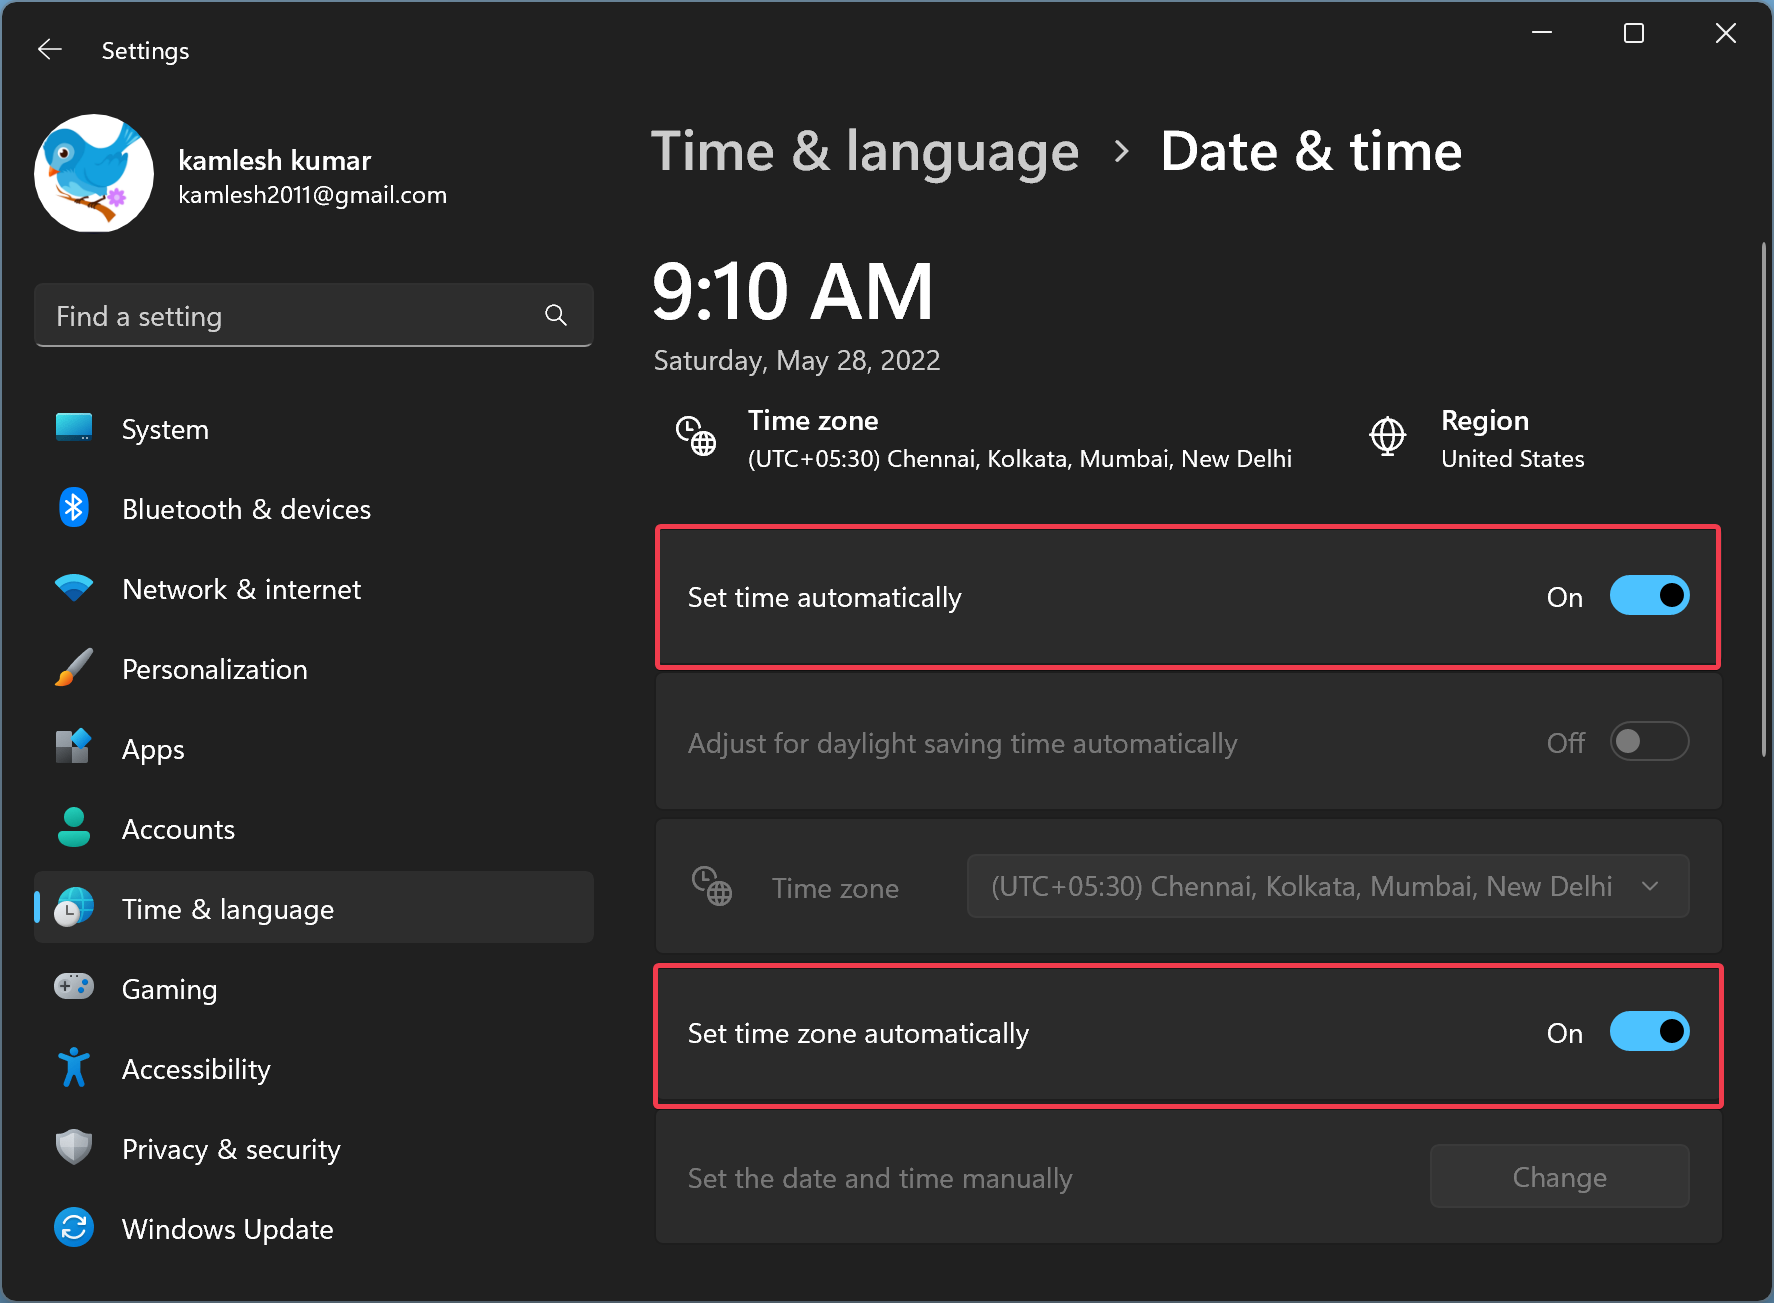
Step 4. Then, turn On the toggle switch “Set time automatically” and “Set time zone automatically.”
Step 5. After that, scroll down to the “Additional settings” section and click the Sync now button beside the “Sync now” option. This will match your PC date and time from the time.windows.com website.
Once you complete the above steps, Windows 11 will change the time zone according to your physical location and automatically adjust the date & time.
How to Manually Change the Date & Time on Windows 10?
To manually adjust the date and time on Windows 10, use these steps:-
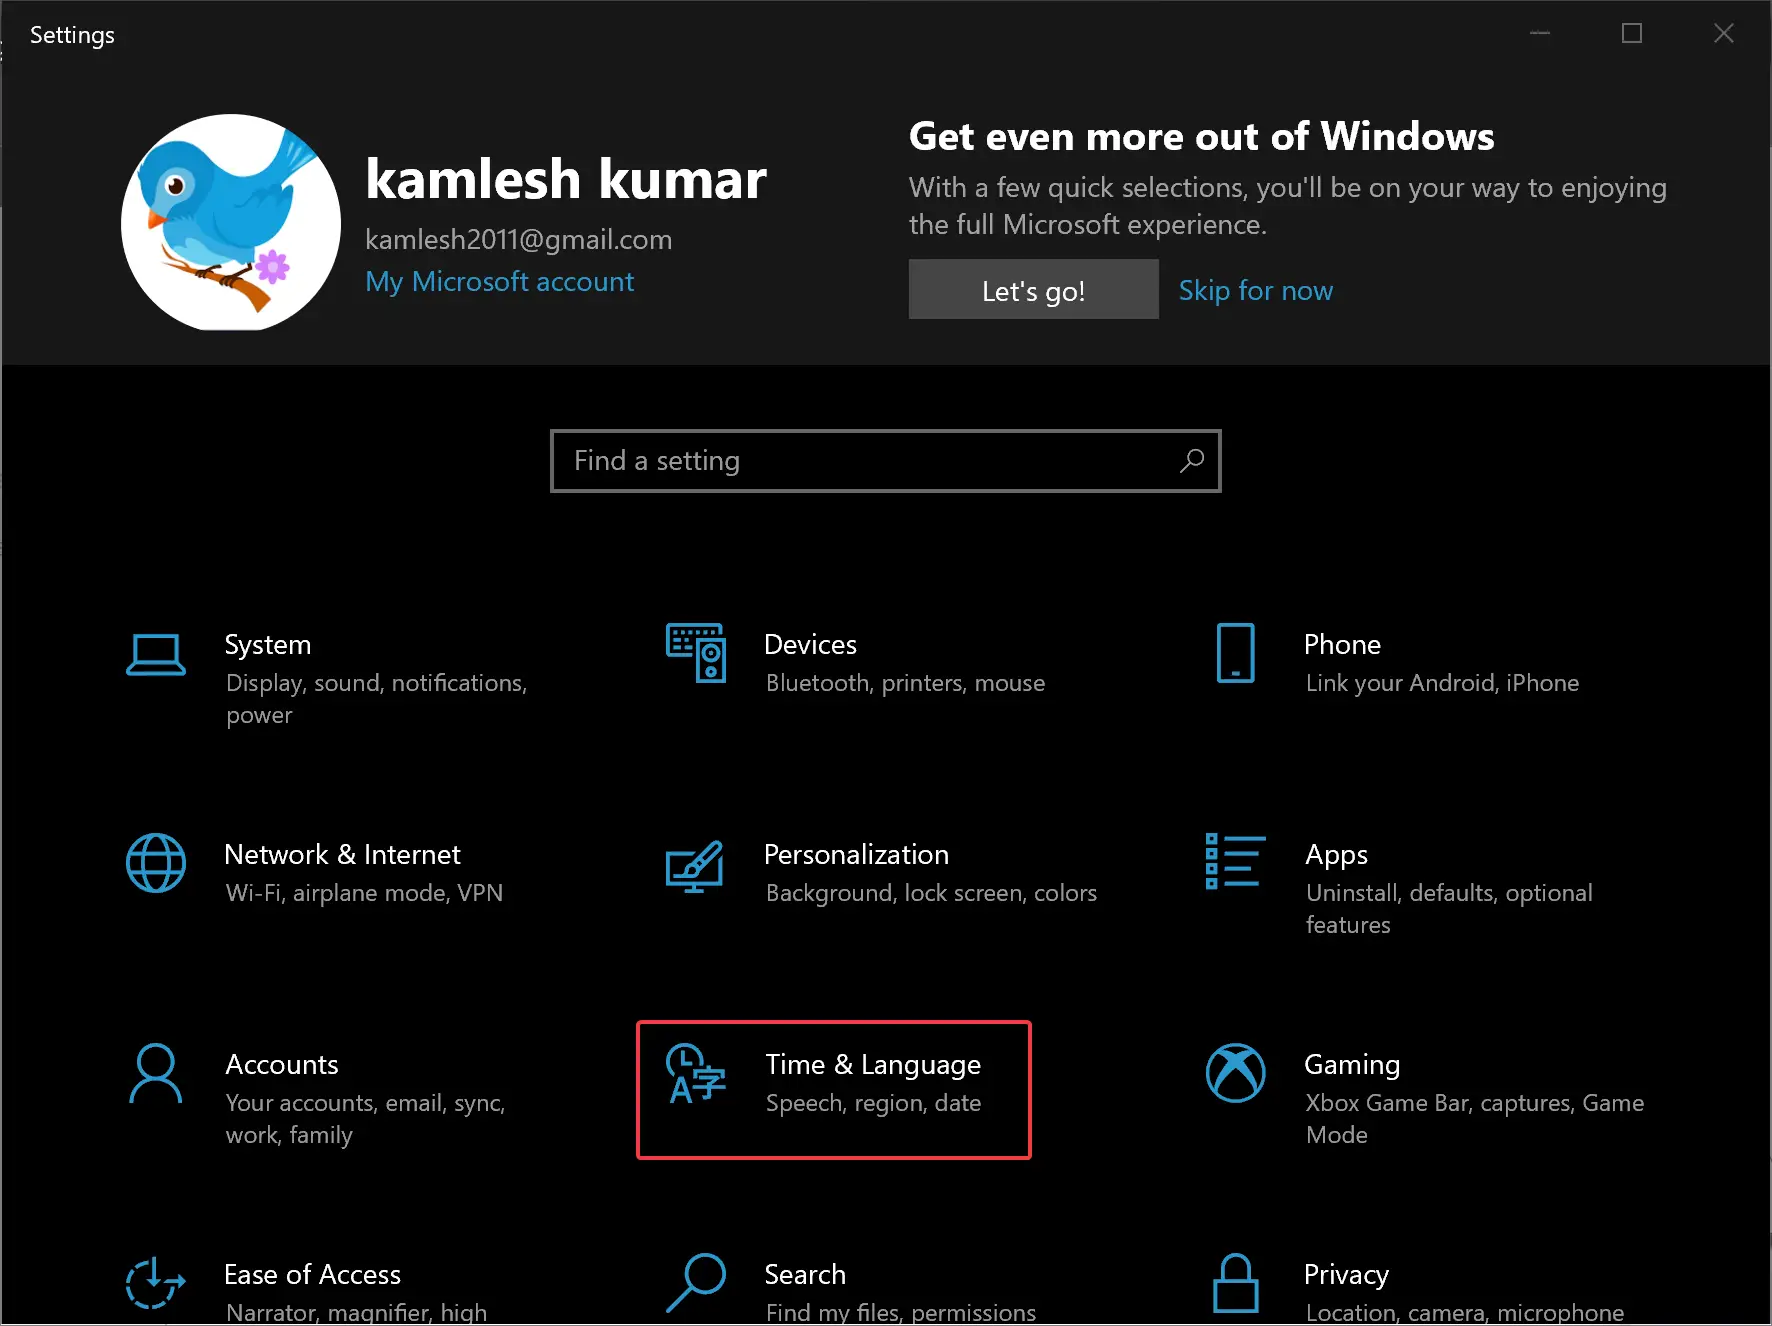
Step 1. Open Windows Settings.
Step 2. On the Windows Settings, click on Time & Language.
Step 3. Under the “Time & Language” setting, select the Date & time option.
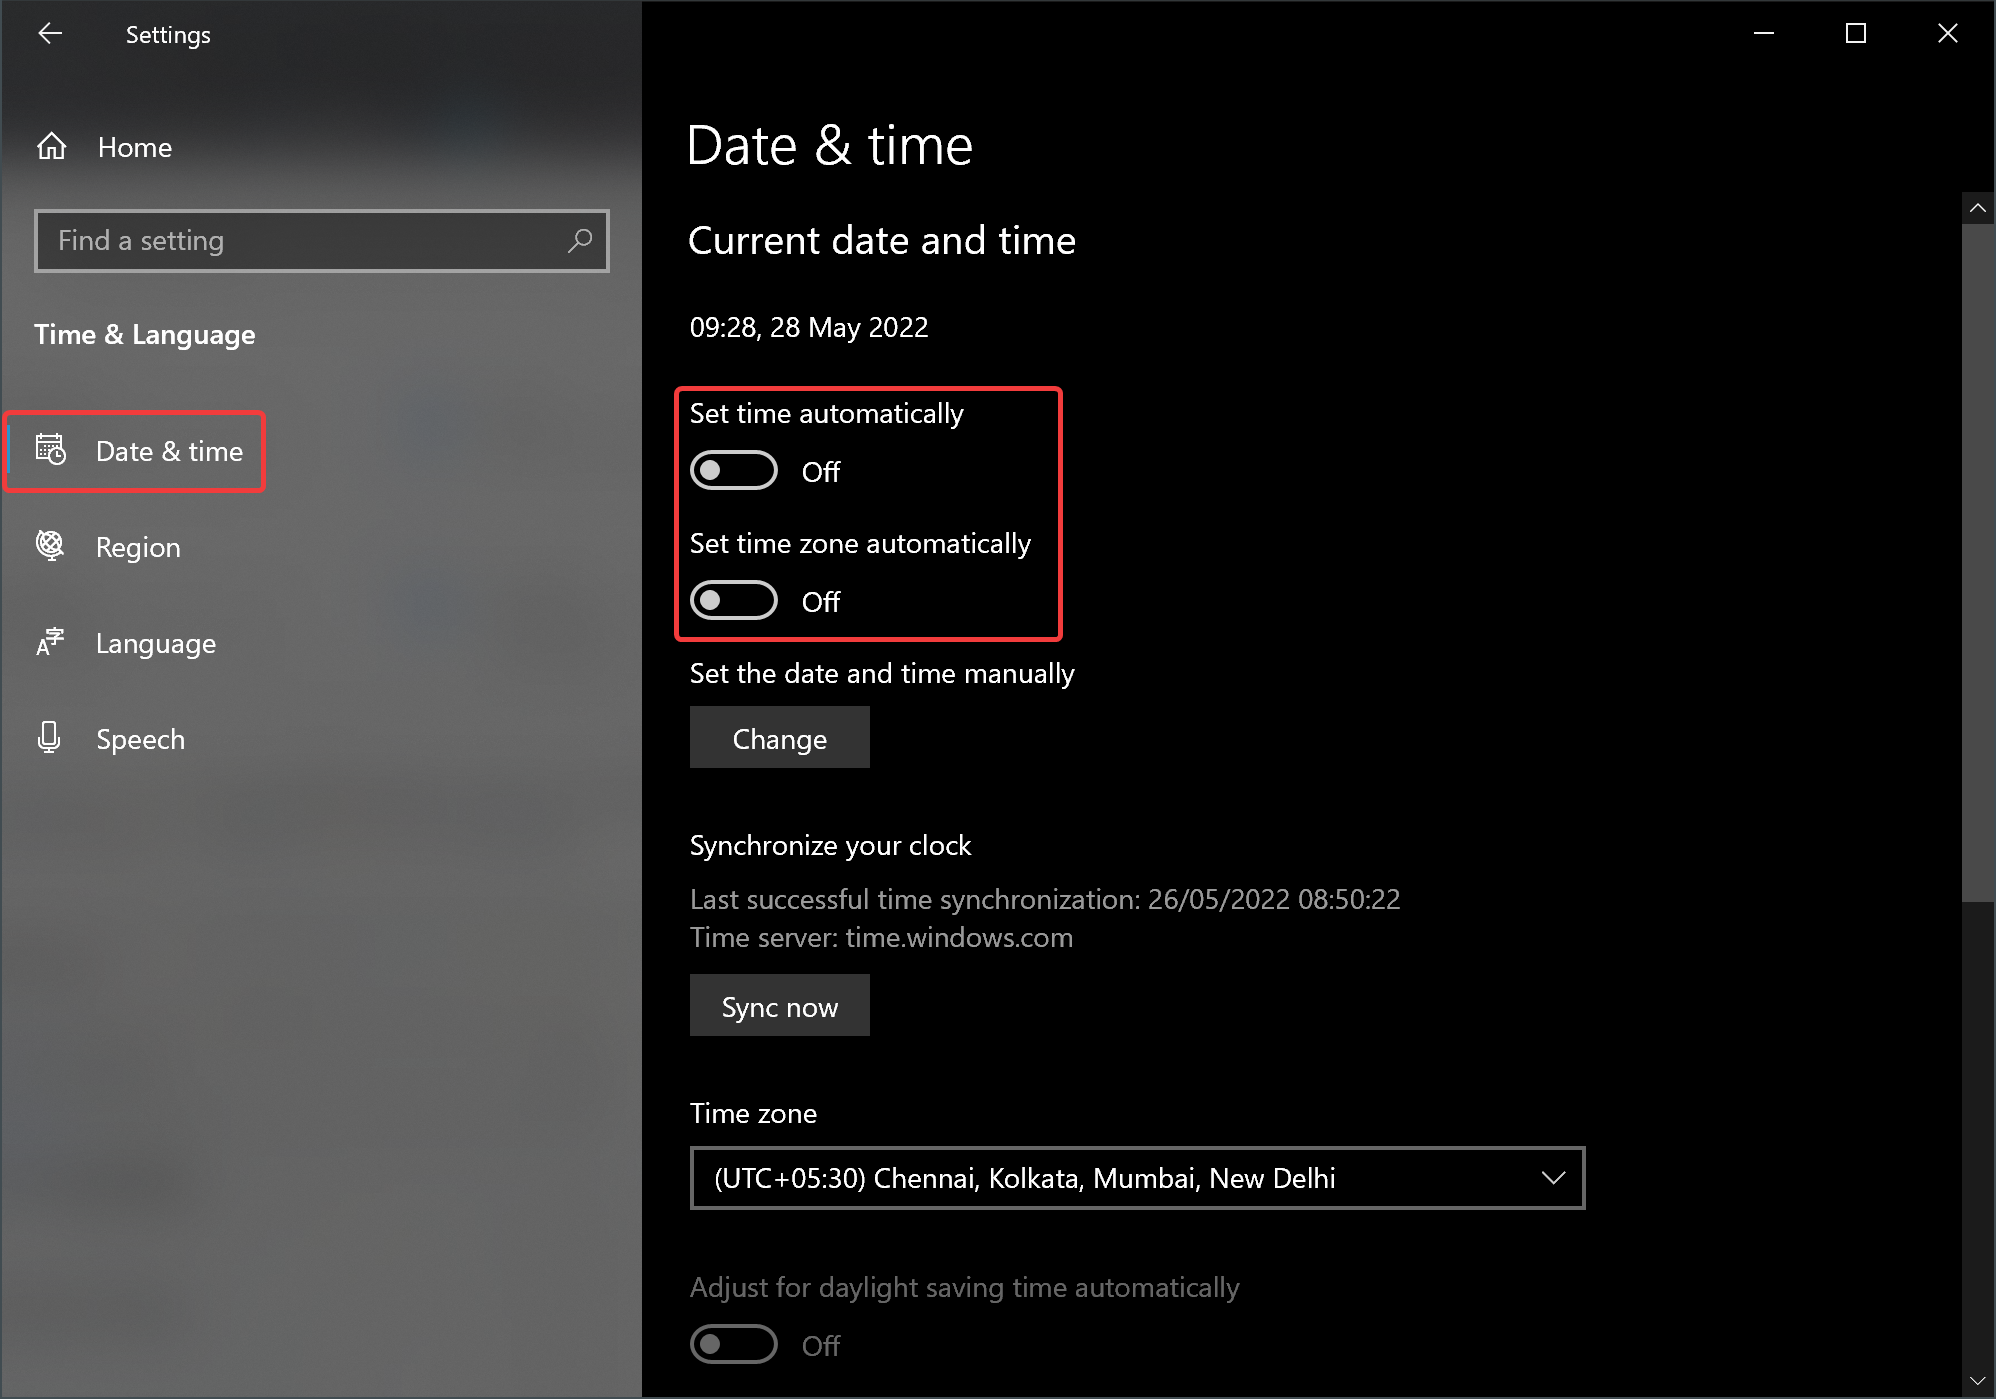
Step 4. Turn off the toggle switches “Set time automatically” and “Set time zone automatically” on the right sidebar.
Step 5. Then, click the Change button beneath the “Set the date and time manually” option.
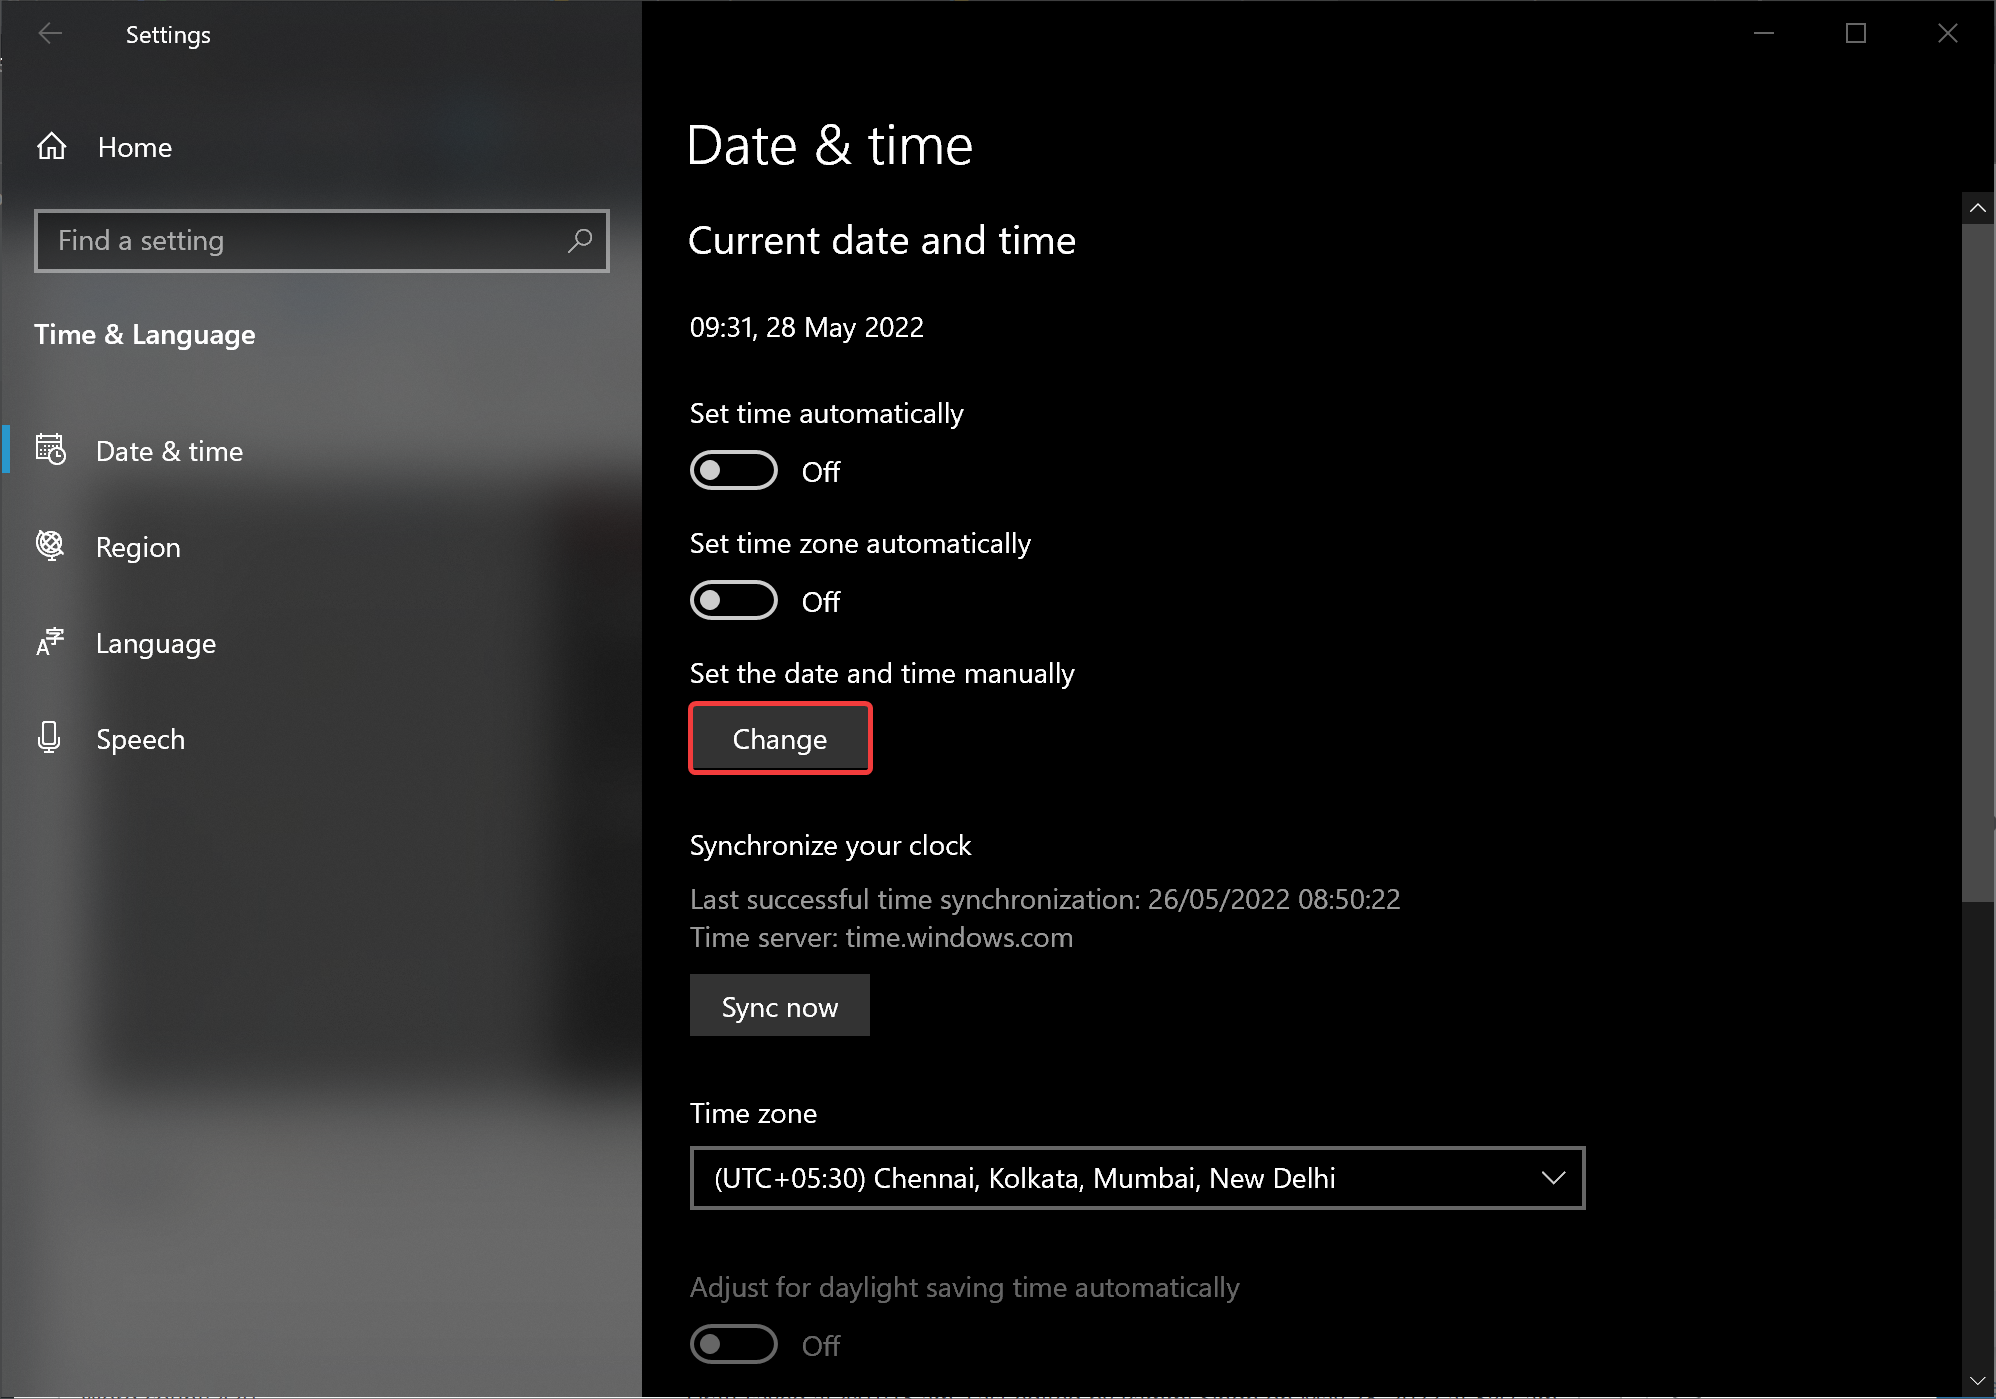
Step 6. When you’re done, a “Change date and time” window will appear on the screen. Use the drop-down menu and set your current date and time. Finally, click the Change button.
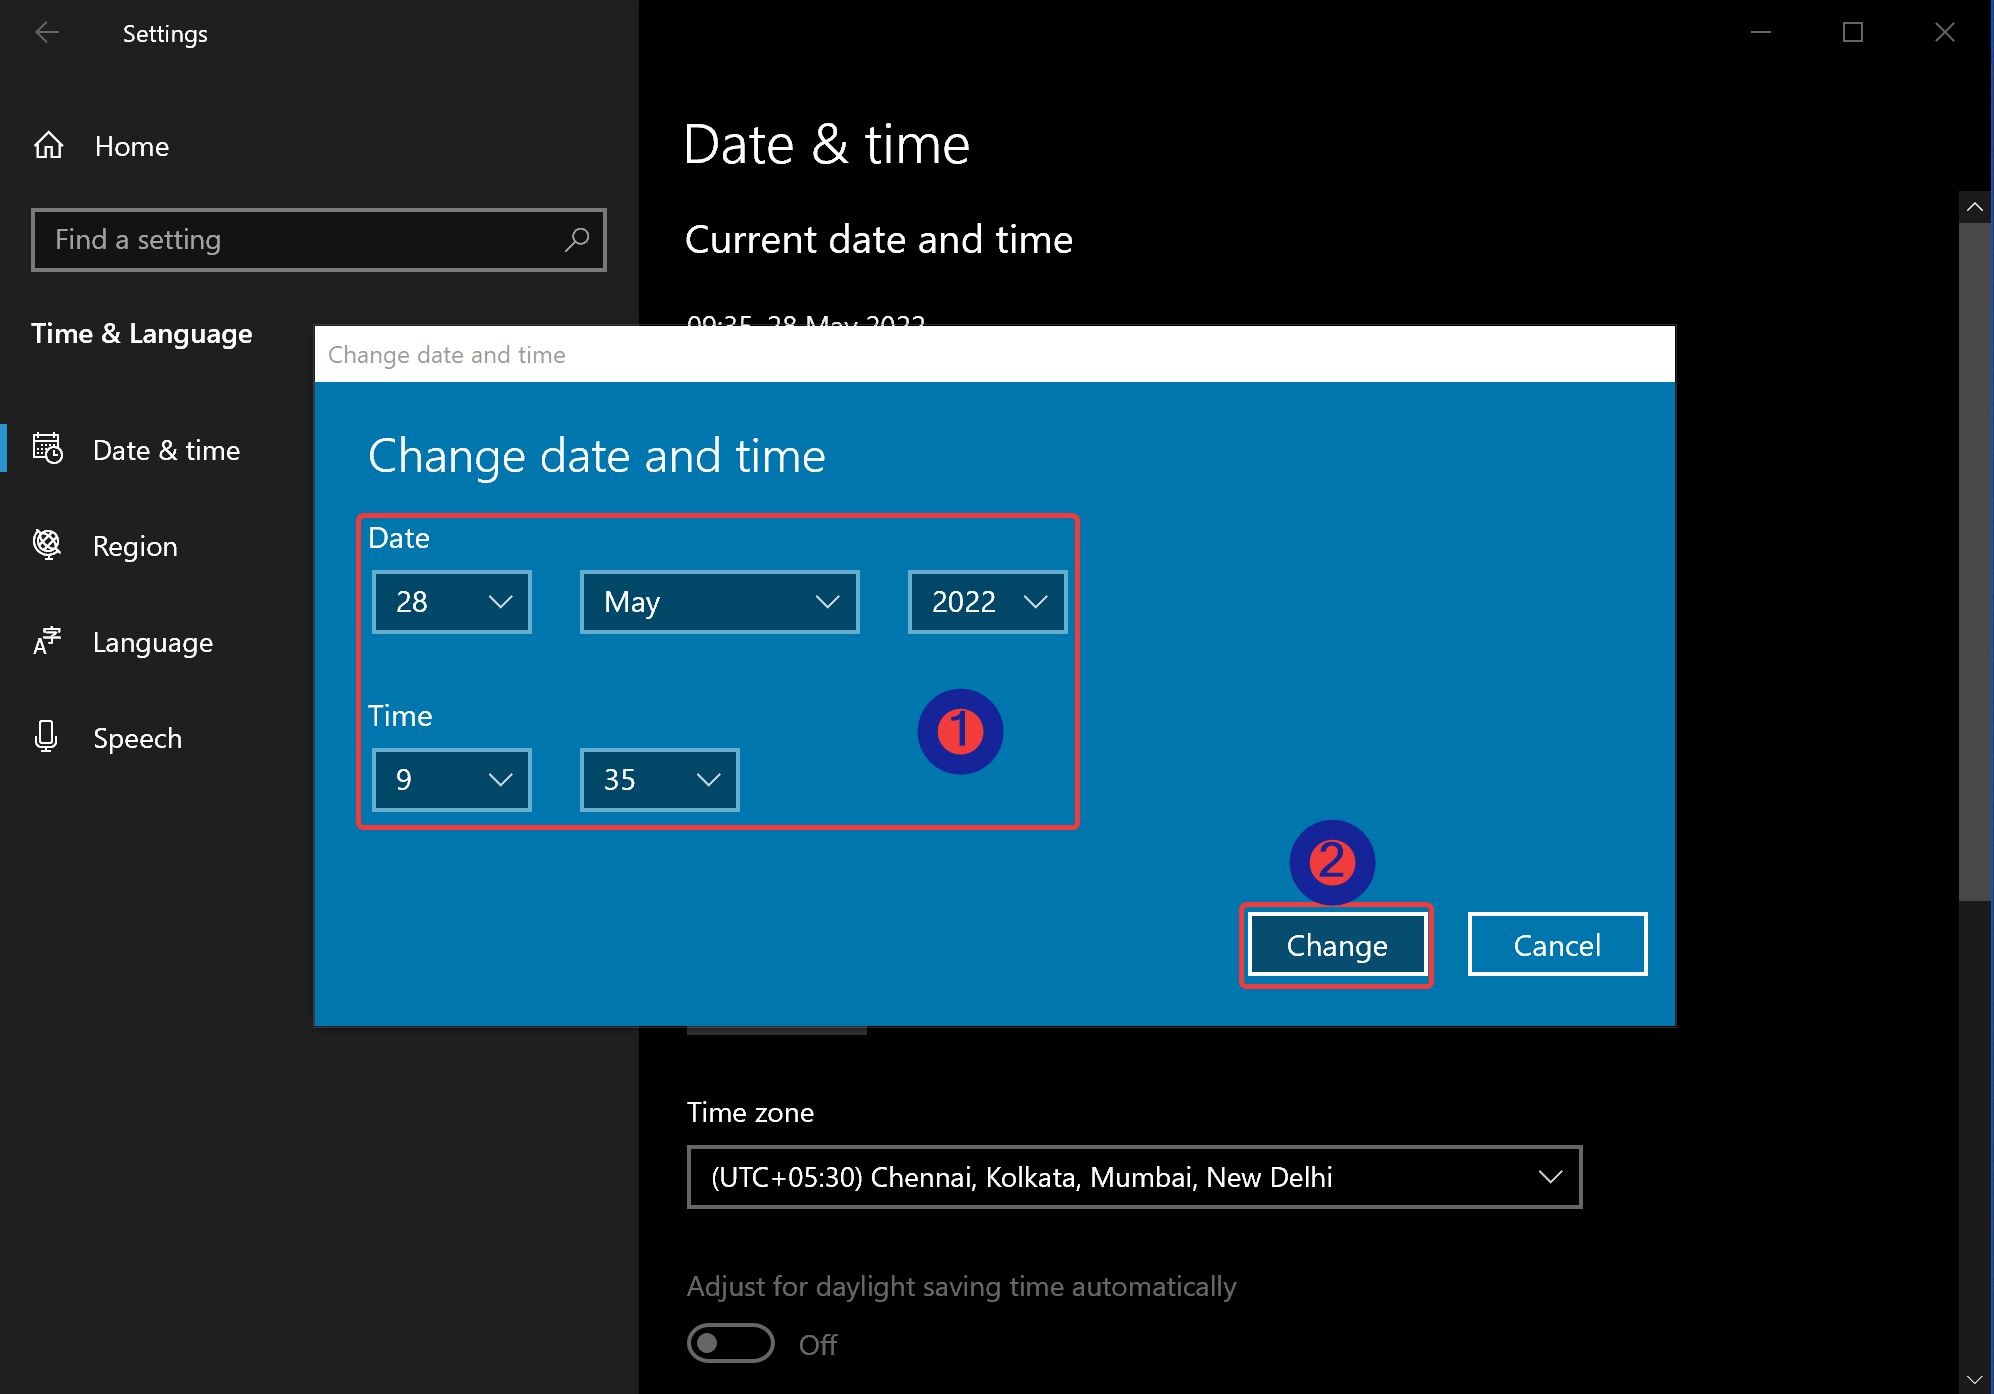
Once you complete the above steps, the date and time of your Windows 10 PC will change immediately.
How to Automatically Change the Date & Time on Windows 10?
If you wish to manage the date & time on Windows 10 automatically, use these steps:-
Step 1. Open Windows Settings.
Step 2. On the Windows Settings, click on Time & Language.
Step 3. Under the “Time & Language” setting, select the Date & time option.

Step 4. Turn On the toggle switches “Set time automatically” and “Set time zone automatically” on the right sidebar.
Step 5. Then, click the Sync now button beneath the “Synchronize your clock” option.
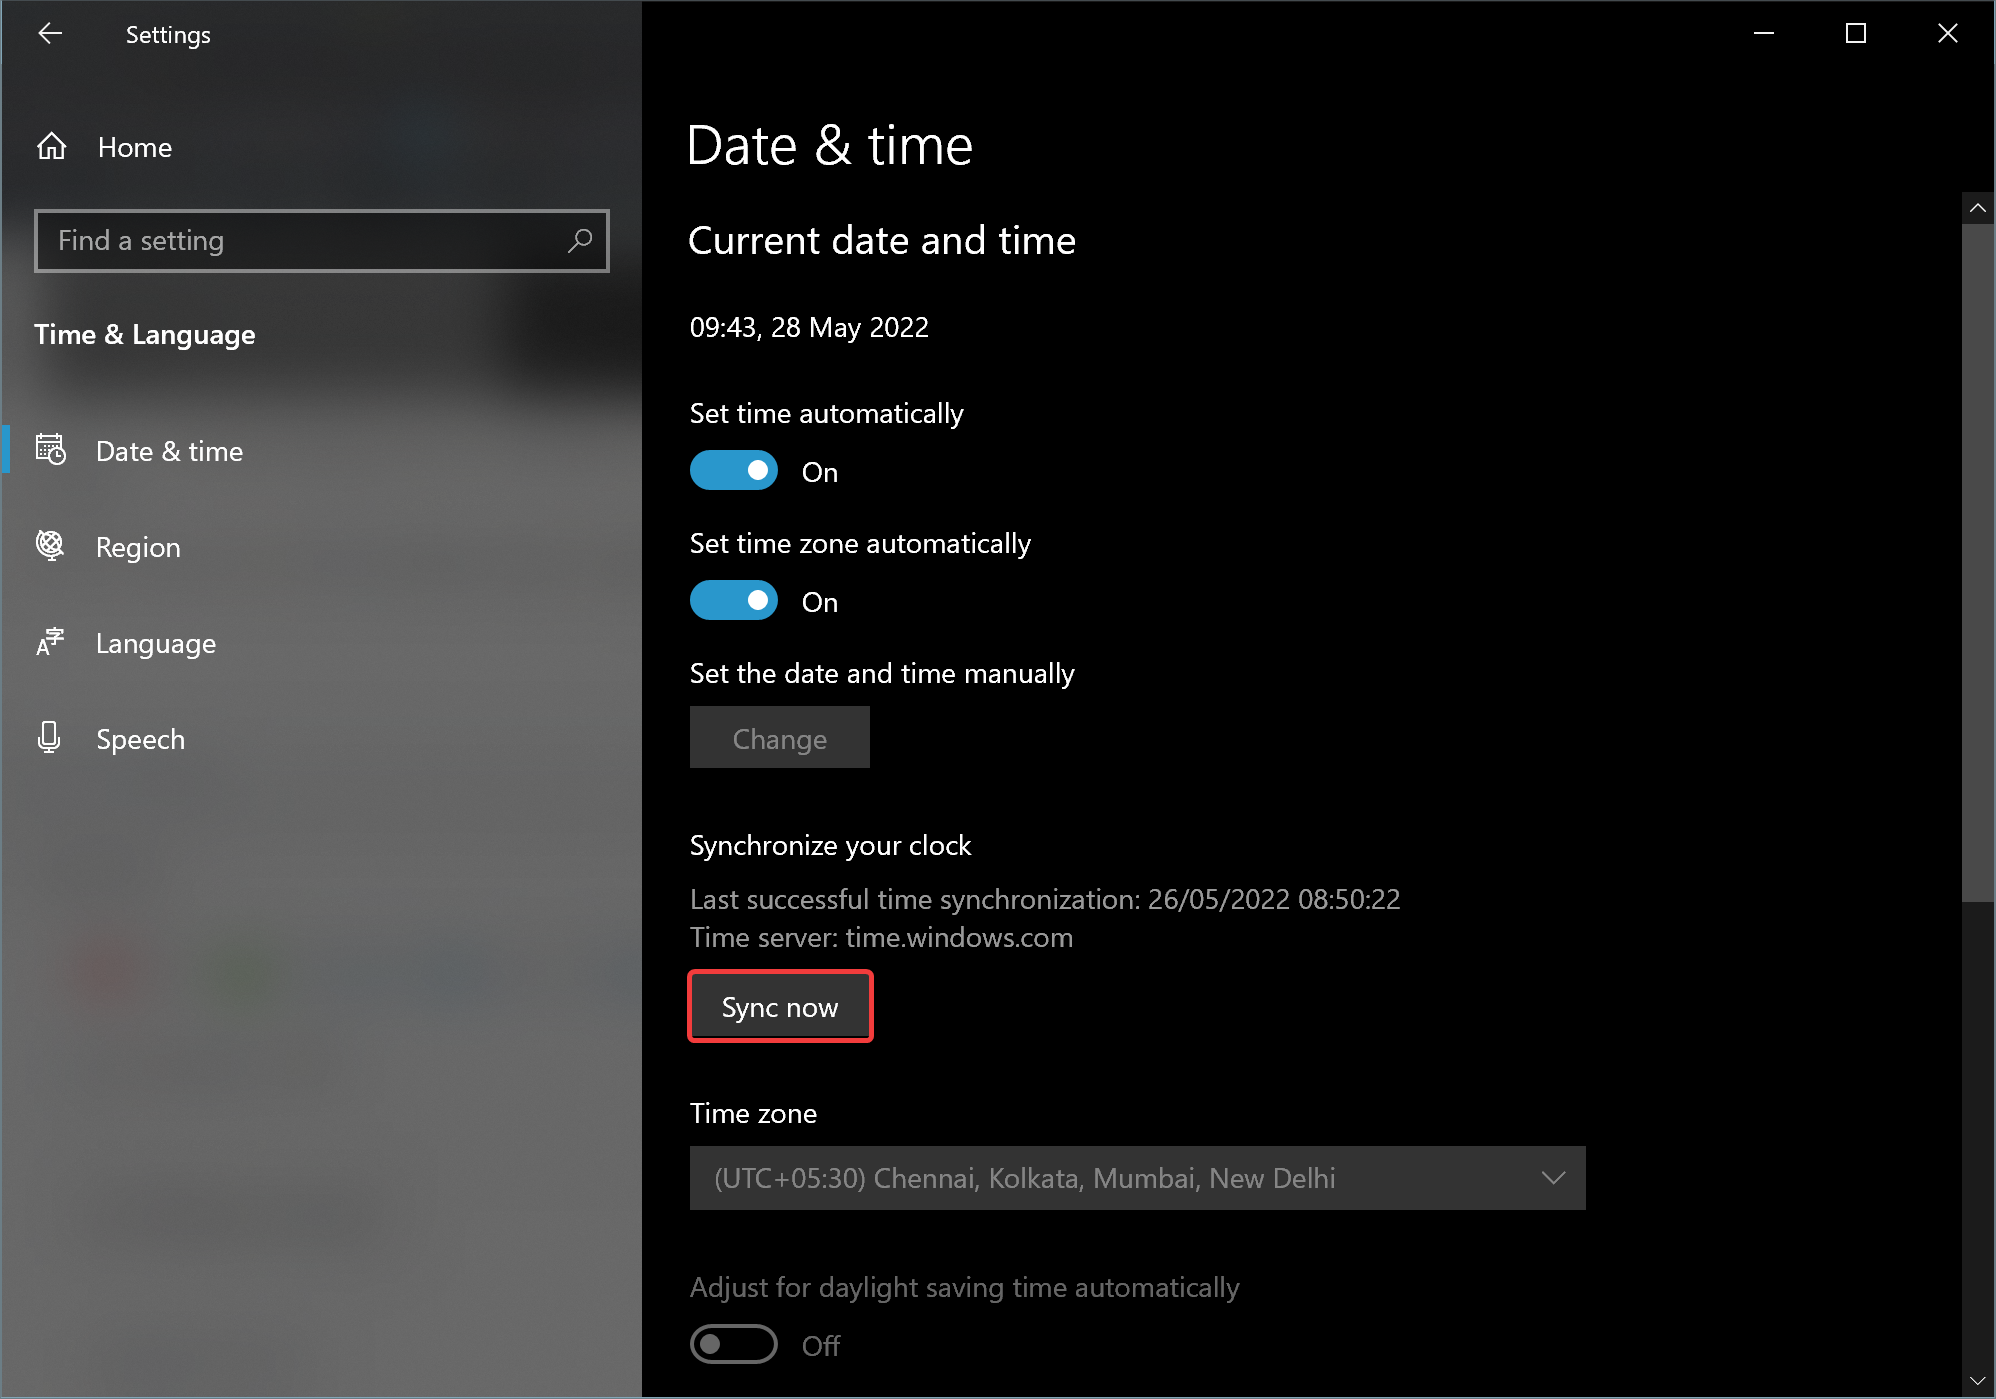
That’s it. Your PC will automatically update the current date & time from Microsoft’s servers and display them in the Windows 10 taskbar clock.
Conclusion
In conclusion, adjusting the date and time on Windows 11 and 10 can be done either manually or automatically. Manually changing the date and time on both operating systems involves turning off the automatic synchronization feature and setting the date and time manually. On the other hand, automatically changing the date and time requires turning on the automatic synchronization feature, which allows the operating system to synchronize the date and time from an internet-based time server. By following the steps outlined in this article, users can easily manage their PC’s date and time settings on both Windows 11 and 10.