DPI complete form is Dots per inch. The DPI is a physical measurement of the number of pixels in a linear inch of a display for your information only. DPI represents a scale factor that Windows uses to resize the running apps and documents. Most modern computers use the most popular scaling factors in the range of 96-125 DPI.
Increasing or decreasing the display scaling in Windows 11 enables you to make UI elements in Windows 11 smaller or bigger. Windows 11 calculates the scaling factor for your monitor automatically, which may not follow your preferences, especially if you have a large display with a high resolution. All modern devices often include high-resolution displays. Even if you have a small Ultrabook or a Windows tablet, you may find a display resolution of 1080p or more. The modern desktop monitor supports up to 4K resolutions.
In most cases, Windows 11 will automatically adjust DPI scaling, so everything on your screen becomes more considerable. But, for every case, it will not be accurate. In such instances, you need to fix the DPI display scaling manually in Windows 11.
In this gearupwindows article, we will guide you on changing DPI Display Scaling in Windows 11 so that you can easily read the text on the monitor. According to your convenience, you can make the display smaller or more significant that suit your needs.
Several options are available on Windows 11 to set a custom DPI display scaling in Windows 11. We will review those methods that are easy to follow.
How to Adjust DPI in Windows 11 using the Settings app?
Follow these steps to adjust DPI in Windows 11 using the Settings app:-
Step 1. Open the Settings app by pressing the Windows + I keys.

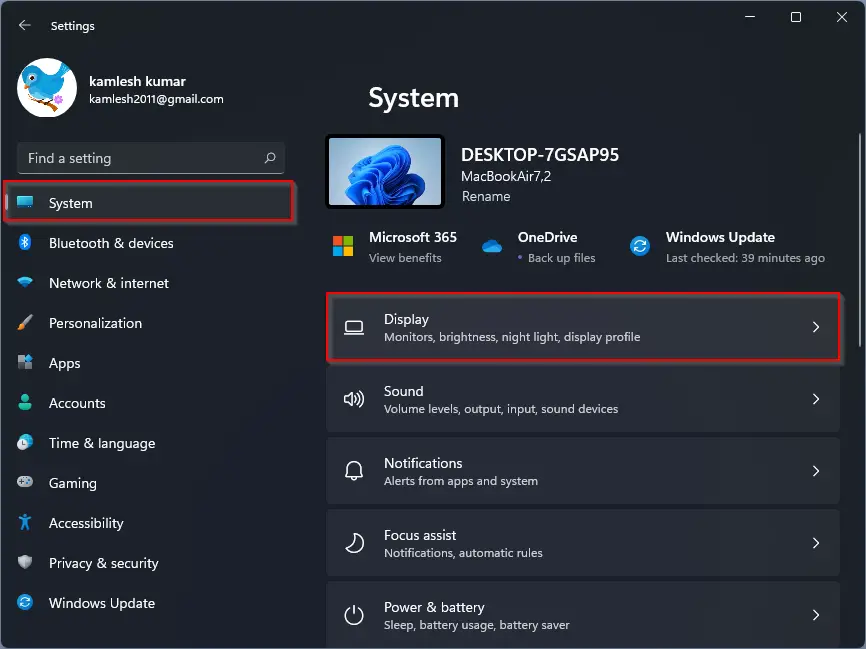
Step 2. When Windows Settings opens, select the System category from the left side pane.
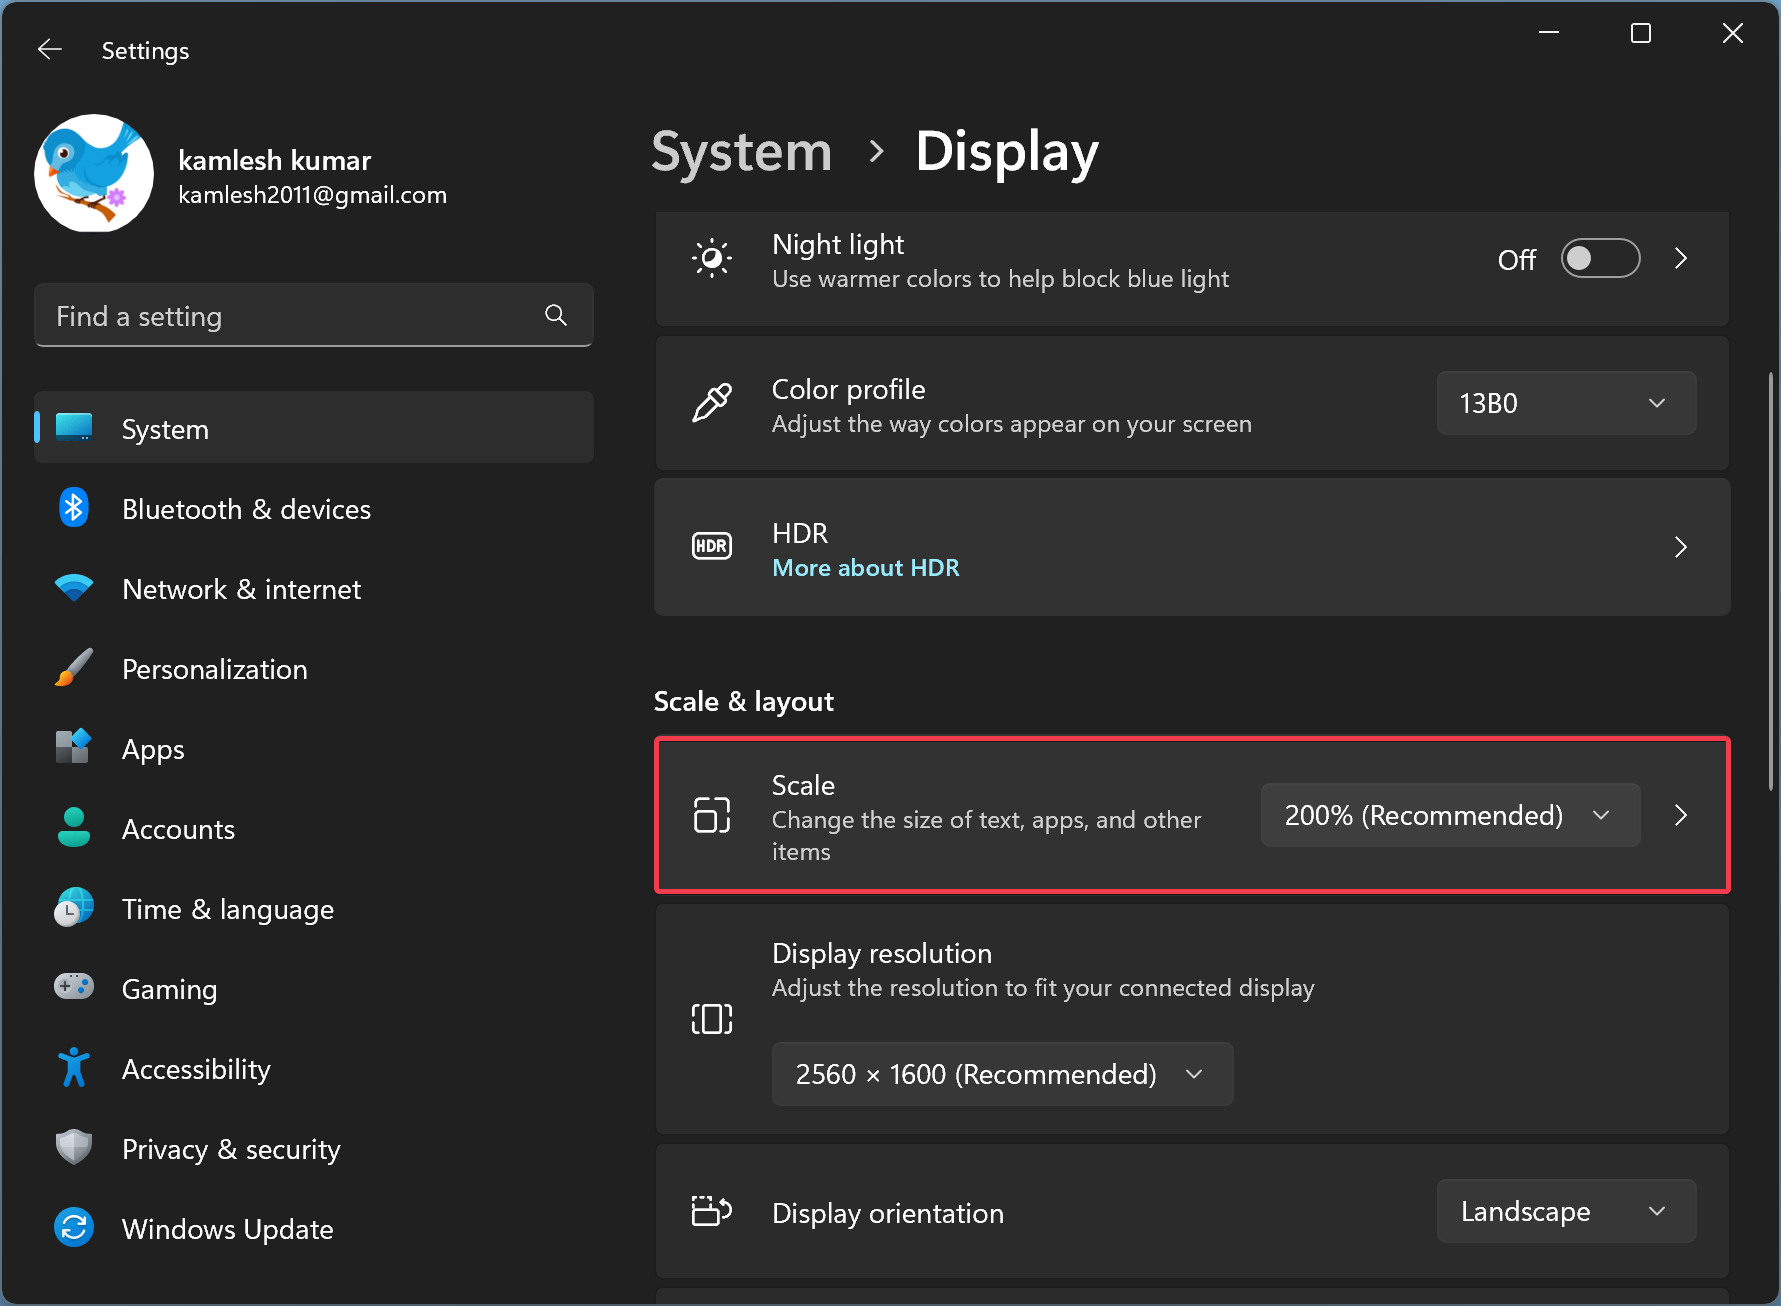
Step 3. On the right sidebar of the System, click the Display option.
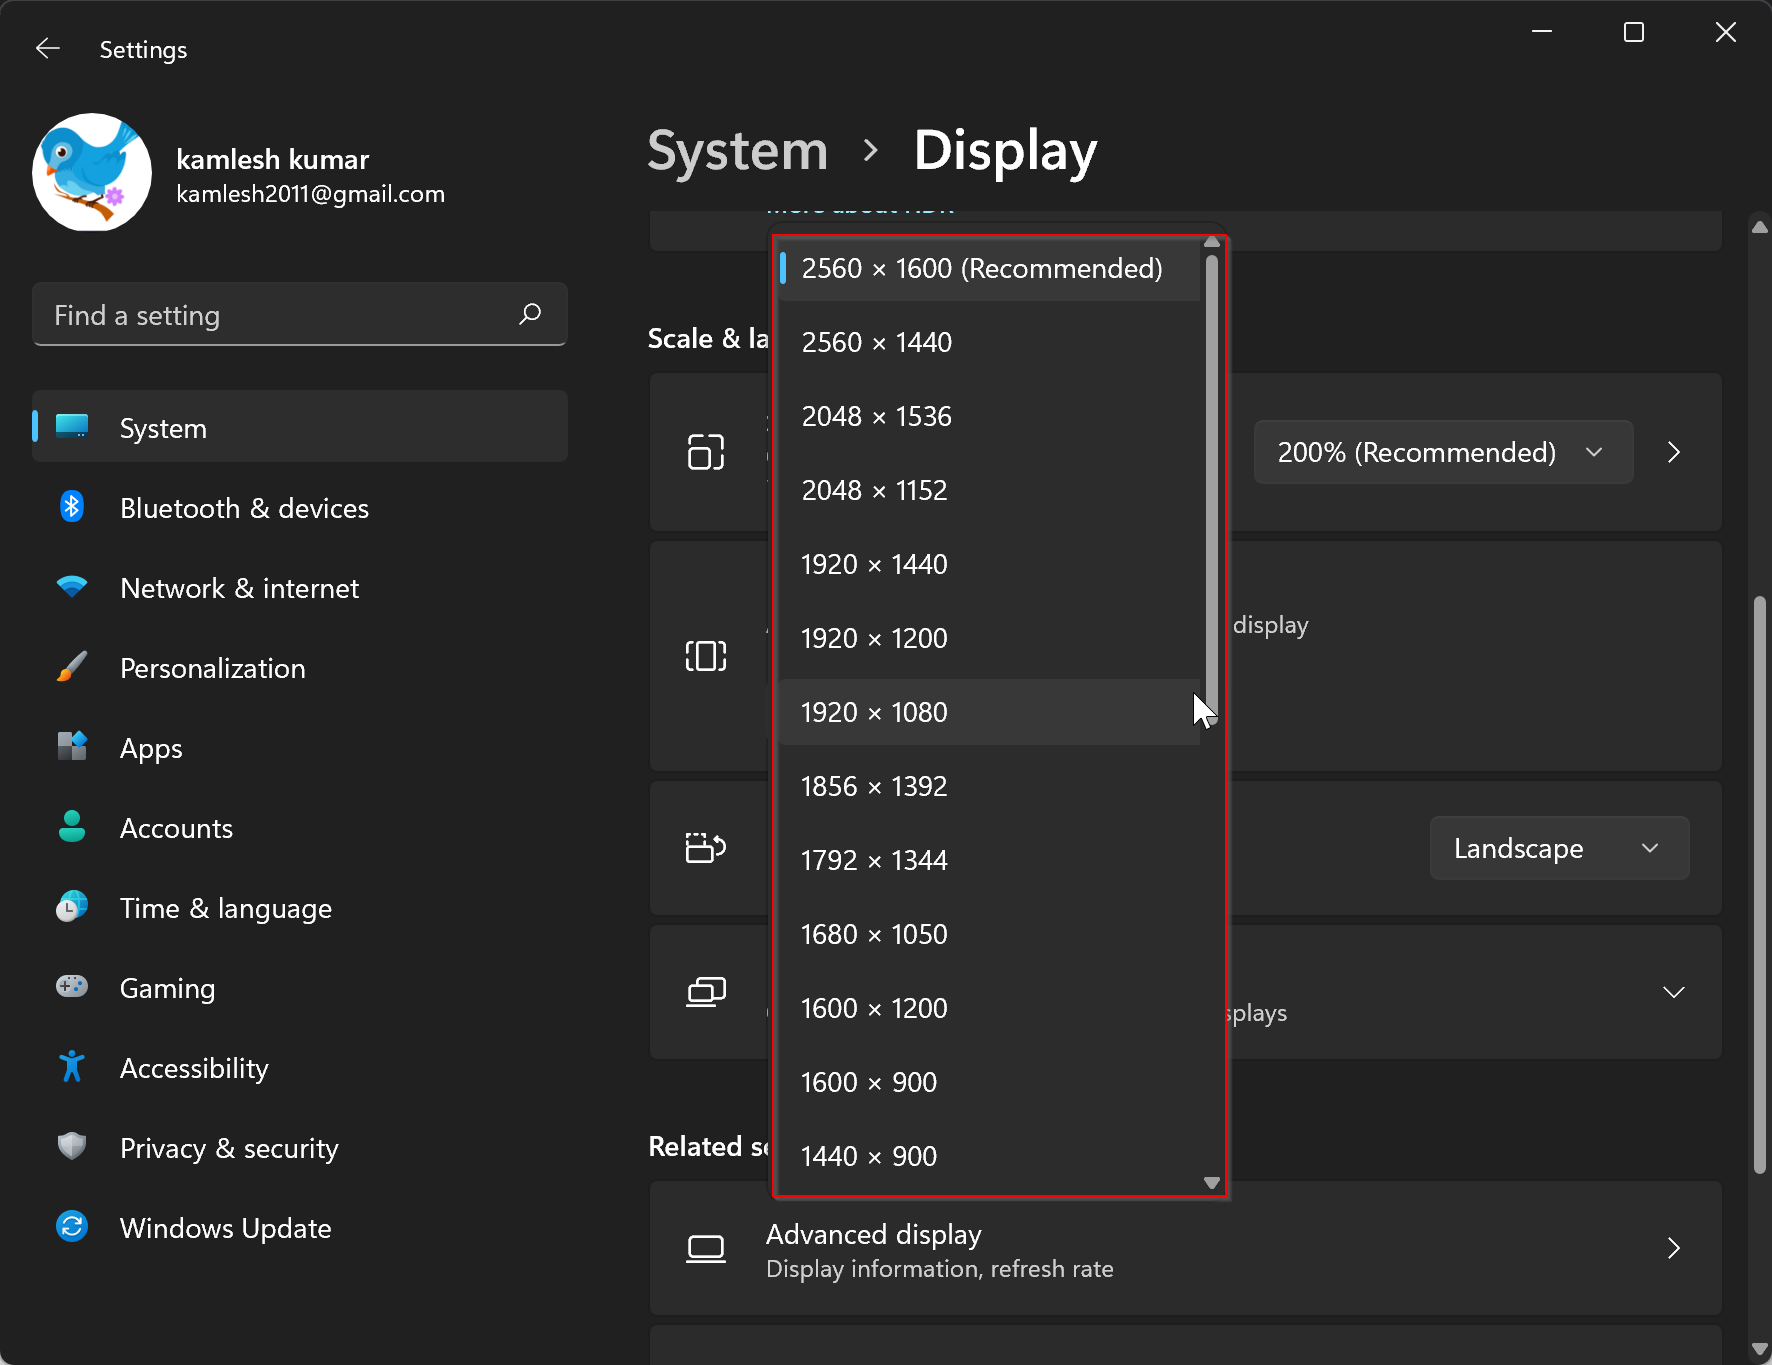
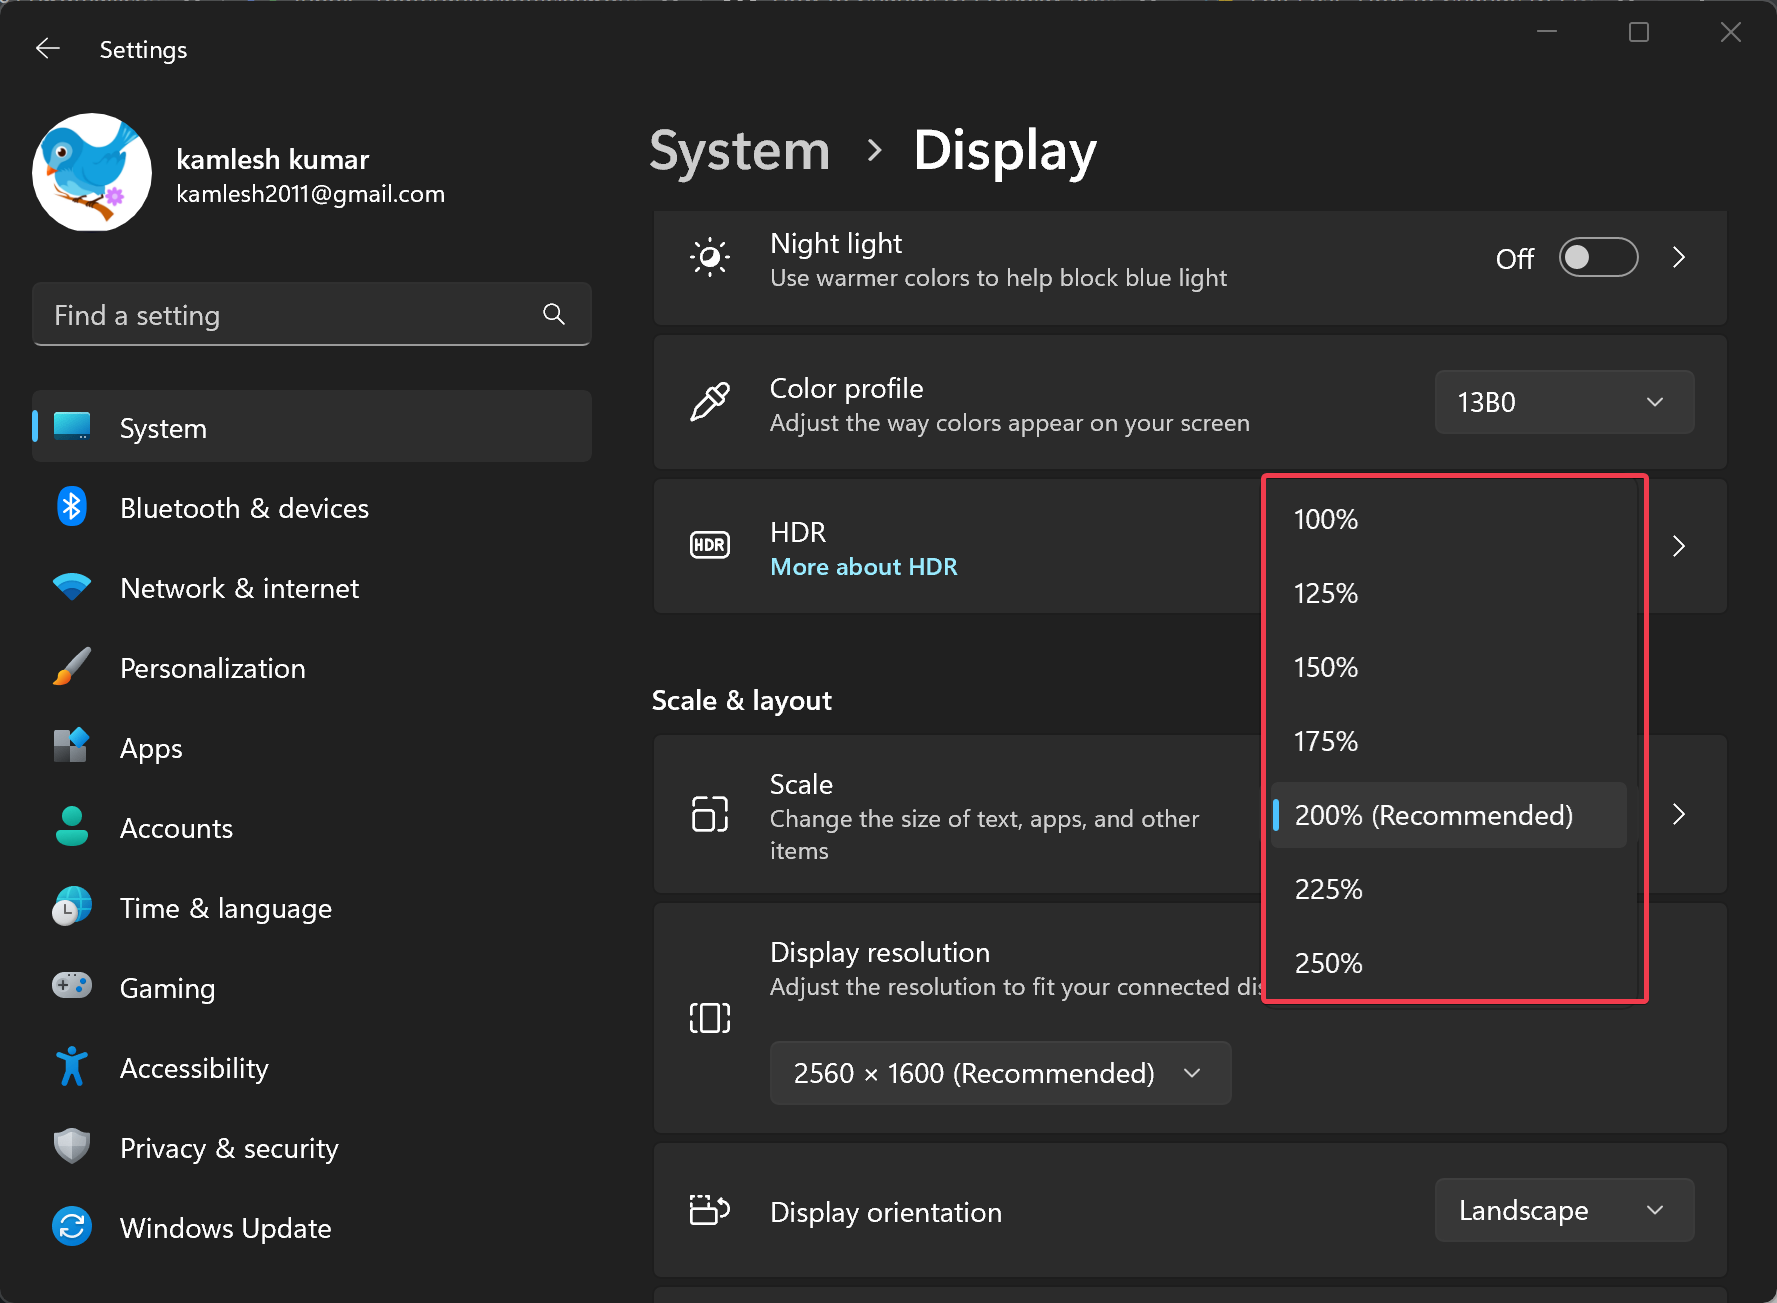
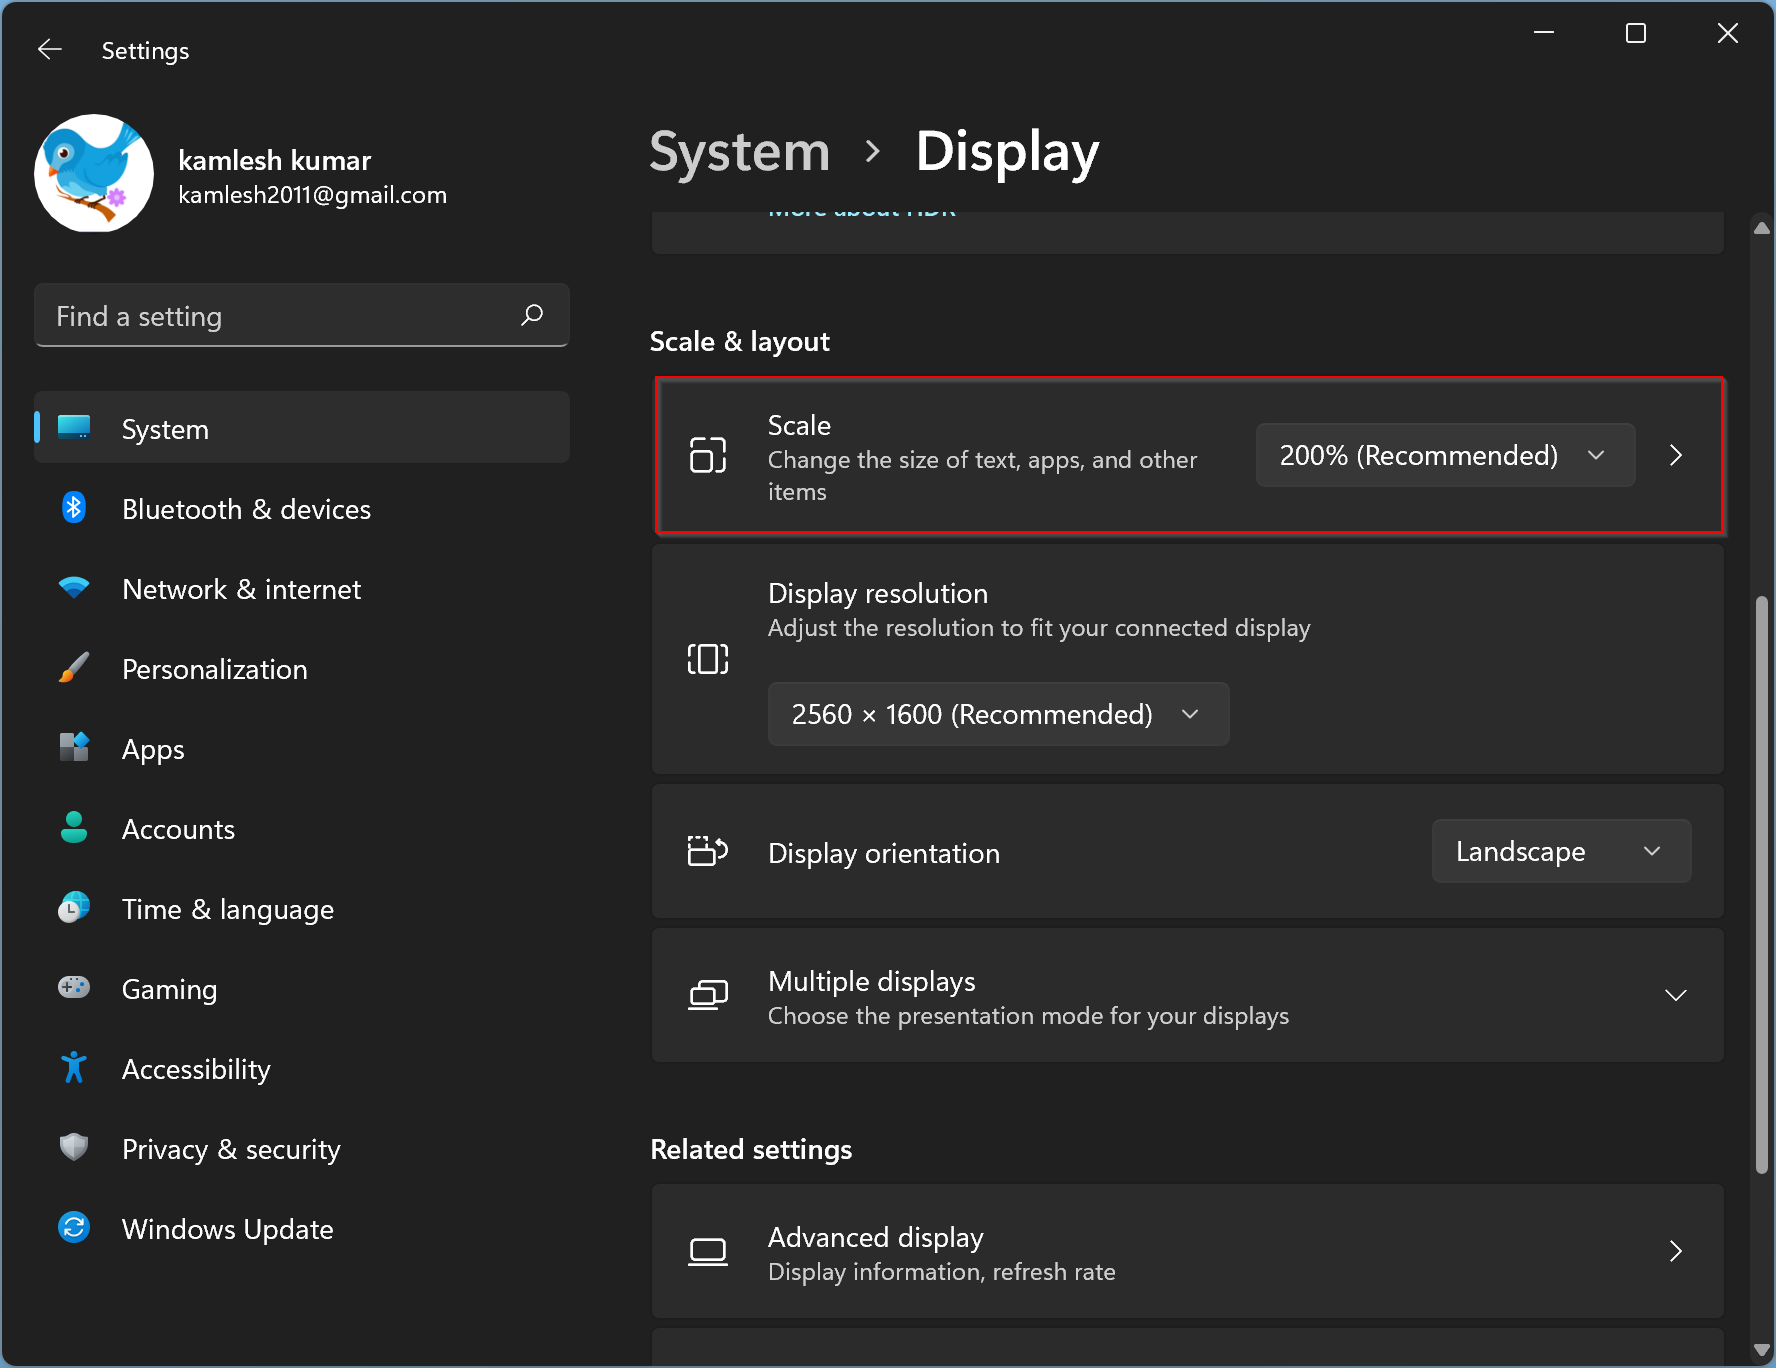
Step 4. After that, find the Scale option and pick a new value from a drop-down list, such as 100%, 125%, 150%, etc.
Step 5. When you’re done, Windows 11 will instantly apply the new DPI scaling value.
If the texts do not appear on the monitor according to your wishes after selecting a particular DPI display, select another DP display and see if it suits your eyes. When you find the correct DPI, close the settings app. All the settings are saved automatically.
How to Change DPI Display Scaling in Windows 11 via Custom Scaling?
Follow these steps to adjust DPI Display Scaling in Windows 11 via Custom Scaling:-
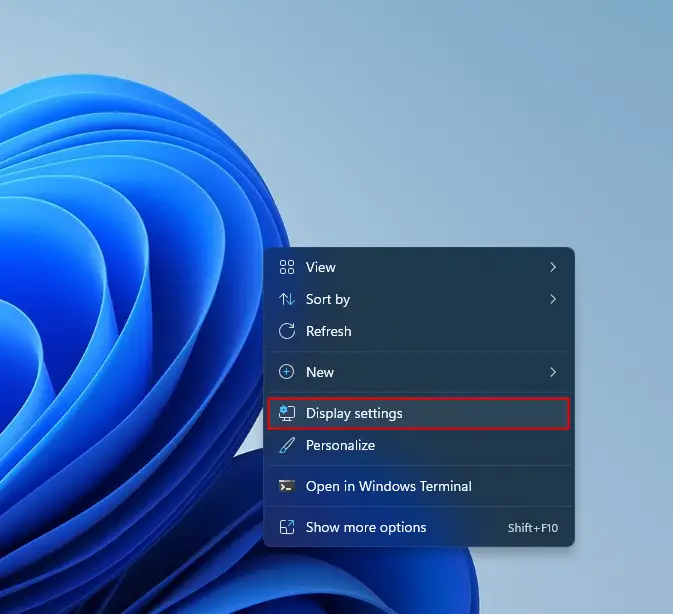
Step 1. First, right-click on the free space on the Windows 11 desktop and select Display Settings from the menu that appears.
Step 2. When Windows Settings opens in the Display category, scroll down a bit and then click the Scale title in the right sidebar.
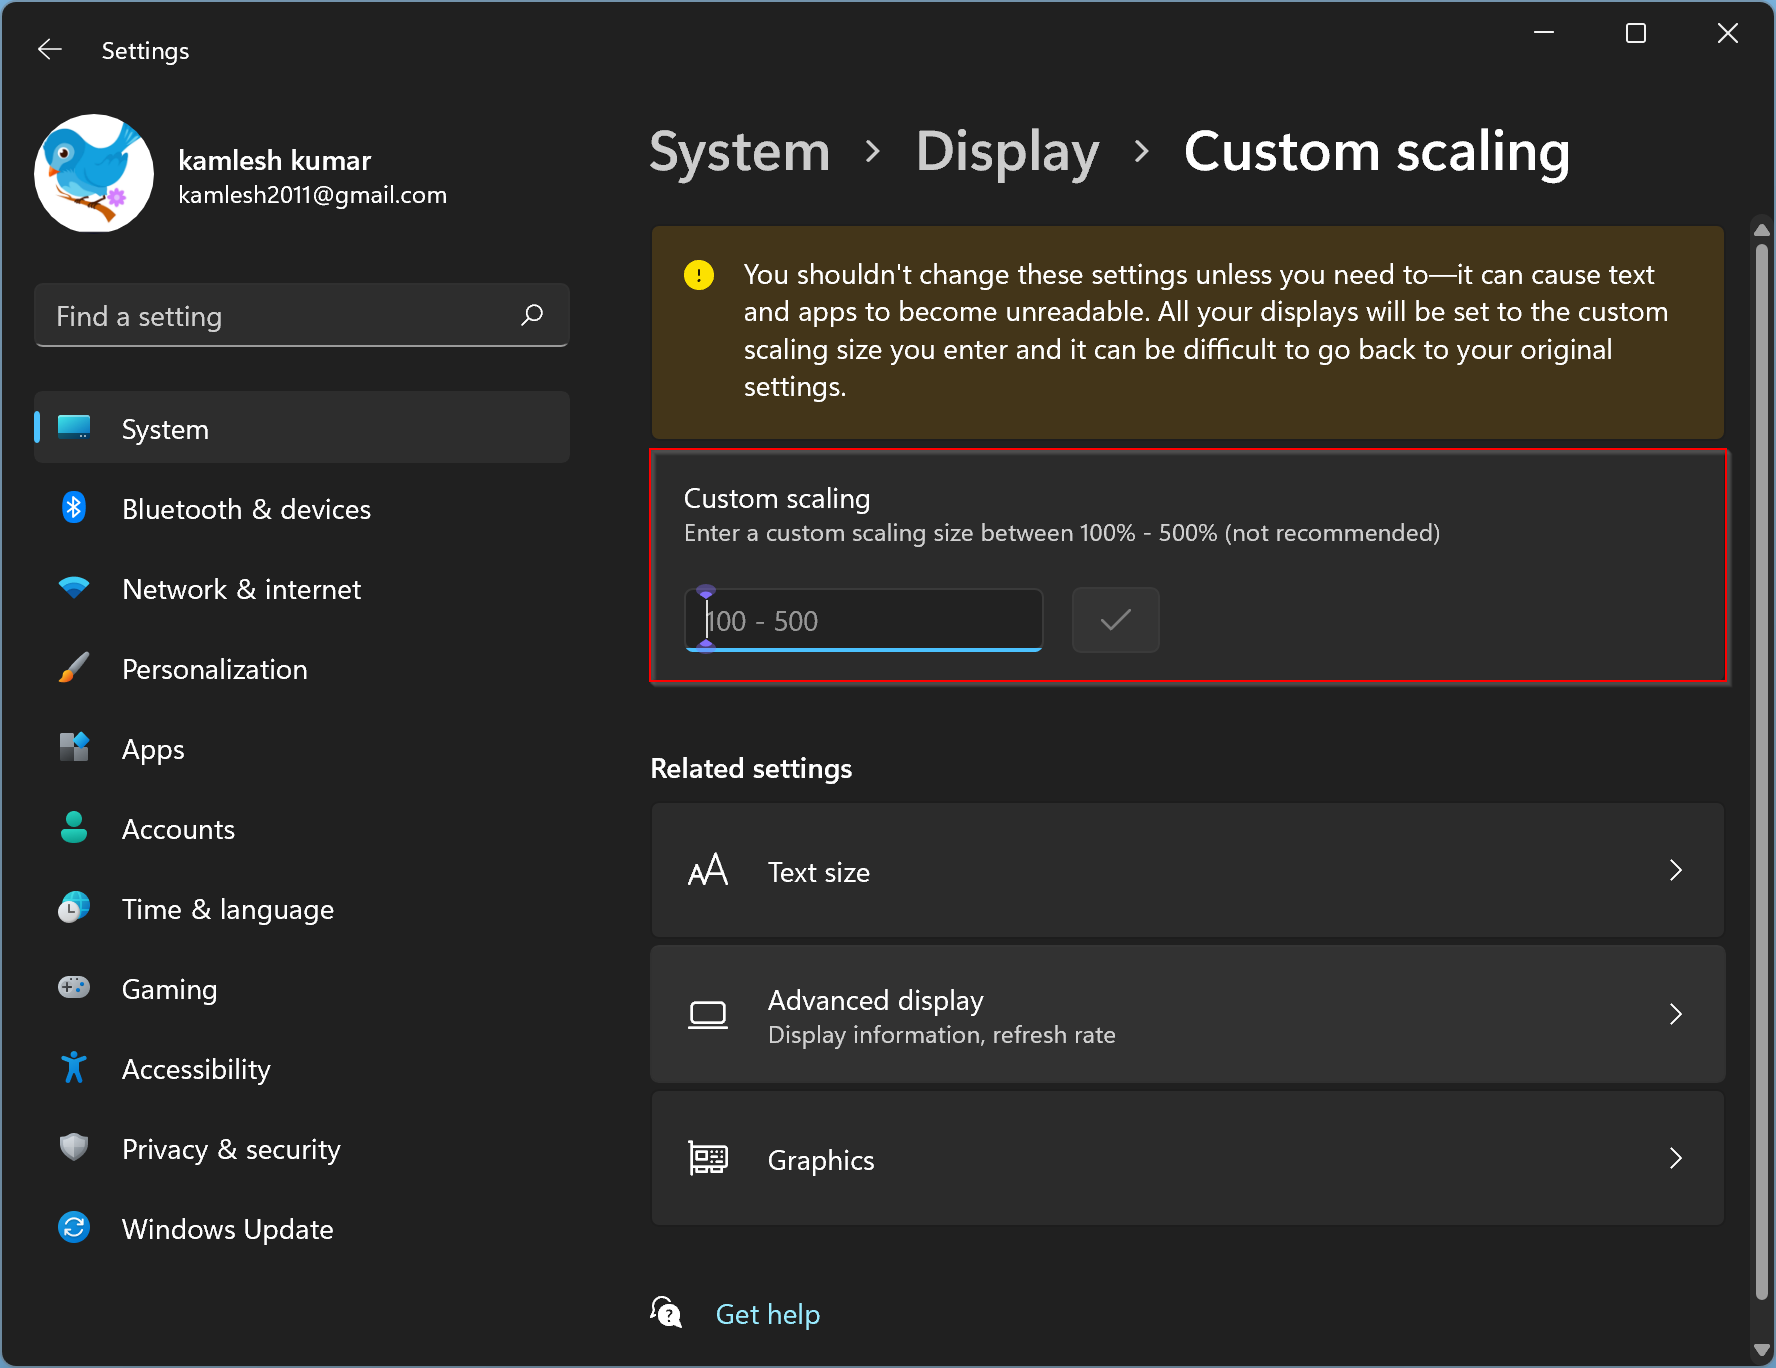
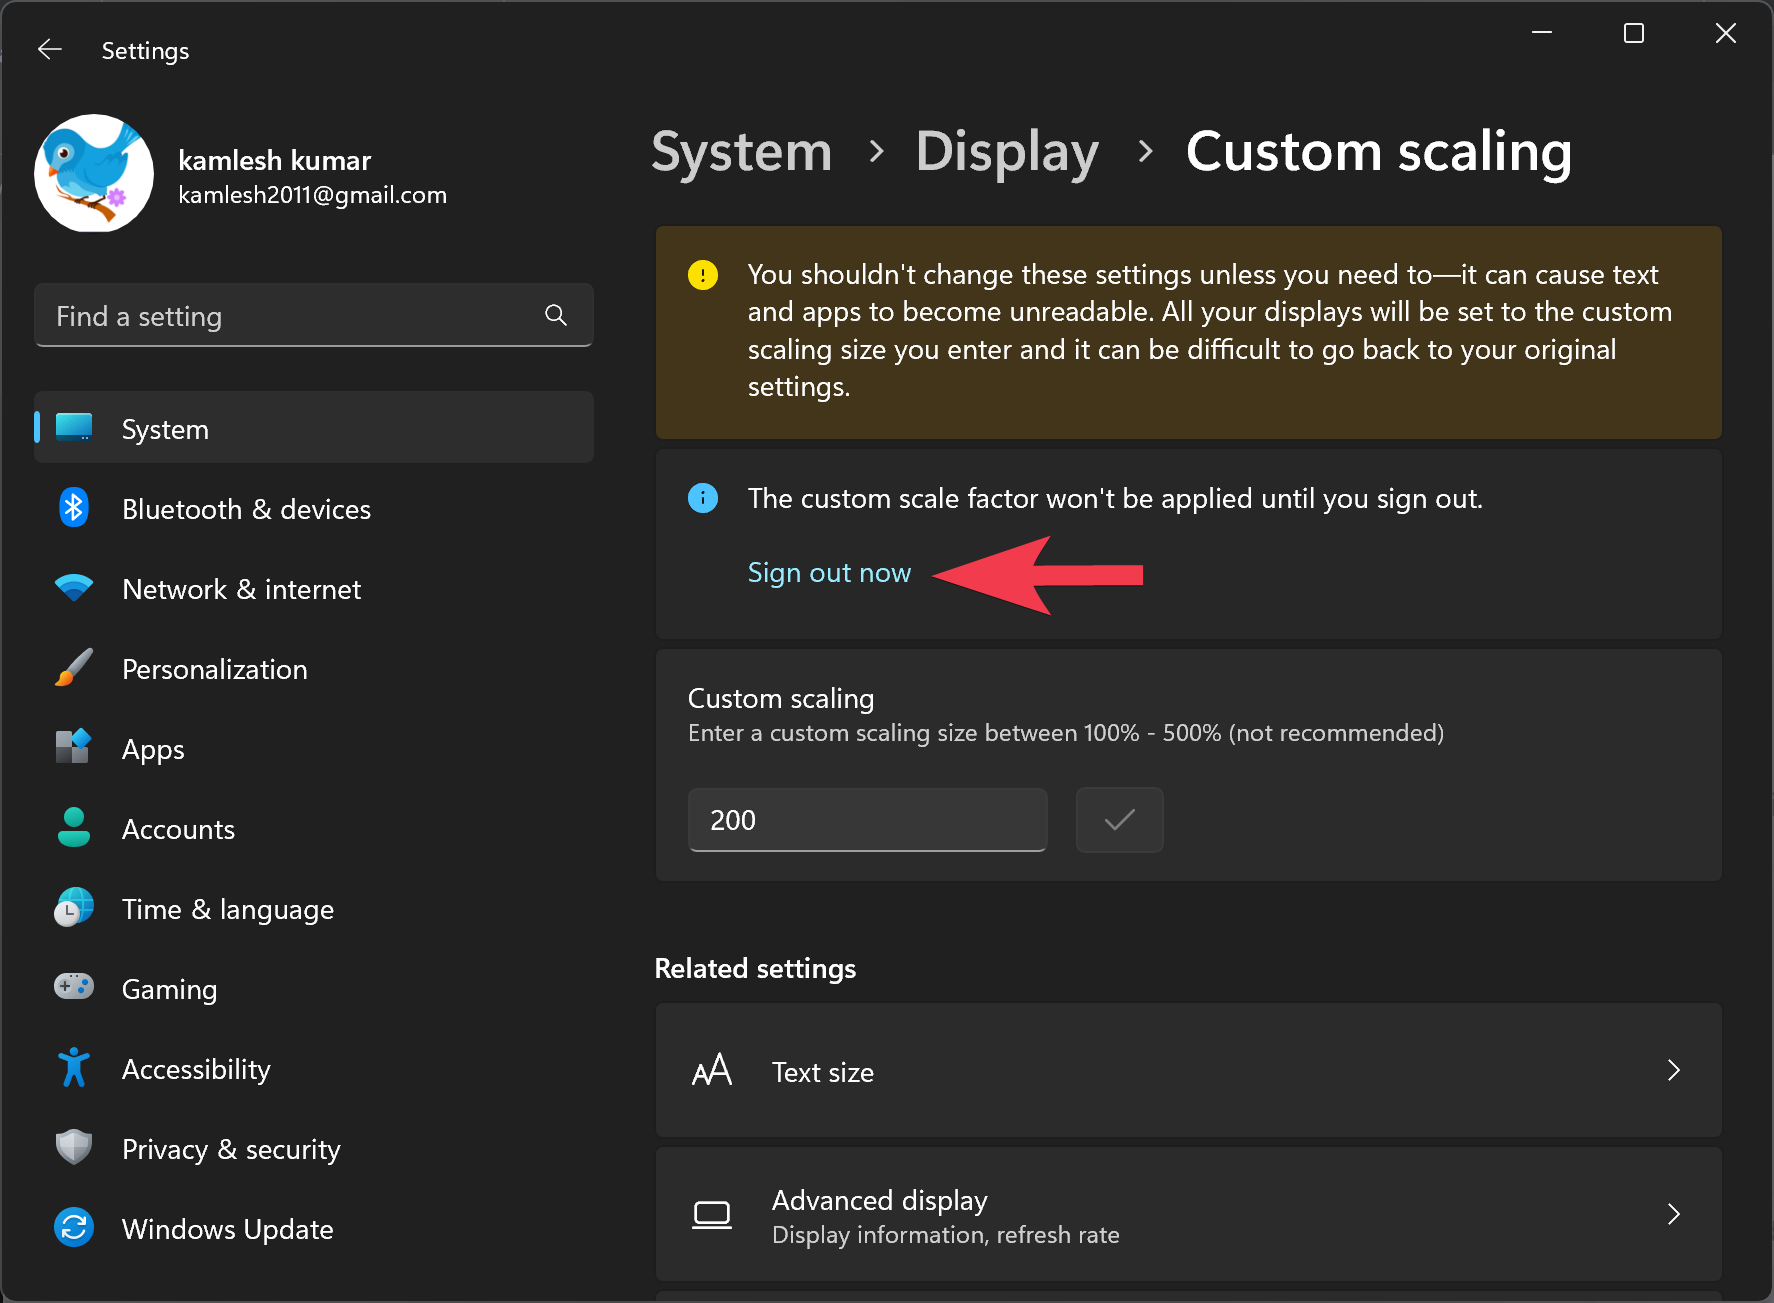
Step 3. Under the Custom Scaling option, enter the value you need between 100 and 500%.
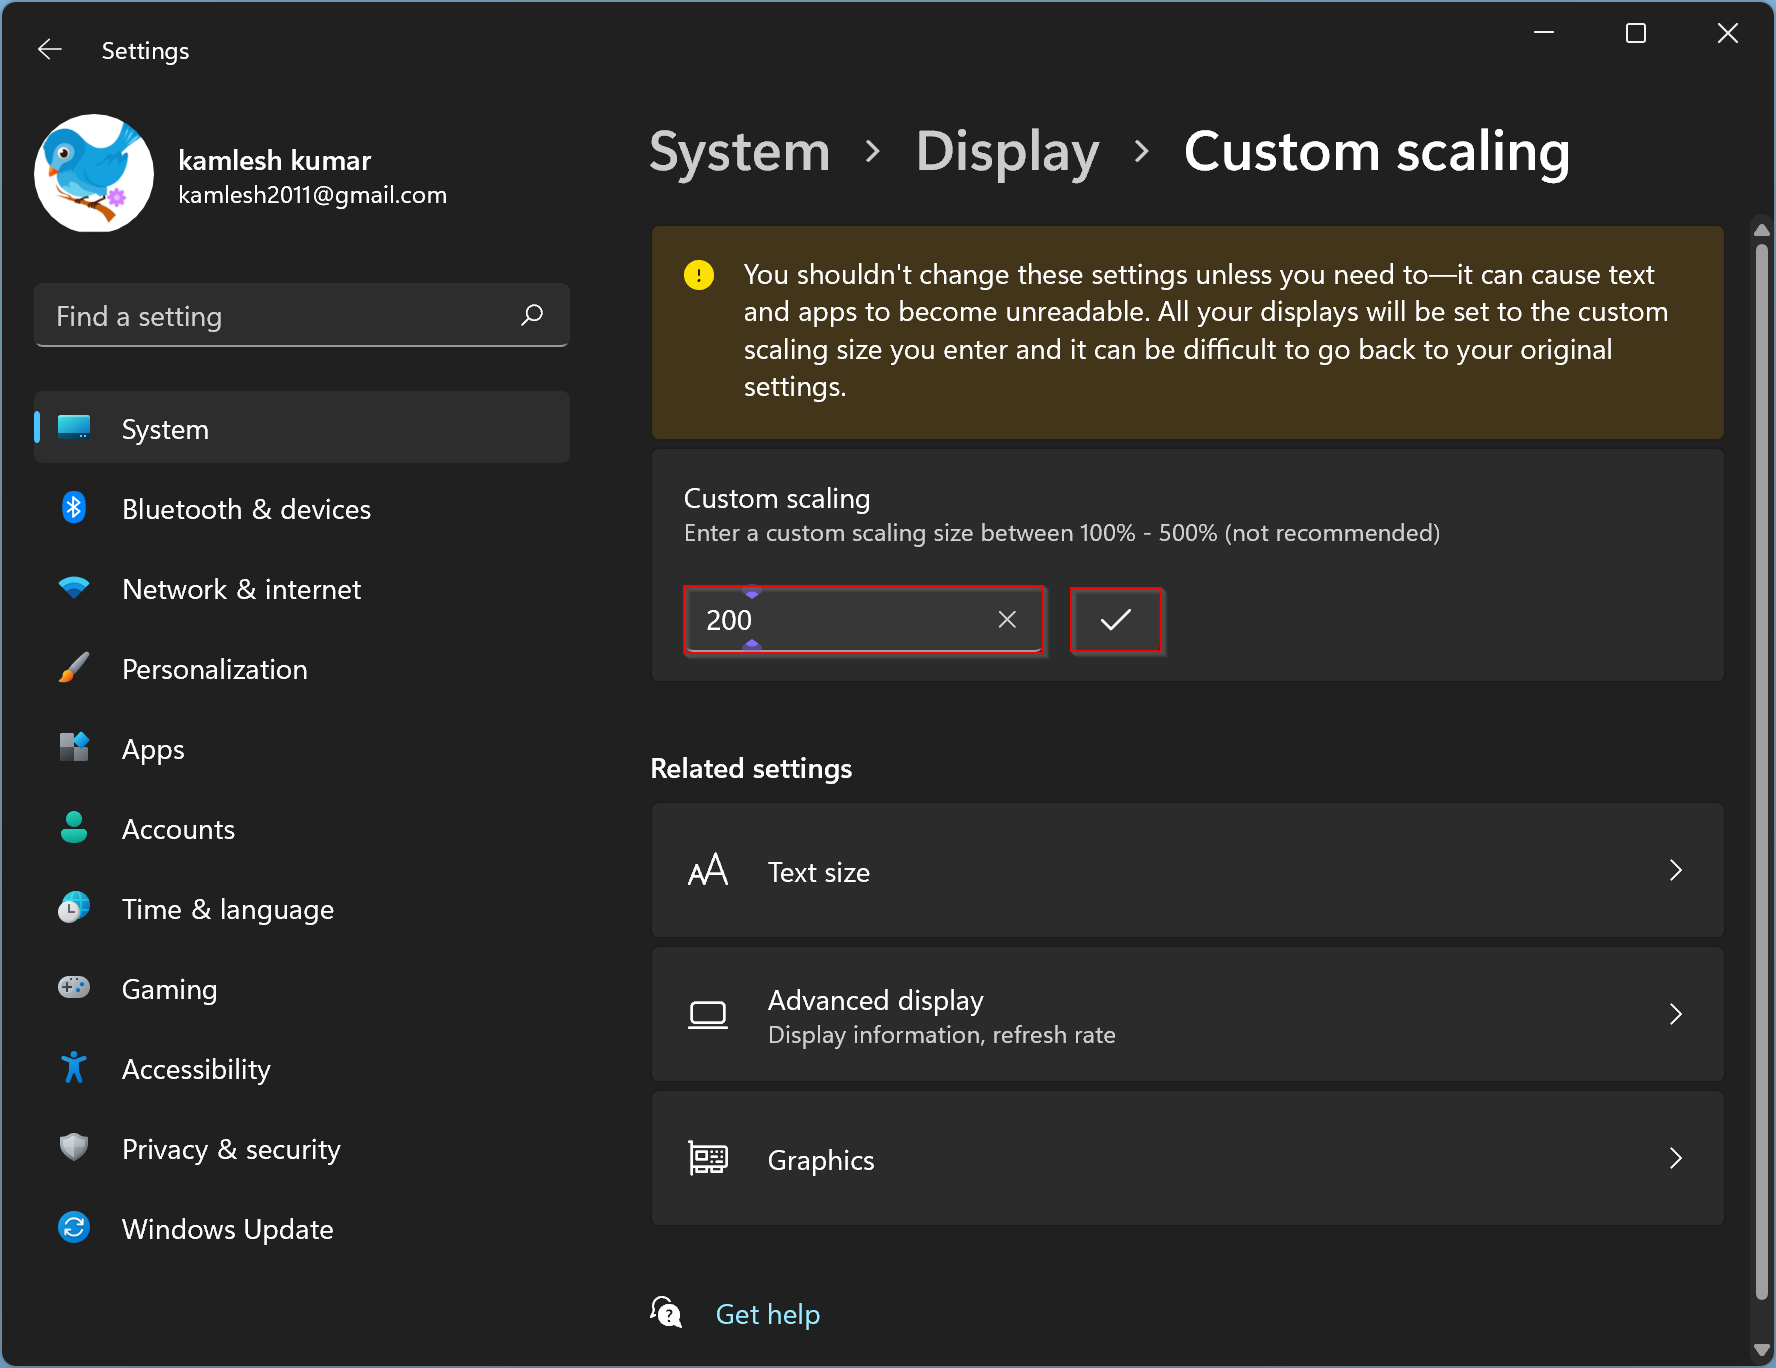
Step 4. When you’re done, click the tick mark to apply the changes.
Step 5. At last, click the Sign out now button.
That’s it. Now, log in to your machine again to see the changes.
How to Change Windows 11 Display Scaling using Registry Editor?
If you prefer to use Registry Editor to adjust display scaling on your Windows 11 machine, use the following steps:-
Step 1. First, open Registry Editor.
Step 2. Then, steer for the following key on the left-hand side of the Registry Editor window:-
HKEY_CURRENT_USER\Control Panel\Desktop
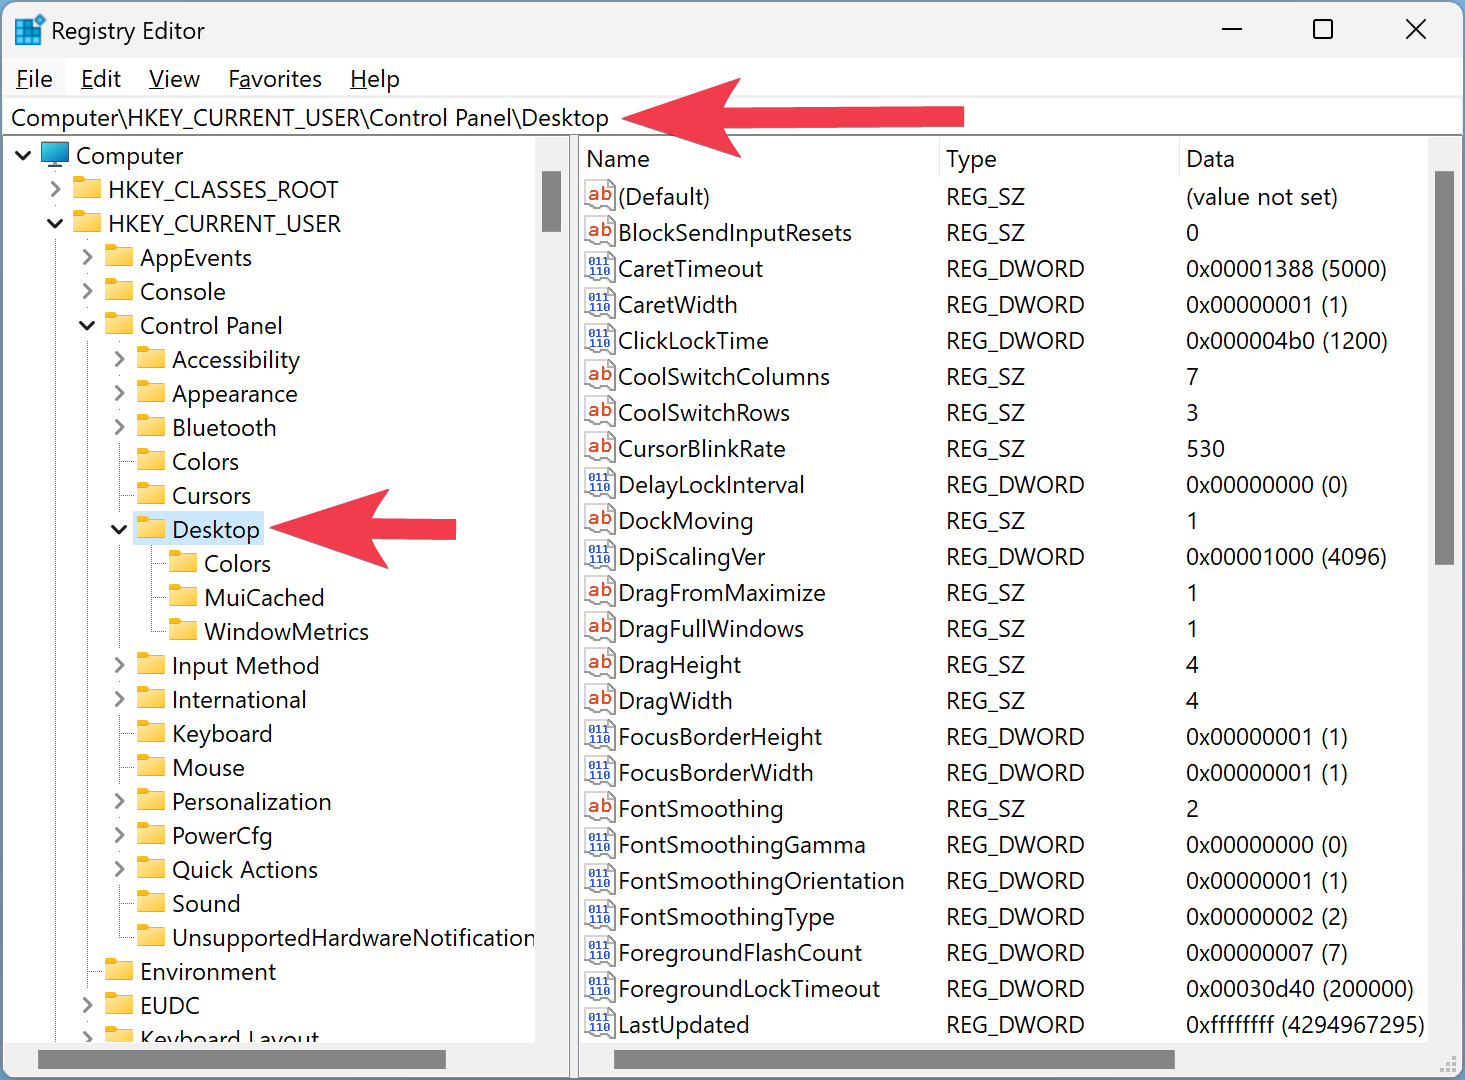
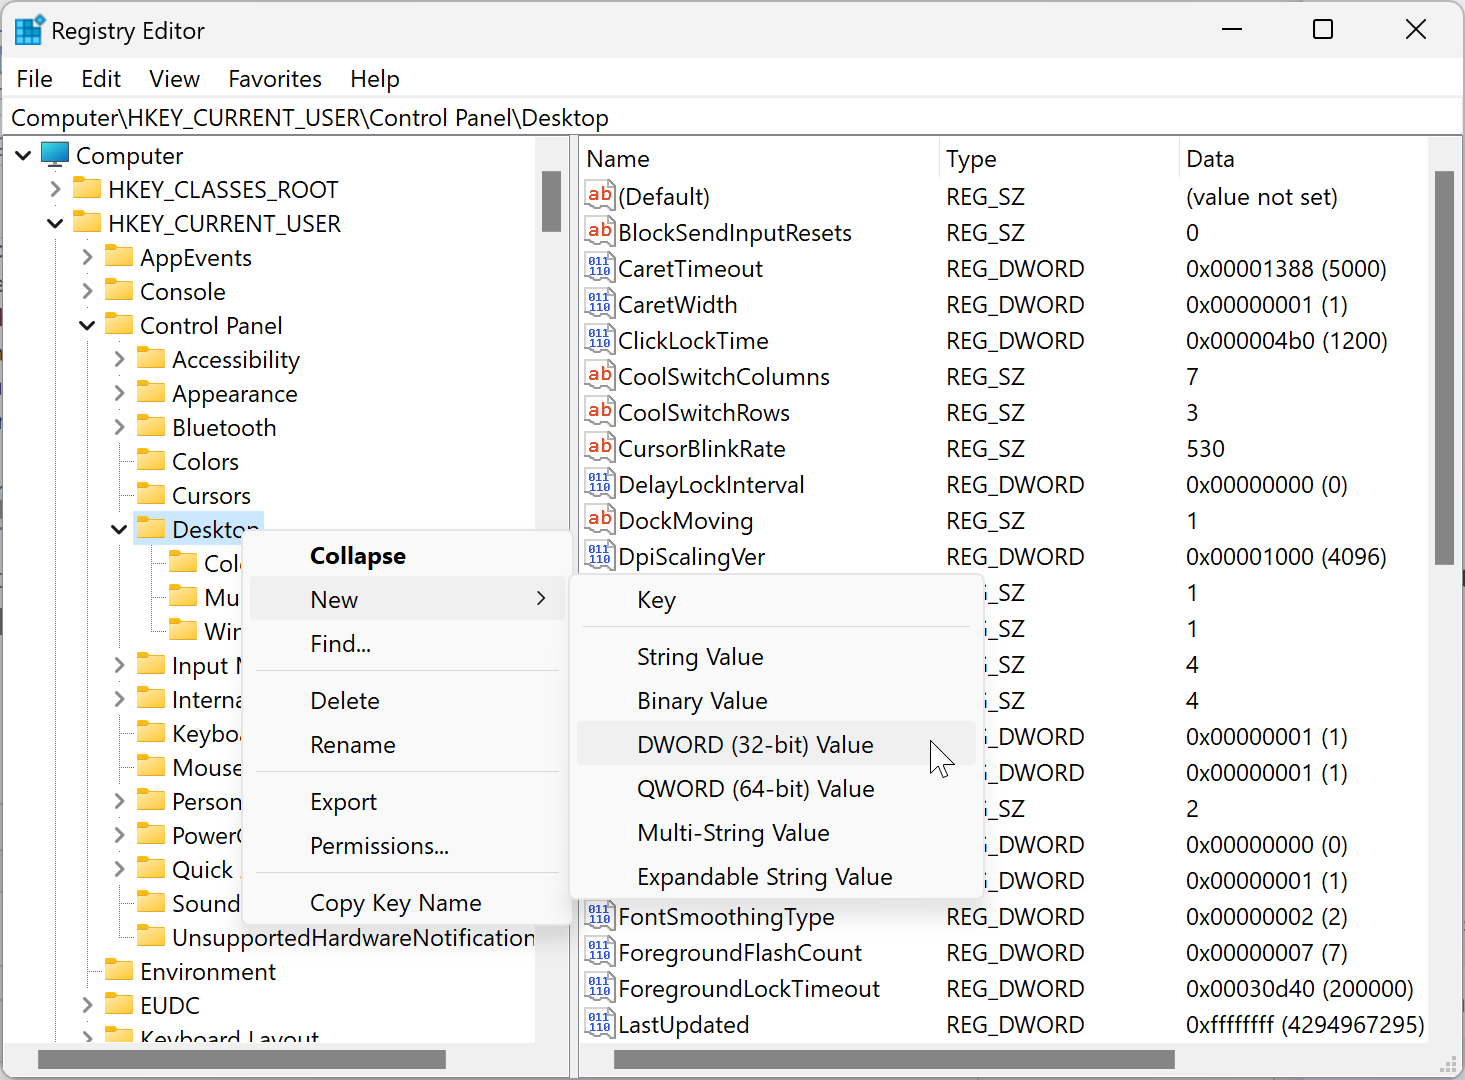
Step 3. Now, right-click on the Desktop folder on the left side and select New > DWORD (32-bit) Value.
Step 4. Name the newly created REG_DWORD as LogPixels.
![]()
Step 5. Next, double-click on the LogPixel REG_DWORD and set Base to Decimal. Then, set the Value data as the following numbers:-
- 96 = default 100%
- 120 = medium 125%
- 144 = larger 150%
- 192 = extra-large 200%
- 240 = custom 250%
- 288 = custom 300%
- 384 = custom 400%
- 480 = custom 500%
![]()
Step 6. Click OK.
Step 7. Next, find the Win8DpiScaling REG_DWORD and double-click on it to open it. Set its “Value data” to 1 if you use a LogPixels value other than 96.
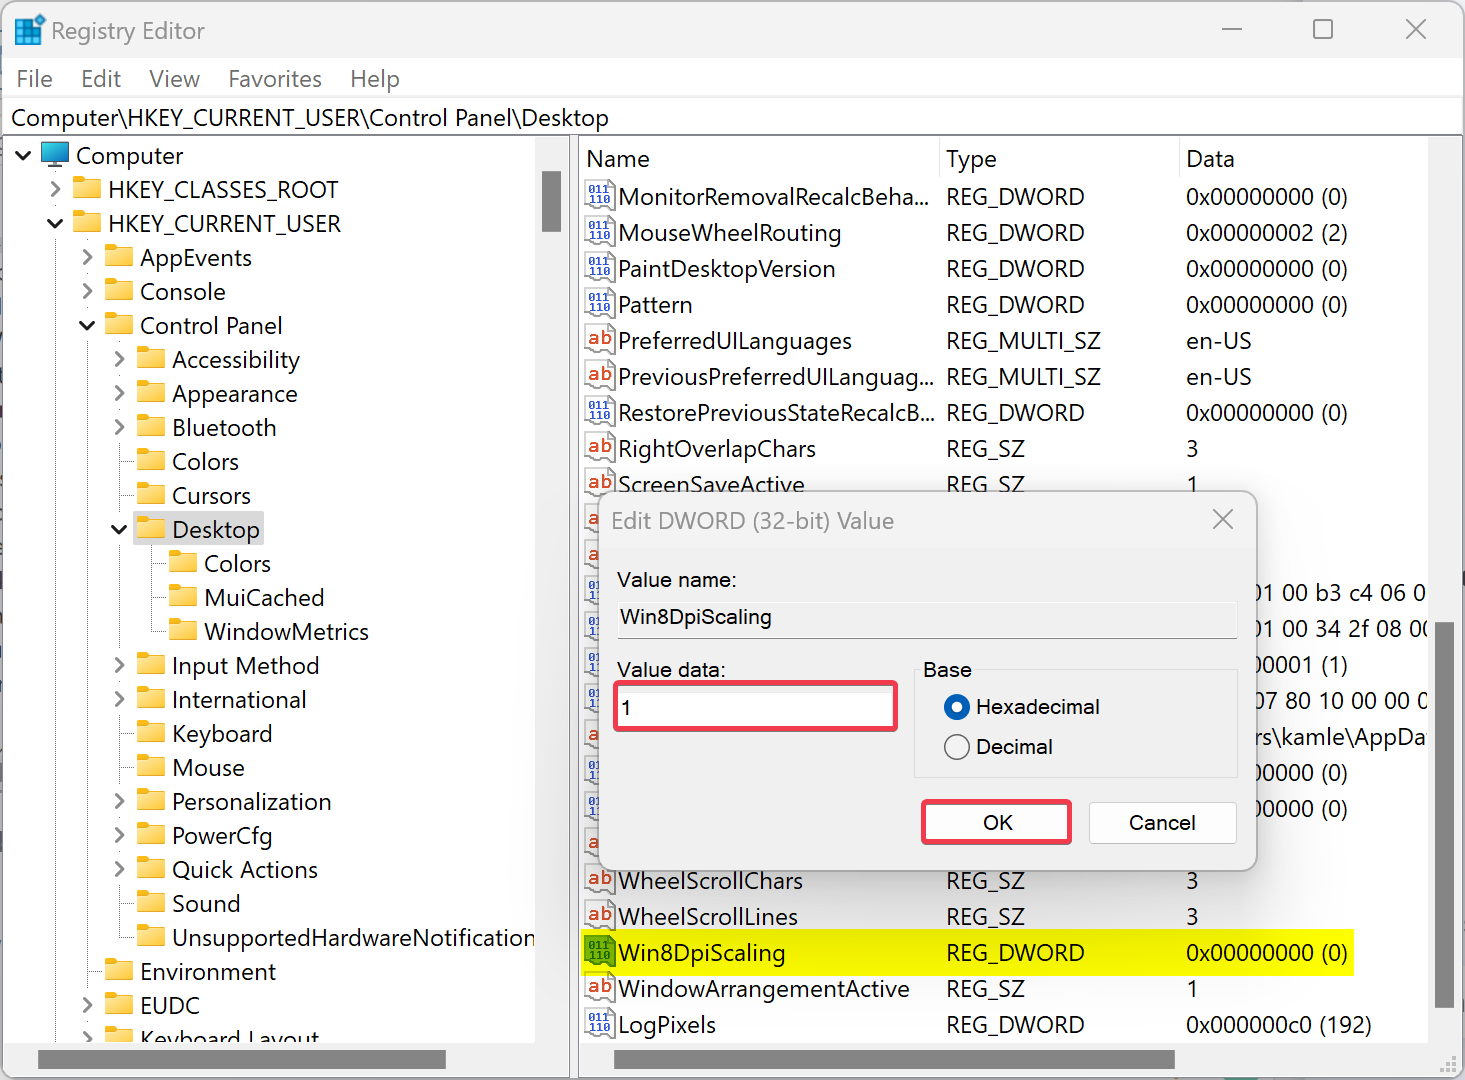
Step 8. Click OK.
Step 9. At last, reboot your computer to apply the changes.
Conclusion
In conclusion, DPI, or Dots per inch, is a physical measurement of the number of pixels in a linear inch of a display. Windows 11 uses DPI as a scale factor to resize running apps and documents. While most modern computers use popular scaling factors in the range of 96-125 DPI, users may prefer to customize the DPI scaling for their monitor. Windows 11 provides various options to adjust DPI scaling, such as through the Settings app, Custom Scaling, or Registry Editor. By following the steps provided, users can easily change DPI display scaling in Windows 11 and make the UI elements smaller or bigger according to their preferences.