Windows 11 and 10 allow users to share files and printers with computers on the same network. The File sharing feature allows you to share files and folders with others on the same network to view, copy, or modify. The Printer sharing option lets you make an attached printer available to other computer users on the same network.
These features of Windows are quite handy, and you can take advantage of these functions after turning on file and printer sharing in Windows 11/10. By default, Windows 11/10 uses 128-bit encryption for file sharing. On the other hand, your older operating systems may use 40-bit or 56-bit encryption for file sharing. So, to communicate with older systems, sometimes you might want to change the encryption level on your Windows 11 or 10 system.
In this gearupwindows article, you will learn to change the encryption level for file-sharing connections in Windows 11 or 10. According to your needs, you can use 128-bit, or 40 or 56-bit encryption for file sharing on your Windows 11/10 machine.
How to Change File Sharing Encryption Level in Windows 11 Settings?
Follow these steps to change File Sharing encryption level in Windows 11 Settings:-
Step 1. First, open Windows 11 Settings.
To do that, you can use the Windows + I keyboard shortcut. Alternatively, right-click on the Start button and select Settings in the menu.
Step 2. Next, select Network & internet in the left sidebar.
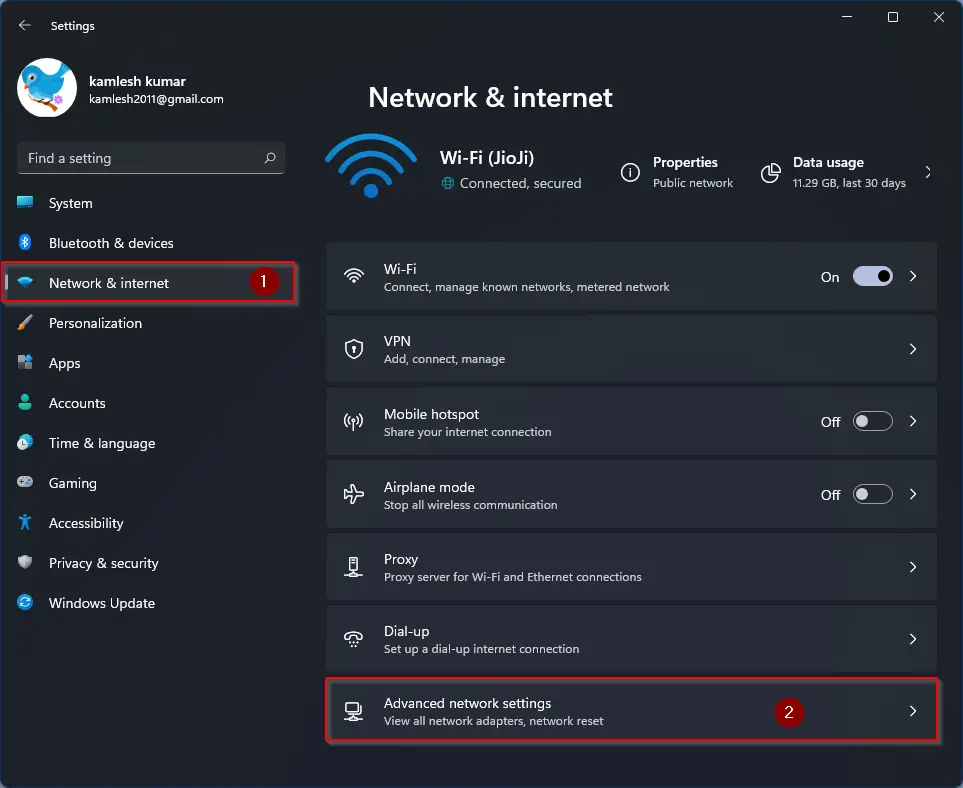
Step 3. After that, click on the Advanced network settings option on the right.
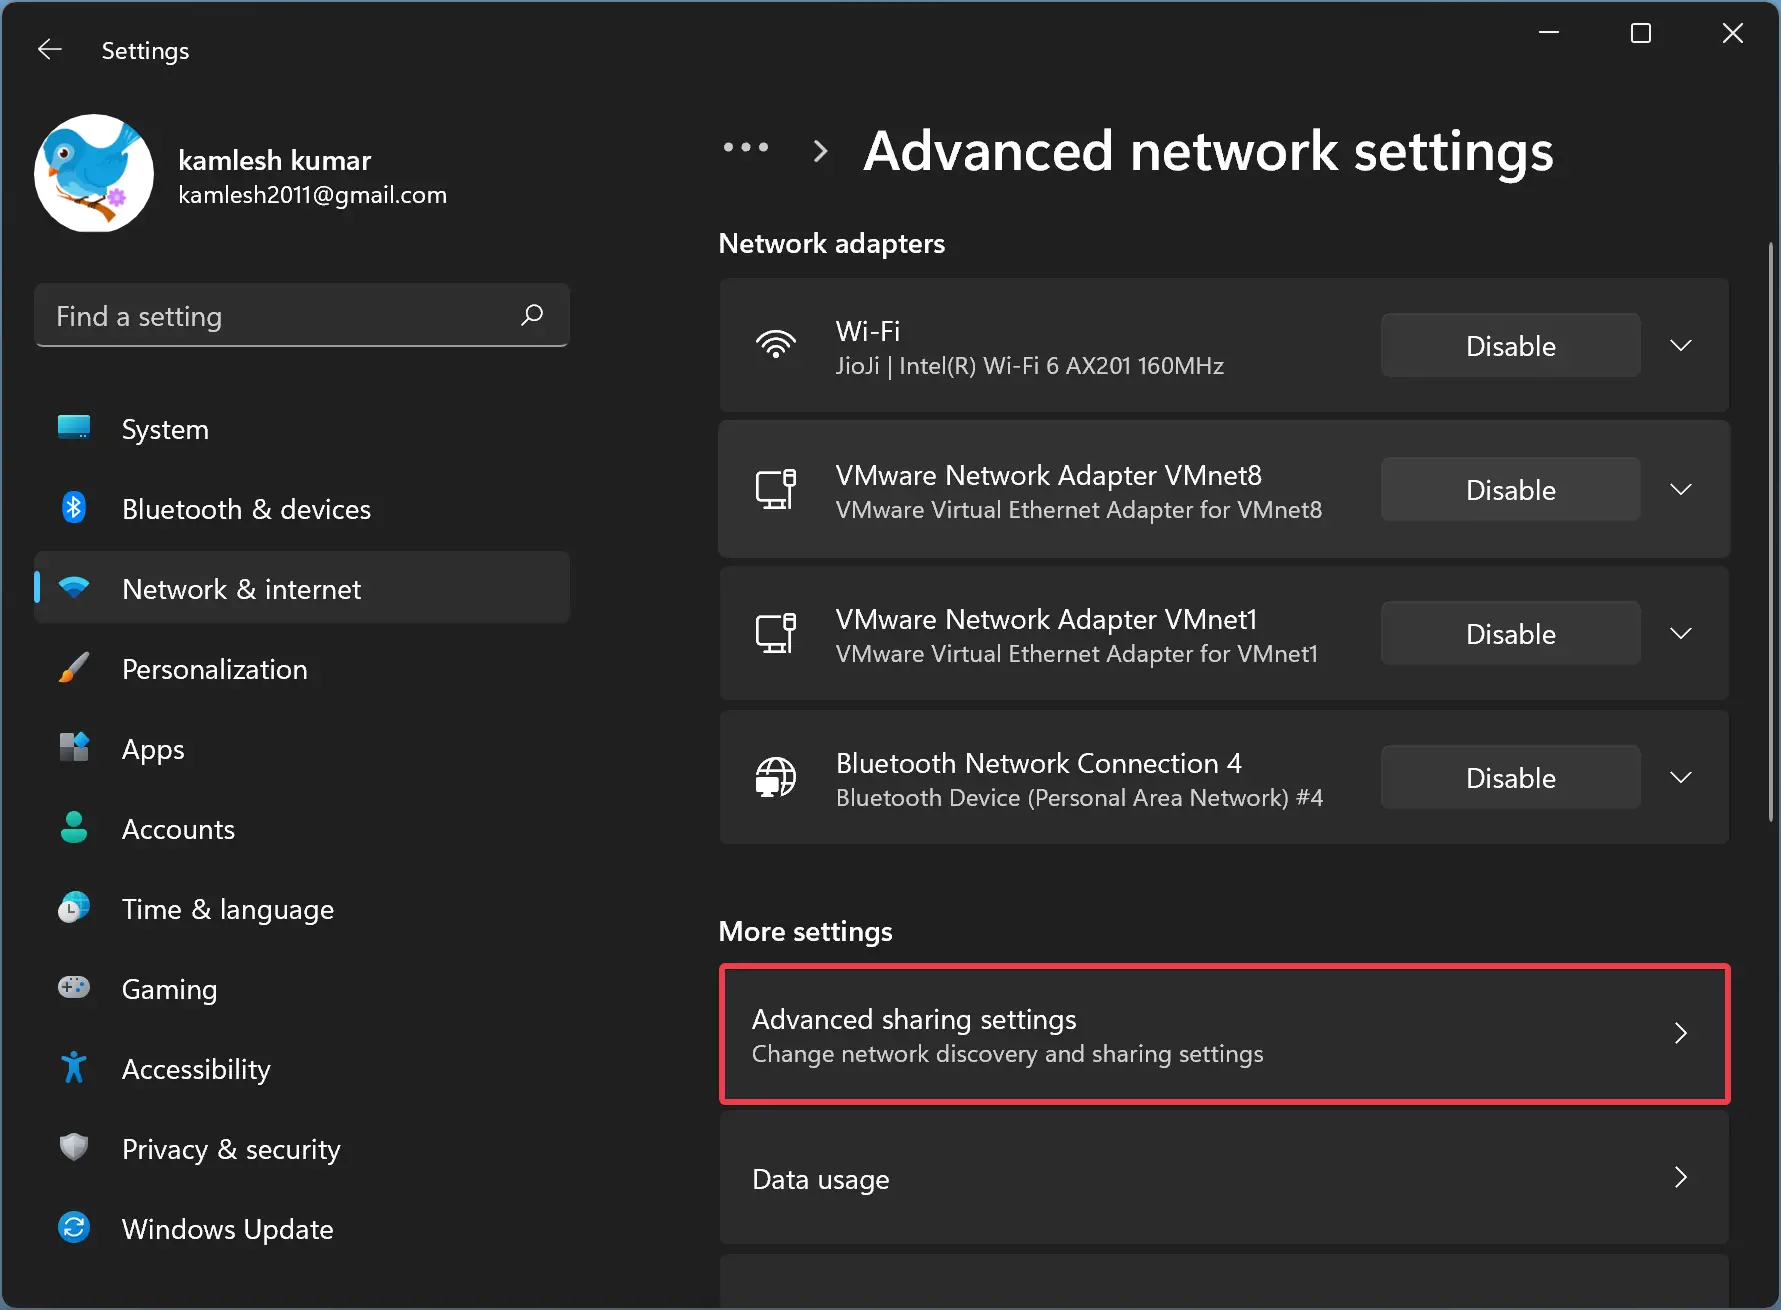
Step 4. On the following screen, under the “More settings” section, click the Advanced sharing settings option.
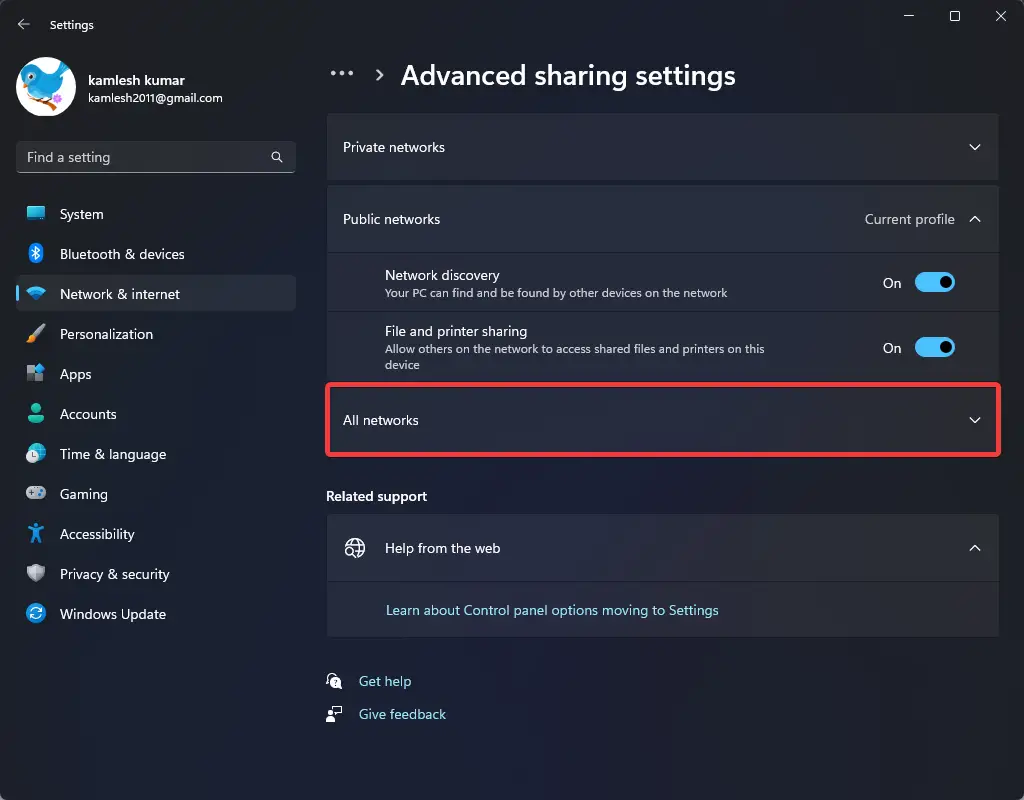
Step 5. Here, click on the All networks tile to expand it.
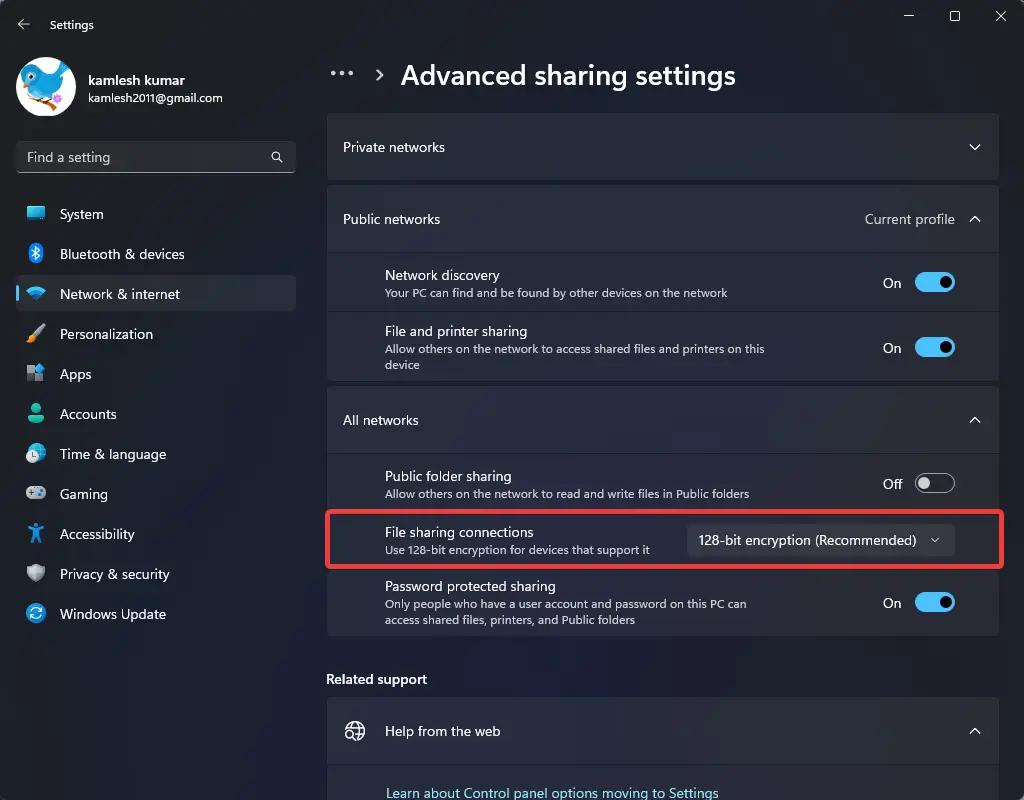
Step 6. Now, click the File sharing connections drop-down menu and choose the 128-bit encryption (Recommended) or 40- or 56-bit encryption option according to your requirements.
How to Change File Sharing Encryption Level via Registry Editor?
To configure the File Sharing encryption level in Windows 11 or 10 through Registry Editor, do these steps:-
Step 1. First, open Registry Editor.
Step 2. Next, navigate to the following path in the left sidebar of Registry Editor:-
HKEY_LOCAL_MACHINE\SYSTEM\CurrentControlSet\Control\Lsa\MSV1_0
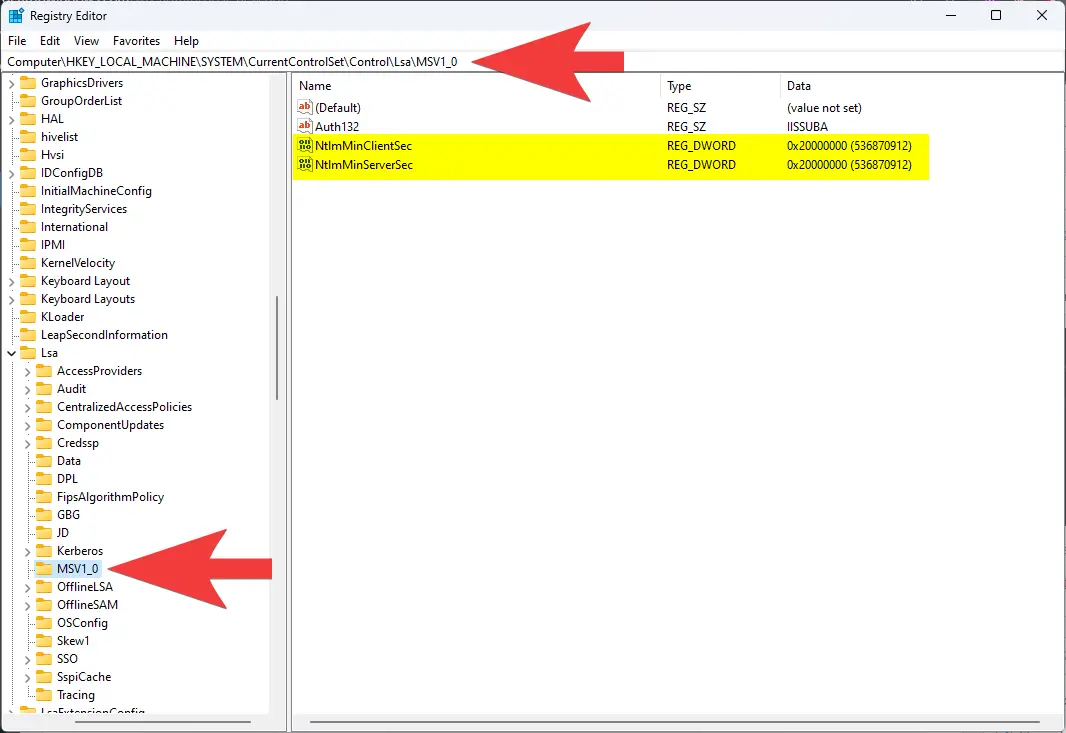
Step 3. On the opposite pane, locate the REG_DWORD entries named NtlmMinClientSec and NtlmMinServerSec that “Value data” to be changed.
Then, double-click on the NtlmMinClientSec REG_DWORD and set its “Value data” to the following:-
- 0 = To use 40- or 56-bit encryption.
- 20000000 = To use 128-bit encryption.
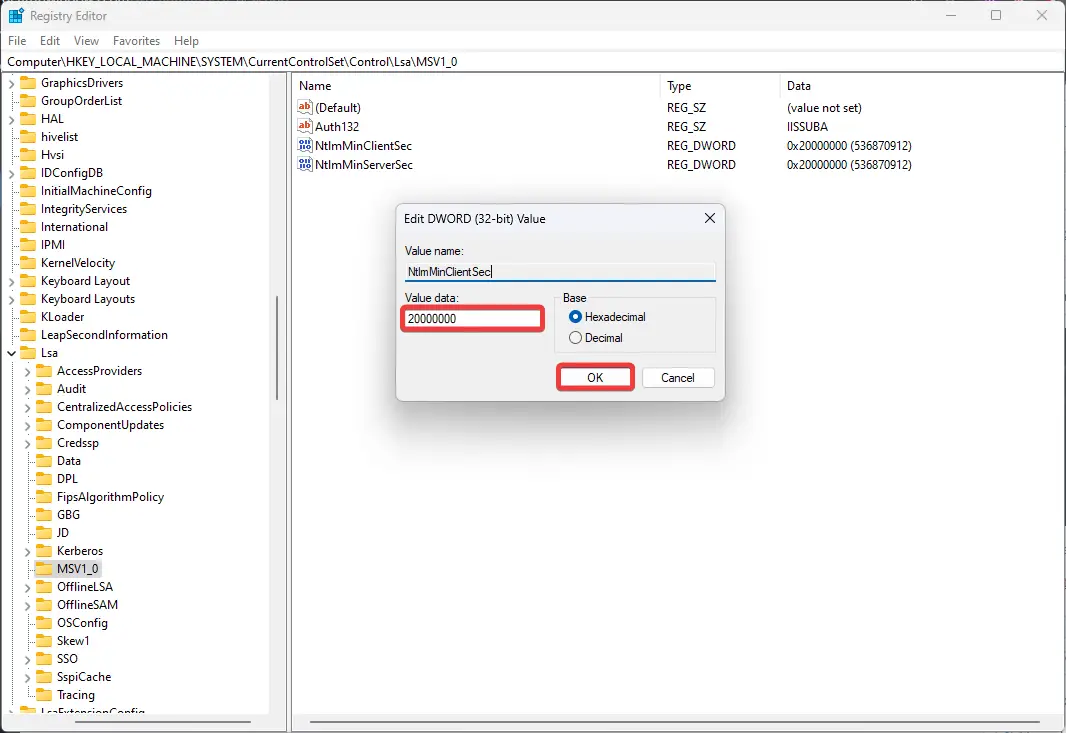
Step 4. Then, click the OK button.
Step 5. Similarly, double-click on the NtlmMinServerSec REG_DWORD and set its “Value data” to the following:-
- 0 = To use 40- or 56-bit encryption.
- 20000000 = To use 128-bit encryption.
Step 6. Next, click the OK button.
Step 7. Finally, reboot your PC to apply the changes.
How to Change File Sharing Encryption Level through Control Panel?
Follow these steps to configure File Sharing encryption level in Windows 11 or 10 if you prefer to use the classic Control Panel:-
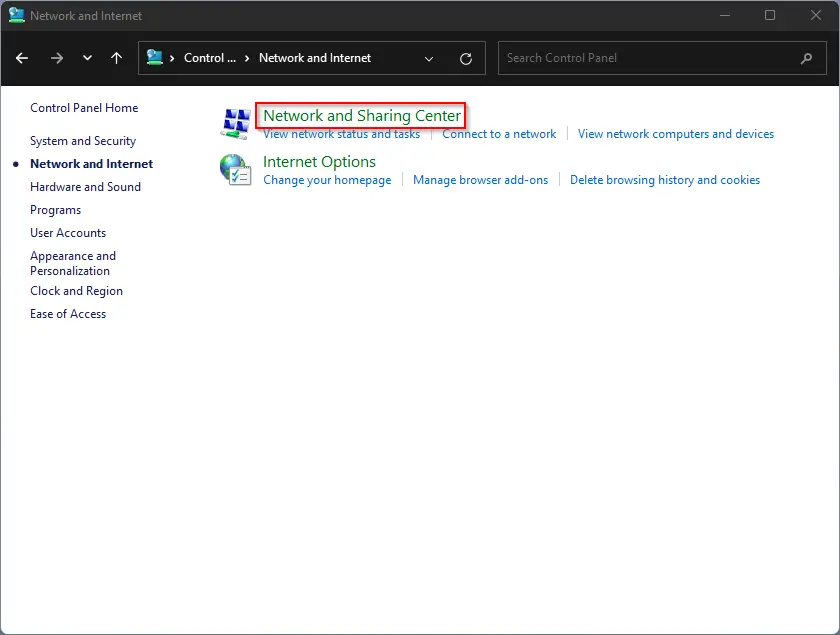
Step 1. Very first, open Control Panel.
Step 2. Next, set “View by” to Category and click on the Network and Internet category.

Step 3. Then, click on Network and Sharing Center.
Step 4. After that, click on the Change advanced sharing settings link in the left side pane.
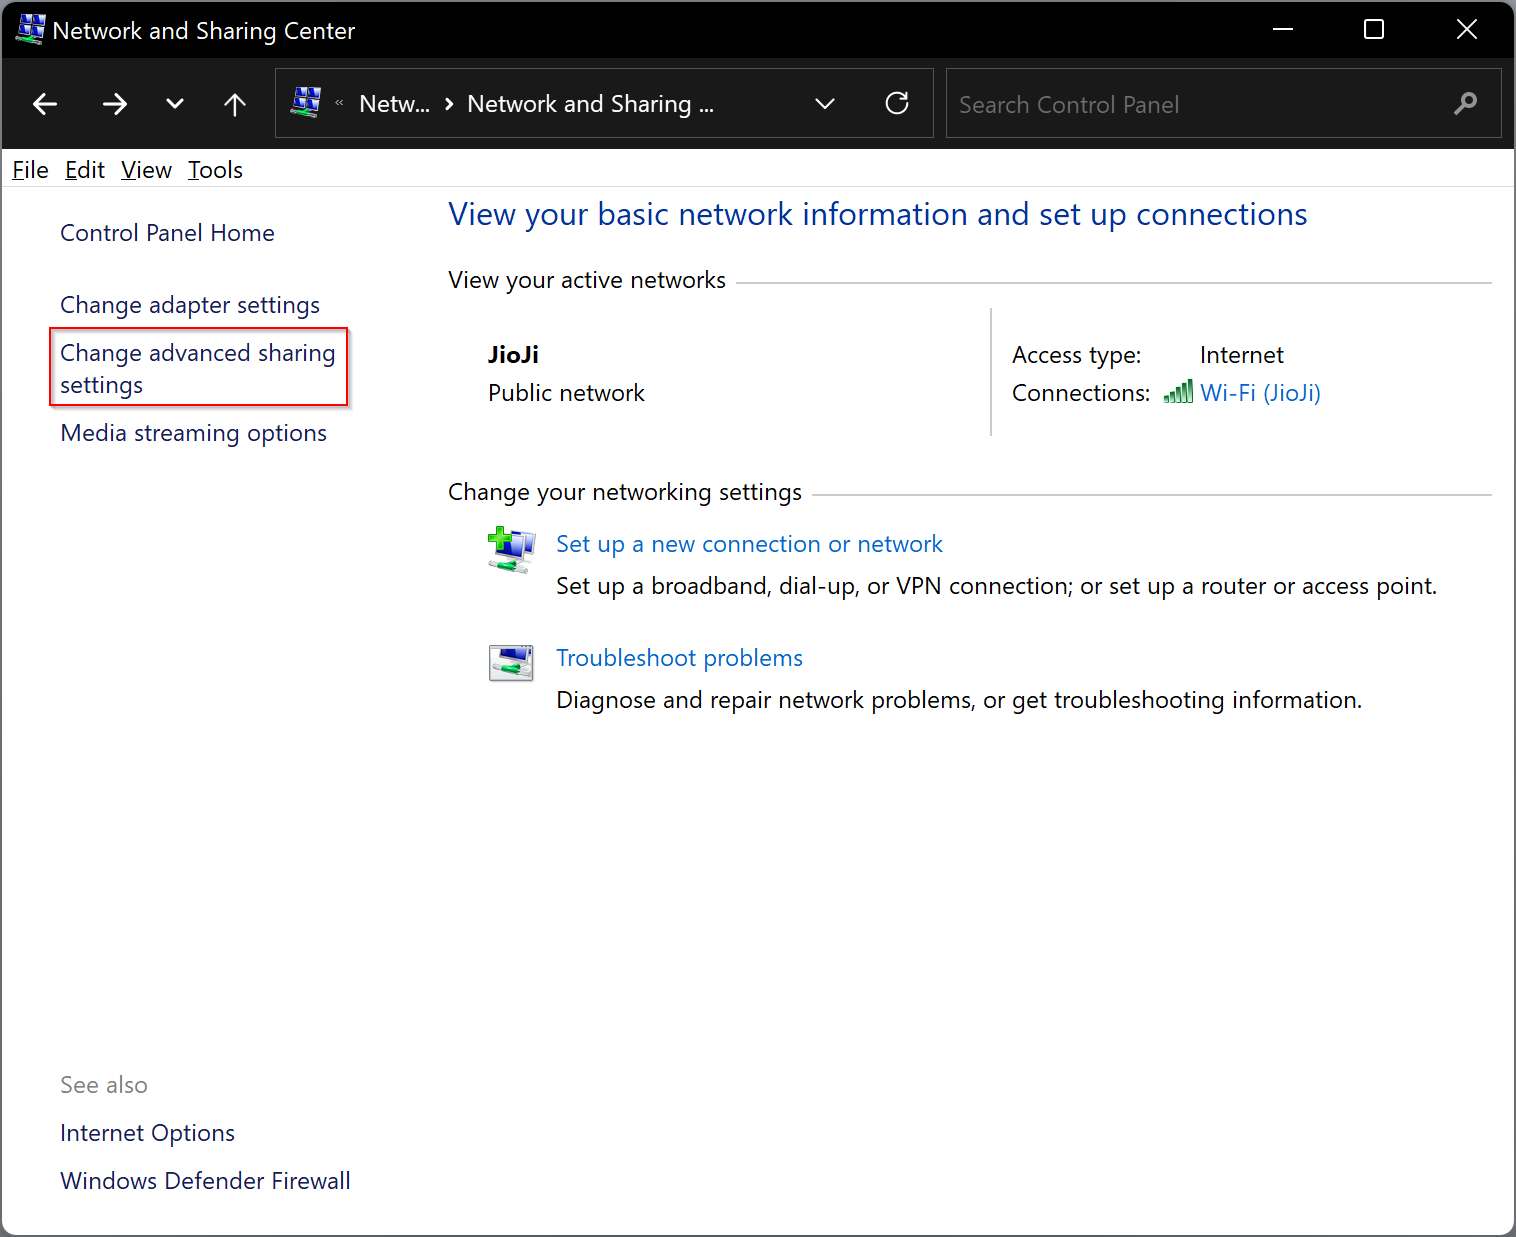
Step 5. When you’re done, the Advanced sharing settings page will open.
Step 6. Here, click on the All networks option to expand it.
Step 7. Now, click the File sharing connections drop-down menu and select the 128-bit encryption (Recommended) or 40- or 56-bit encryption option according to your needs.
Conclusion
In conclusion, Windows 11 and 10 come with useful file and printer-sharing features that allow users to share files and printers with other computers on the same network. By default, Windows 11 and 10 use 128-bit encryption for file sharing, which is more secure than the 40-bit or 56-bit encryption used by older operating systems. However, users may need to change the encryption level to communicate with older systems. This gearupwindows article provides step-by-step instructions for changing the encryption level through Windows 11 Settings, Registry Editor, or Control Panel. With these easy-to-follow instructions, users can configure file-sharing encryption to suit their needs and ensure secure communication on their network.