When you start your Windows 11/10 PC, it stops at the Lock Screen. To login or return to your desktop when your session is locked, you press a key on the keyboard to raise the lock screen curtain to reveal the logon screen. After entering the correct password, you get access to your system.
The Lock Screen displays the date and time, along with other things. It picks the date and time from your PC time zone. Windows 11 may display a clock in either 12-hour or 24-hour (military) clock format depending on the time zone.
Some people prefer to get time like 20:20 while some want to get the time like 8:20 PM. If the lock screen clock does not show time according to your needs, you can change it using Windows Settings or Control Panel. Either way, it will change the Taskbar time format as well.
How to Change Windows 11 Lock Screen Clock Format from Settings App?
To change the Lock Screen Clock format using the Settings app, do the following:-
Step 1. First, open the Settings app (keyboard shortcut Windows + I).
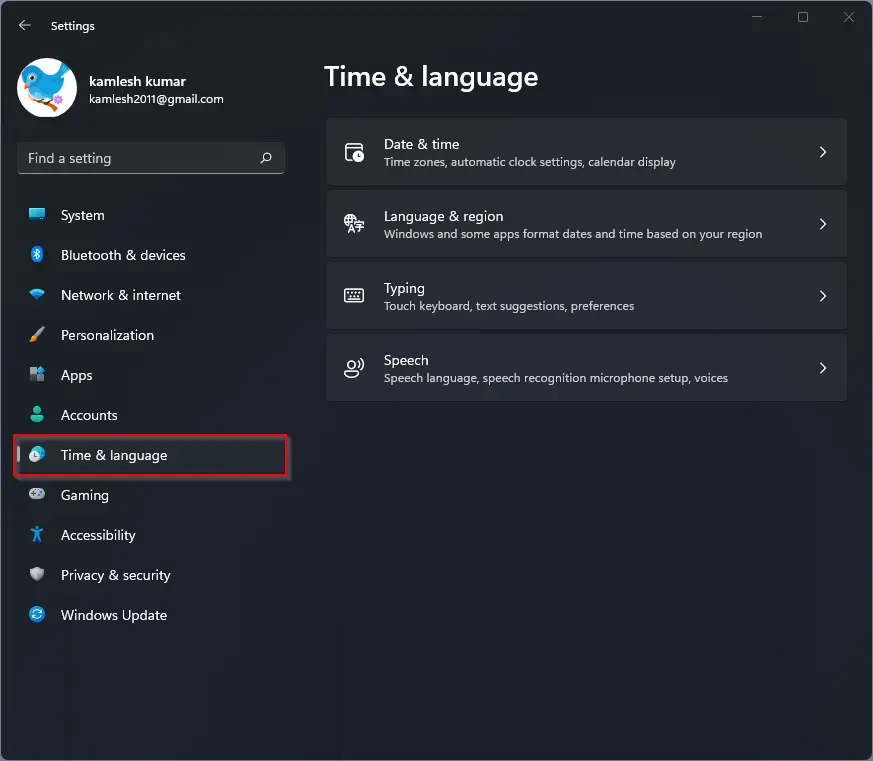
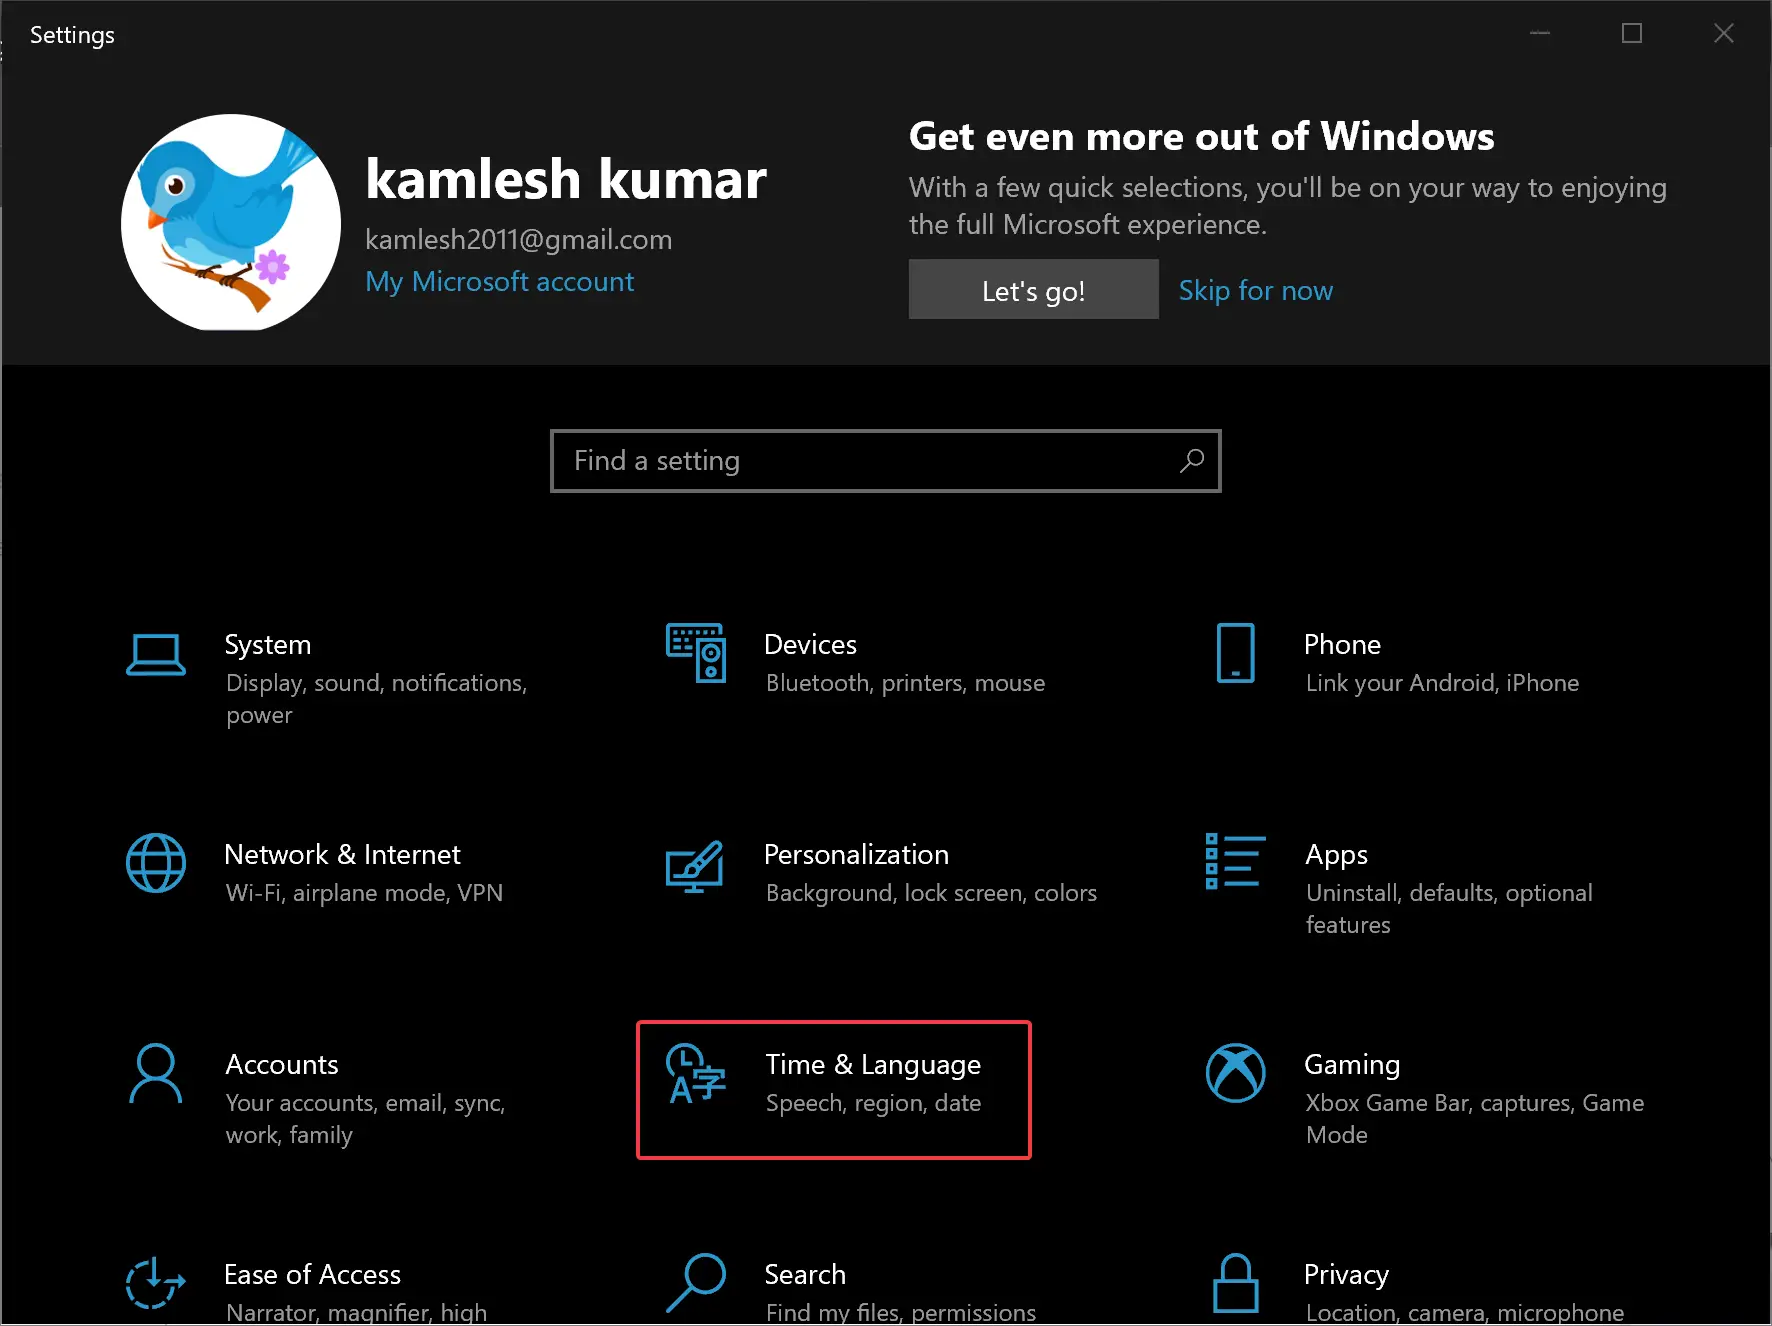
Step 2. When the Settings window appears on your computer, select the Time & language category on the left side.
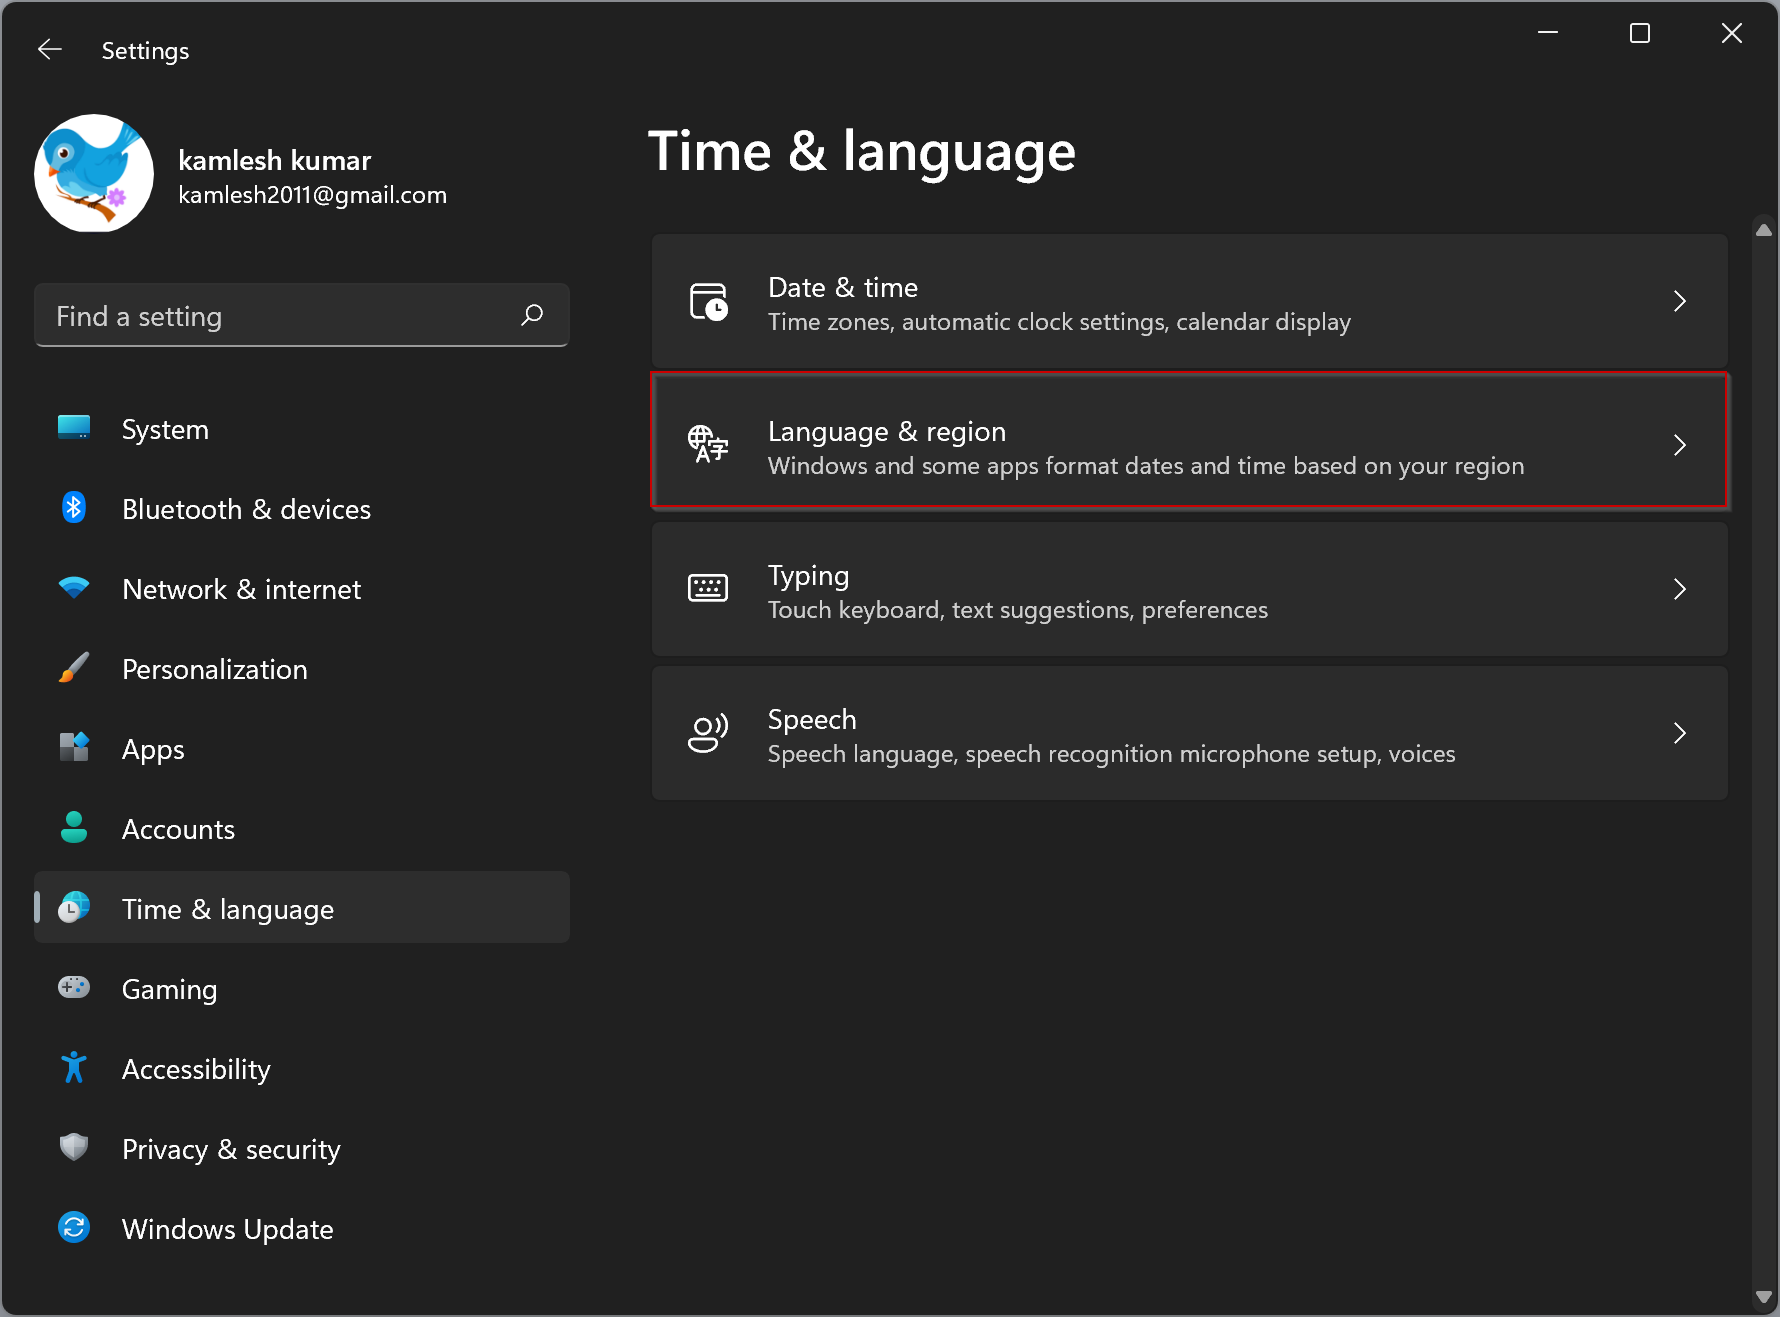
Step 3. Next, click on Language & region to access settings related to time formats.
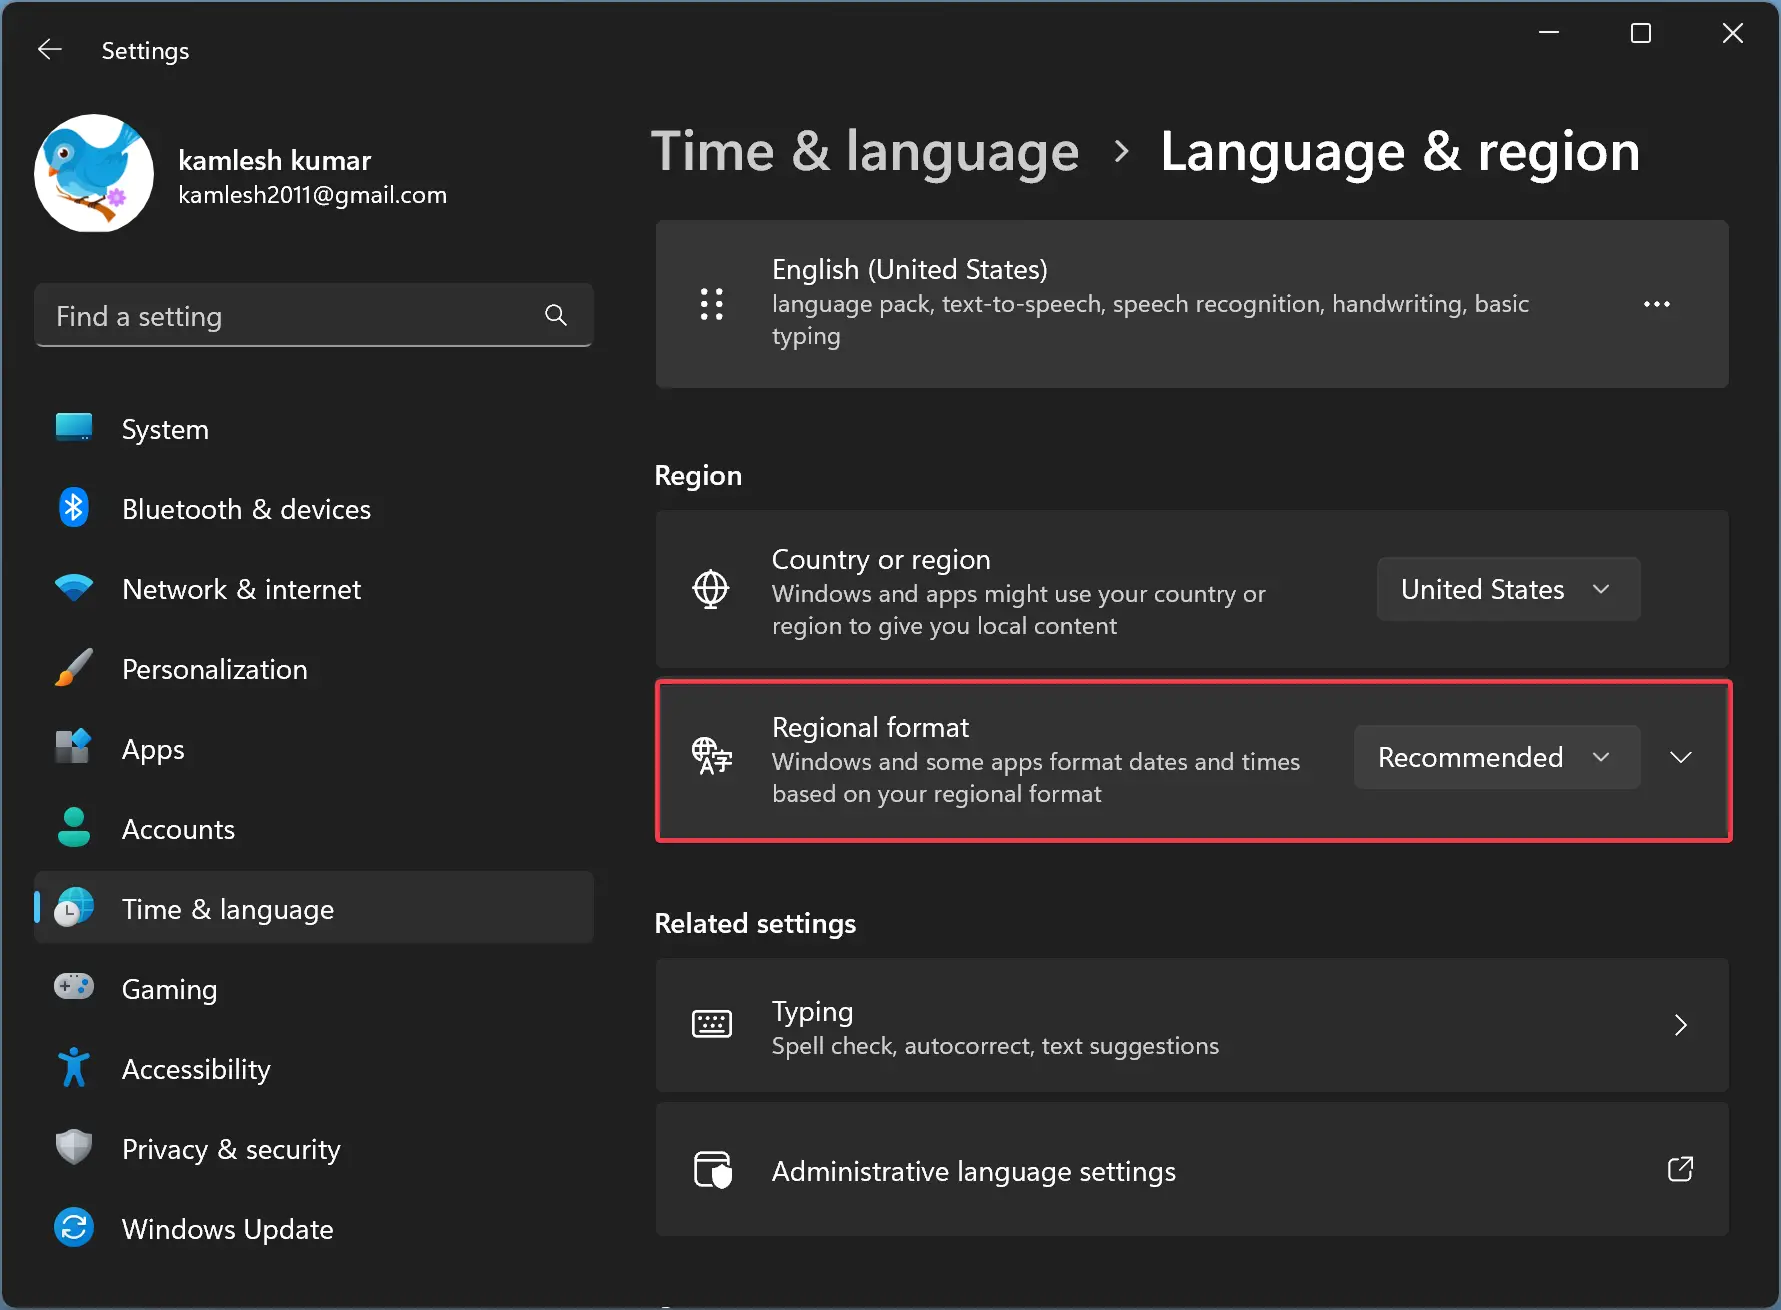
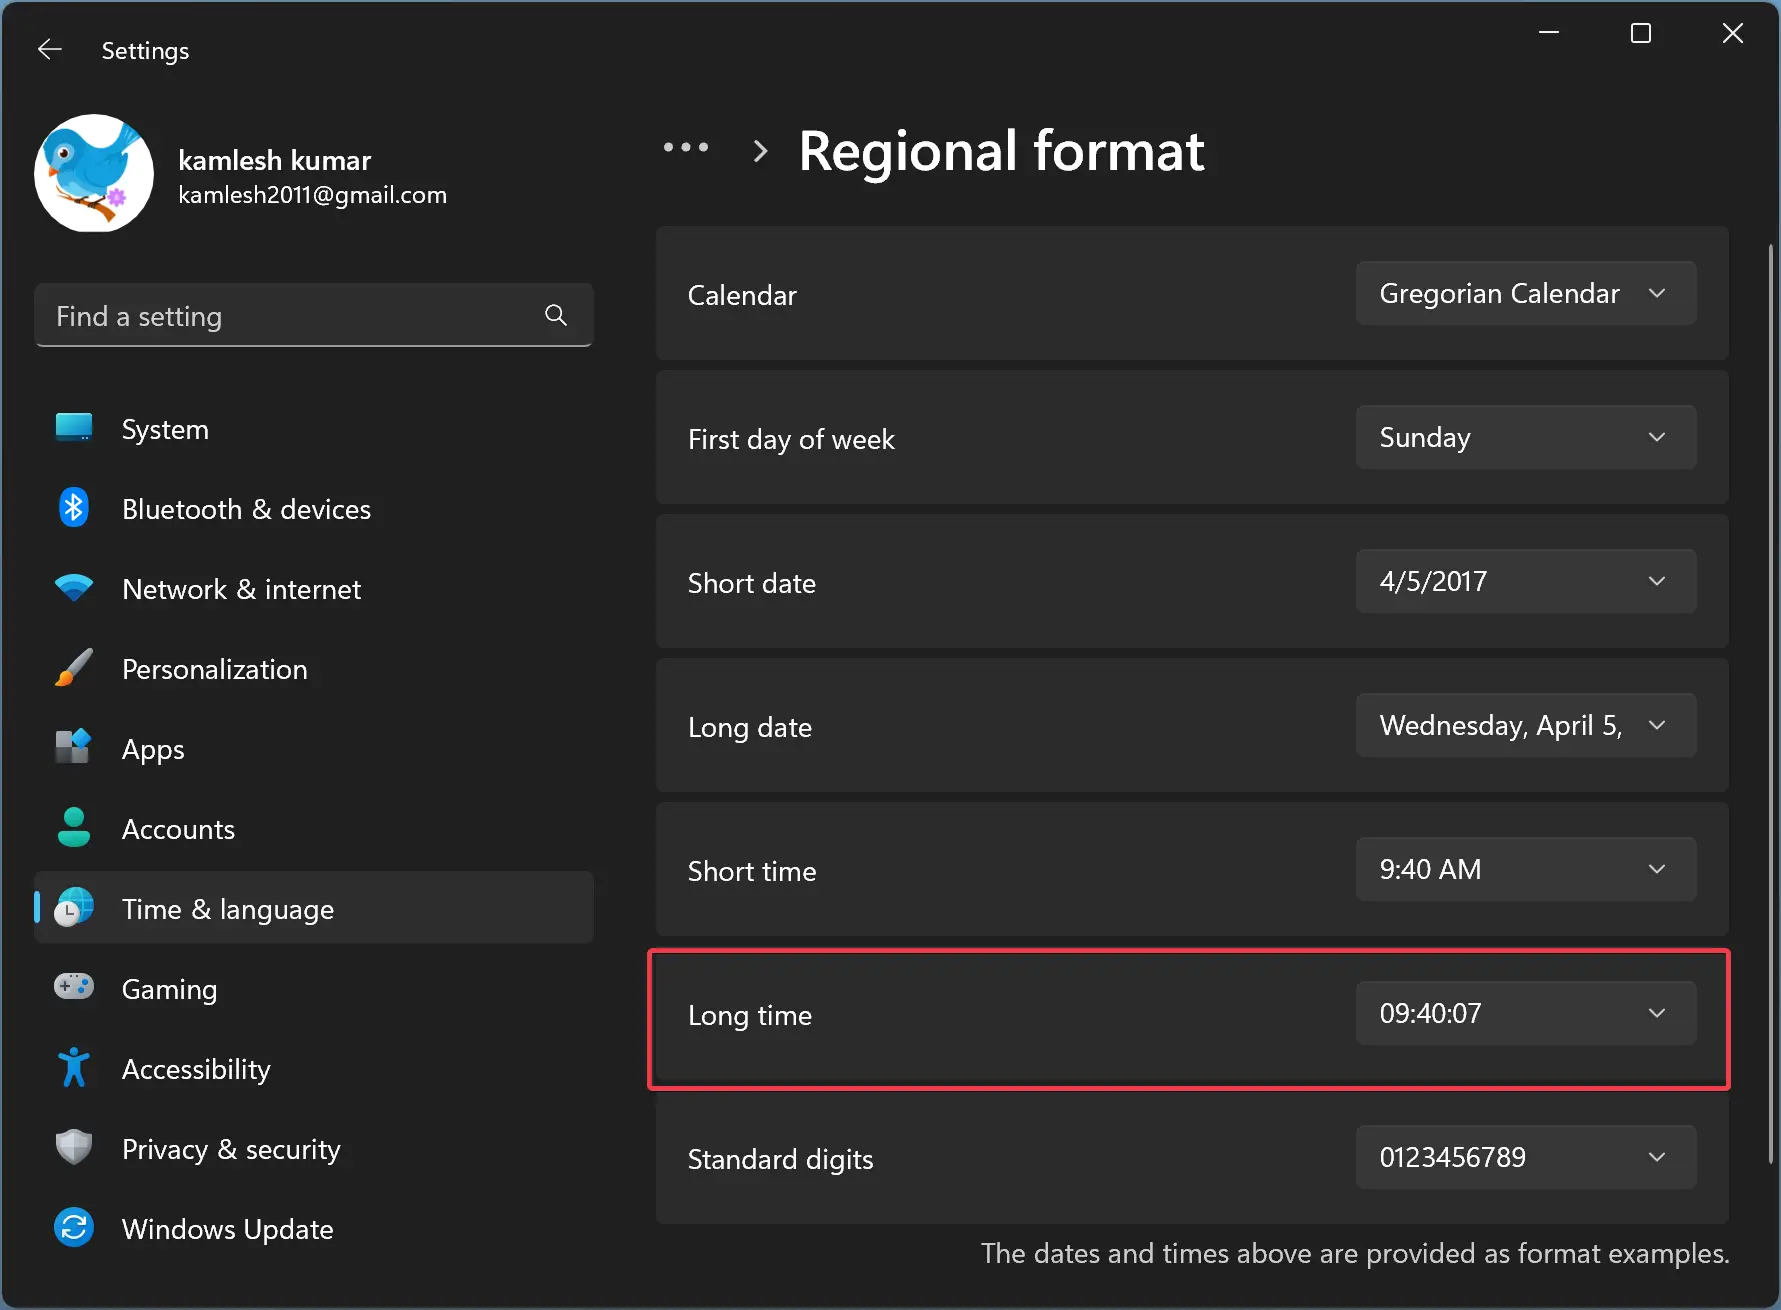
Step 4. Under the Region section, click the Regional format option to expand it.
Step 5. Now, click on the Change formats button to change the time format.
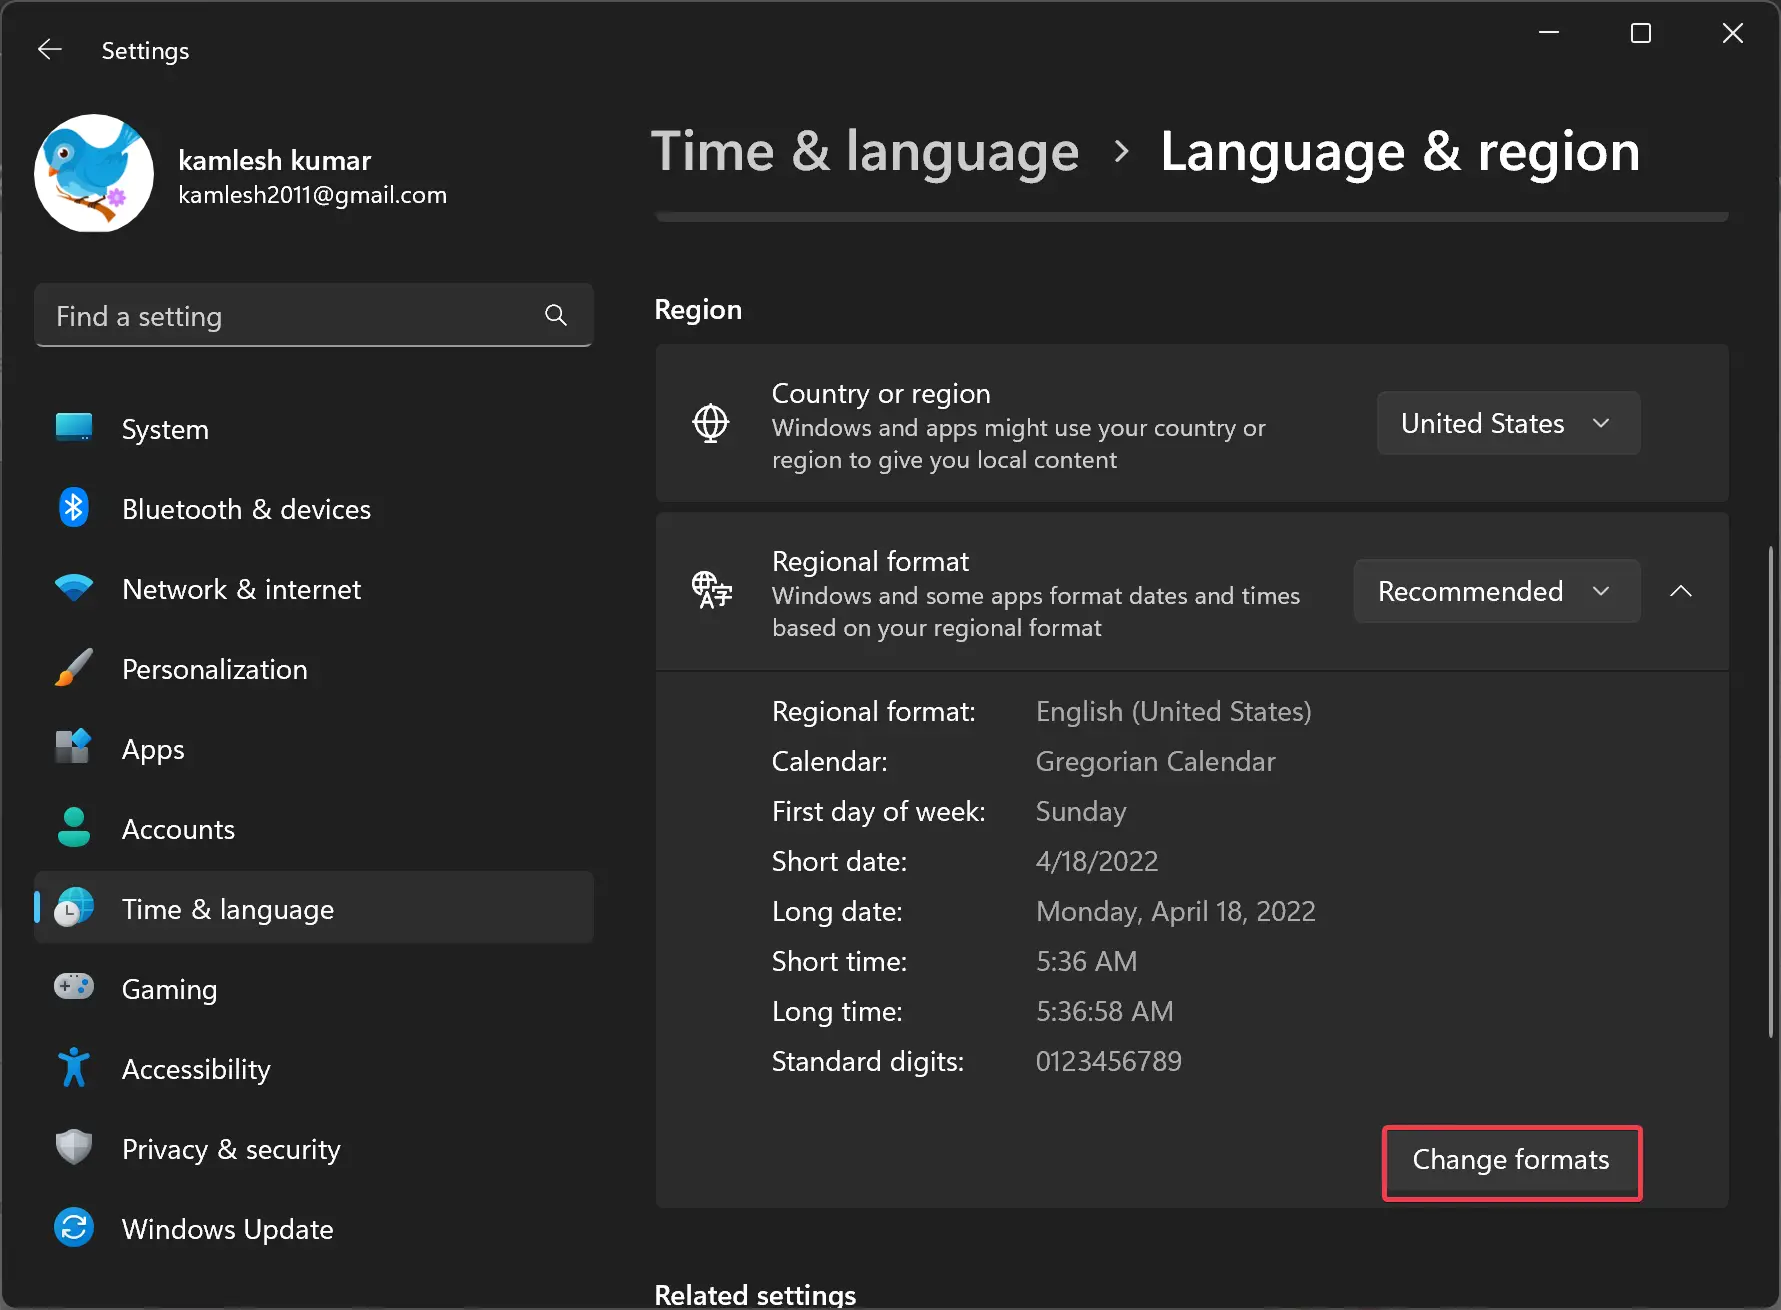
Step 6. After that, click on the dropdown list Long time and pick the option with AM to use the 12-hour format or choose one without AM to go with the 24-hour lock screen format.
Step 7. Restart your PC.
The clock will appear on the lock screen depending on your chosen clock format, 24-hour or 12-hour clock format.
How to Change Windows 11 or 10 Lock Screen Clock Format through Control Panel?
To change the Lock Screen clock format through Control Panel, do the following:-
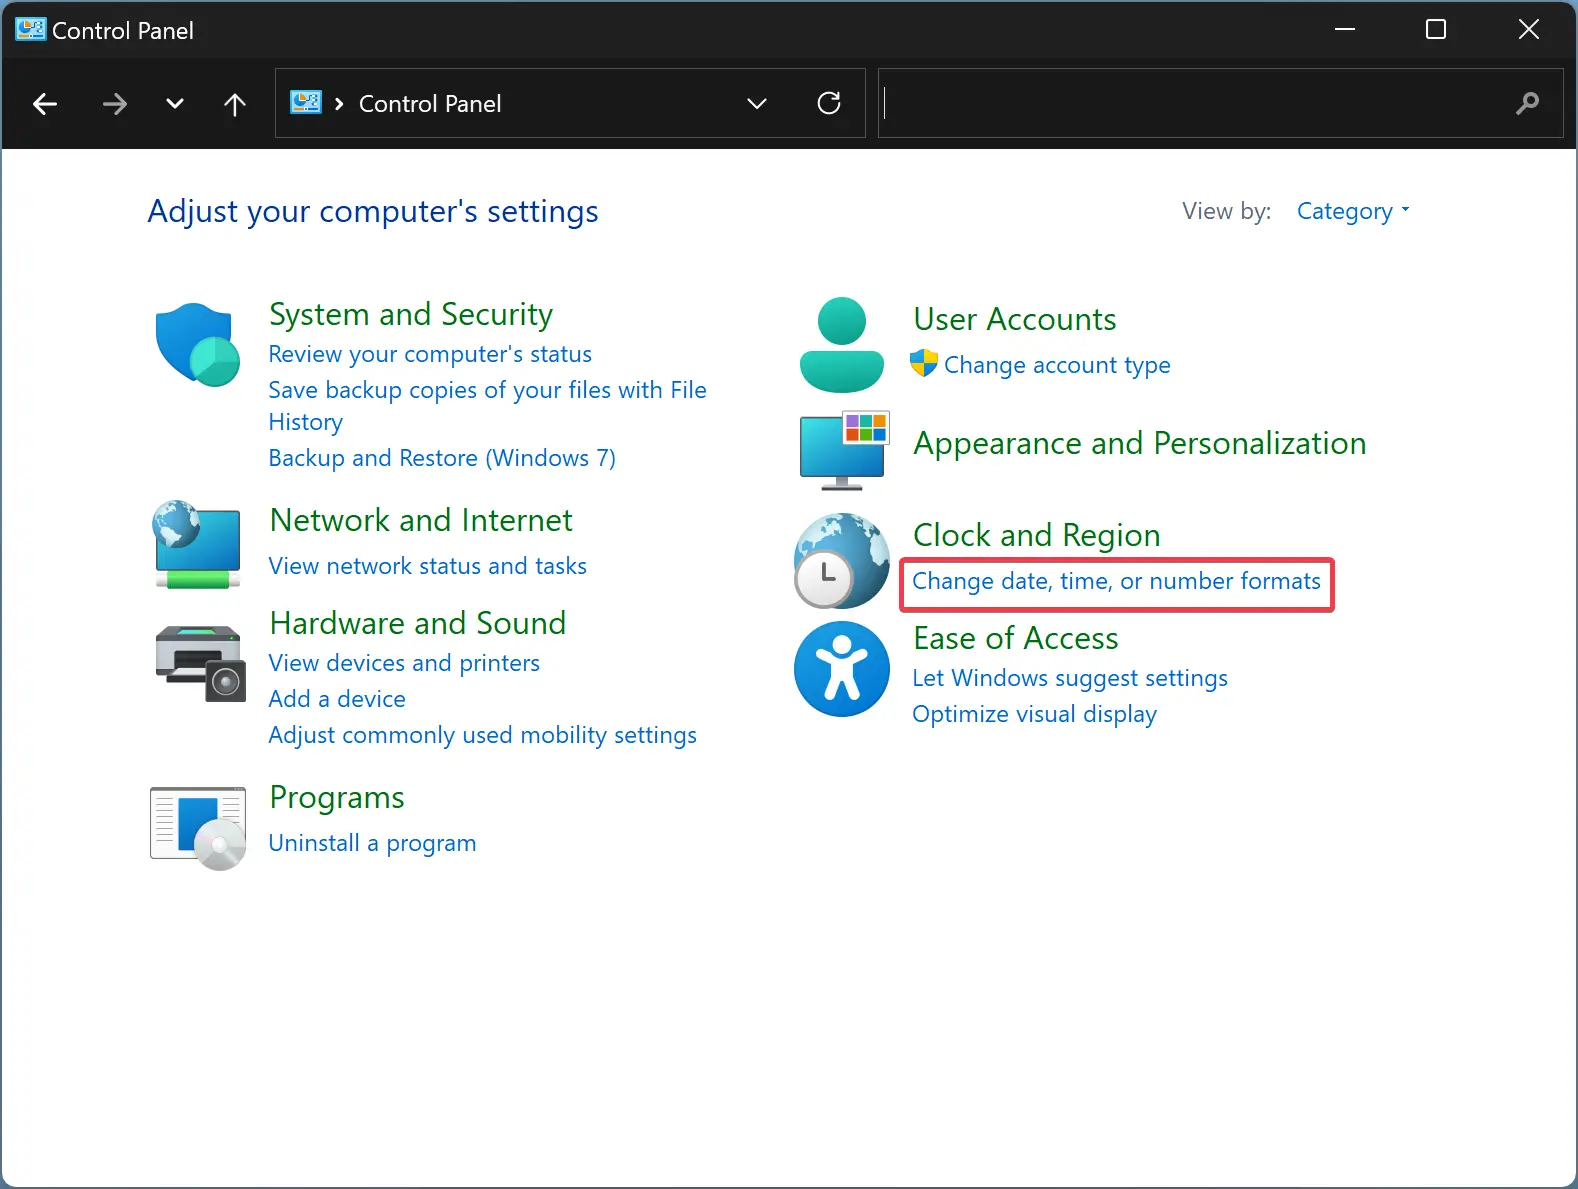
Step 1. Open Control Panel.
Step 2. Then, under “Clock and Region,” click on Change date, time, or number formats to change the lock screen date format.
Step 3. After that, switch to the Formats tab. Then, click on the dropdown menu Long time and select H:mm:ss or HH:mm:ss to apply a 24-hour clock. On the other hand, you can use h:mm:ss tt or hh:mm:ss tt for the 12-hour clock.
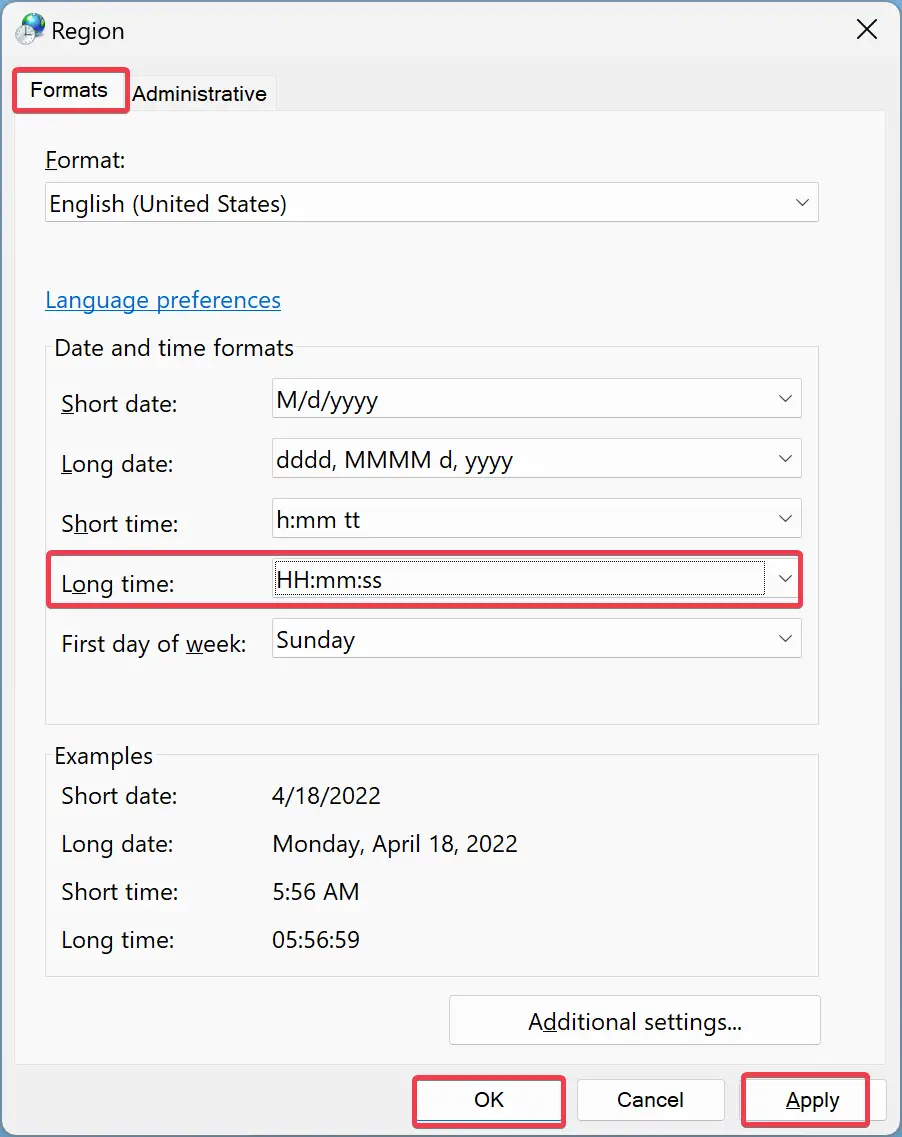
Step 4. Click Apply.
Step 5. Click OK.
Step 6. Restart your computer.
How to Change Windows 10 Lock Screen Clock Format from Settings App?
To change Windows 10 Lock Screen clock format through the Settings app, do the following:-
Step 1. First, open Settings.
Step 2. Then, click the Time & Language option.
Step 3. Under “Time & language,” select the Date & time option.
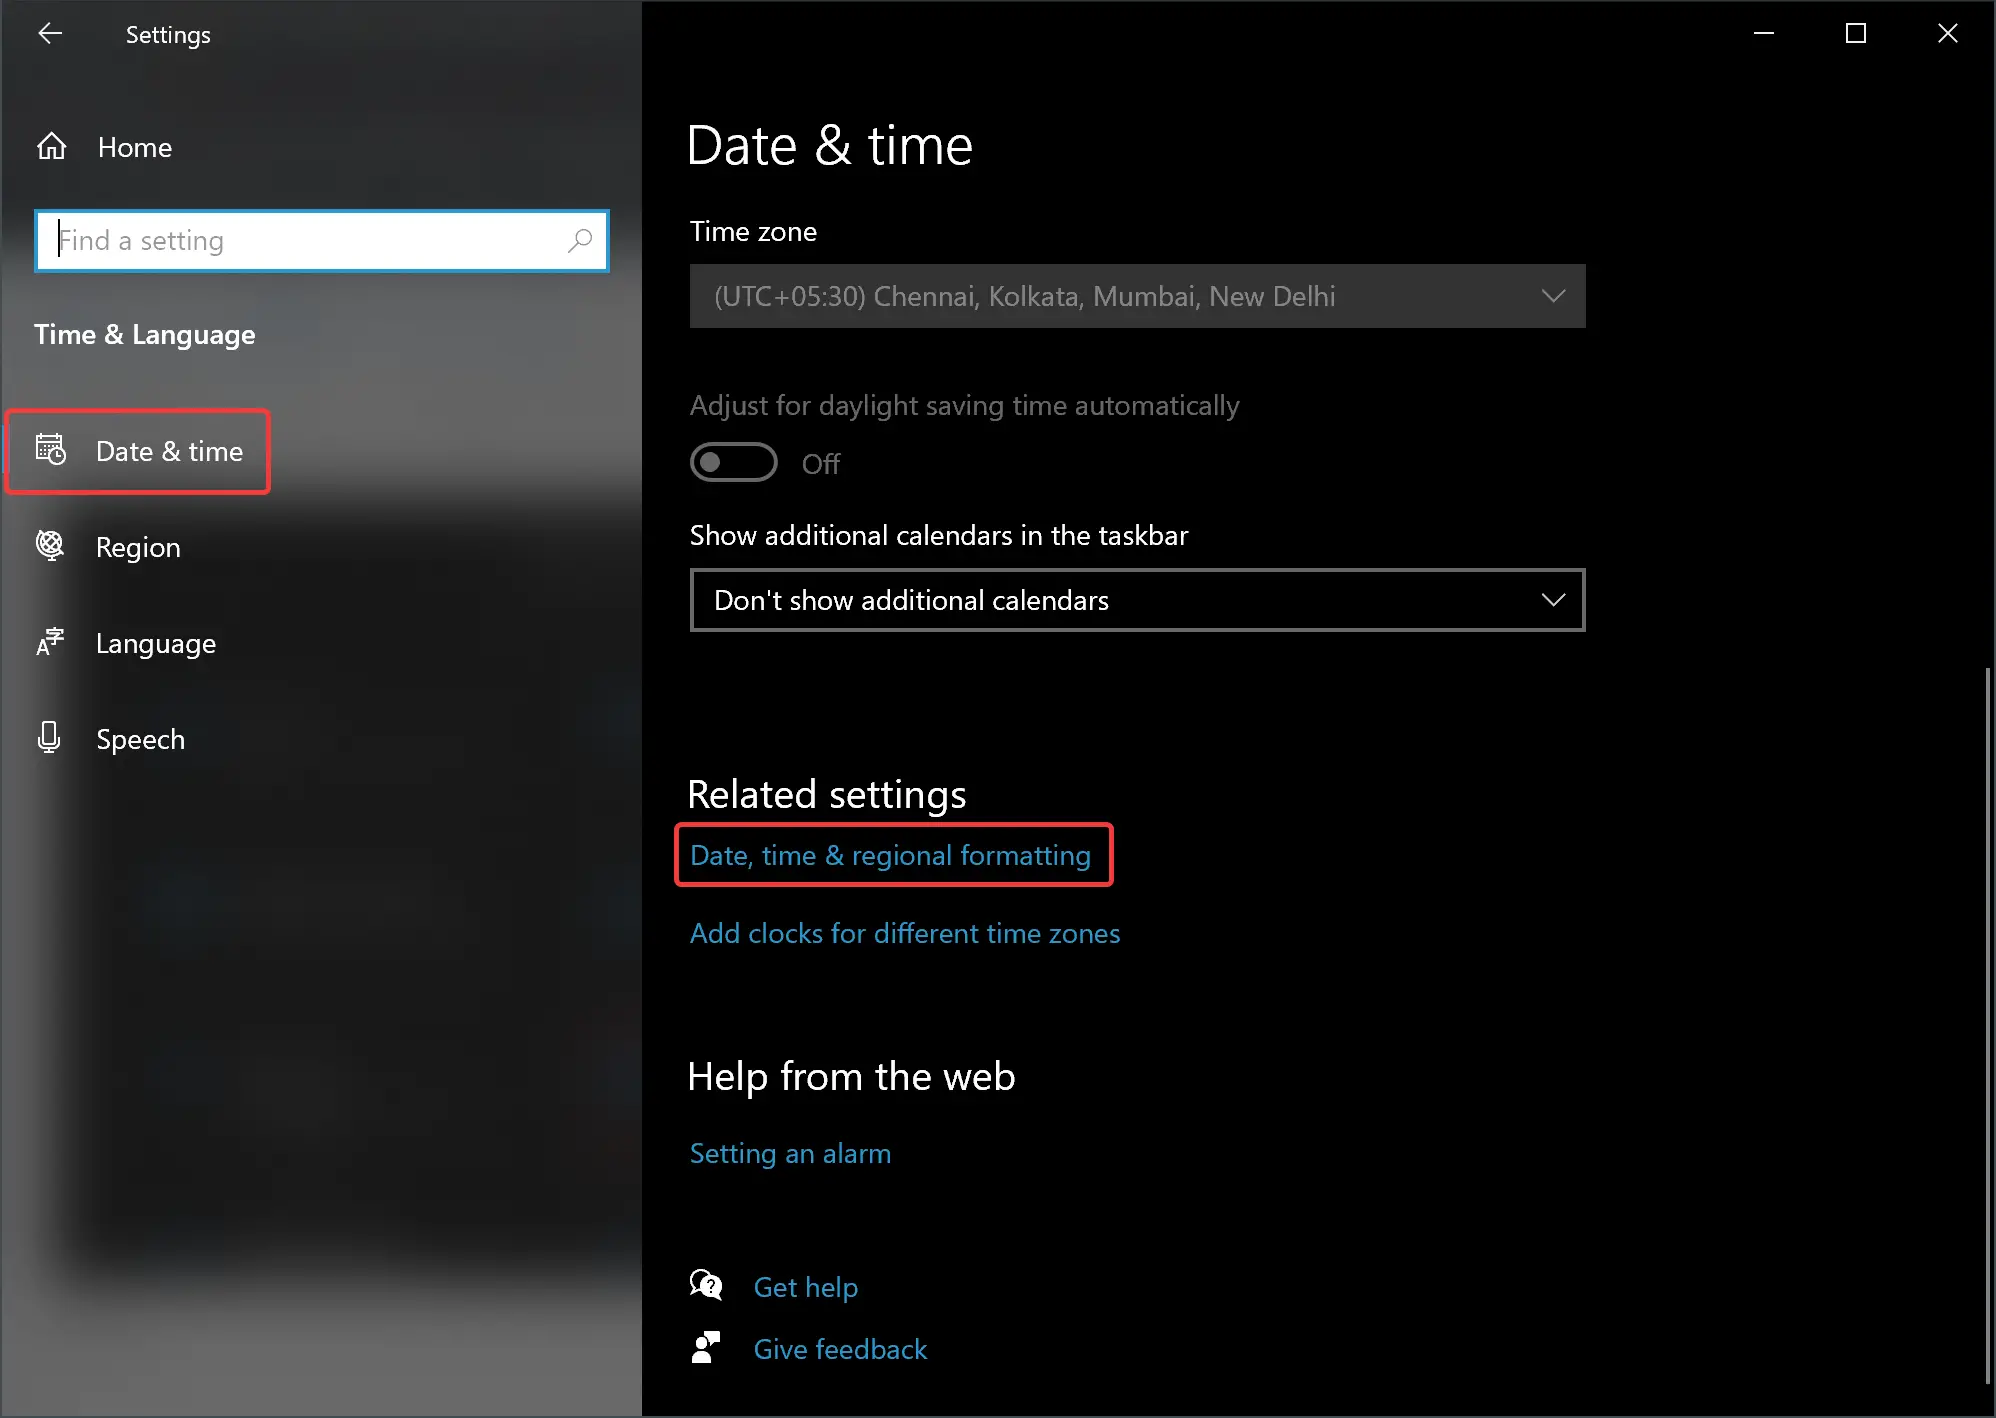
Step 4. On the right-sidebar of “Date & time,” click the link Date, time & regional formatting under the “Related settings” section.
Step 5. In the following screen, select Region in the left sidebar.
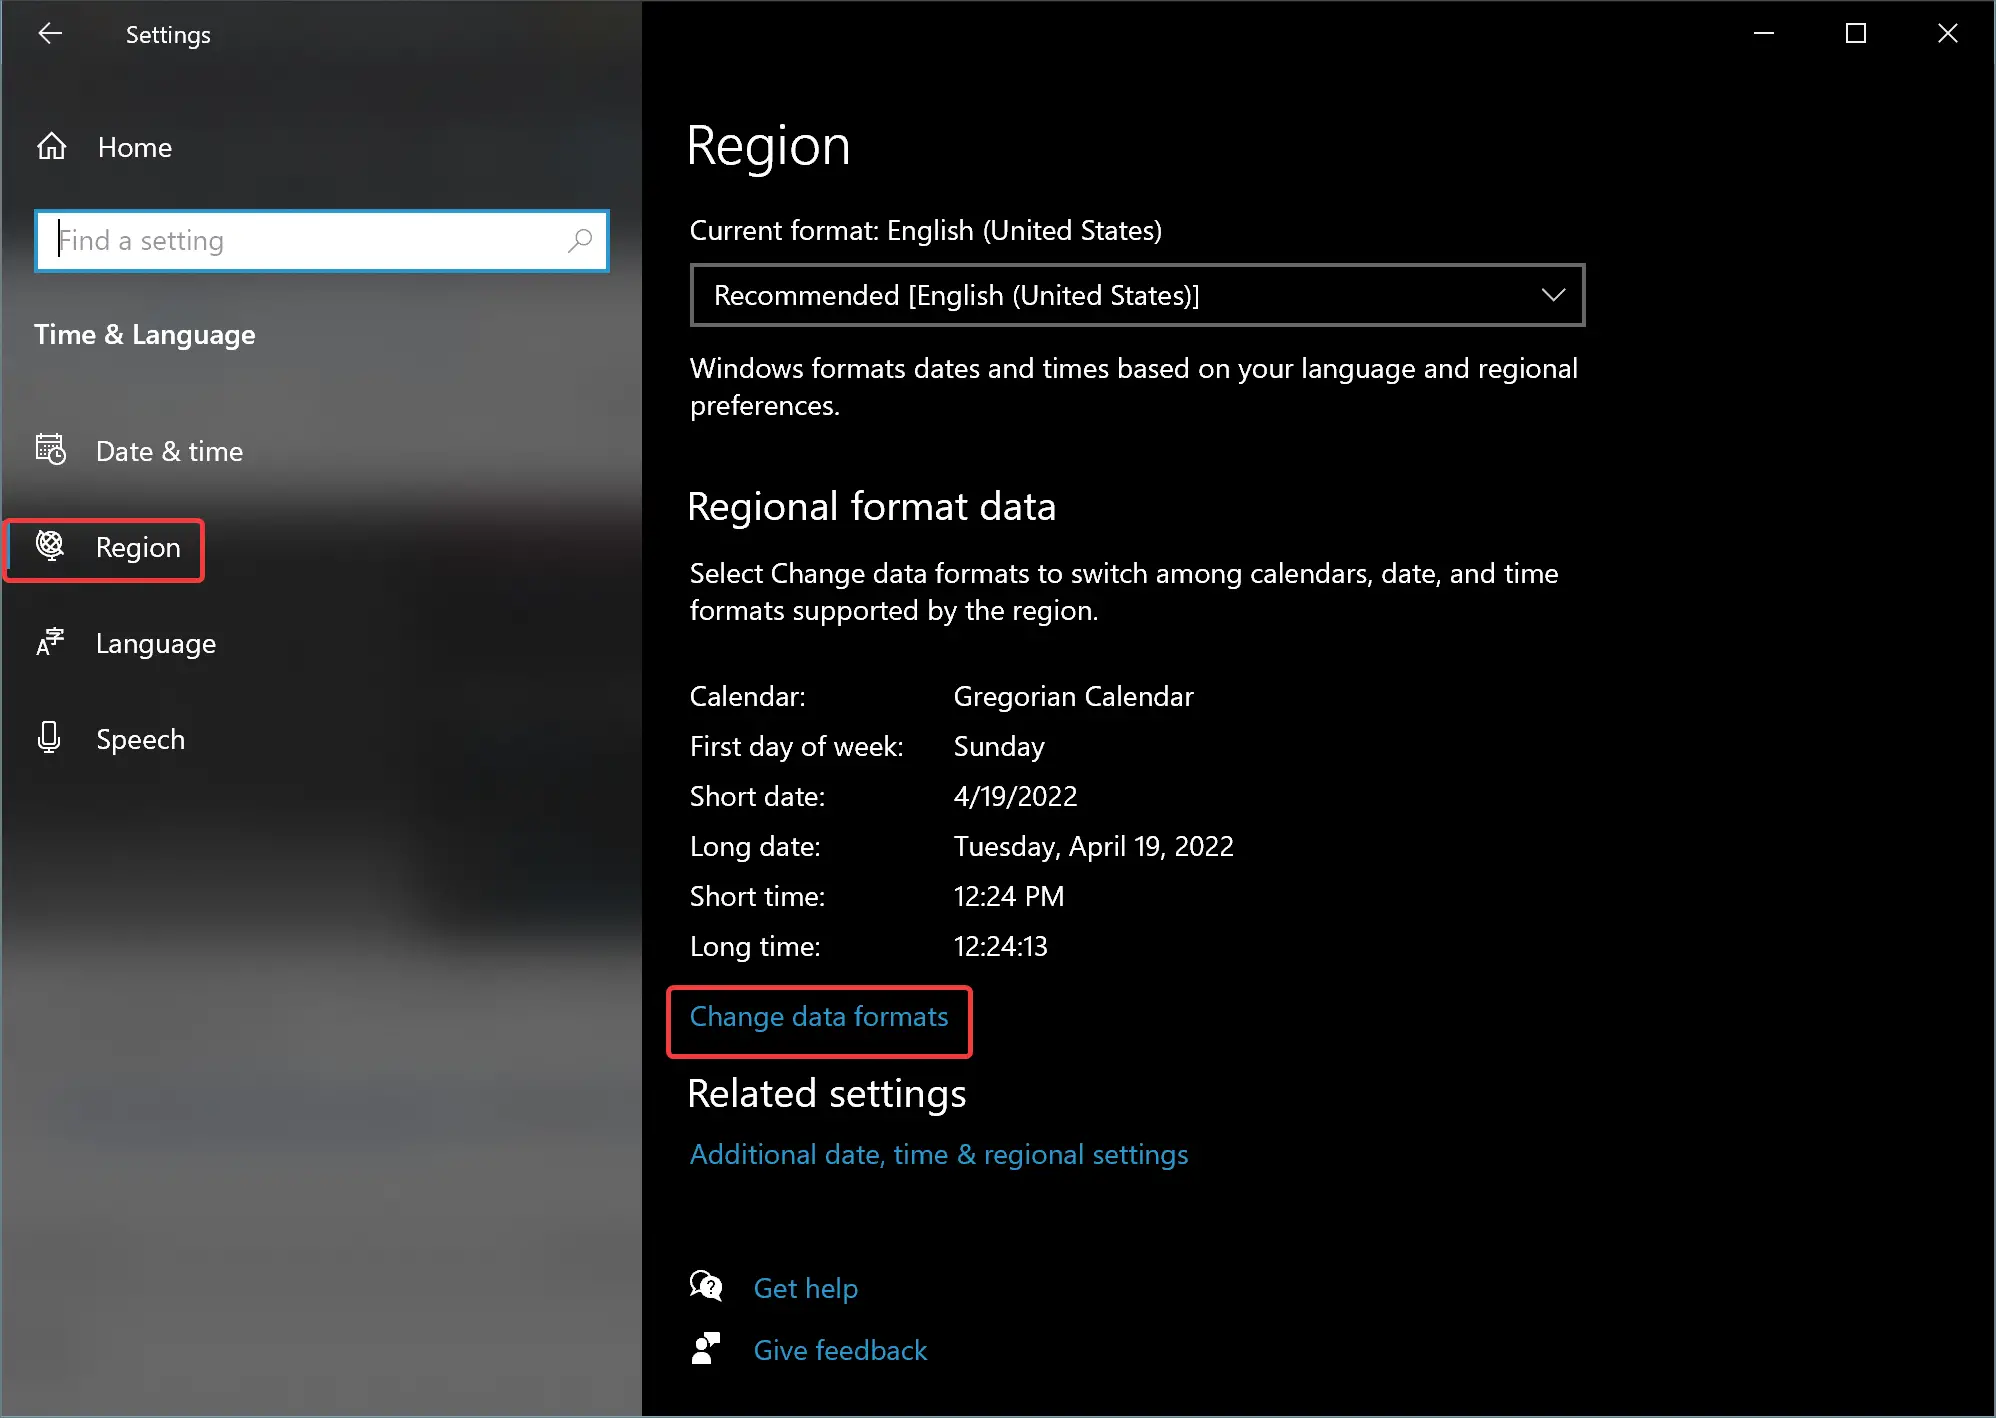
Step 6. On the right side of “Region,” click the link Change data formats.
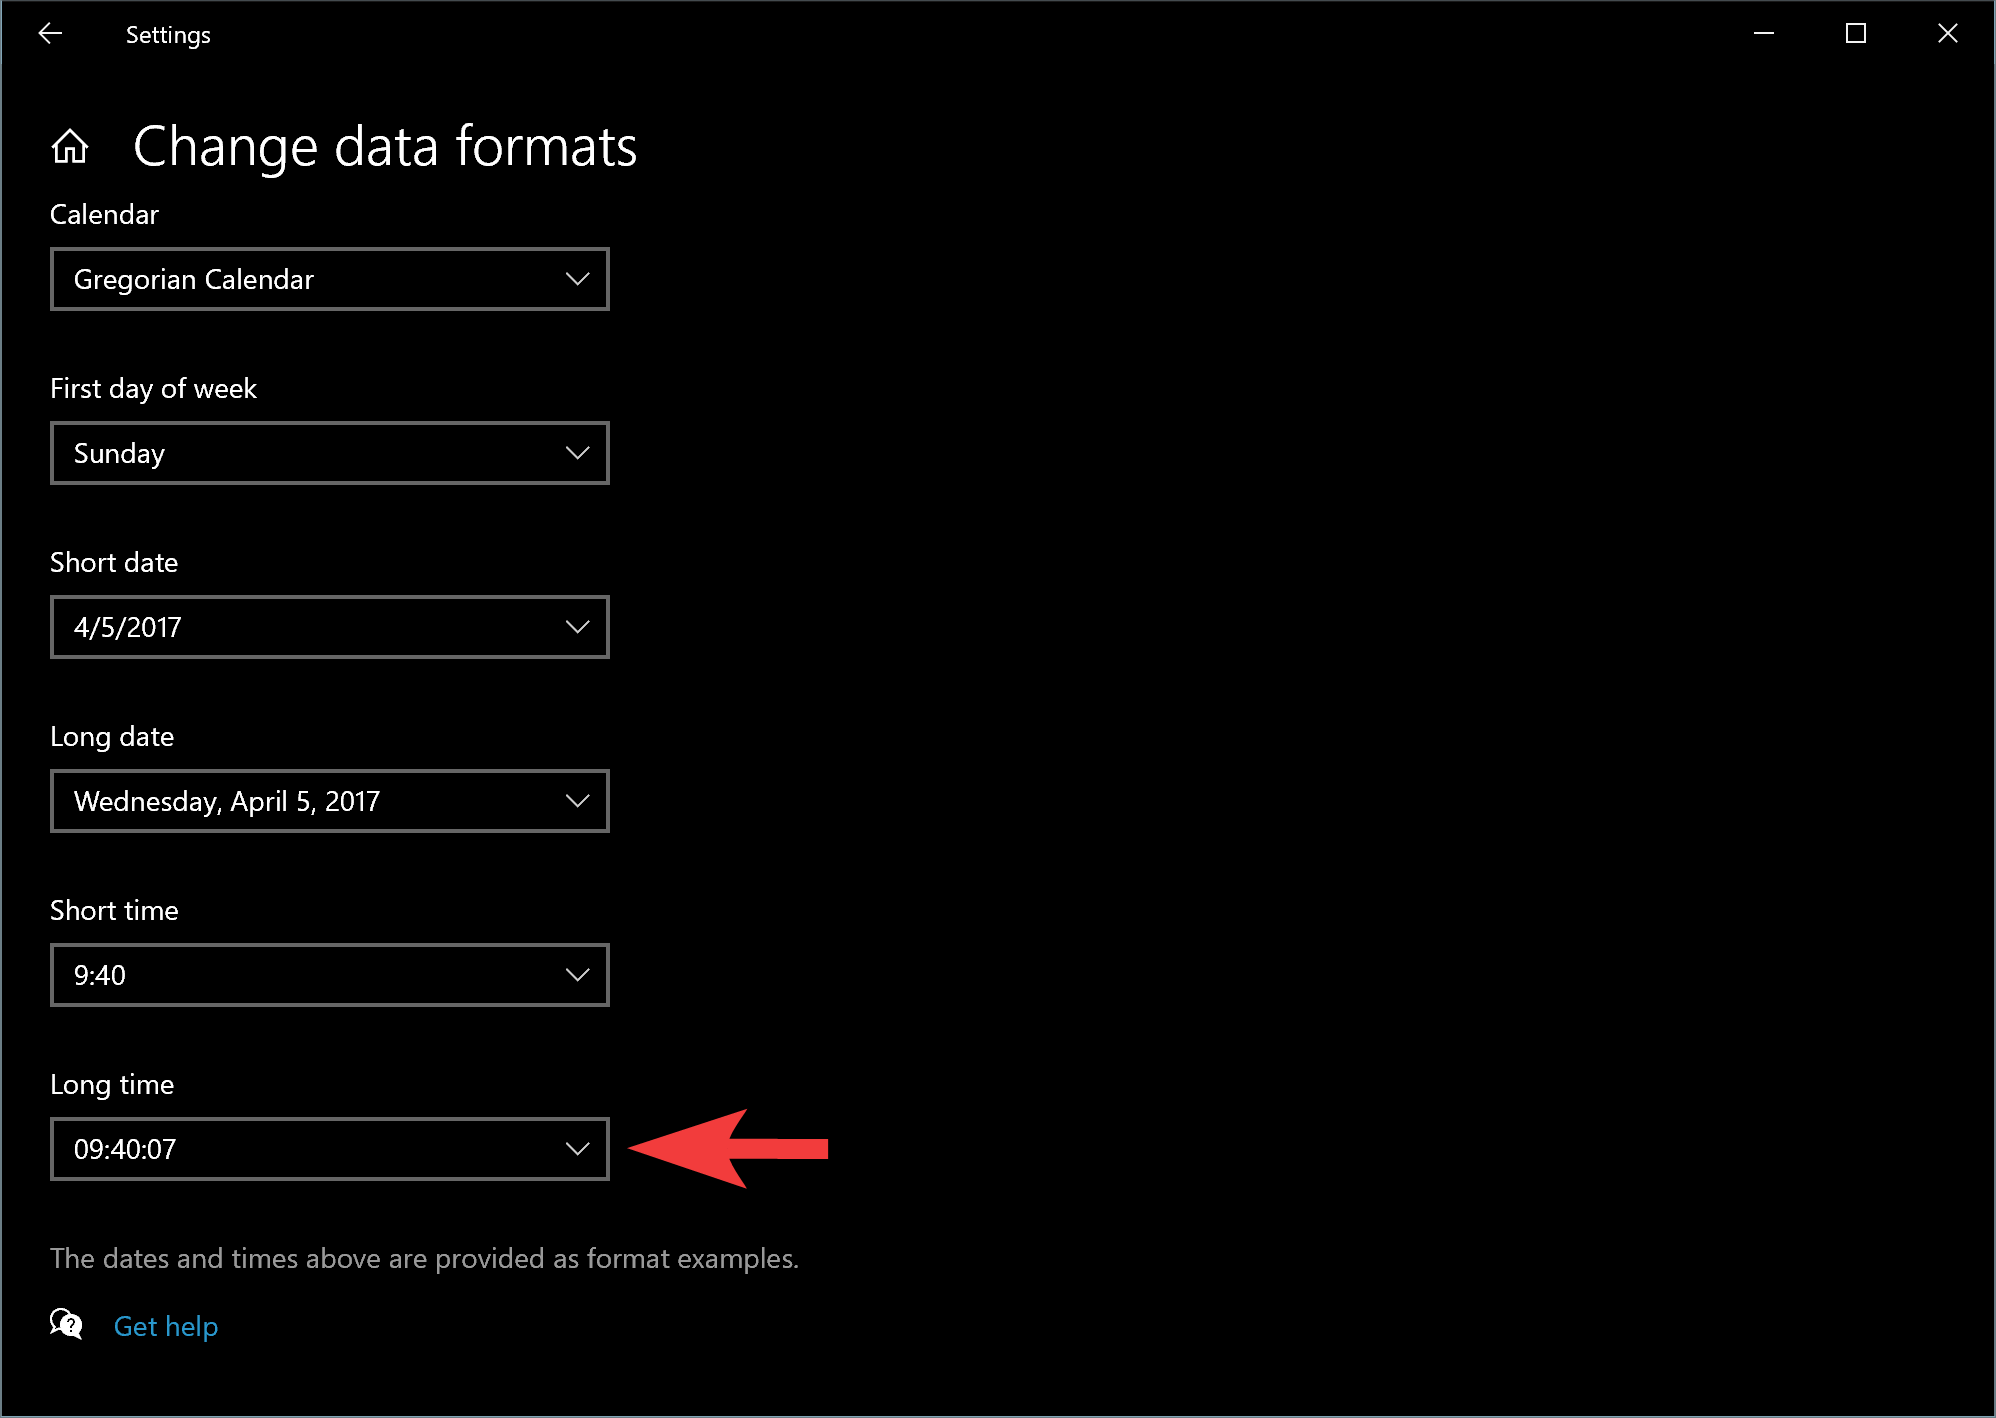
Step 7. Then, click on the dropdown menu Long time and select H:mm:ss or HH:mm:ss to apply a 24-hour clock. On the other hand, you can use H:mm:ss tt or HH:mm:ss tt for the 12-hour clock.
That’s it.
Conclusion
In conclusion, changing the lock screen clock format in Windows 11/10 is a simple process that can be done through either the Settings app or the Control Panel. By following the step-by-step instructions provided in this guide, users can easily switch between the 12-hour or 24-hour clock format to display the time in the way they prefer. With this feature, users can personalize their lock screen and ensure that the displayed time is convenient for their daily use.