Your monitor’s refresh rate in a Windows 10 machine determines how often your display image updates every second. Higher is usually better. However, if your computer screen is flickering or your display is unstable, you might consider changing your monitor’s refresh rate.
While Windows 10 automatically select the best refresh rate for your monitor, there are times that you might need to do this manually.
In this gearupwindows article, we will guide you on how you can change your monitor refresh rate in Windows 10.
What is the Refresh Rate?
Refresh rate refers to the number of times an image refreshes on the screen per second. The refresh rate is measured in Hertz (Hz). The higher the refresh rate, the better the experience, while a lower refresh rate usually results in on-screen flickering, and it can cause eye strain and headaches. For example, a monitor with 60 Hz displays an image 60 times in one second. Monitors with low refresh rates can cause your screen to flicker.
For daily computing tasks, the ideal rate is 60Hz. However, if you’re a gamer, for a good experience, you need a higher screen refresh rate of 144Hz or even 240Hz will offer a much better and smoother gaming experience.
Depending on the monitor, resolution, and graphics card you’re using on Windows 10, it’s possible to adjust the refresh rate manually for a sharper and smoother viewing experience.
How to Change Your Monitor Refresh Rate in Windows 10?
Although Windows 10 automatically adjust the monitor refresh rate, you can manually set it if you need it.
If you’re experiencing monitor issues because of the refresh rate configuration, use these steps to set the most accurate refresh rate:-
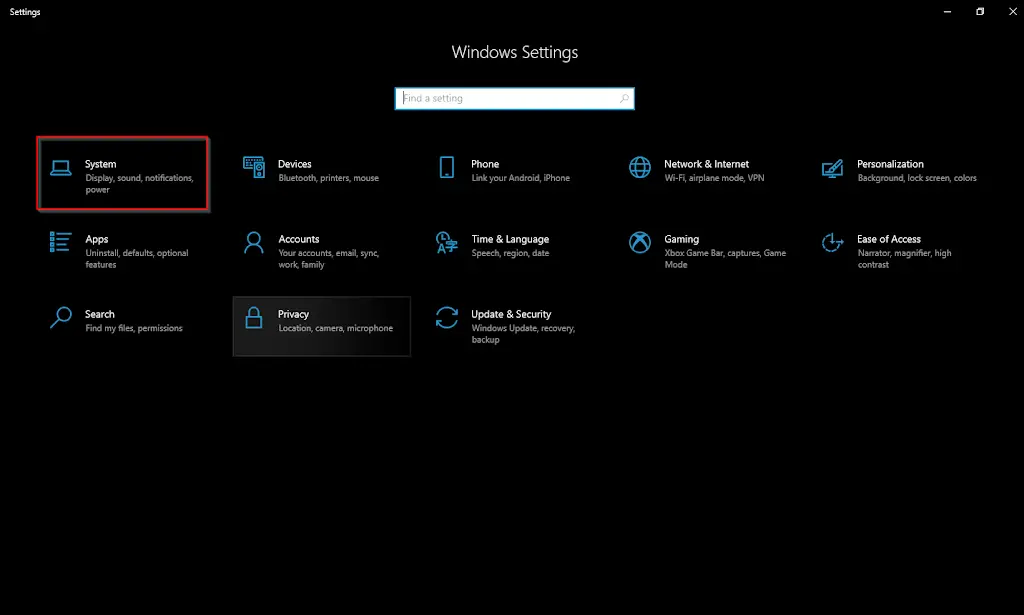
Step 1. First, open Windows Settings.
Step 2. Then, click on System.
Step 3. Next, select Display in the left sidebar.
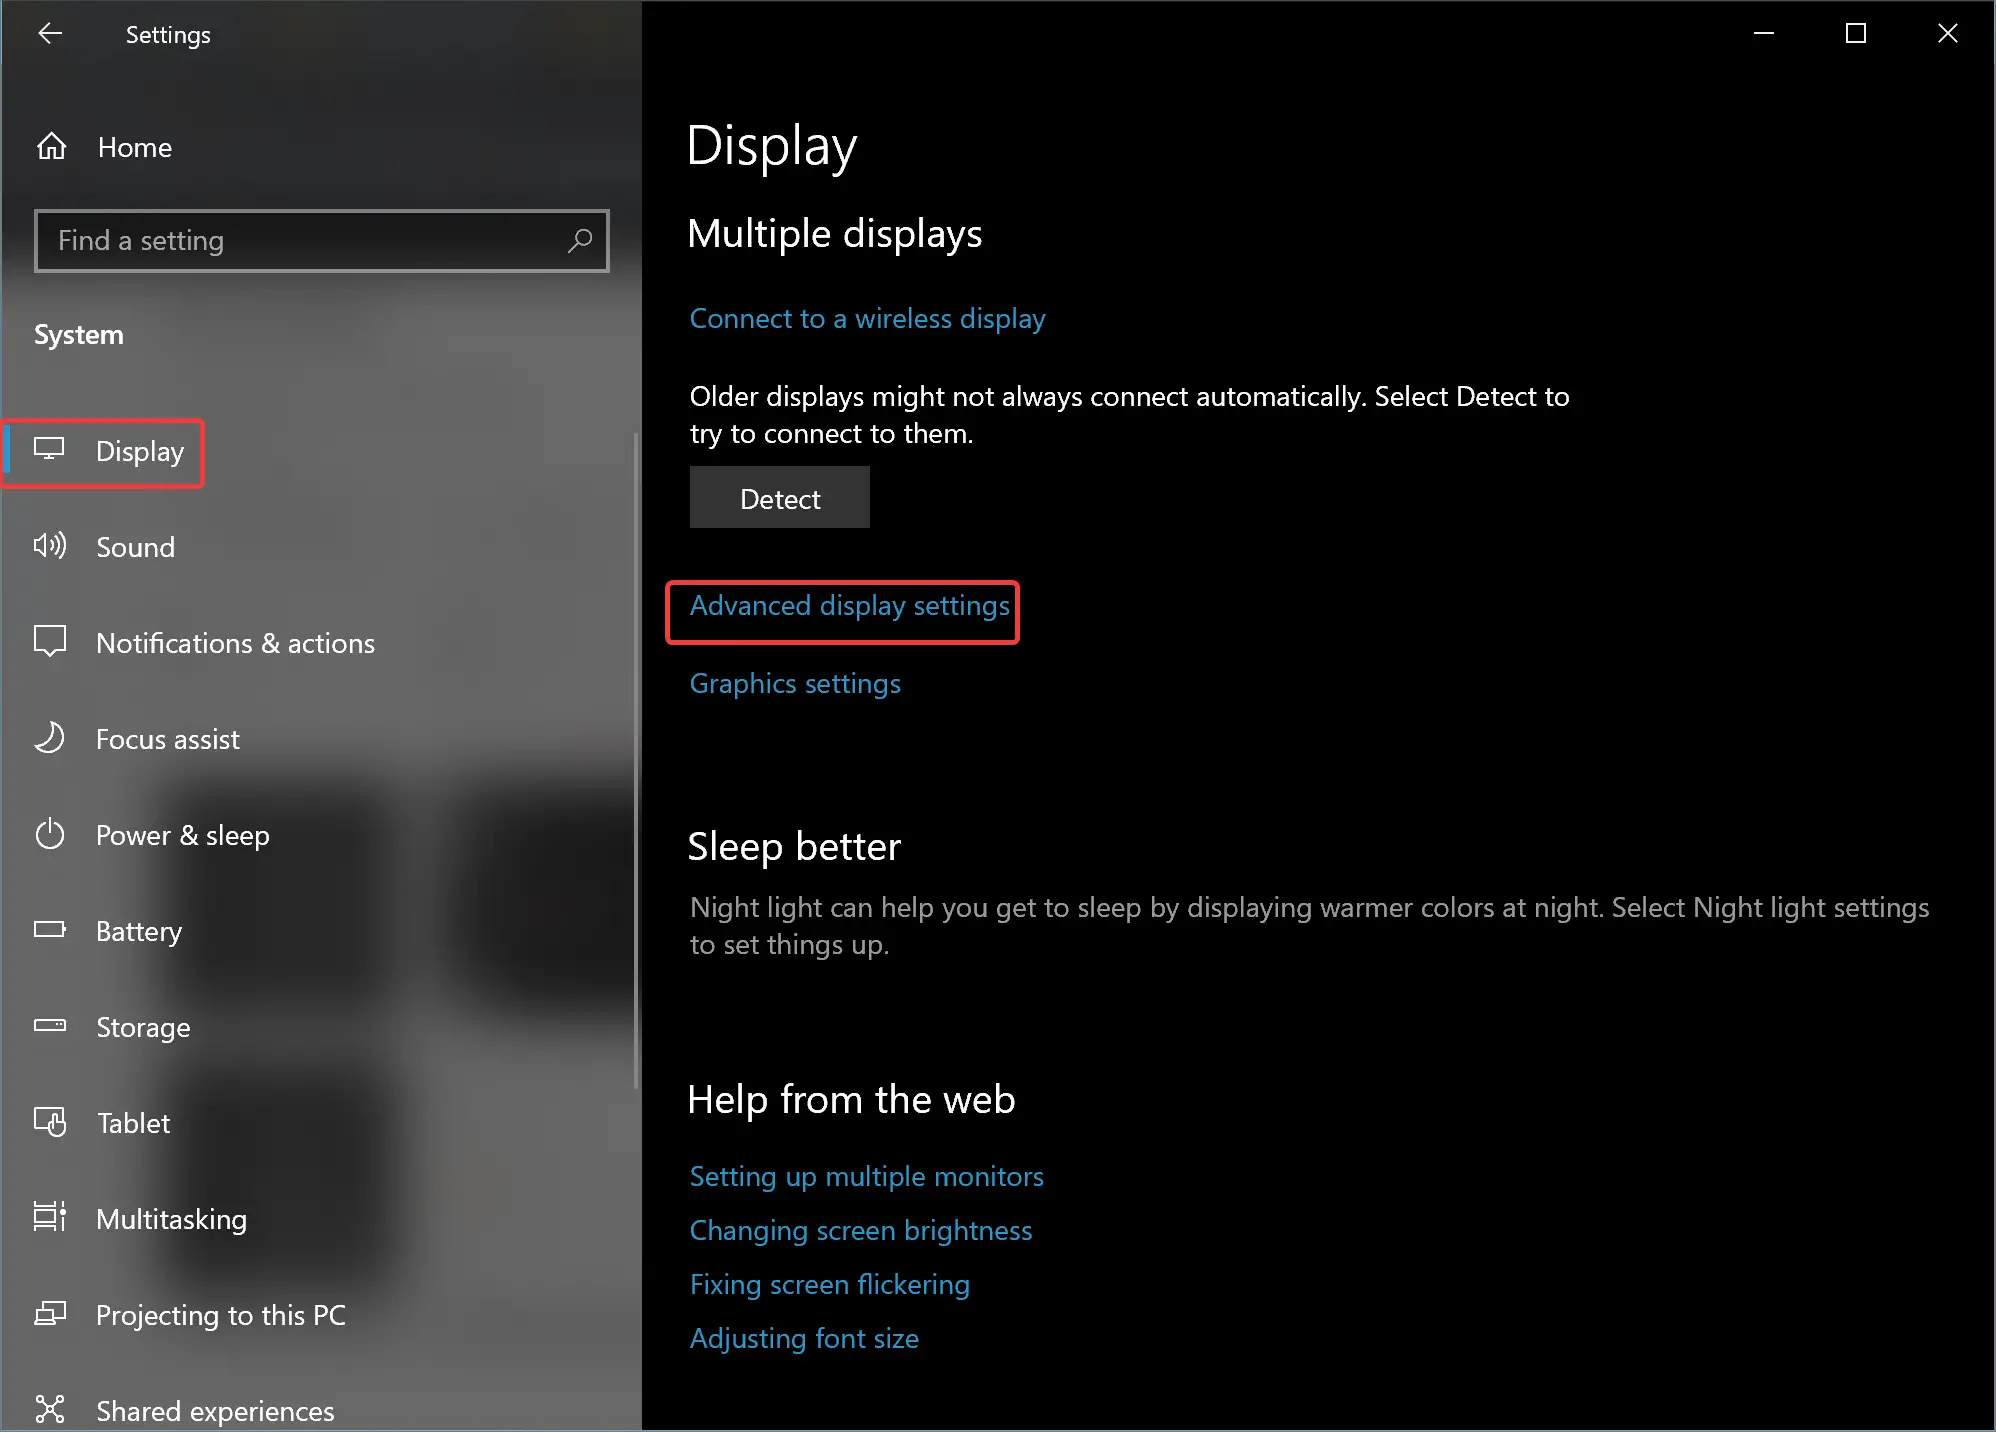
Step 4. On the right sidebar, click the Advanced display settings link.
Step 5. Next, select the monitor in the “Choose display” drop-down menu if you want to change the refresh rate.
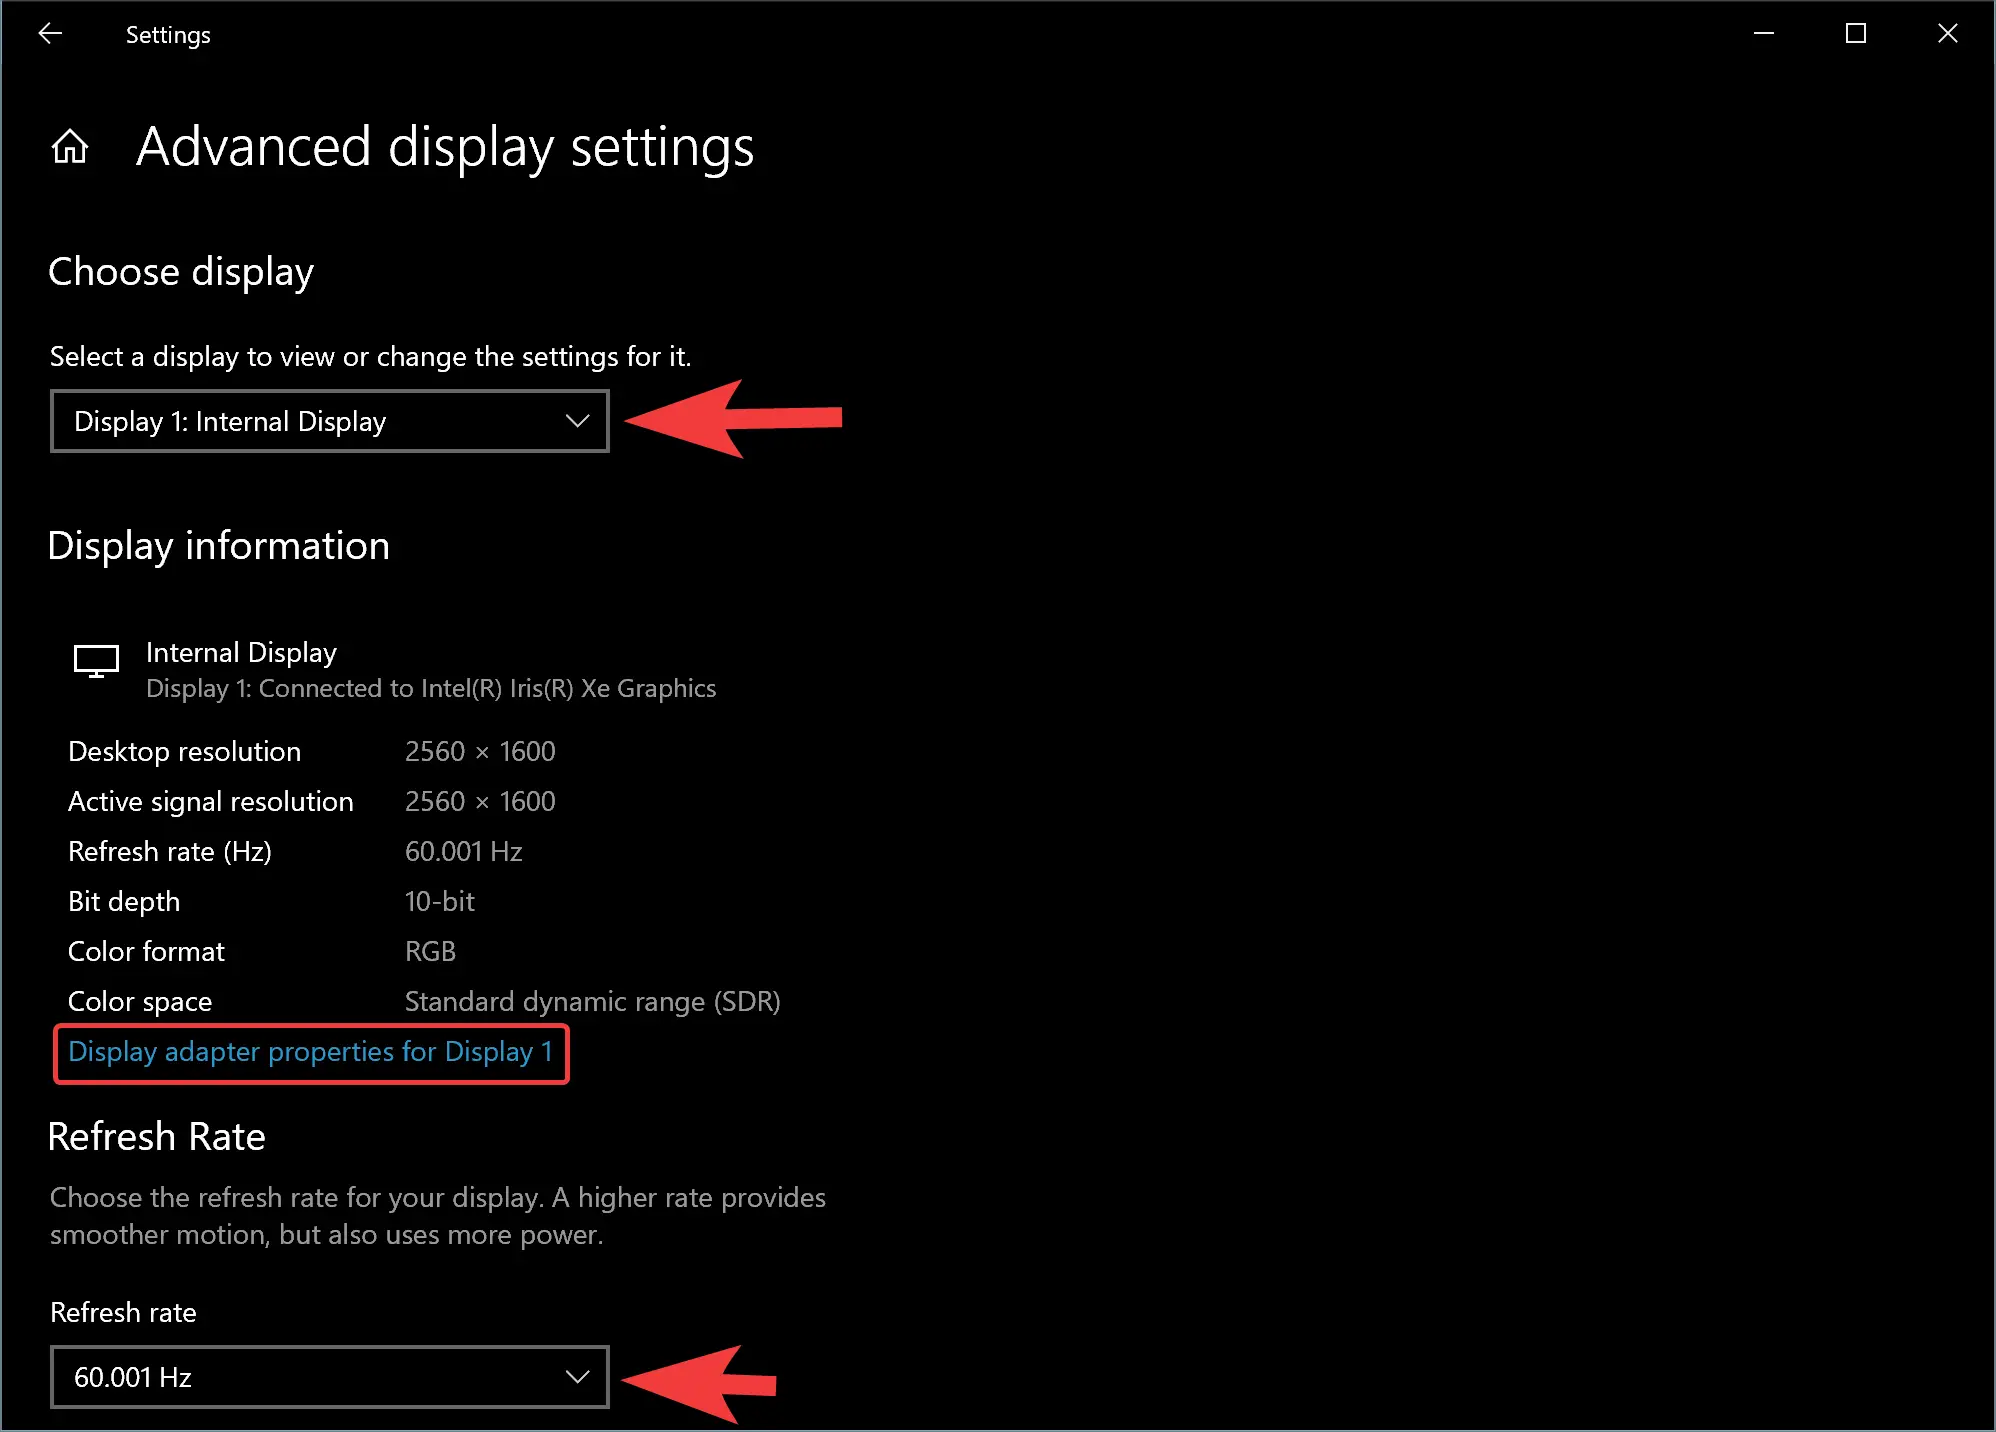
Step 6. Then, select a new refresh rate in the “Refresh rate” drop-down menu under the “Refresh Rate” section. Alternatively, click the “Display adapter properties for Display 1” link.
Step 7. After that, select the Monitor tab in the pop-up window.
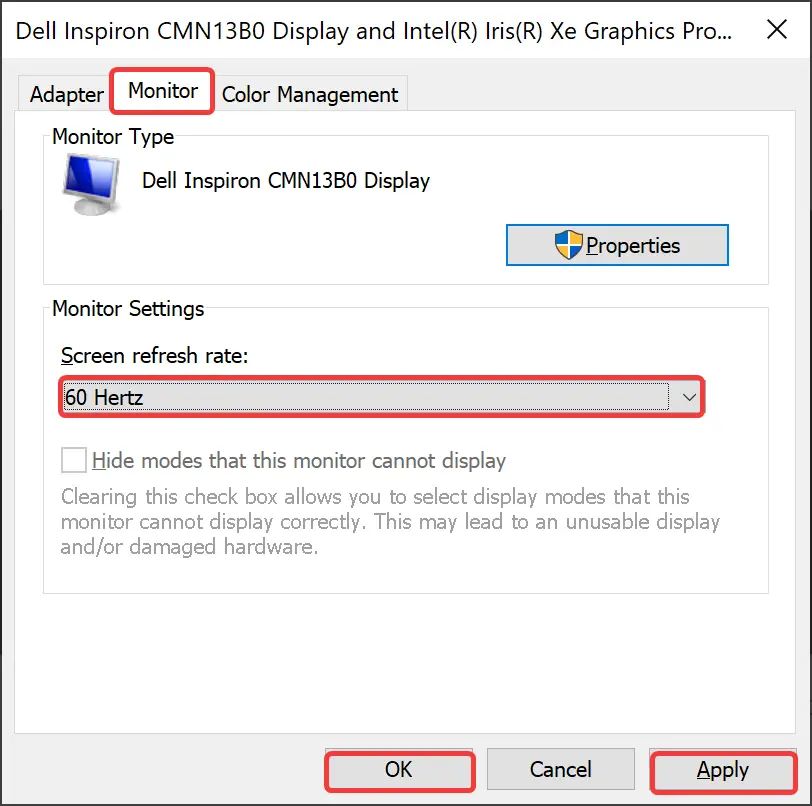
Step 8. Under the “Monitor Settings” section, use the drop-down menu “Screen refresh rate” to select the desired refresh rate.
Step 9. When you’re done, click the Apply button.
Step 10. Next, click OK.
Once you complete the above steps, your monitor should start using the new refresh rate that you’ve selected.
The refresh rate you can select always depends on the monitor, graphics adapter, and resolution your device uses. If your display supports a higher refresh rate, but the option is not available, try to install the latest graphics driver. Also, you can try setting a lower resolution as many times as displays can support a higher refresh rate but on a lower resolution.
Conclusion
In conclusion, the refresh rate of your monitor plays a critical role in your overall computing and gaming experience. A higher refresh rate results in a smoother display, while a lower refresh rate can lead to screen flickering and eye strain. While Windows 10 automatically sets the best refresh rate for your monitor, you may need to adjust it manually in some cases. By following the steps outlined above, you can easily change your monitor’s refresh rate in Windows 10 to achieve the best viewing experience. Remember that the refresh rate you can select depends on the capabilities of your monitor, graphics adapter, and resolution, so try to install the latest graphics driver and adjust your resolution accordingly if your desired refresh rate is not available.