Printing issues can be frustrating, especially when you’re in the middle of an important task. One common solution to many printing problems in Windows 10 is changing the printer port. A printer port acts as a communication channel between your computer and the printer. Sometimes, changing the port can resolve connectivity issues, driver conflicts, and other printing glitches. In this article, we will guide you through the step-by-step process of changing the printer port in Windows 10, helping you troubleshoot printing problems effectively.
What is a Printer Port?
A printer port refers to a communication channel that allows data to flow between a computer and a printer. It serves as a connection point where the computer sends print jobs and receives status updates from the printer. Common types of printer ports include USB, parallel (LPT), and network (Ethernet or Wi-Fi). The printer port plays a crucial role in establishing a stable and reliable connection, and understanding its functionality is essential for troubleshooting printing issues.
How to Change Printer Port to Fix Printing Issues in Windows 10?
Follow these simple steps to change the printer port in Windows 10:-
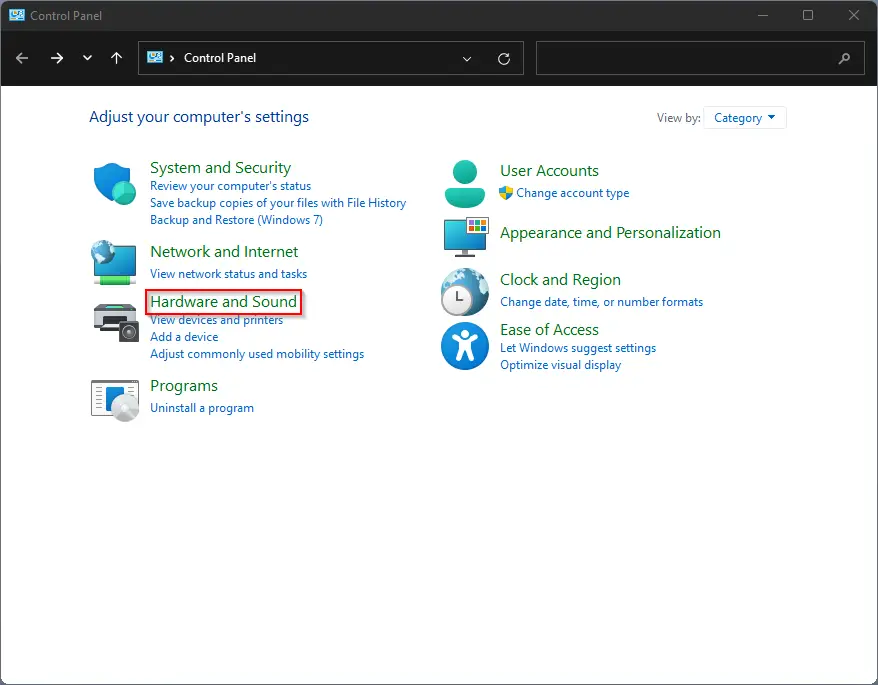
Step 1. Open the Control Panel by clicking on the Start button and typing “Control Panel” in the search bar. Select it from the search results.
Step 2. In the Control Panel window, set “View by” to Category and click on the “Hardware and Sound” category.
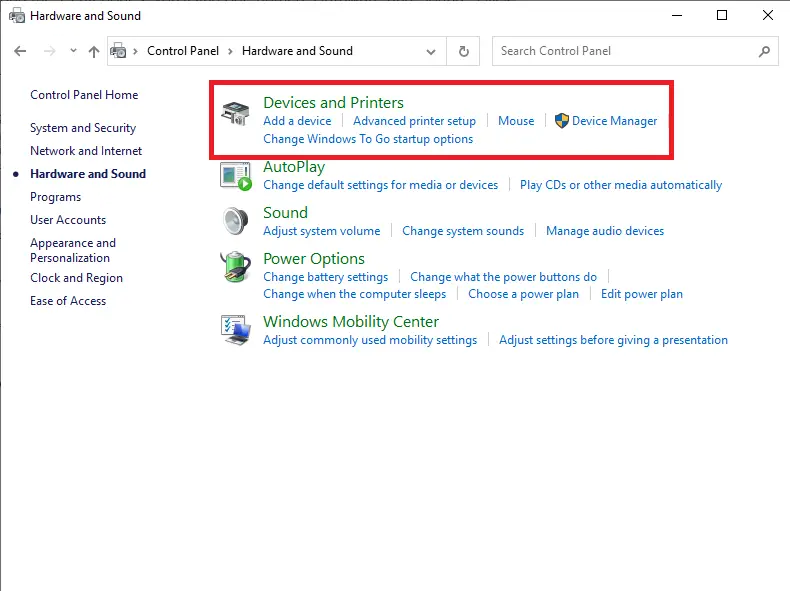
Step 3. Locate and click on the “Devices and Printers” option. This will display a list of installed printers.
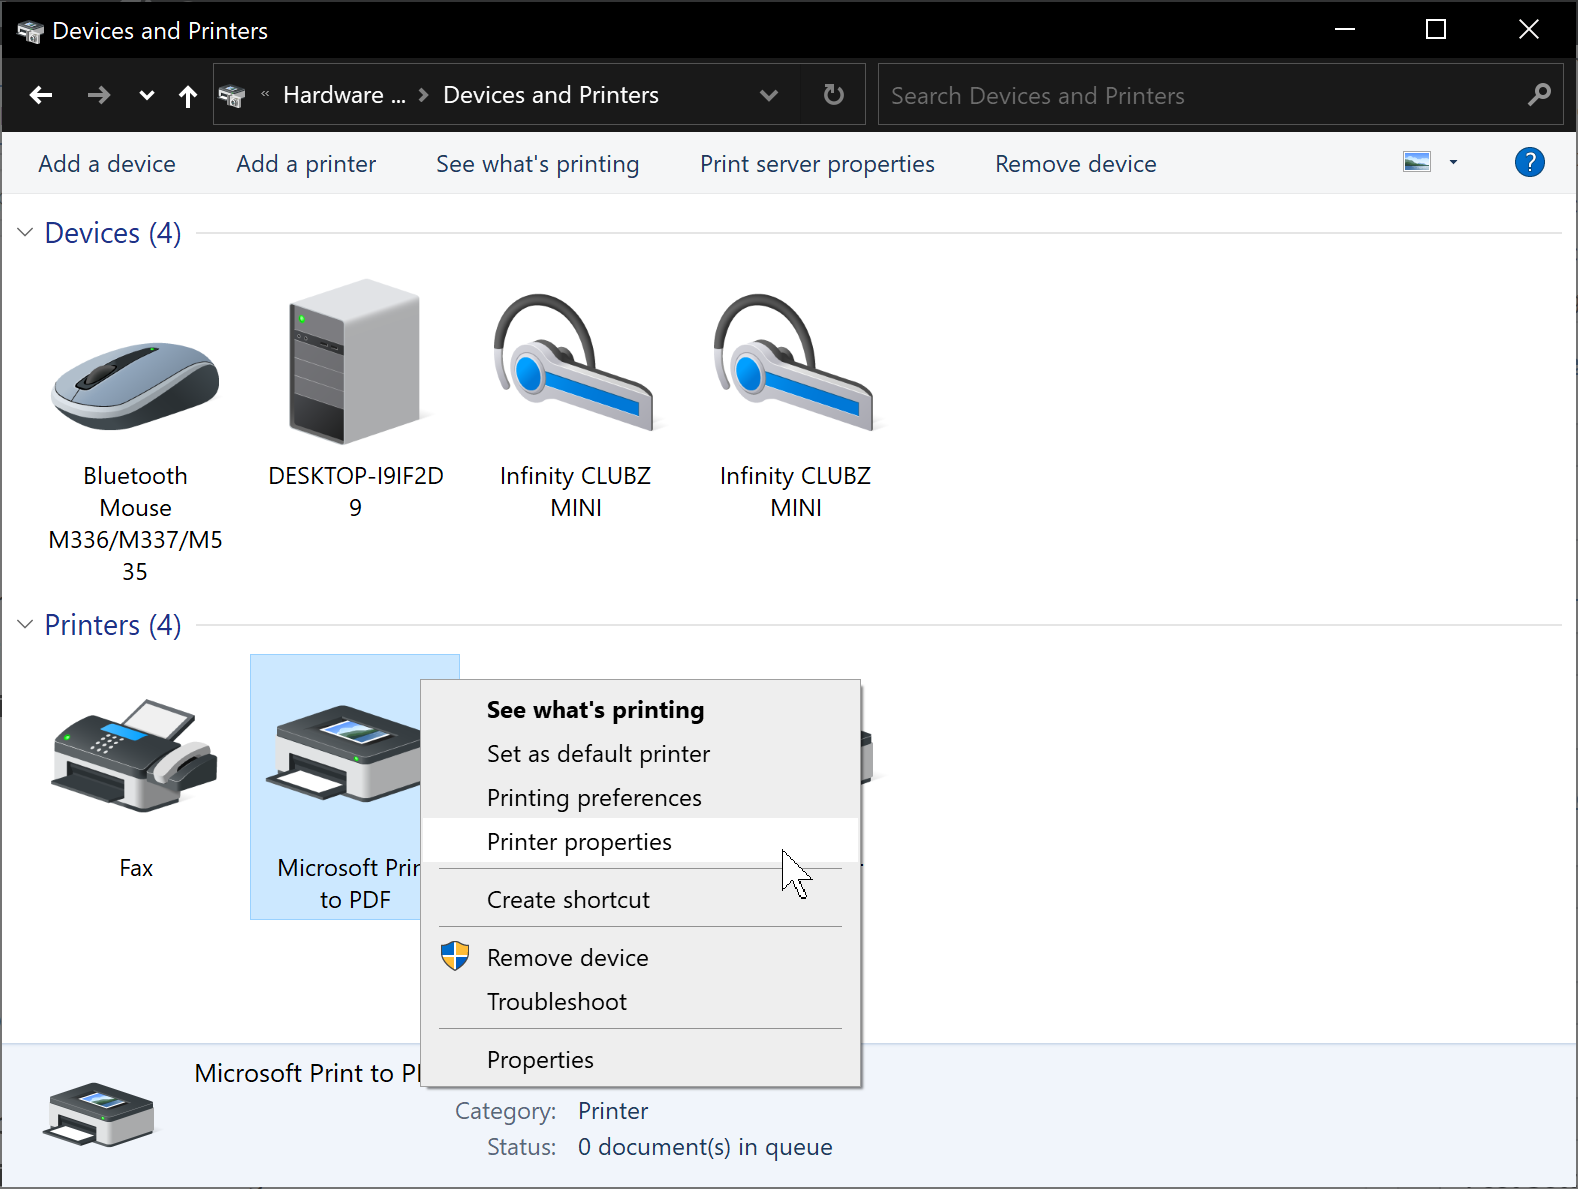
Step 4. From the list of printers, find the printer you want to change the port for and right-click on it.
Step 5. In the context menu that appears, click on “Printer properties.” Note that it is essential to select “Printer properties” and not “Properties,” as the latter will not provide the necessary options. Also, please note that if the “Print Spooler” service is not running, you will be unable to find the “Printer properties” option.
Step 6. In the Printer Properties window, navigate to the “General” tab.
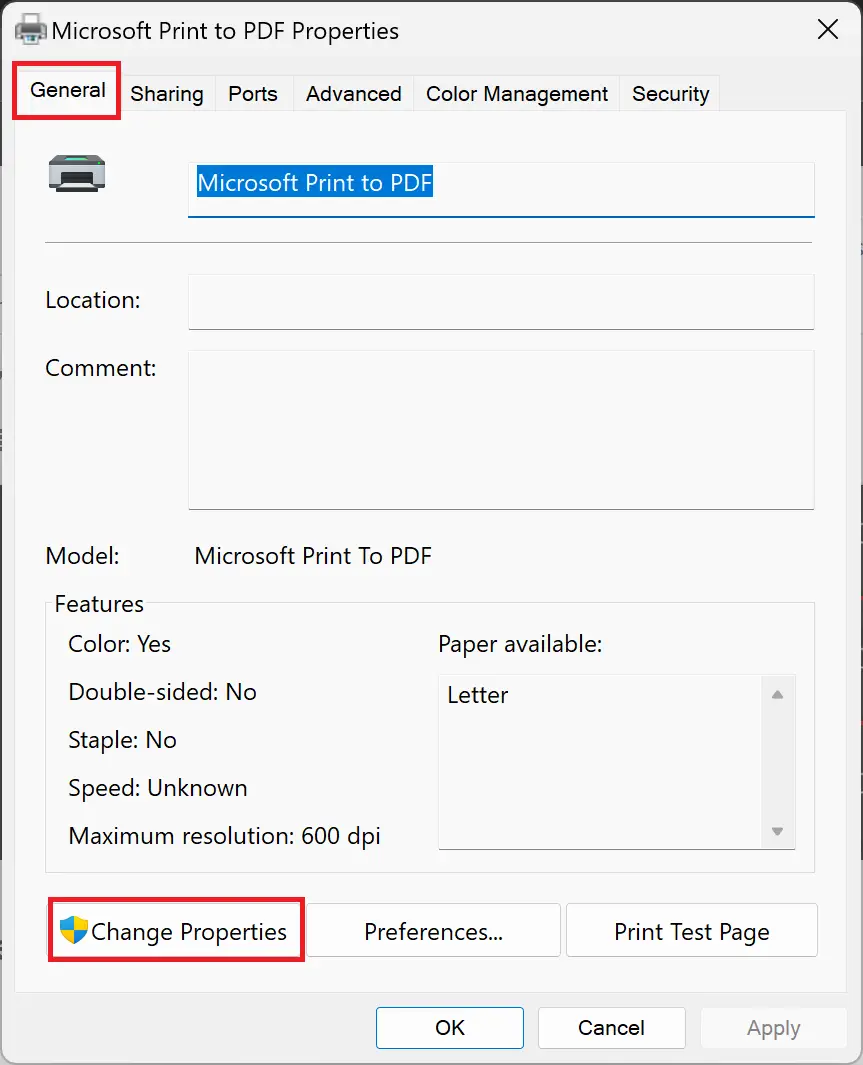
Step 7. Click on the “Change Properties” button.
Step 8. Switch to the Ports tab.
Step 9. You will see a list of ports currently assigned to the printer. Select the port that matches your printer’s current connection. Common port names include USB001, LPT1, or COM1. The port with a checkmark indicates the currently assigned port.
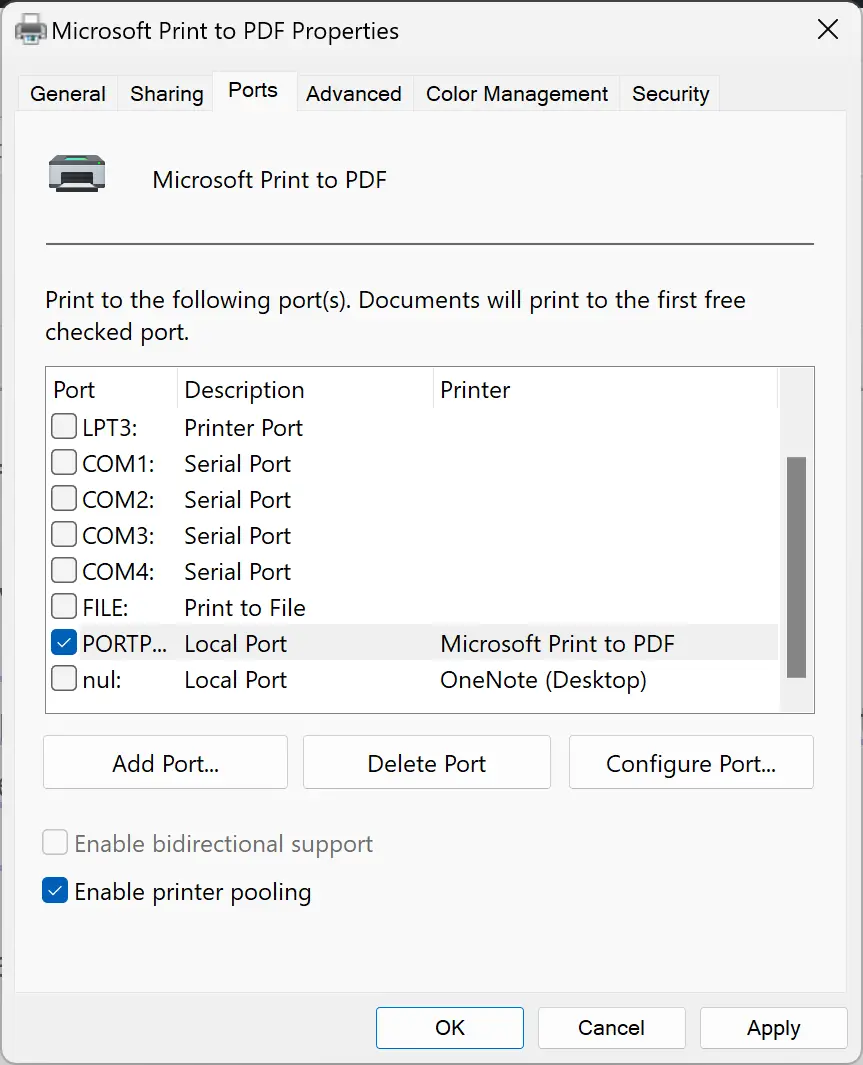
Step 10. Click Apply.
Step 11. Click OK.
How to Test the Printer?
After changing the printer port, it is crucial to test whether the new configuration has resolved the printing issue. So, close the Printer Properties window and return to the Devices and Printers screen. Right-click on the printer and select “Printer Properties” once again. Navigate to the “General” tab and click on the “Print Test Page” button.
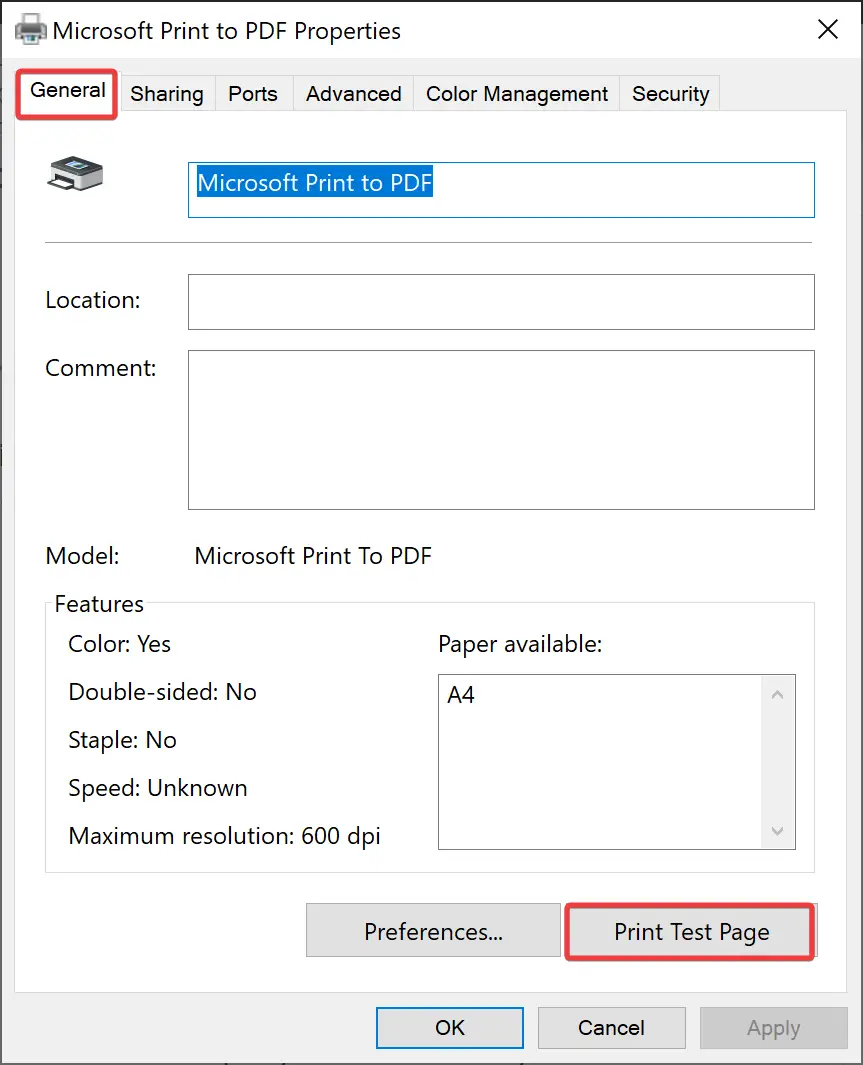
If the test page prints successfully, the printer port change has likely resolved the issue. If not, you may need to try an alternative solution or consult with the printer manufacturer’s support.
Conclusion
Changing the printer port in Windows 10 can be a simple yet effective way to address printing problems. By following the step-by-step instructions outlined in this article, you can easily modify the printer port and potentially resolve connectivity issues, driver conflicts, and other printing glitches. Remember to test the printer after making the changes to ensure that the issue is resolved. If problems persist, consider reaching out to the printer manufacturer’s support for further assistance.
You’re welcome.