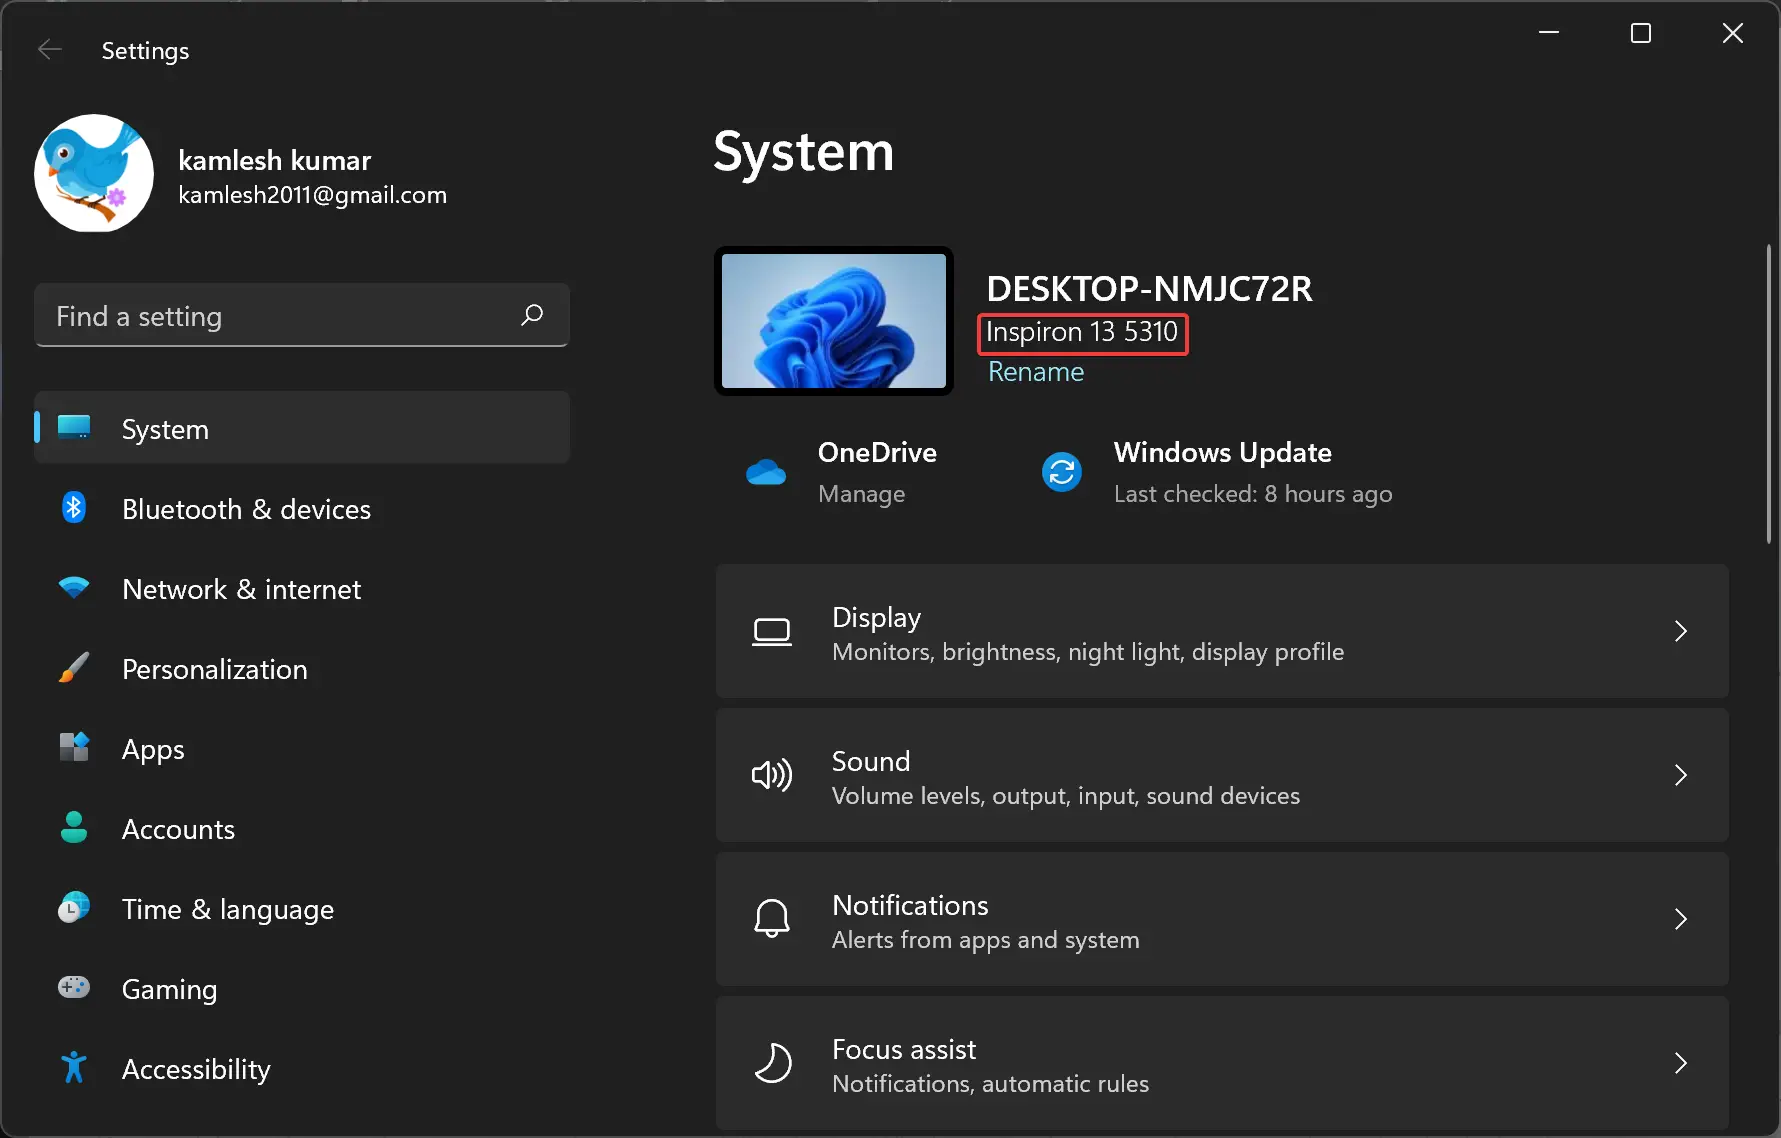
By default, the computer manufacturer specifies the name of the system. For instance, if you have purchased a Dell Inspiron I2 5310, when you open Windows Settings, you will see Inspiron I2 5310 under your computer name. However, if you have assembled your computer, Windows 11/10 shows the motherboard name in the Windows Settings panel by default.
If you wish to change the system product name visible in the Windows Settings panel, you need to take the help of Registry Editor. There is no direct method to change the OEM information in Windows Settings, but you can quickly do it through Registry Editor.
In this gearupwindows article, we will guide you on changing the System Product Name in Windows 11/10.
How to Change System Product Name or Manufacturer Name in Windows 11/10?
If you want to change the System Product Name or Manufacturer Name in Windows 11/10, do the following steps:-
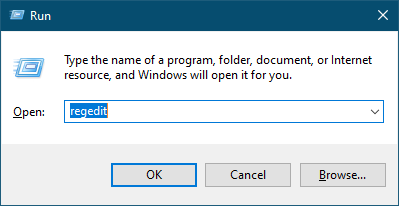
Step 1. At first, open the Registry Editor on your computer.
For that, you can press Windows + R to open the Run dialog. Then, type regedit in the empty box and hit the Enter button. If the UAC prompt appears, click on the Yes button.
Step 2. When the Registry Editor window opens on your computer, navigate to the following path in the left sidebar:-
HKEY_LOCAL_MACHINE\SOFTWARE\Microsoft\Windows\CurrentVersion\OEMInformation
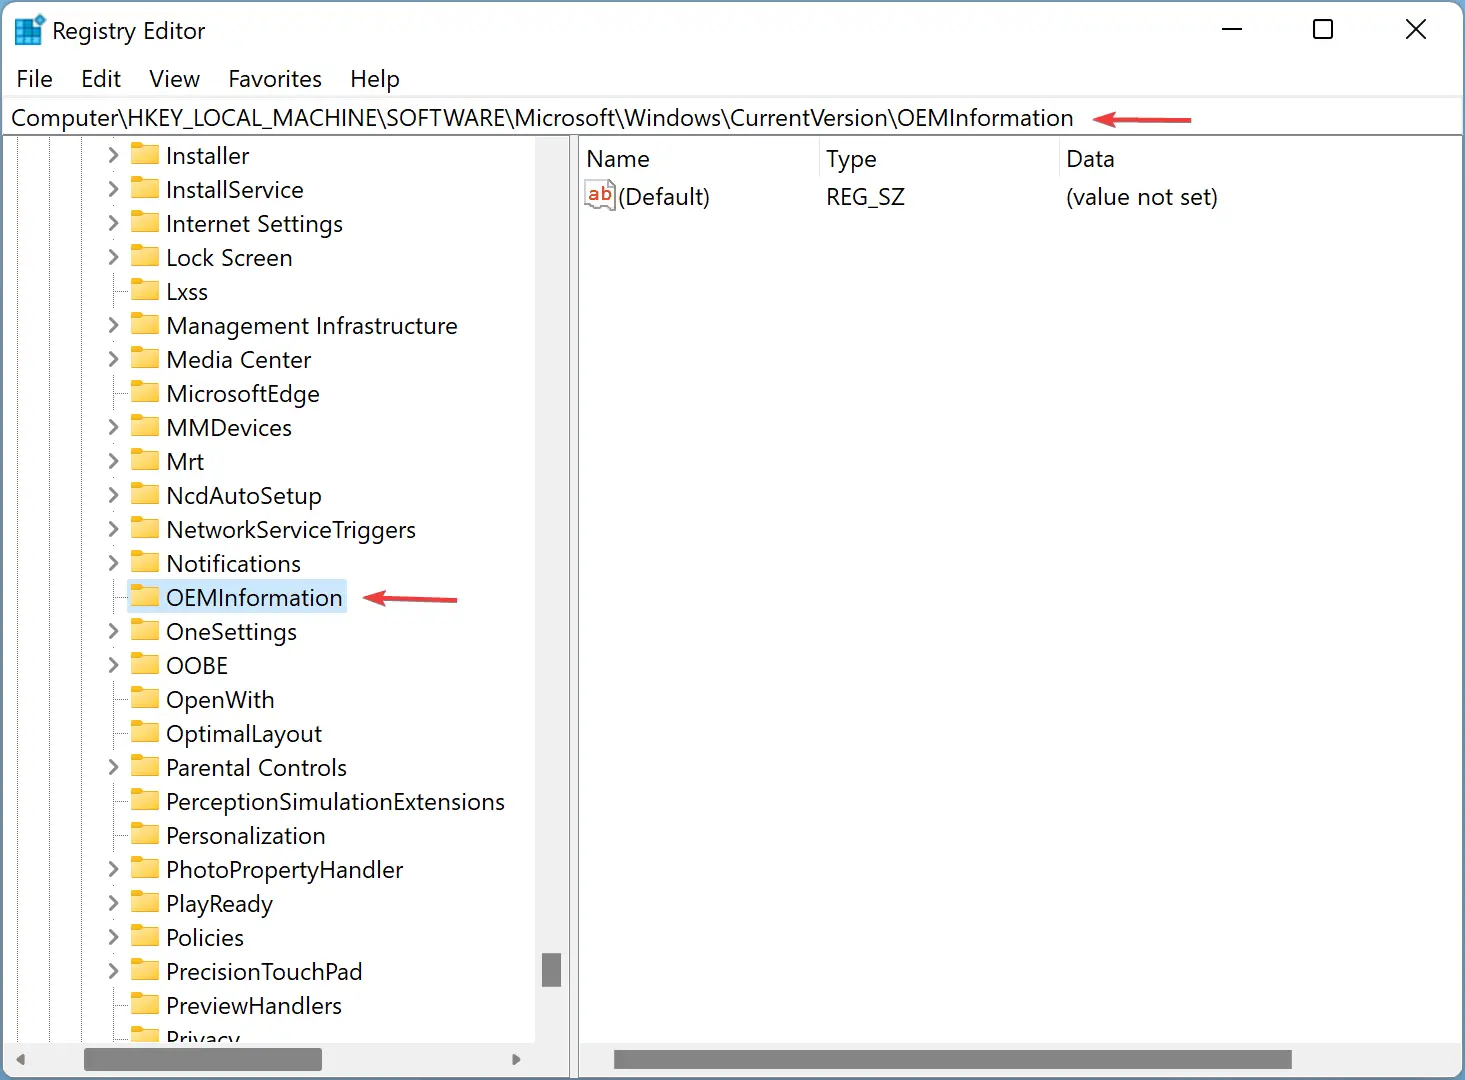
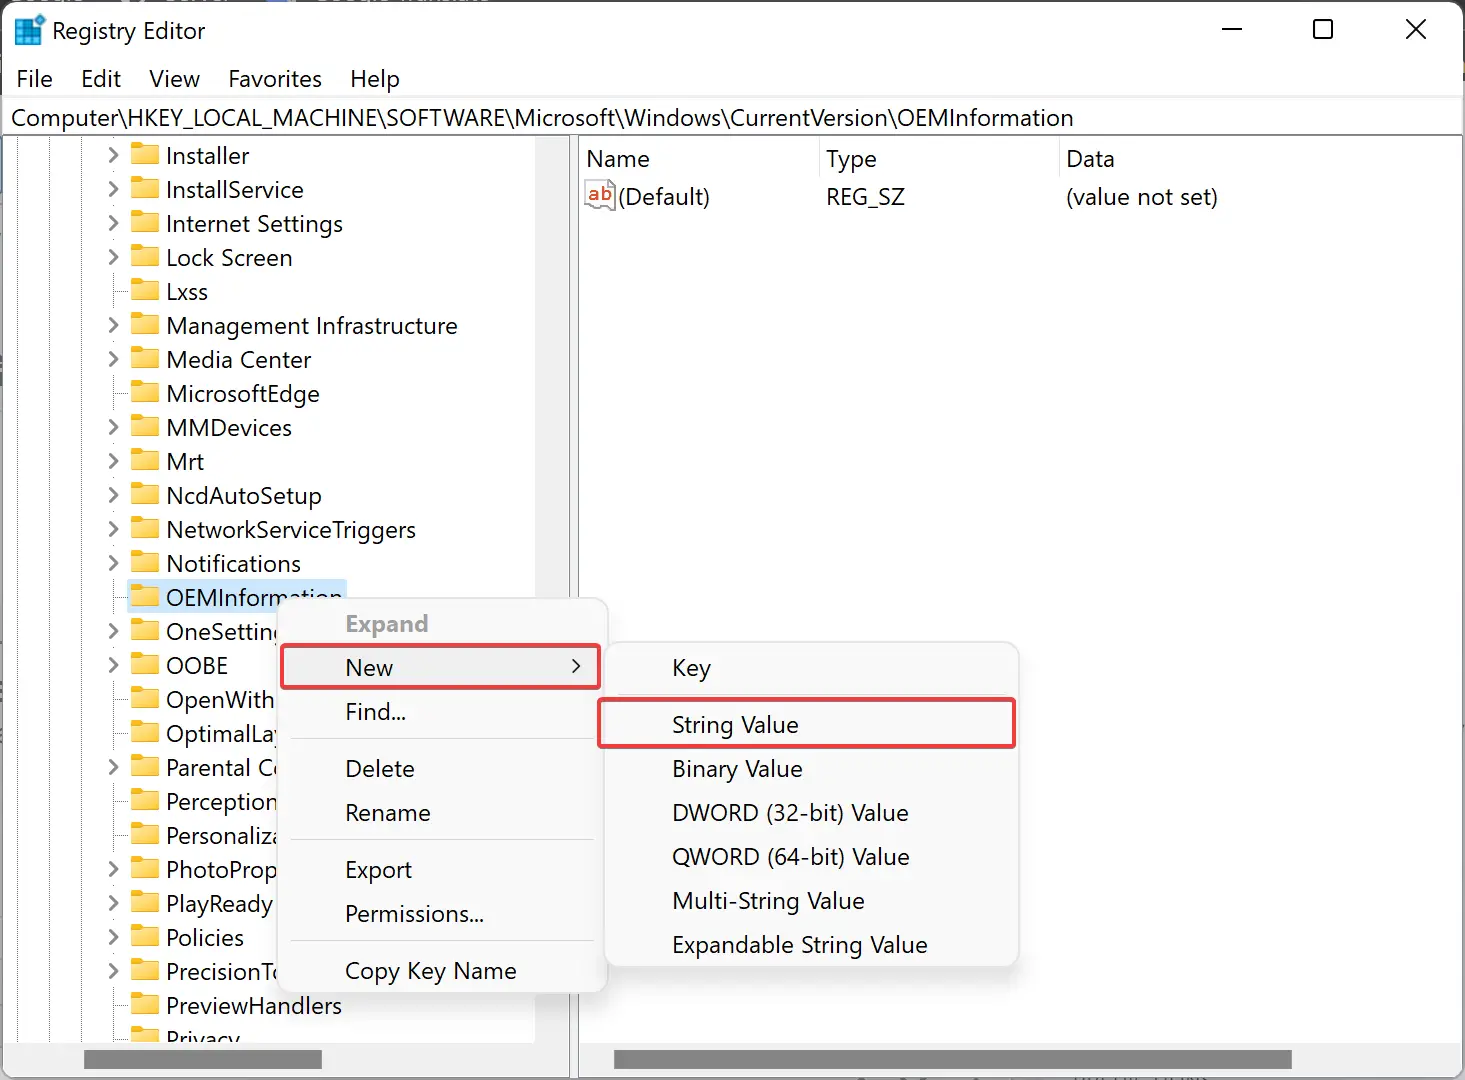
Step 3. On the opposite side of the OEMInformation key, you will see a String Value named Model. However, if it doesn’t exist, you must create it manually. For that, right-click on the OEMInformation key and select “New > String Value.”
Step 4. Then, name it Model. Next, double-click on it and set the “Value data” as the name you want to display under your computer name.
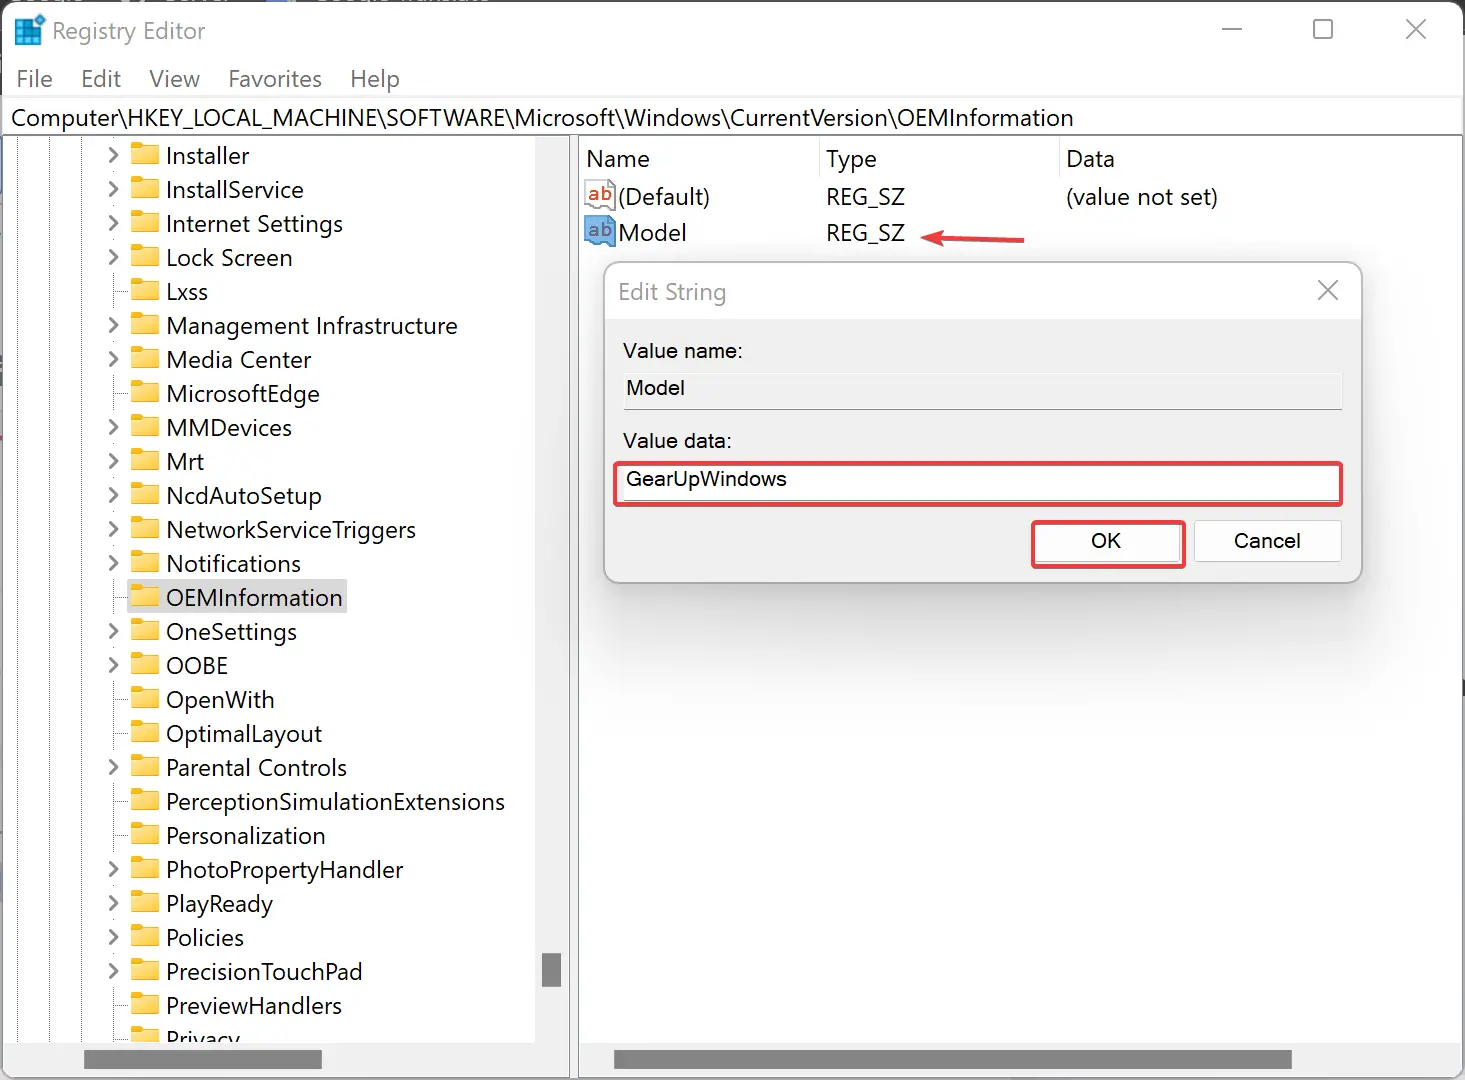
Step 5. Finally, hit the OK button to save the changes.
Once done, open the Windows Settings by pressing the Windows + I keys or any other method. If Windows Settings is already opened, just close and reopen the see the changes.

If you want to display the default name, you need to delete the String Value you created above. For that, right-click on the Model String Value and select the Delete option from the context menu. Finally, hit the Yes button.
Conclusion
In conclusion, changing the system product name or manufacturer name in Windows 11/10 can be done using the Registry Editor. Though the default name is set by the computer manufacturer, you can modify it as per your preference. By following the simple steps outlined in this gearupwindows article, you can quickly change the product name visible in the Windows Settings panel. Remember, if you want to display the default name again, you need to delete the created String Value using the Registry Editor.