Windows 10 operating system features a lock screen before you sign in to your account. The Lock Screen showcases the date and time, quick status for apps you choose, and a background image, typically personal pictures or from Windows Spotlight.
While the Lock screen provides valuable information and beautiful pictures, you might have noticed that your computer’s display turns off just after 60 seconds when you lock your Windows 10 machine. This happens even if you change the power options, never turn off the monitor, or never put the computer to sleep.
The reason behind that the operating system includes a function that automatically detects when the device is locked and waits for 60 seconds. After the time expires, the computer screen goes black.
However, Microsoft allows you to customize it through Control Panel or the Settings app. This setting you can also modify through Registry Editor or Command Prompt.
In this gearupwindows article, we will guide you with all the possible methods through which you can change the Windows 10 Lock Screen timeout.
How to Increase Lock Screen Timeout from Windows 10 Settings?
If you want to increase the Lock Screen timeout in Windows 10 through the Settings app, use the following steps:-
Step 1. First, open the Windows Settings.
To quickly access Windows Settings, you can use the Windows + I hotkey.
Step 2. When Windows Settings appears, click on System.
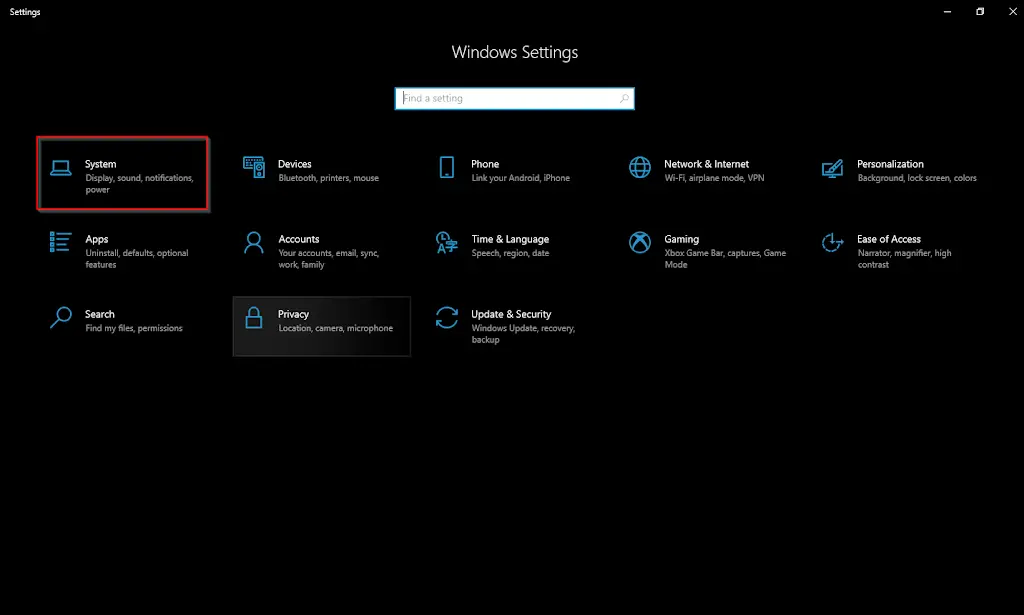
Step 3. Then, select the Power & sleep option under System.
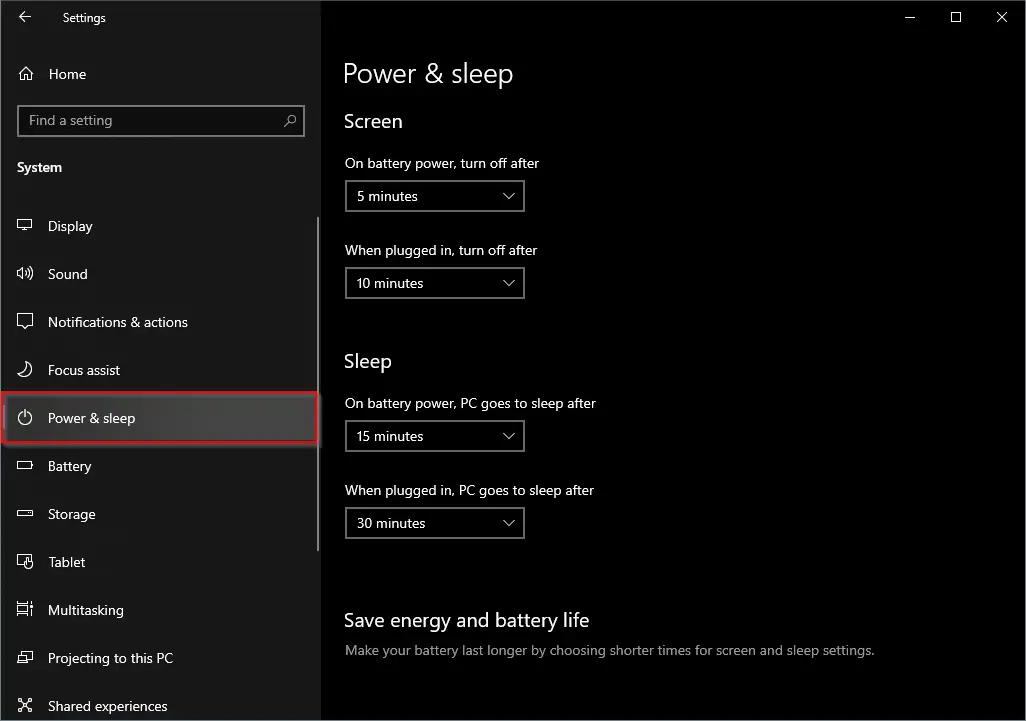
Step 4. On the “Power & sleep” settings page, set the time under the Screen section for both options “On battery power, turn off after” and “When plugged in, turn off after.”
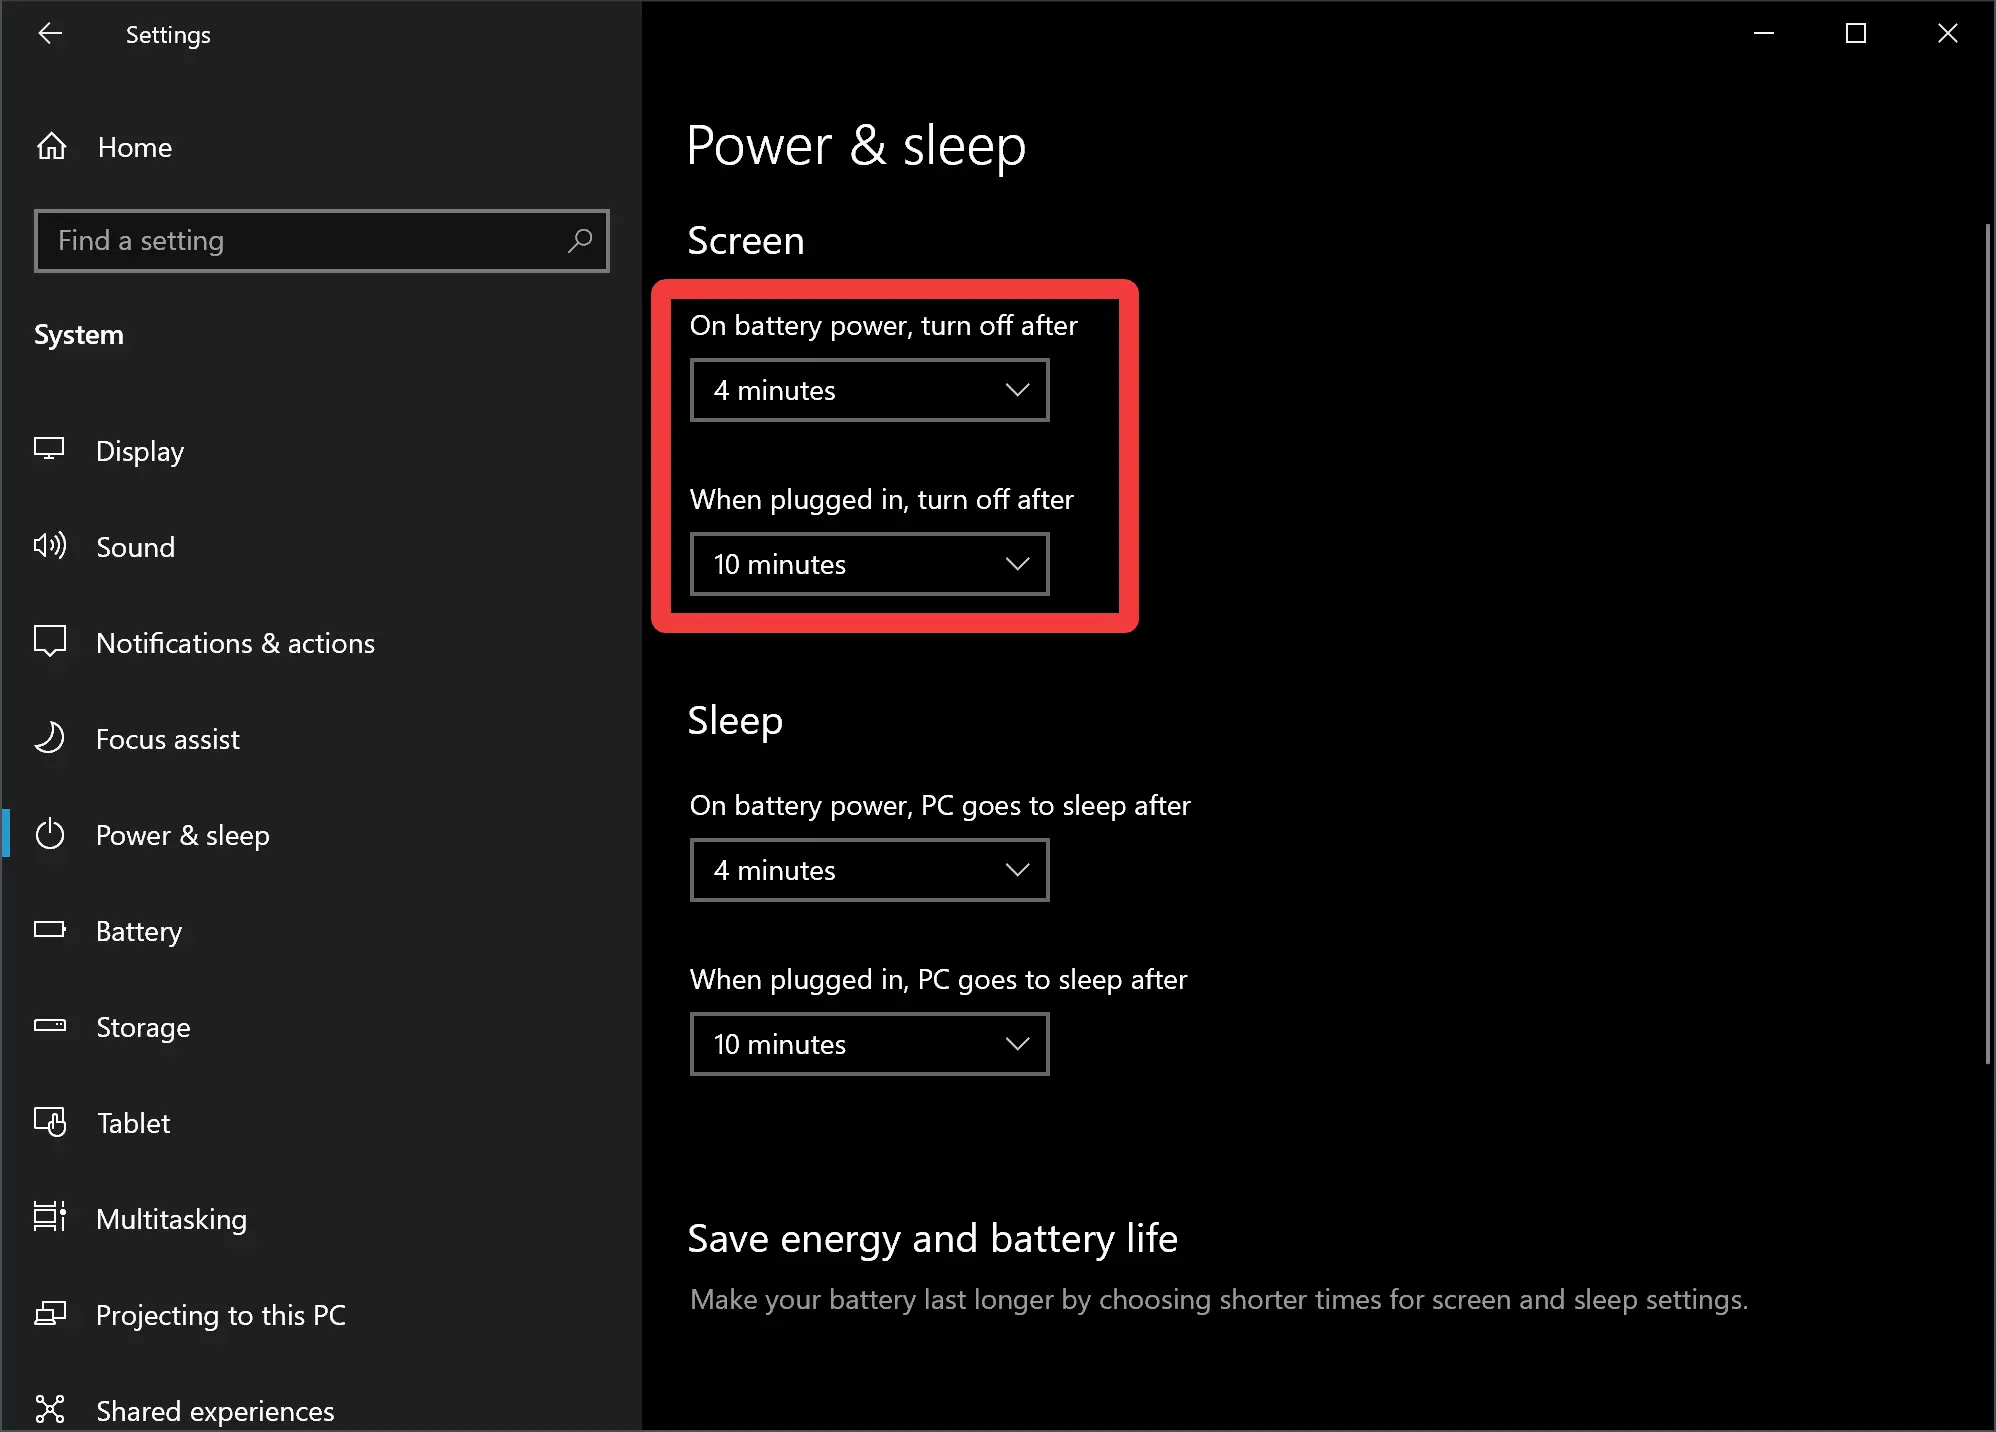
If you want to disable this setting altogether, choose the Never option from the dropdown.
How to Change Lock Screen Timeout using the Control Panel?
To change the Lock Screen timeout using Control Panel, do the following:-
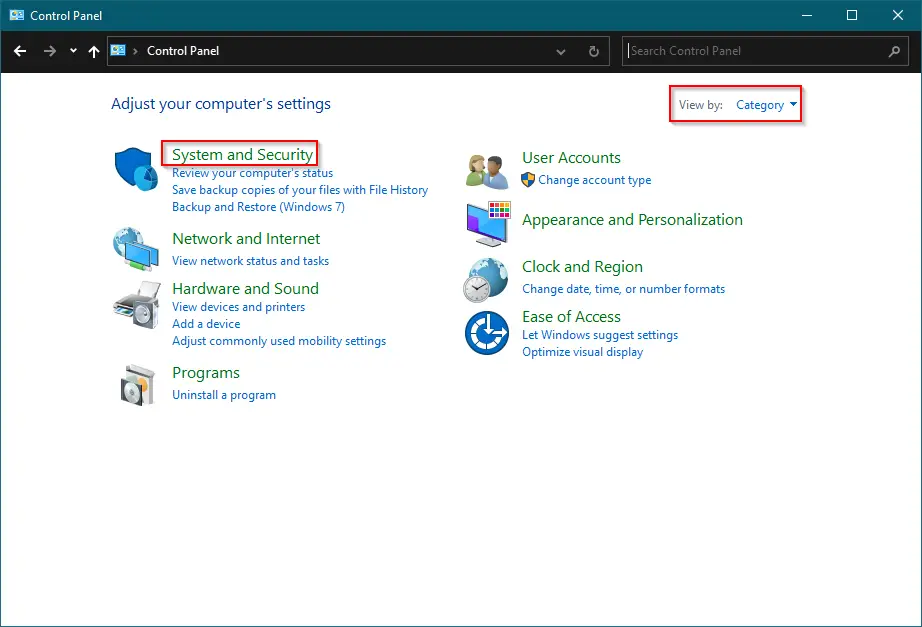
Step 1. First, open Control Panel.
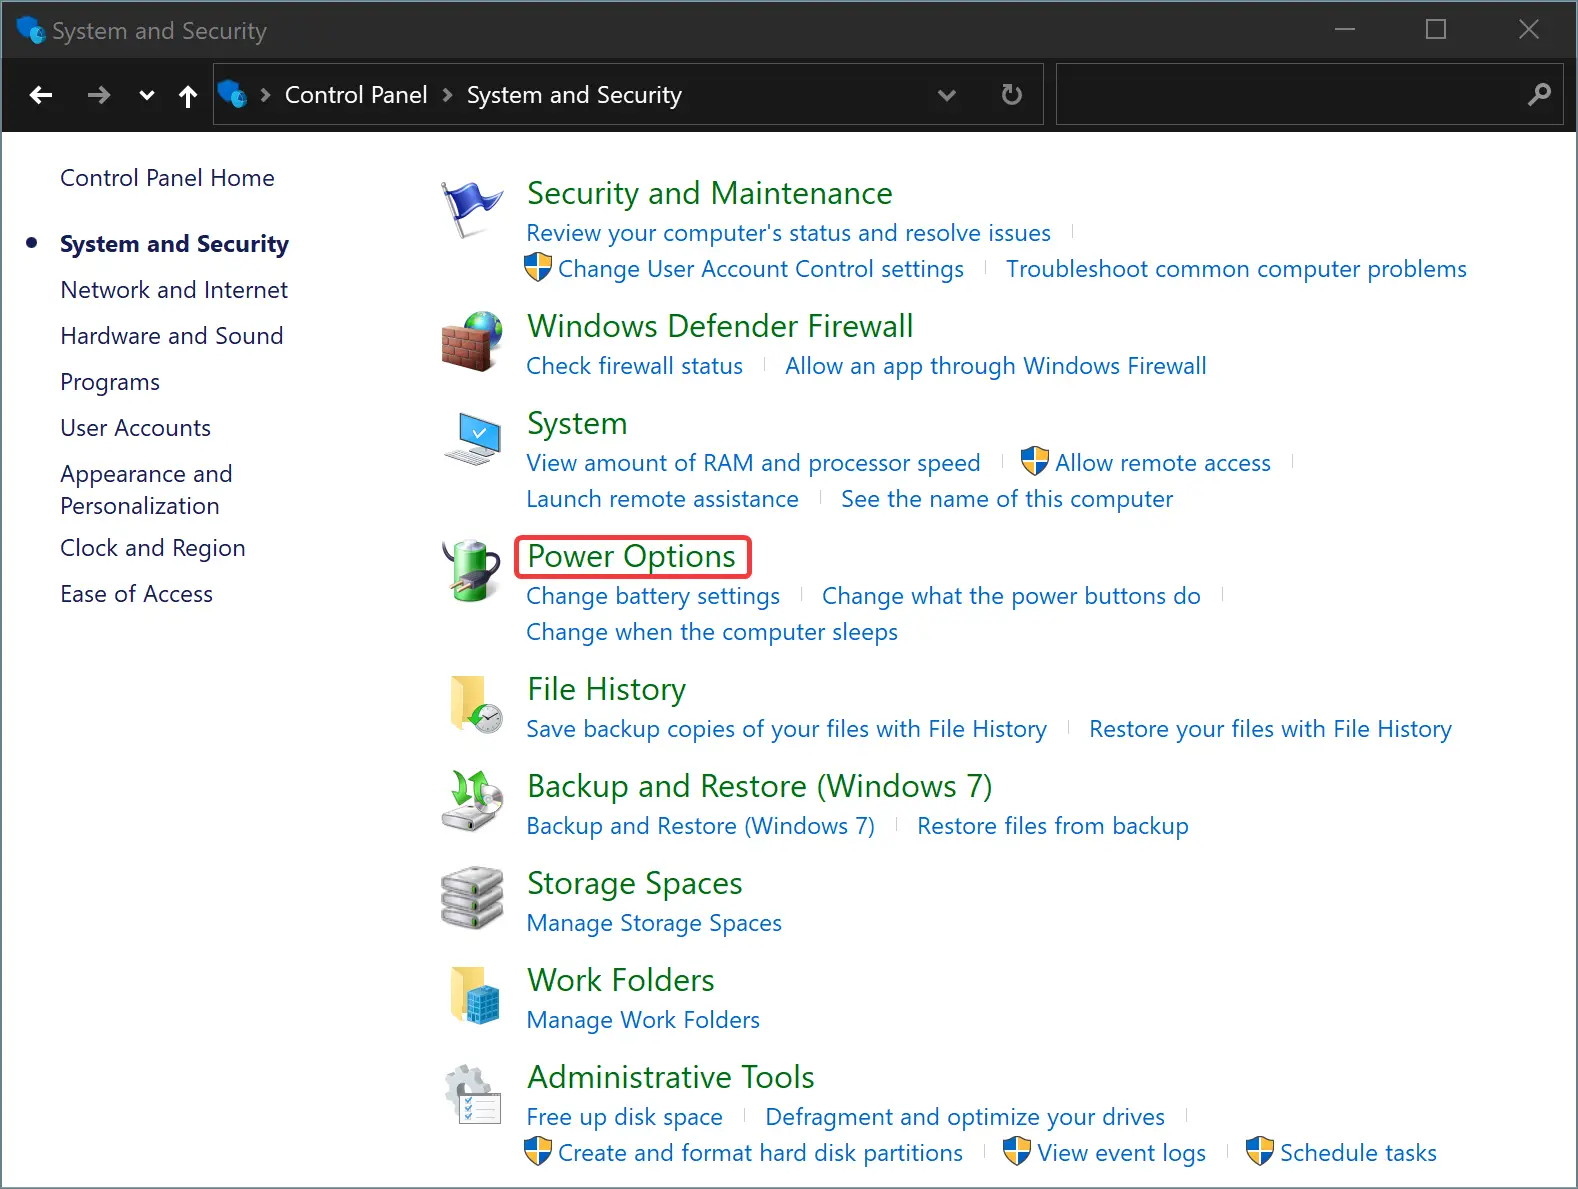
Step 2. Then, click System and Security.
Step 3. Next, click on Power Options.
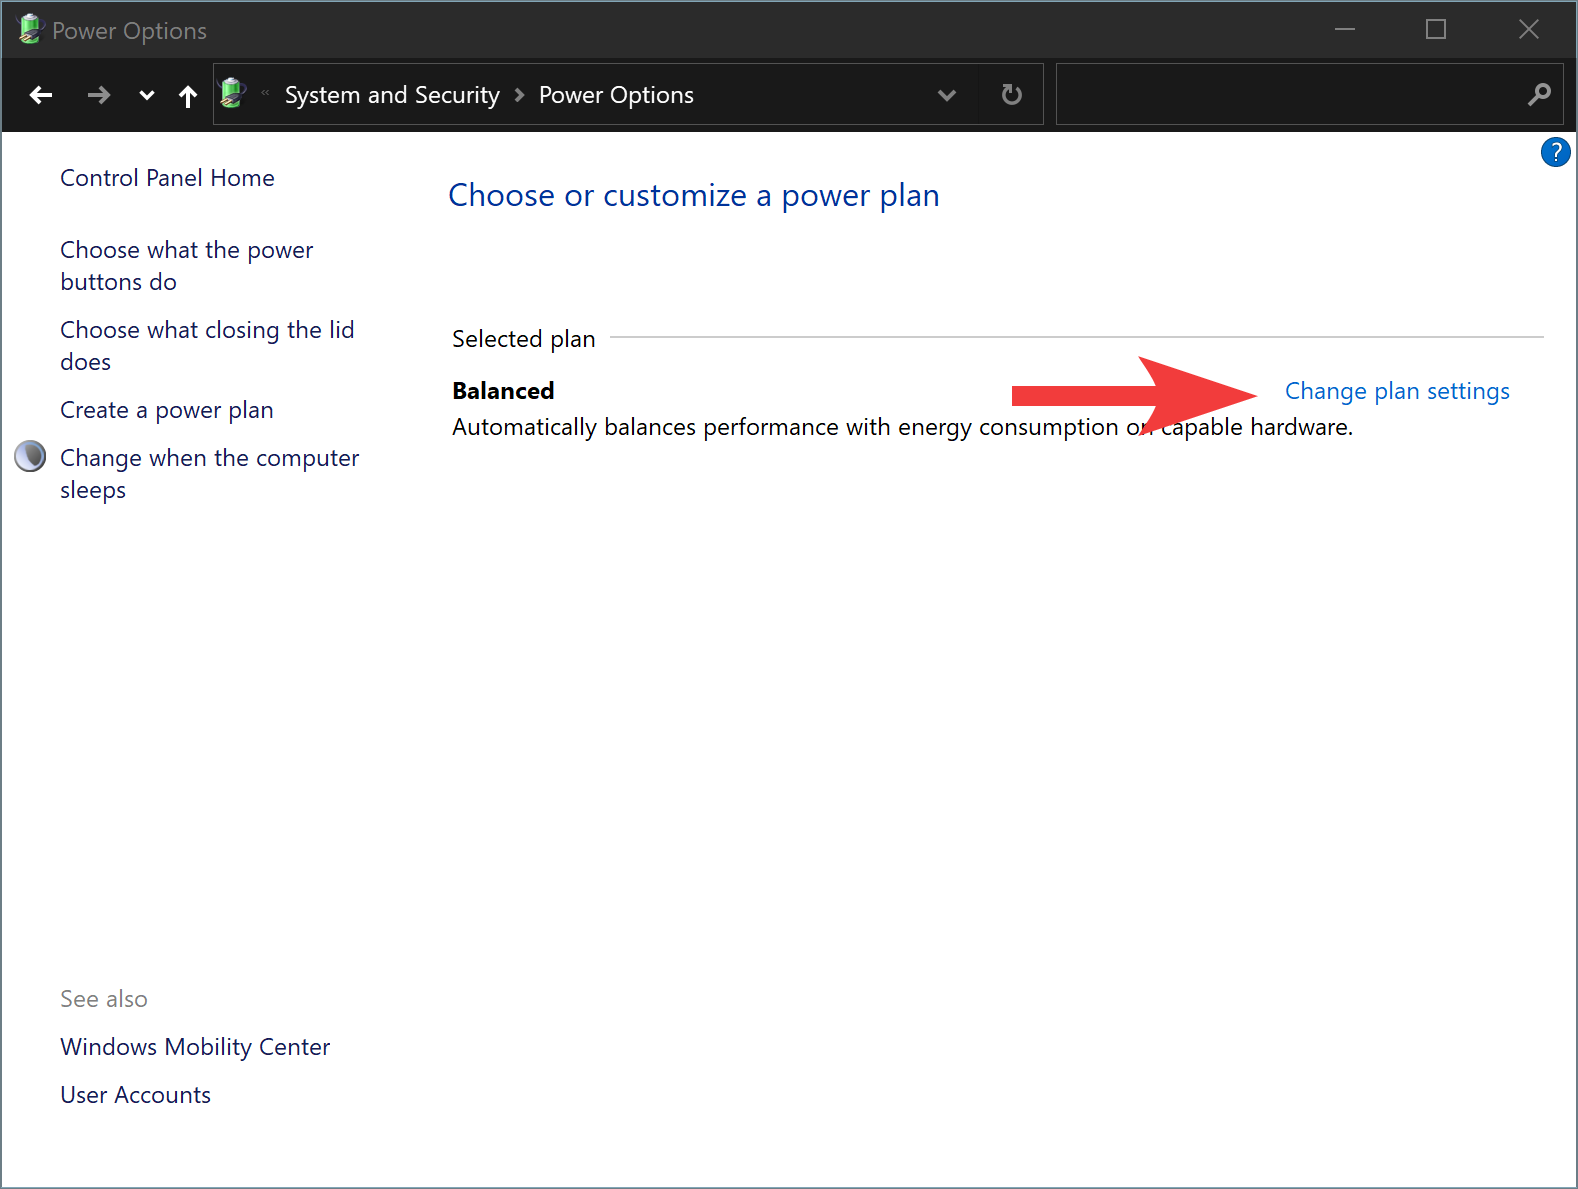
Step 4. After that, click Change plan settings next to an active power plan.
Step 5. In the following screen, set the turn-off display time beside the “Turn off the display” option for both “On battery” and “Plugged in” settings.

How to Change Lock Screen Timeout through Registry Editor?
To adjust the Lock Screen timeout in Windows 10 using Registry Editor, do the following:-
Step 1. First, launch the Registry Editor.
Step 2. Then, navigate to the following folder in the left sidebar of Registry Editor:-
Computer\HKEY_LOCAL_MACHINE\SYSTEM\CurrentControlSet\Control\Power\PowerSettings\7516b95f-f776-4464-8c53-06167f40cc99\8EC4B3A5-6868-48c2-BE75-4F3044BE88A7
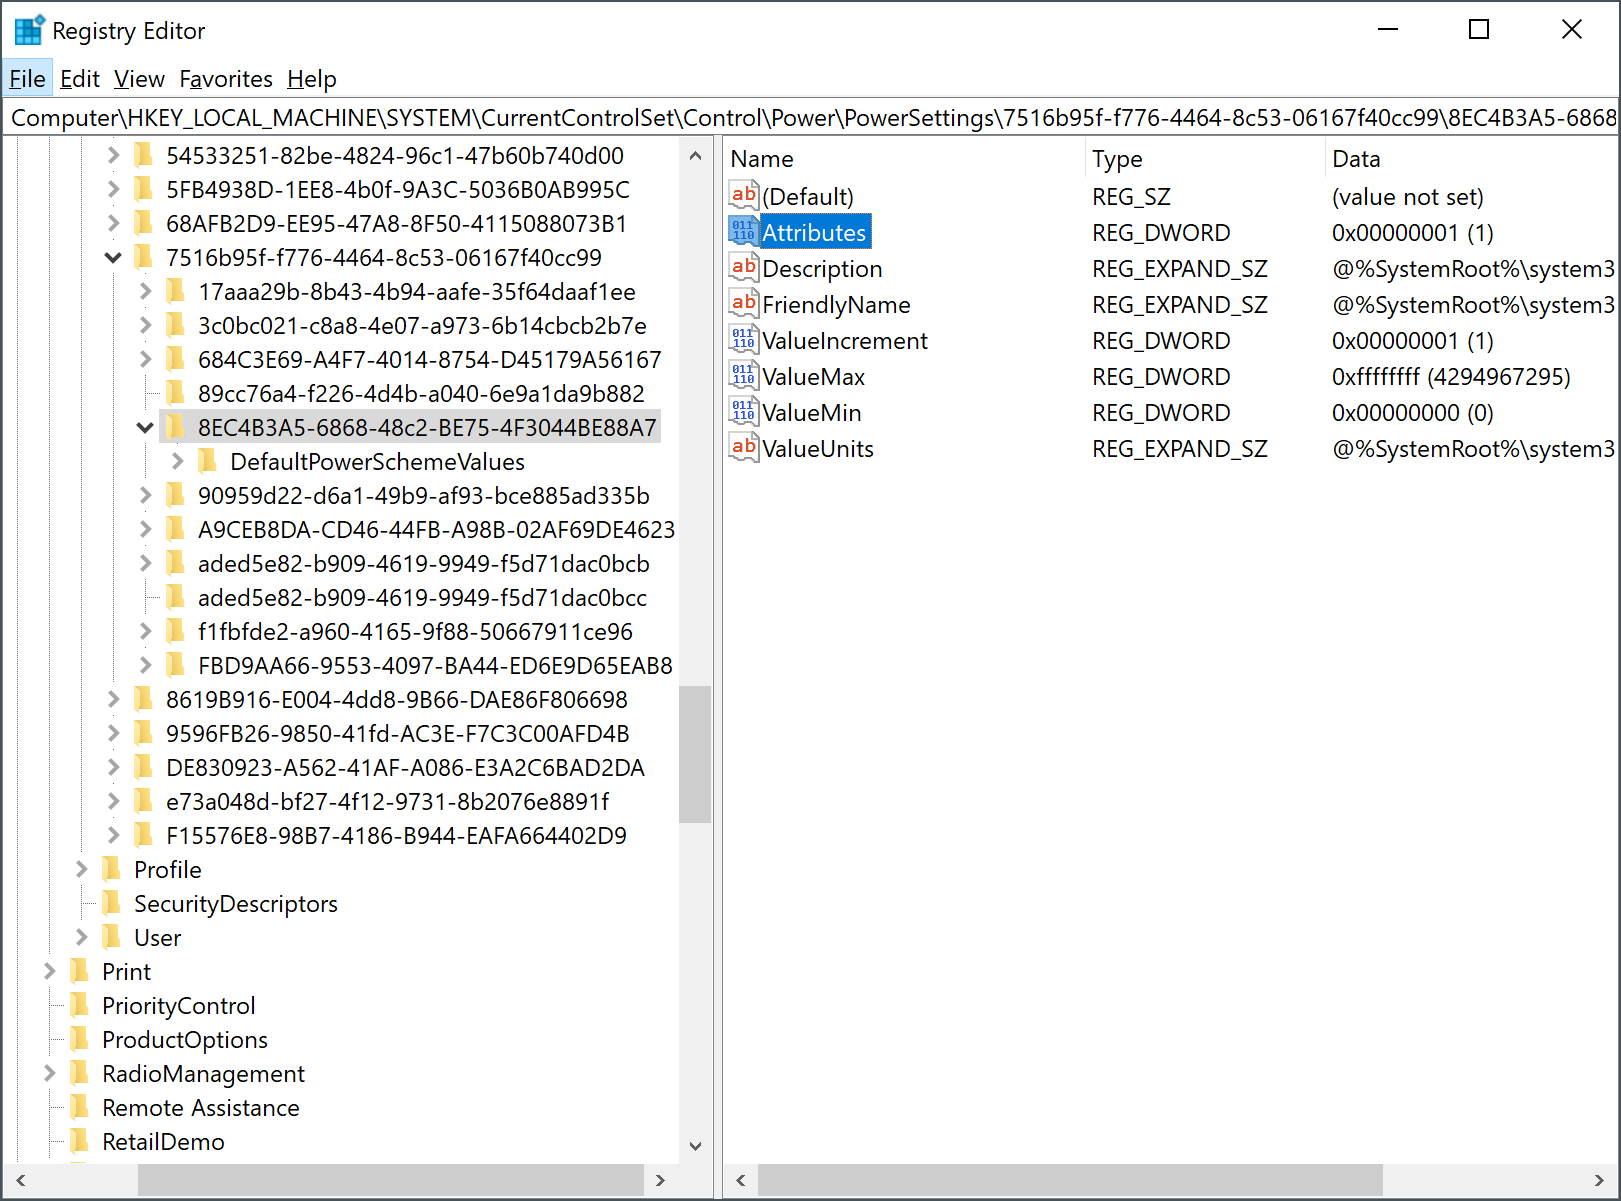
Step 3. On the right-hand side window, double-click on Attributes REG_DWORD.
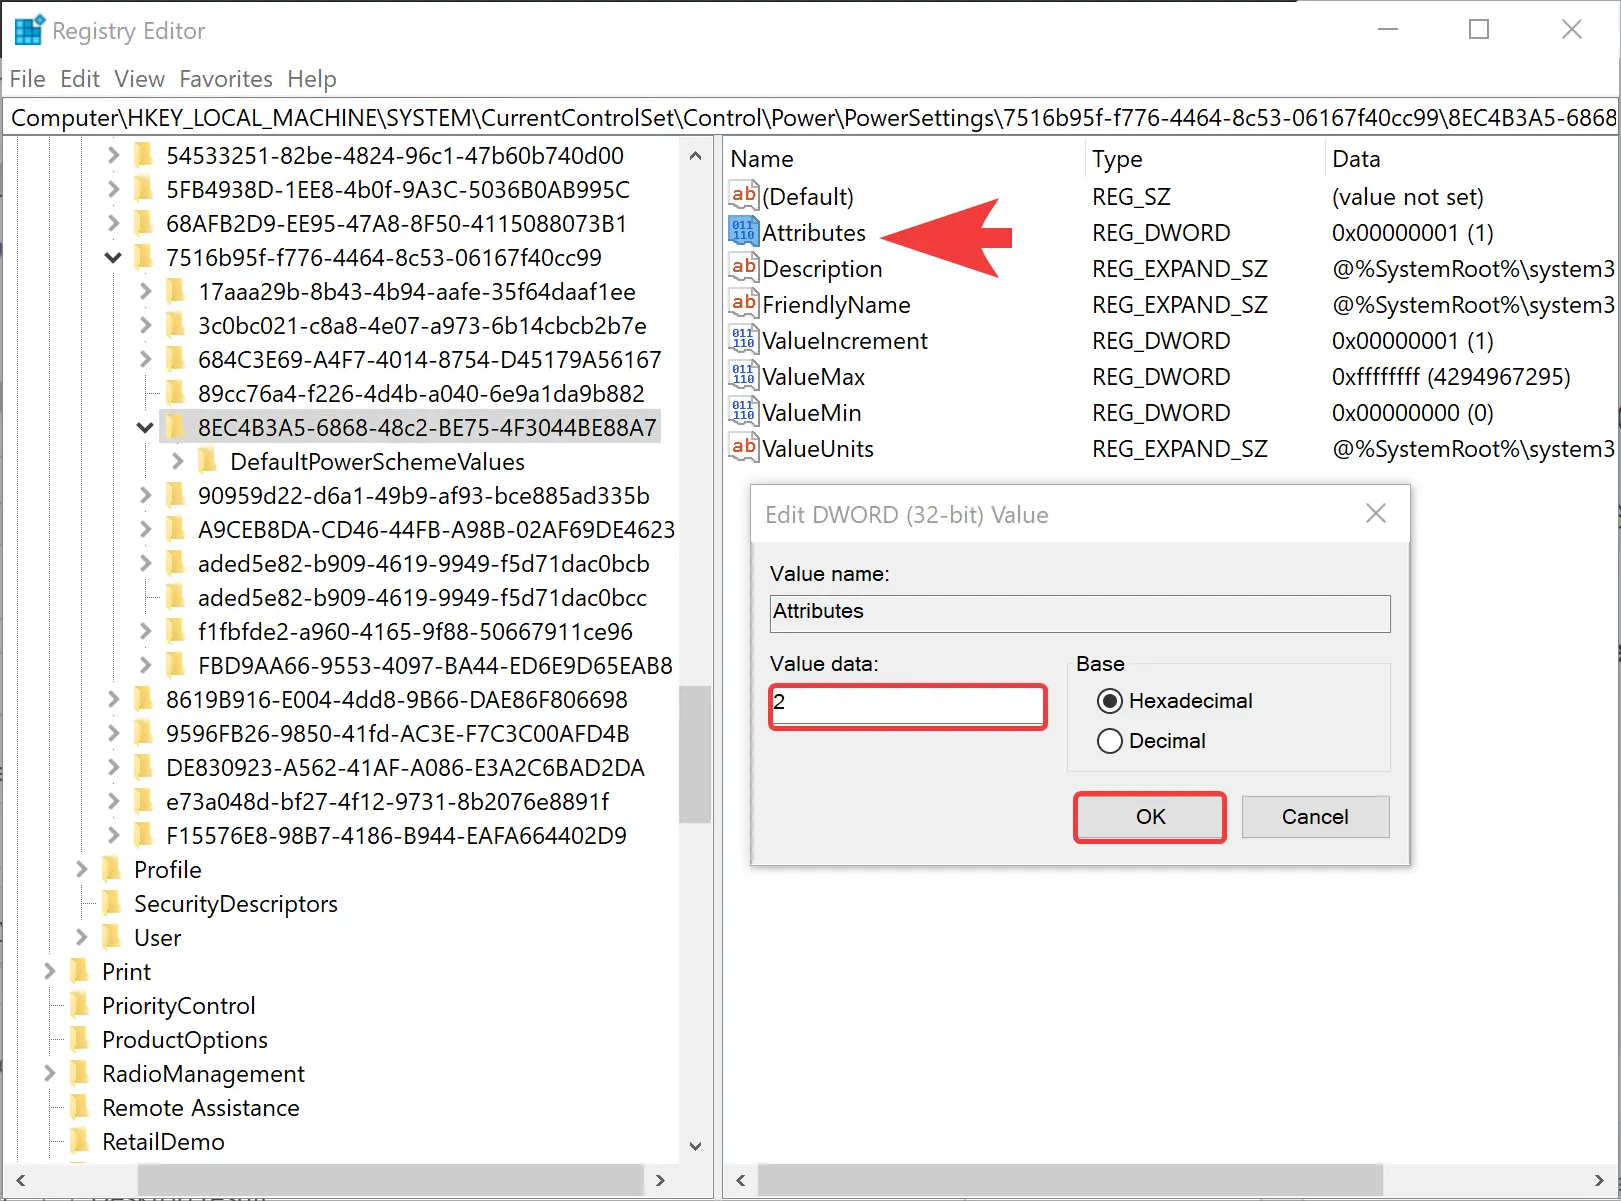
Step 4. Set “Value data” to 2.
Step 5. Click OK.
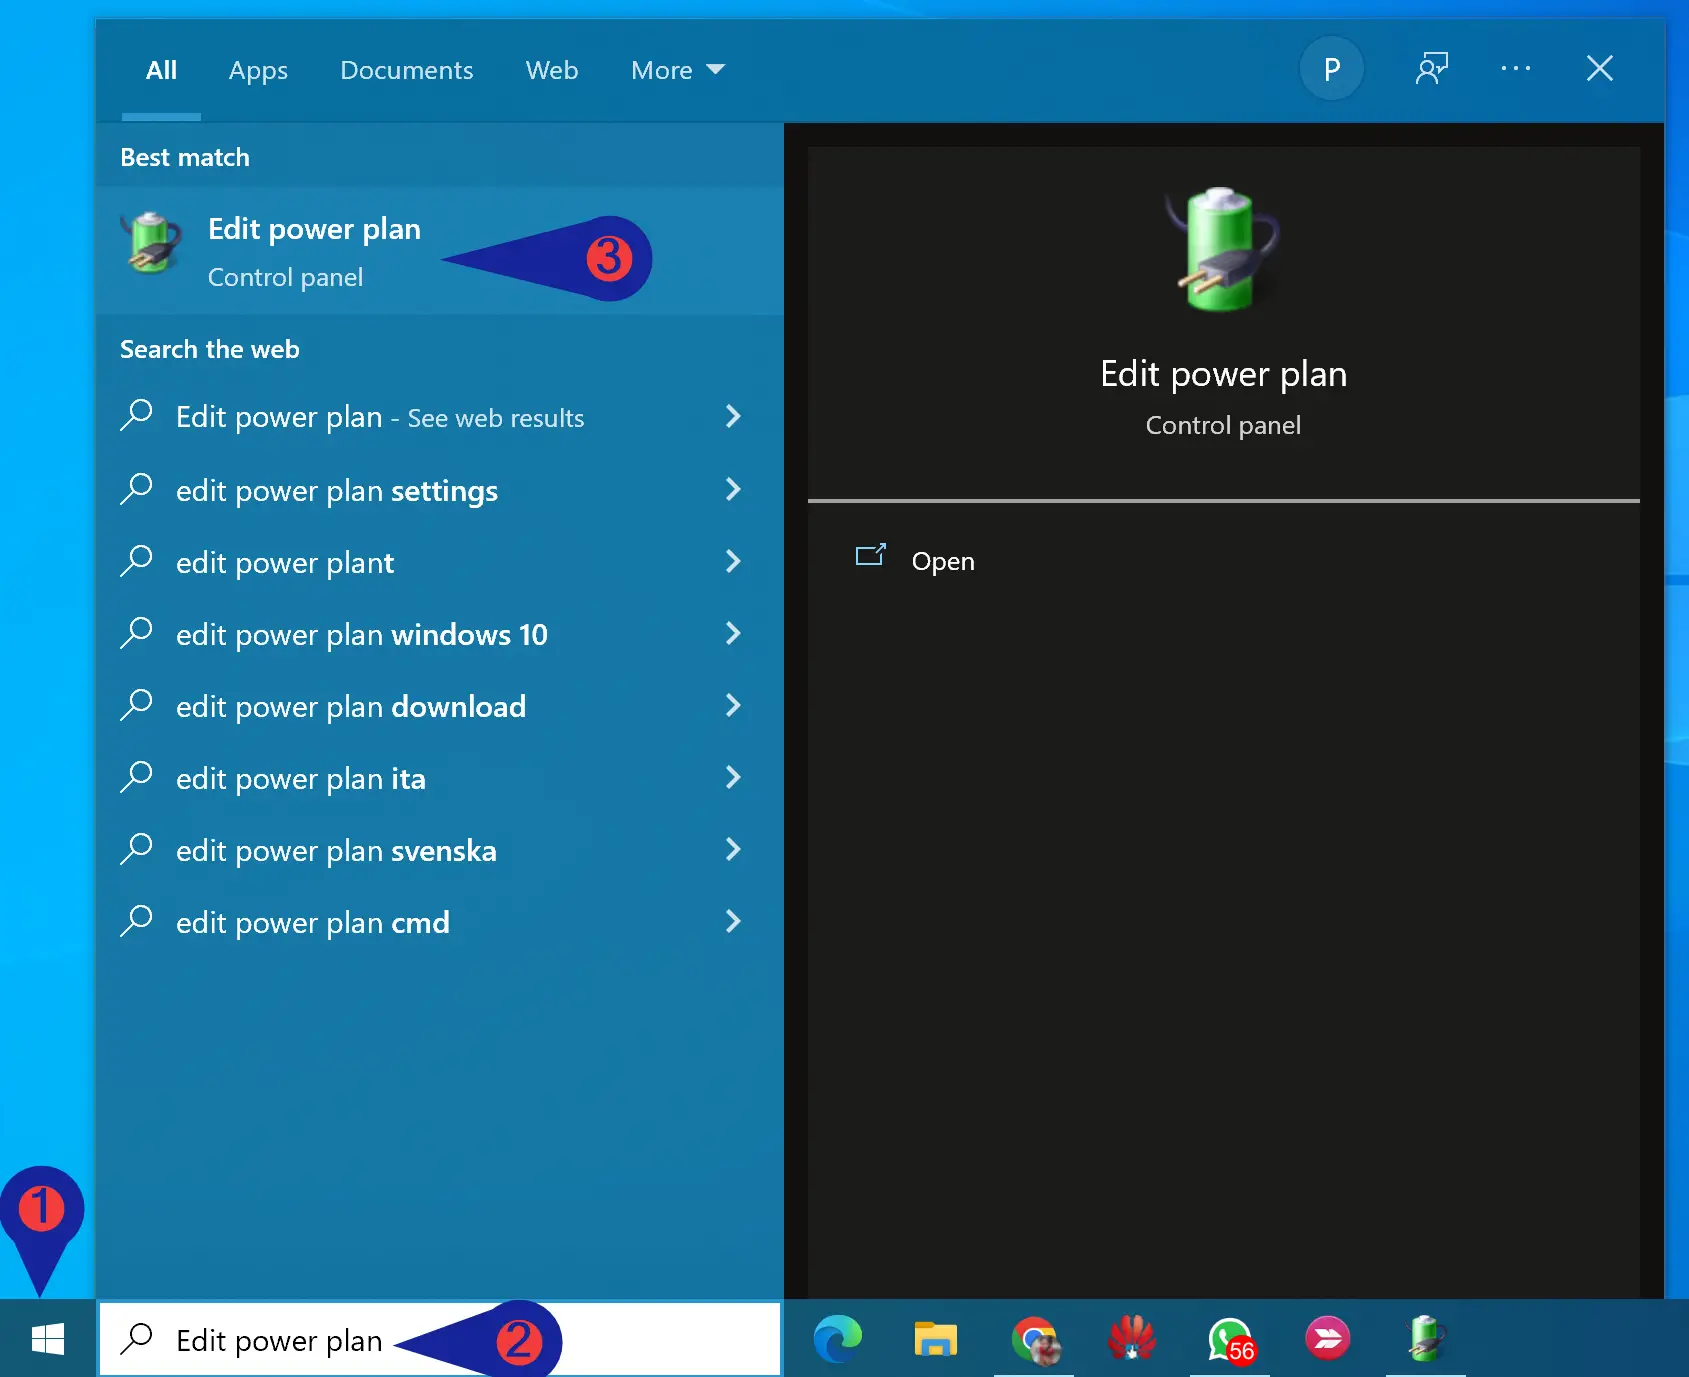
Step 6. Now, click on the Start button and type Edit power plan. Click on the same in the search results.
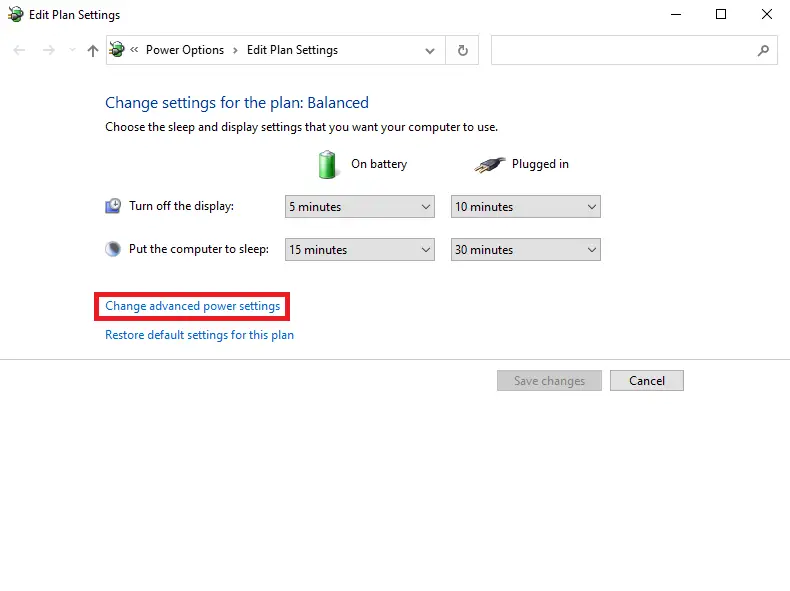
Step 7. Click the link to Change advanced power settings.
Step 8. Expand Display > Console lock display off a timeout.
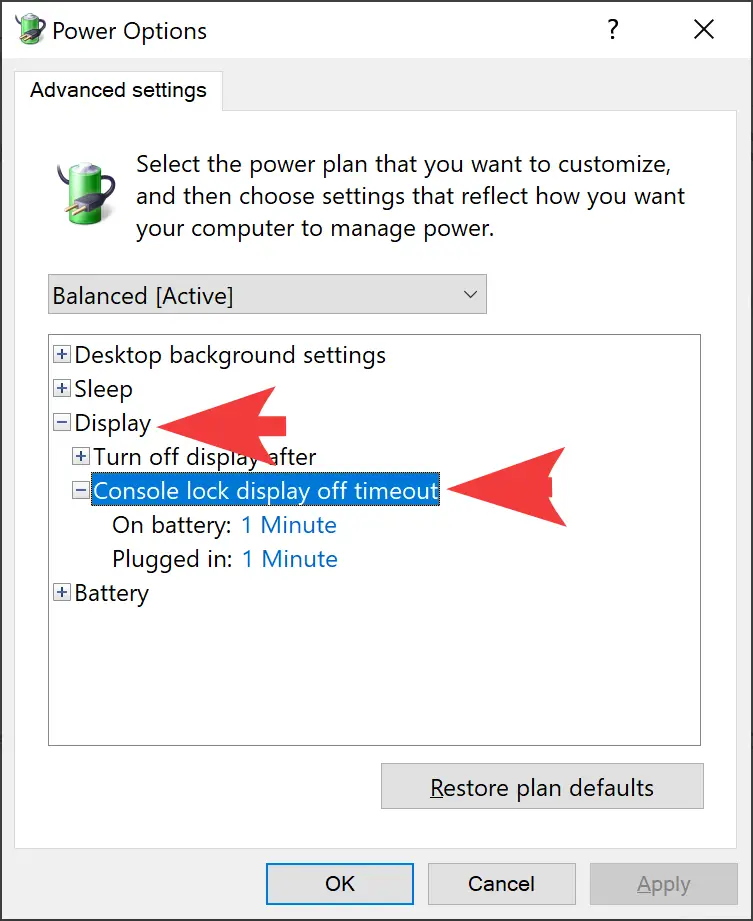
Step 9. Change the value for “On battery” and “Plugged in.”
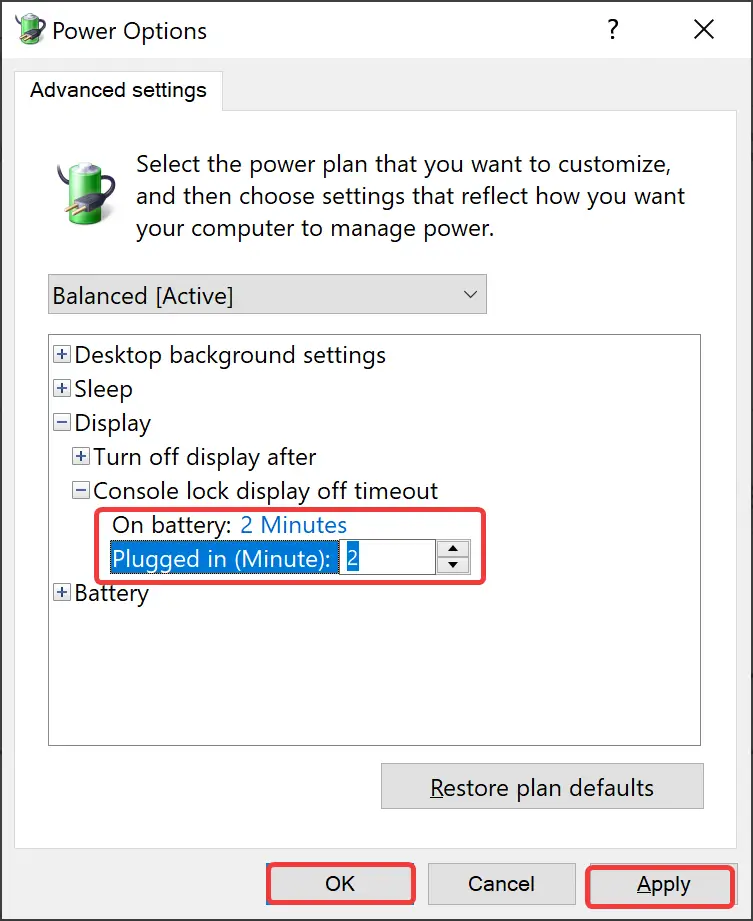
Step 10. Click Apply.
Step 11. Click OK.
Step 12. Finally, reboot your PC.
How to Change Lock Screen Timeout Settings using Command Prompt?
To change the Lock Screen timeout settings using Command Prompt, do the following:-
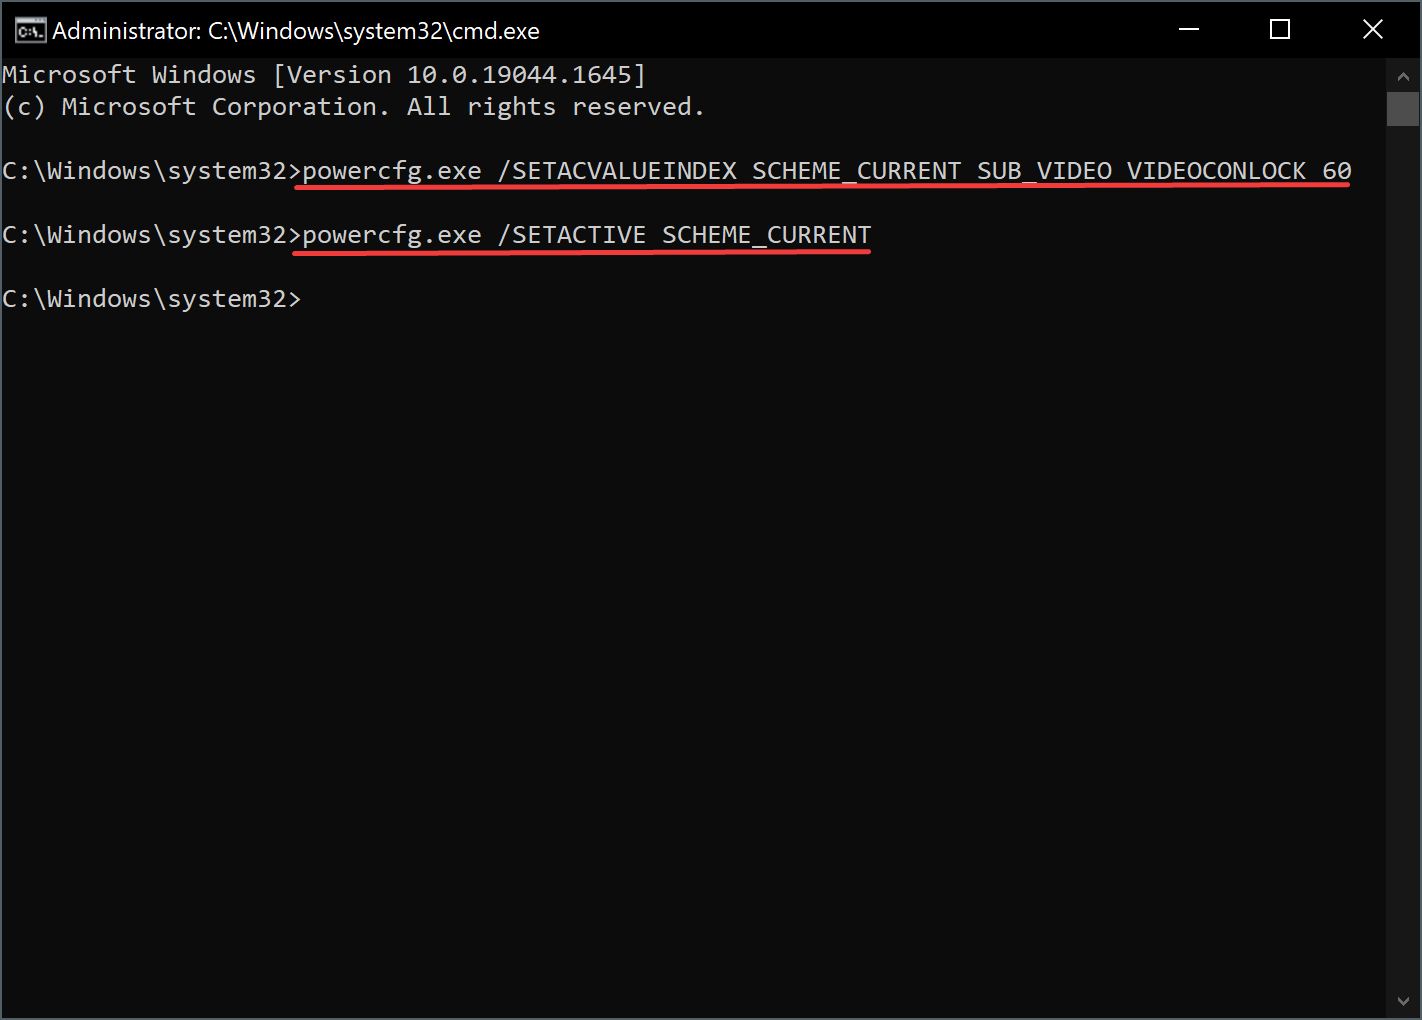
Step 1. First, open the Command Prompt as admin.
Step 2. Then, type the following and press the Enter key on the keyboard:-
powercfg.exe /SETACVALUEINDEX SCHEME_CURRENT SUB_VIDEO VIDEOCONLOCK 60
Note: You need to replace “60” in the above command with the timeout time you want to use in seconds. For example, if you’re going to turn off the screen after 2 minutes, you need to use 120.
Step 3. Again, type the following command and press the Enter key on the keyboard:-
powercfg.exe /SETACTIVE SCHEME_CURRENT
That’s it.
Conclusion
In conclusion, the Lock Screen is an important feature of the Windows 10 operating system, showcasing valuable information and beautiful pictures. However, by default, the display turns off after 60 seconds when the device is locked. Fortunately, Microsoft provides several methods to change the Lock Screen timeout, including through the Settings app, Control Panel, Registry Editor, and Command Prompt. Users can choose the method that best suits their needs to adjust the turn-off display time for both “On battery” and “Plugged in” settings. By following the steps outlined in this article, users can easily customize their Lock Screen timeout settings and improve their Windows 10 experience.