Windows 11 and 10 offer various multitasking features to enhance productivity and user experience, and three-finger tap gestures are among them. By default, these gestures allow users to access various functions, such as opening the action center, switching between virtual desktops, or opening Task View. However, depending on individual preferences or workflow, some users may want to customize these gestures or even disable them altogether. In this article, we will guide you through the steps to change three-finger tap gestures in Windows 11 or 10, and help you tailor the experience to your liking. To configure the three-finger tap gestures, you can use the Windows Settings app or Registry Editor.
How to Configure Three-Finger Tap Gestures in Windows 11 Settings?
To change the Three-Finger Tap Gestures in Windows 11 using Settings, use these steps:-
Step 1. First, open Windows 11 Settings.
To do that, you can use the Windows + I keyboard shortcut. Or, right-click on the Start button and select Settings in the menu.
Step 2. Then, select Bluetooth & devices in the left sidebar.
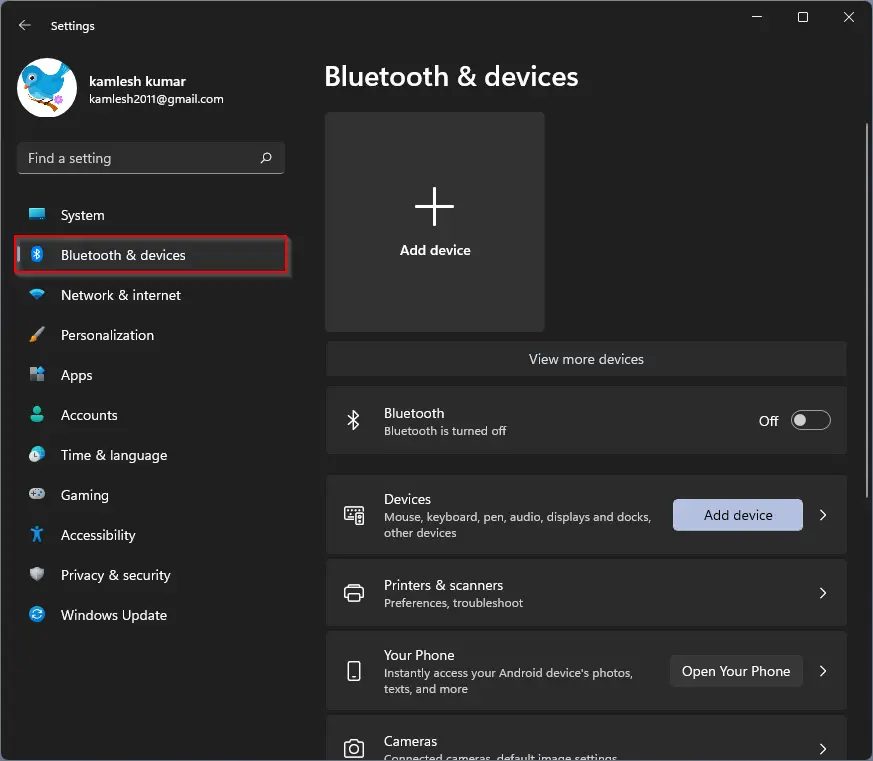
Step 3. On the right side, click on the Touchpad tile.
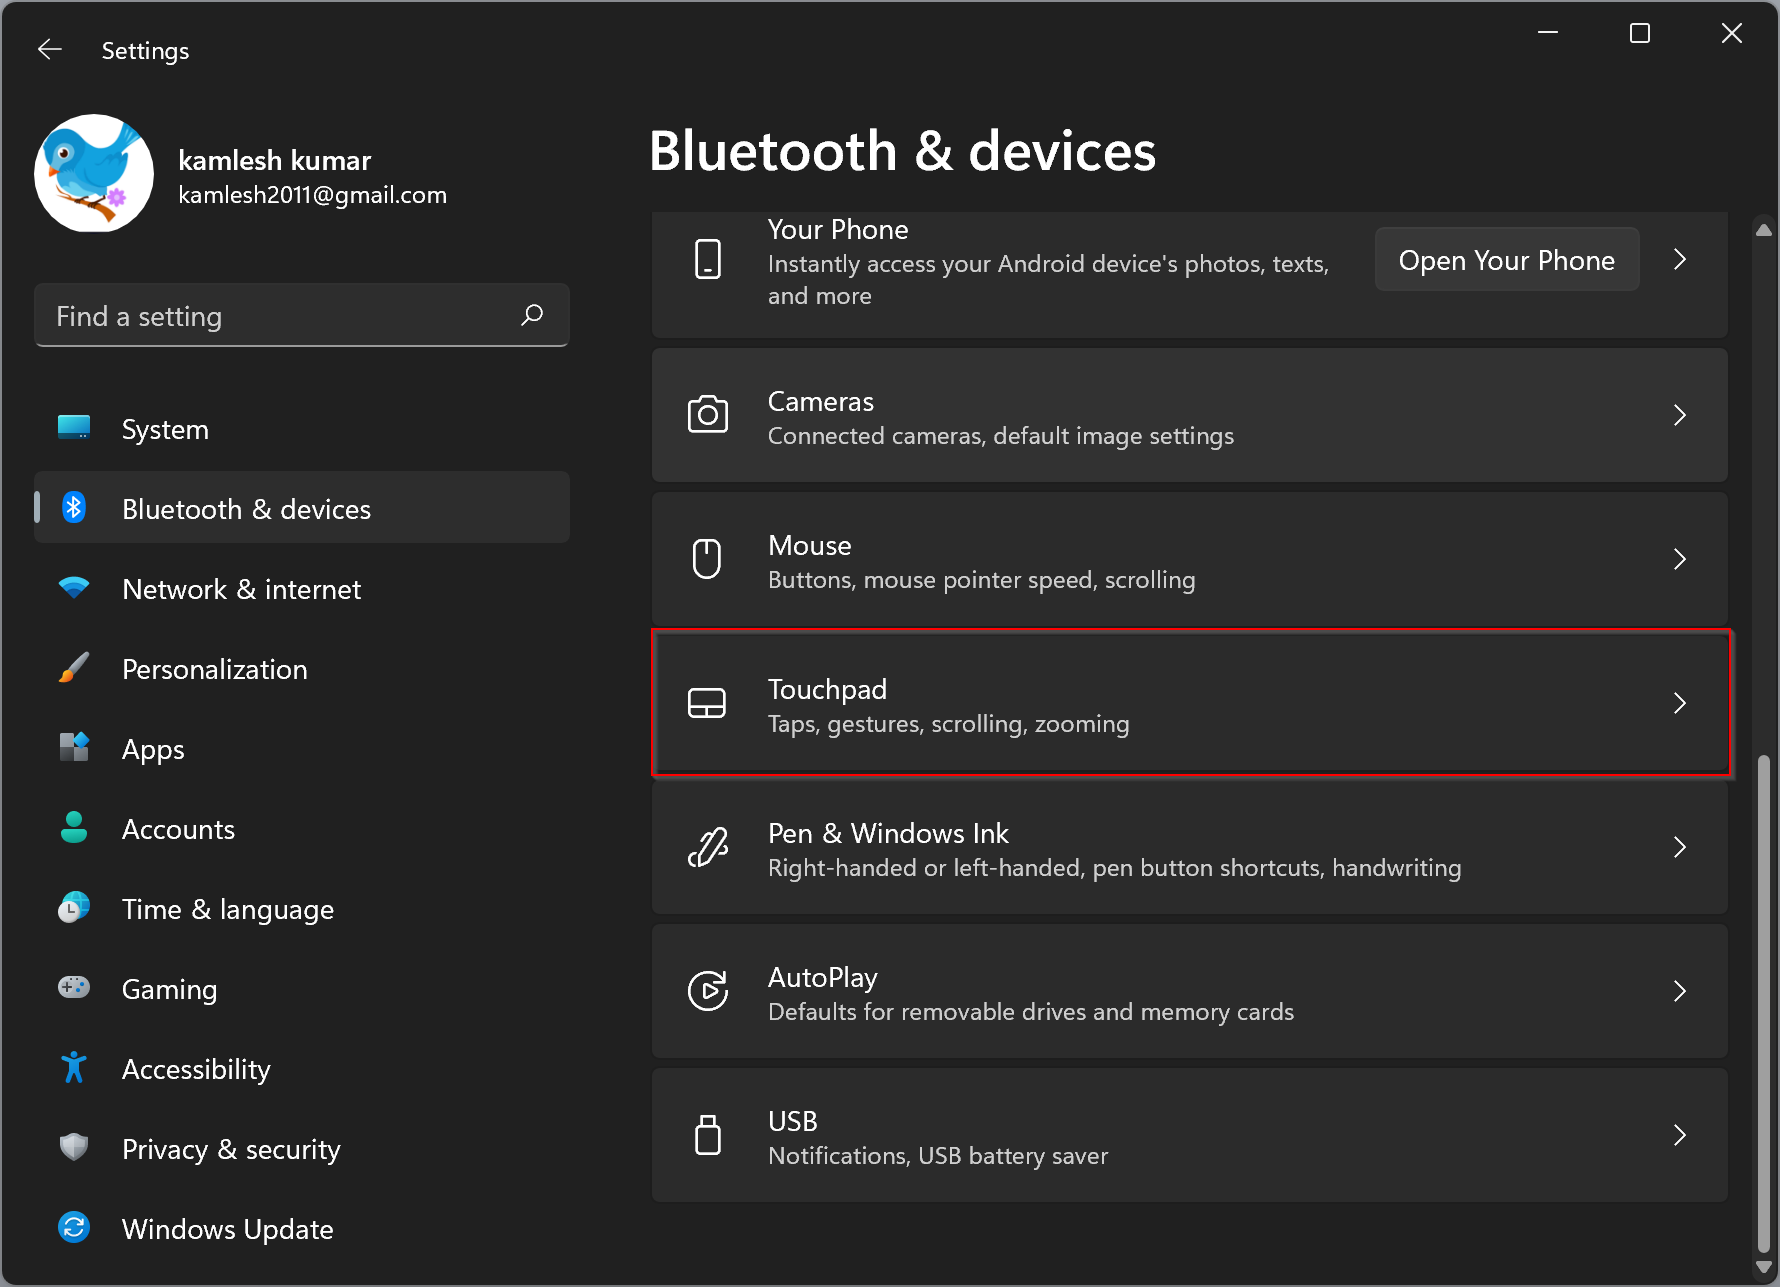
Step 4. Click Three-finger gestures.
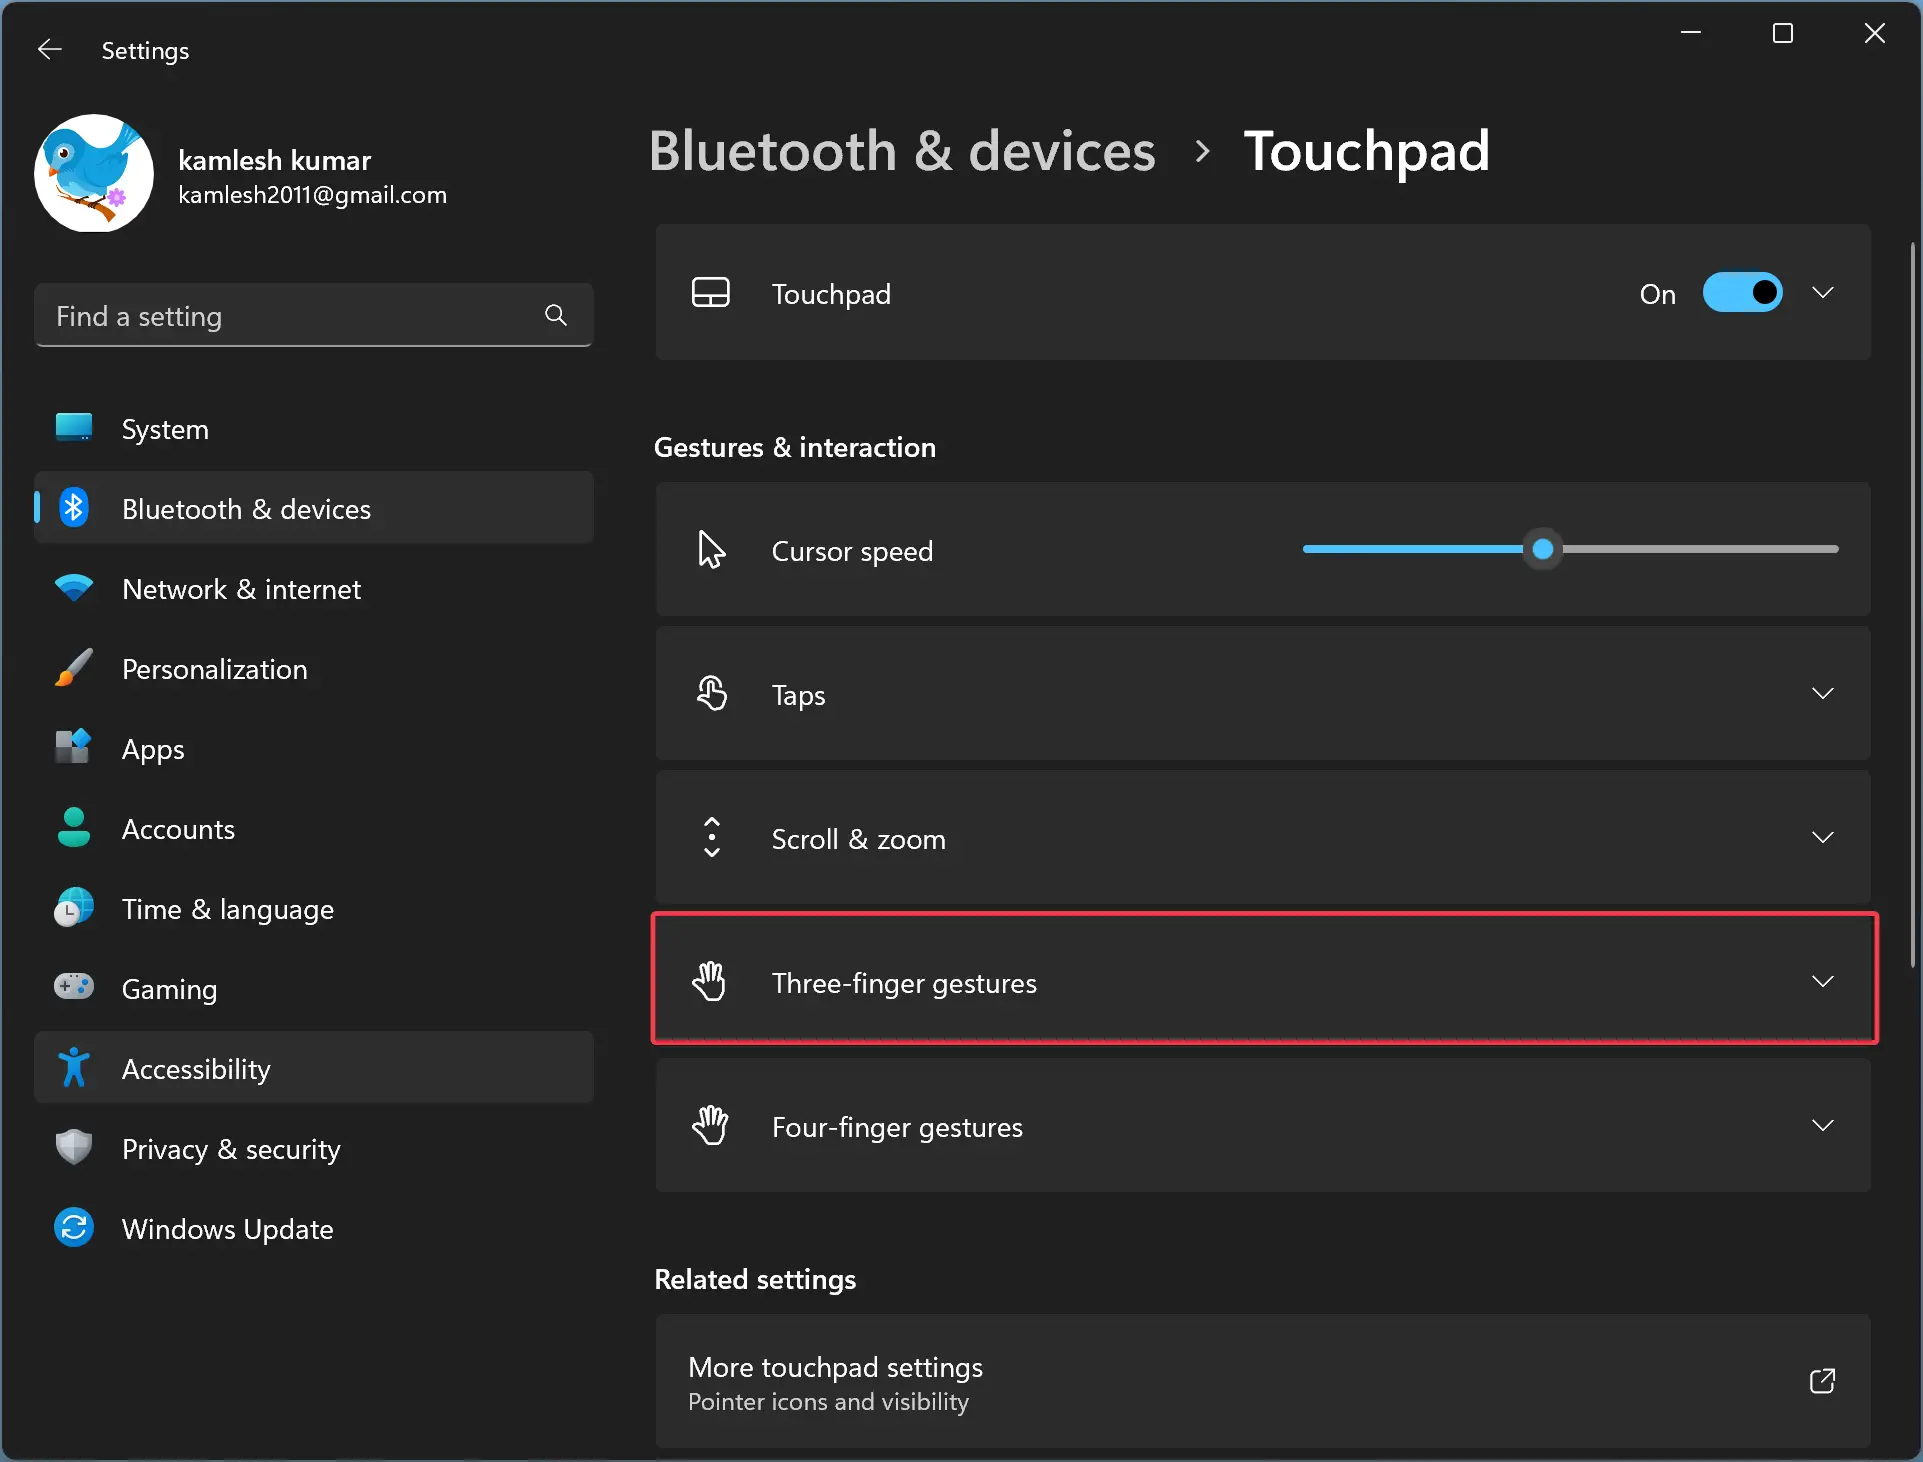
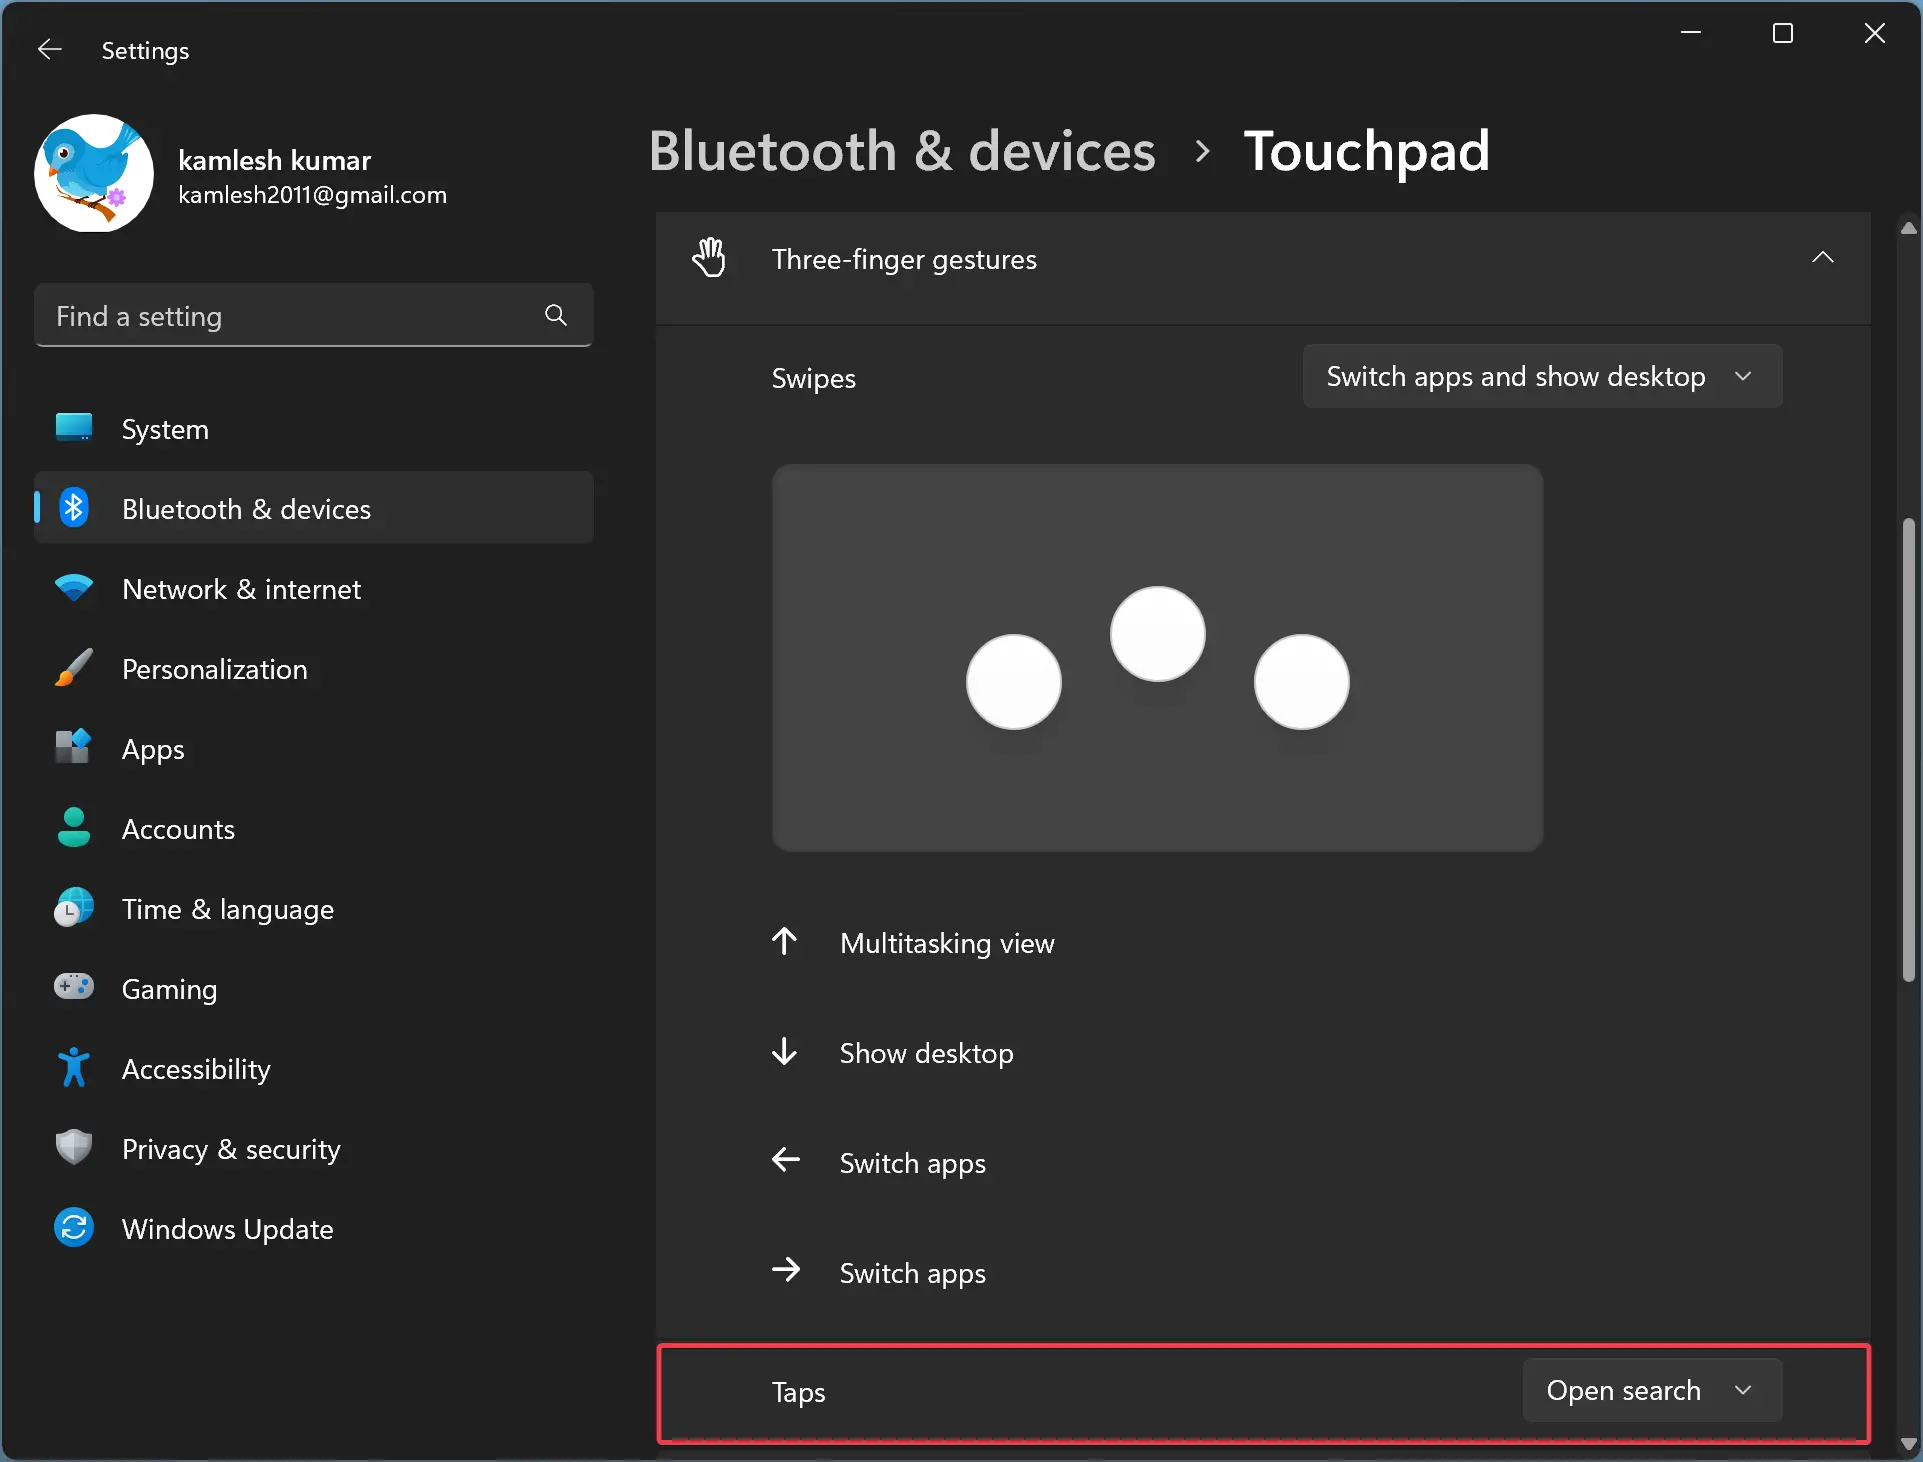
Step 5. Next, use the drop-down Taps and select one of the options:-
- Nothing
- Open search
- Notification center
- Play/pause
- Middle mouse button
How to Configure Three-Finger Tap Gestures in Windows 10 Settings?
If you want to configure three-finger tap gestures in Windows 10 using Settings, perform these steps:-
Step 1. Open Windows 10 Settings.
Step 2. Click on Devices.
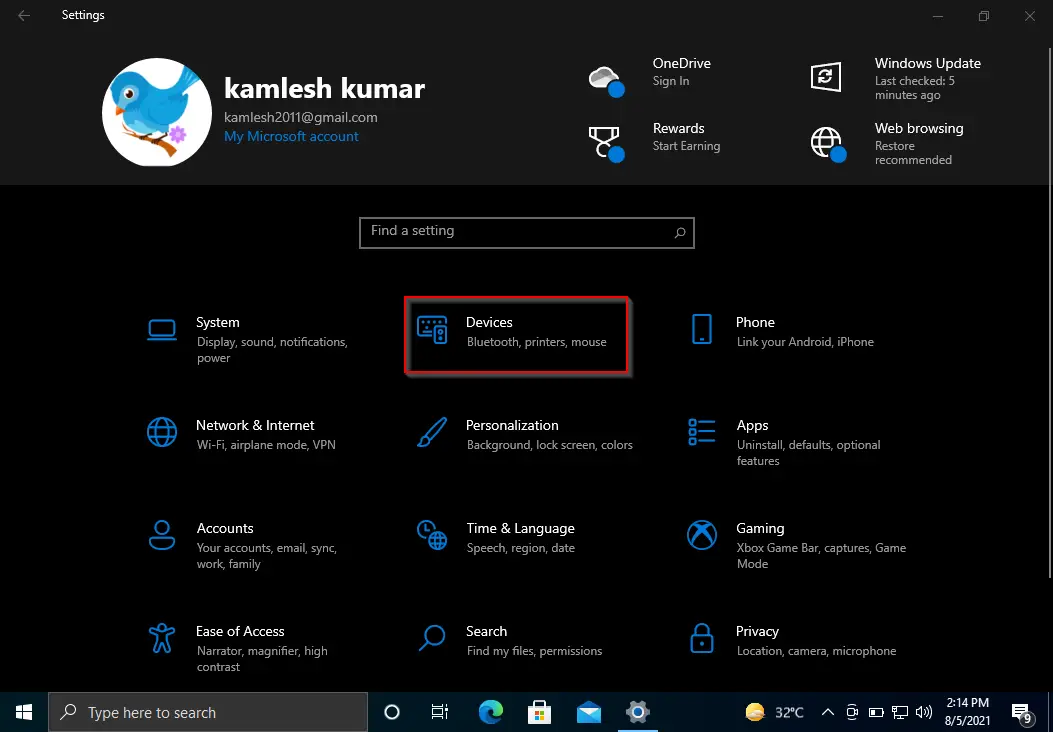
Step 3. Select Touchpad under “Devices.”
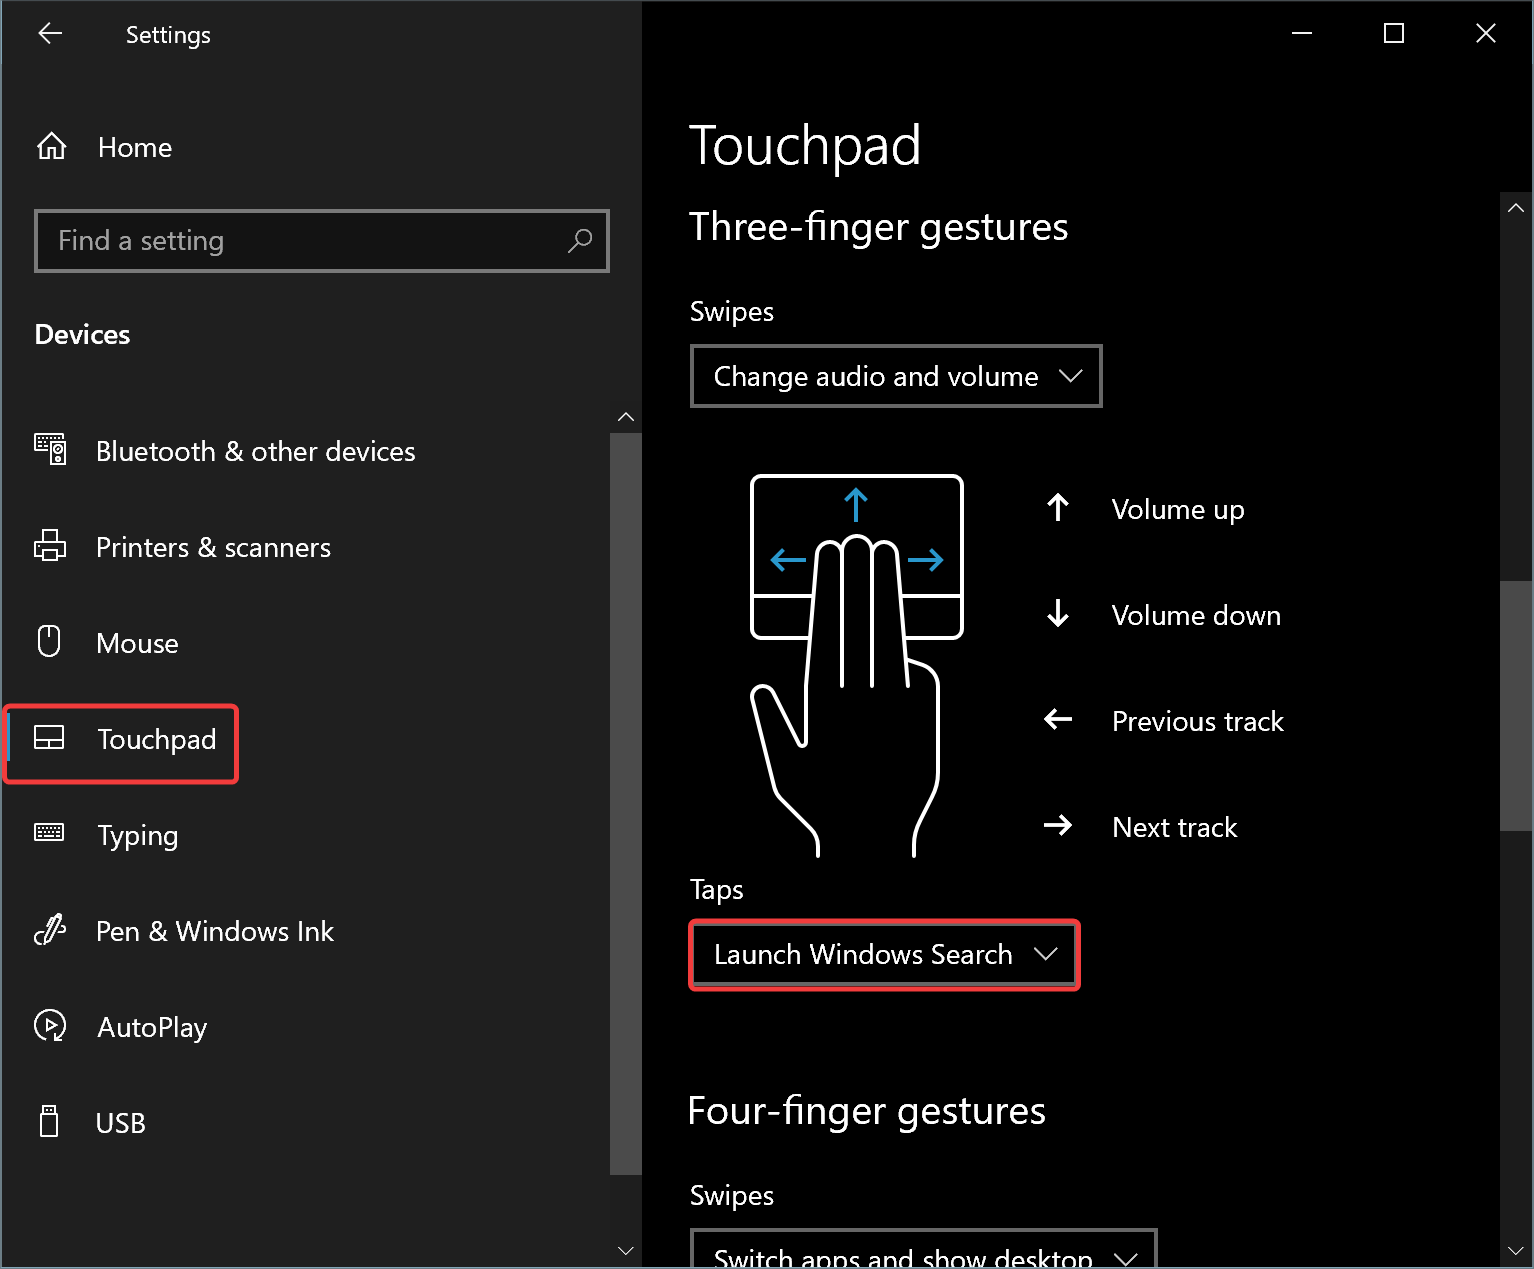
Step 4. On the opposite side, scroll down to the “Three-finger gestures” section and select an option in the “Taps” drop-down menu:-
- Nothing
- Launch Windows Search
- Action Center
- Play/pause
- Middle mouse button
How to Configure Three-Finger Tap Gestures in Windows 11 or 10 using Registry Editor?
Step 1. Open Registry Editor.
Step 2. Then, navigate or browse to the following key in the left sidebar of Registry Editor:-
HKEY_CURRENT_USER\Software\Microsoft\Windows\CurrentVersion\PrecisionTouchPad
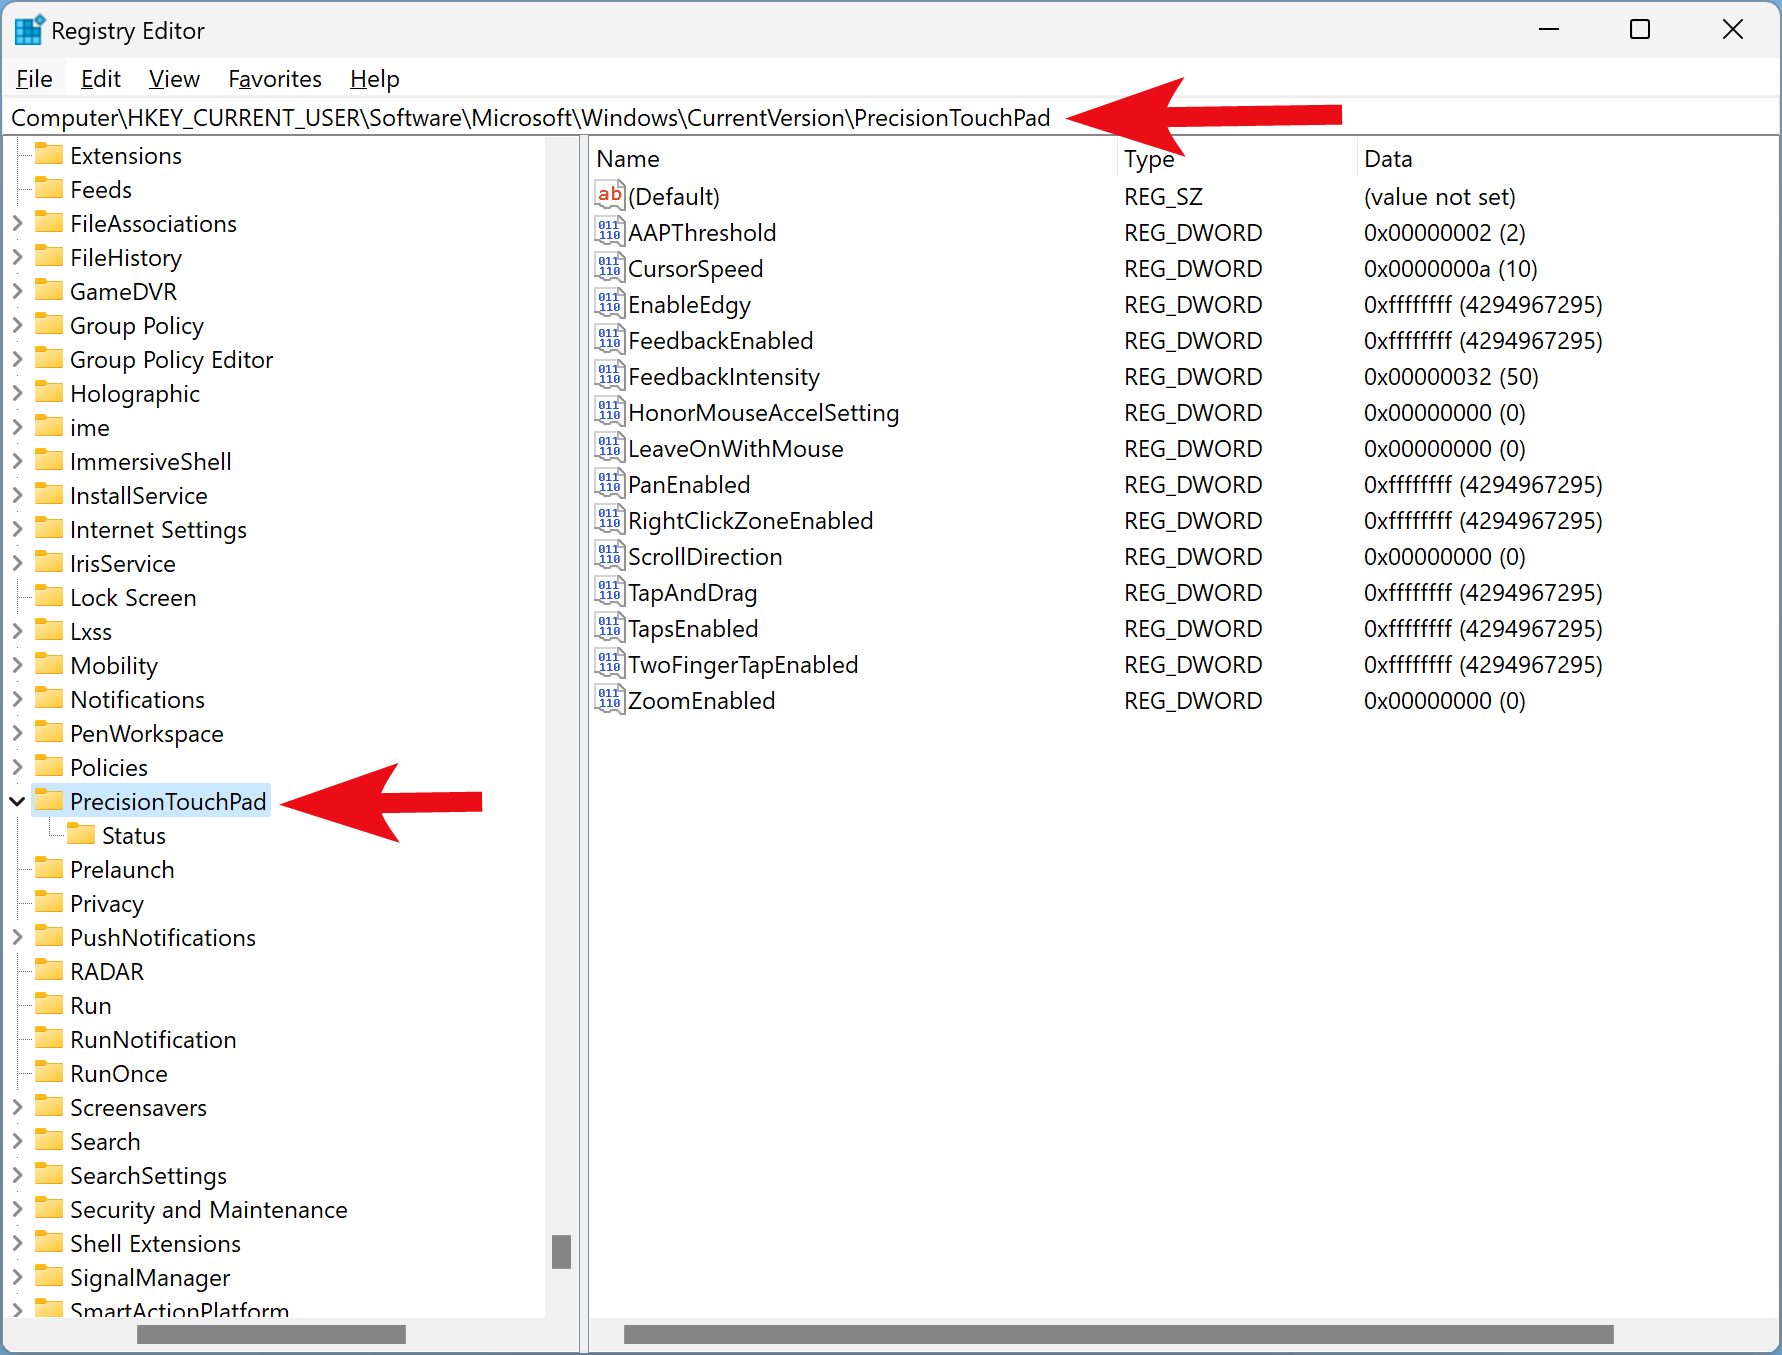
Step 3. On the right side of the “PrecisionTouchPad” folder, look for a ThreeFingerTapEnabled REG_DWORD. If it is not present, you need to create one. So, to create a new REG_DWORD, right-click on the PrecisionTouchPad key and select New > DWORD (32-bit) Value.
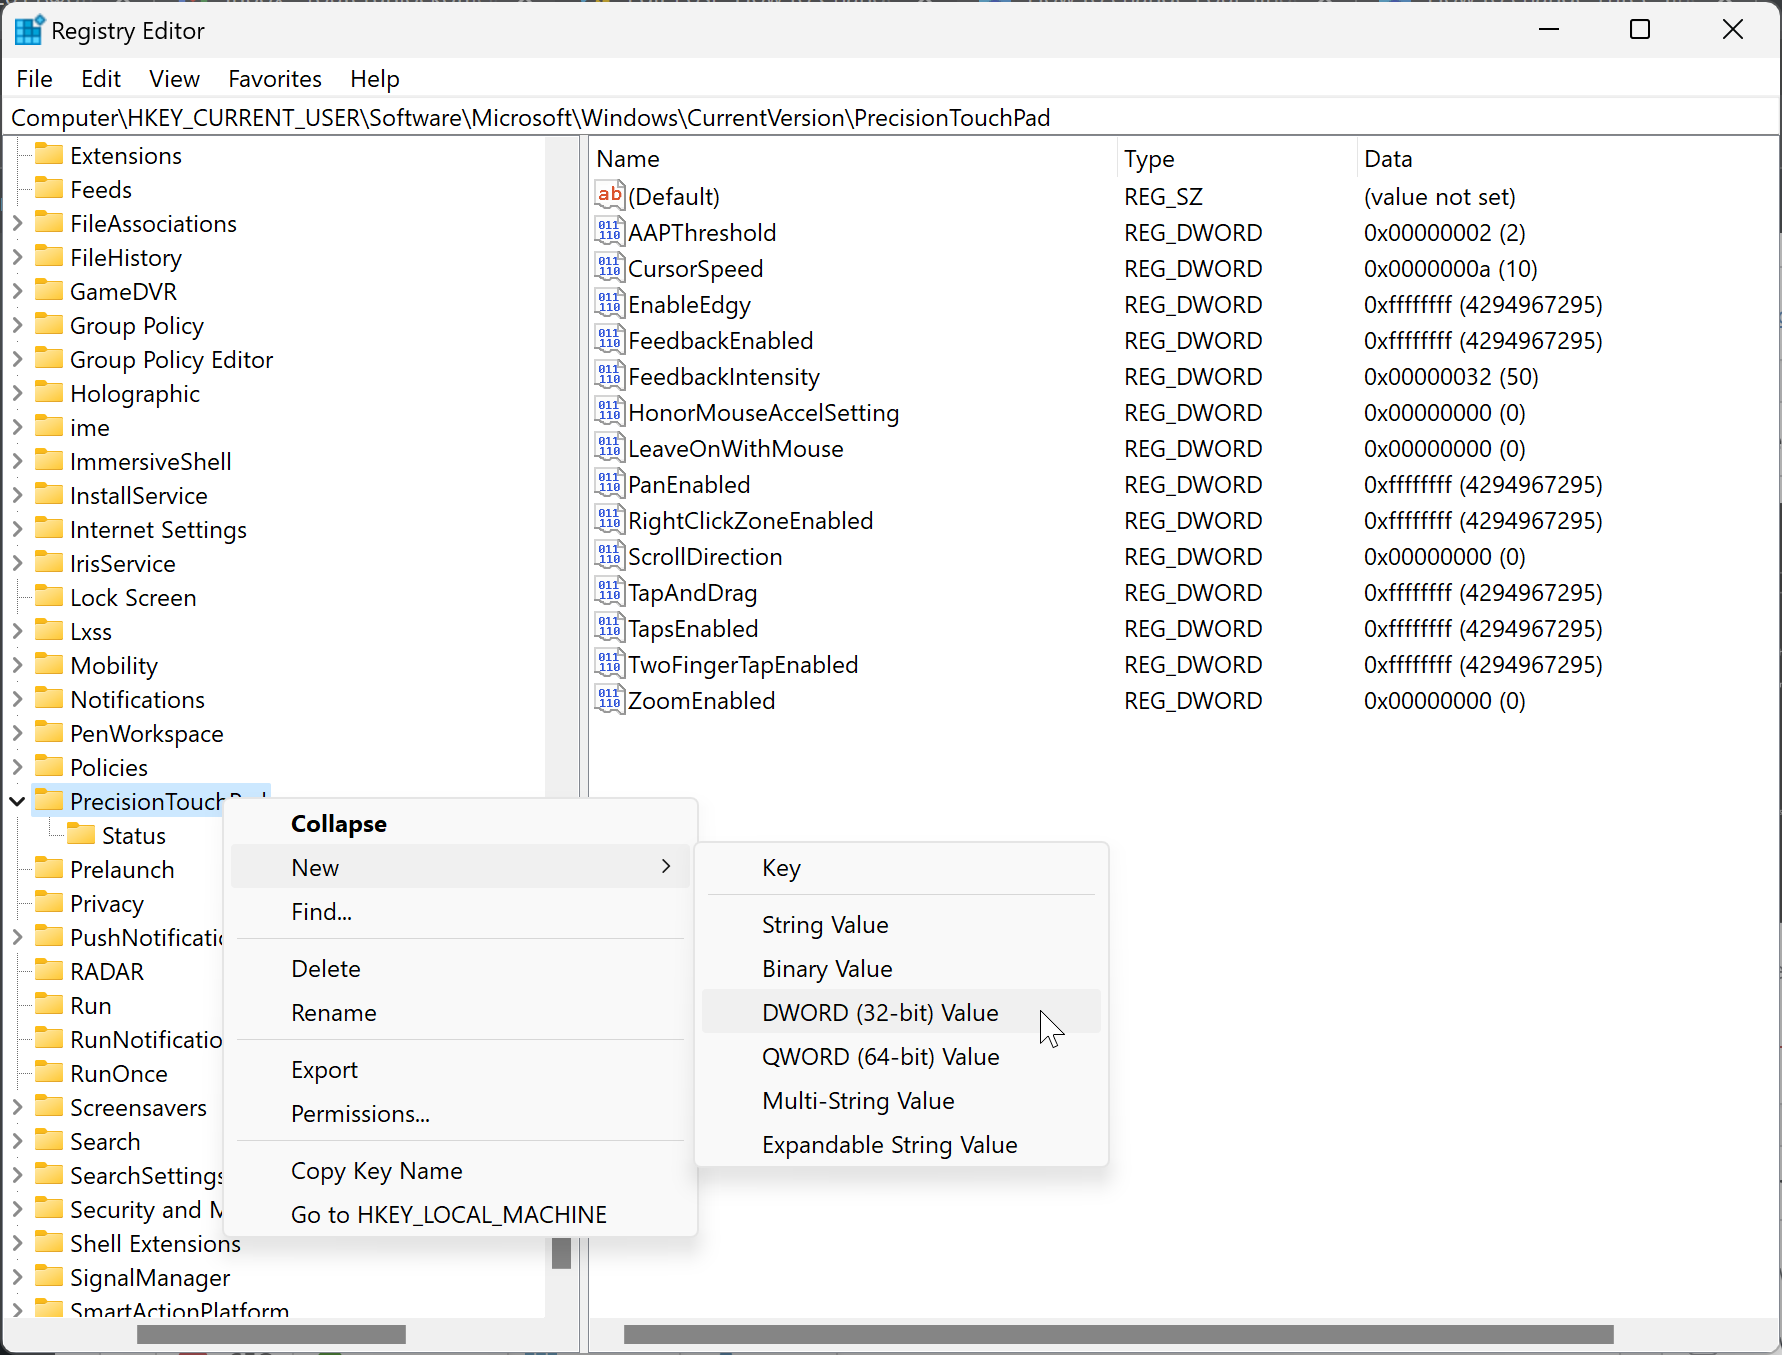
Step 4. Name the newly created REG_DWORD to ThreeFingerTapEnabled.
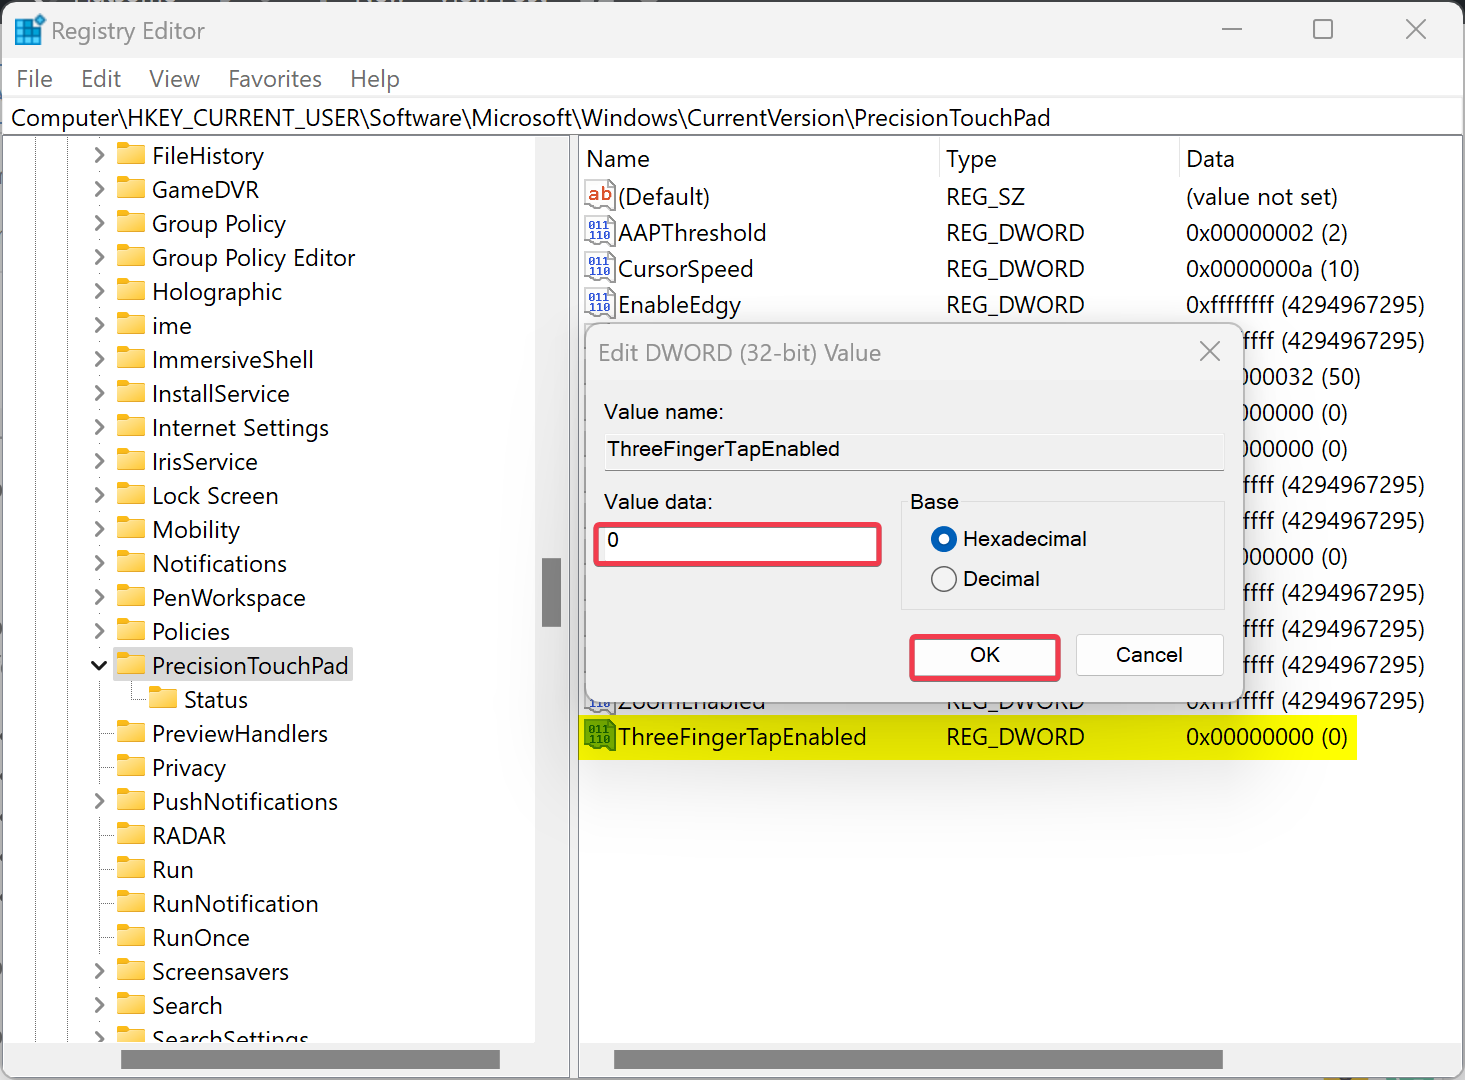
Step 5. Now, double-click on the ThreeFingerTapEnabled REG_DWORD and set its “Value data” to the following:-
- 0: Nothing.
- 1: Open search / Launch Windows Search.
- 2: Notification center / Action Center.
- 3: Play/pause.
- 4: Middle mouse button.
Step 6. Click OK.
Step 7. At last, reboot your computer to apply the changes.
Conclusion
In conclusion, the three-finger tap gestures in Windows 11 and 10 offer a convenient way to navigate and multitask on your device. However, it is possible to customize these gestures to suit your preferences or workflow better. This article has provided a detailed guide on how to change three-finger tap gestures in Windows 11 and 10 using the Settings app or Registry Editor. By following these steps, you can easily modify the actions performed by the three-finger tap gestures to improve your productivity and user experience. Remember to reboot your computer after making changes in the Registry Editor to apply the changes.