You can add several user accounts on a single Windows 11 PC if more people share your computer. For instance, the same system is used by your family members and friends. Having multiple accounts on a shared PC lets all users access the same device with their sign-in info. All of them will have a separate desktop and access to their files, browser favorites, etc. You can add a local user account or Microsoft account to sign in to the PC if you need.
The user name of an account is used to identify the account on your machine. Due to some reason, if you want to change or rename the name of a local account or Microsoft account in Windows 11, this gearupwindows article will guide you.
Please note that you need to sign in to an administrator account to rename a user account on a Windows 11 machine; then after you can proceed with the succeeding steps.
How to Change the Name of Microsoft Account?
To change the username connected with your Microsoft account, do the following:-
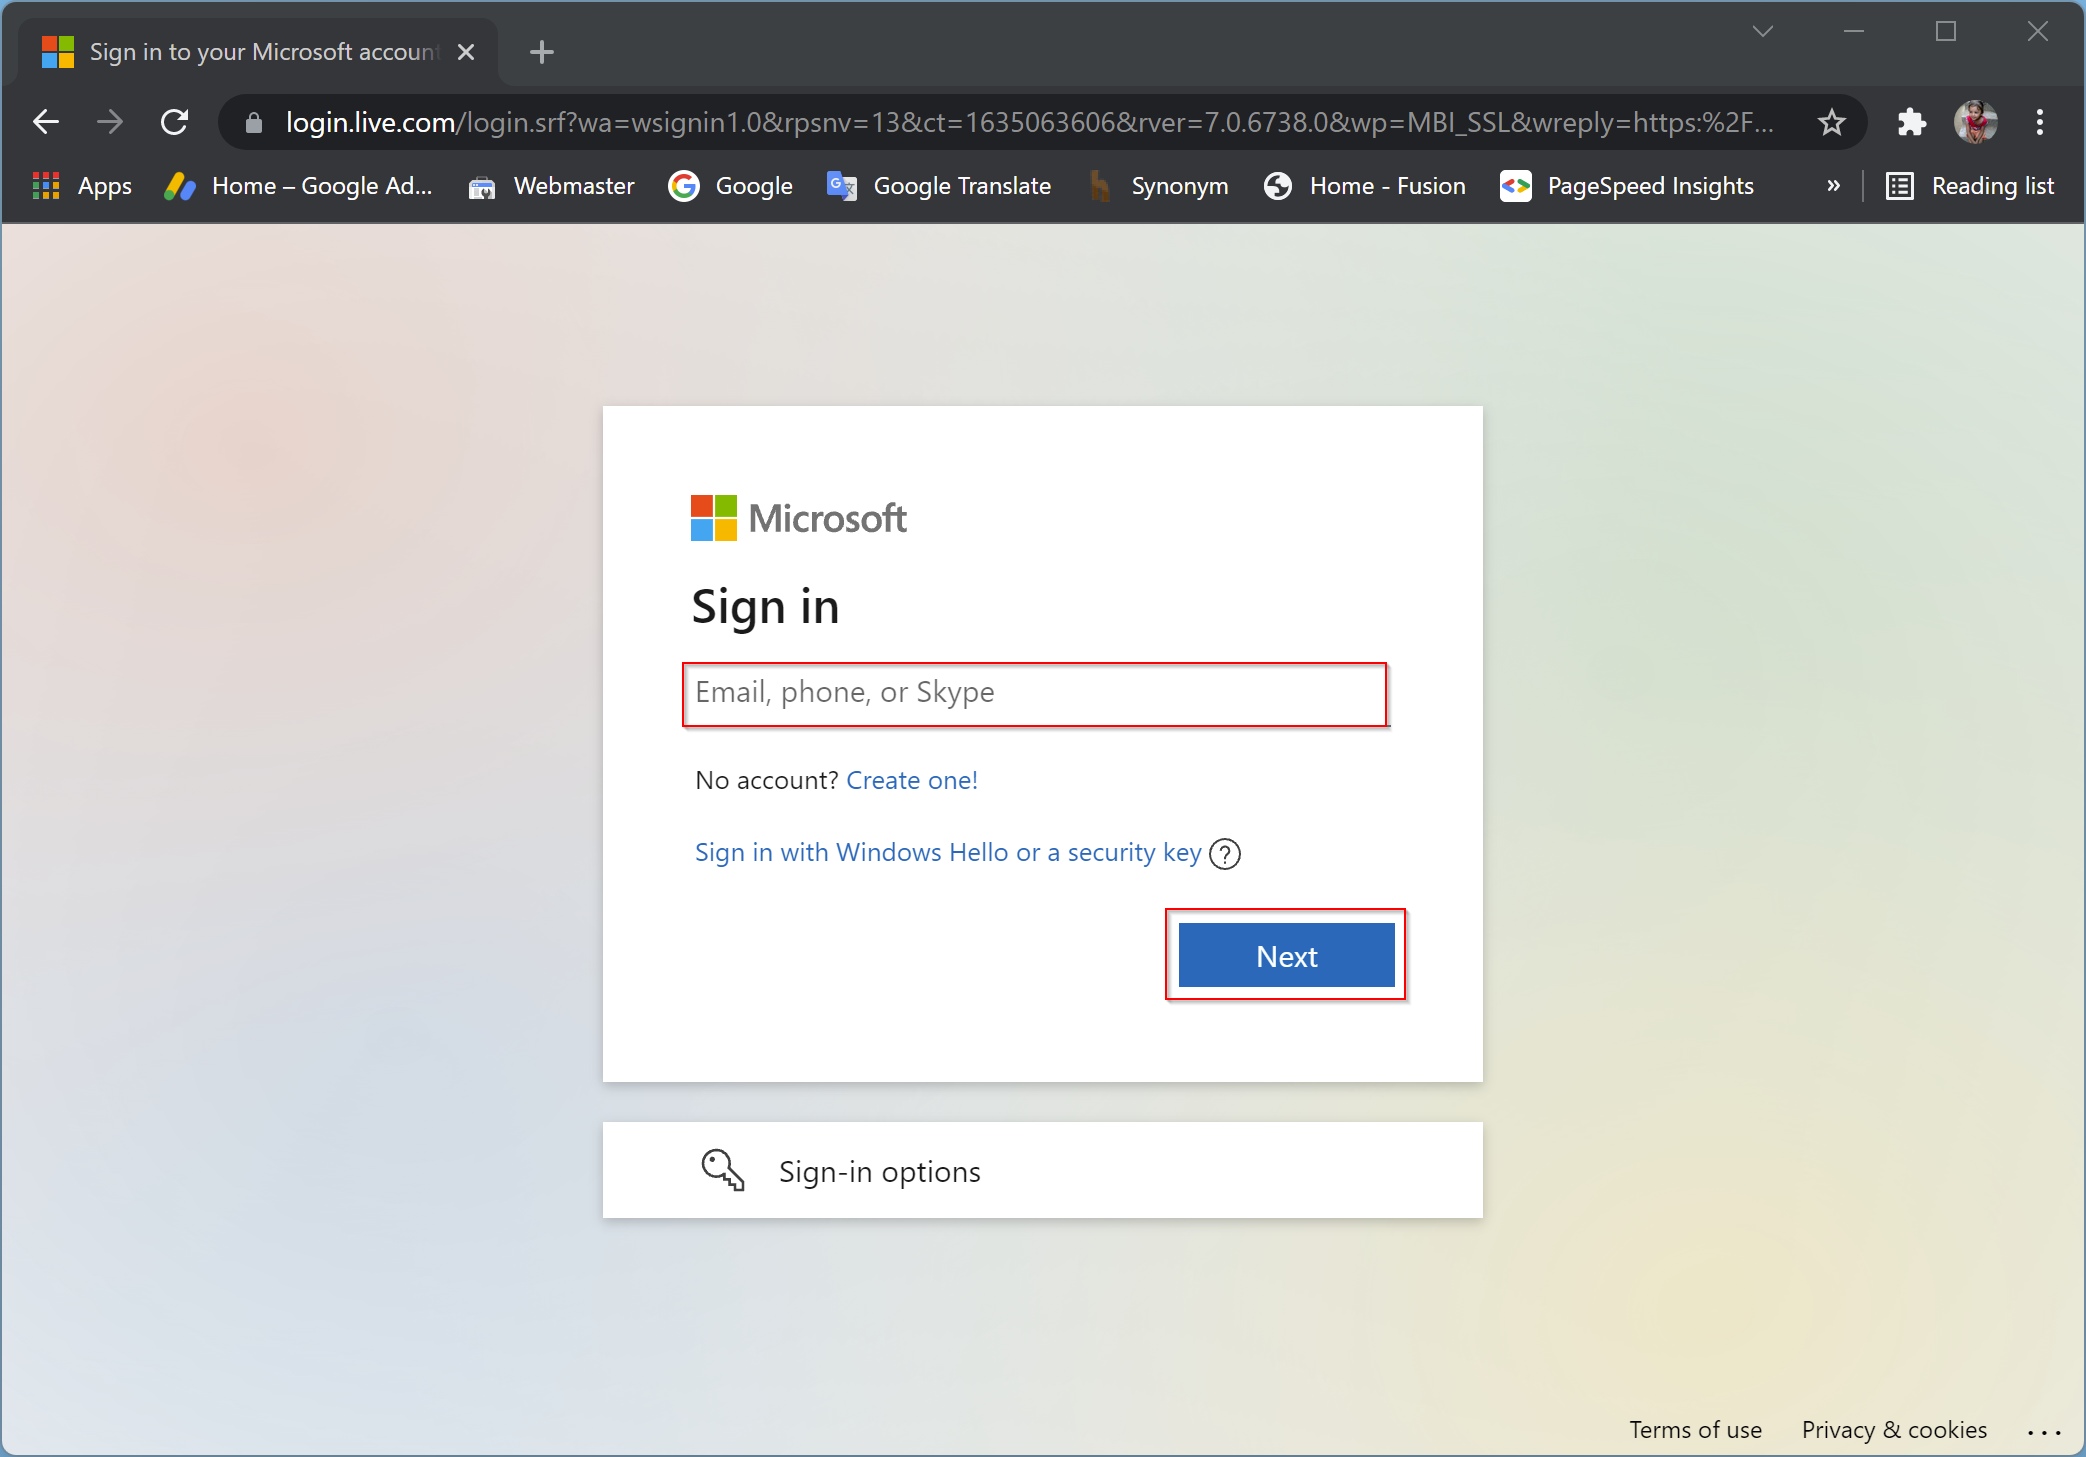
Step 1. First, navigate to the Microsoft website and click the Sign In button.

Step 2. Then enter the email, phone, or Skype that you have used to create your account. After that, click the Next button. Alternatively, you can use the link “Sign in with Windows Hello or security key” if you have configured it before.
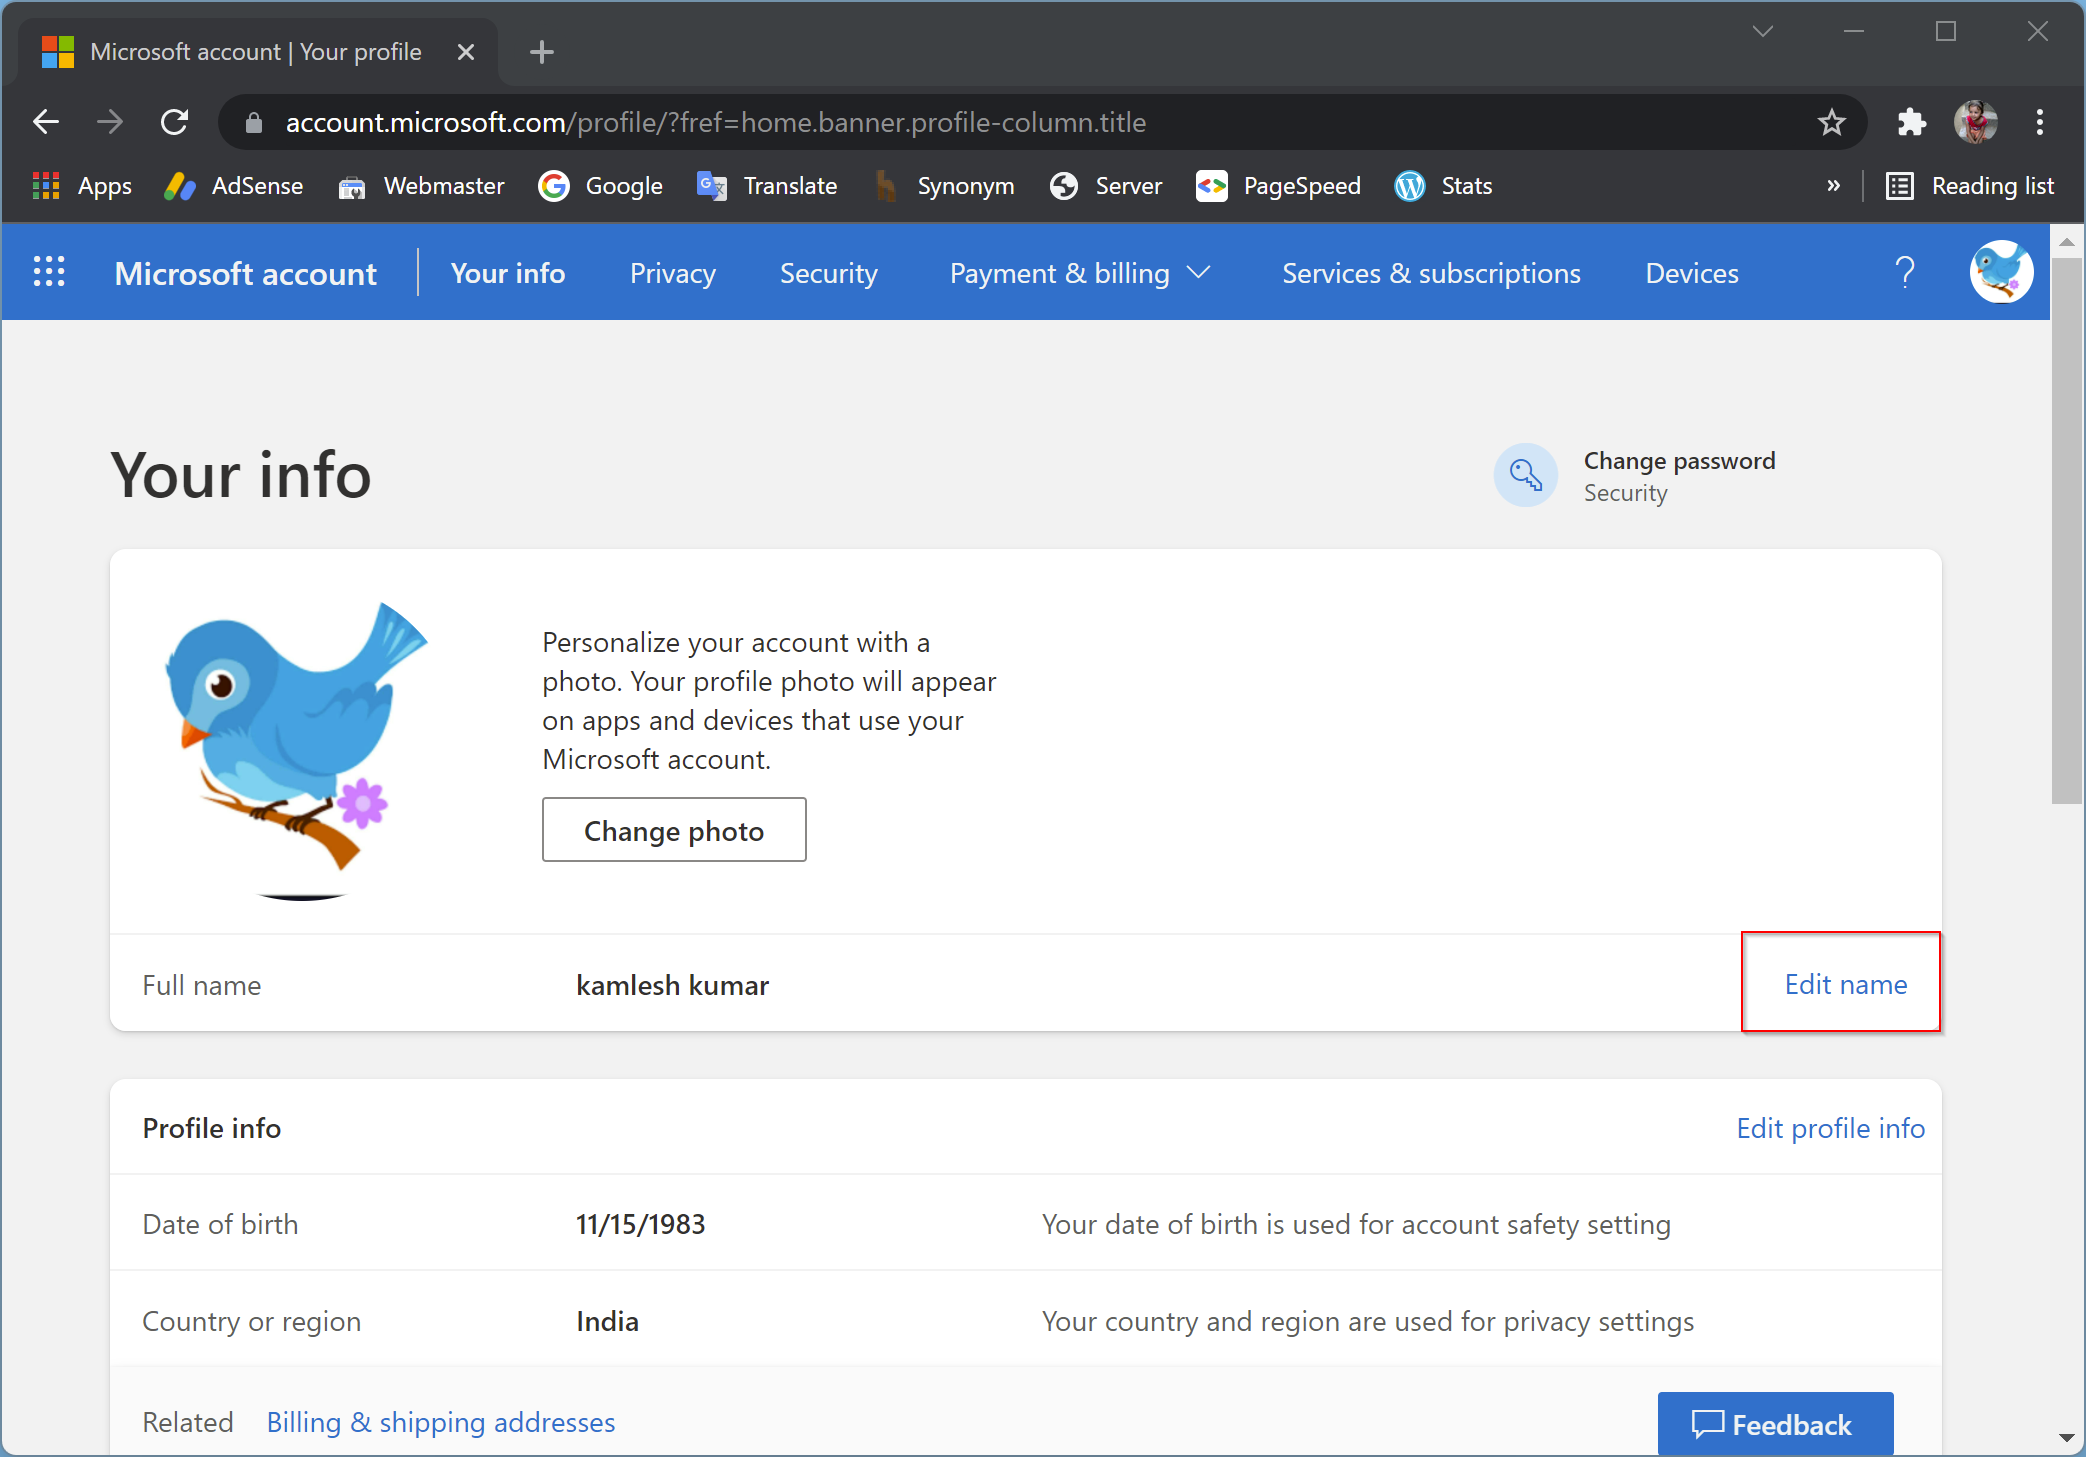
Step 3. After sign-in to your Microsoft account, click on the user name beside the user profile image.

Step 4. Then click on the Edit name link.
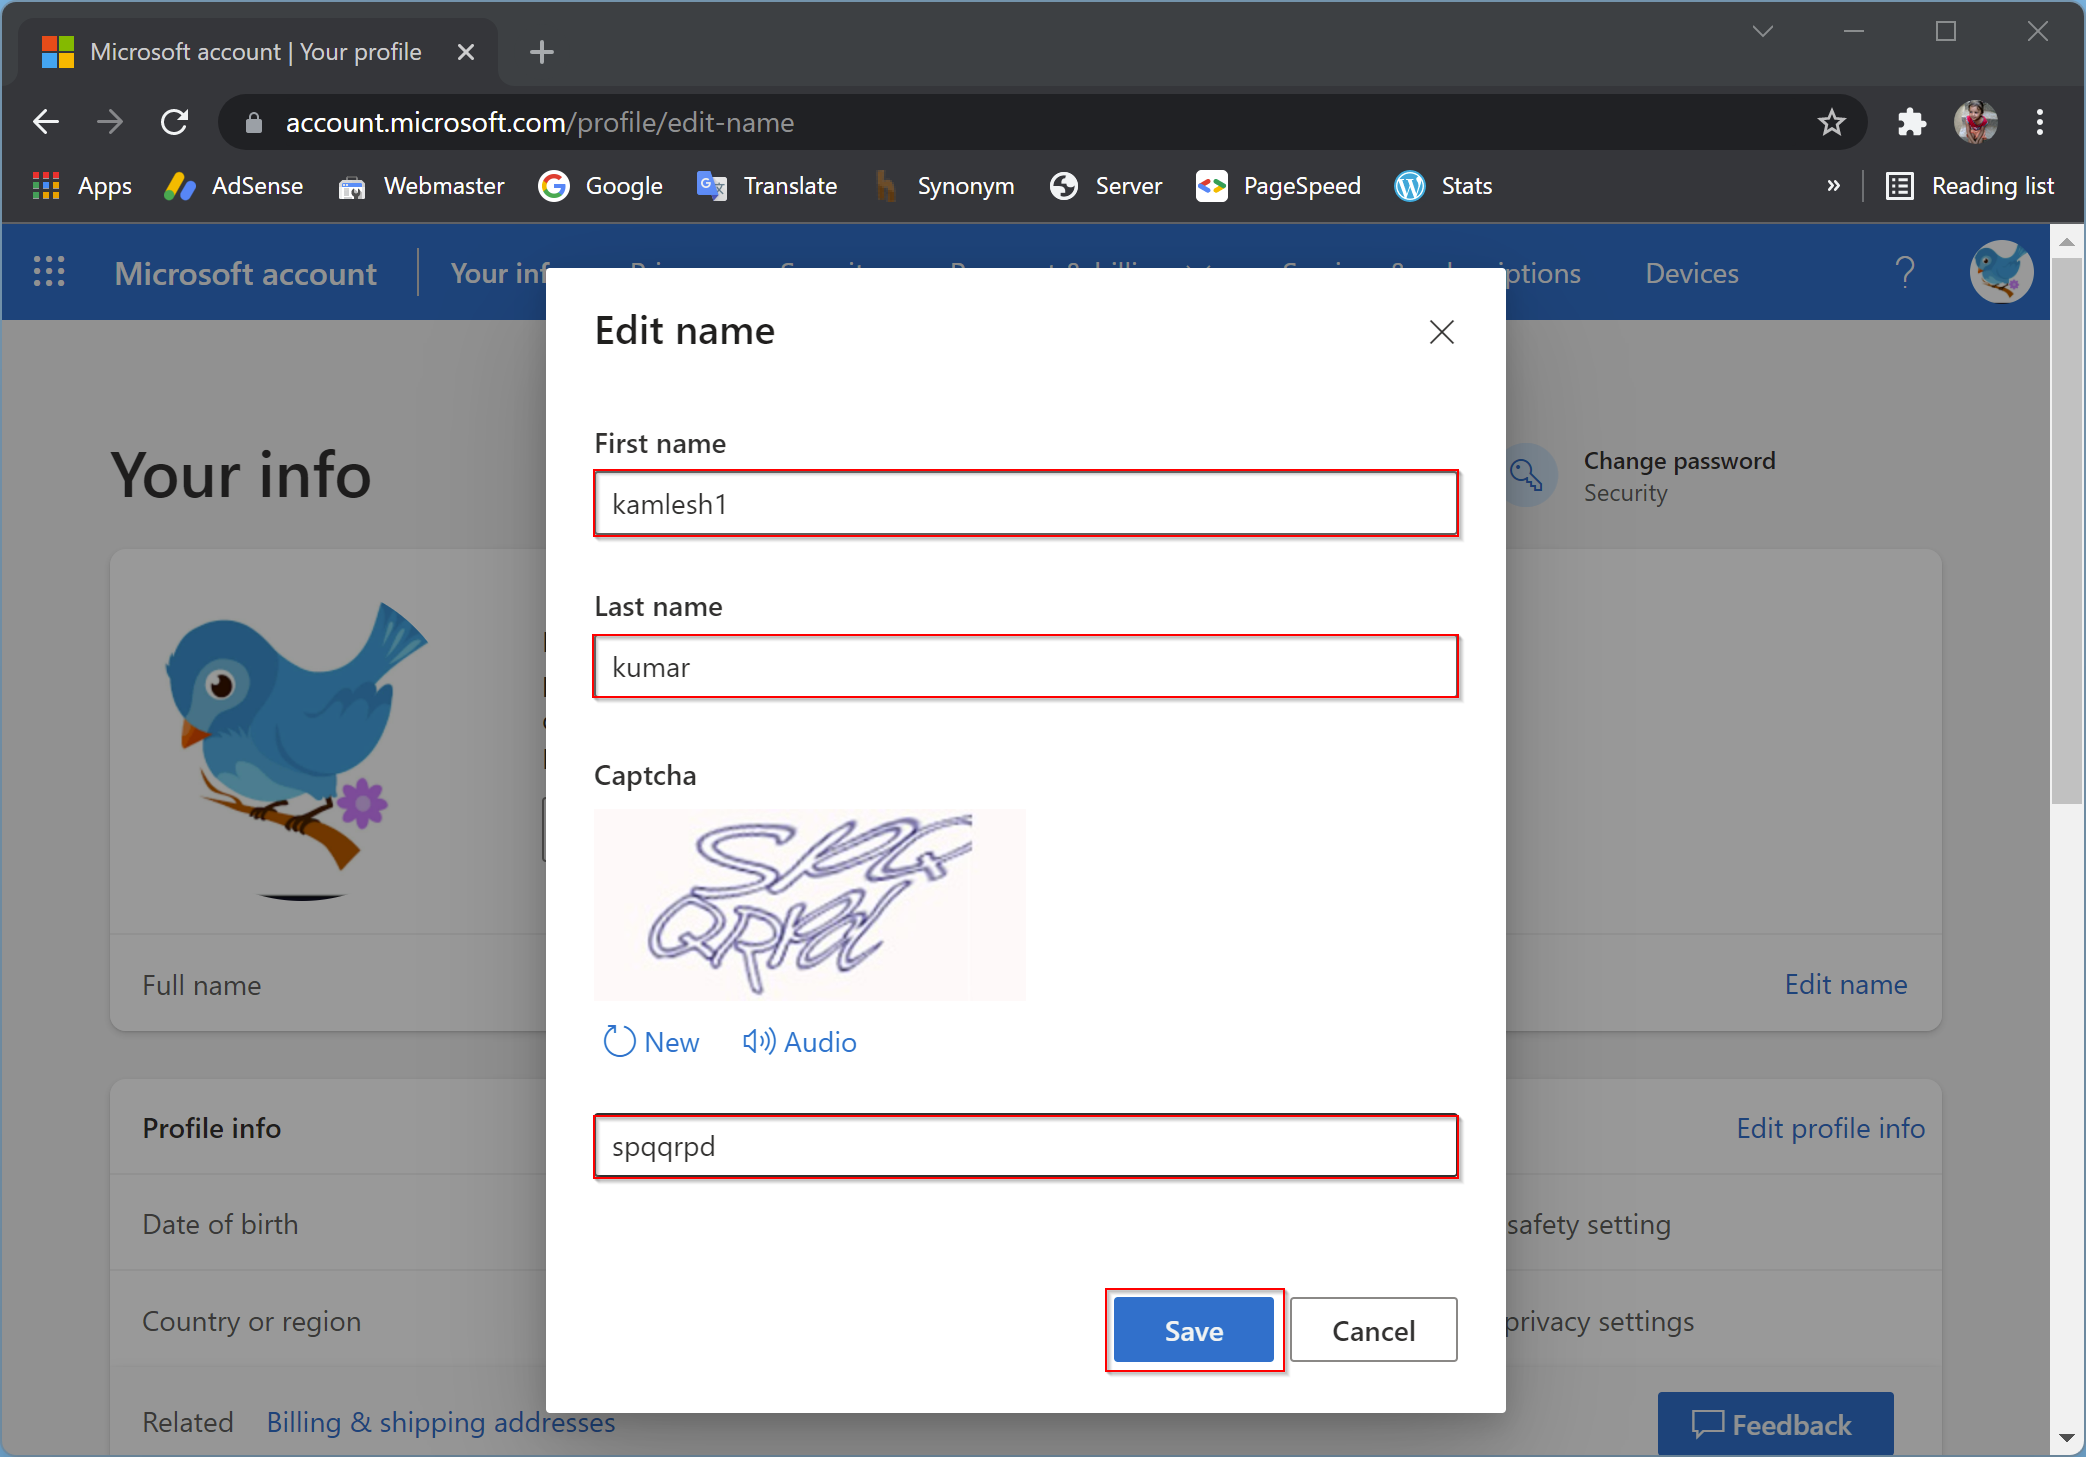
Step 5. After that, change the first name or last name, or both, enter the captcha and finally click the Save button.
Finally, sign out and sign in to your Microsoft account on your Windows 11 PC to see the changes.
How to Change the Name of Local Account in Control Panel?
To change the name of the local account using Control Panel, use these steps:-
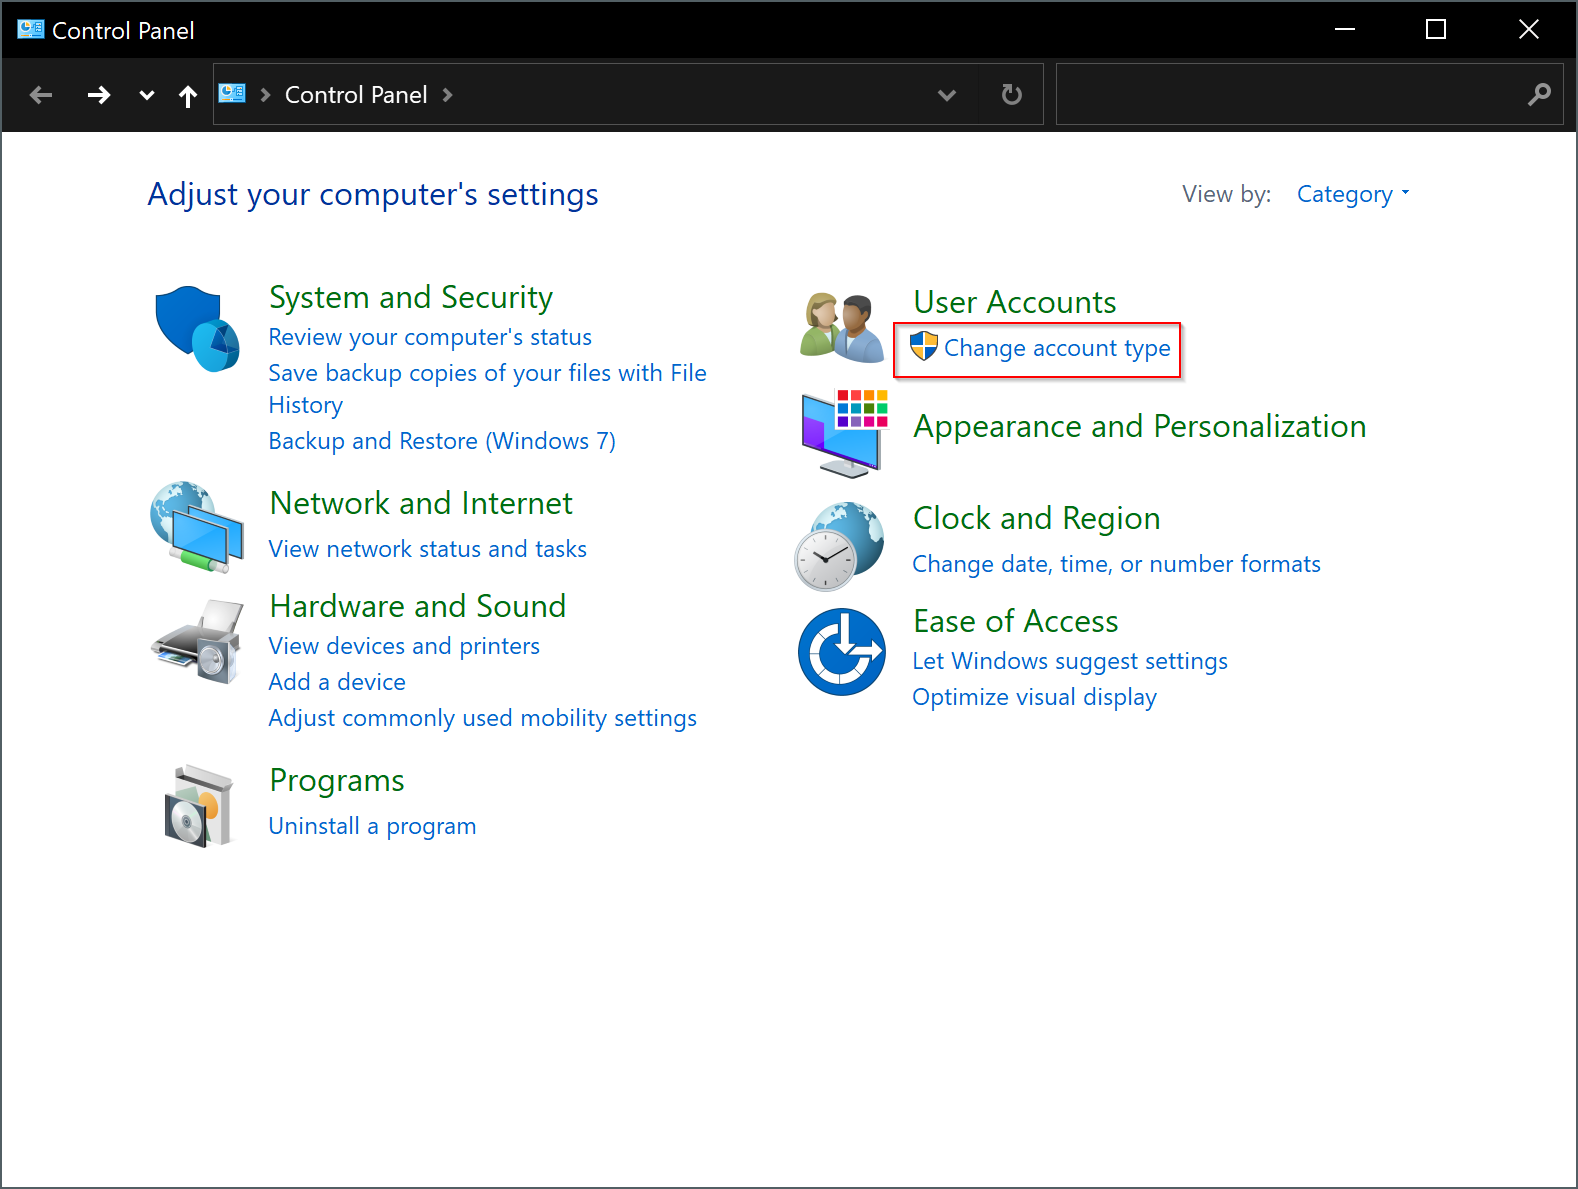
Step 1. Open Control Panel.
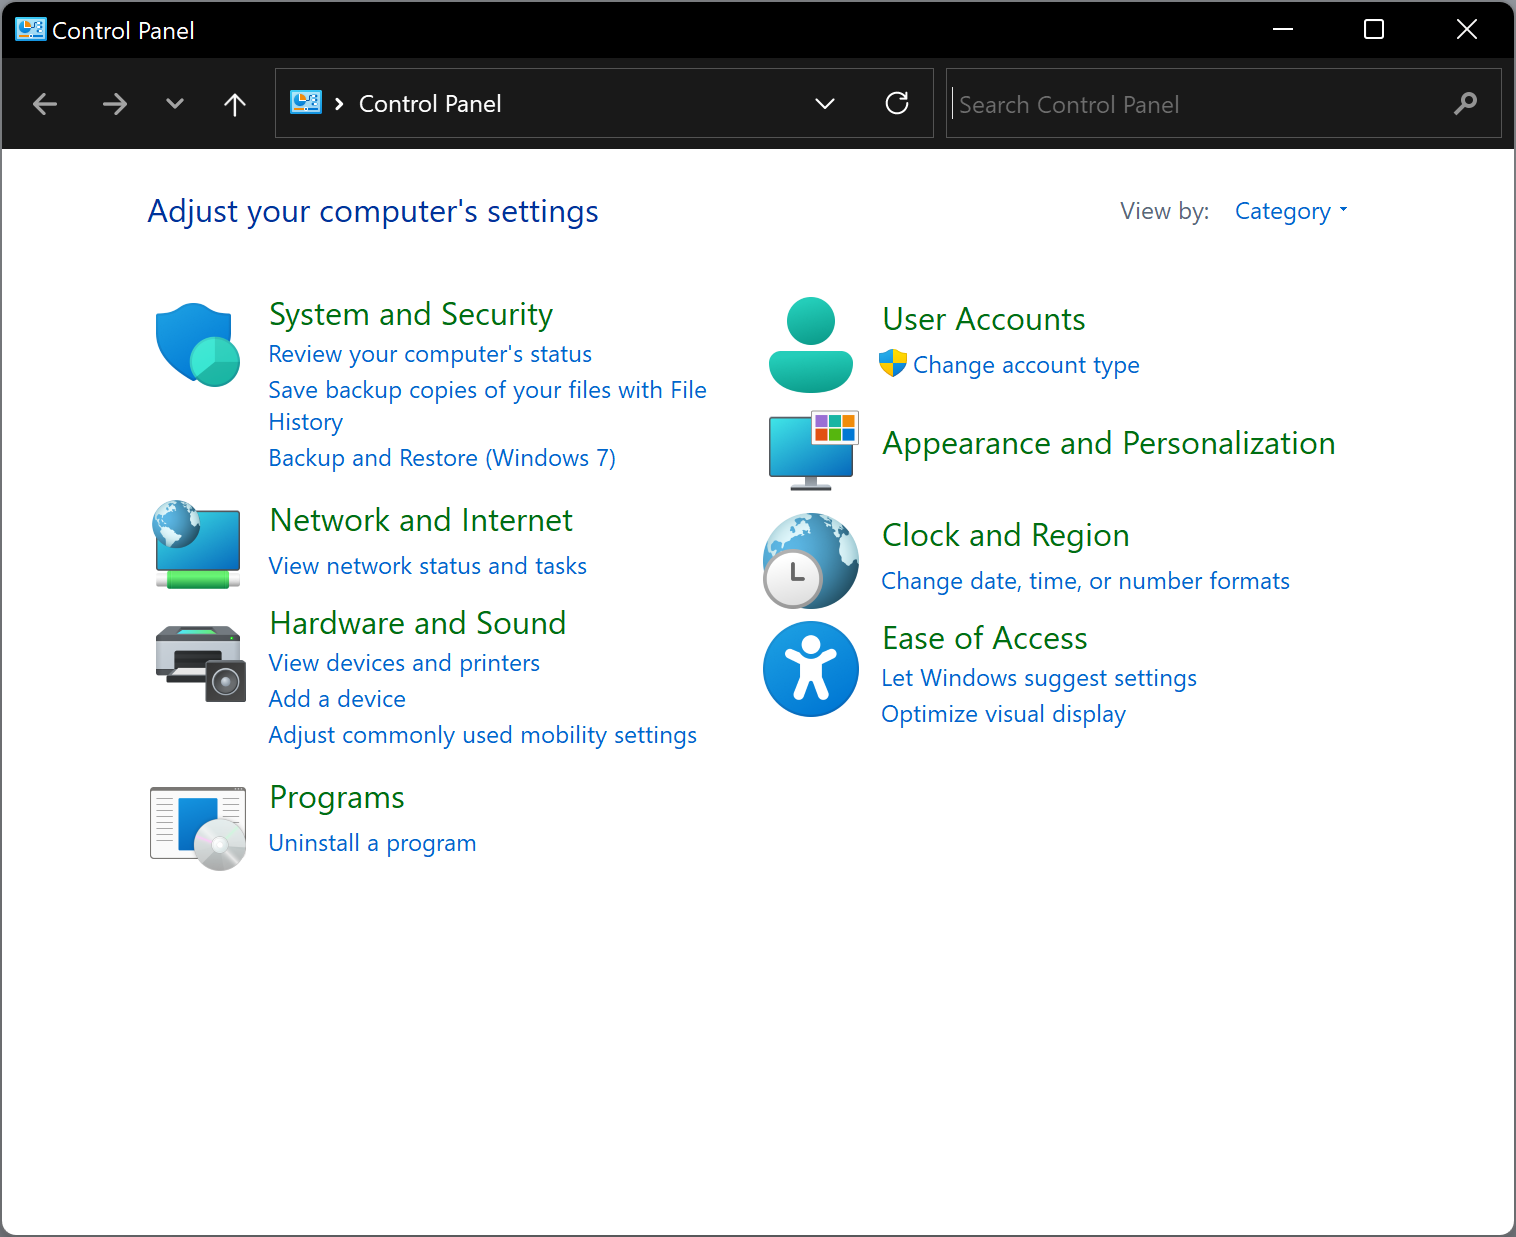
Step 2. Click the link Change account type link under “User Accounts.”
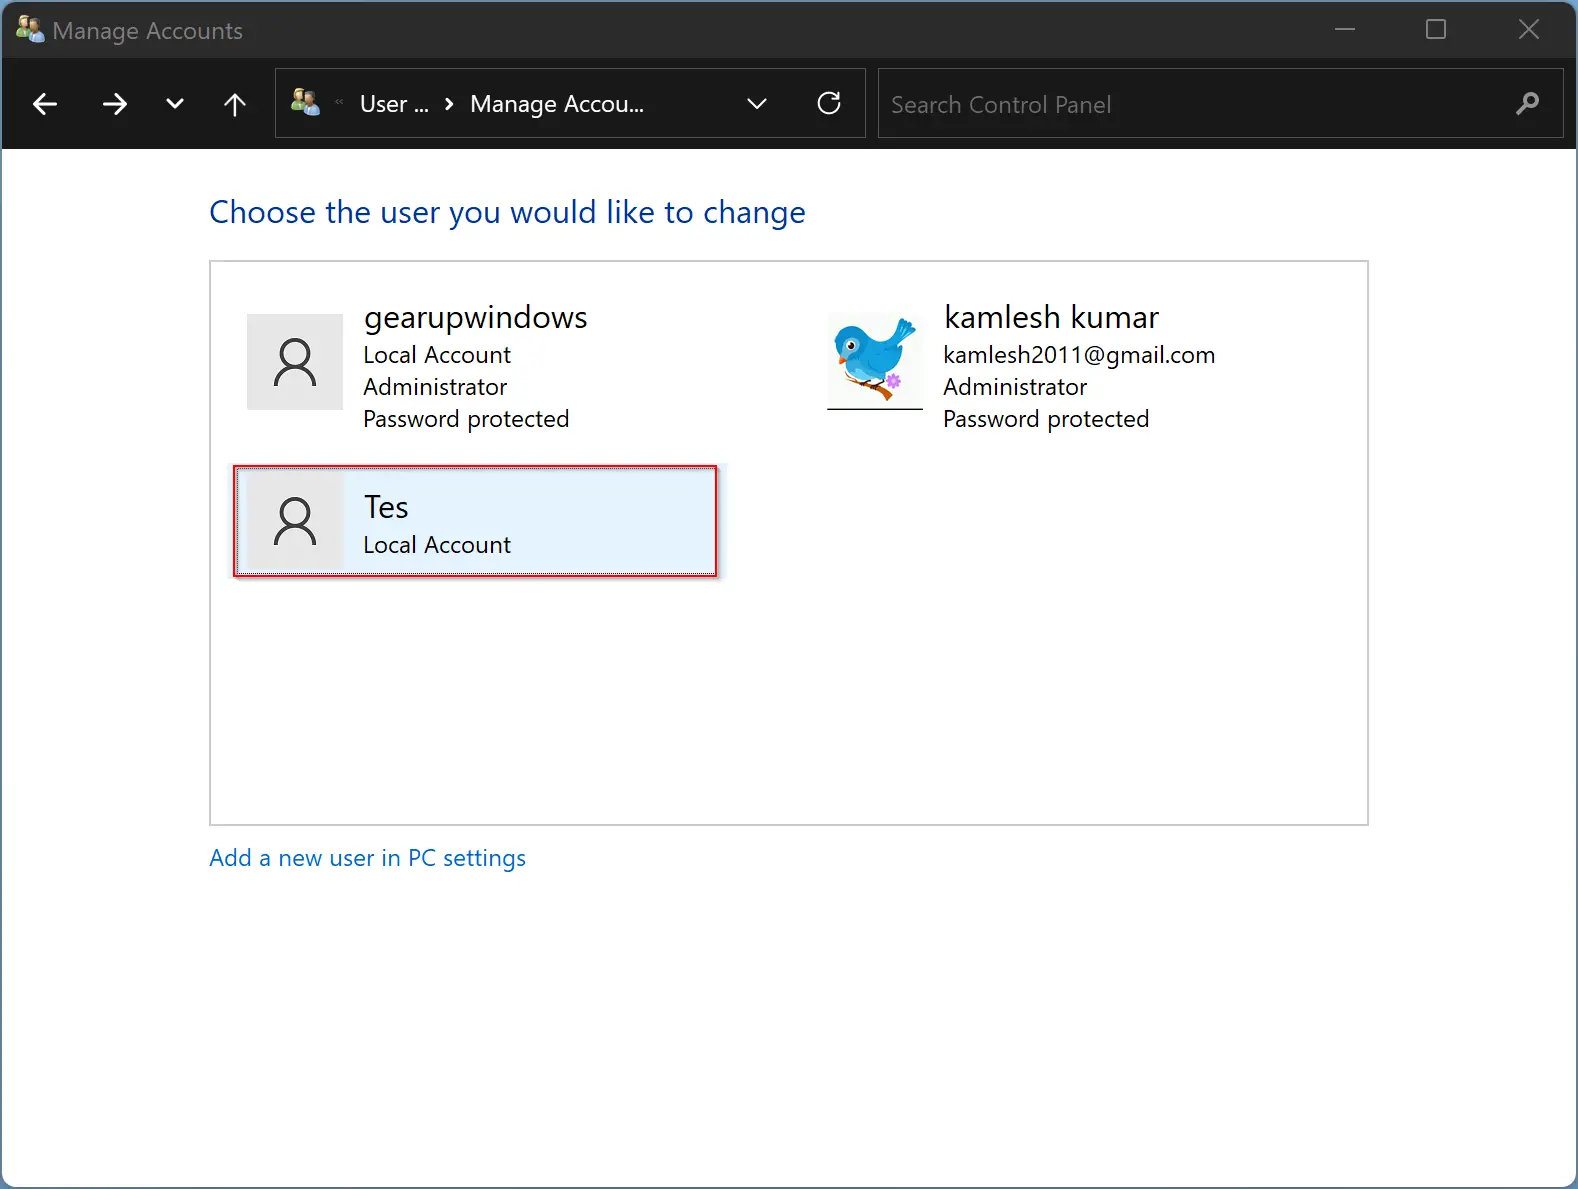
Step 3. After that, select the user account you want to change the name.
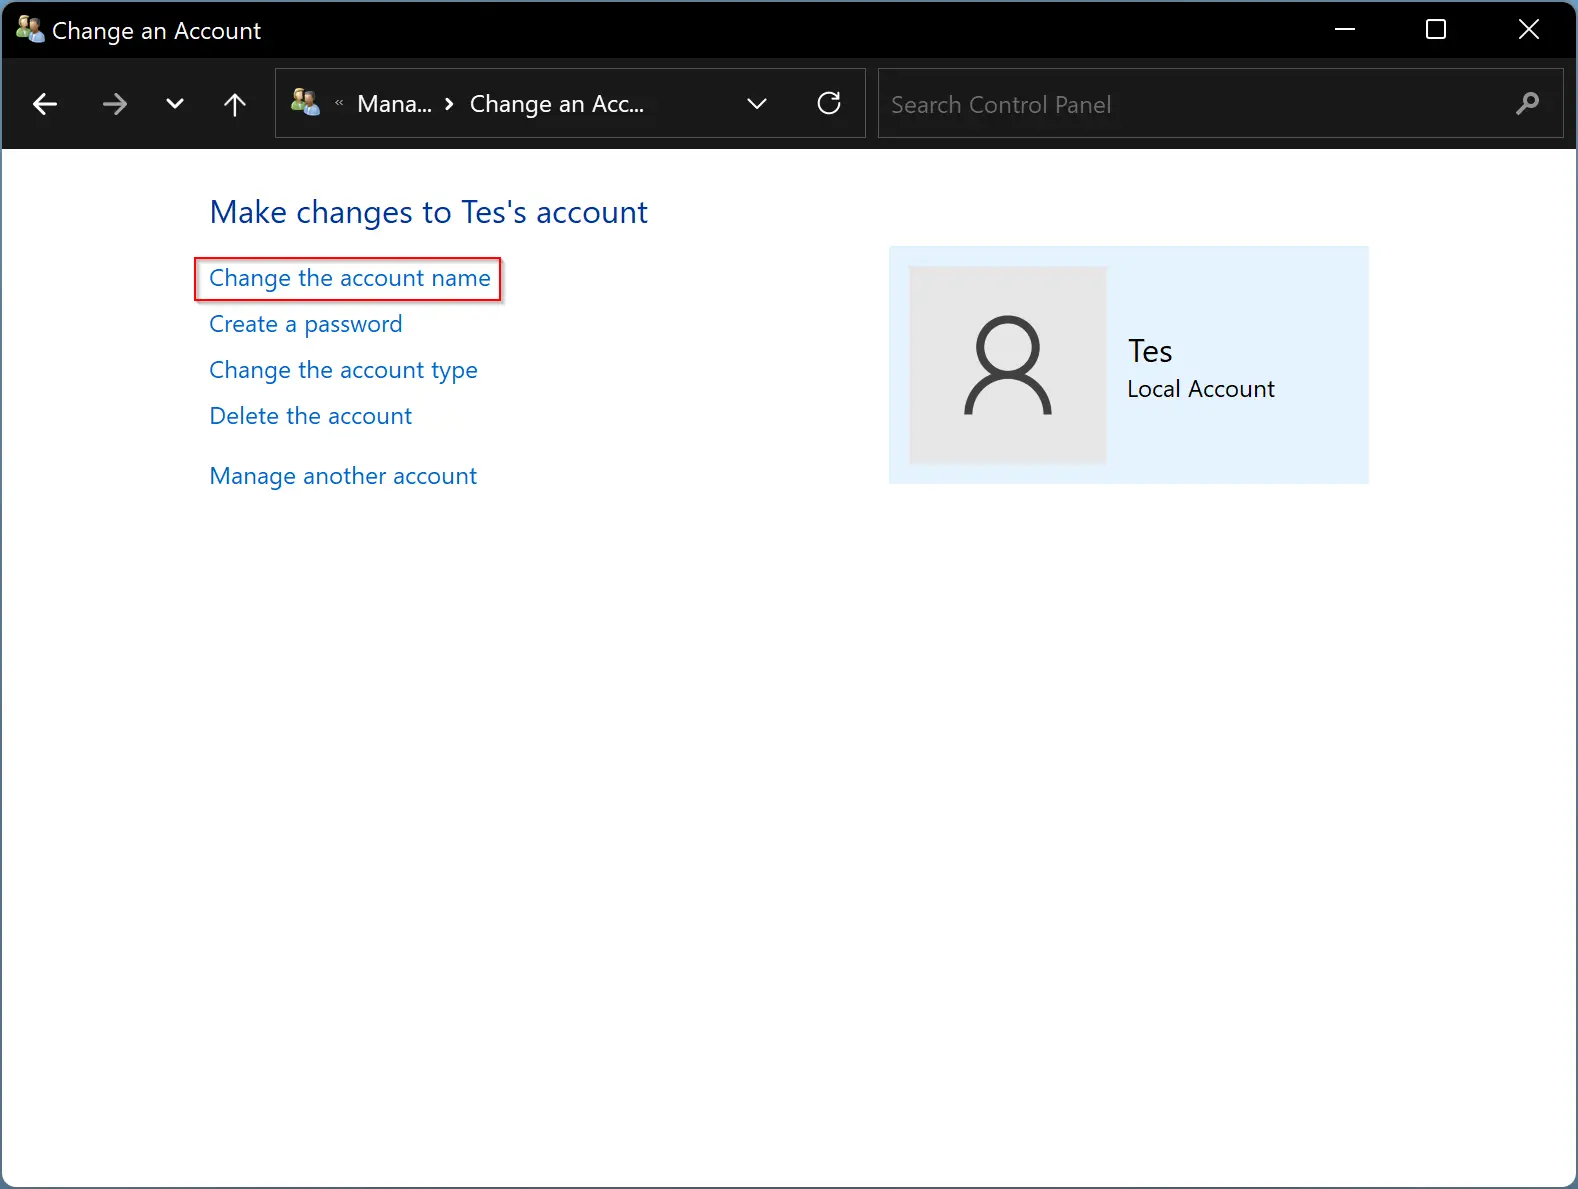
Step 4. Then, click the link Change the account name.
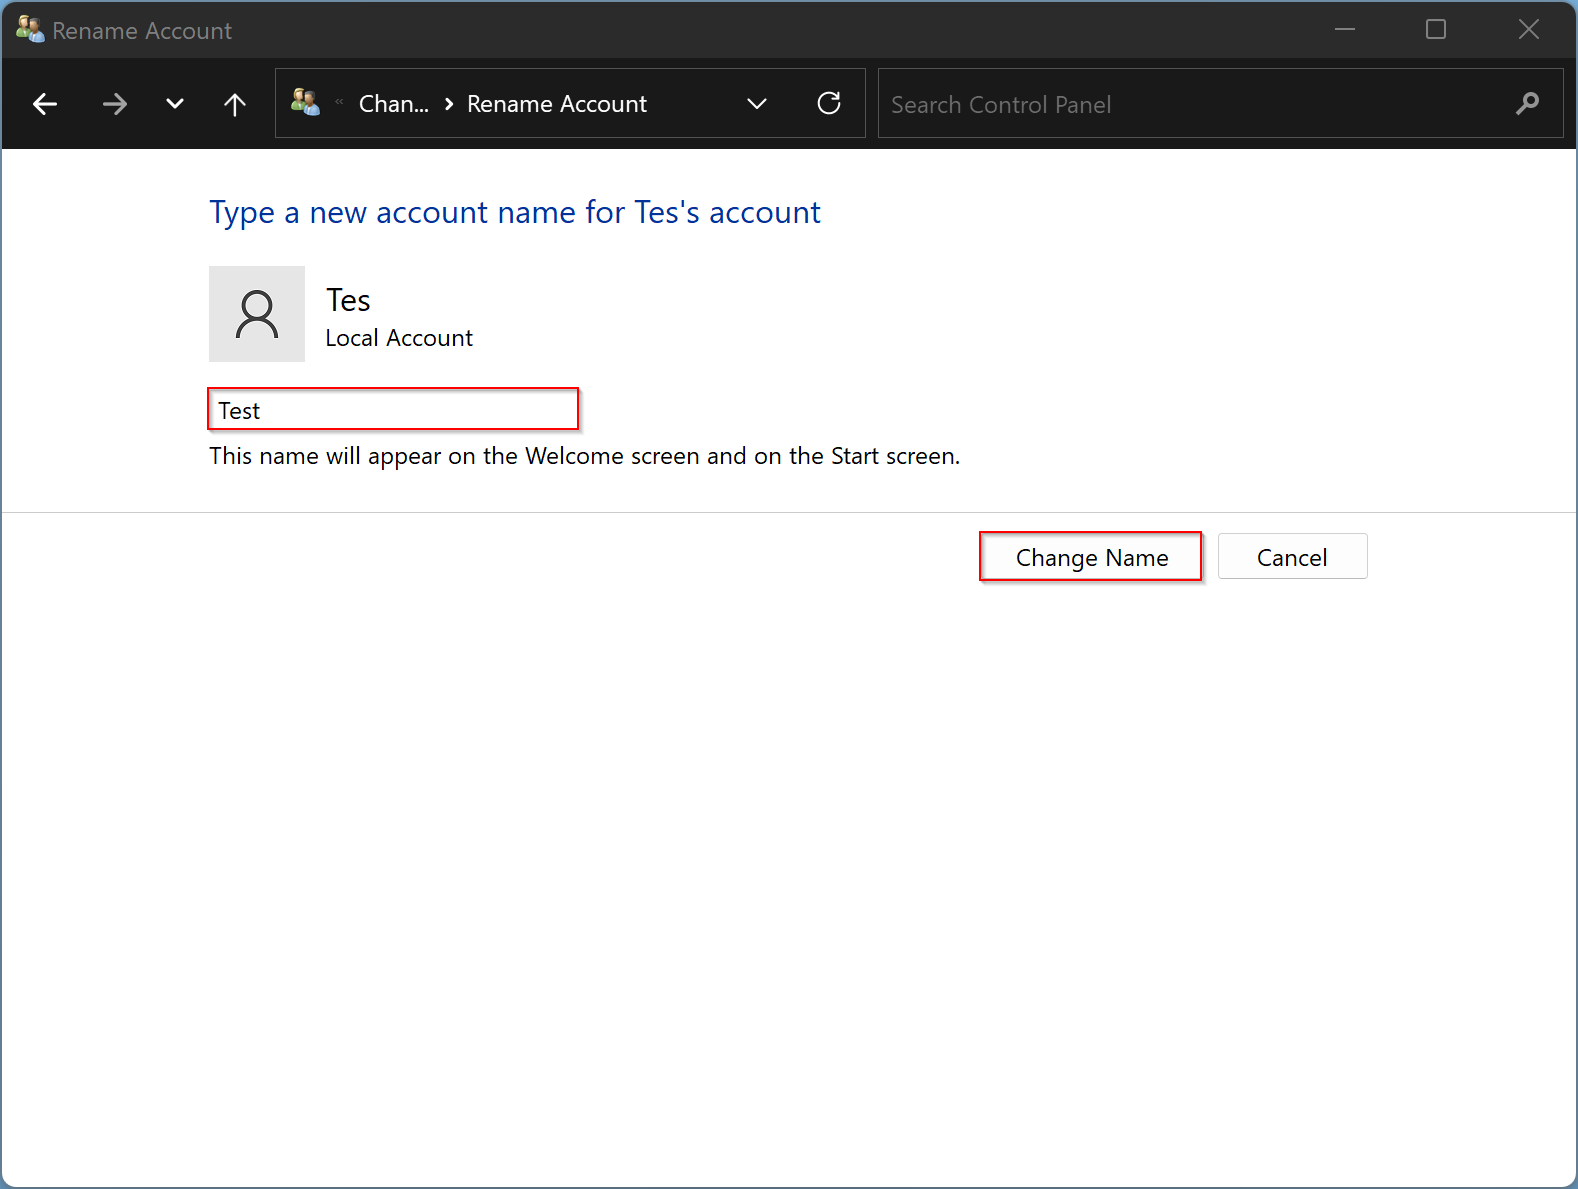
Step 5. Type a new account name you want, and hit the Change Name button.
How to Change the Name of a Local Account using Local Users and Groups?
The Local Users and Groups is part of Windows 11 Pro, Enterprise, and Education editions only. If you are using Windows 11 Home edition and want to use this method to change the name of a local account, then you need first to turn on the Local User and Group Management (Lusrmgr.msc) console.
Step 1. Open the Local User and Group Management.
To do that, press the Windows + R keys from the keyboard to invoke the Run dialog box. Then type lusrmgr.msc in the Run box and hit Enter from the keyboard.
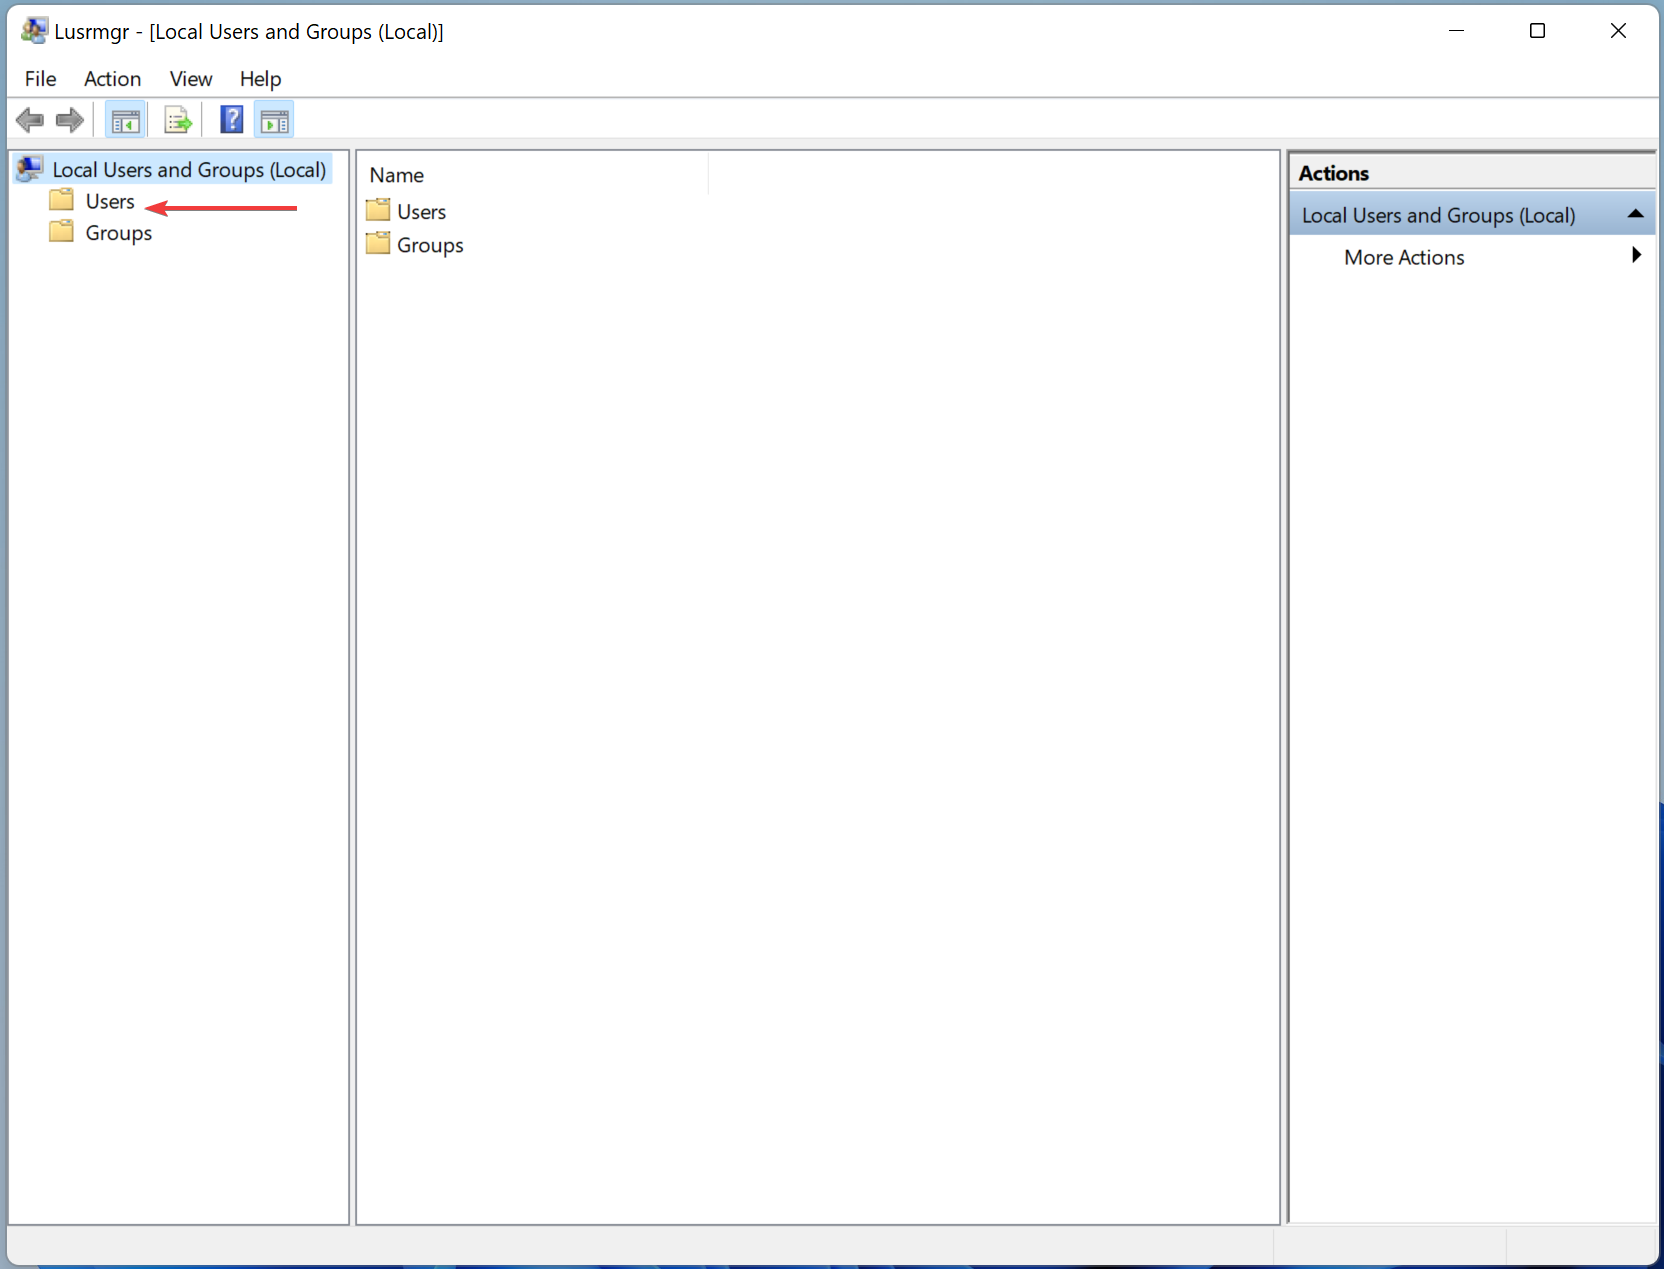
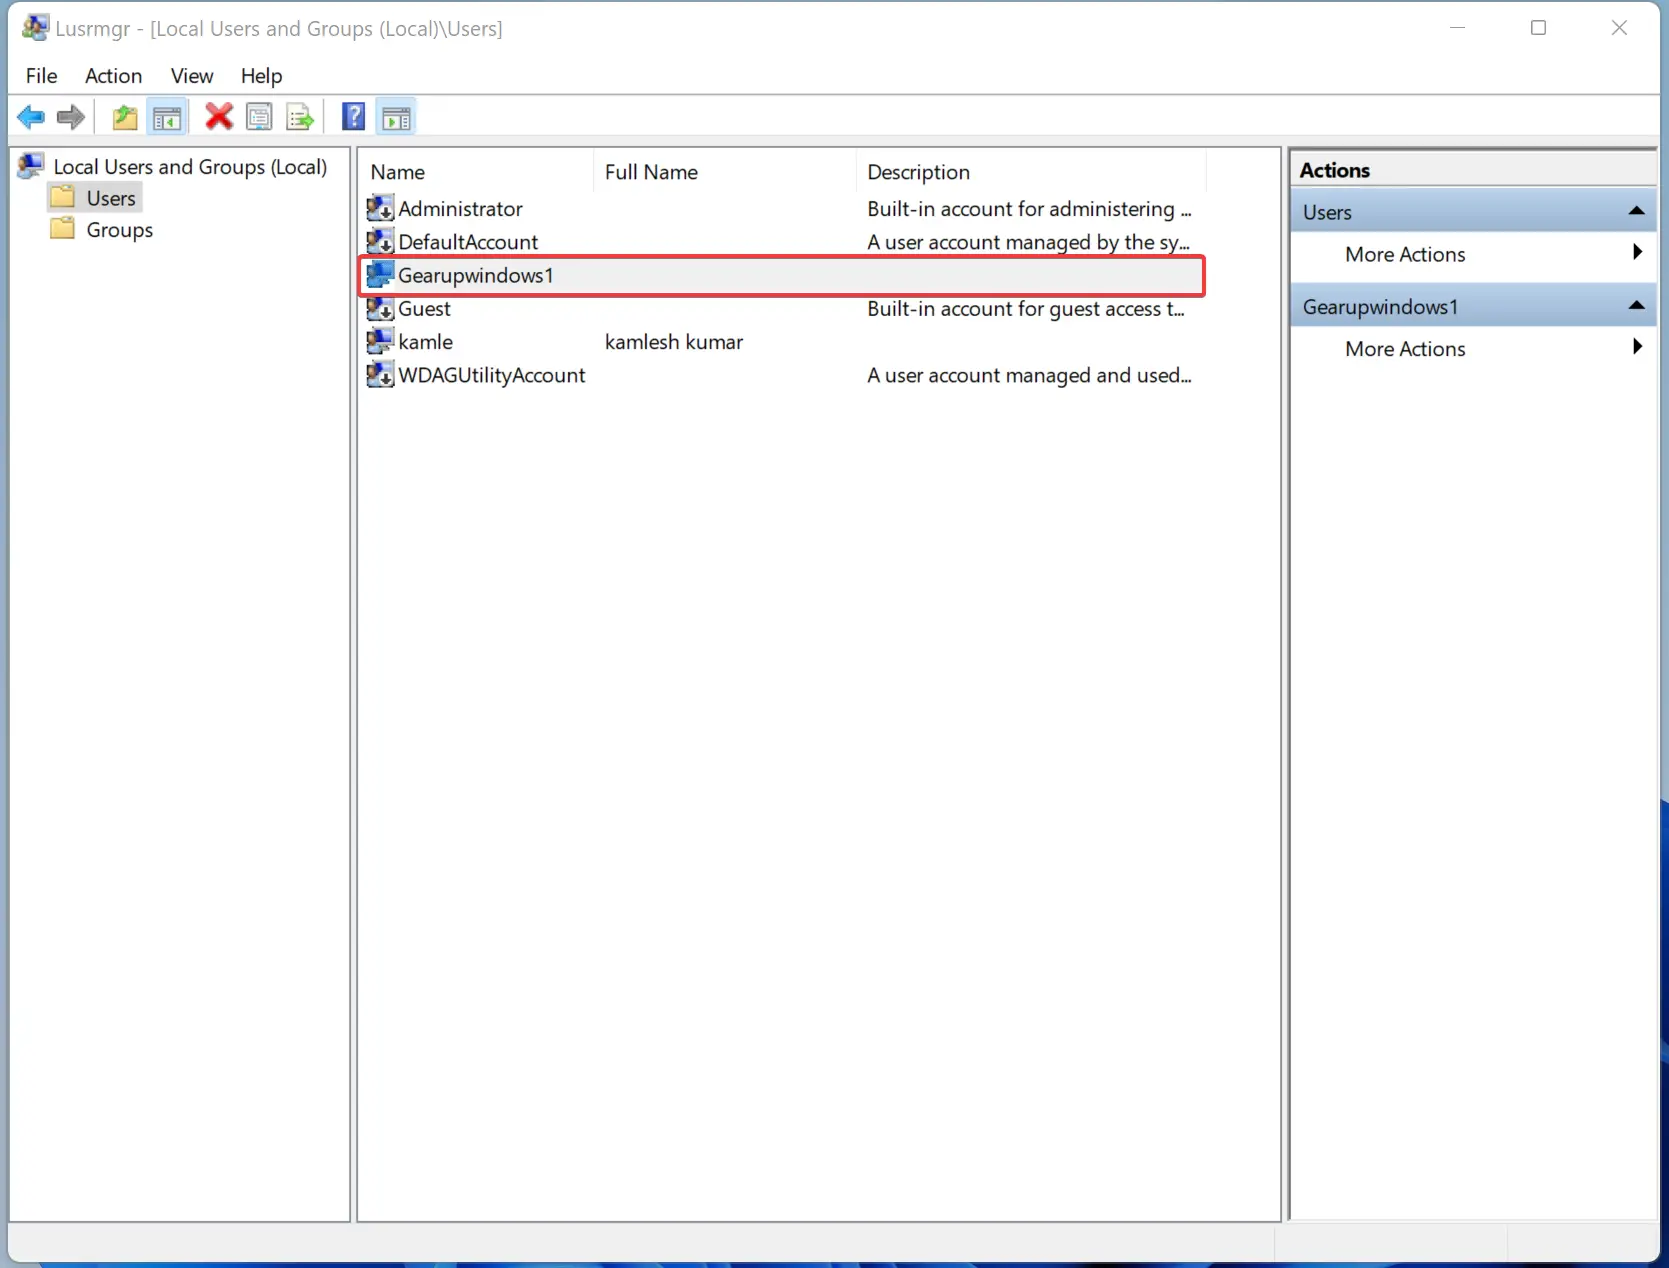
Step 2. Select Users in the left pane.
Step 3. Double-click on the user name (For example, Gearupwindows1) on the right sidebar you want to modify.
Step 4. Write a new username beside the “Full name” box.
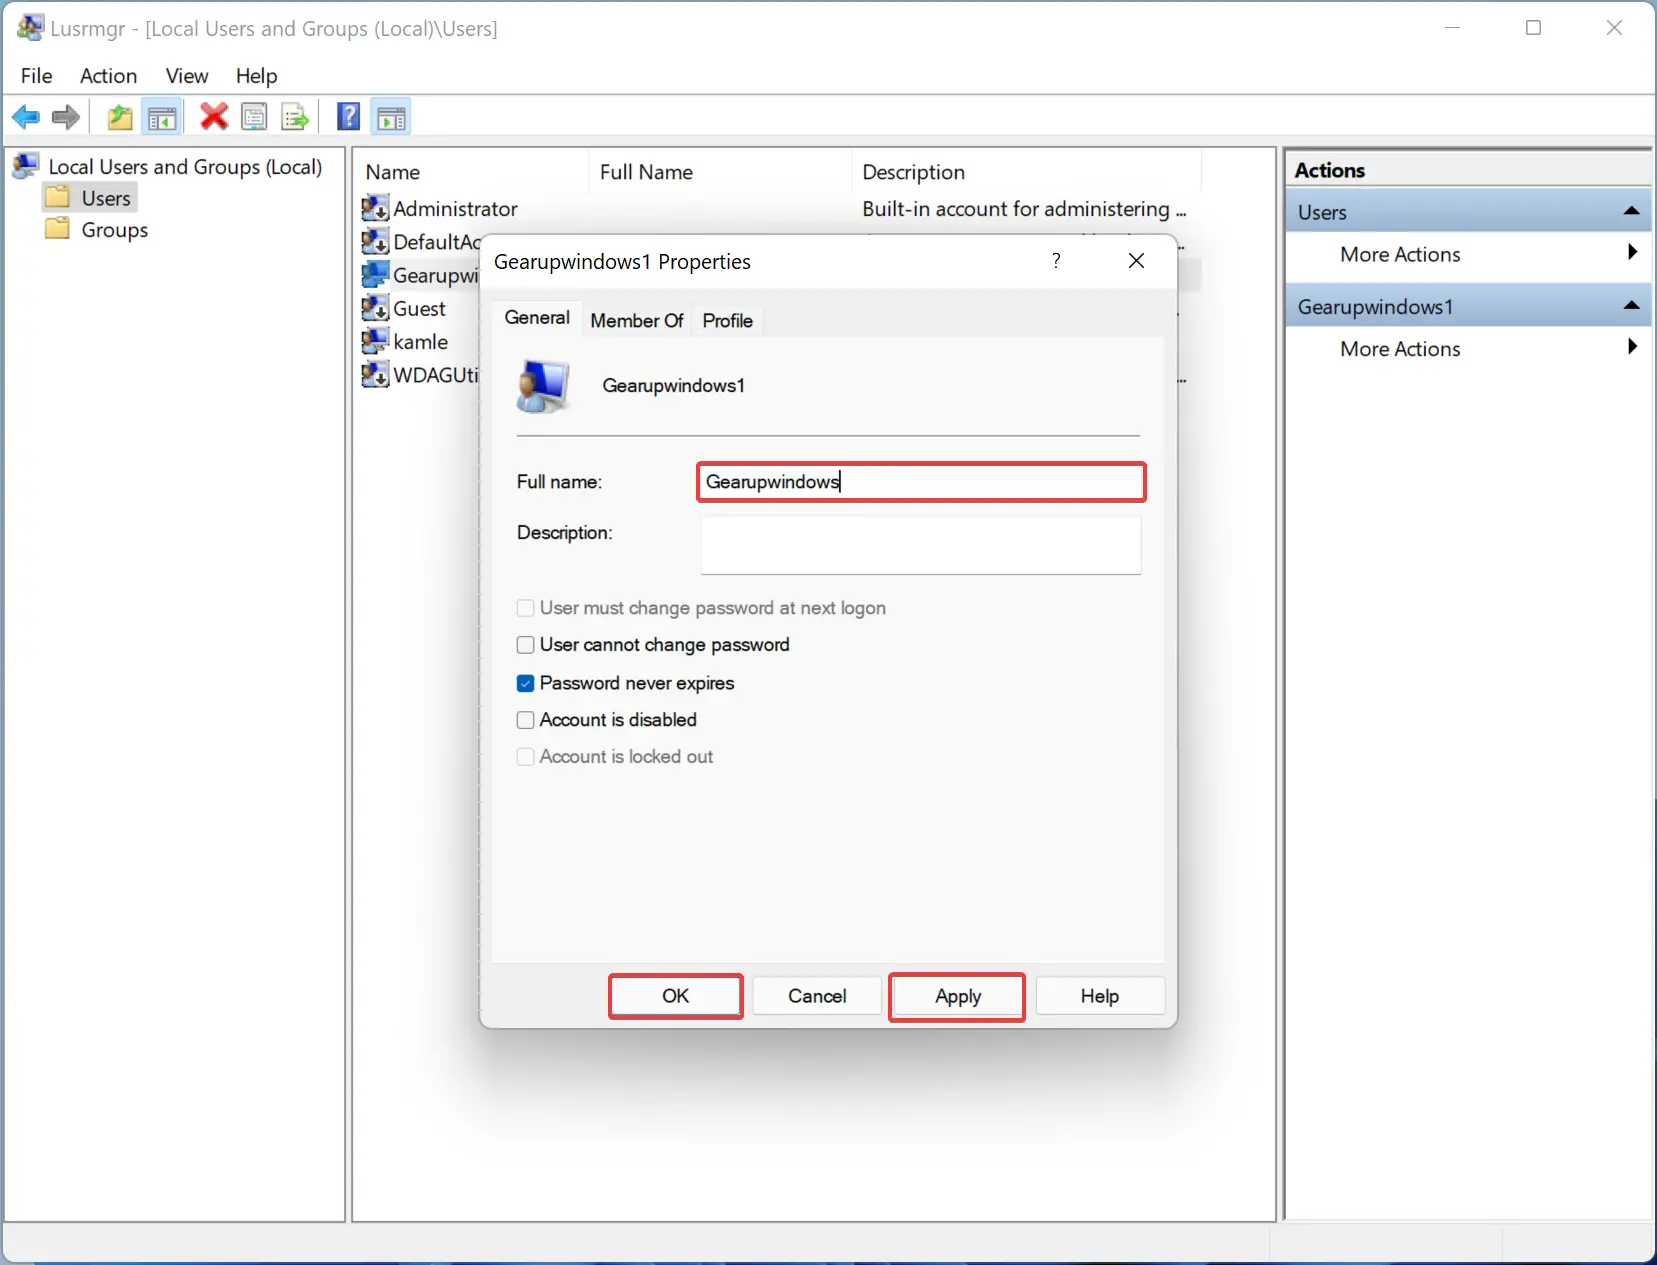
Step 5. Click Apply.
Step 6. Click OK.
That’s it.
Conclusion
In conclusion, adding multiple user accounts to a single Windows 11 PC is a convenient way to share a computer among family members and friends. Each user can have their own personalized settings and access to their files and favorites. If you need to change the name of a local account or a Microsoft account, you can follow the steps outlined above. Whether you choose to use Control Panel or Local Users and Groups, make sure to sign in to an administrator account first. By following these steps, you can easily update the username associated with your account on your Windows 11 PC.