If you want to save network bandwidth in Windows 11, this post may concern you. In this gearupwindows article, we will guide you on turning On and Off Video Playback Settings to save network bandwidth by playing video at a lower resolution.
While watching movies or streaming videos, you might want to get the highest possible resolution. However, you may land in trouble if you have a terrible internet connection.
A few apps, such as YouTube, automatically detect weak network connections and play videos at a lower resolution. However, not all apps support this feature, resulting in you may not being able to stream the video. Here, Windows 11 built-in settings to save bandwidth by playing videos at a low resolution will play a handy role.
Universal Windows Platform (UWP) apps, including Microsoft Edge, Photos, Movies & TV, and video apps downloaded from Microsoft Store (for instance, Hulu, Netflix, Vudu, etc.), can use Windows playback settings.
How to Play Video at Low Resolution to Save Network Bandwidth in Windows 11?
To change video playback settings to enhance the video’s quality automatically and save network bandwidth by playing videos at lower resolutions in Windows 11, use the following steps:-
Step 1. First, open the Settings app.
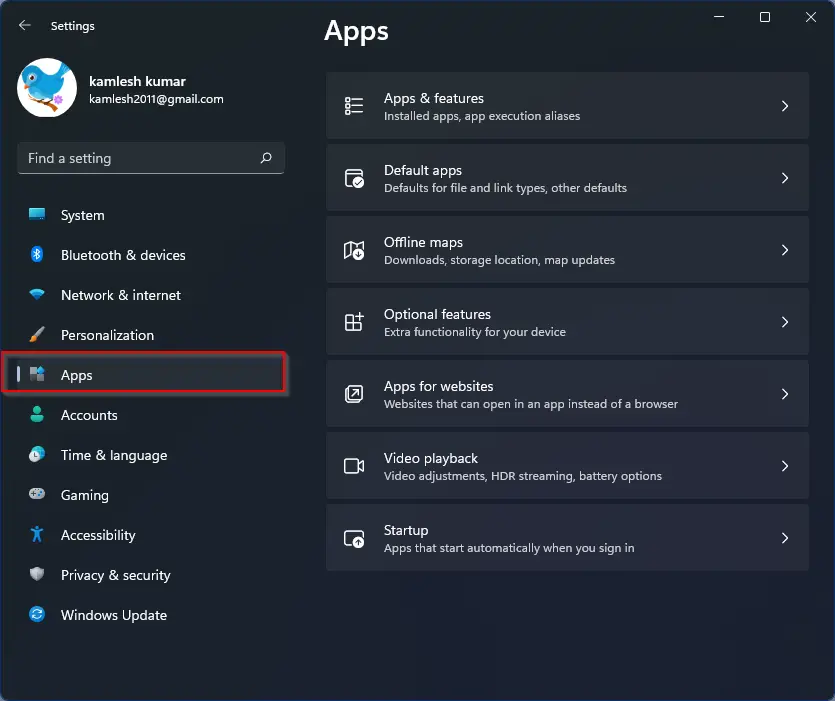
Step 2. In the Windows Settings, select Apps on the left side.
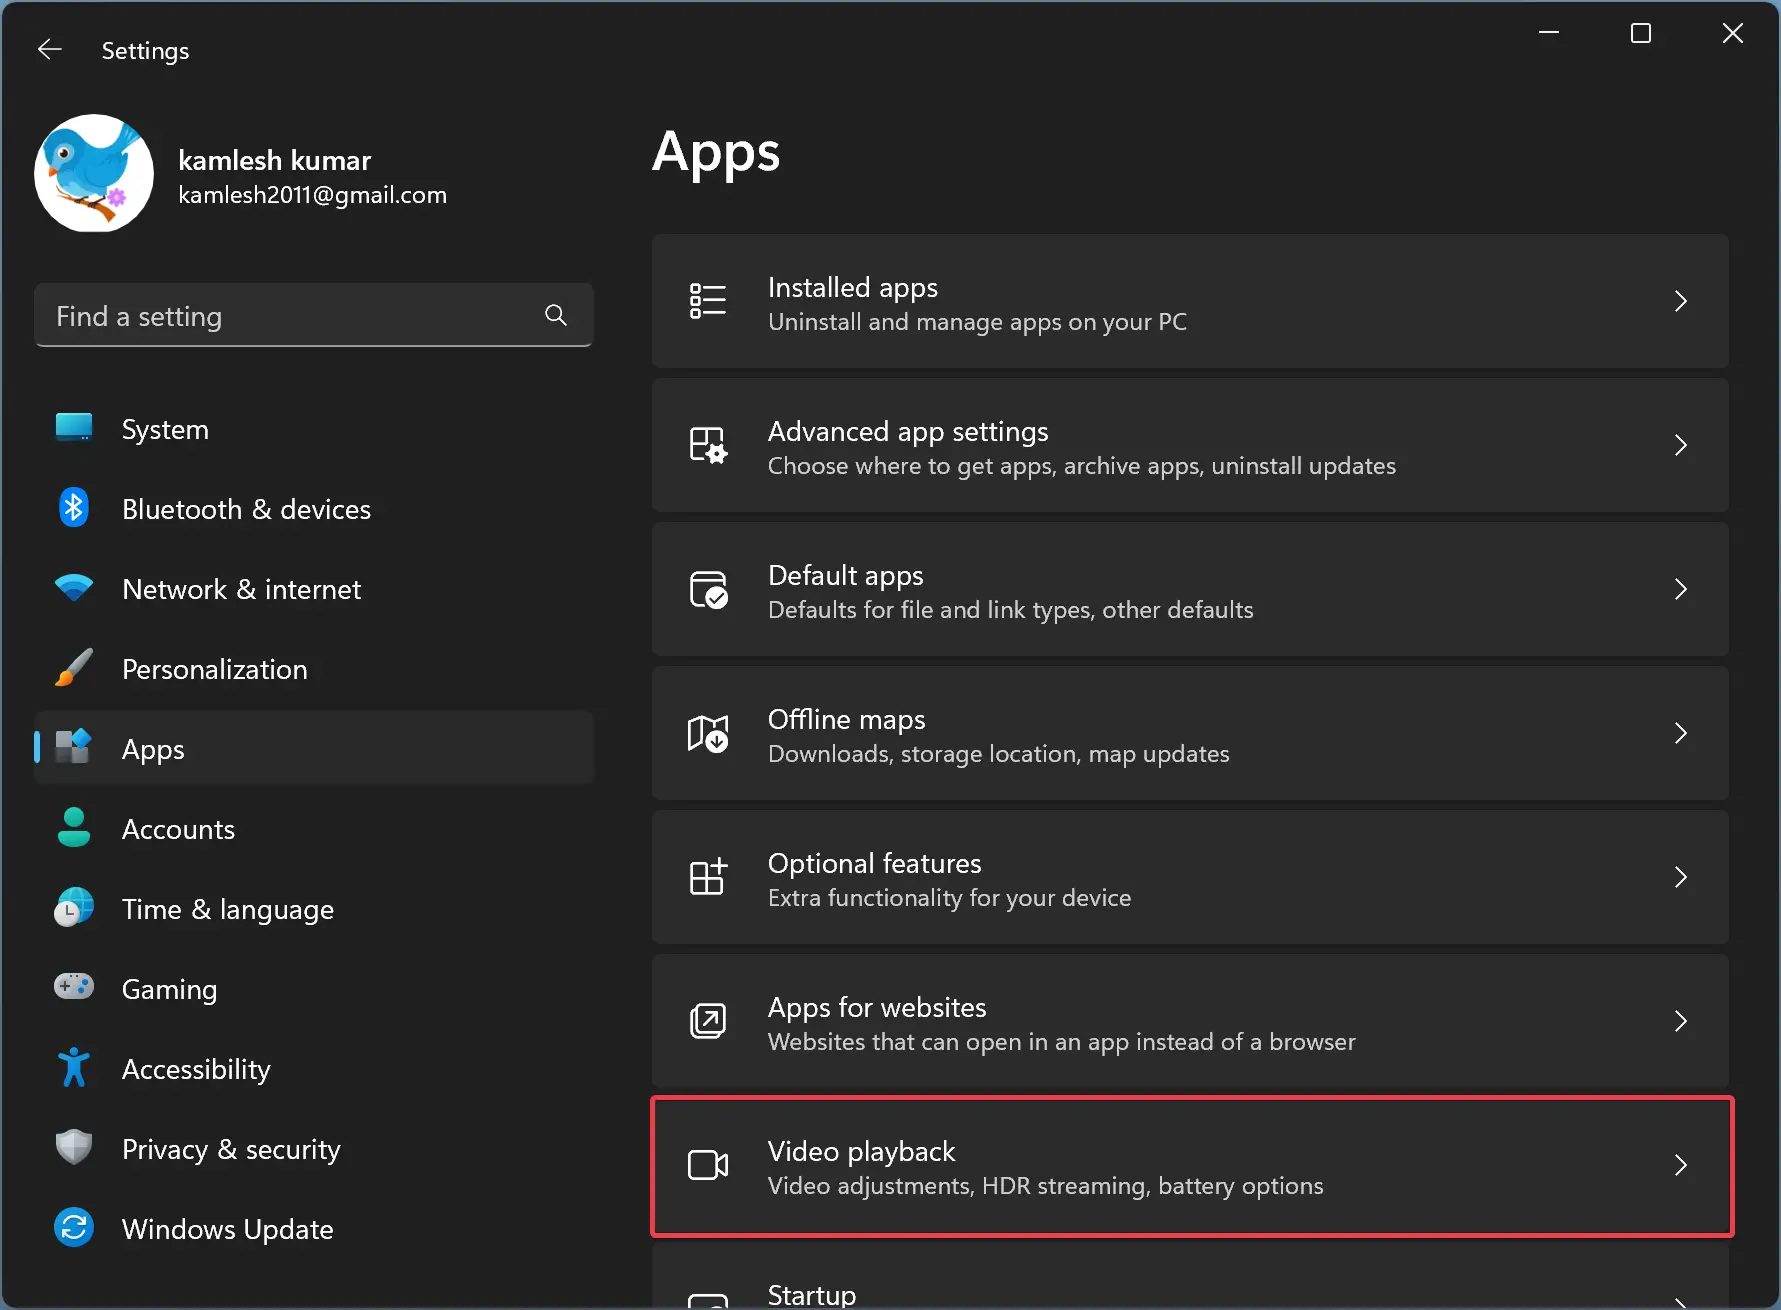
Step 3. Then, click the Video playback tile on the right-side pane to expand it.
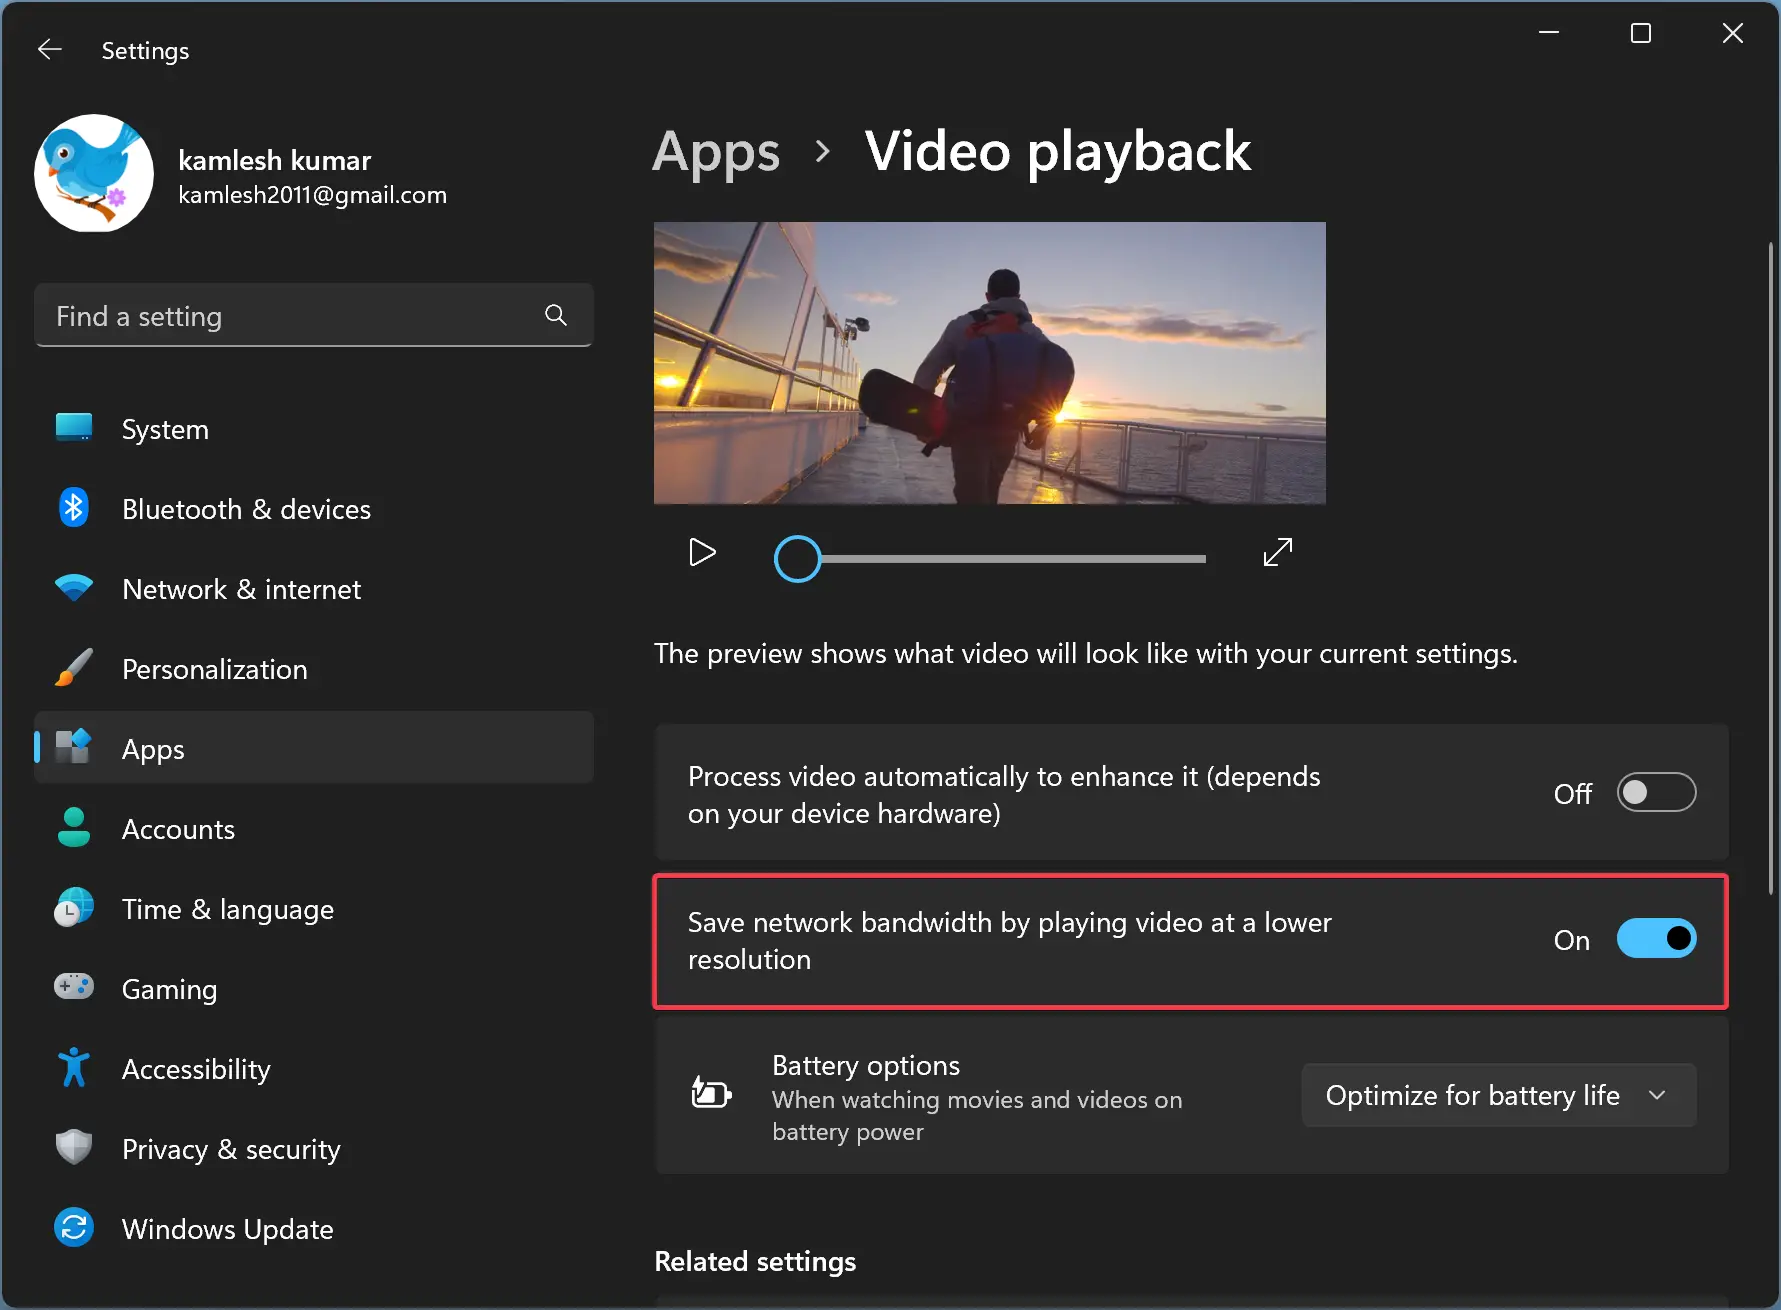
Step 4. After that, on the Video playback settings, toggle On the button that reads “Save network bandwidth by playing video at a lower resolution.”
That’s it. You can now close the Settings app. Next time you play the video on your Windows 11 machine using built-in apps or UWP apps, it will run in low resolution, resulting in saving the network bandwidth.
To revert the changes, repeat the above steps, and in step 4 above, toggle Off the button that says “Save network bandwidth by playing video at a lower resolution.”
How to Turn On Save Network Bandwidth Feature in Registry Editor?
To enable the network bandwidth saver feature on Windows 11 using Registry Editor, use the following steps:-
Step 1. Open Registry Editor.
Step 2. Then, navigate to the following key on the left side of the Registry Editor window:-
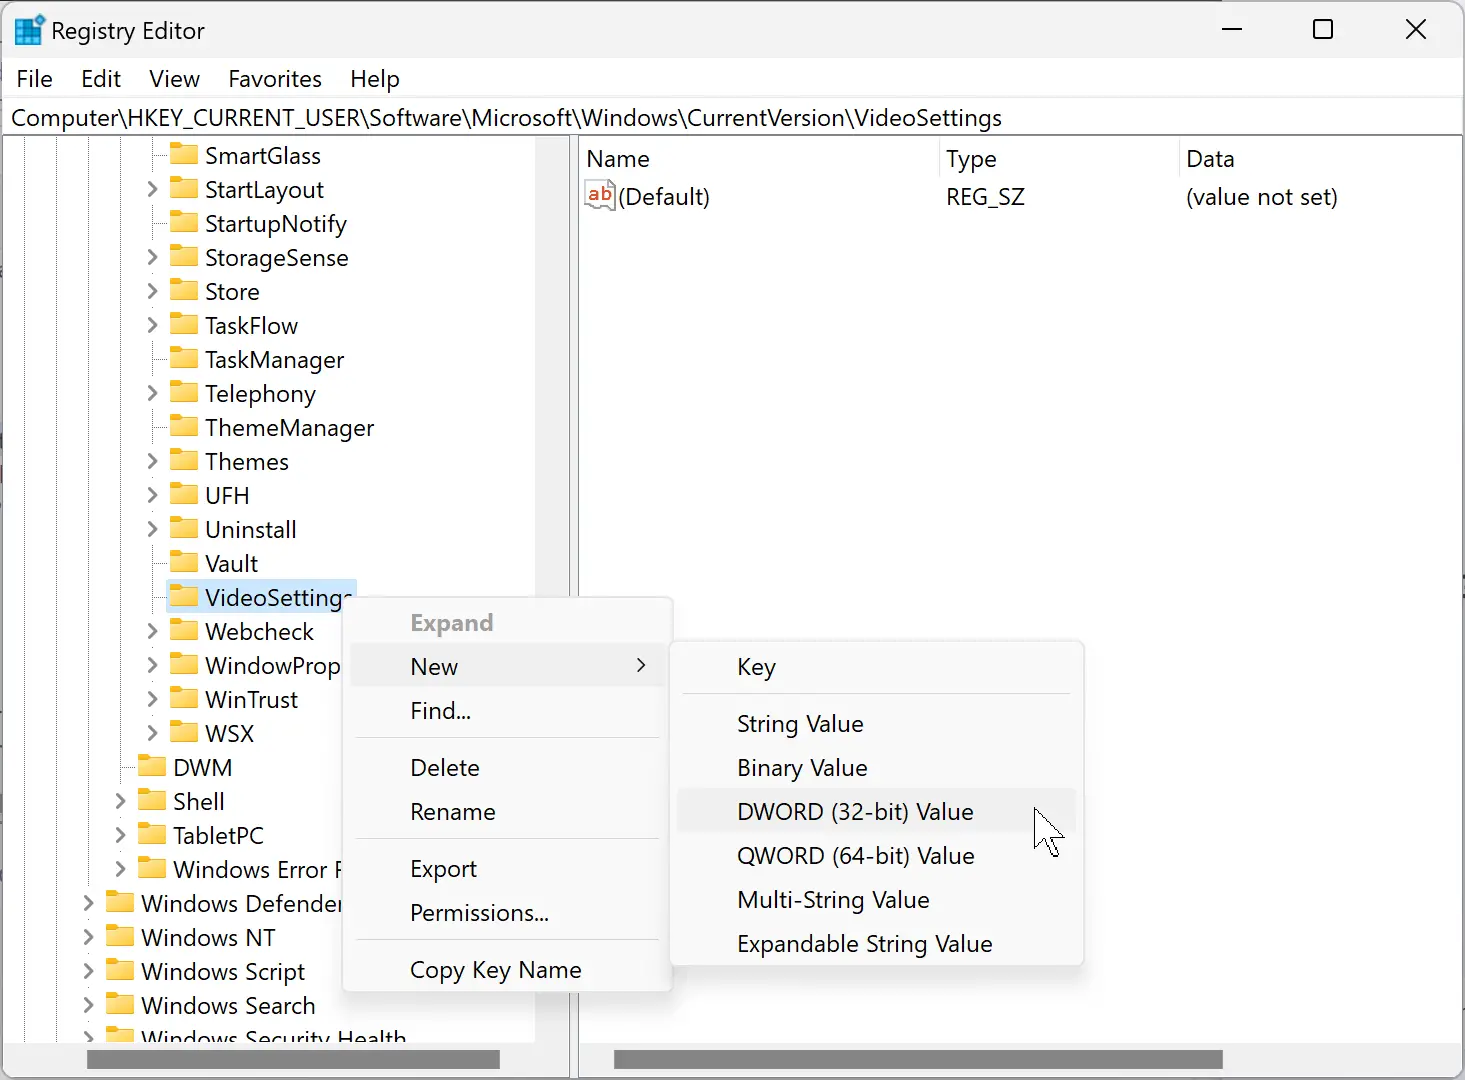
Computer\HKEY_CURRENT_USER\Software\Microsoft\Windows\CurrentVersion\VideoSettings
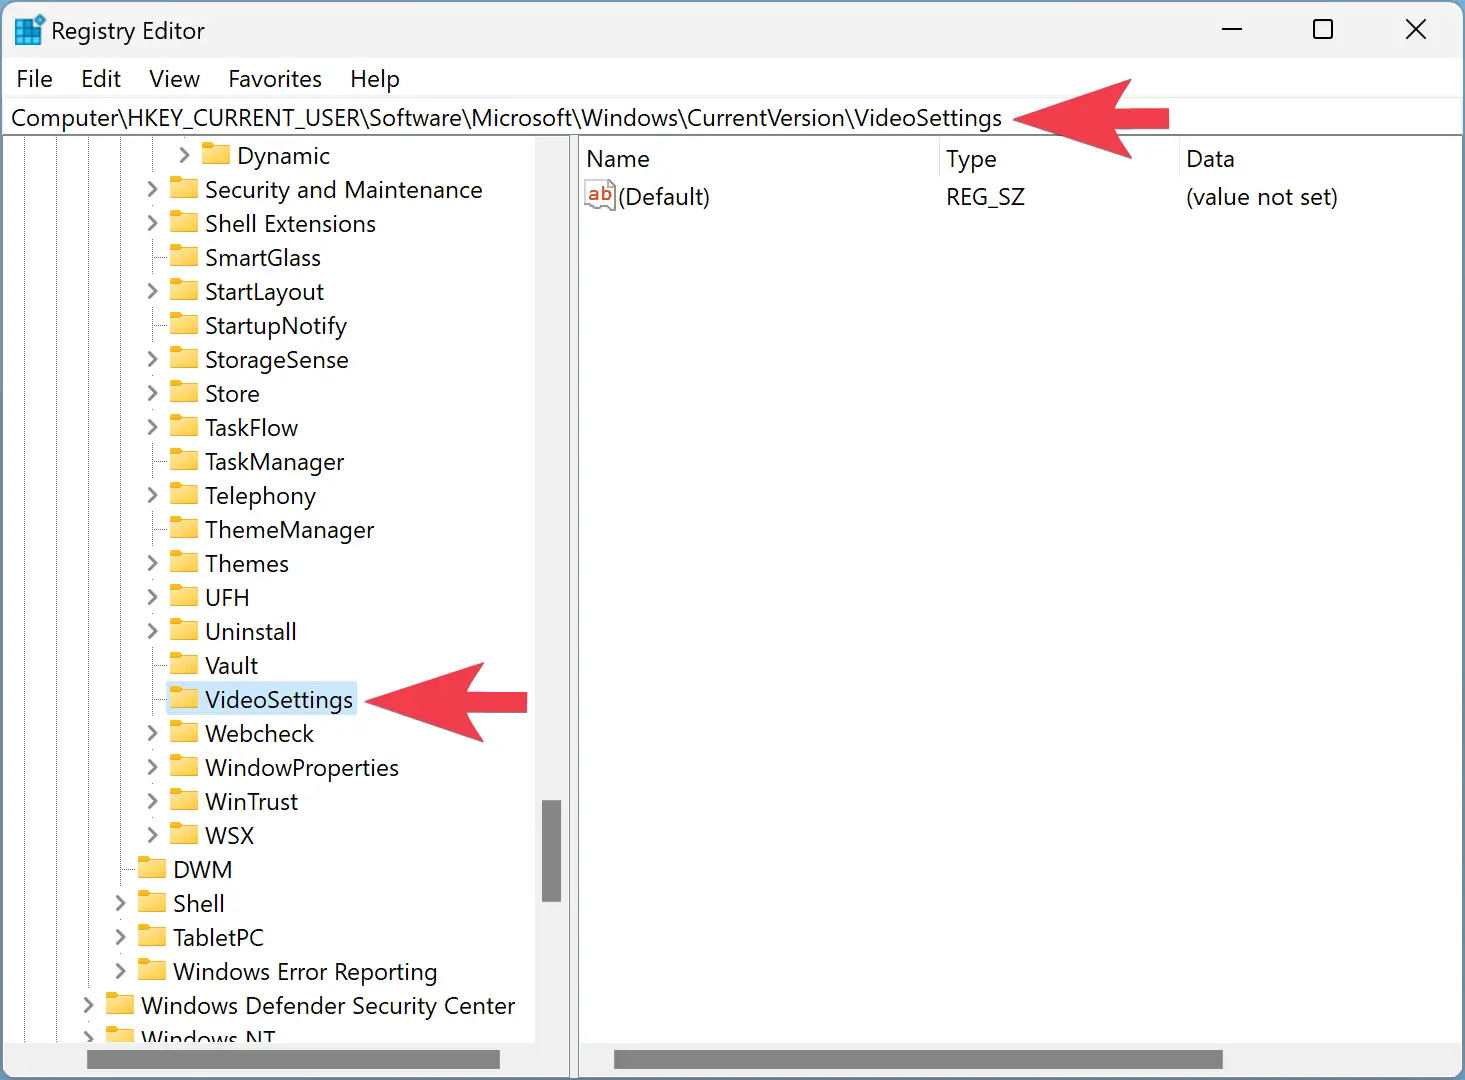
Step 3. Next, right-click on the VideoSettings folder and select New > DWORD (32-bit) Value.
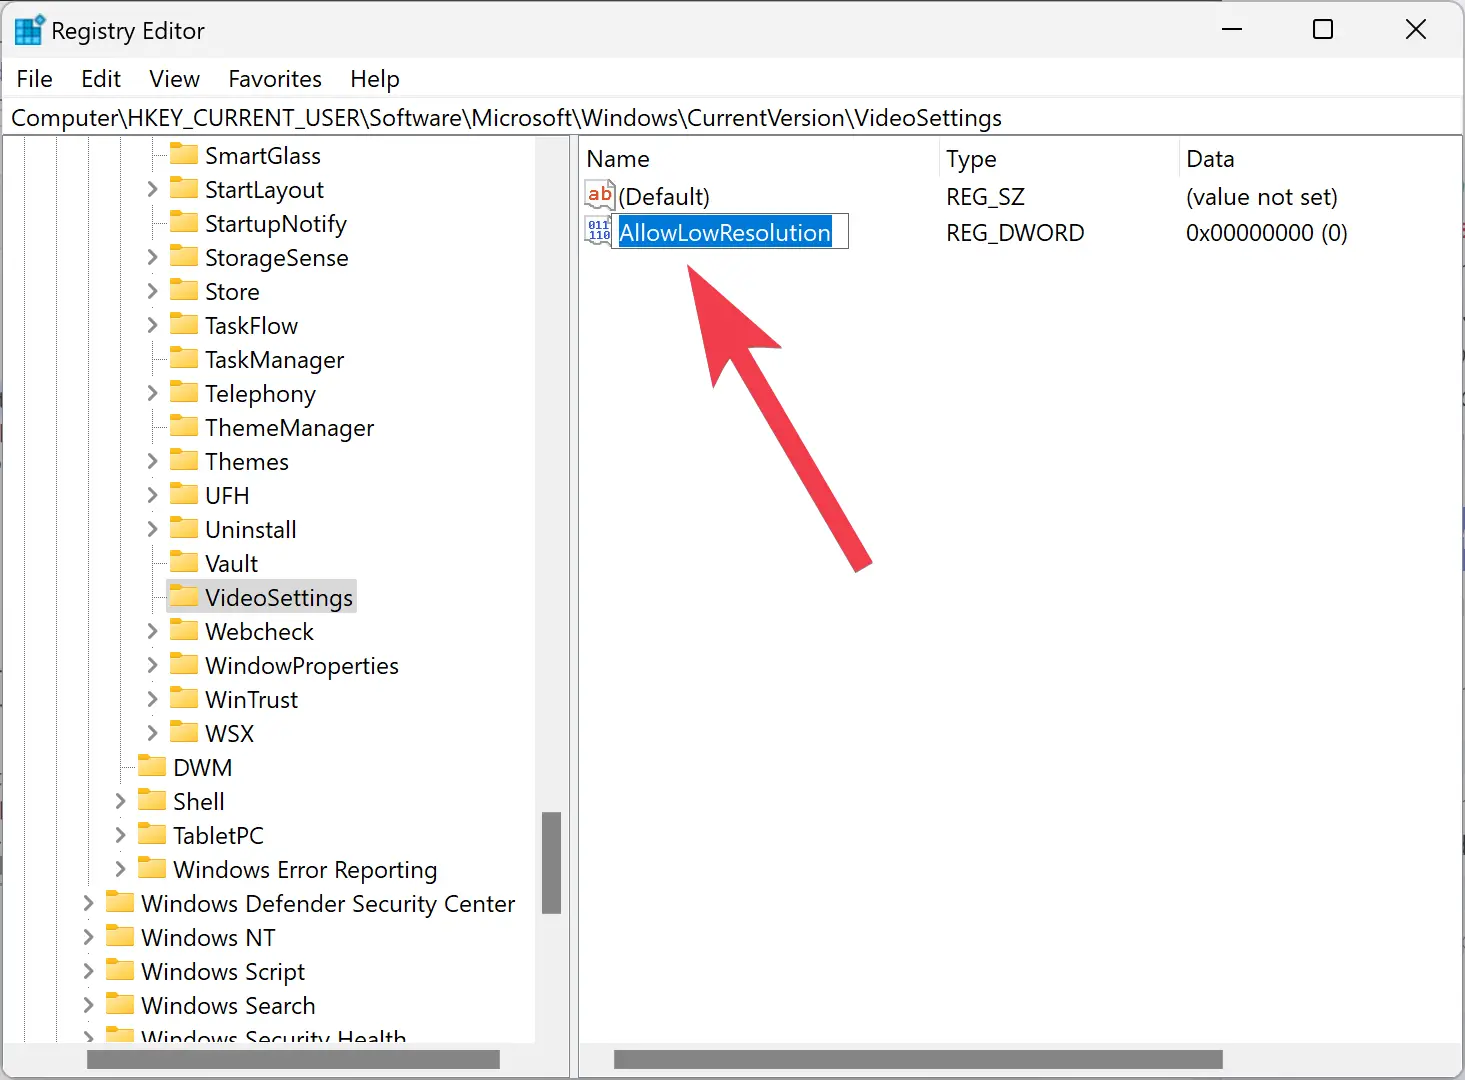
Step 4. Name the newly created REG_DWORD as AllowLowResolution.
Step 5. Now, double-click on the AllowLowResolution REG_DWORD and enter 1 in the Value data field.
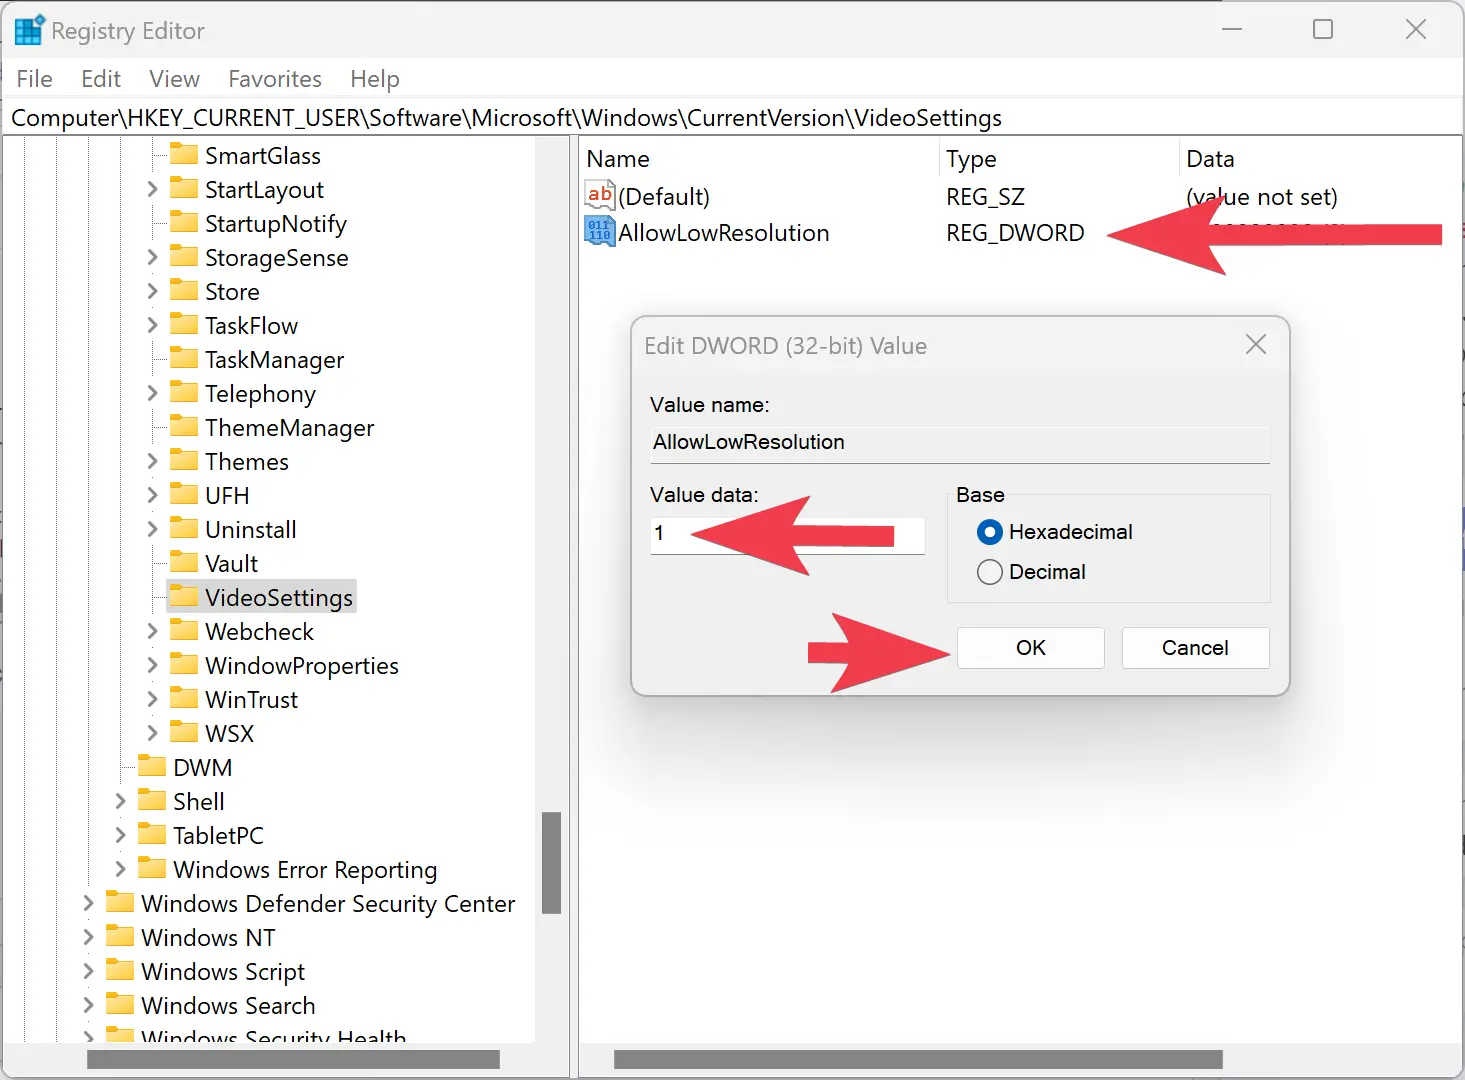
Step 6. Click OK.
Step 7. Finally, reboot your PC to apply the changes.
To revert the changes, open Registry Editor and navigate to the following path:-
Computer\HKEY_CURRENT_USER\Software\Microsoft\Windows\CurrentVersion\VideoSettings
On the right side of the VideoSettings folder, right-click on AllowLowResolution and select the Delete option. Click Yes to confirm.
Good luck.
Conclusion
In conclusion, Windows 11 offers built-in features that allow you to control video playback settings to enhance the video’s quality and save network bandwidth. This gearupwindows article has provided step-by-step instructions on how to turn On and Off the video playback settings to save network bandwidth by playing video at a lower resolution. By following these steps, you can easily change the playback settings to suit your needs and ensure that your videos play smoothly, even with a weak internet connection. Additionally, this article has also explained how to enable the network bandwidth saver feature on Windows 11 using Registry Editor. By implementing these changes, you can have a better video playback experience while also conserving network resources.