All Windows PCs come with a built-in audio device that is used by the system when required. A built-in audio device gives a sound output when you play audio or video or something related to sound. Some Windows users connect external speakers while playing audio or videos.
If you use multiple audio devices on your Windows 11 and want to switch between them (speakers, headphones, headsets, or other sound output devices), it’s easy to do. Using the Settings app, you can choose a speaker to play the audio or video.
In this gearupwindows article, we will guide you on selecting speakers for audio output on Windows 11.
How to Select an Audio Output Device in Windows 11 using the Settings app?
To choose an Audio Output device in Windows 11 using the Settings app, do the following:-
Step 1. Launch the Windows Settings app by pressing Windows + I keys from the keyboard.

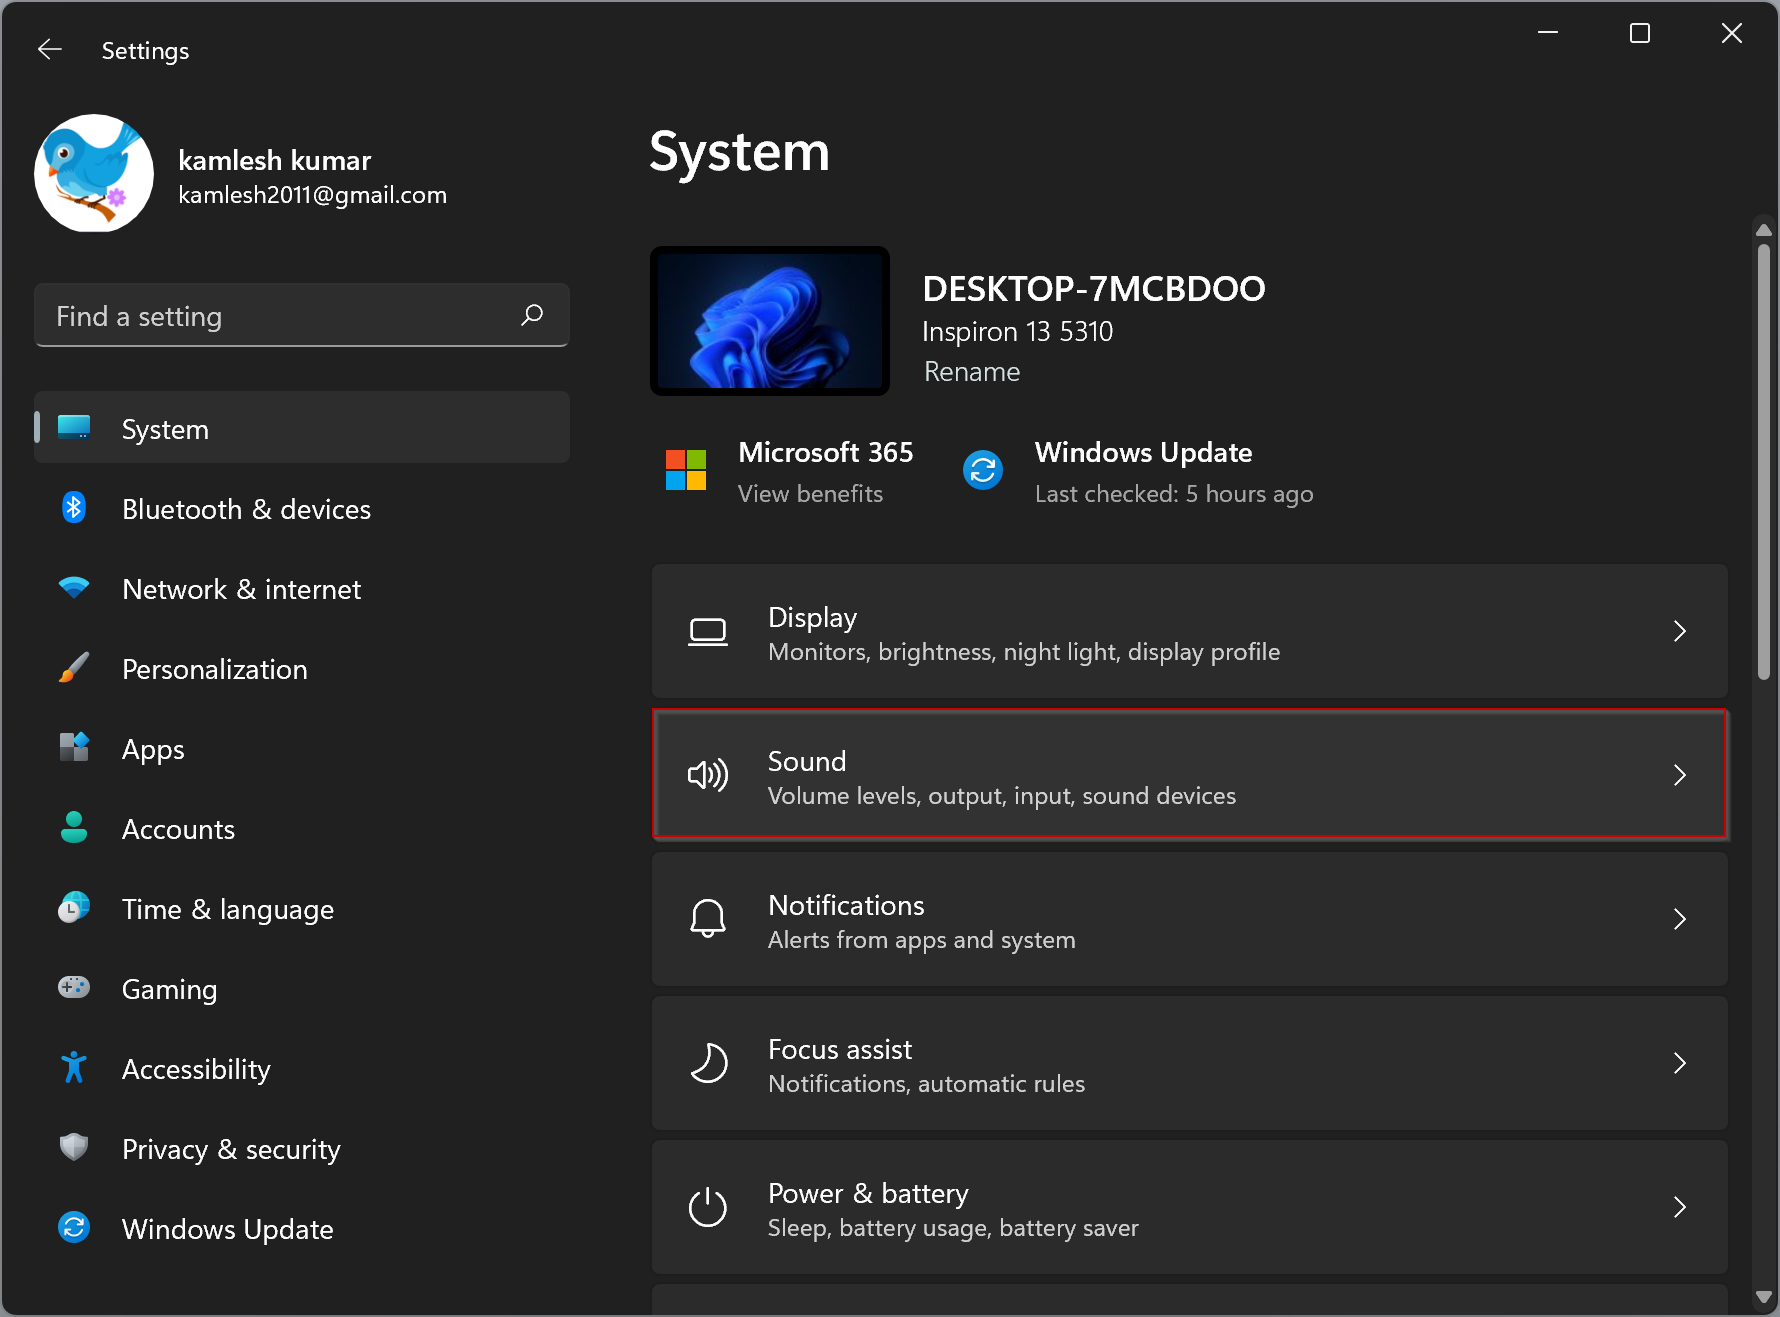
Step 2. Select the System category from the left sidebar when Windows Settings opens.
Step 3. On the right side pane of System, click the Sound tab.
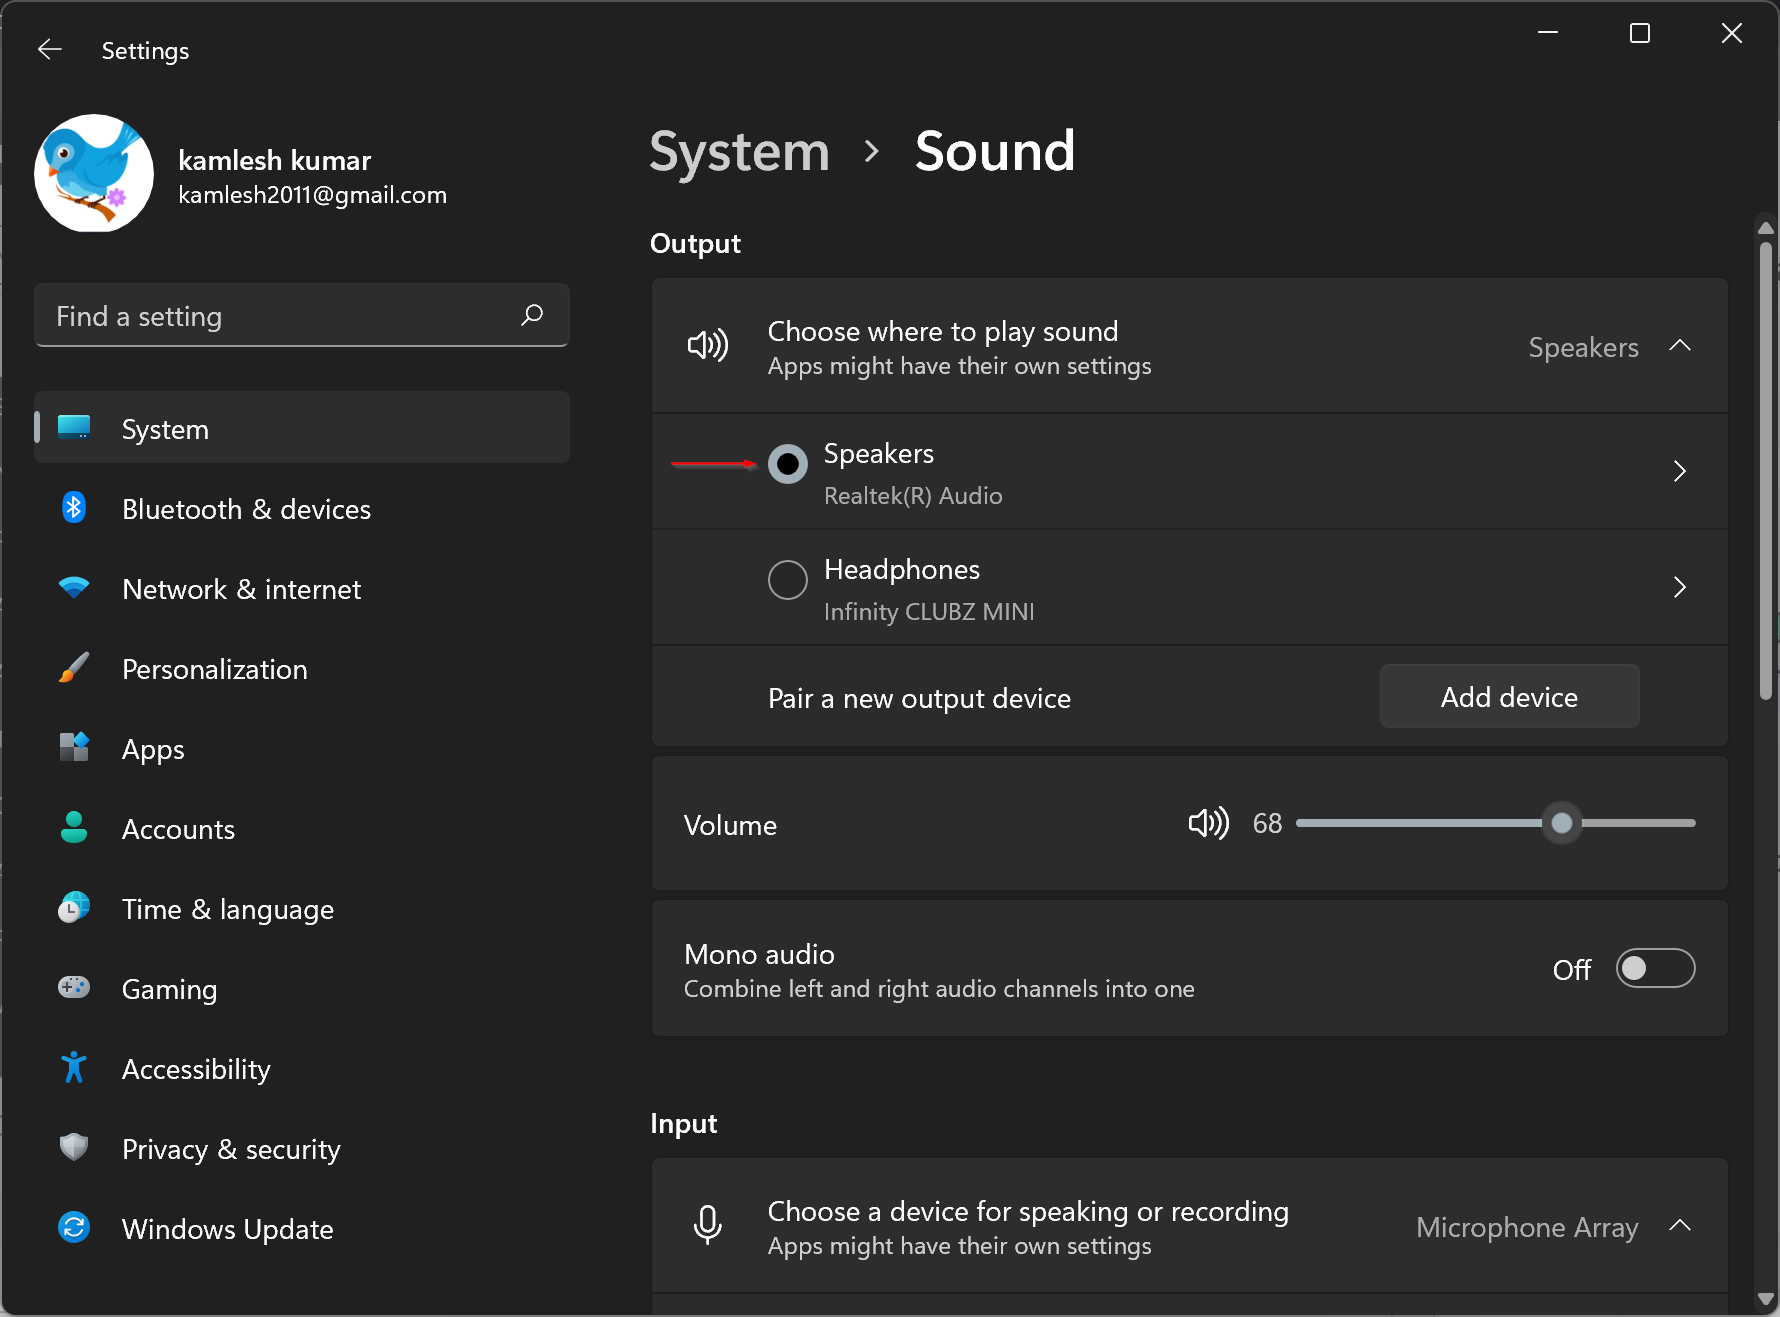
Step 4. Now, under the Output section, you will see a list of audio devices connected to your PC.

Step 5. Click on any device you want to use as your audio output.
That’s all. Now you can close the Settings page. The changes will be automatically saved.
How to Select a Sound Output Device in Windows 11 using Taskbar?
Follow these steps to pick a Sound Output device in Windows 11 using Taskbar:-
Step 1. Open the Quick Settings menu by pressing Windows + A keyboard shortcut on click on the Quick Settings area on the taskbar.
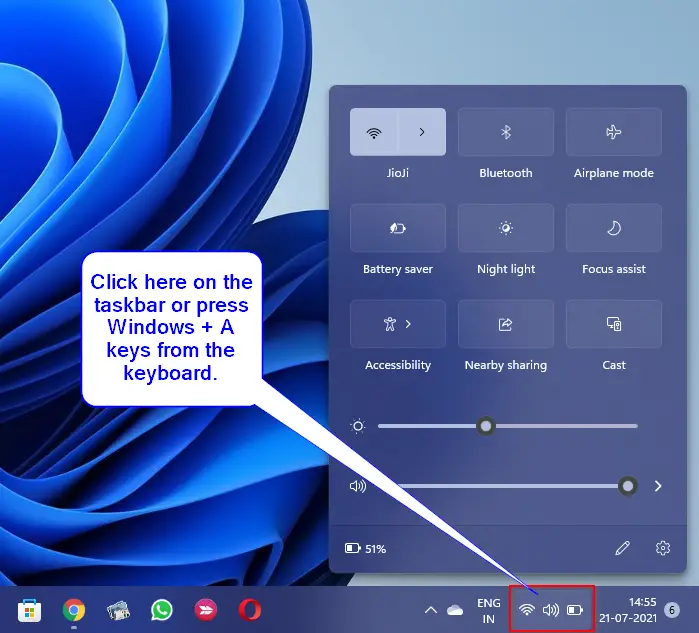
Step 2. When the Quick Settings menu opens, click the right-facing arrow (caret) beside the volume slider.
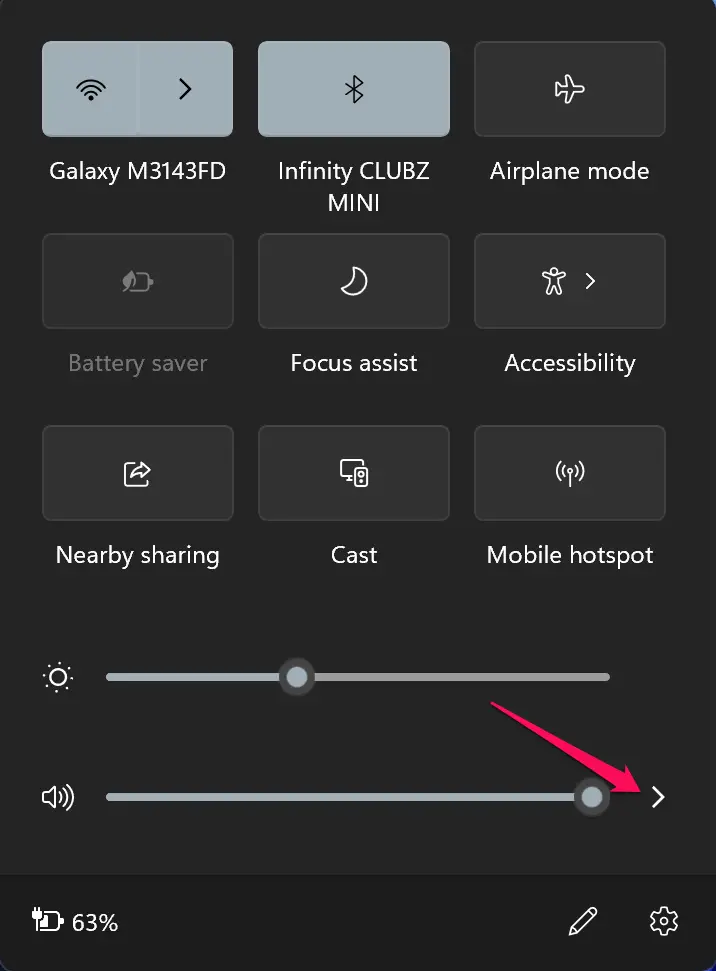
Step 3. Then, you will see a list of audio output devices connected to your computer. Click on any that you would like to use.
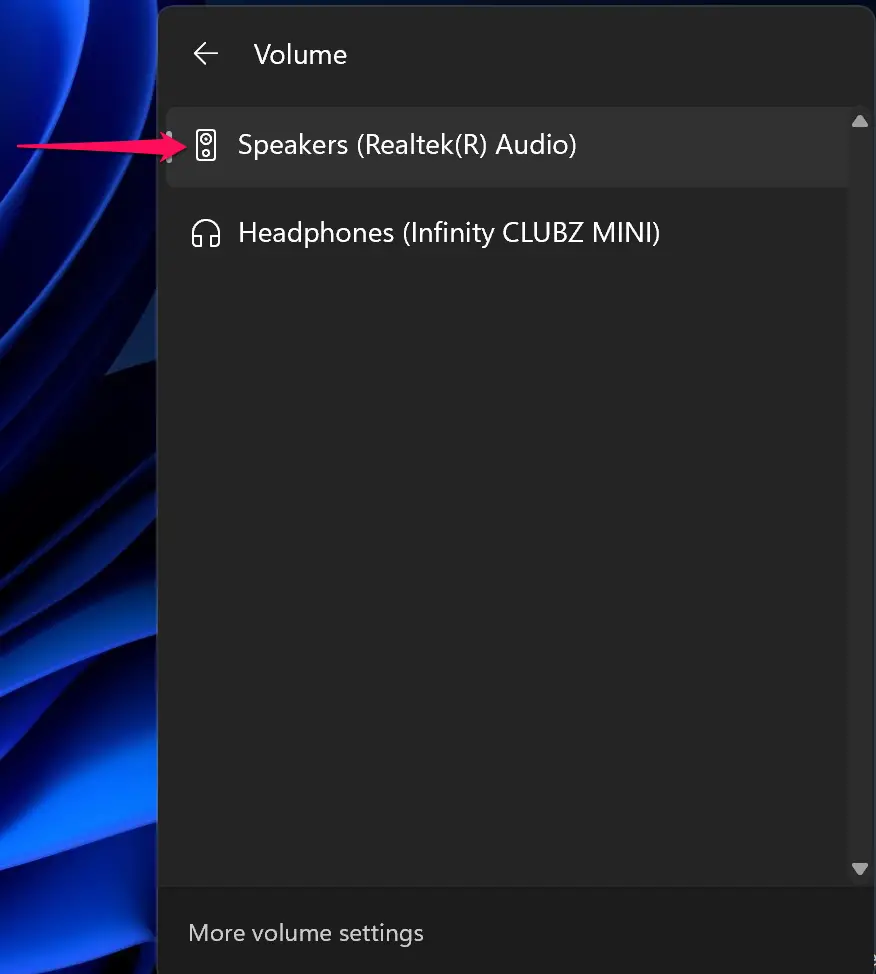
When done, click anywhere outside the Quick Settings menu to close this pop-up window.
How to Change the Default Audio Output Device from Sounds Applet?
To select the default audio output device using the Sounds applet, use the following steps:-
Step 1. First, open the Run dialog by pressing Windows + R keys on the keyboard.
Step 2. Then, type the following and hit the Enter key on the keyboard to open the classical Sounds applet:-
mmsys.cpl

Step 3. Switch to the Playback tab when the Sound window appears. Here, you’ll see all available audio playback devices. Select the desired output device from the list and click the Set Default button to switch between audio devices.
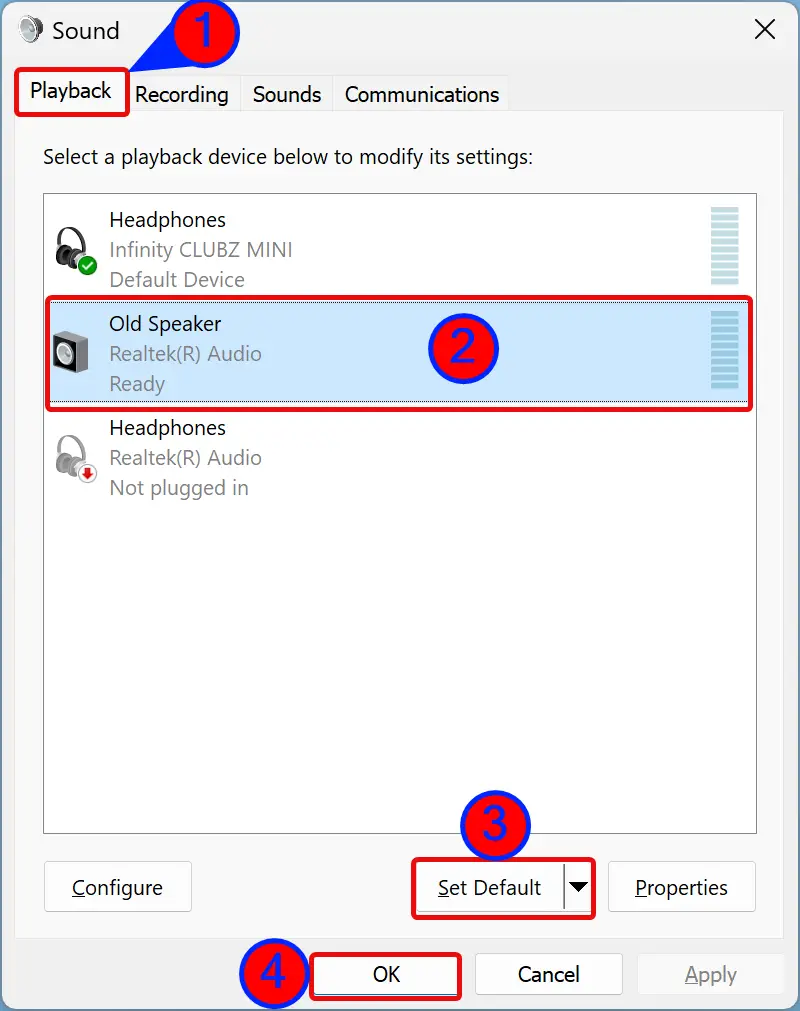
Step 4. Then, click OK.
Conclusion
In conclusion, Windows 11 provides multiple ways to select an audio output device. You can use the Settings app or Quick Settings menu on the taskbar to switch between different audio devices. Additionally, you can also change the default audio output device from the Sounds applet. These steps are easy to follow and can help you ensure that you get the best audio experience on your Windows 11 PC.
ok, but how do you output the audio to multiple devices?
2022 knocking on doors and they still haven’t figured this bit out