Google Chrome is a popular web browser that is known for its fast browsing speed and user-friendly interface. Over time, your browsing experience can become slow due to the accumulation of cached data, which can include images, videos, and website data. Clearing your cache can help to free up storage space on your computer, speed up your browsing experience, and ensure that you are seeing the most up-to-date version of websites you visit. In this guide, we will explain how to clear the cache on Google Chrome so that you can keep your browser running smoothly.
Clearing cache on Google Chrome is a simple process that can be done in just a few steps. Whether you are experiencing slow browsing speeds or just want to free up space on your computer, clearing your cache can help. In this guide, we will walk you through the steps to clear the cache on Google Chrome on Windows 11 and 10. So let’s get started!
How to Clear Cache on Google Chrome?
Here are the steps to clear the cache on the Google Chrome browser:-
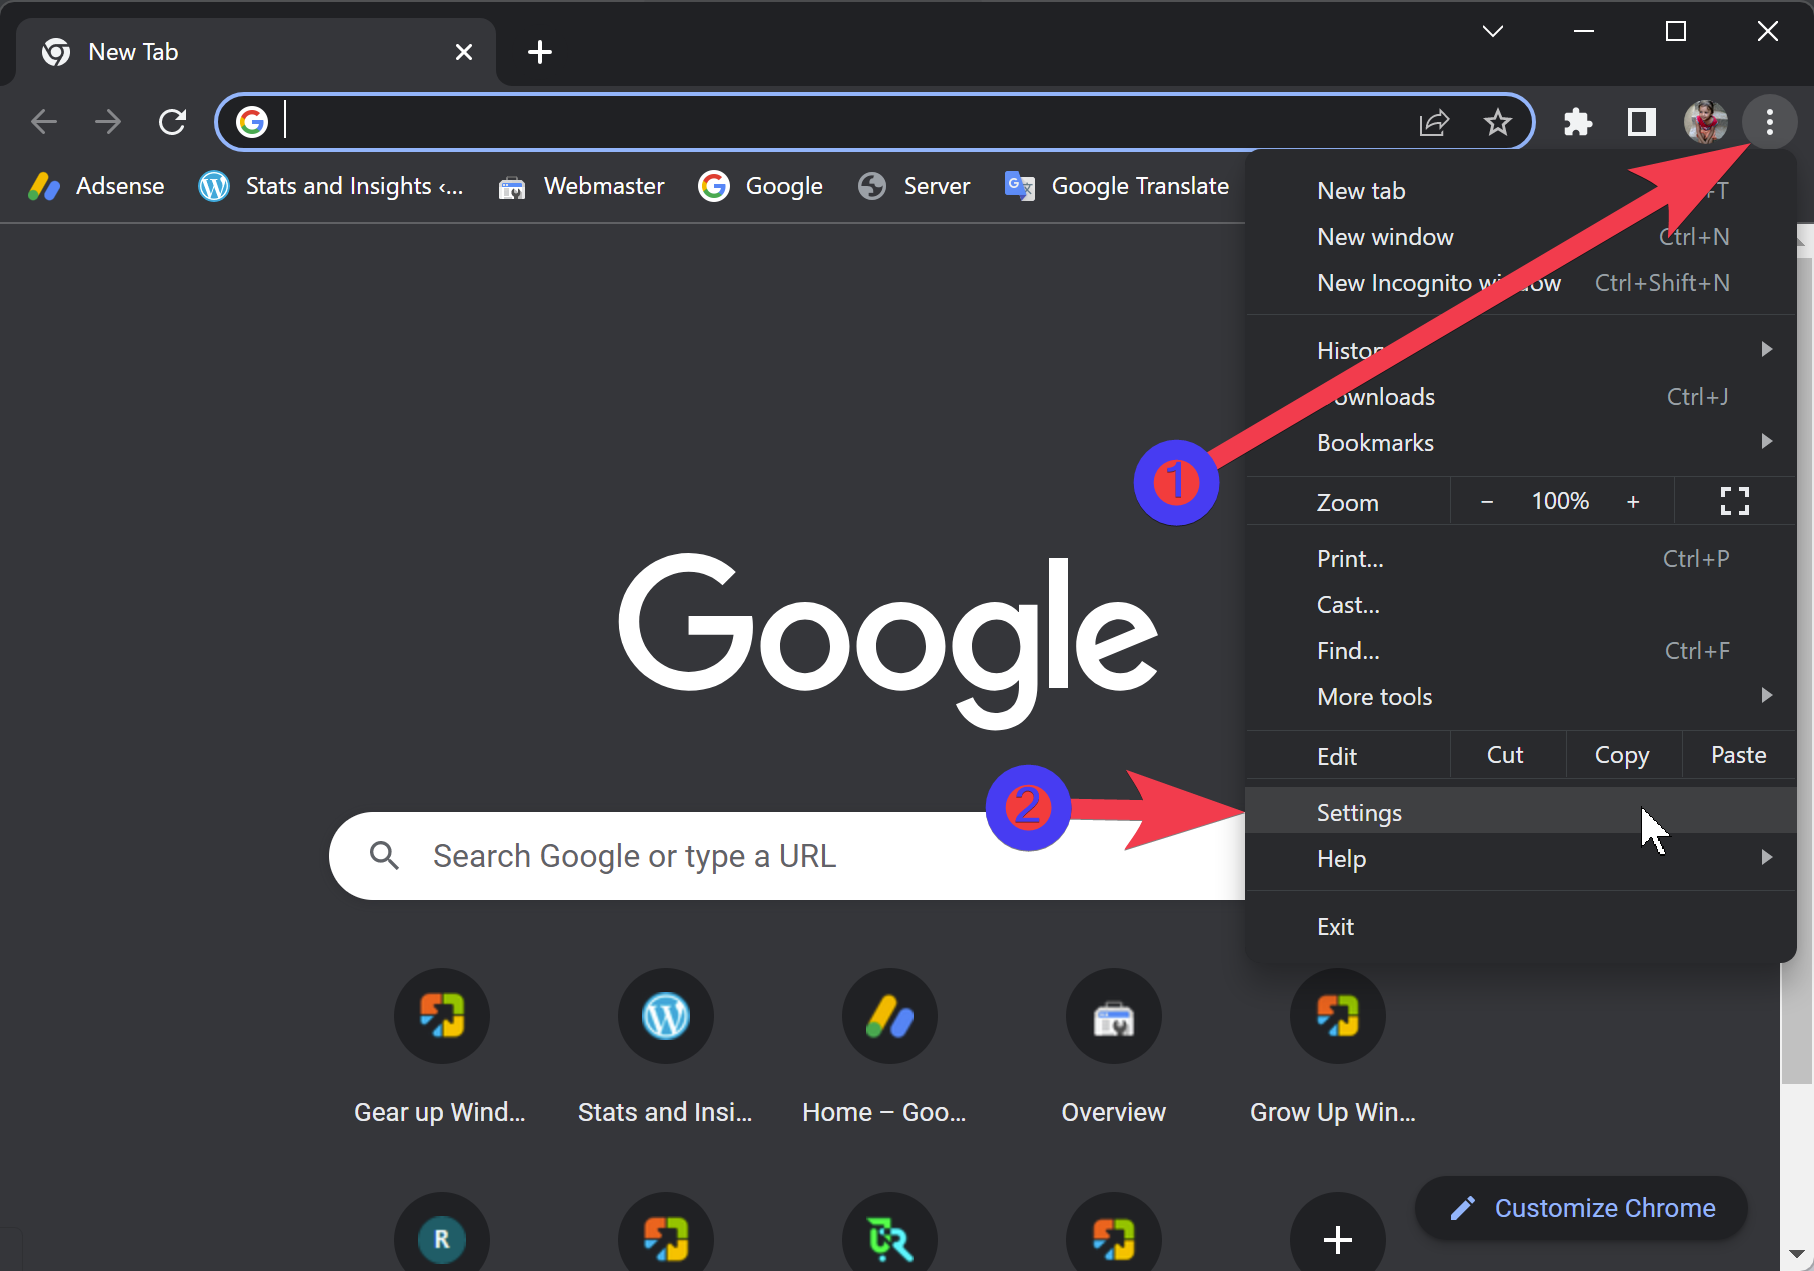
Step 1. First, launch Google Chrome on your PC.
Step 2. Next, click on the three dots icon in the top right corner of the browser window and select “Settings” from the drop-down menu.
Step 3. Now, scroll down to the bottom of the Settings page and click on the “Privacy and security” option.
Step 4. Here, under the “Privacy and security” section, click the “Clear browsing data” button.
Step 5. Now, use the “Time range” dropdown menu to select the time range you want to clear the cache. You can choose to clear the cache for the past hour, day, week, month, or all time.
Step 6. After selecting the time range, click the “Clear data” button to clear the cache.
Now, wait for the process to complete. Depending on the data being cleared, it may take a few minutes.
That’s it! You have successfully cleared the cache on Google Chrome.
Note: Clearing the cache may log you out of some websites and delete any saved login information.