If you’re planning to reinstall Windows 10 on your Dell computer due to problems like a hard disk drive (HDD) or solid-state drive (SSD) replacement, startup issues, or any other reason, it’s essential to prepare a Dell USB recovery media for Windows 10. Fortunately, Dell provides a tool to help you create the Dell Windows 10 USB recovery media.
Previously, Dell offered a service that allowed users to download a Windows 10 recovery ISO for Dell computers by entering the service tag of their computer. However, this service tag option has been removed from its webpage and is now included in the Dell OS Recovery Tool.
The best part of this software is that it can be installed on any Windows PC. Once installed, you can create a Dell Recovery USB drive with drivers and software for your Dell PC using a service tag. This process ensures that your Dell computer has all the necessary drivers and software for optimal performance after the reinstallation of Windows 10.
Dell OS Recovery Tool is beneficial for those who own a preinstalled Windows 10 Dell computer and want to reinstall Windows 10 OS due to any reason. One can also create a bootable USB flash drive of Windows 10 using the Media Creation Tool, but it will not include your Dell machine’s necessary drivers and software. So, if you want a personalized copy of Dell Windows 10, better prepare your own Dell Windows 10 recovery media and reinstall Windows 10 using it.
How to prepare a Dell Windows 10 USB recovery media?
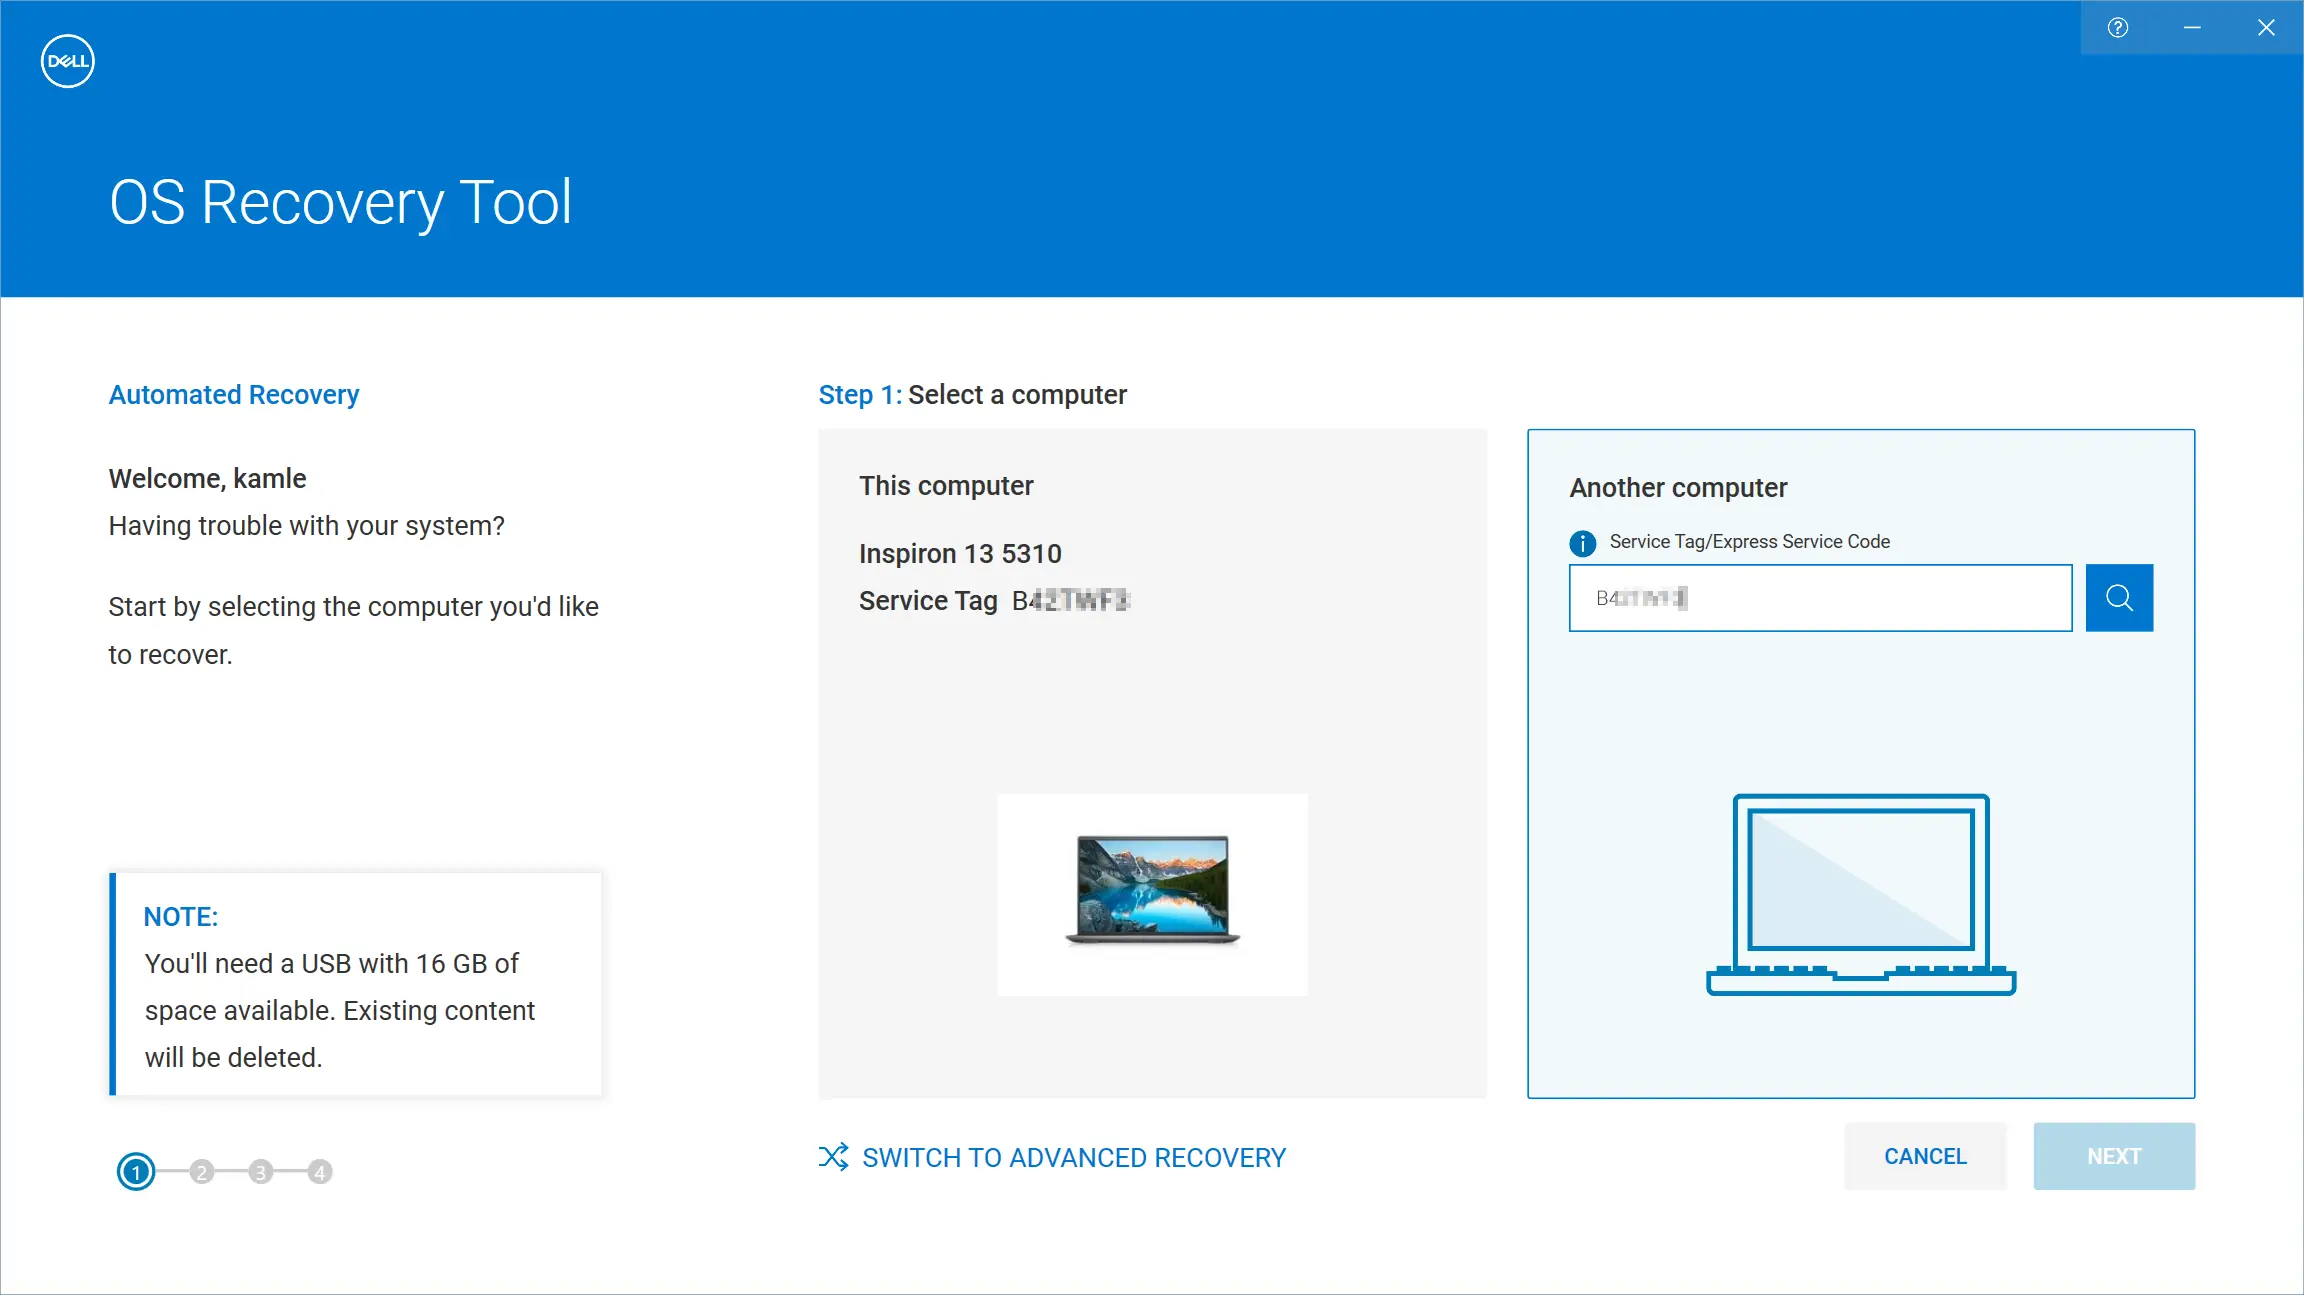
Note: You need at least a 16GB capacity USB flash drive to create a personalized copy of Dell Windows 10 OS.
Step 1. Download and install the Dell OS Recovery Tool from its official webpage and install it on your computer.
Step 2. Connect a USB flash drive with at least 16GB storage capacity.
Note: During the Dell Recovery USB Drive creation for Windows 10, all stored data will be erased from your USB flash drive. Hence, before further steps, copy all data from your USB drive to any hard disk.
Step 3. Now, open the Dell OS Recovery Tool and type the Dell computer’s service tag where you want to reinstall Windows 10.
Note: If you have installed the OS Recovery Tool on the same Dell PC where you want to reinstall Windows 10, it would automatically detect your PC and enter the service tag.
Step 4. After entering the Dell service tag, you will now see an option to select the operating system. Select the operating system and click the Download link next to the Windows 10 entry to download the Windows 10 installation files. It may take several hours to complete downloading Windows 10 with your Dell machine drivers and software.
Step 5. Once the required installation files are downloaded, select your USB drive and then click the Burn OS button.
Step 6. Finally, click the Yes button when you get a warning message to format the connected USB drive and prepare the Dell Windows 10 USB recovery media.
Once the copying of files is completed in a USB flash drive, you can now use the Dell Windows 10 USB recovery media to reinstall Windows 10 on your Dell computer.
Since this recovery media is created for a specific Dell computer, you can not use it on other OEM computers.
Download Dell OS Recovery Tool
You can download the Dell OS Recovery Tool from the official website.
support download