A guest account is valuable if you want to share your computer with someone to have their own space and access their personal stuff. This gearupwindows article will show you how to create a guest account in Windows 11.
On Windows 8 and 7, it was easy to create a dedicated guest account. These accounts had limited access to your computer. For example, guest accounts couldn’t install software or change system settings.
Unfortunately, it’s not as easy as it once was to create a guest account in Windows. However, we will show you two methods to create a Guest account on your Windows 11 PC to make the process easy. You can use either that you would like to use.
Starting Windows 10, Microsoft has hidden the guest account feature. But Microsoft still reserves the “Guest” name for guest accounts, but it’s impossible to create the same type of guest accounts that was available before Windows 10. That means you can not access an inbuilt guest account; instead, you’ll need to create a local account that doesn’t require a password. However, the limitation for this guest will not be the same as you had seen in Windows 8/7. That means they can install software and adjust settings, but it won’t affect your profile.
How to Set Up a Guest Account Using Windows 11 Settings?
To make a guest account through Windows 11 Settings, use the following steps:-
Step 1. First, open the Settings app using Windows + I keys on the keyboard.
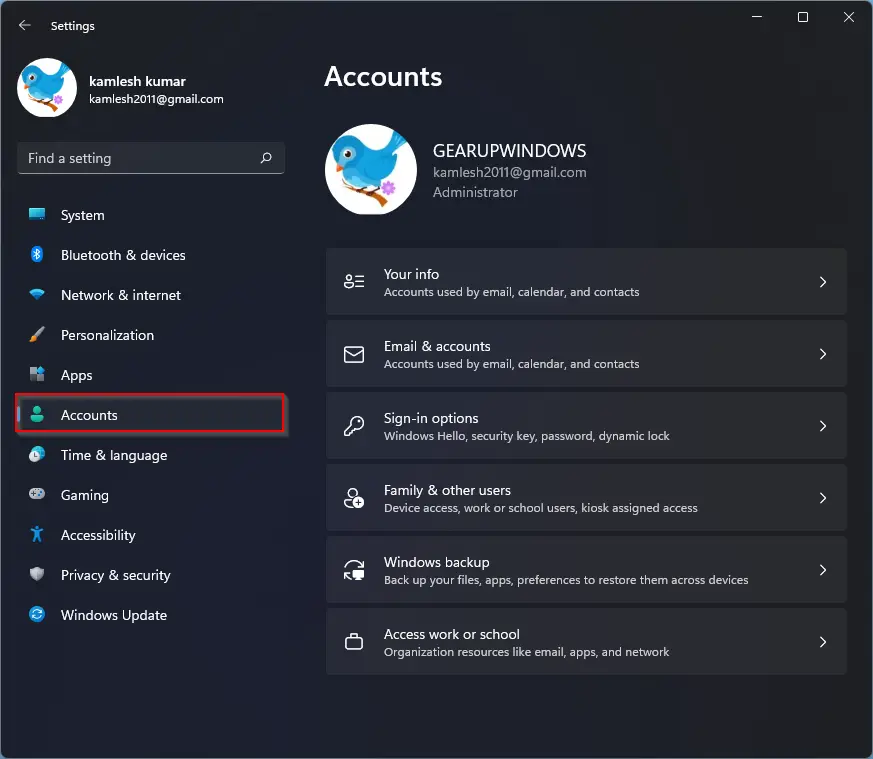
Step 2. Then, select the Account category in the left side pane of the Settings window.
Step 3. After that, click the Family & other users tile on the right pane of your screen.
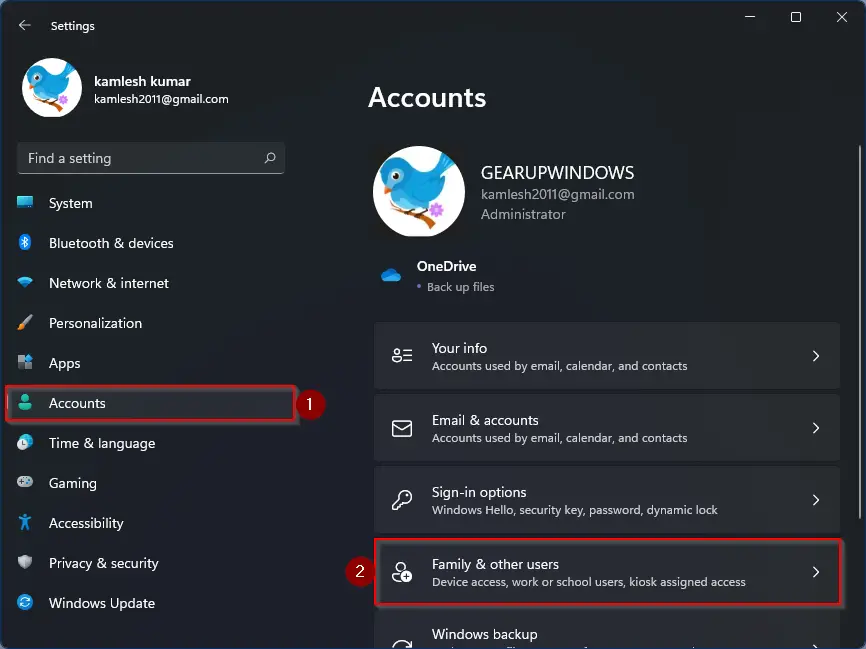
Step 4. When the Family & other users settings page opens, under the “Other Users” section, click the button Add account beside the “Add other user” option.

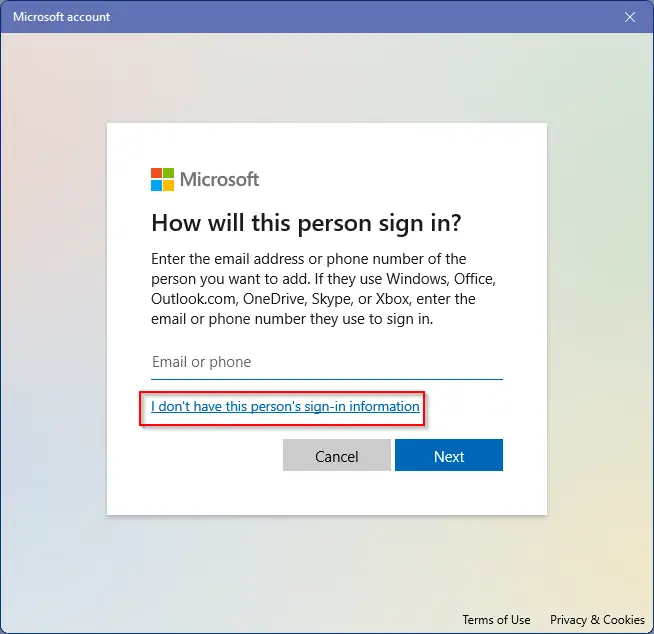
Step 5. Once done, a pop-up window will appear on your computer asking you, “How will this person sign in?” Click the “I don’t have this person’s sign-in information” link on the Microsoft account sign-in screen.
Step 6. On the following window, click the link “Add a user without a Microsoft account.”

Step 7. After that, enter the name of the guest account. You can’t make an account as a “Guest,” but anything else will work. Leave the password fields blank and hit the Next button.
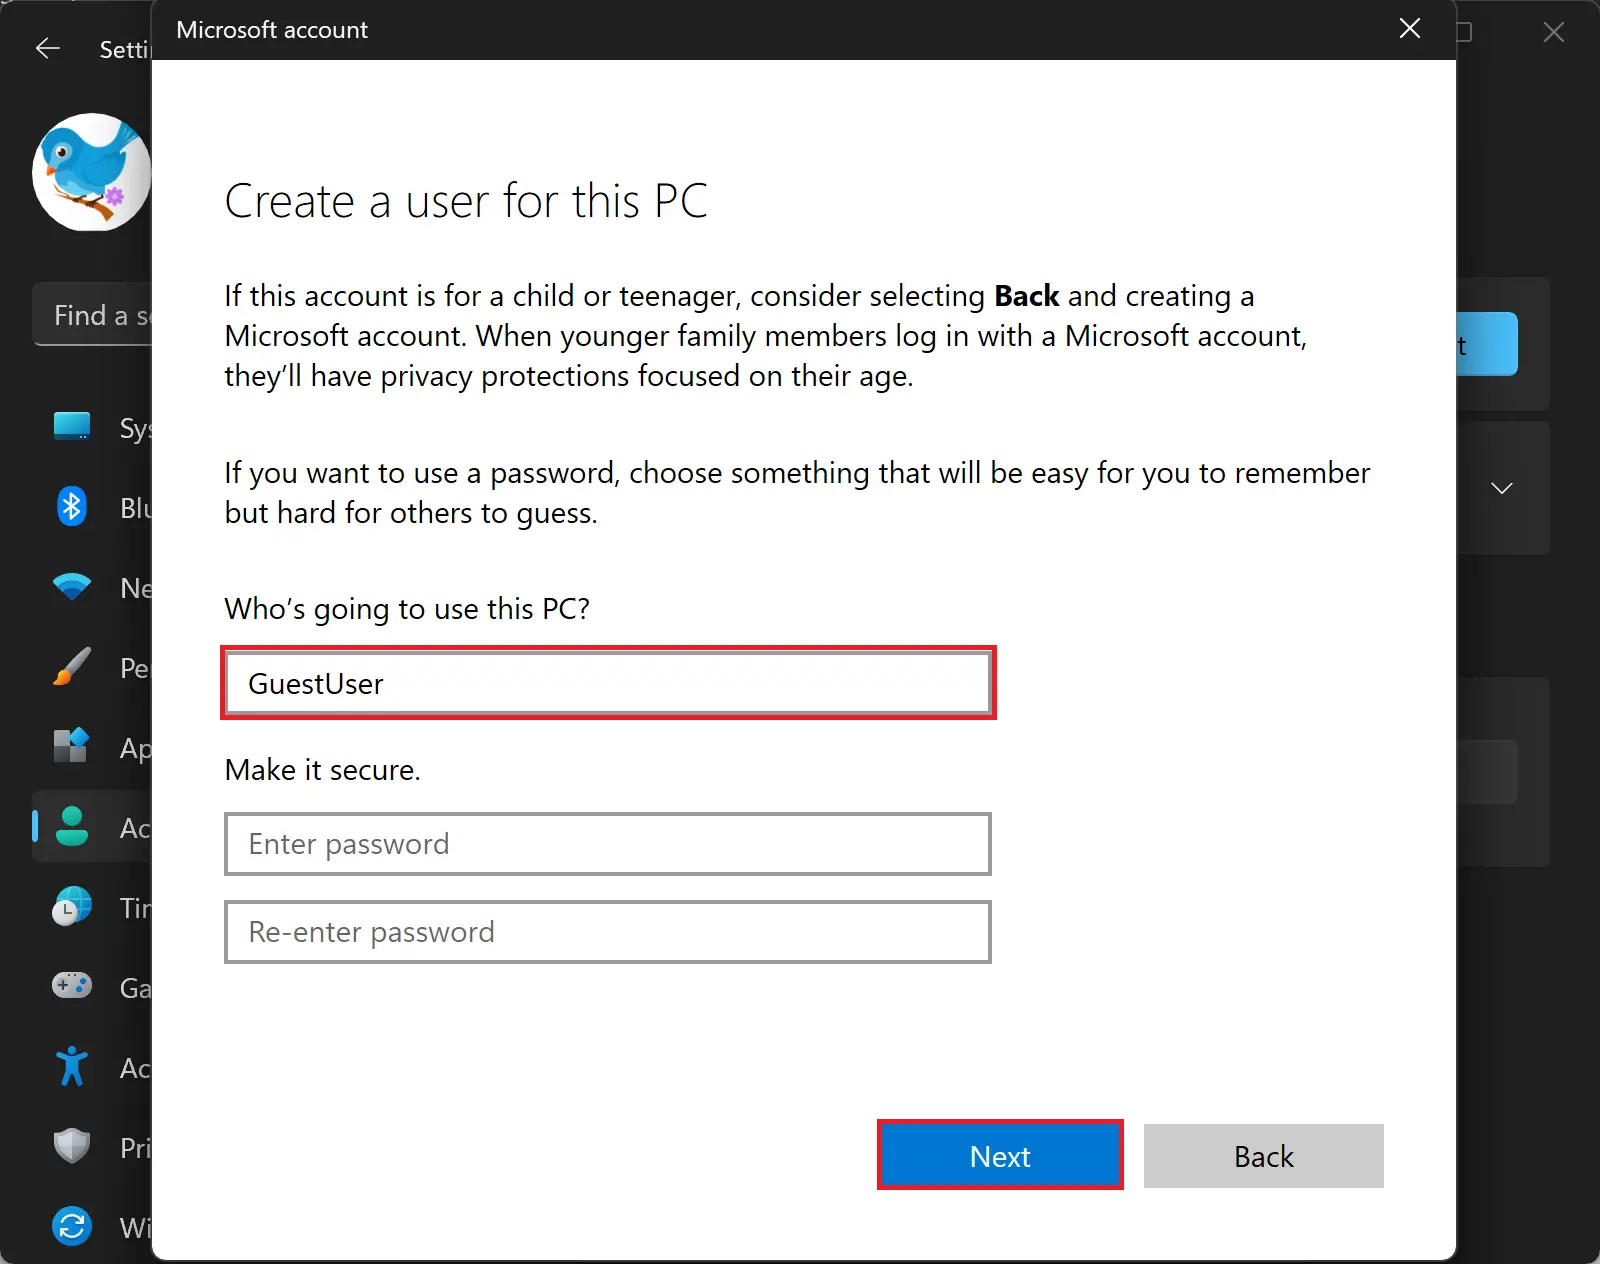
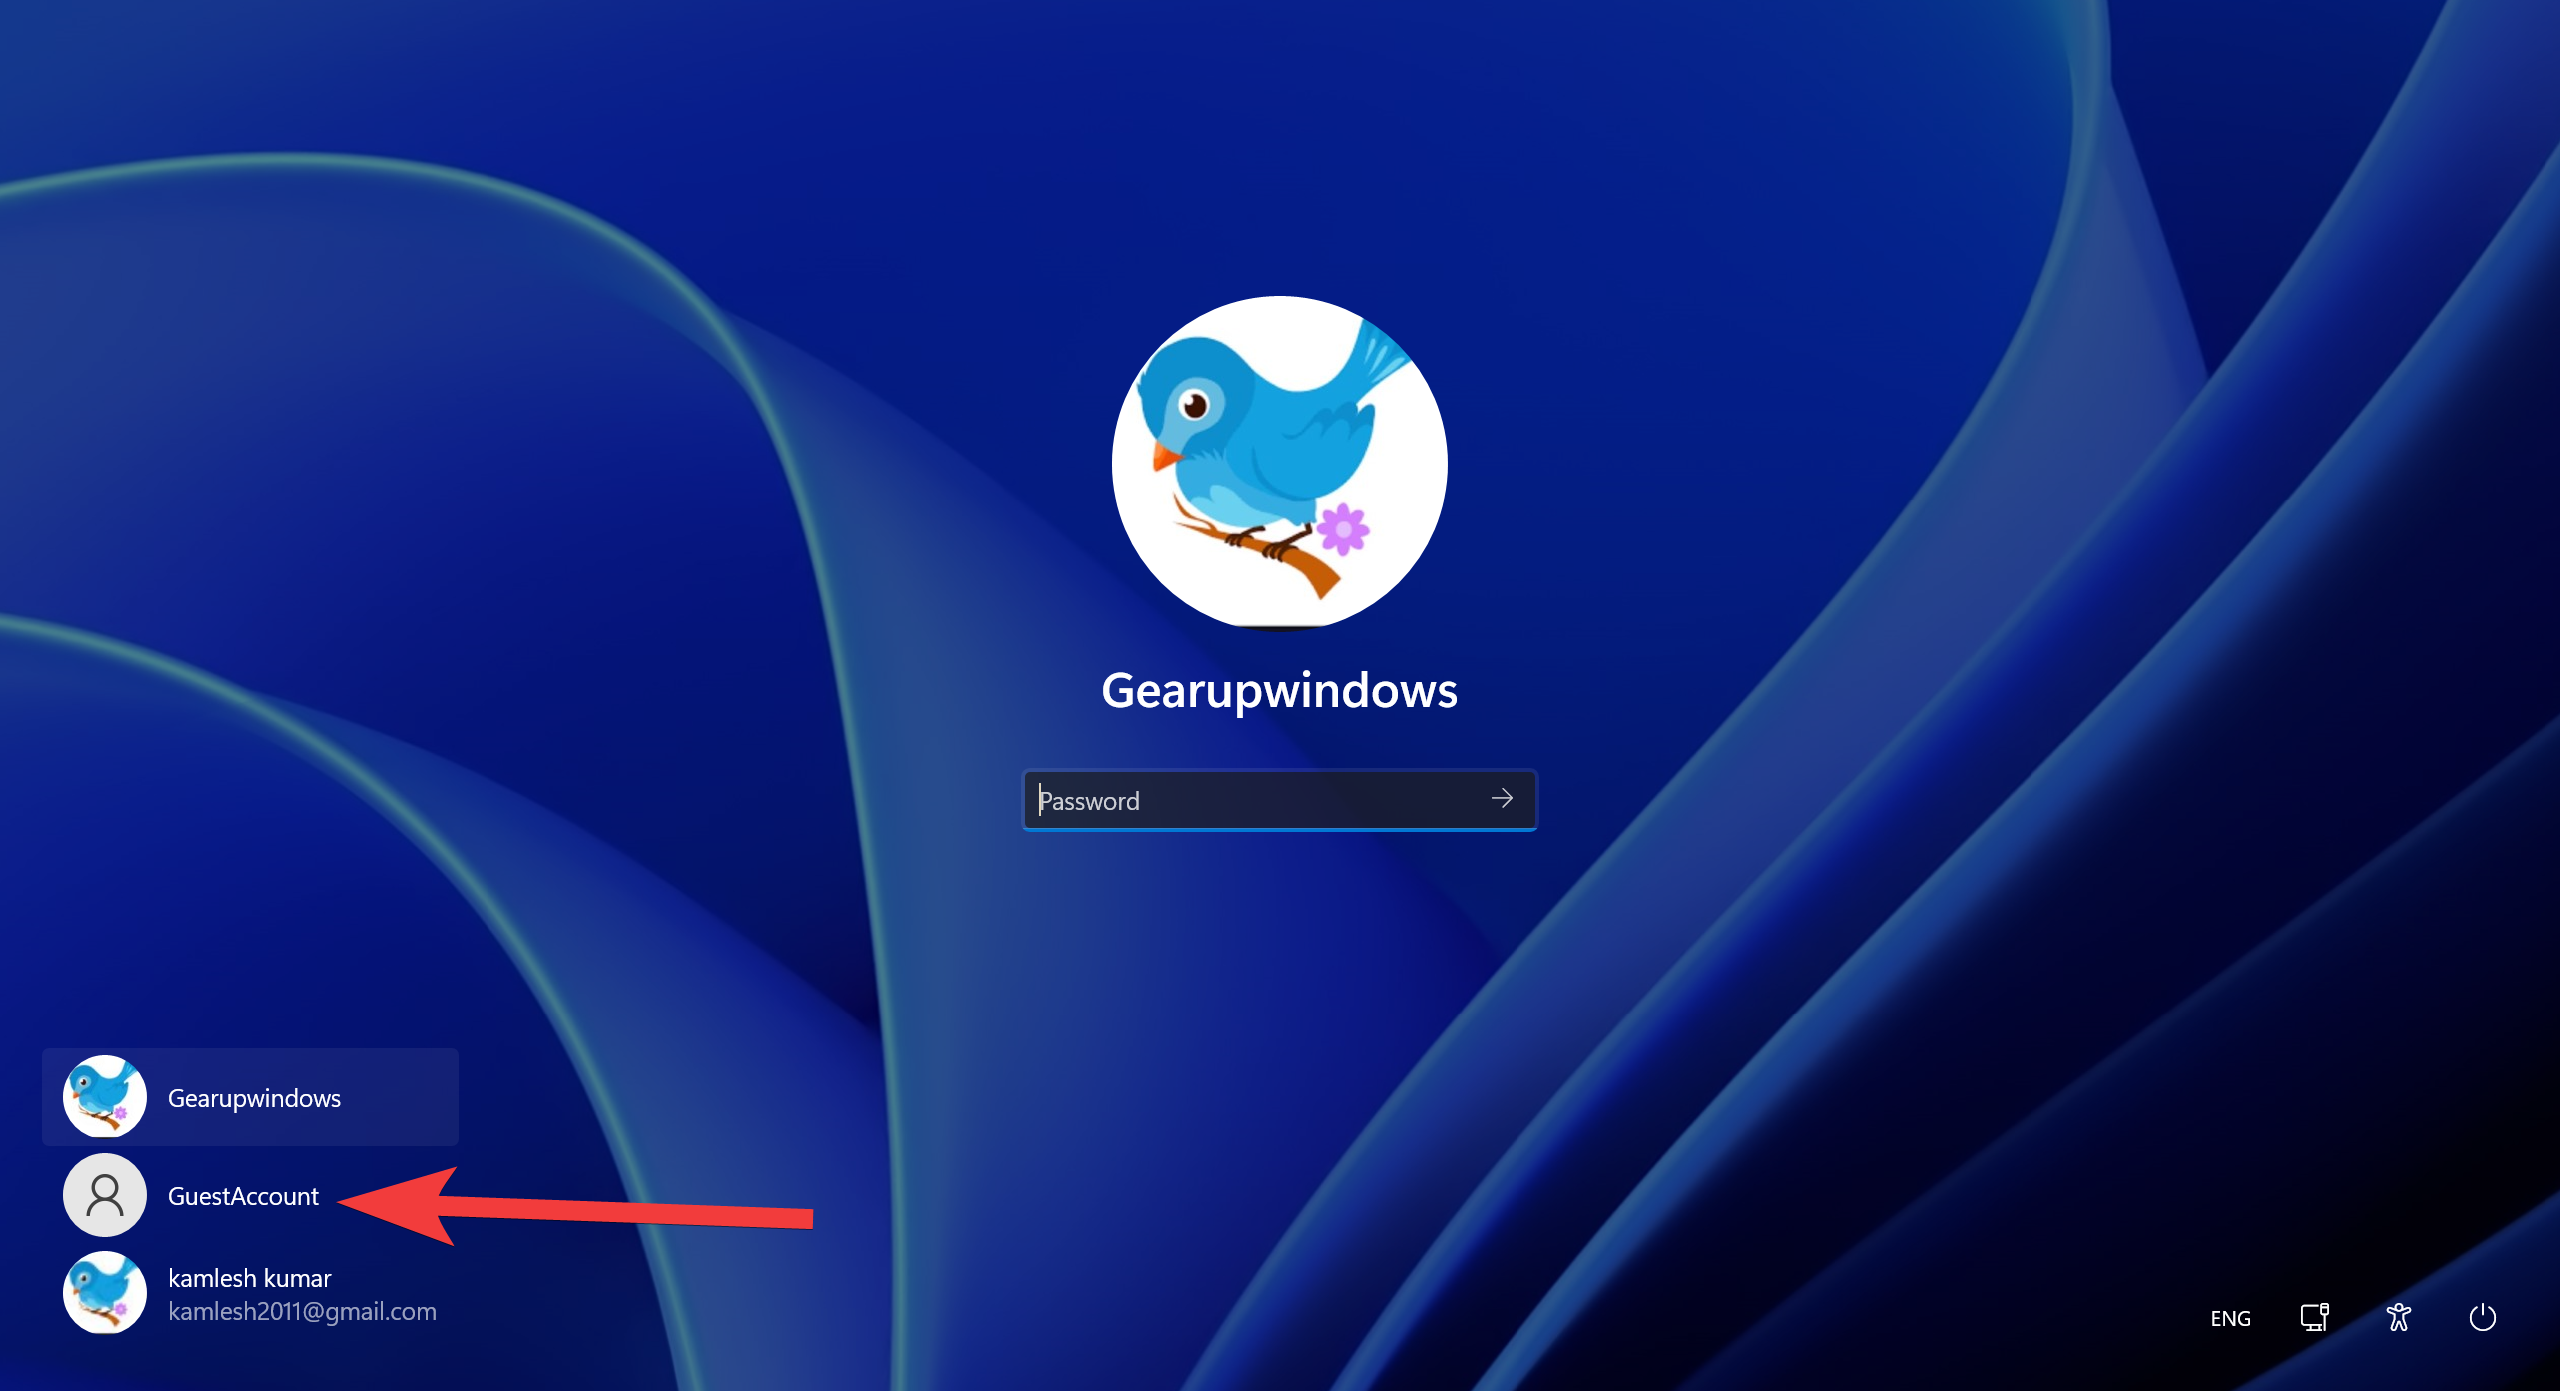
Step 8. That’s it! The account will now appear along with the other accounts on the sign-in screen that won’t require a password.
How to Make a Guest Account in Windows 11 through Command Prompt?
If you prefer to use Command Prompt for most of the tasks on a Windows 11 PC, do the following:-
Step 1. First, open the Command Prompt as administrator.
Step 2. On the prompt, type the following and hit Enter key on the keyboard to add a guest account on your Windows 11 PC:-
net user ForGuest /add /active:yes
Note: You can change “ForGuest” with any other word you want to set for a guest account in the above command.
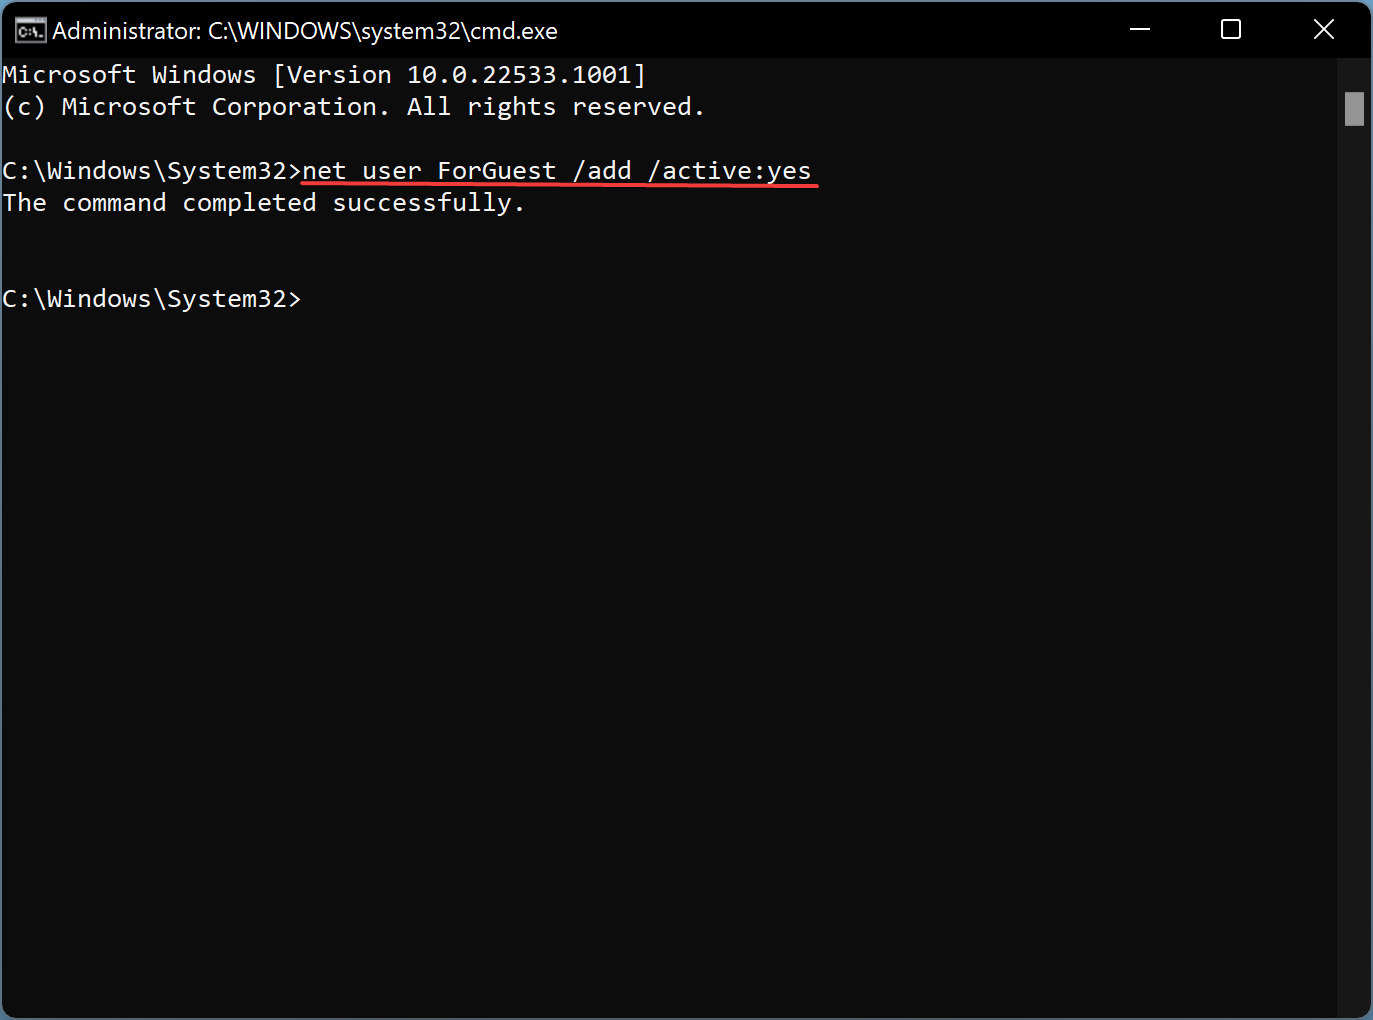
That’s it! You will see a message, “The command completed successfully.” You can view all user accounts under your computer by navigating to Settings > Accounts > Family & other users > Other users.
Good luck.
Conclusion
In conclusion, while creating a guest account in Windows 11 is not as straightforward as it was in earlier versions, it is still possible to do so using the methods outlined in this gearupwindows article. By creating a guest account, you can allow someone to use your computer without compromising your personal data or system settings. Whether you prefer using Windows 11 Settings or the Command Prompt, both methods are simple and easy to follow. So, if you need to create a guest account on your Windows 11 PC, simply follow the steps mentioned above, and you’ll be good to go.
Thanks, but these posts look like you’re copying and pasting from other websites? Paragraphs are not aligning.
Of course, some ideas we take from the internet and then do practical, and after that, I post it. We will take more care to align the paragraphs.
Thanks.