A picture can say thousands of words, but a word cannot. That’s why word clouds are so critical in PowerPoint.
An image outline that contains different words can be called a word cloud. You can use a word cloud to build a strong image on a PowerPoint slide by using different fonts, sizes, colors, and shapes. To make your most important message stand out, make important words bold and large.
If you want an exceptional presentation that stands out among the regular PowerPoint slides, a PowerPoint word cloud is the solution. Your audience will be intrigued by the words hidden within a word cloud if you use them in PowerPoint.
It is important to convey important information in an intelligent way by using bold, colorful, and larger words to ensure listeners’ full attention. A PowerPoint word cloud is a powerful way to combine graphics and words. You can use them as images in your presentation to make it outstanding.
I’ll show you how to include it in a PowerPoint slide in this gearupwindows article.
How to Create a Word Cloud with Word Art?
This is the fastest method to insert a Word Cloud in Microsoft PowerPoint. In this method, we will use a free online tool WordArt, and then that will use in PowerPoint slides. Here are the steps:-
Step 1. Create a PowerPoint presentation where you want to introduce the word cloud and navigate to the slide where you want to place it.
Step 2. Now open your browser and type https://wordart.com/ in the address bar, and hit Enter on your keyboard.
Step 3. When the Word Art website opens on your browser, click on the CREATE button.

Step 4. When you’re done, a new tab will open with tools and data on it.
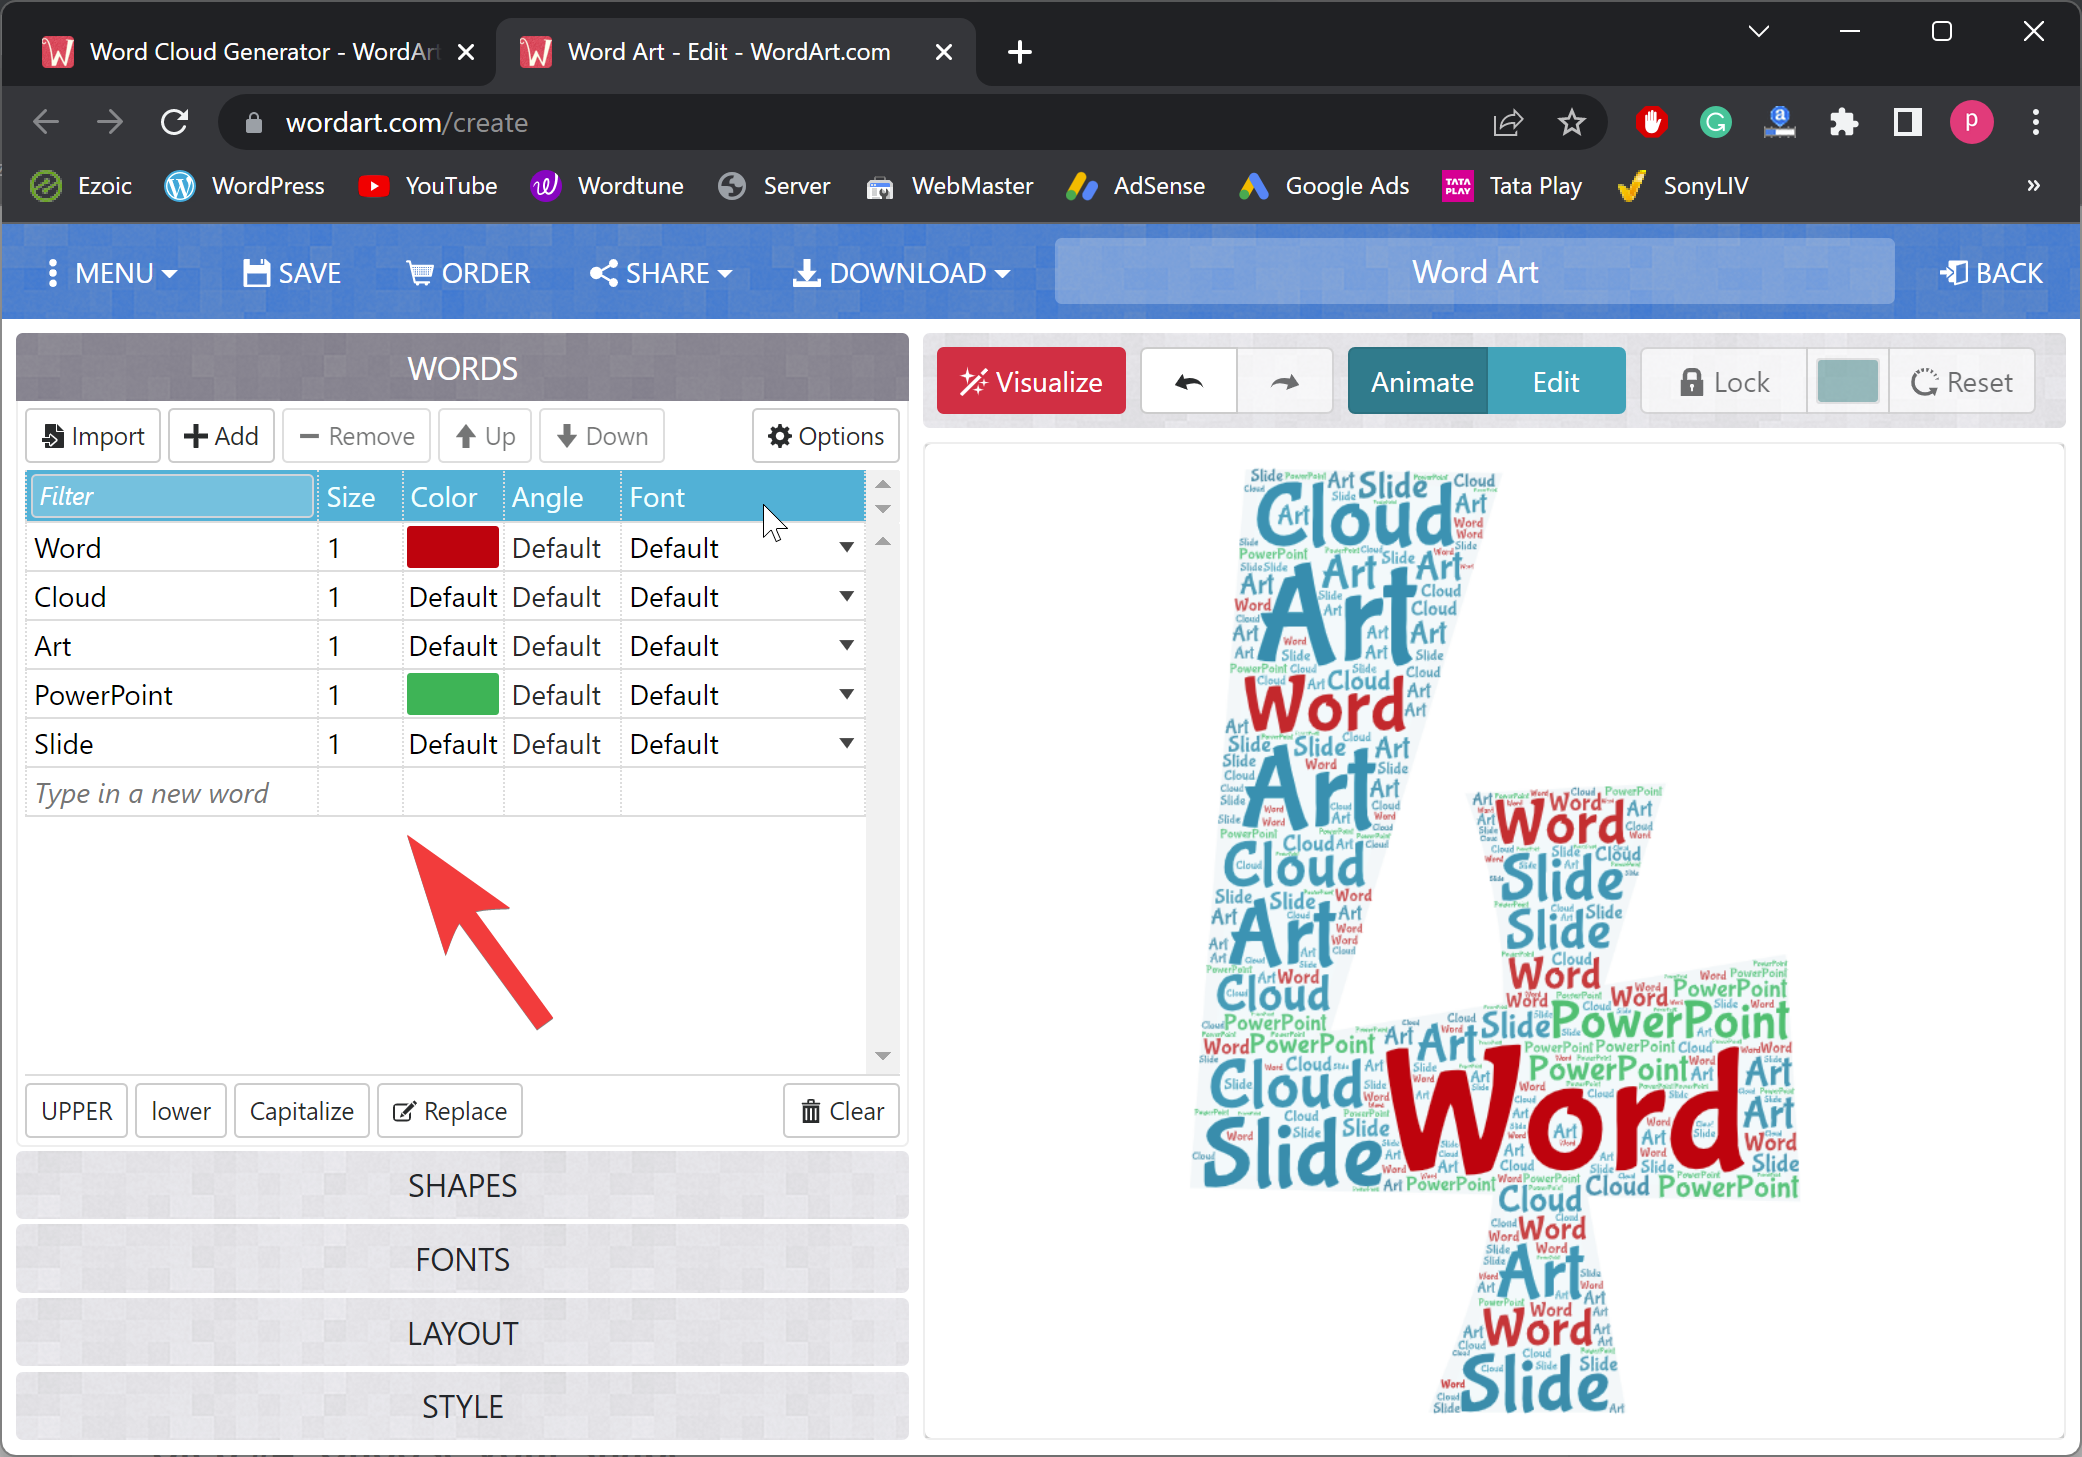
Step 5. Under the Words header, enter the words or sentences you want to see in Word Cloud. If you want, here you can change the size of the word, color, angle, font, etc.
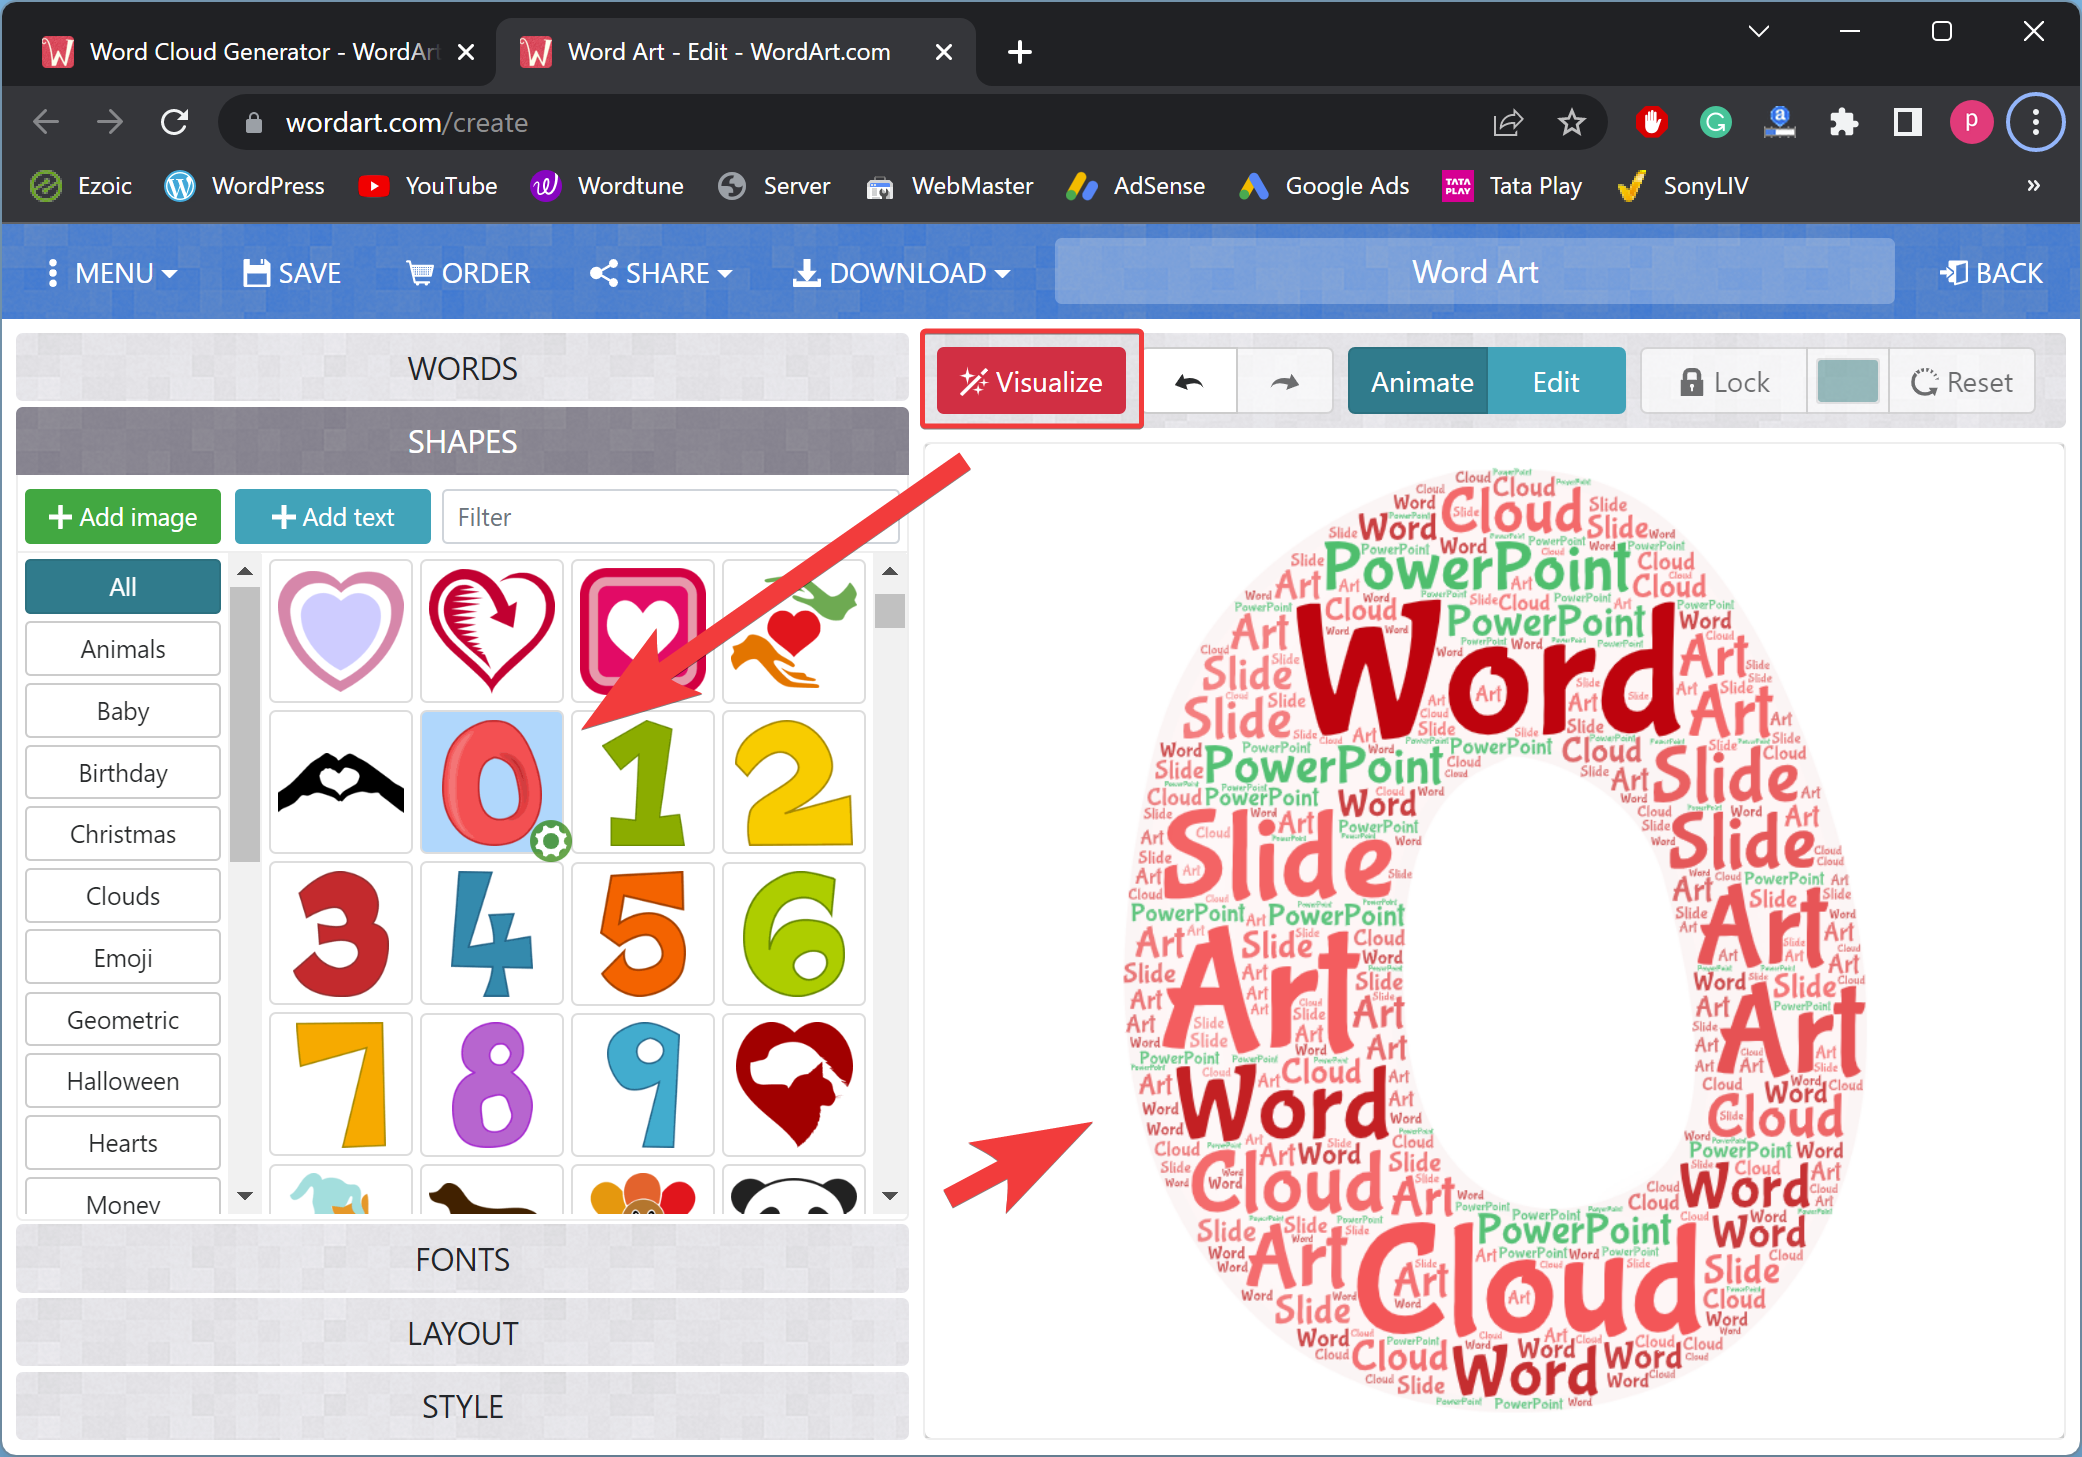
Step 6. If you’re not happy with the default shape of your Word Cloud, then expand the SHAPES by clicking on it. Select one from the list of shapes and then click on the Visualize button to see a preview on the right side.
Step 7. When you’re done, Word Art creates a word cloud image based on your selections. If you wish to make further changes, you can Undo or Edit the word cloud image.
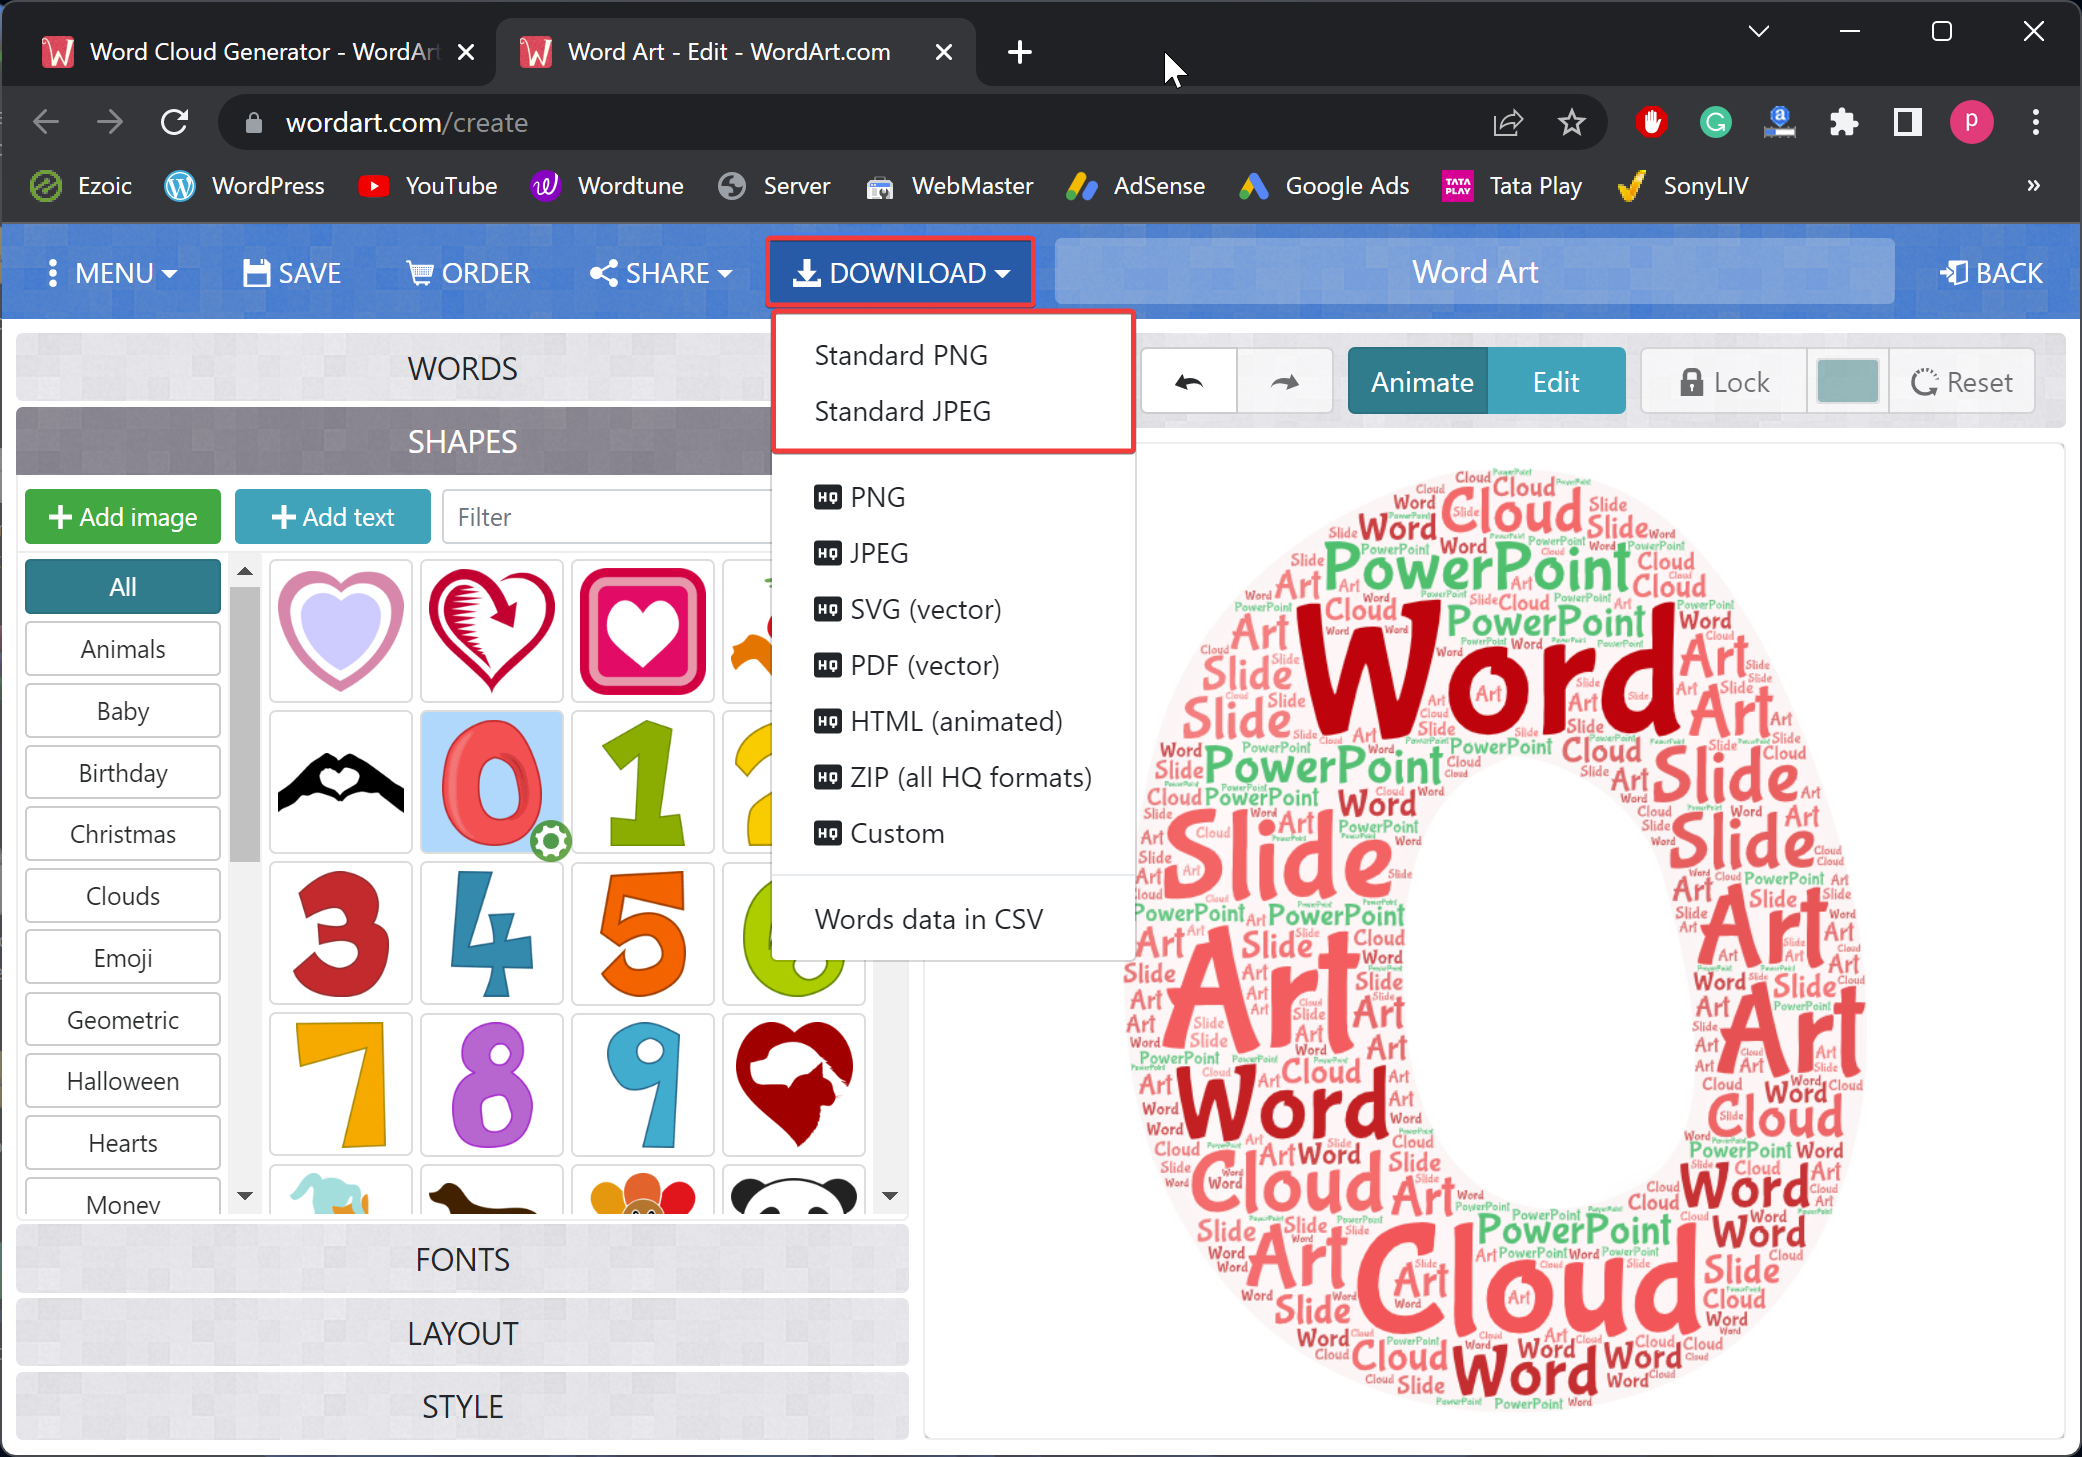
Step 8. If there is no further editing is required, click on the DOWNLOAD tab and pick either Standard PNG or Standard JPEG format for the image. The Word art file will now be downloaded to your computer.
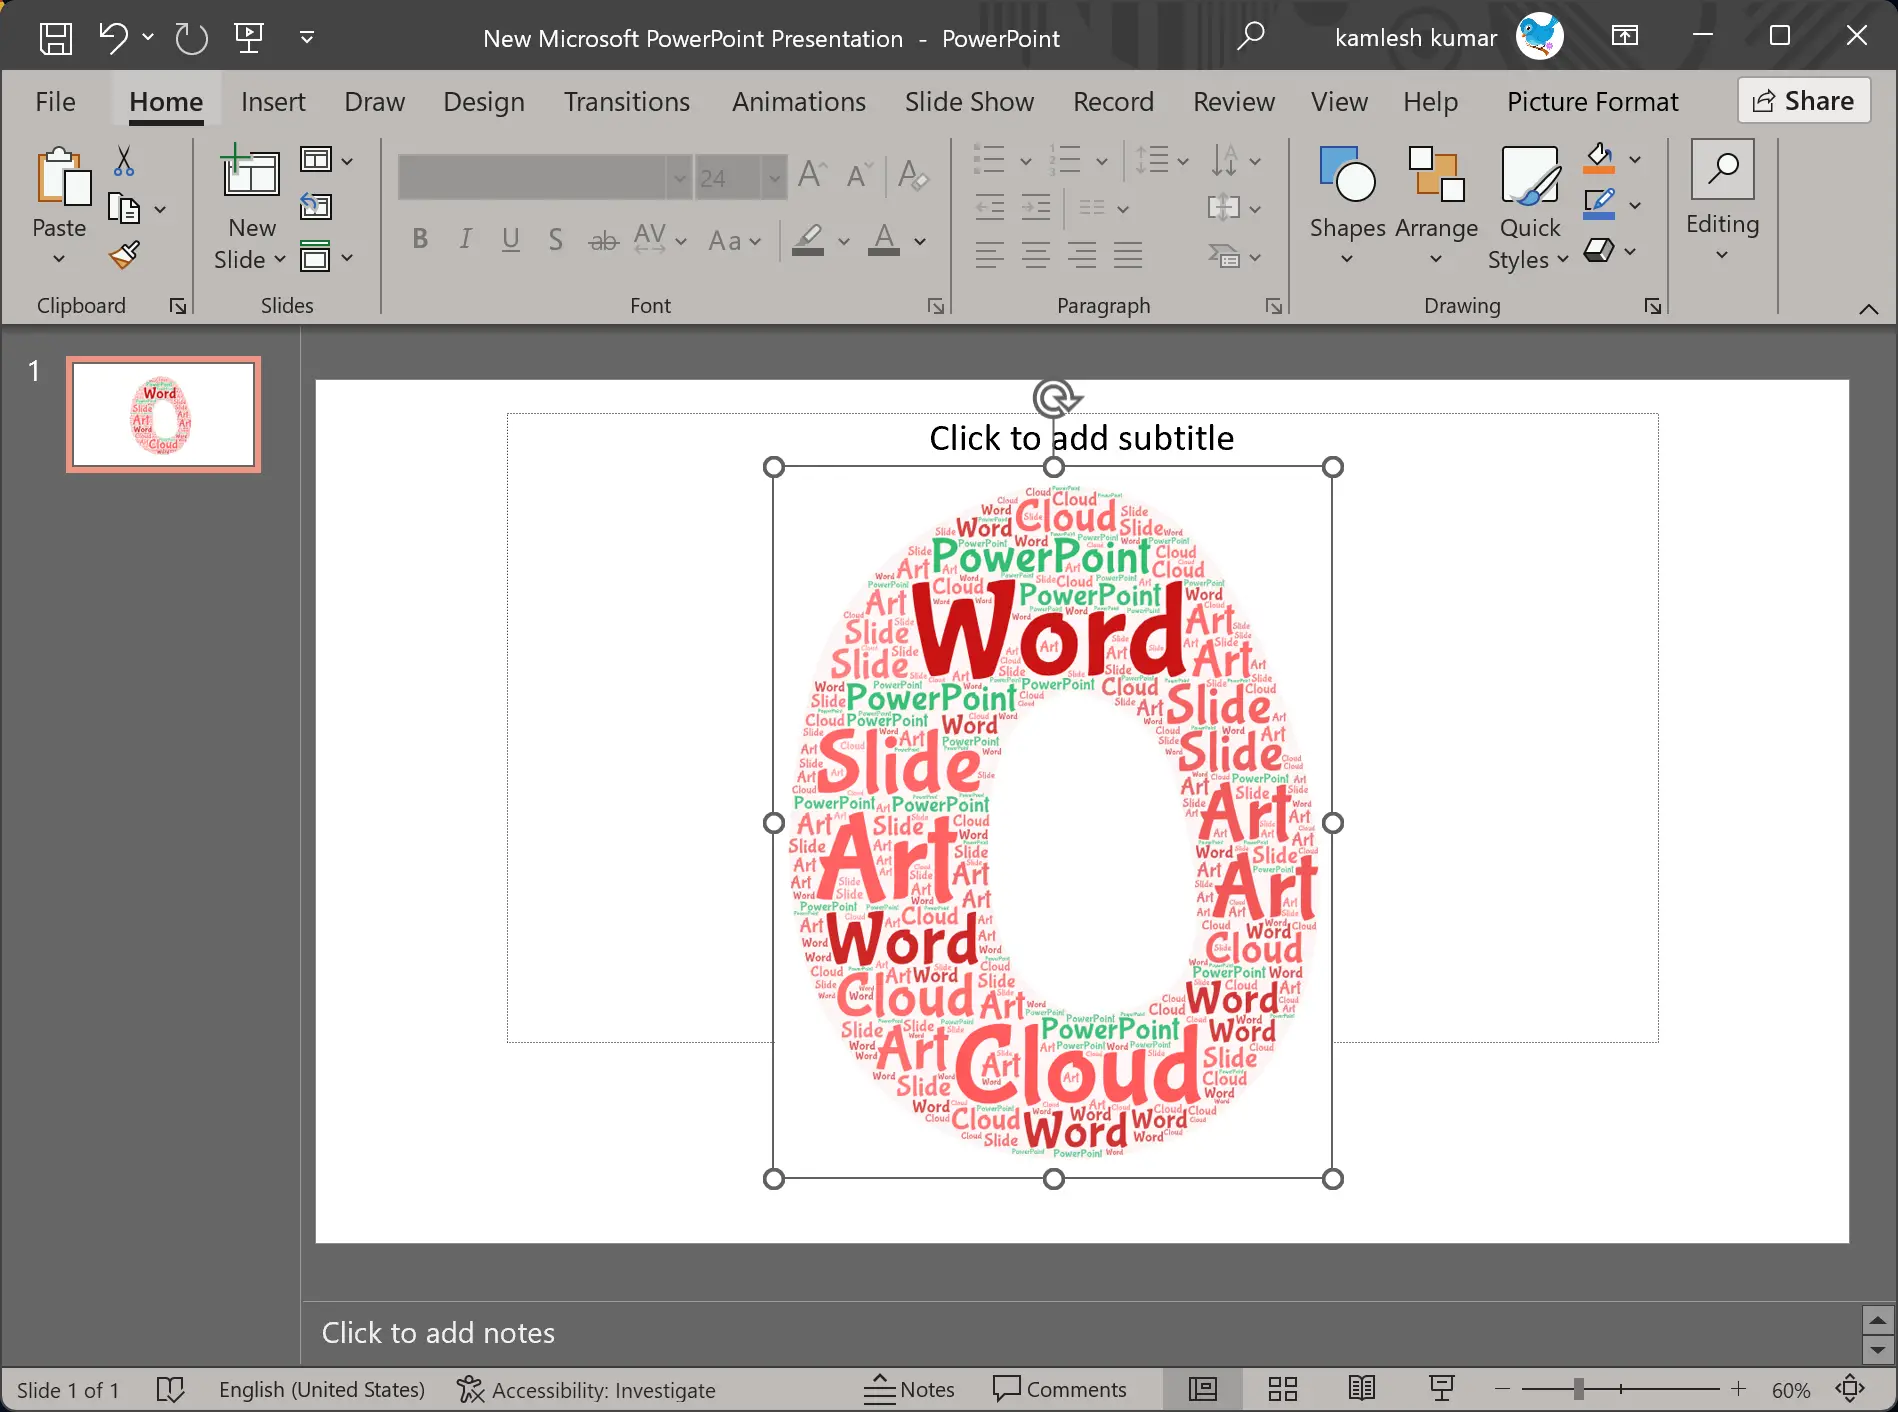
Step 9. Now, go to PowerPoint and copy and paste the downloaded Word Cloud into your slide.
How to Make a Word Cloud with Word Cloud Generator?
In this method, we will use a free online tool, Word Cloud Generator, and then insert the Word Cloud image into PowerPoint slides. Here are the steps:-
Step 1. Open your browser and type the following in the search bar, and hit the Enter key on your keyboard to open the Word Cloud Generator website:-
https://www.jasondavies.com/wordcloud/
Step 2. Scroll down a bit to find the text box and Enter the words and sentences you want to see in Word Cloud. Make the changes using built-in tools if required. Finally, click the Go button to generate the Word Cloud.
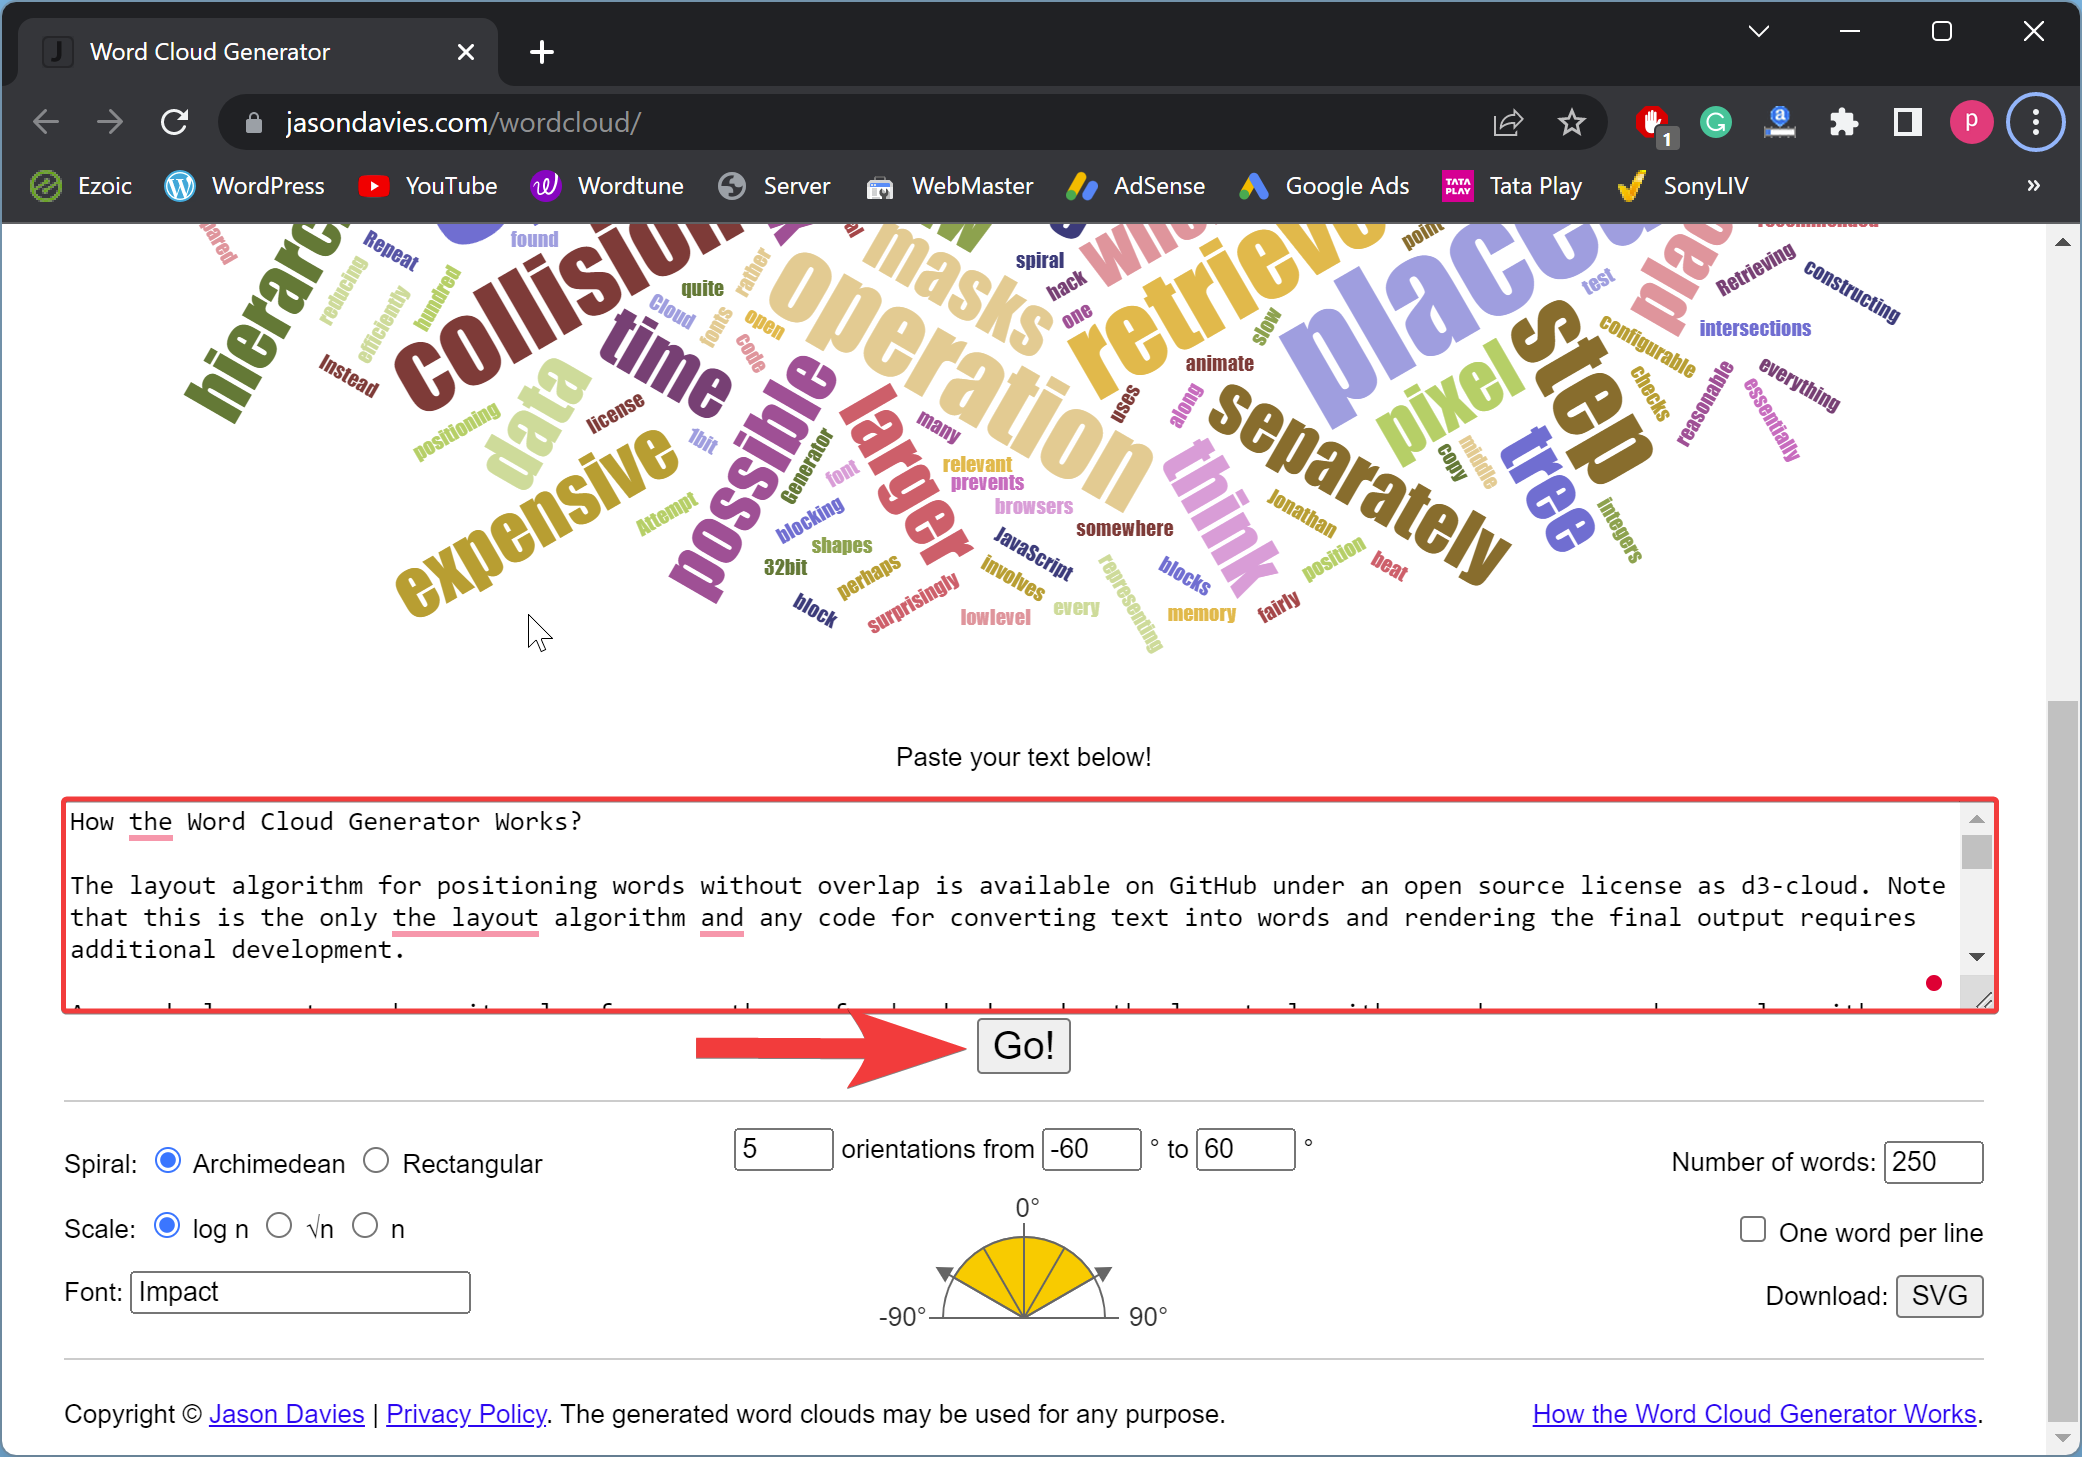
Step 3. Now, scroll up to see the preview of your generated Word Cloud. If you’re happy with the results, scroll down to the bottom and click the SVG button to download the image in SVG format.

Step 4. Now, open your Microsoft PowerPoint and copy and paste the downloaded SVG file into it.
How to Generate a Word Cloud with Pro Word Cloud?
In this method, we will use an Add-in, Pro Word Cloud, and then insert the Word Cloud image into PowerPoint slides. Here are the steps:-
Step 1. Open an existing PowerPoint or create a new one.
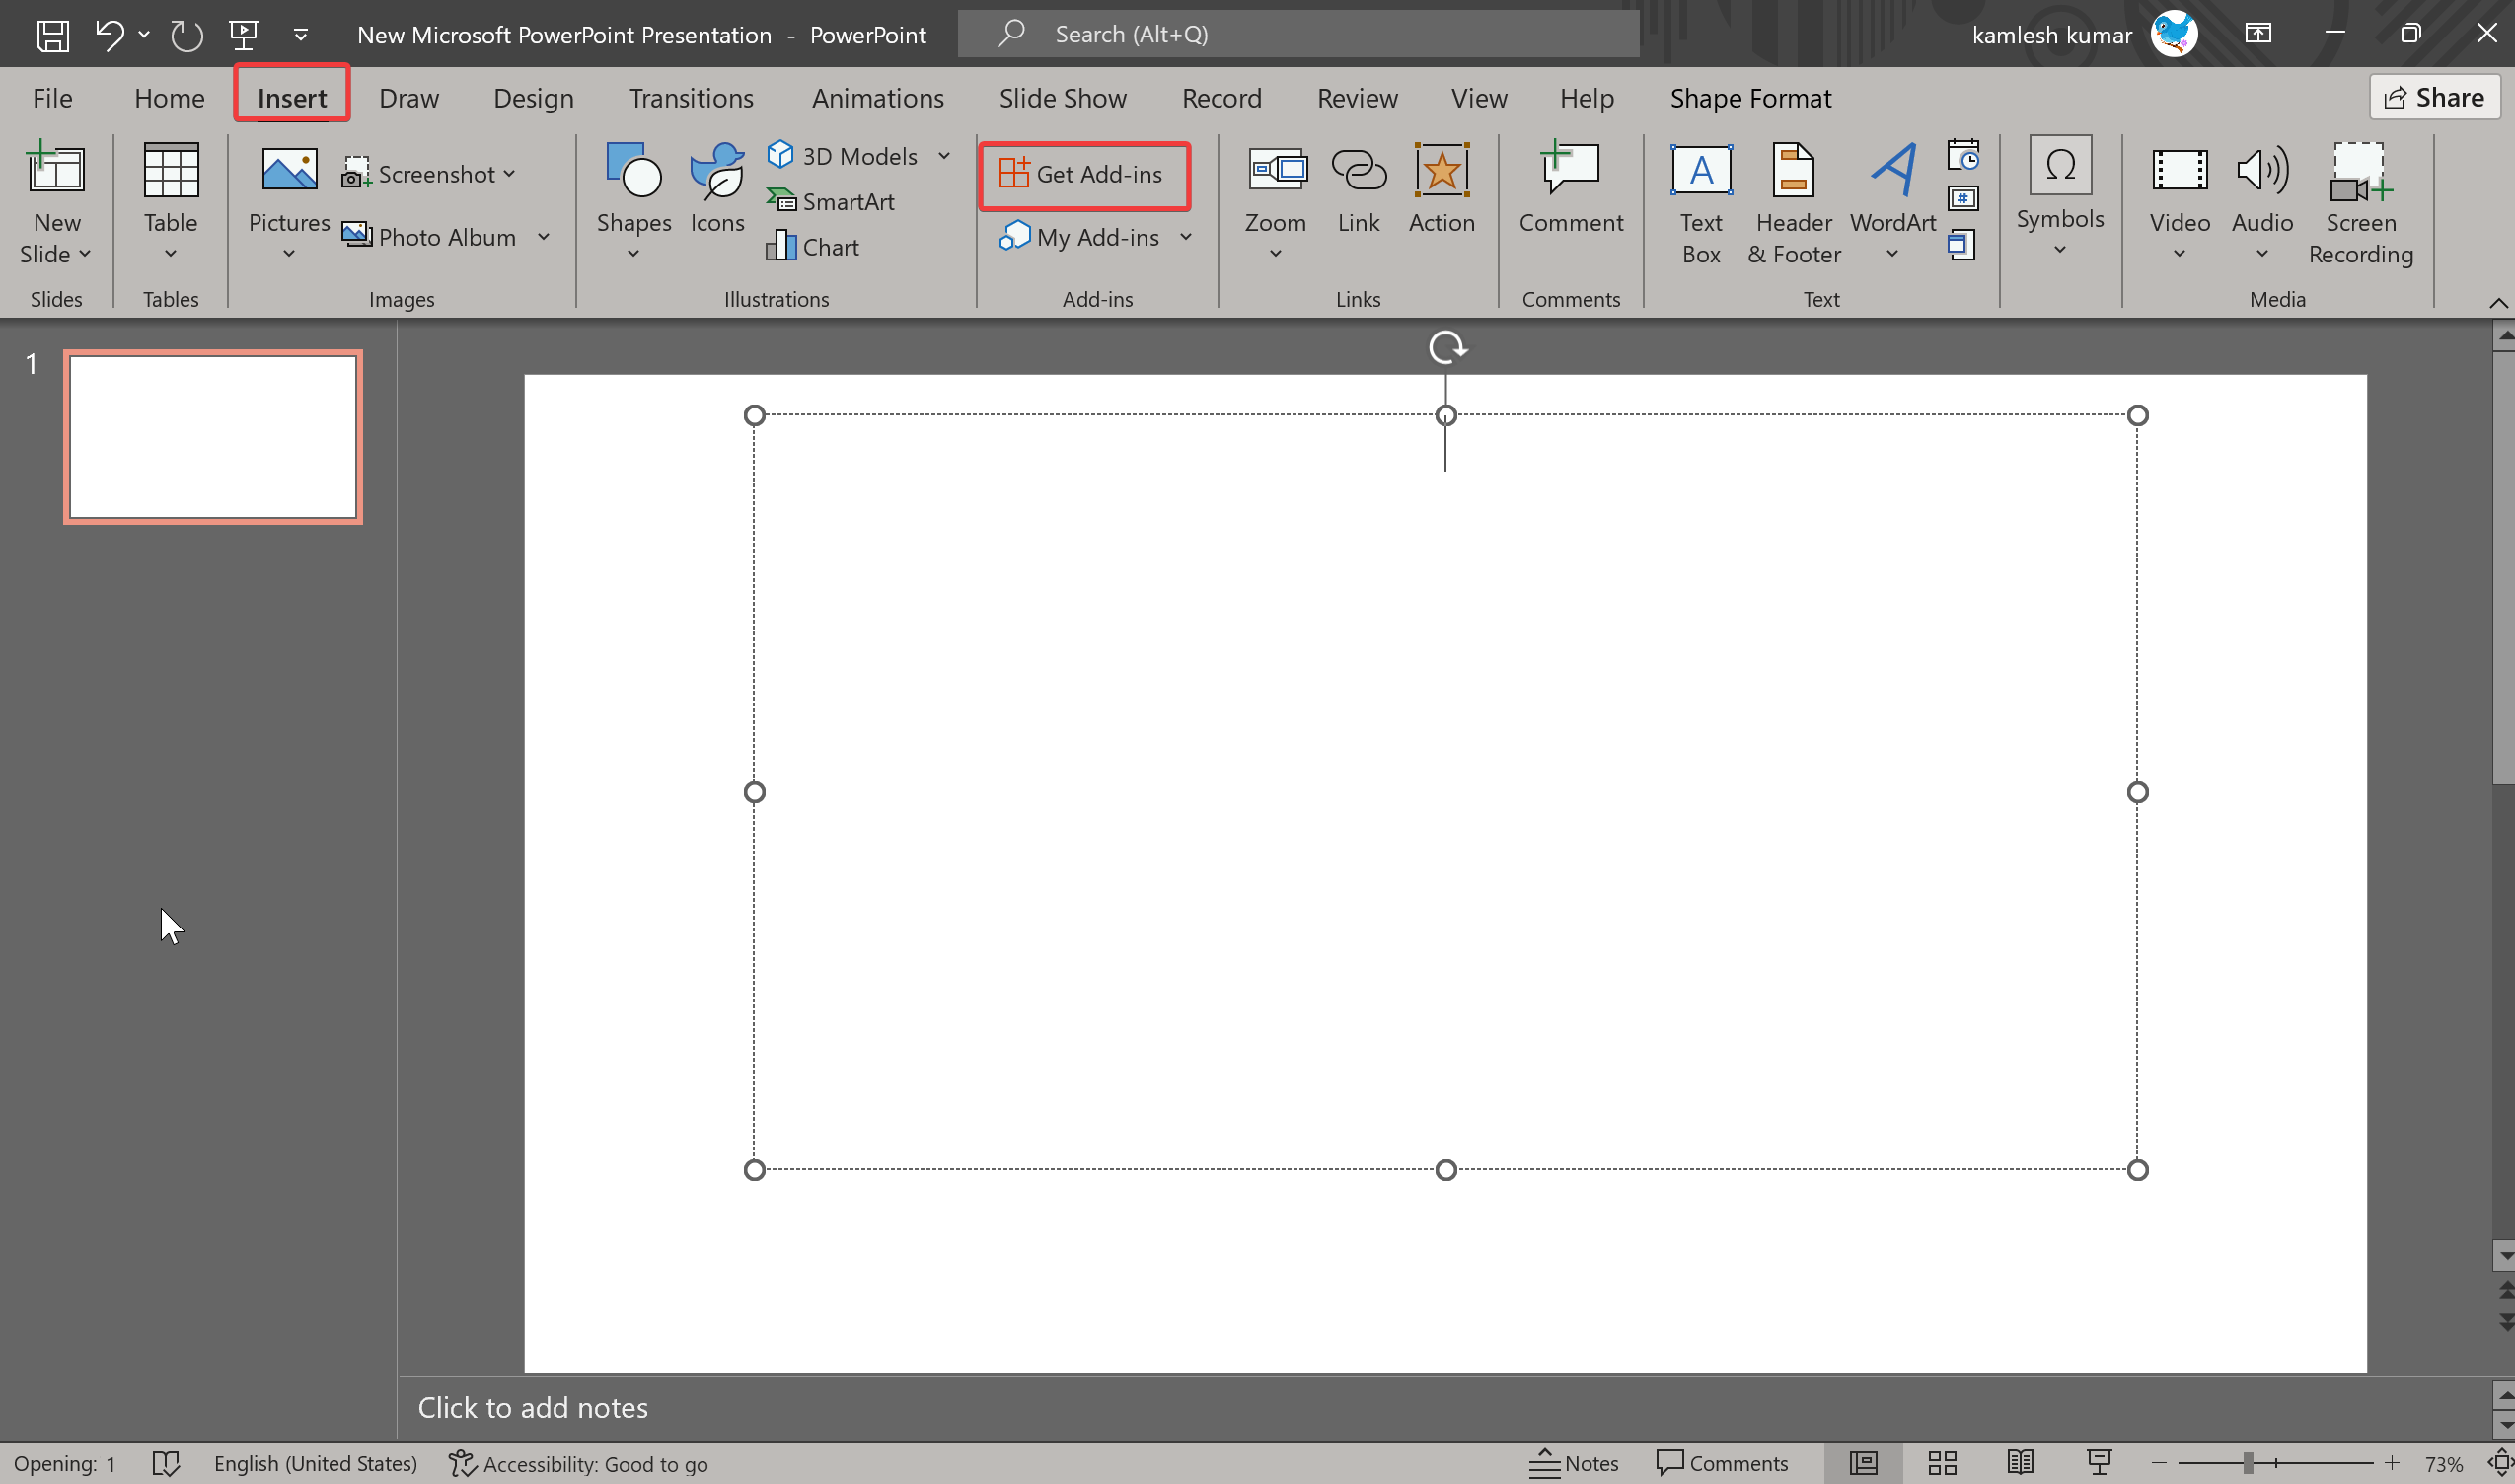
Step 2. Next, click on the Insert tab in the main menu bar and then click on the Get Add-in button under the “Add-ins” group.
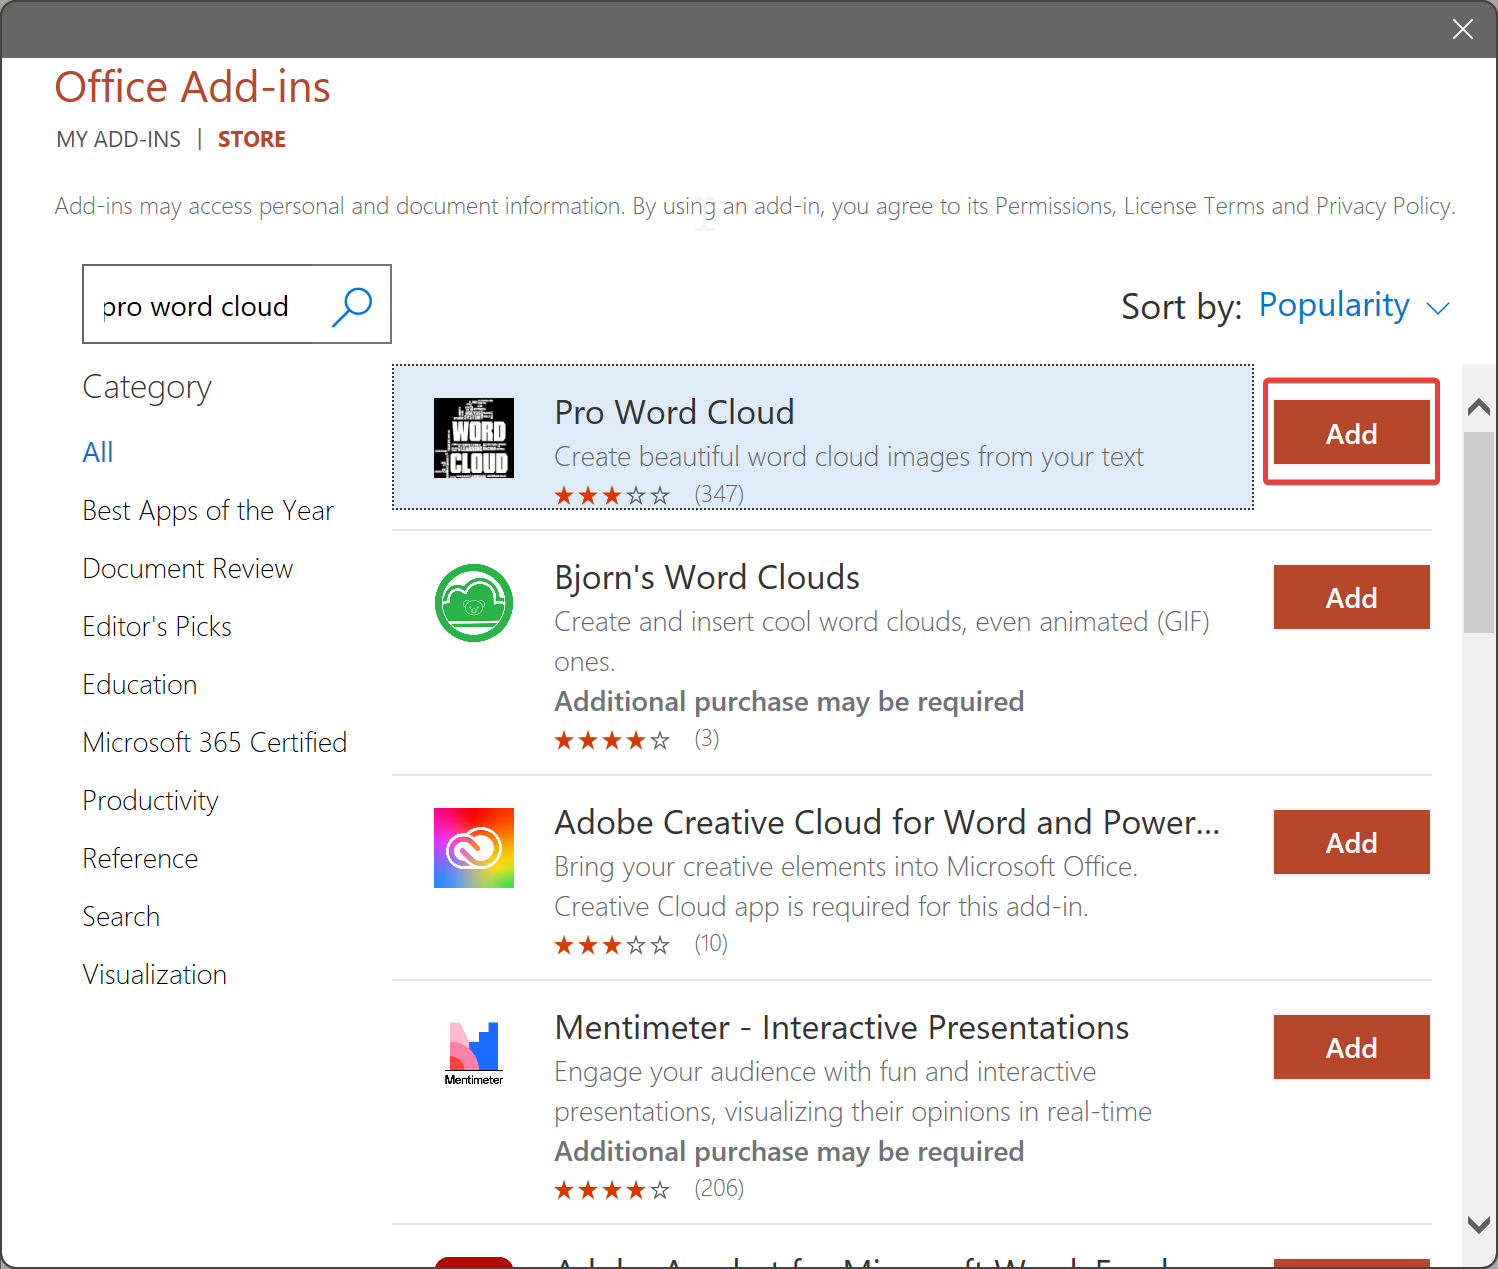
Step 3. When you’re done, the Office Add-Ins dialog will appear on your computer. In the Search bar, type Pro Word Cloud and click the Search icon.

Step 4. Click on the Add button beside the “Pro Word Cloud,”
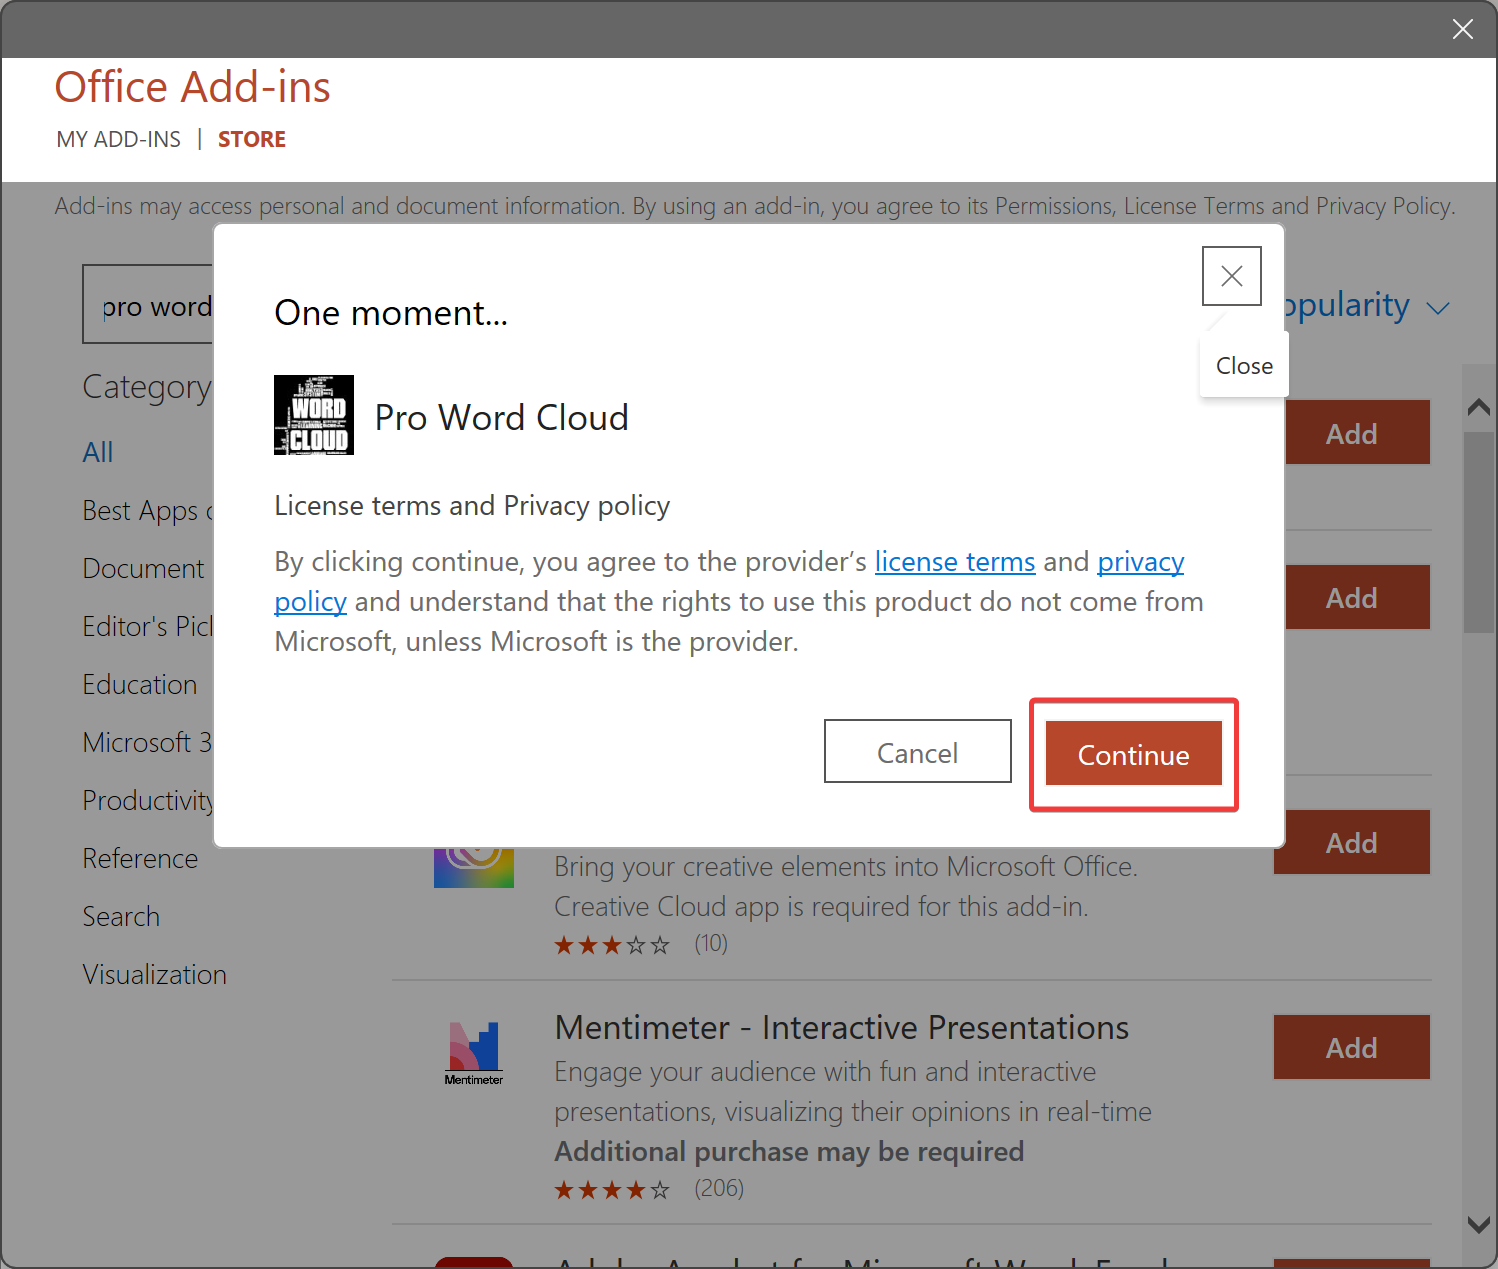
Step 5. Click on the Continue button in the pop-up window.
Step 6. Now, place the cursor where you want to insert the Word Cloud in your slide. Switch to the Insert tab and click on the Add-ins button.
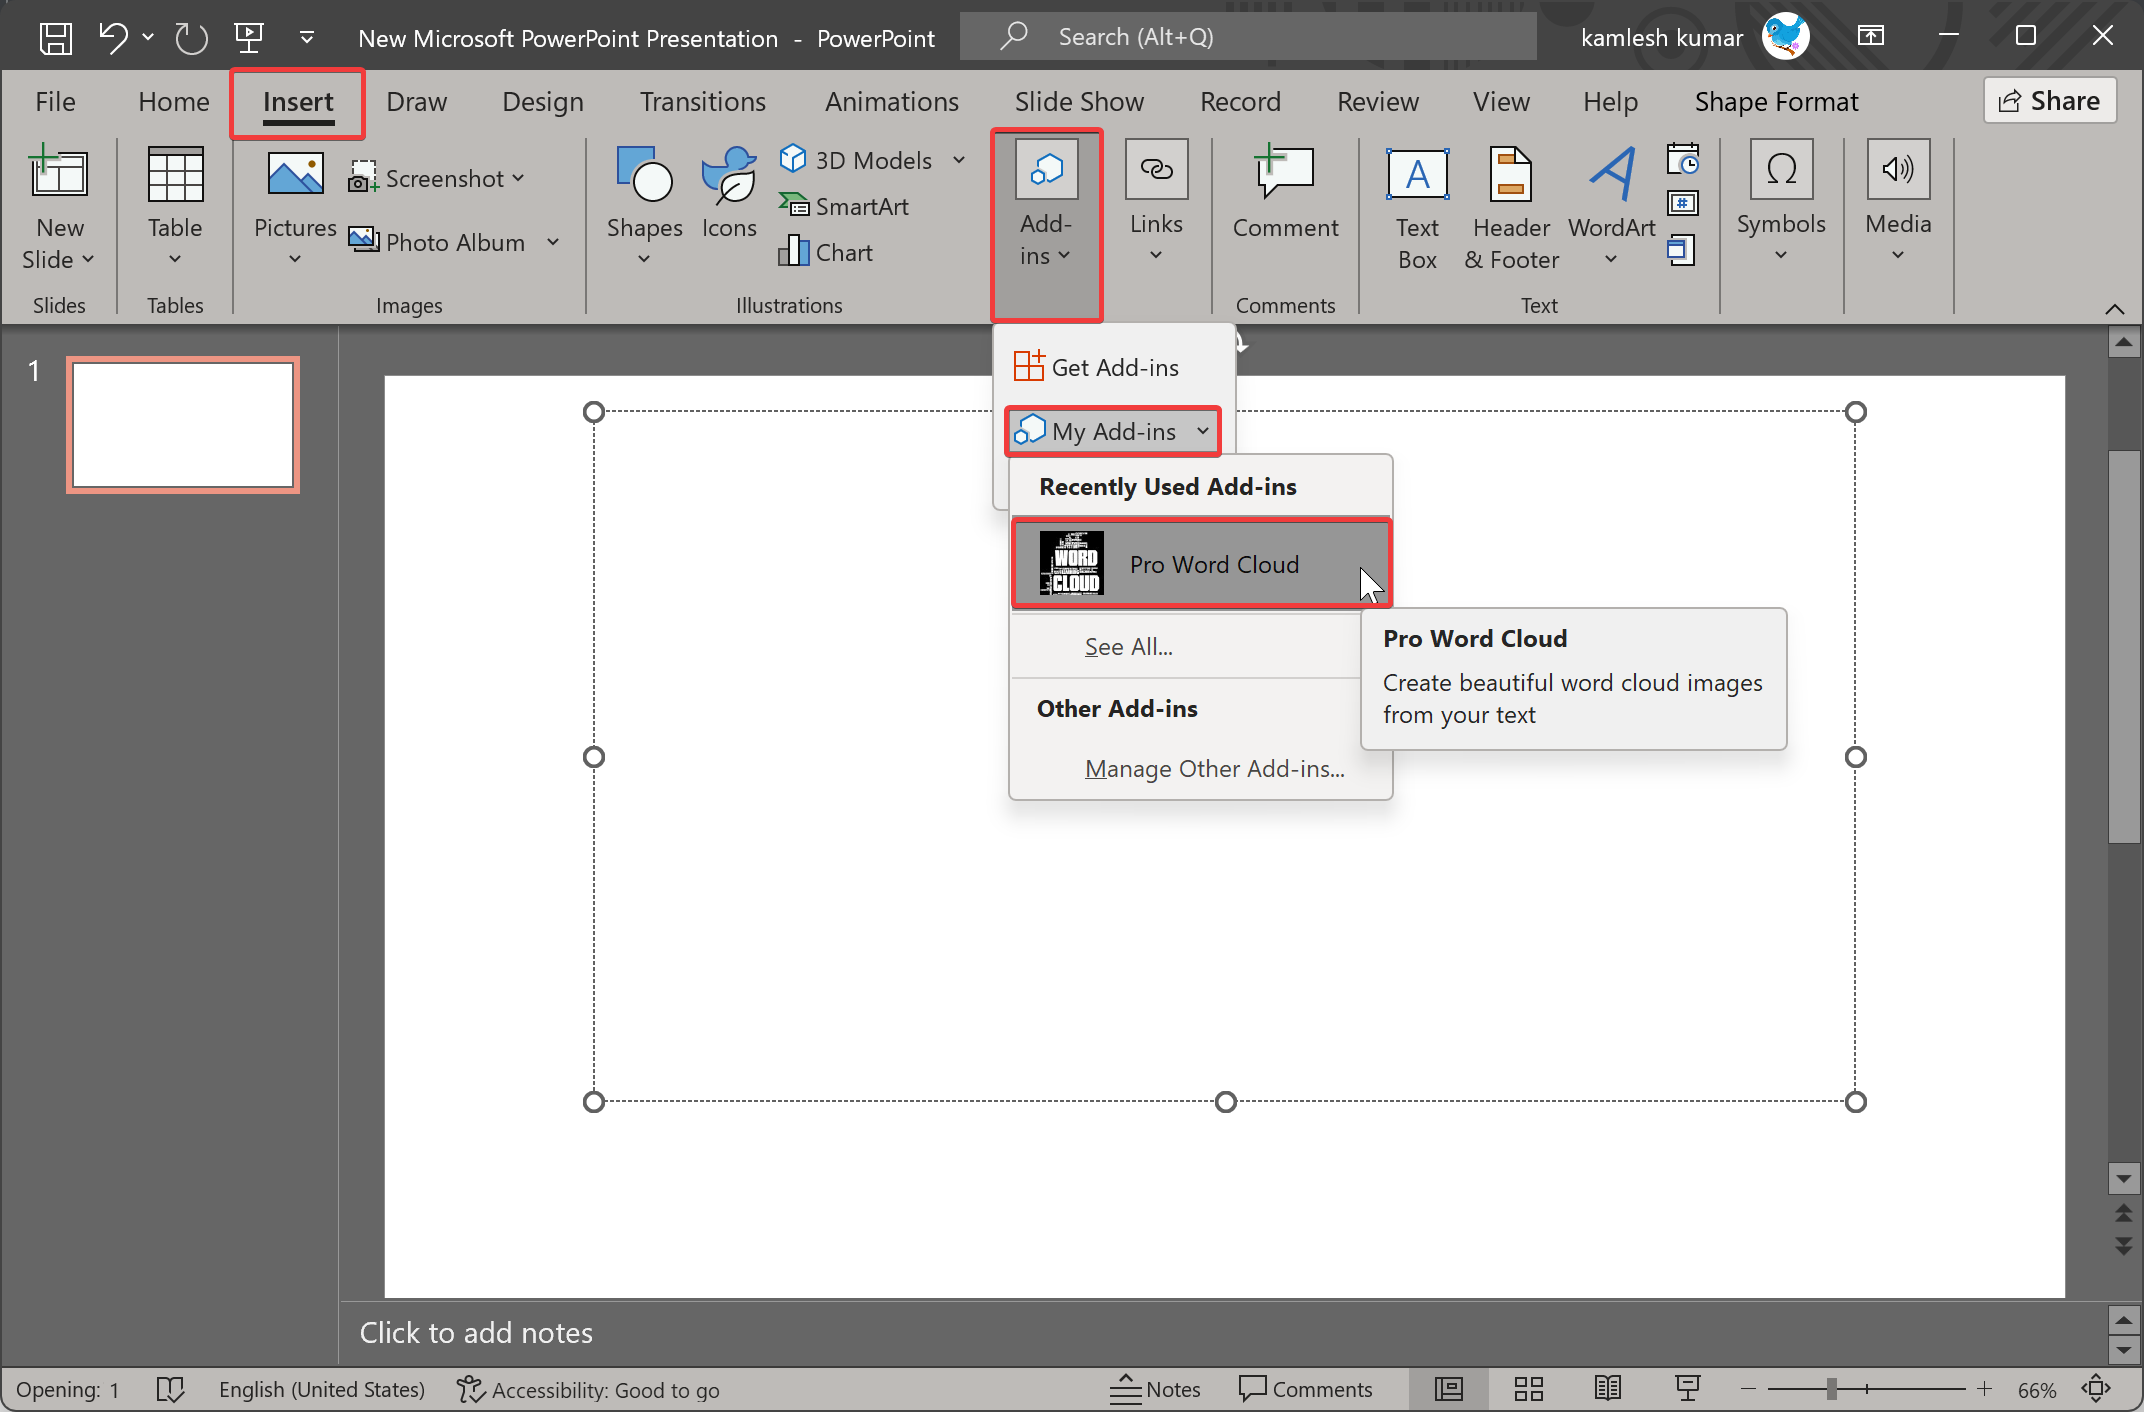
Step 7. In the drop-down, select My Add-ins down arrow and then Pro Word Cloud.
Step 8. On the right side of the slide, the Pro Word Cloud window will appear.
Step 9. Here, you can adjust Font, Colors, Layout, Case, etc if you want. Once changing is completed, type some text that you want to see in Word Cloud.
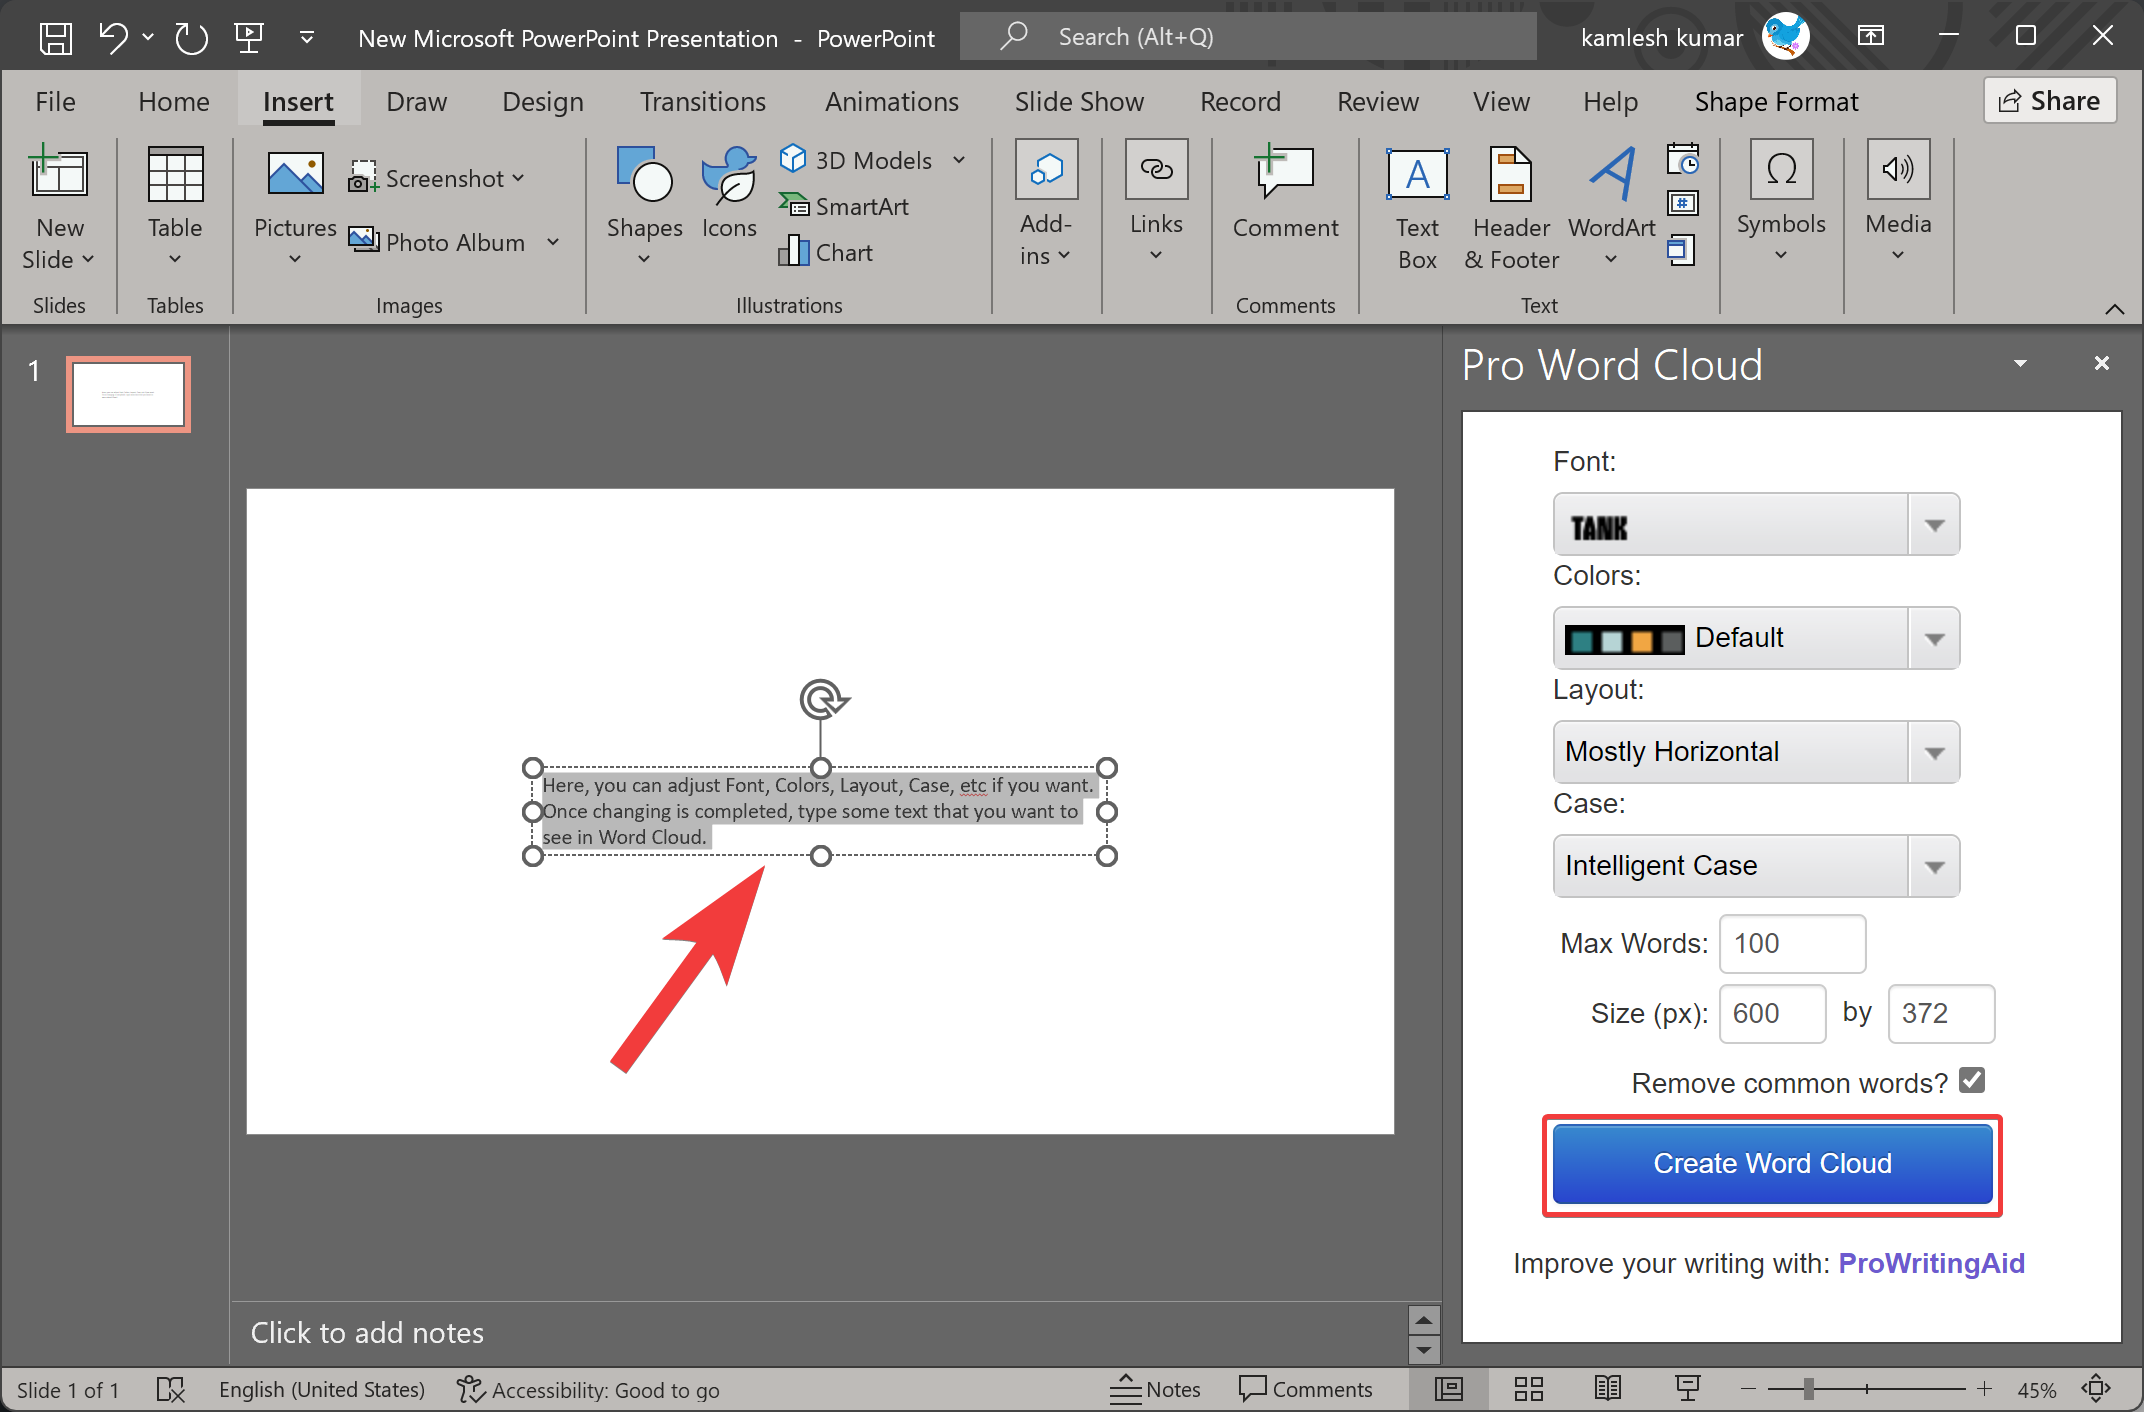
Step 10. Select the texts you want to see in Word Could and click on the Create Word Cloud button.
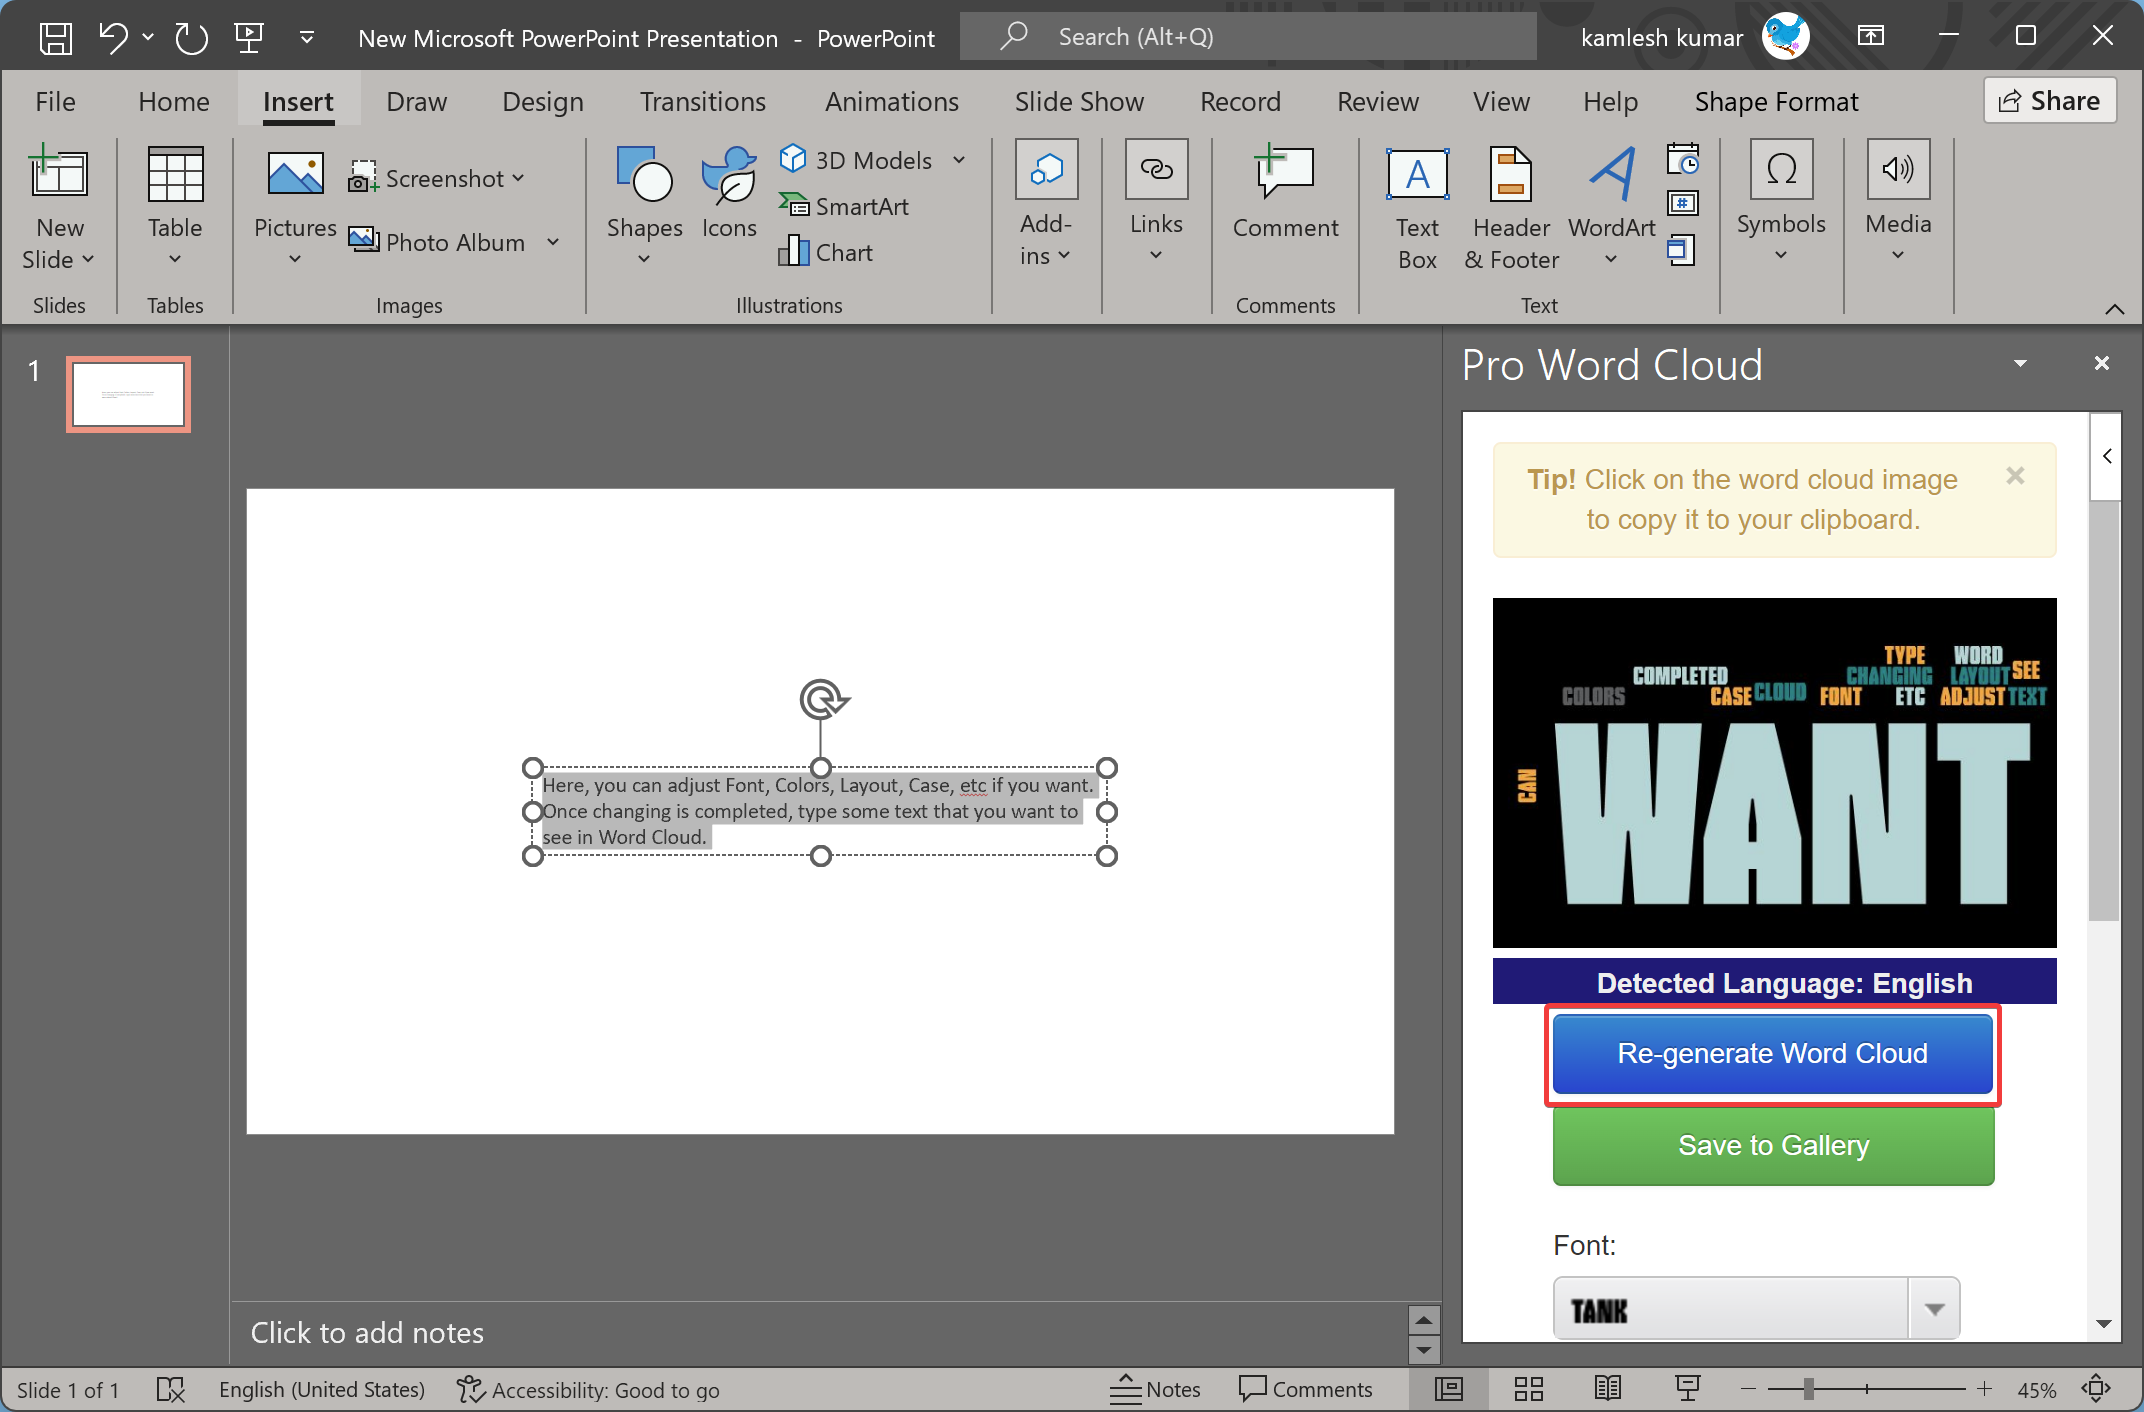
Step 11. If you want to change the texts later, edit them accordingly and then click the Re-generate Word Cloud button.
Step 12. Once you find the generated preview is OK, right-click on the preview image and select the Copy image option.
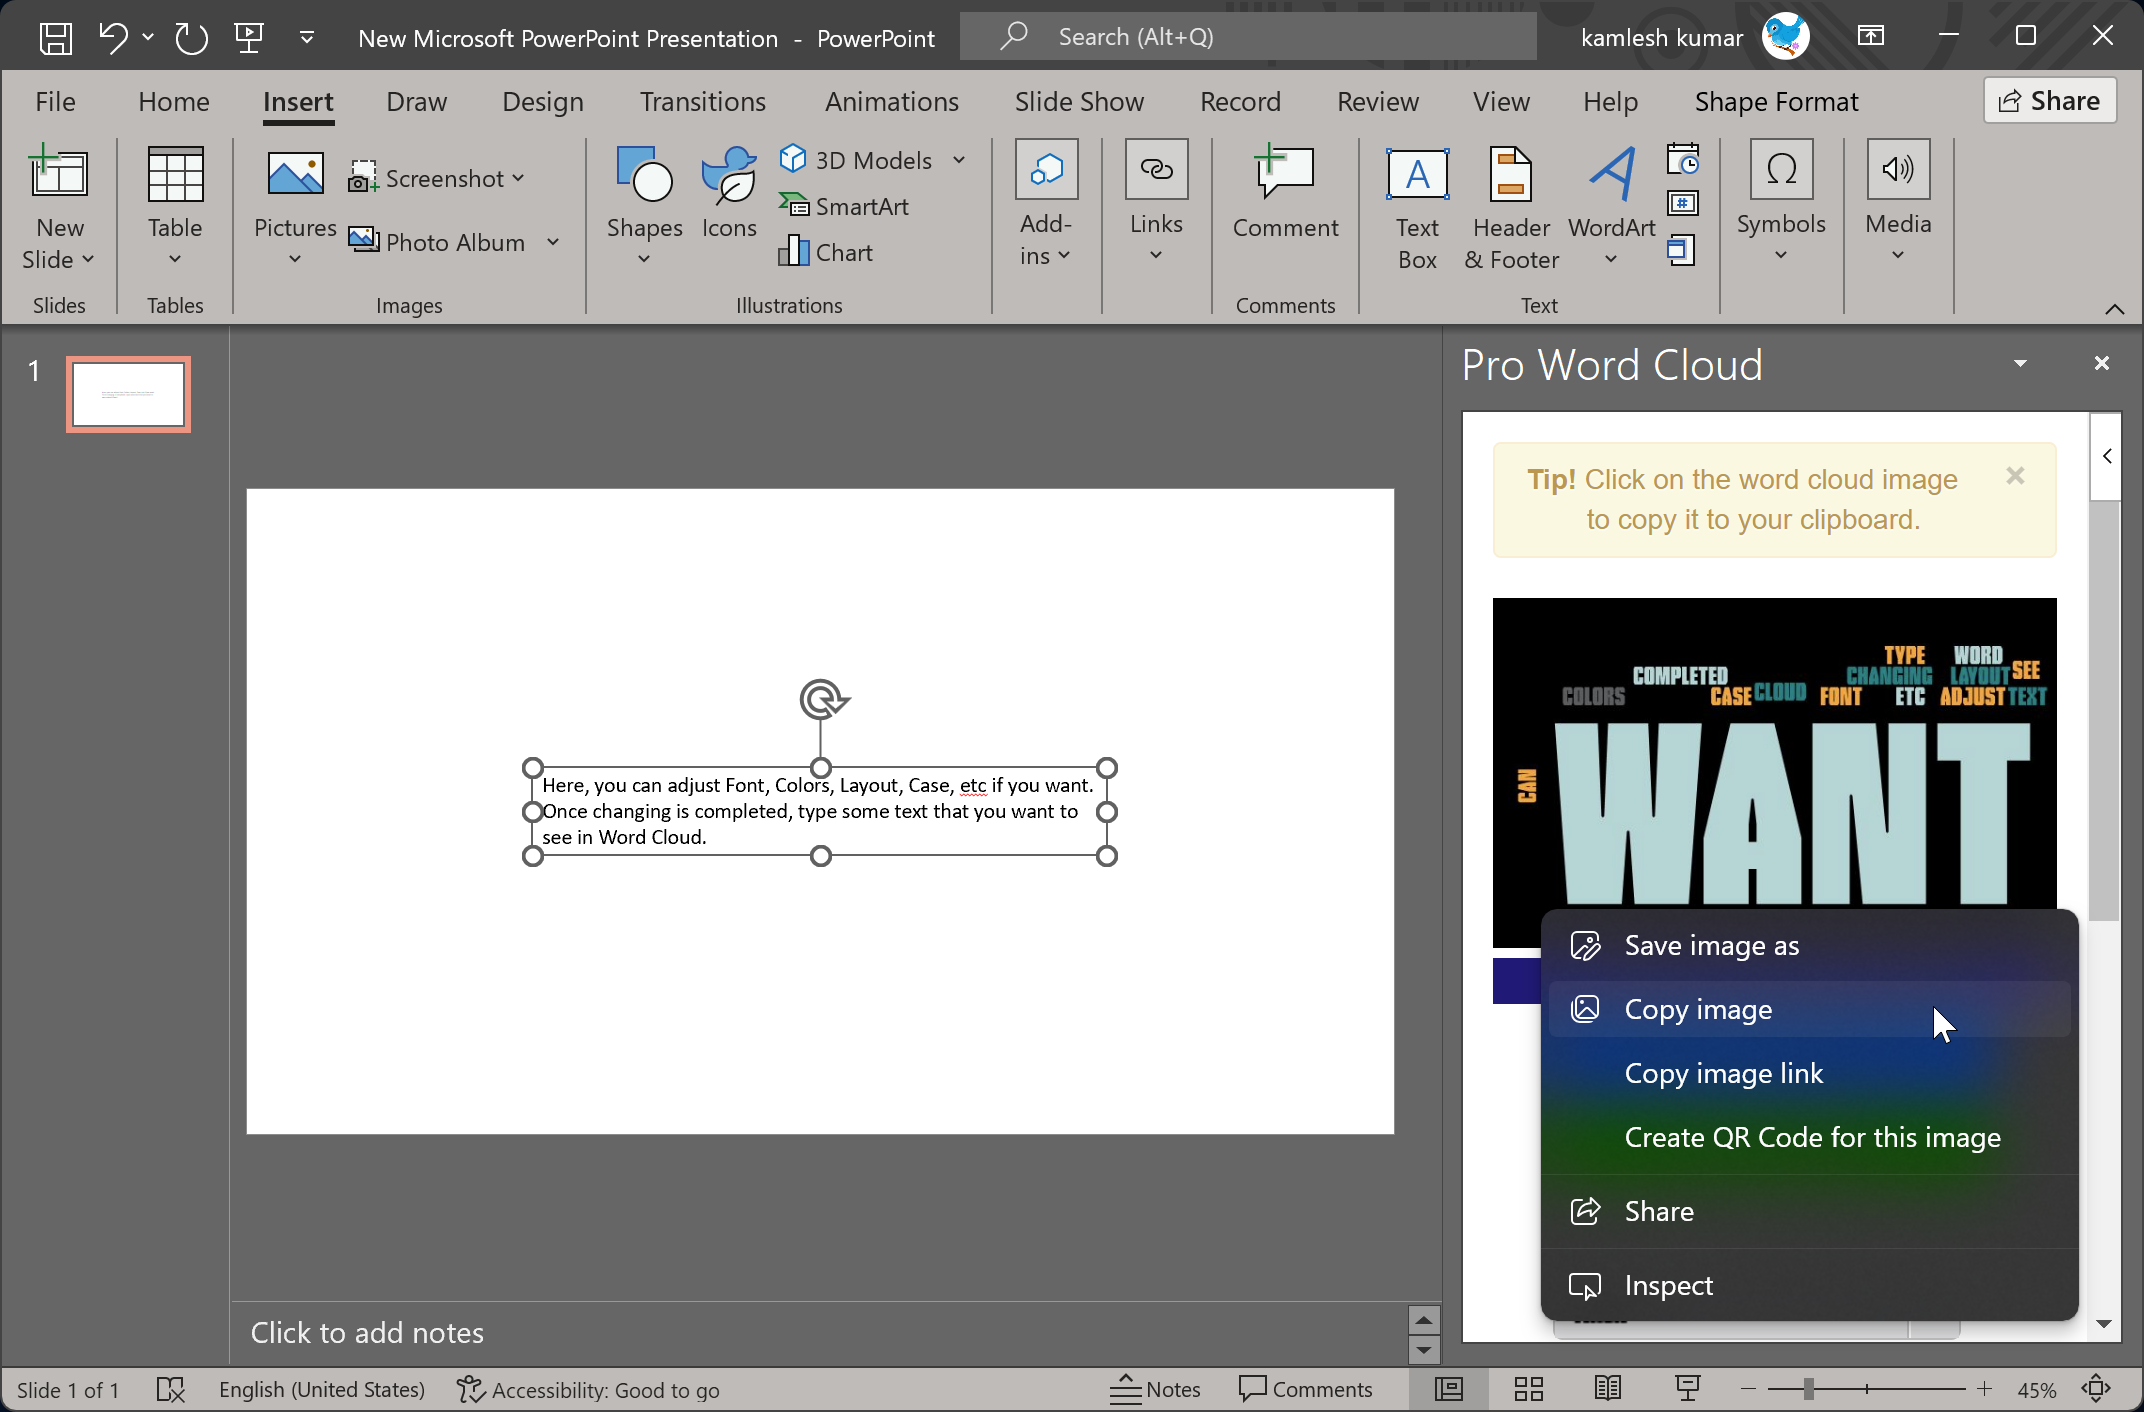
Step 13. Now, delete the selected texts and paste (CTRL+V) the copied image into your slide.
That’s it.
Conclusion
In conclusion, word clouds are a powerful tool to create an impactful and visually appealing PowerPoint presentation. They help to convey important messages in an intelligent and creative way by combining graphics and words. With the help of free online tools such as WordArt and Word Cloud Generator, or an Add-in like Pro Word Cloud, creating a word cloud has become easy and hassle-free. Using different fonts, sizes, colors, and shapes, you can make the most important message stand out and grab the audience’s attention. By following the step-by-step instructions, you can easily generate a word cloud and insert it into your PowerPoint slide. So, next time you want to make your presentation stand out, consider using a word cloud to make an impact.