Microsoft introduced a virtual Desktop on Windows 10, and now it is part of Windows 11 as well. Earlier, we used third-party applications to create virtual desktops on our Windows PCs to open and manage different apps and separate desktops. Virtual Desktop is a nice feature that lets you create a separate desktop so multiple purposes. For example, you may have one desktop for your work and a second for your personal apps.
On Windows 11, Virtual Desktop applicable has been upgraded compared to Windows 10. Now, you can also have a different wallpaper for each desktop, making it easier to distinguish one from another. There are several other features on this Virtual Desktop that let you distinguish your job.
In this gearupwindows article, we will guide you on creating and using Virtual Desktops on Windows 11.
How to Create Virtual Desktops on Windows 11?
When it comes to creating a new virtual desktop, hover over or click on the Task view button in your taskbar. Then, click on the Plus (+) icon on New desktop thumbnail.
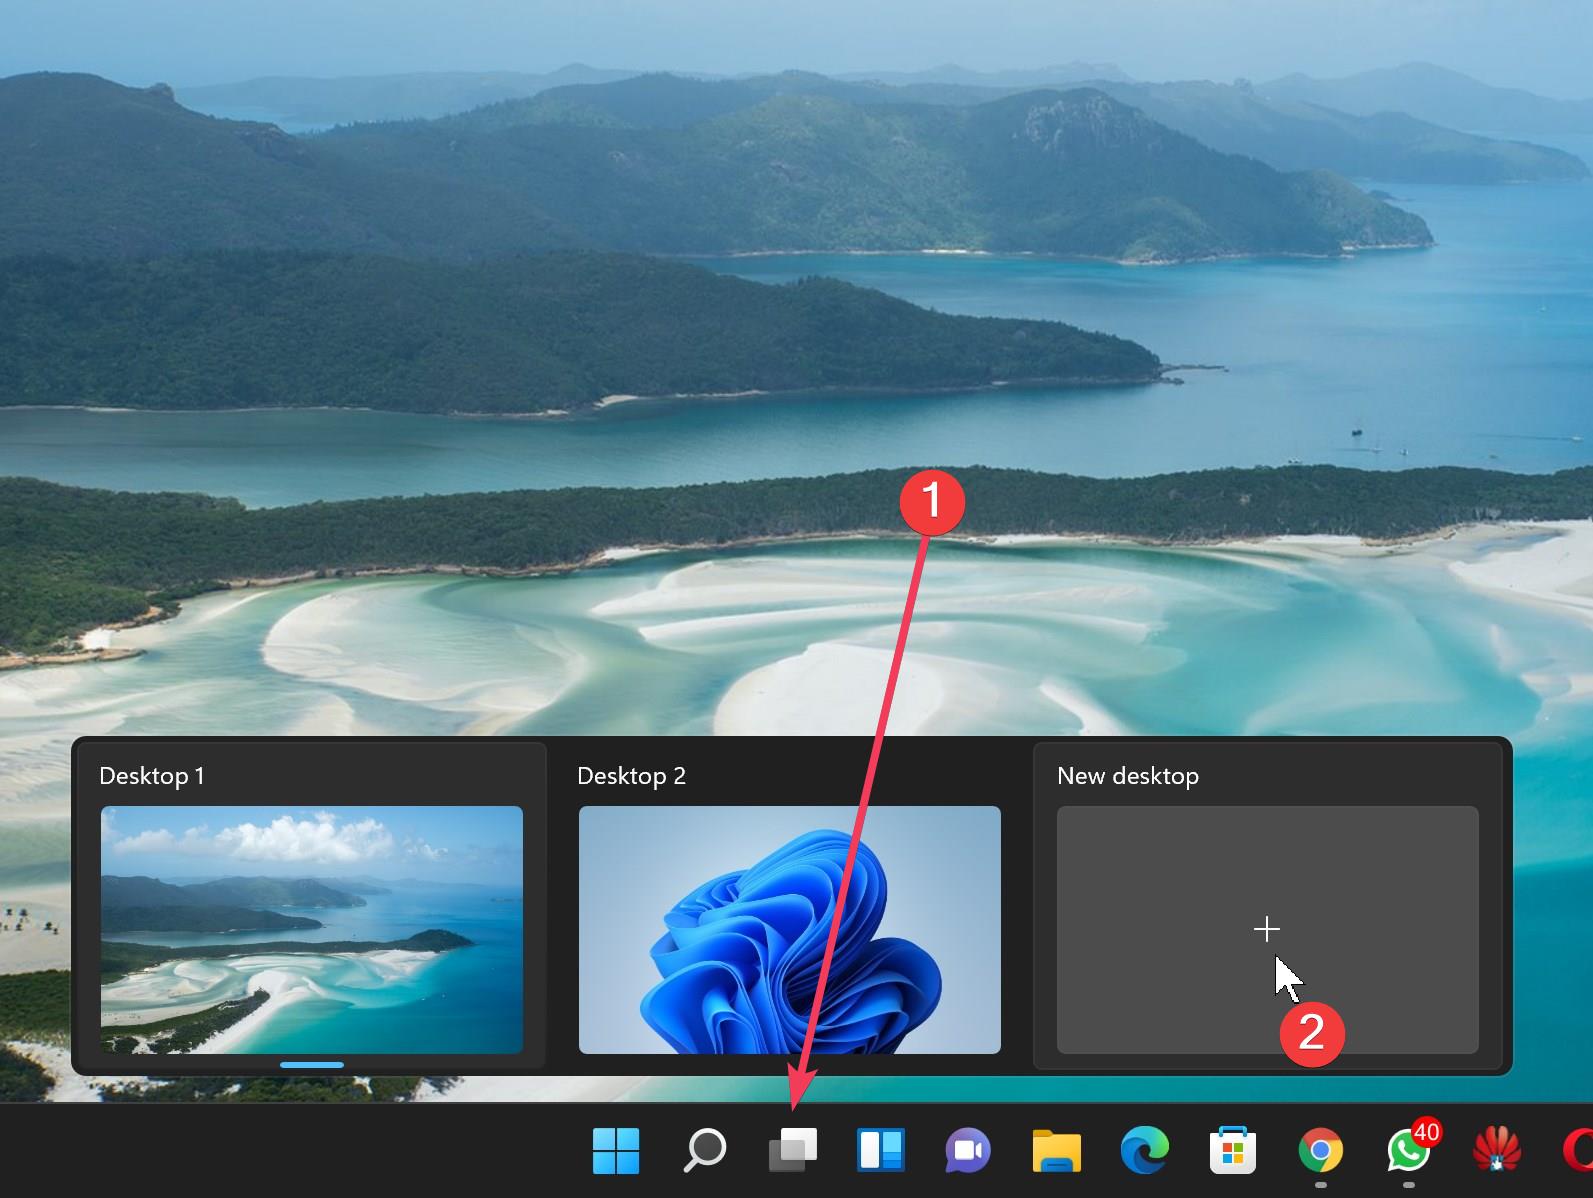
If you have removed the “Task view” button from the taskbar, then you can use the Windows + Tab key combination to bring up the task view menu, and there you can create a new Virtual Desktop by clicking on the Plus (+) icon under the New desktop thumbnail.
You can also use the key combination Windows + Ctrl + D to quickly create a new Virtual Desktop and move on to your new desktop.
Once you create a new desktop and move there, you can open different apps. If you want to move from one desktop to the other, click on the “Task view” icon on the taskbar and select your preferred desktop. You can also choose another desktop by pressing Windows + Tab keys and selecting desired one.
How to Remove a Virtual Desktop on Windows 11?
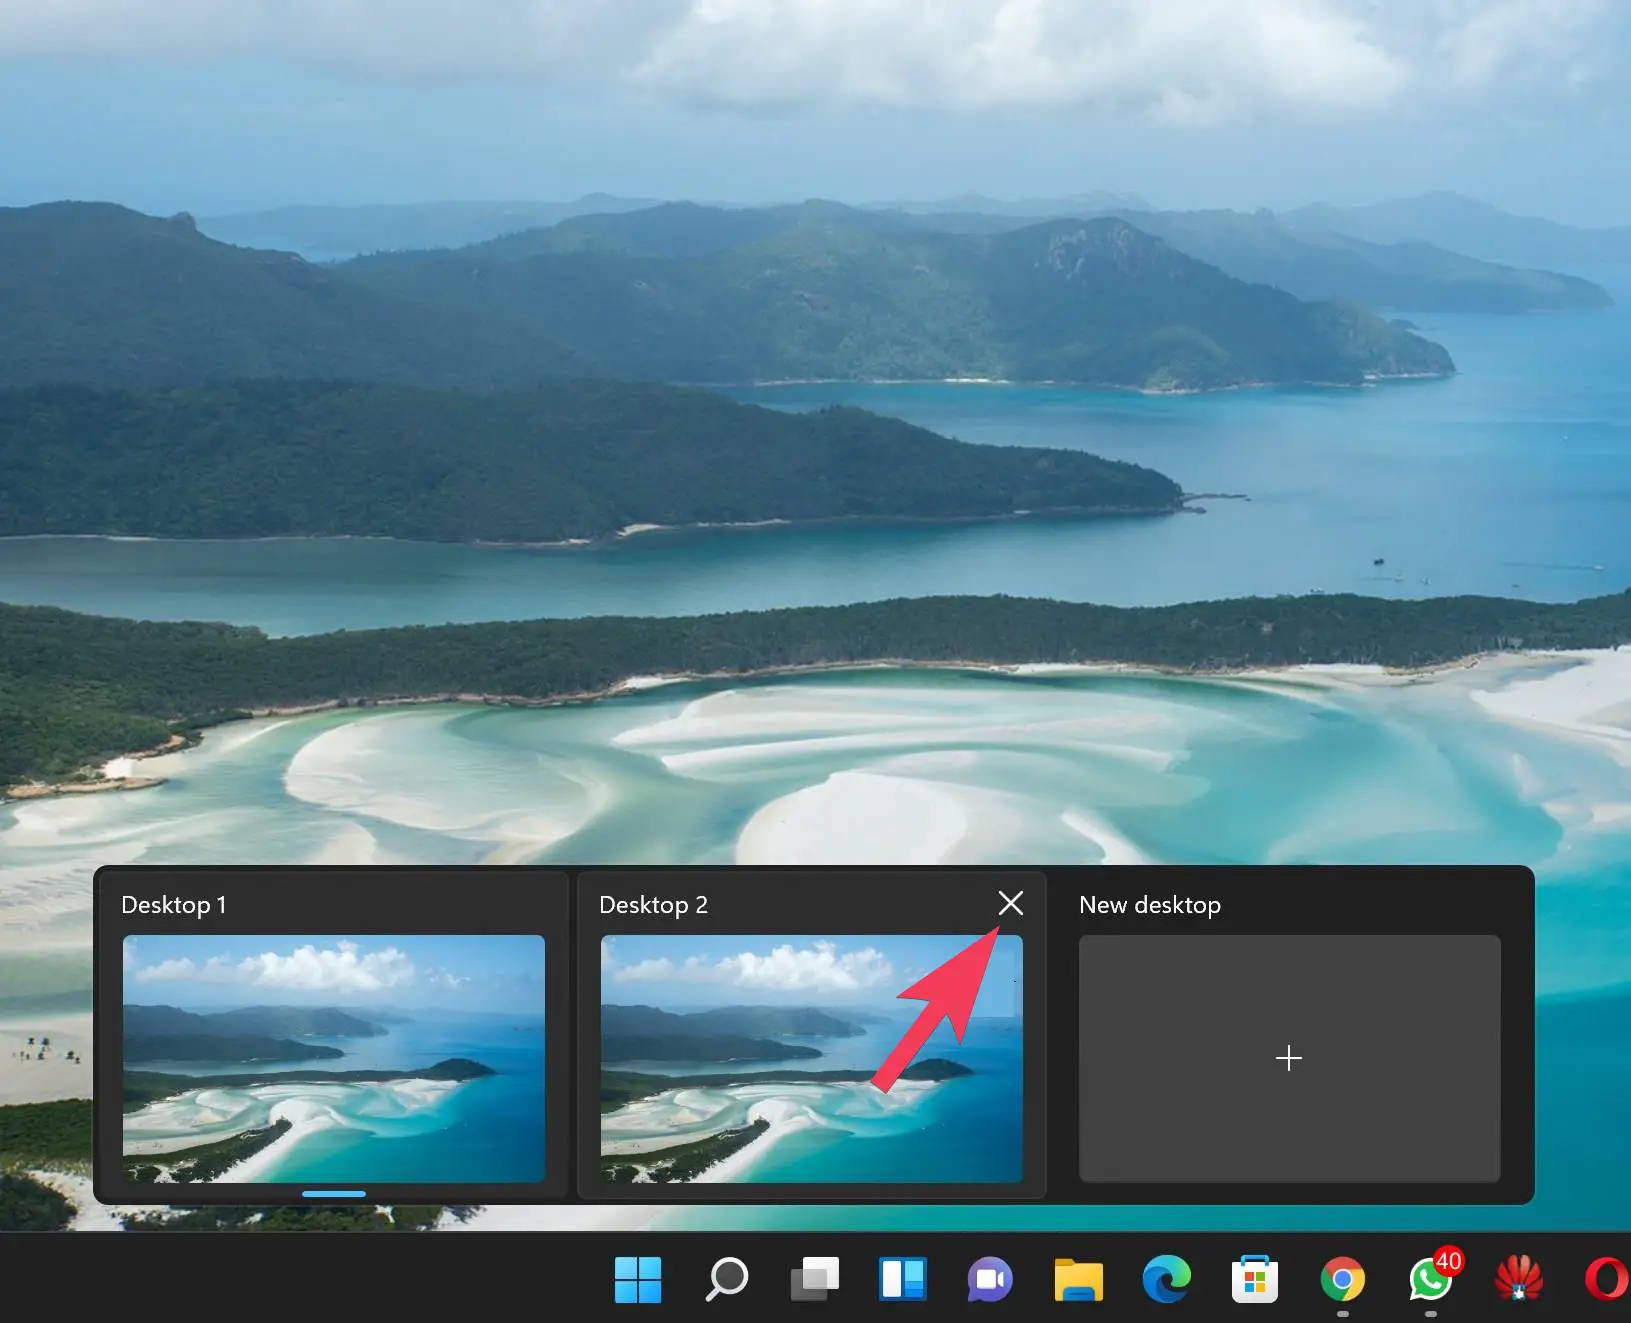
To remove a virtual desktop, hover over or click the “Task view” icon on the taskbar. Then, hover over the virtual desktop you want to remove and click the X in the upper right corner.
How to Choose Different Wallpapers for Distinct Virtual Desktops?
You can personalize your desktops on a Windows 11 PC if you want. By applying different wallpaper for each desktop, you can easily differentiate them. It is pretty simple to change the wallpaper. Here is how to do it.
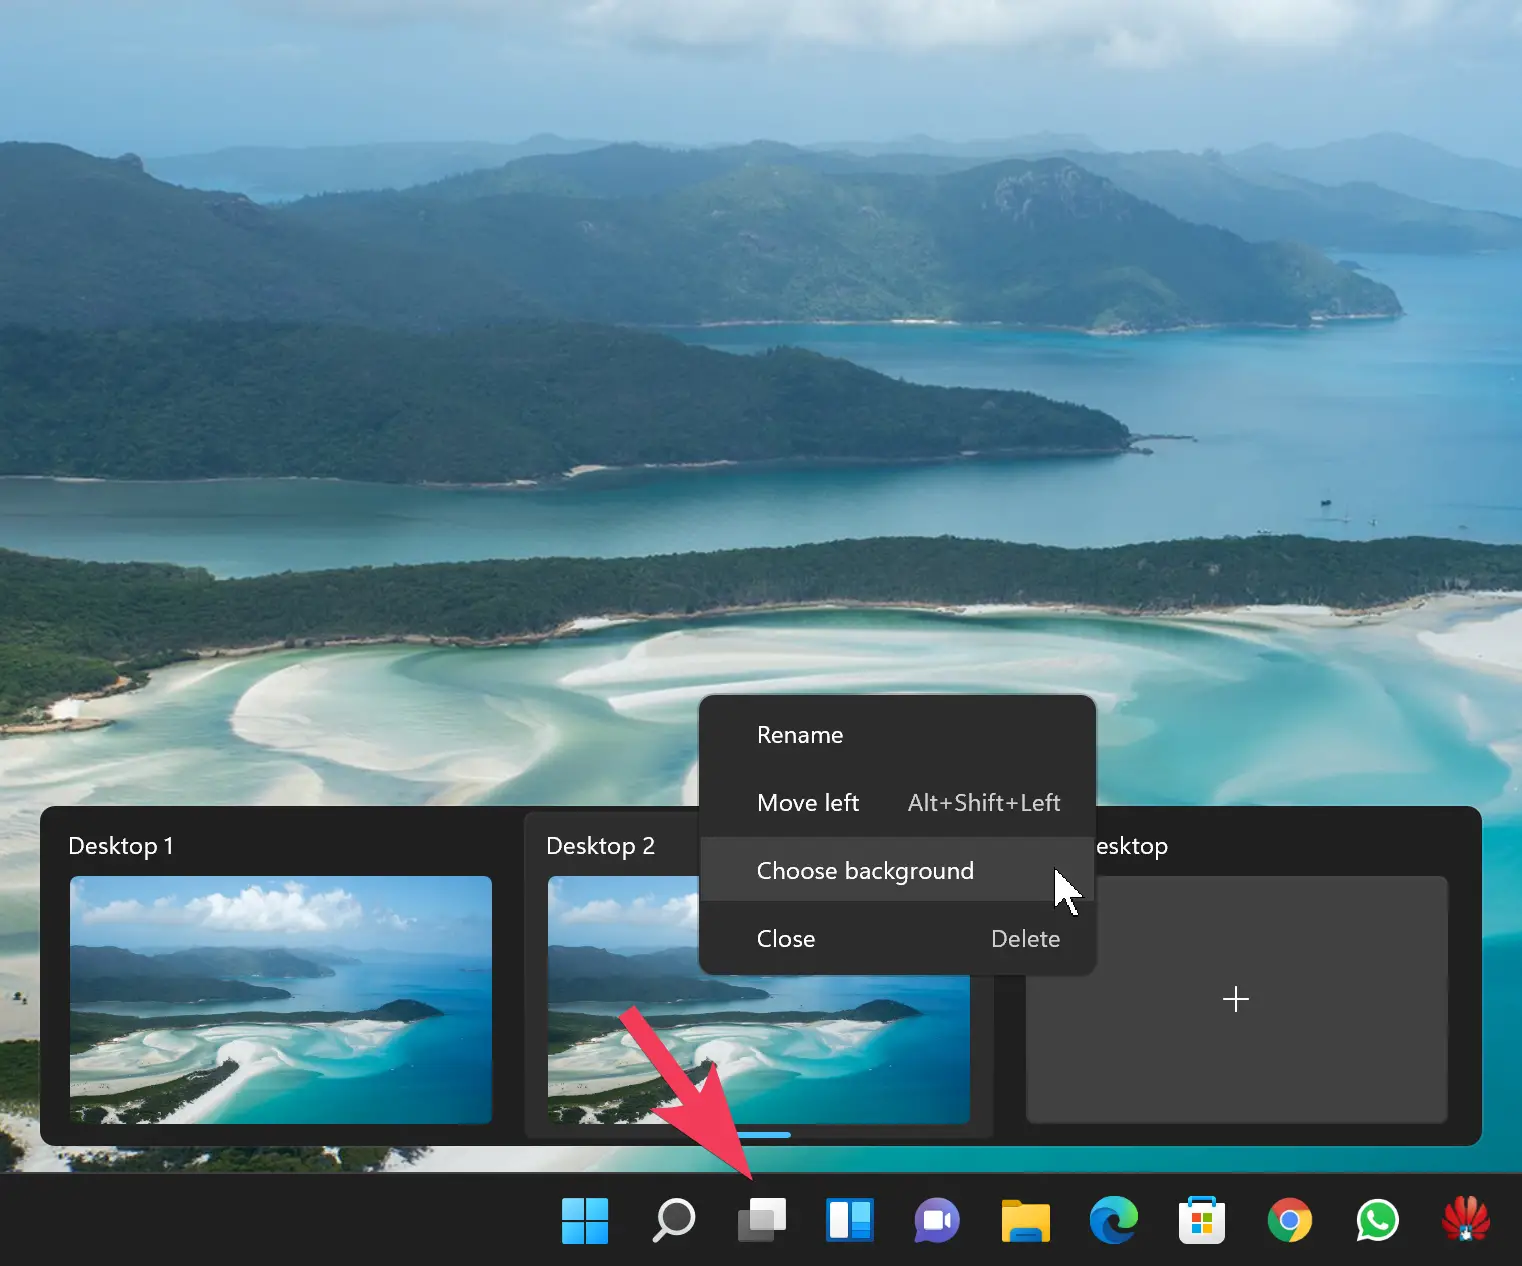
Step 1. First, click on the “Task view” icon in the taskbar.
Step 2. Then, right-click on the desktop you want to change the wallpaper.
Step 3. Click on Choose background option.
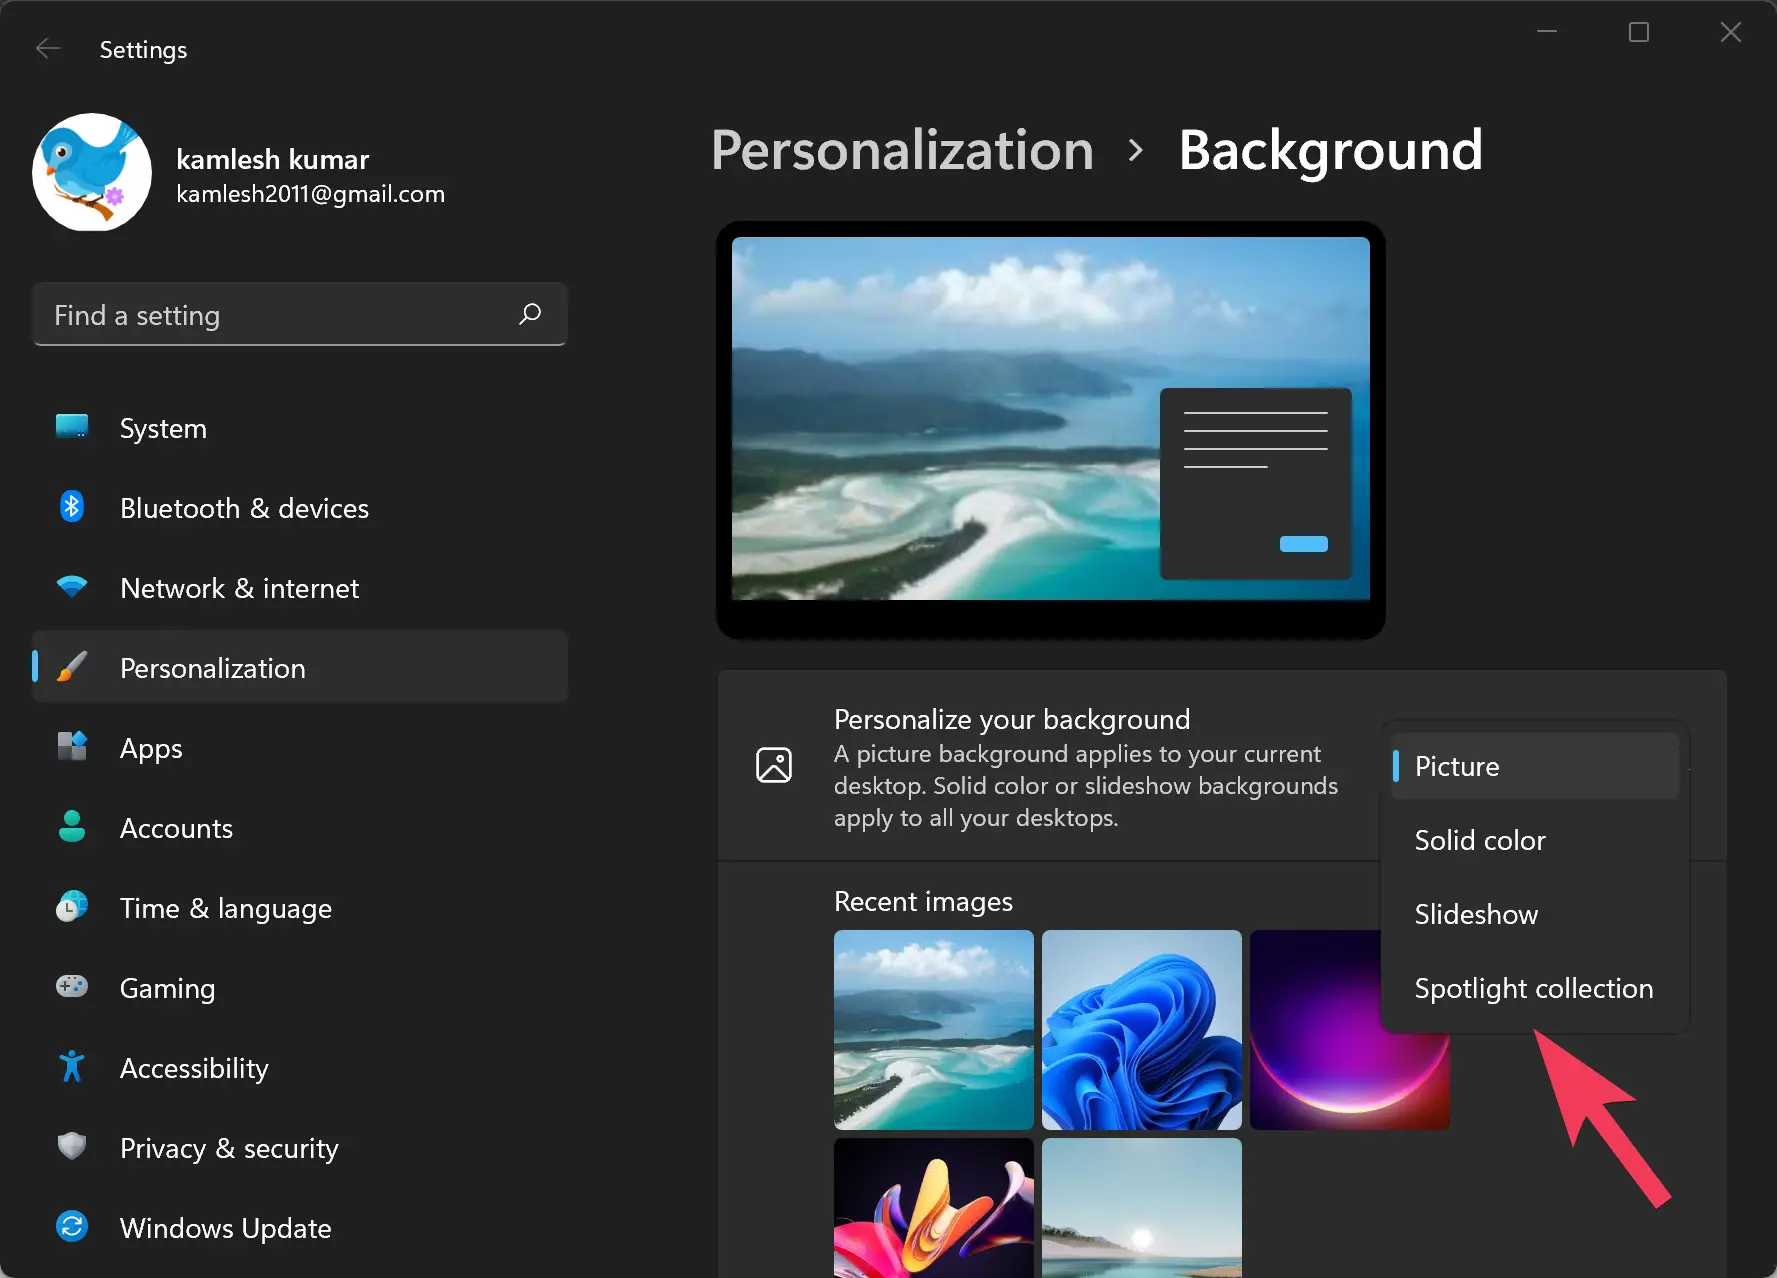
Step 5. Once you complete the above step, Settings > Personalization > Background page will appear. Here, you can choose either an image for your background, a solid color, a slideshow, or a Spotlight collection. You can then browse your photos for your choice of image(s) to use and decide the type of fit you want for your image.
How to Rename Virtual Desktops on Windows 11?
By default, Microsoft automatically names your desktops as “Desktop 1,” “Desktop 2,” etc. You can change that easily by giving each desktop a unique name.
Step 1. Click on or hover over the “Task view” icon on the taskbar.
Step 2. Right-click on the desktop you want to change the name and select the Rename option.
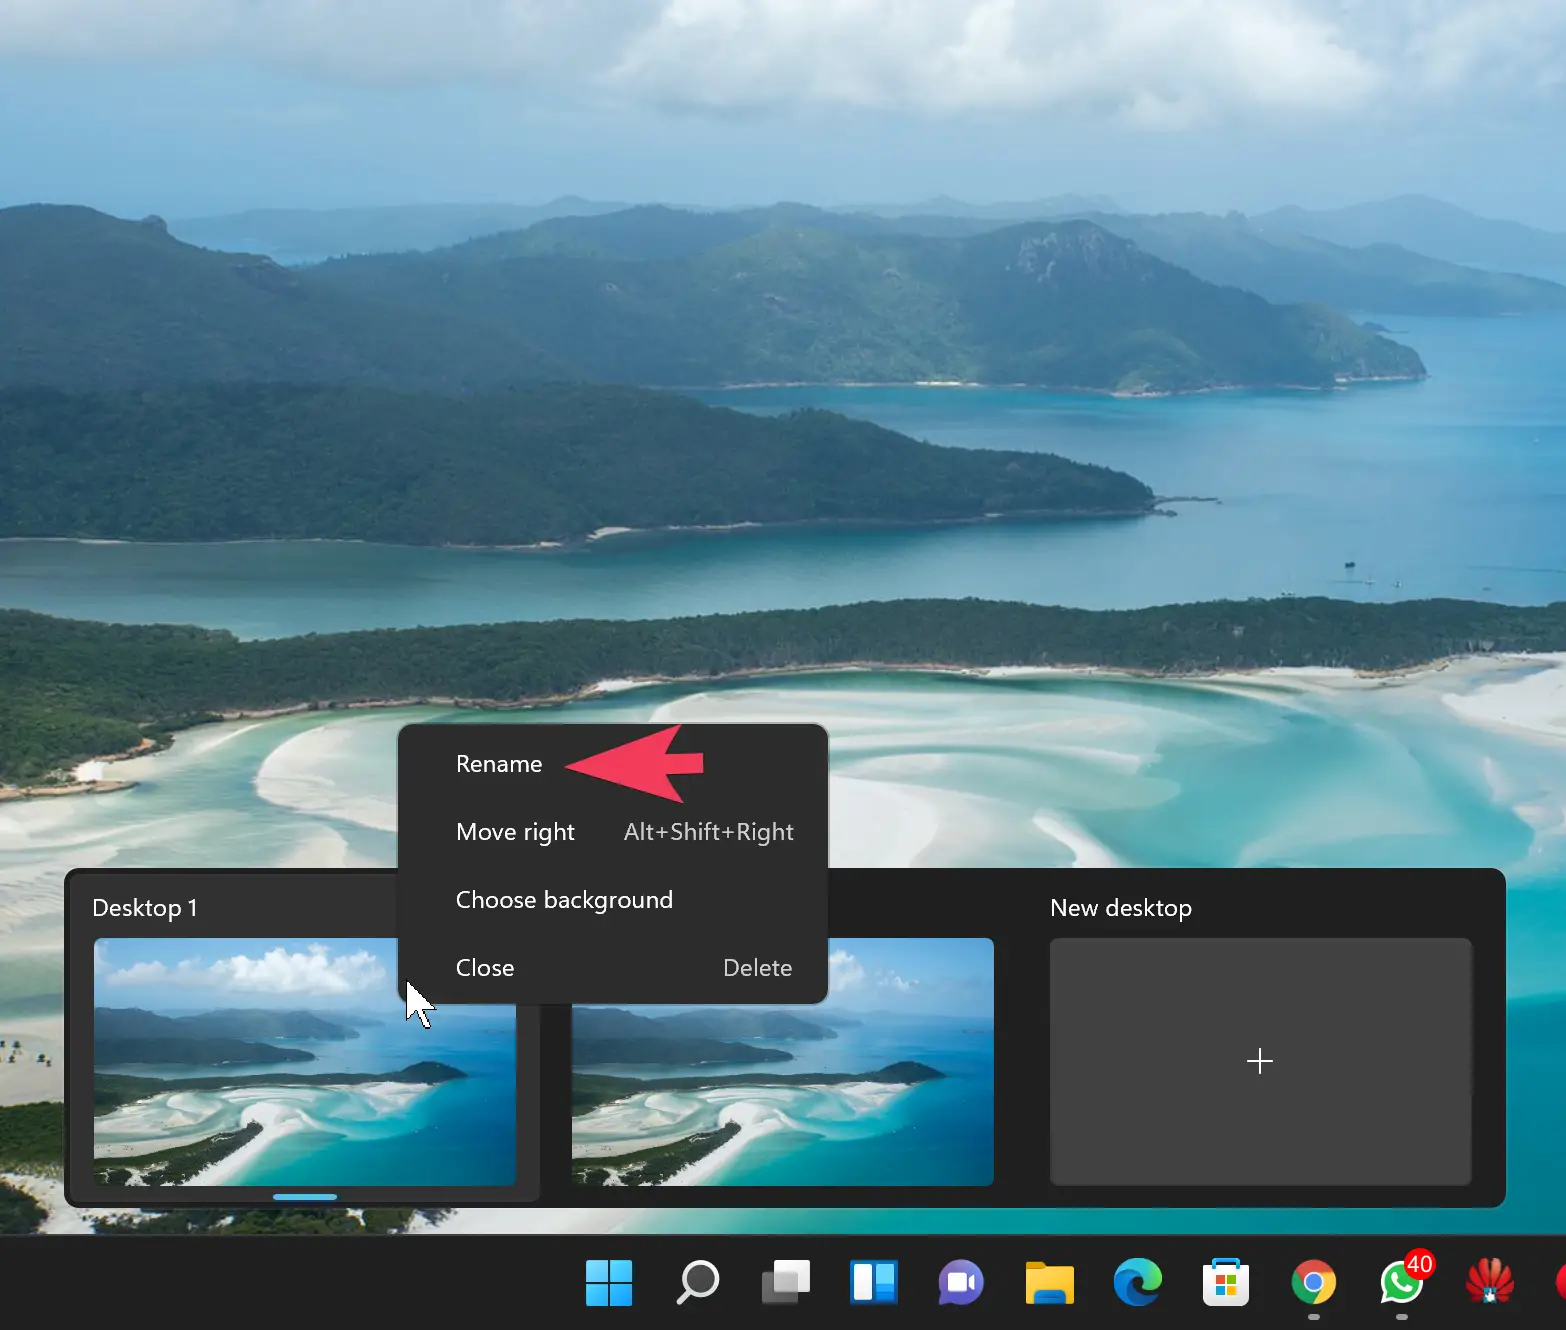
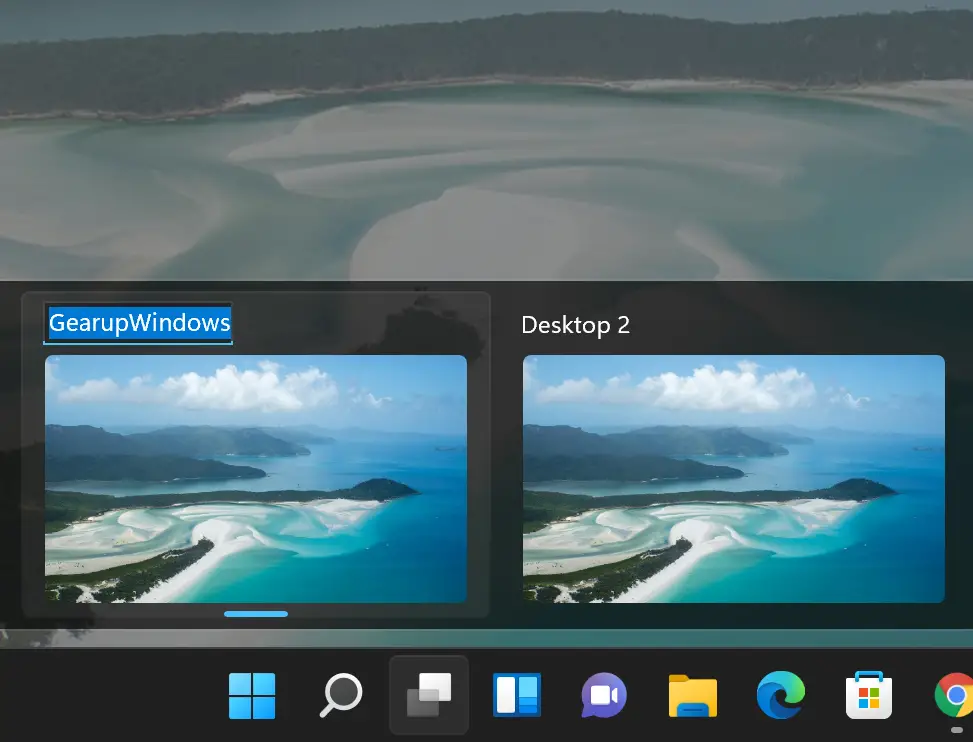
Step 3. Type in the new name.
How to Rearrange Virtual Desktops?
If you need, you can change the desktops’ order to make it easier to remember which to use and when to use.
For that, click on or hover over the “Task view” icon. Then, click and hold on the desktop you want to move and drag it to its new position. That’s it.
How to Use the Same App on Different Desktops?
If you are already using an app on one desktop and want to open the same window on another, do the following:-
Step 1. Click on the “Task view” button.
Step 2. Select a desktop from where you want to duplicate running apps on another desktop.
Step 3. Then, right-click on the app you want to use on the other desktop.
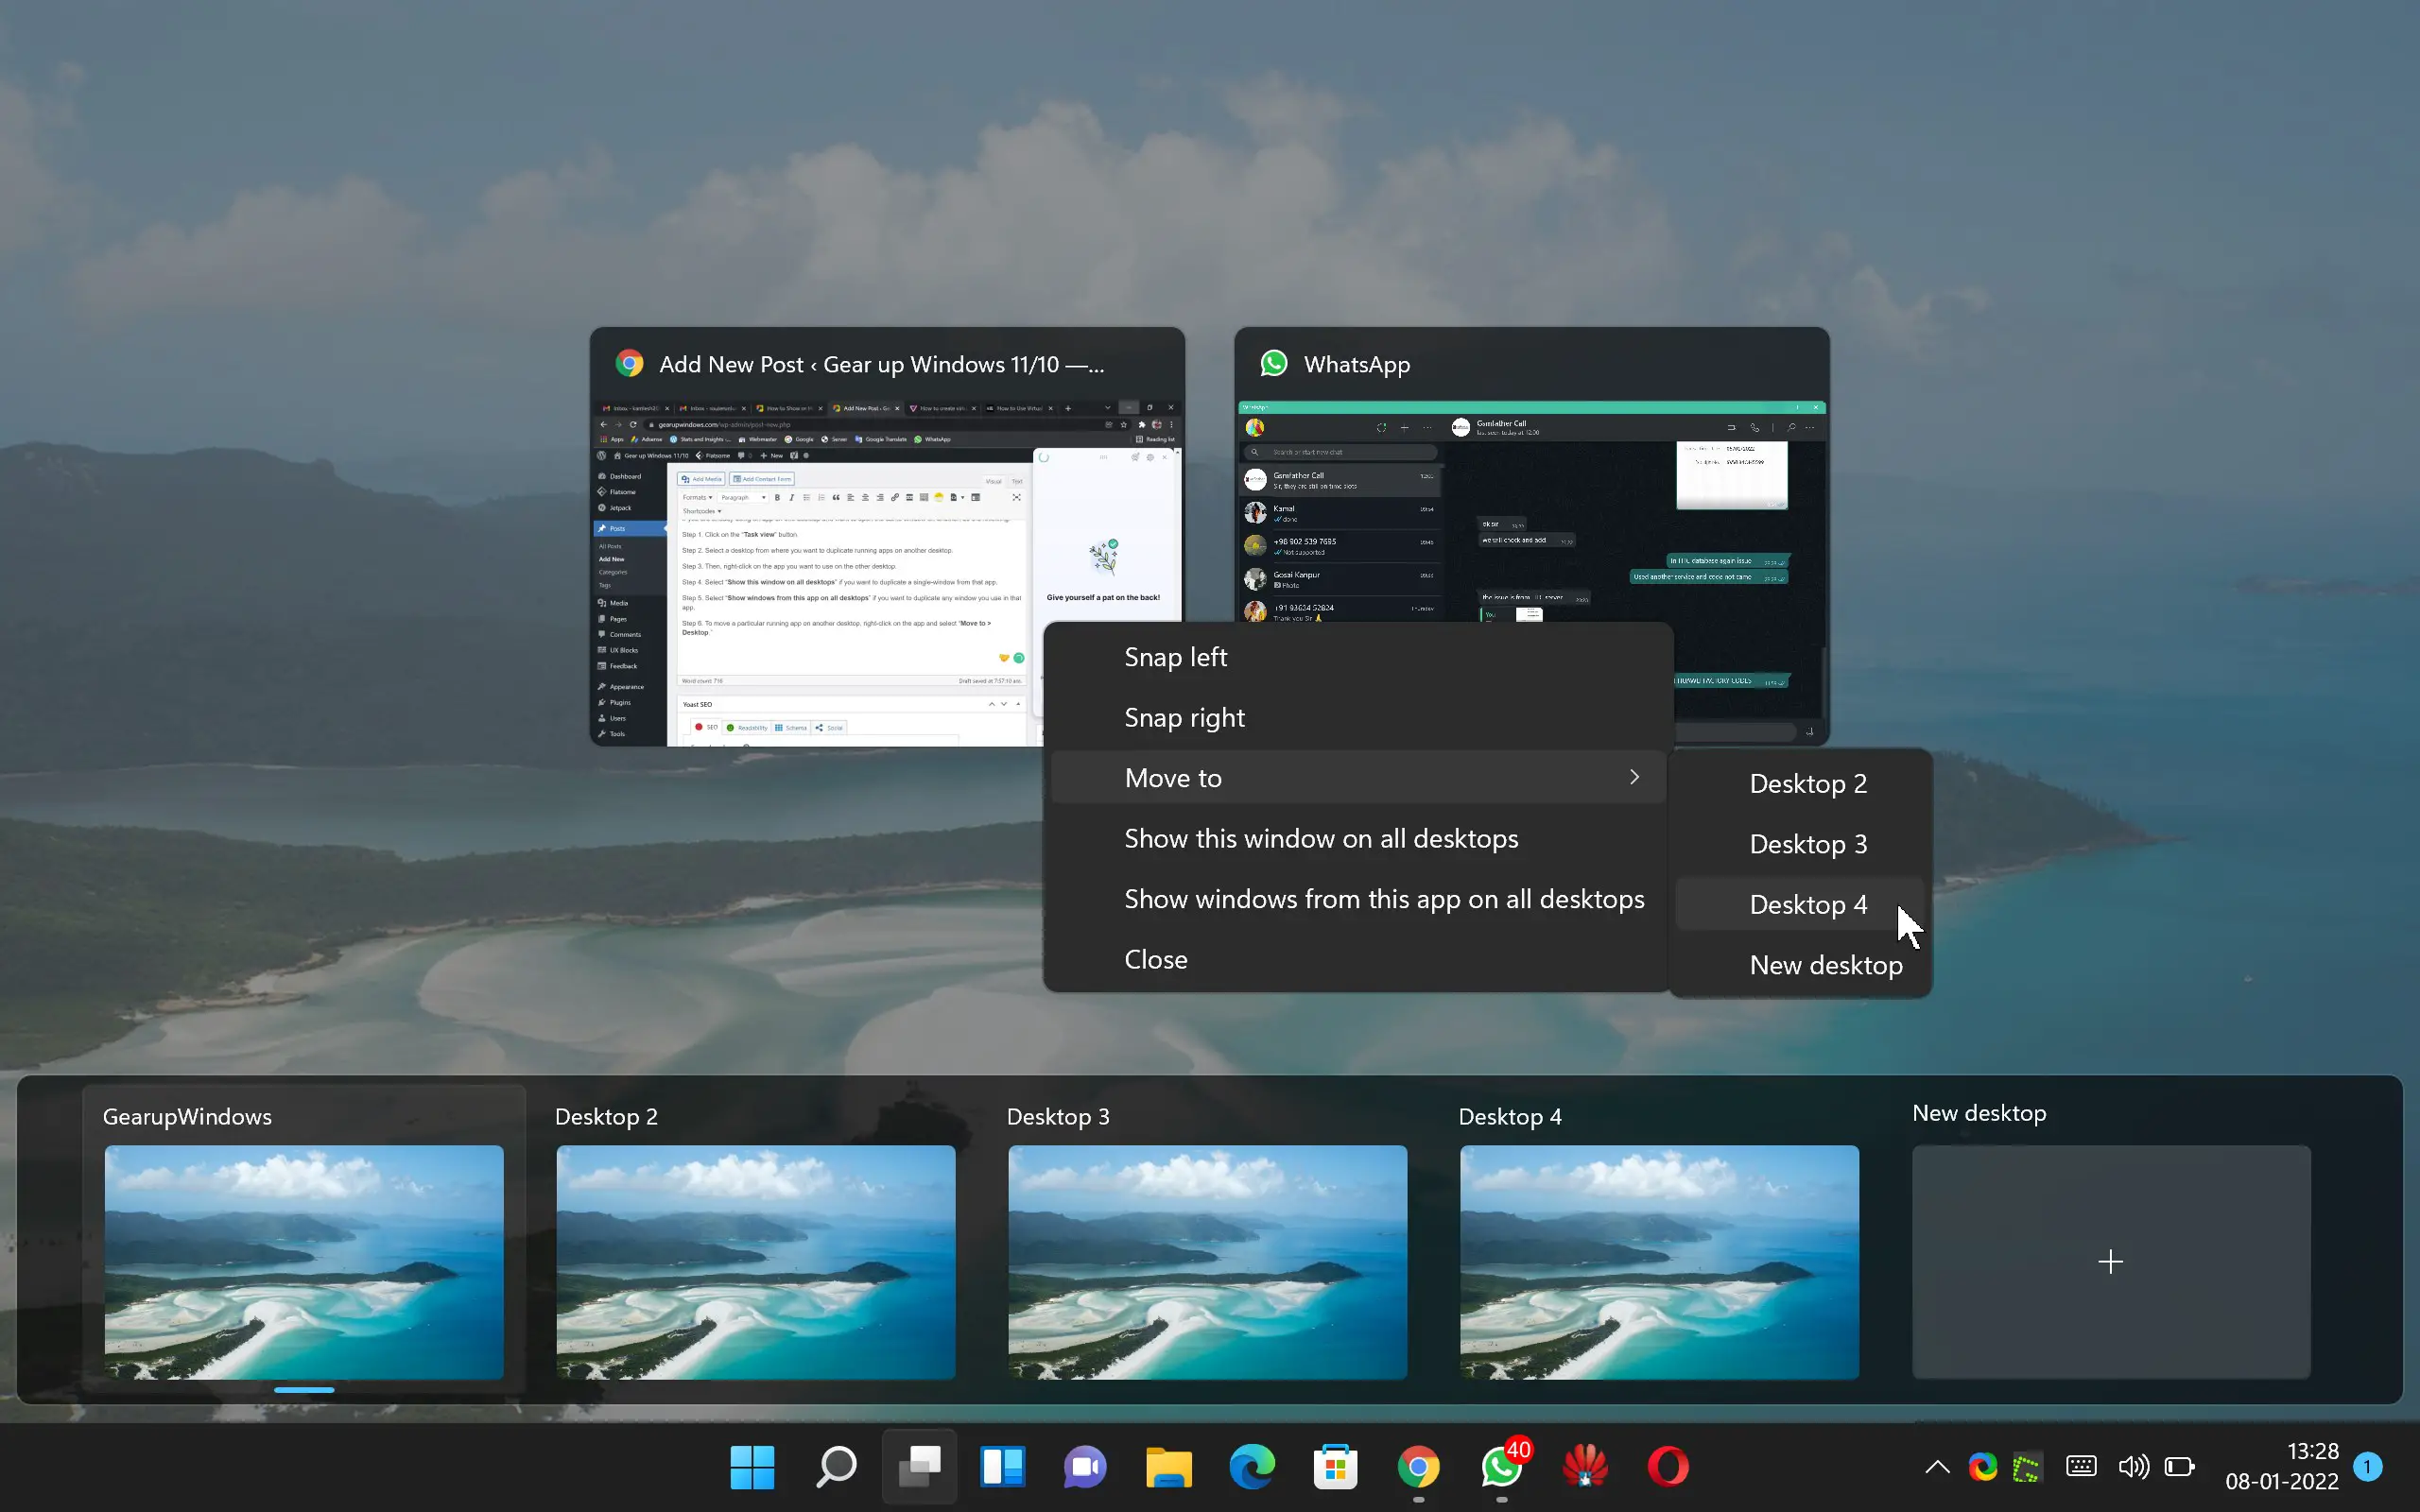
Step 4. Select “Show this window on all desktops” if you want to duplicate a single window from that app.
Step 5. Select “Show windows from this app on all desktops” if you want to duplicate any window you use in that app.
Step 6. To move a particular running app on another desktop, right-click on the app and select “Move to > Desktop.”
Conclusion
In conclusion, the Virtual Desktop feature is a great addition to Windows 11, allowing users to create separate desktops for various purposes and easily switch between them. With the ability to customize wallpapers, rename desktops, rearrange them, and use the same app on different desktops, users can create a personalized and efficient workspace. The steps to create and use Virtual Desktops on Windows 11 are easy to follow, and users can start taking advantage of this feature right away. Overall, the Virtual Desktop feature on Windows 11 is a great way to enhance productivity and multitasking on your PC.