When you left click on the desktop, hold the mouse, and then drag the pointer over items to select them, a box appears on the desktop; you can call this Selection Rectangle. By default, a translucent selection rectangle box opens when you left click and hold and then drag the pointer over items to select them. When you release the left click, things get elected that you can move to the different locations on your PC or delete if required.
If you need, you can change the color of the selection rectangle background and borders on Windows 11, 10, 8, or 7. Also, if you no longer need to see the selection area, or if it affects your PC performance, you can disable it. When the translucent selection rectangle is turned off for the desktop, you will only see an outline selection rectangle on the desktop.
In this gearupwindows article, you will learn how to customize or disable the Desktop Selection Rectangle in Windows 11 or 10.
How to Change the Background Color of the Desktop Selection Rectangle?
if you find the rectangle hard to see or just want to personalize your Windows PC, use these steps to customize the background color of the selection rectangle:-
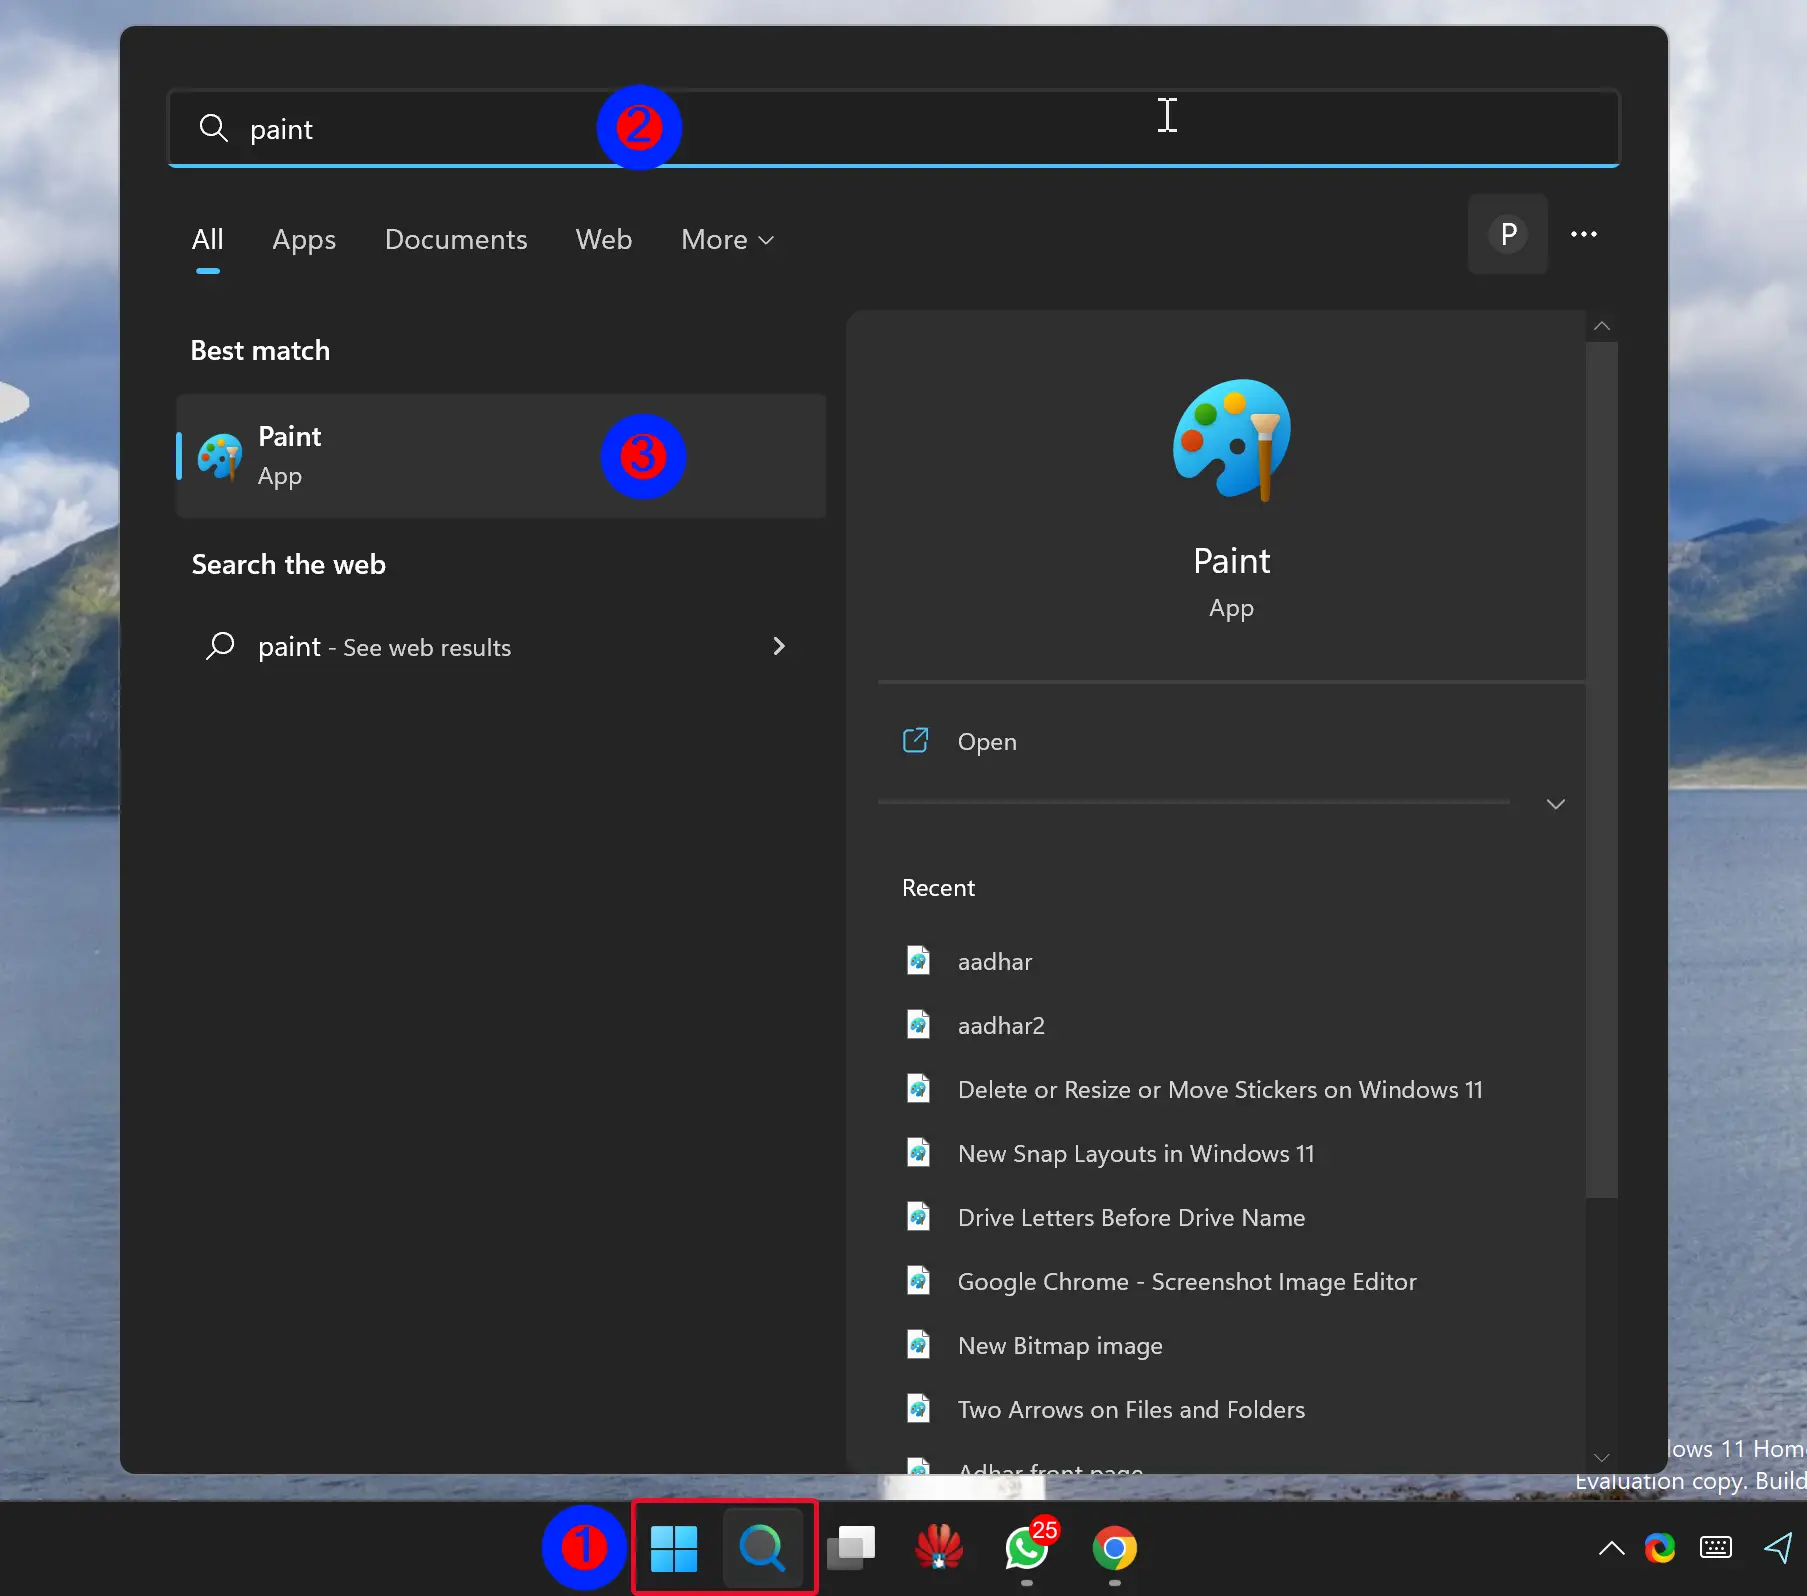
Step 1. First, open the paint (mspaint.exe) application on your computer.
To do that, click on the Start button and type paint. Click the same name in the search result to open it.
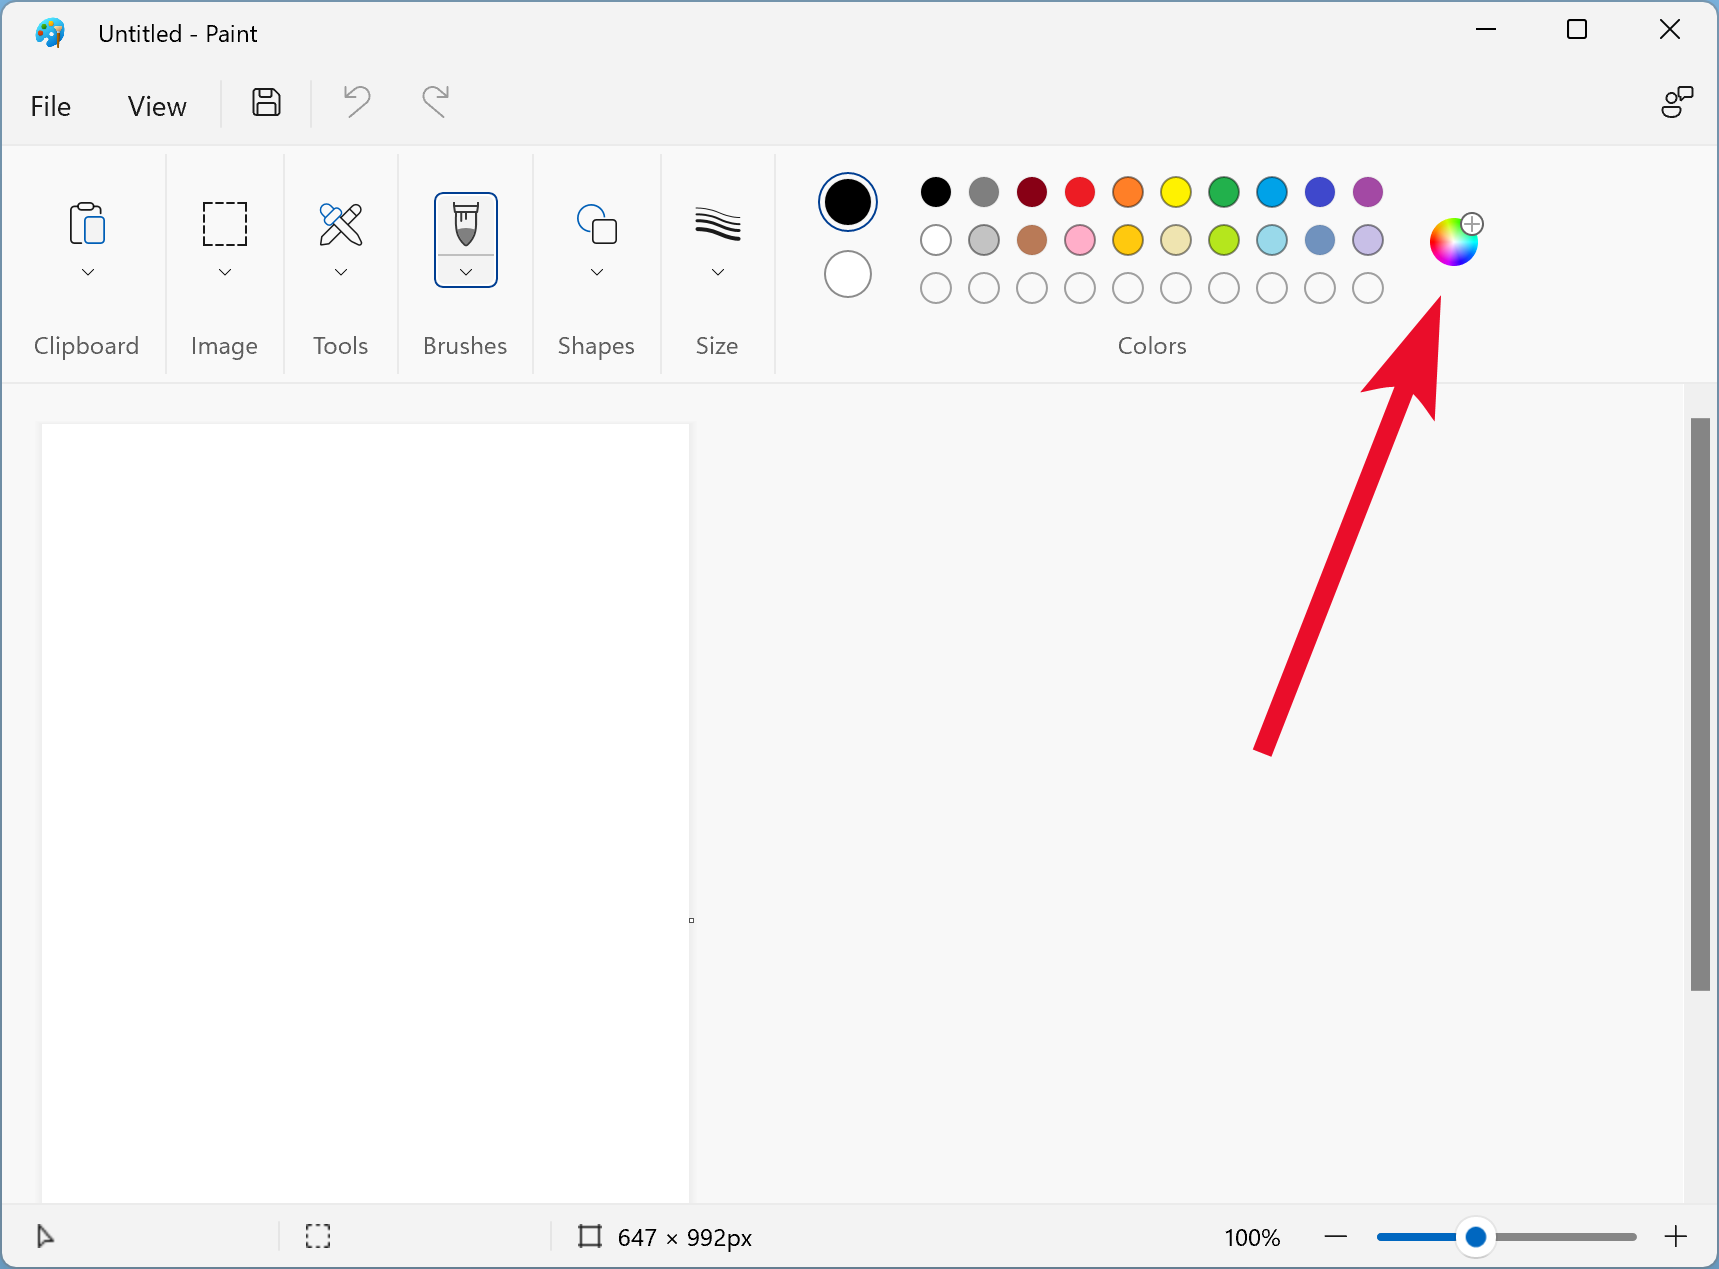
Step 2. When the Paint application appears on your computer, click on the Edit colors button.
Step 3. Now, select a primary color of your choice and then move the cursor over the color palette to get your desired color.
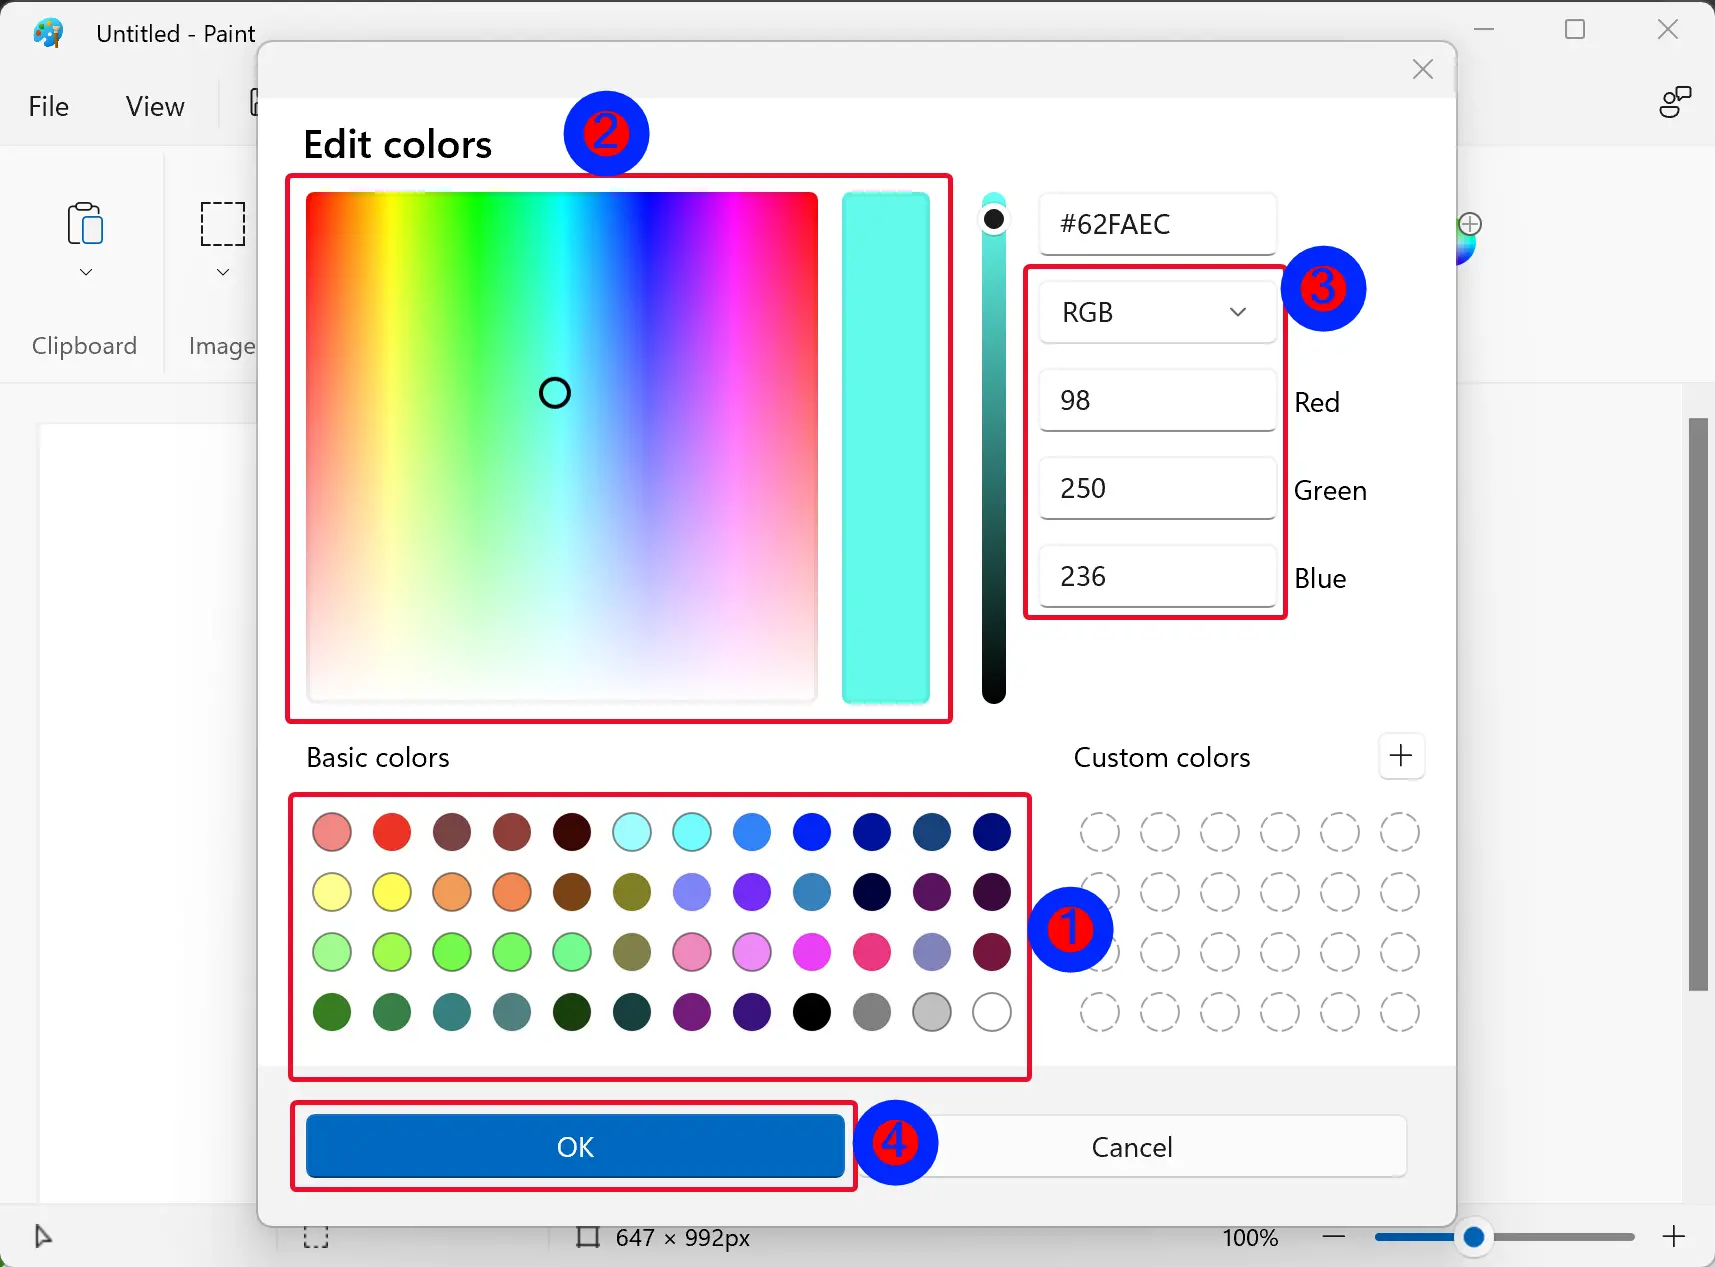
Step 4. Once done, make a note of the RGB (Red Green Blue) numbers (ex: “98 250 236”) for your color. Repeat the above steps to get one more RGB number combination.
Step 5. Now, close the Paint application.
Step 6. Open Registry Editor.
Step 7. Browse or navigate to the following key in the left pane of the Registry Editor window:-
HKEY_CURRENT_USER\Control Panel\Colors
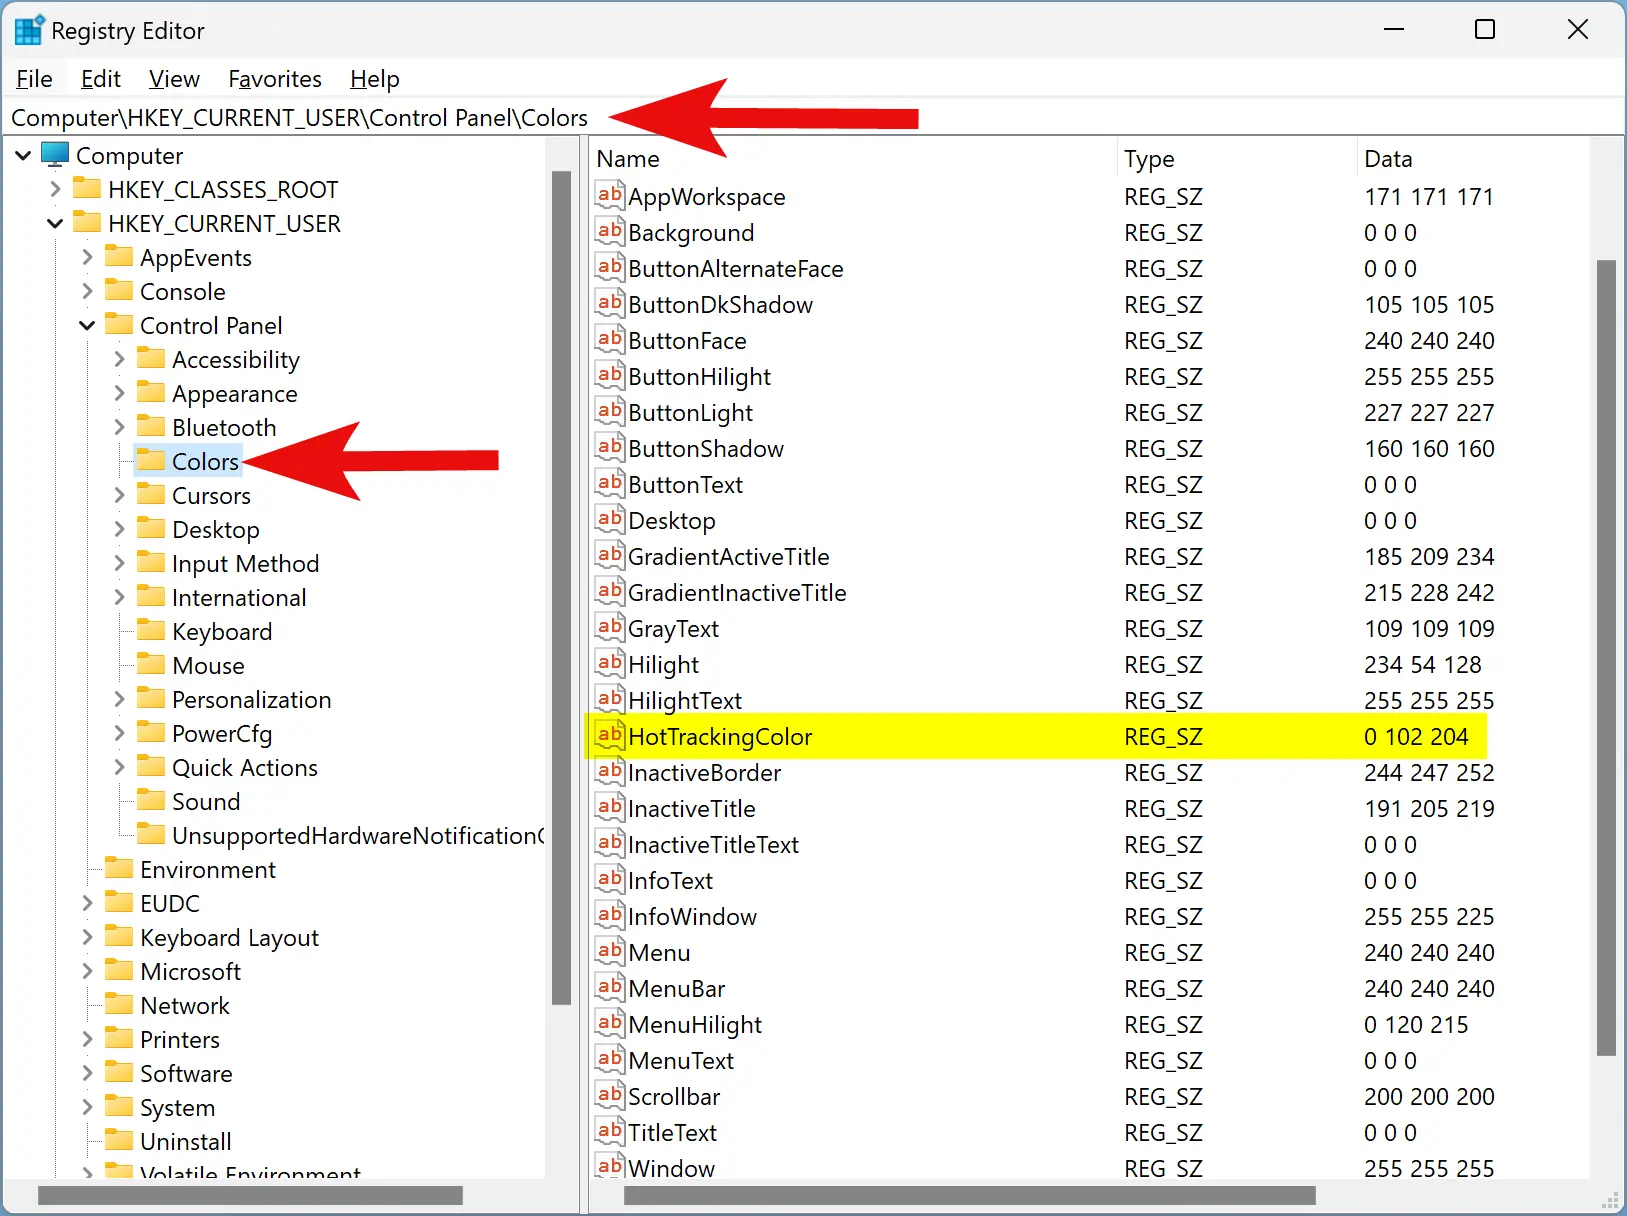
Step 8. On the right sidebar, look for HotTrackingColor REG_SZ and double-click on it to change its default “Value data.”
![]()
Step 9. Enter the desired RGB value with spaces.
Step 10. Click OK.
Step 11. Reboot your computer to apply the changes.
How to Edit the Border Color of the Desktop Selection Rectangle?
It is also possible to change or edit the color of the translucent rectangle border. To edit the border color of the desktop selection rectangle, use these steps:-
Step 1. First, open the paint (mspaint.exe) application on your computer.
To do that, click on the Start button and type paint. Click the same name in the search result to open it.
Step 2. When the Paint application appears on your computer, click on the Edit colors button.
Step 3. Now, select a primary color of your choice and then move the cursor over the color palette to get your desired color.
Step 4. Once done, make a note of the RGB (Red Green Blue) numbers (ex: “98 250 236”) for your color. Repeat the above steps to get one more RGB number combination.
Step 5. Now, close the Paint application.
Step 6. Open Registry Editor.
Step 7. Then, navigate to the following key in the left pane of Registry Editor:-
HKEY_CURRENT_USER\Control Panel\Colors
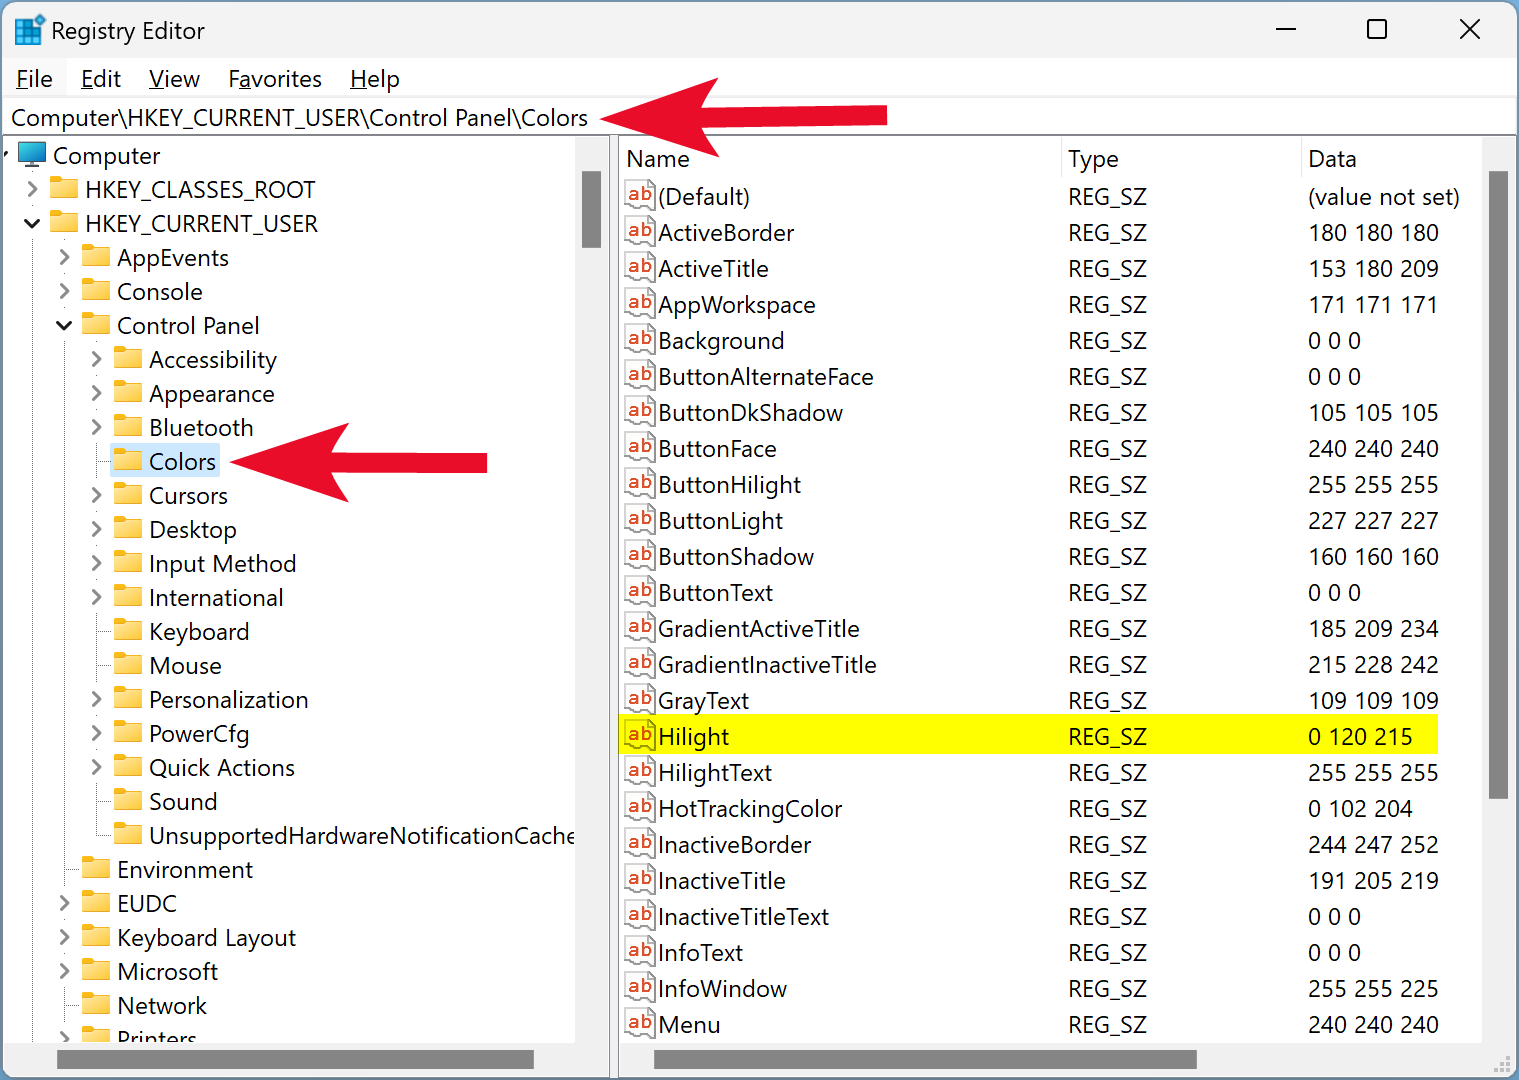
Step 8. On the right side of the Colors folder, double-click on the Hilight REG_SZ to modify it.

Step 9. Enter the RGB numbers (ex: “255 255 255”) for selected text background color in the “Value data” field.
Note: The default RGB value of “Hilight” REG_SZ is 0 120 215.
Step 10. Click OK.
Step 11. Finally, reboot your PC to apply the changes.
How to Enable or Disable Translucent Selection Rectangle on Desktop in Visual Effects Performance Options?
To enable or disable the Translucent Selection Rectangle on Desktop using Visual Effects Performance Options, do these steps:-
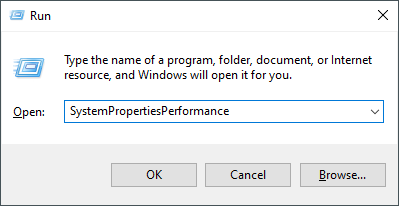
Step 1. First, open the Run dialog box by pressing the Windows + R keys on the keyboard.
Step 2. Then, type SystemPropertiesPerformance into the Run box and click the OK button to open the Visual Effects tab in Performance Options.
Step 3. Here, check or uncheck the checkbox “Show translucent selection rectangle” to enable or disable the feature.
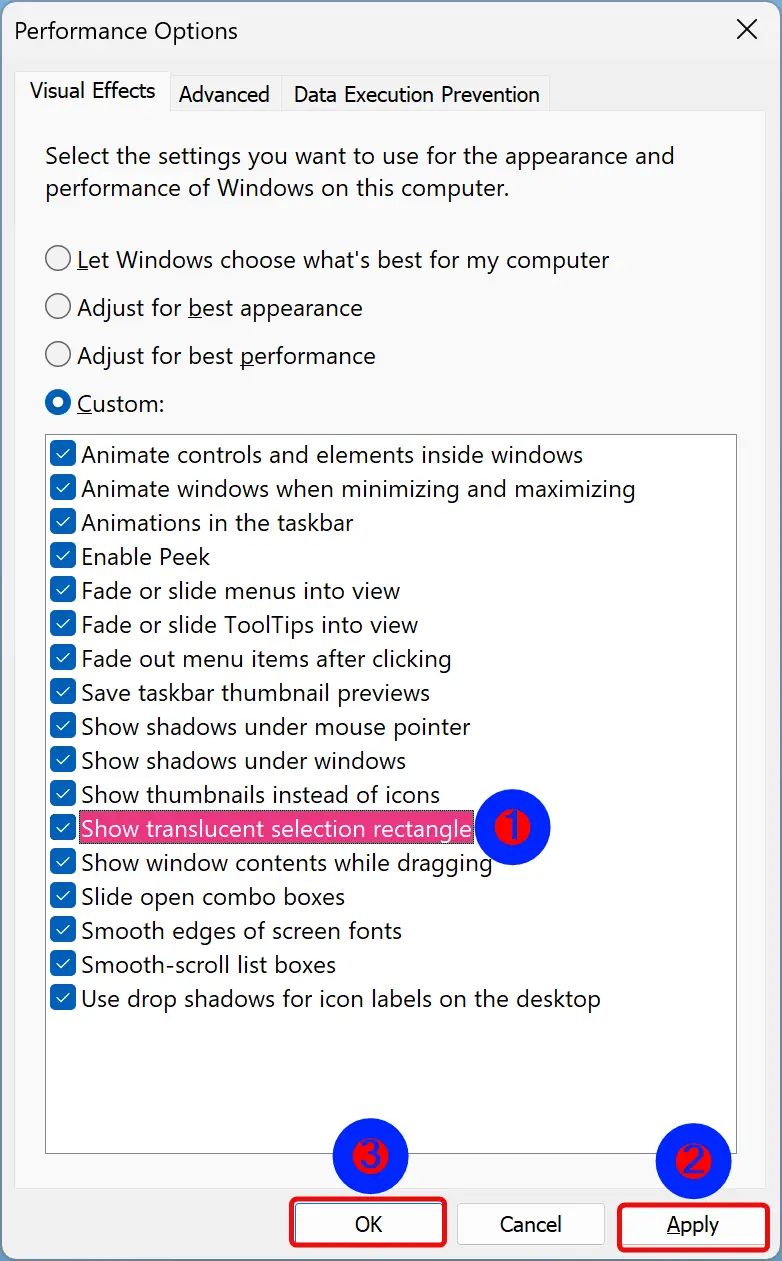
Step 4. Click Apply.
Step 5. Click OK.
How to Turn On or Off Translucent Selection Rectangle on Desktop through Registry Editor?
If you prefer to tweak the Registry, use these steps to enable or disable Translucent Selection Rectangle on Desktop:-
Step 1. Open Registry Editor.
Step 2. Then, browse or navigate to the following key in the left sidebar of Registry Editor:-
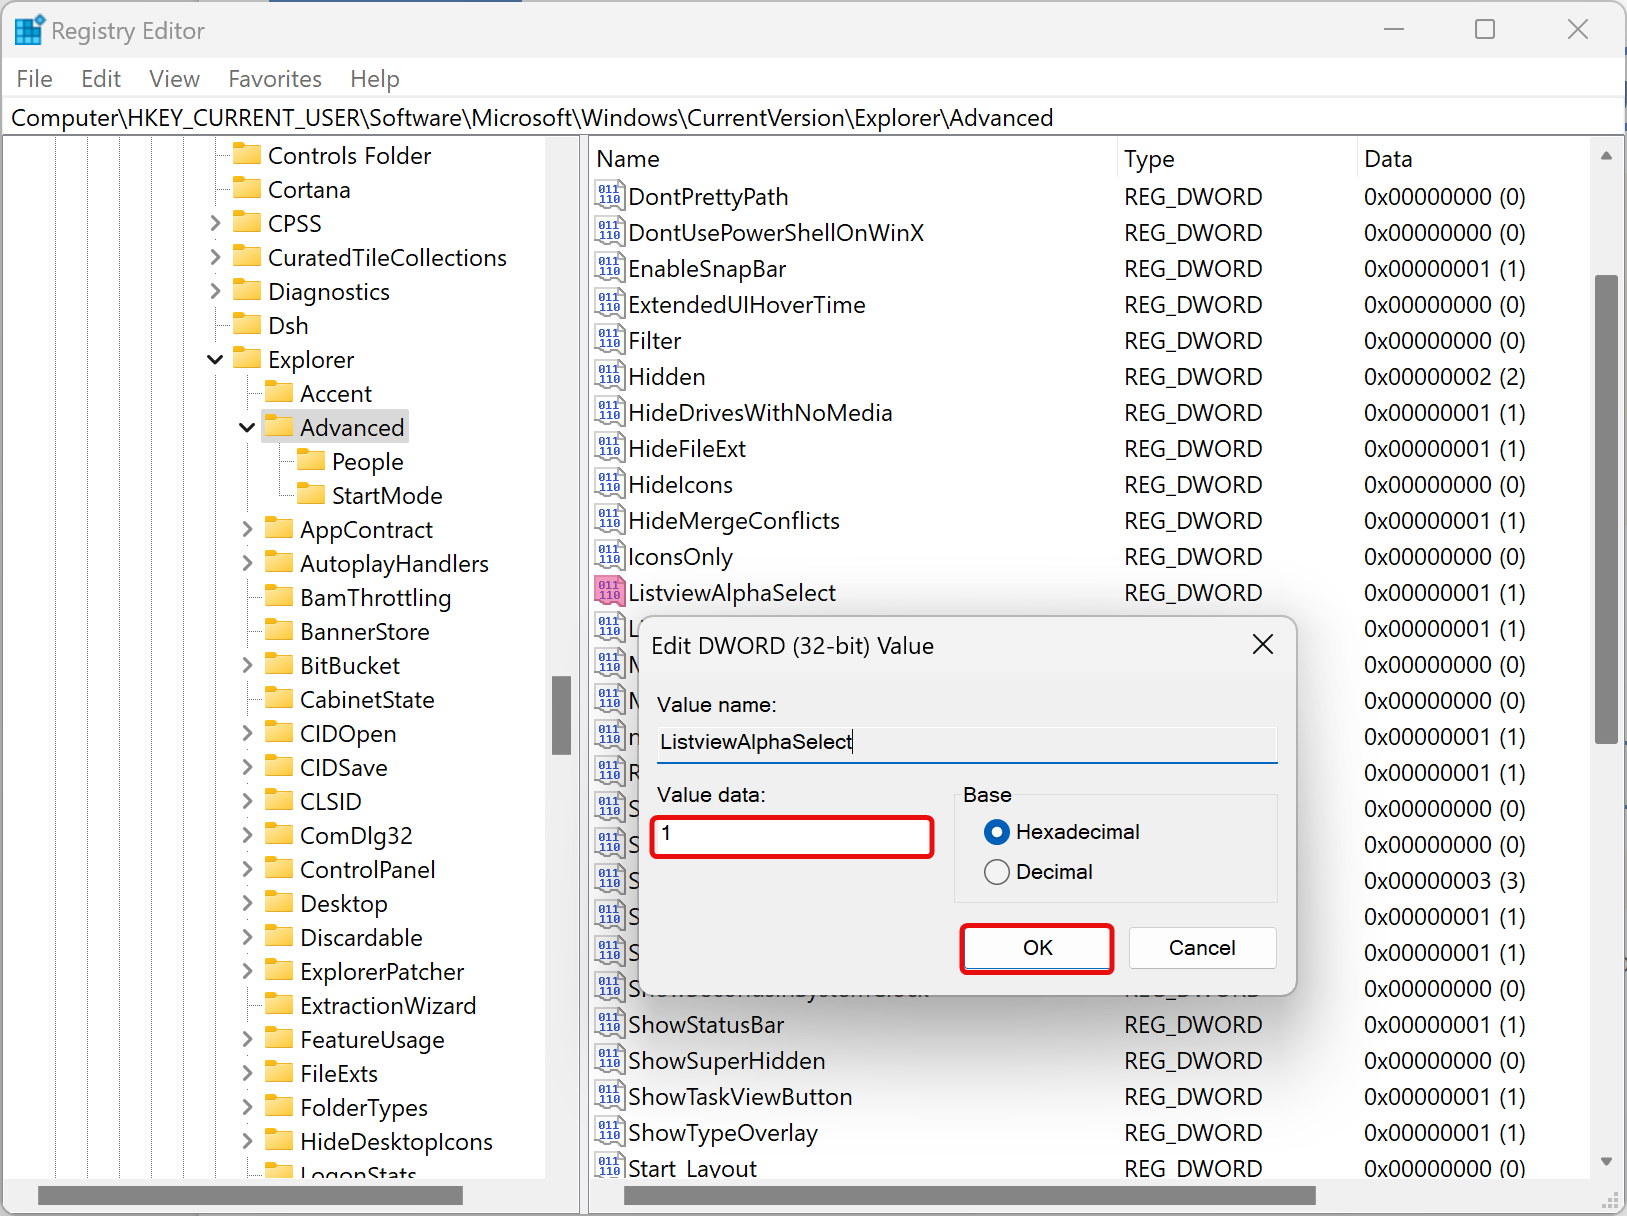
HKEY_CURRENT_USER\Software\Microsoft\Windows\CurrentVersion\Explorer\Advanced
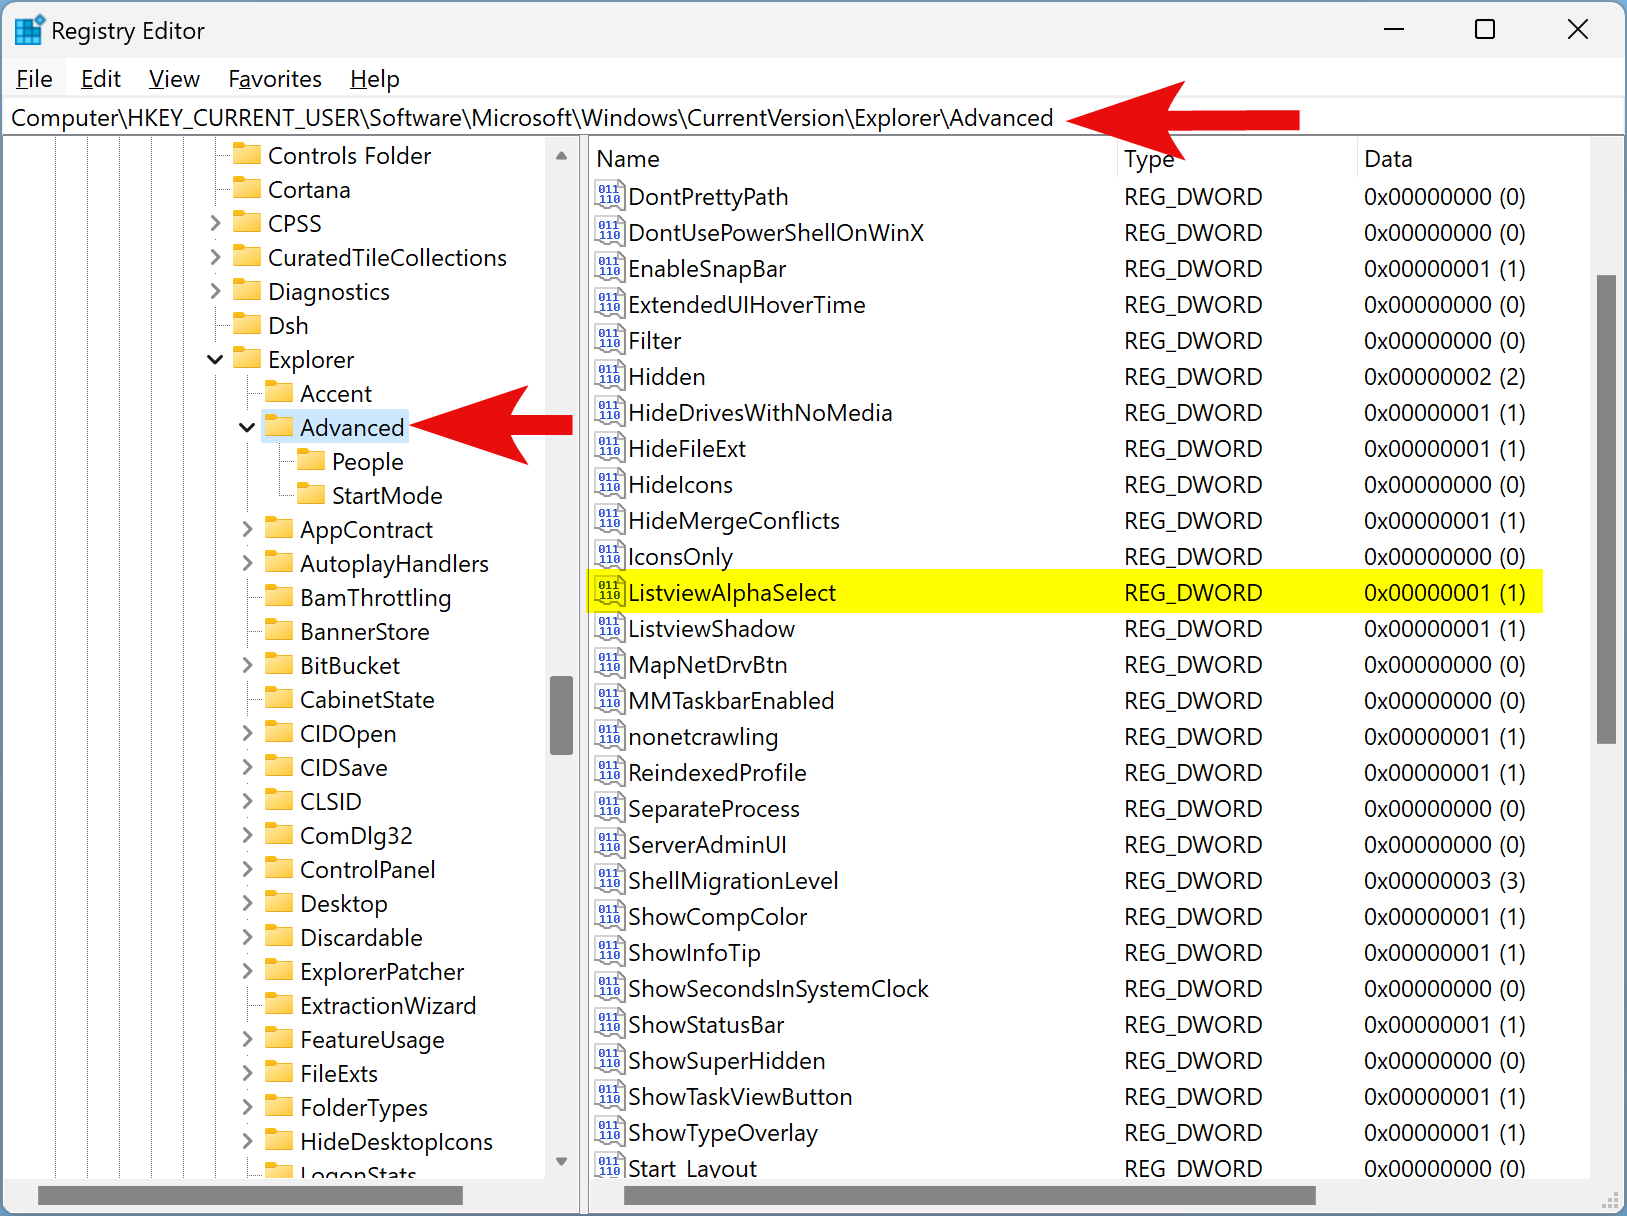
Step 3. On the right sidebar, double-click on the ListviewAlphaSelect REG_DWORD and set its “Value data” to the following:-
- 0: Turn off the future.
- 1: Turn on the future.
Conclusion
In conclusion, customizing the desktop selection rectangle is a simple way to personalize your Windows PC. Changing the background and border colors can help make it easier to see or fit your personal preferences. Disabling the translucent selection rectangle can also improve the performance of your PC. Windows 11, 10, 8, and 7 provide different methods to customize or disable the desktop selection rectangle, including using the Paint application, the Registry Editor, and Visual Effects Performance Options. By following the steps outlined in this gearupwindows article, users can easily modify or turn off the desktop selection rectangle to suit their needs.