A lock screen is one of the customization options that Microsoft has added to Windows 10. Windows 10 lets you optimize and customize the lock screen as well. When a user attempts to sign in, the lock screen slides up. In Windows 10, you can change your Lock Screen by using a freeware application called Windows Logon Screen Changer.
The mouse pointer color can also be customized in Windows 10. You can also download third-party mouse cursors to customize your desktop.

How to set a custom image on the Lock screen of Windows 10?
Windows Spotlight is the default option in Windows 10 that is responsible for pulling images from the cloud to display as a Lock screen. However, Microsoft has also added an option to change the Lock Screen background.
To use a custom image on the Windows 10 Lock screen, do the following:-
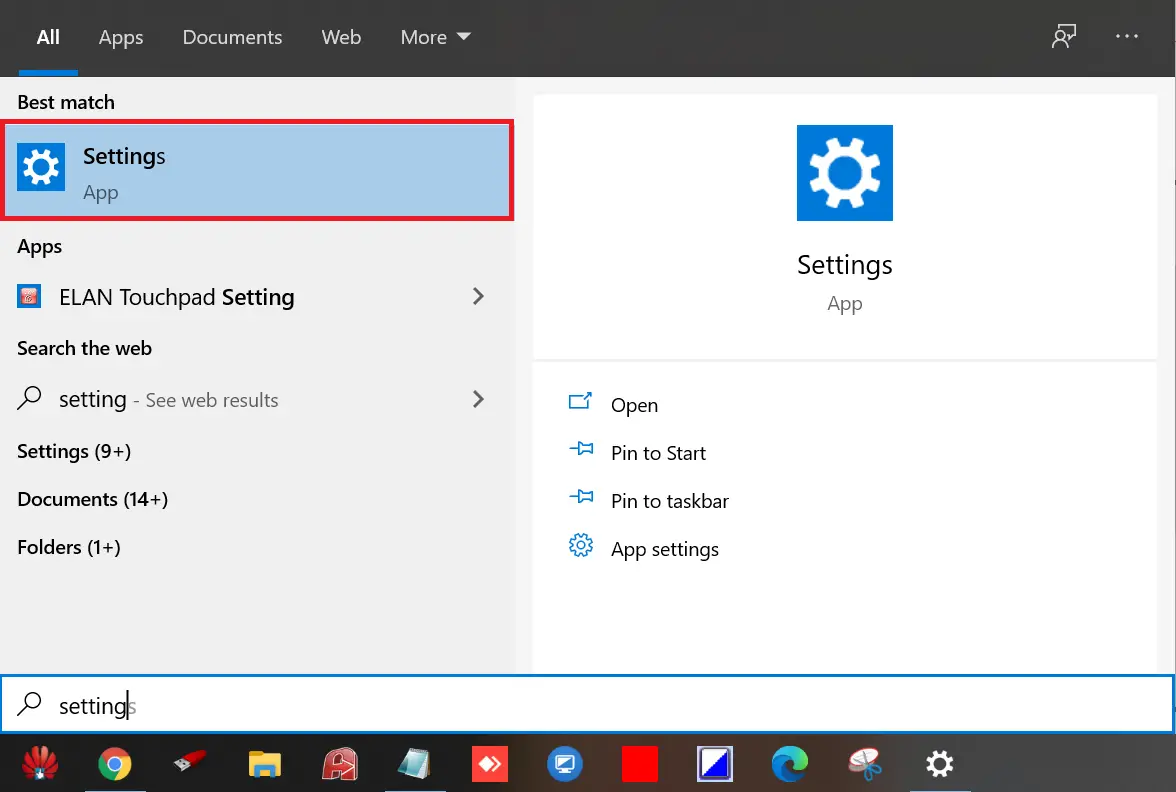
Step 1. Open the Settings app.
To open the Setting app, click on the Start button and type Settings. Click on Settings to open it.
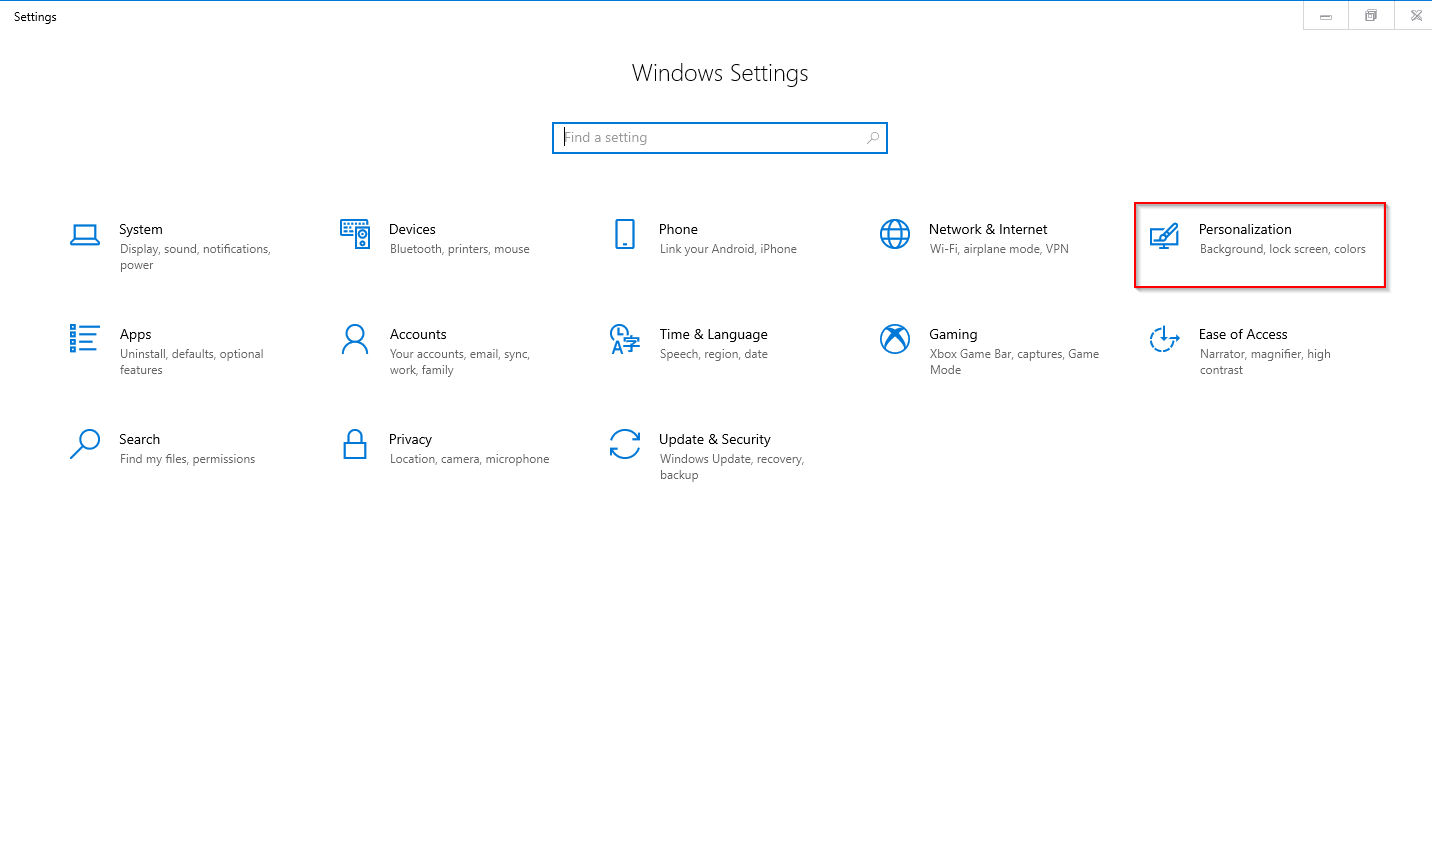
Step 2. Click on the Personalization category under Windows Settings.
Step 3. From the left side options, click on the Lock screen.

Step 4. From the “Background” drop-down menu, select the Picture option.
Here, you can turn off the slider “Get fun facts, tips, and more from Windows and Cortana on your lock screen.”
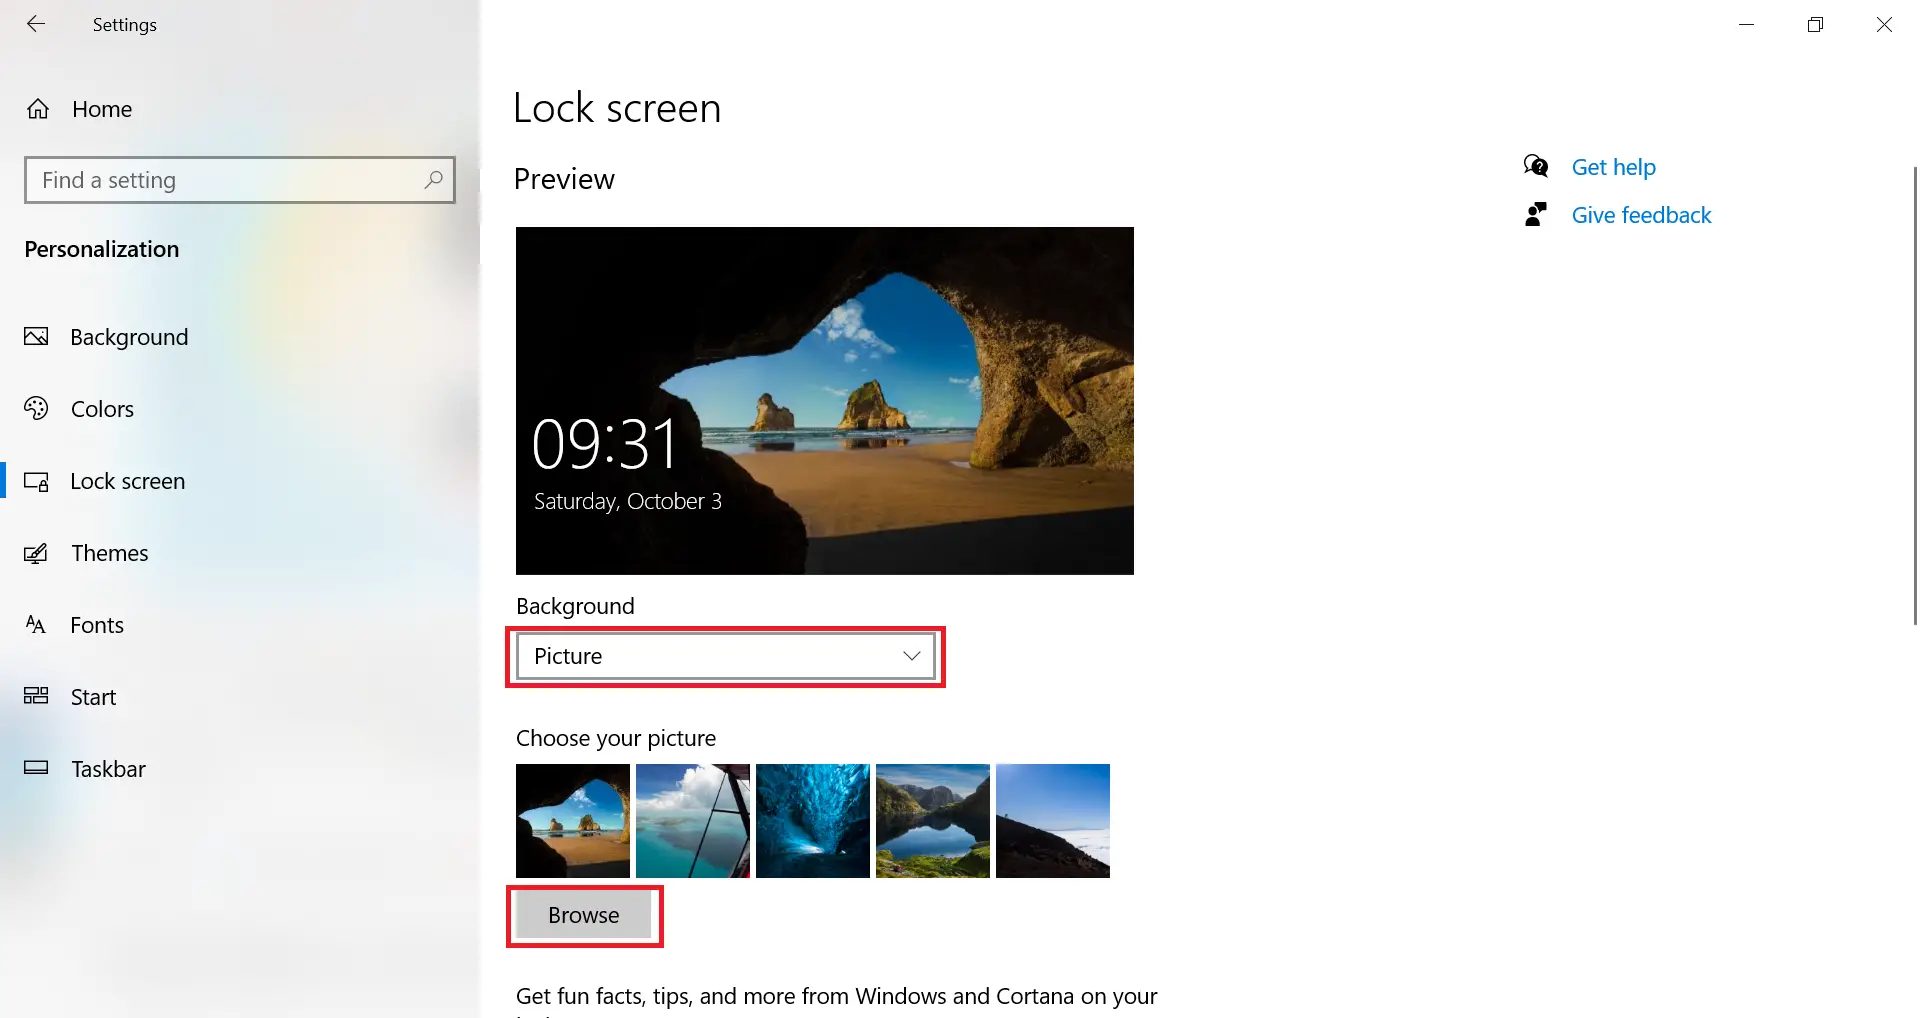
Step 5. Click the Browse button.
Step 6. Select an image from your PC and click the Choose picture button.
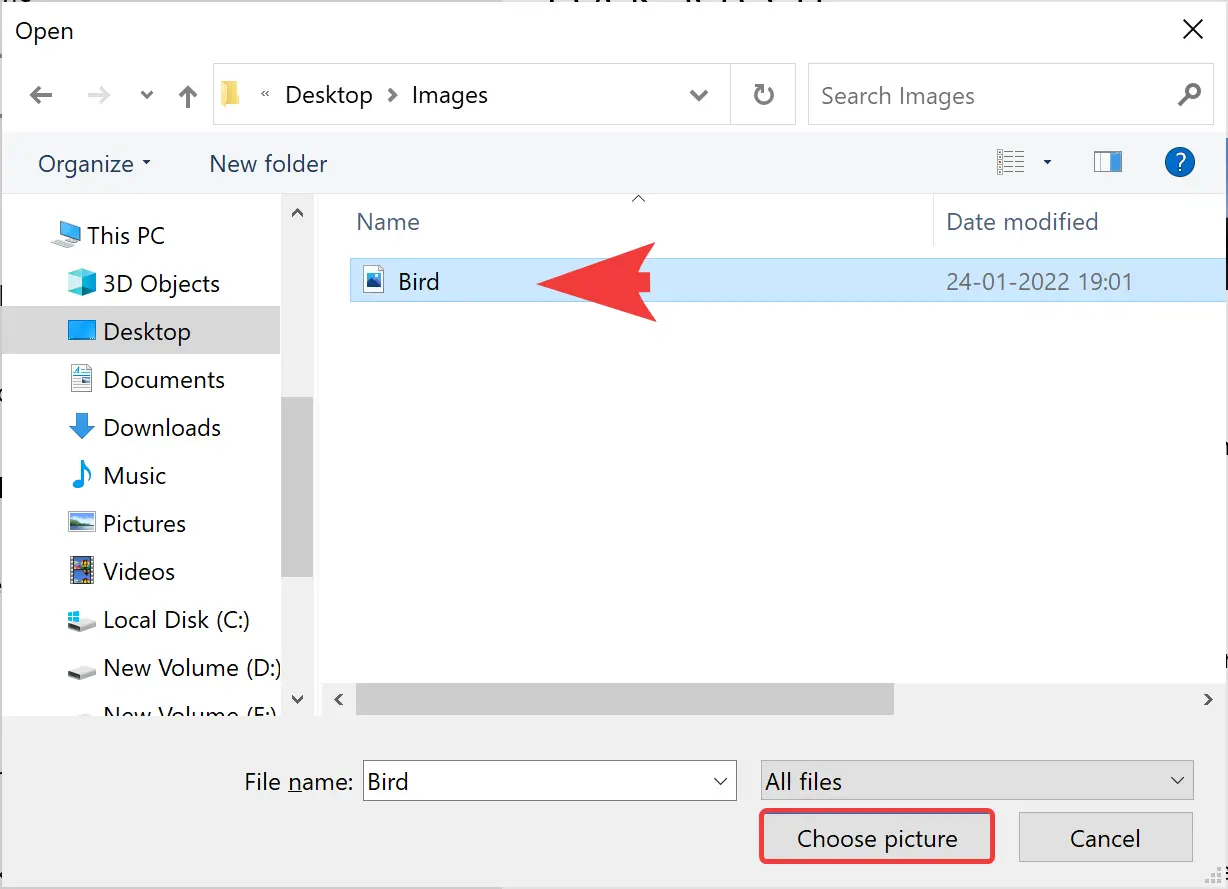
Now, log out from your account to see the new lock screen background image.
How to set a custom slideshow on the Lock screen of Windows 10?
To display a slideshow of images on the Windows 10 Lock screen, do the following:-
Step 1. Open the Settings app.
For that, click on the Start button and type Settings. Now, click on Settings to open it.
Step 2. Click on Personalization under Windows Settings.
Step 3. From the left side options, click on the Lock screen.
Step 4. From the “Background” drop-down menu, select the Slideshow option.
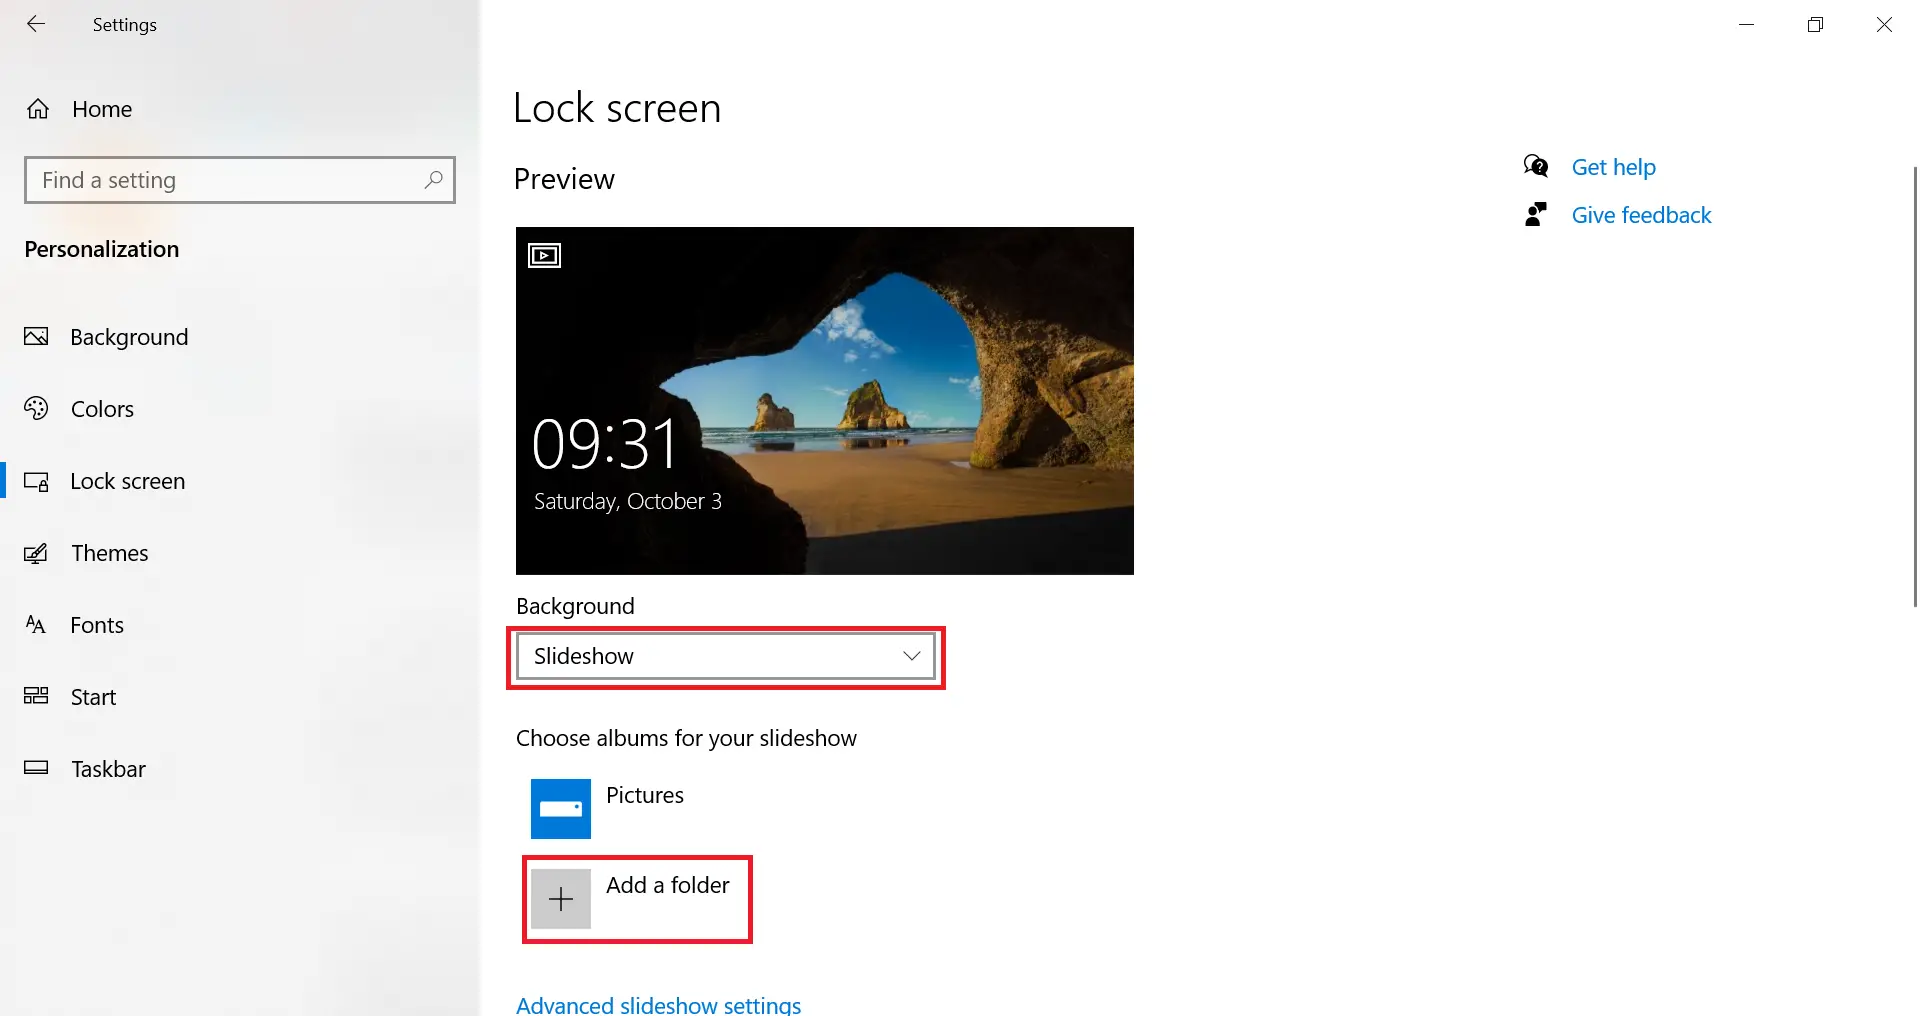
Step 5. Click on the Add a folder button to locate the folder with the images you want to use as a slideshow on the Lock screen.
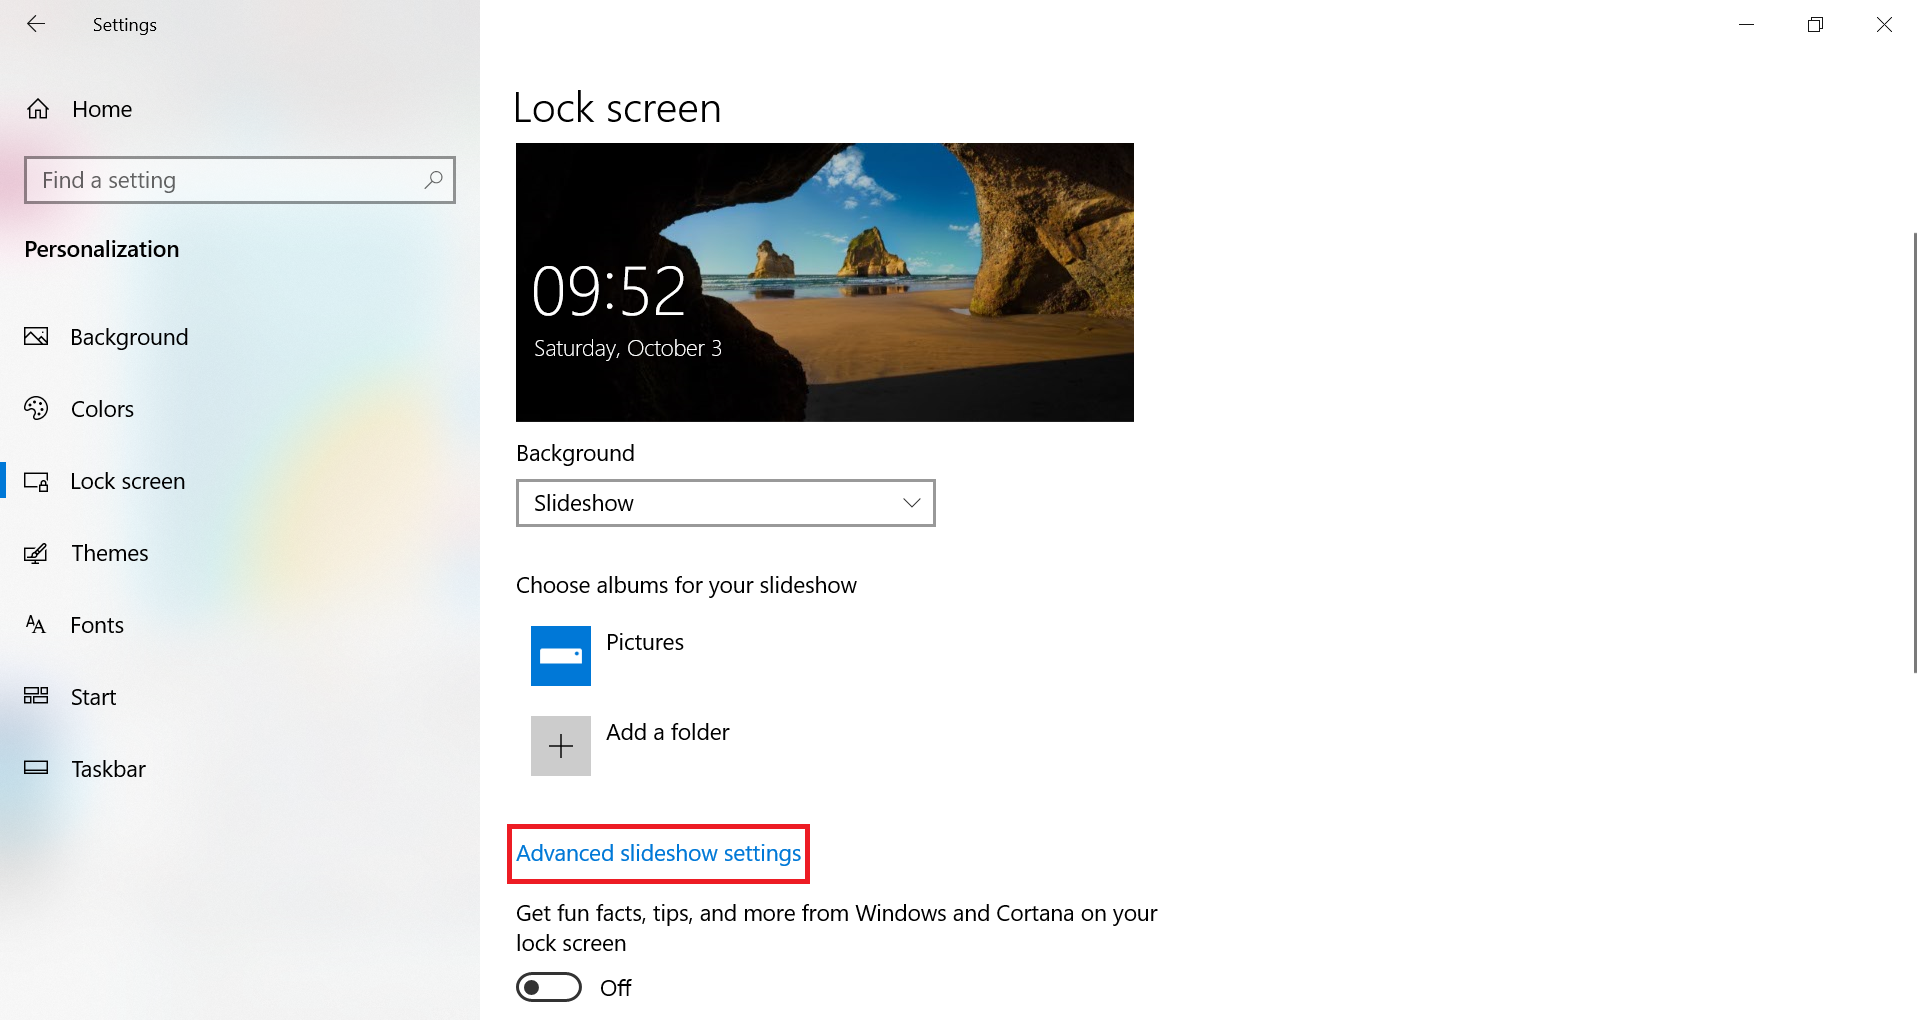
Now you can Log out from your account to see the slideshow of images as a Lock screen.
To tweak more, click on “Advanced slideshow settings.”
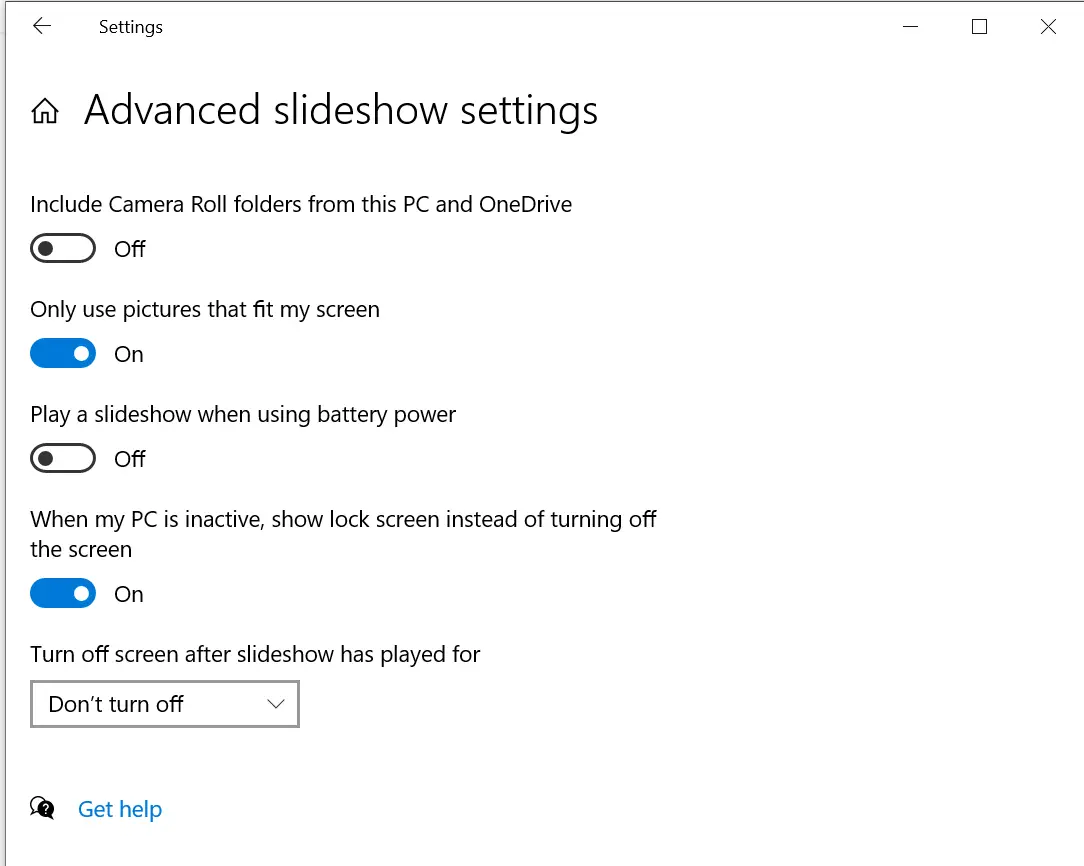
You can set here the optional settings of the Lock screen:-
- Include Camera Roll folders from this PC and OneDrive.
- Only use pictures that fit my screen.
- Play a slideshow when using battery power.
- When my PC is inactive, it shows a lock screen instead of turning off the screen.
How to control app notifications on the Lock screen on Windows 10?
By default, on the Lock screen, Messaging, and Calendar app display information. If you want to control the apps on the Lock screen/add or remove app notifications in your lock screen, do the following steps:-
Step 1. Open the Settings app.
To launch the Settings app, click on the Start button and type Settings. In the available results, click Settings to open the Settings app.
Step 2. Click on Personalization under Windows Settings.
Step 3. From the left side options, click on the Lock screen.
Step 4. Under the “Choose which apps show quick status on the lock screen” section, click the plus (+) (or app icon) button and select from the available app.
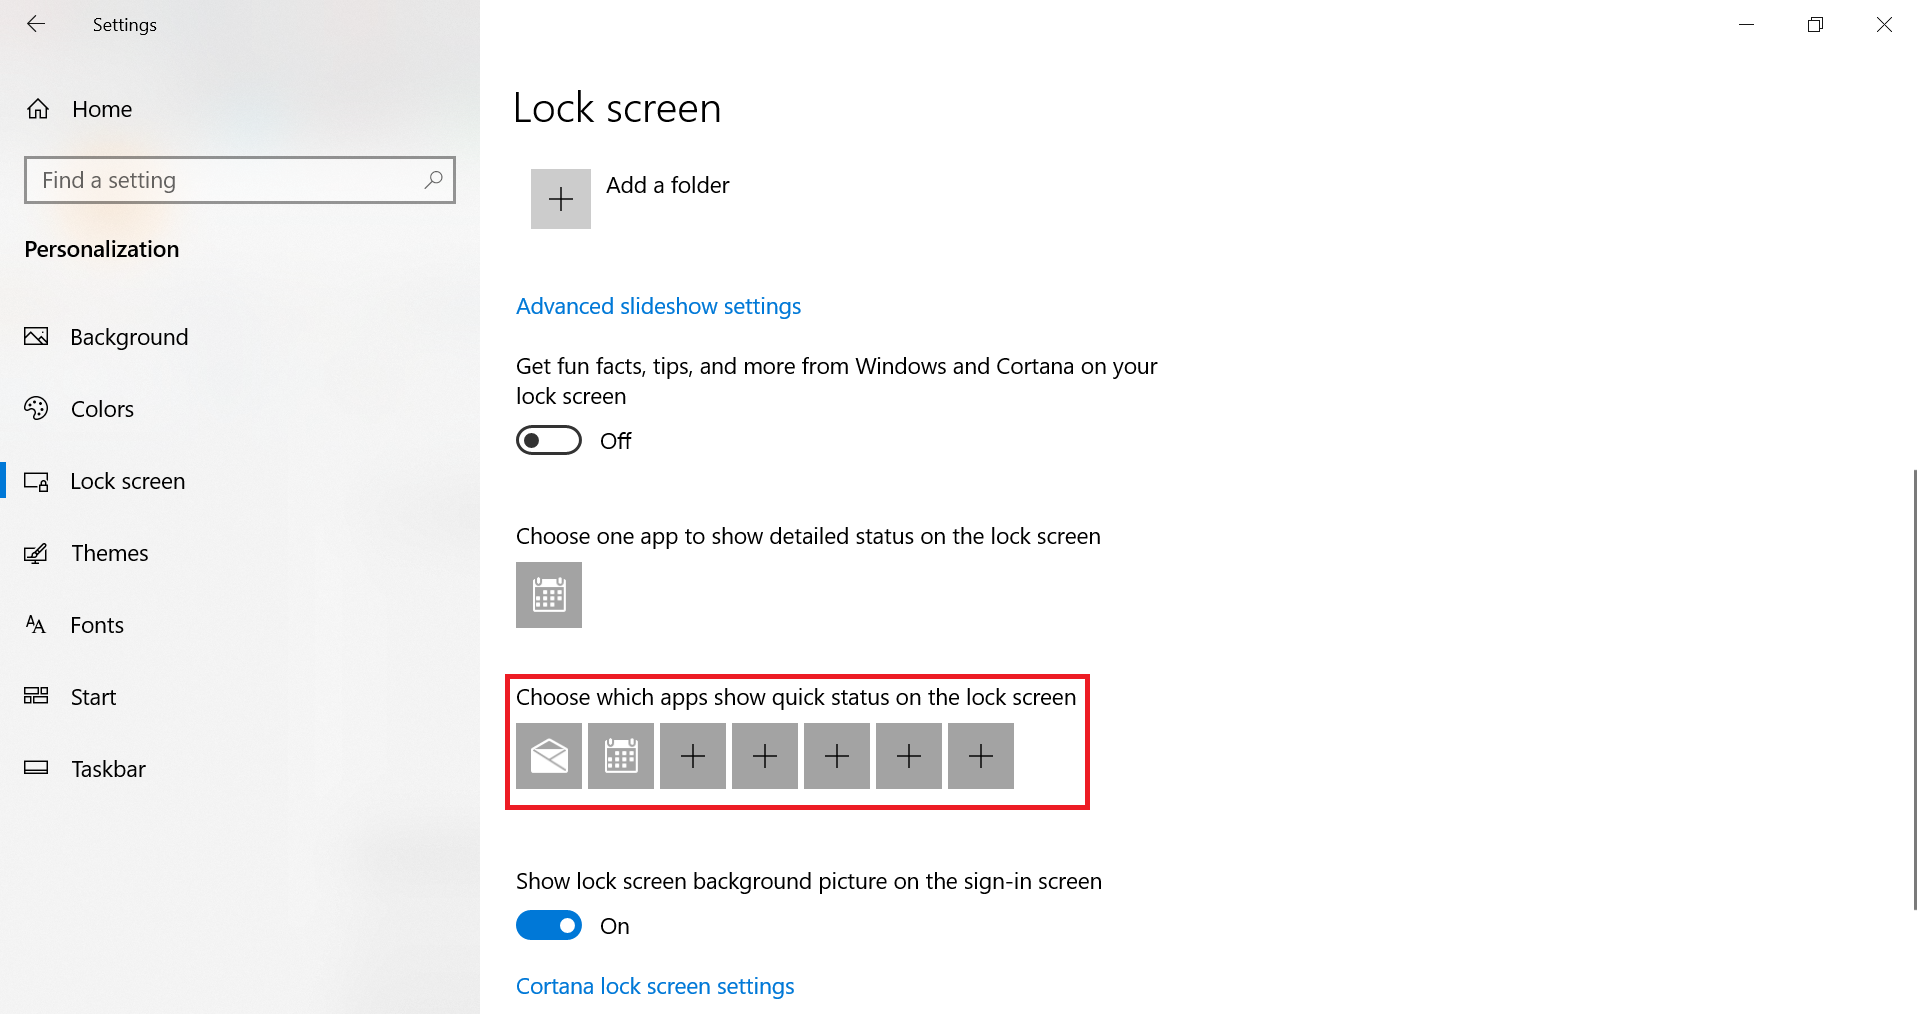
You can add up to 7 apps. Once the above steps are completed, the Lock screen will display notifications for apps in the screen’s bottom-left corner.
That’s all!!
Conclusion
In conclusion, Windows 10 offers several options to customize the Lock screen, allowing users to personalize their desktop according to their preferences. With the Windows Logon Screen Changer, users can change their lock screen, while the mouse pointer color and third-party mouse cursors can also be customized. Users can set a custom image or slideshow as the lock screen background by accessing the Personalization settings, and the apps displaying notifications on the lock screen can be controlled as well. Overall, these customization options provide users with a more personalized and enjoyable computing experience on Windows 10.