Google Chrome is the most popular browser worldwide and has several features, including hardware acceleration. This takes advantage of your computer’s GPU (graphics hardware) to speed up processes and free vital CPU time. This improves the overall user experience while surfing the internet.
However, depending on your device configuration, the hardware acceleration feature of Chrome may negatively affect your experience by preventing visual elements from displaying correctly on the screen. If you are experiencing issues, such as missing menus or dialog boxes, we recommend you disable the hardware acceleration feature and see if this helps you.
In this gearupwindows article, you will learn to enable and disable hardware acceleration in Google Chrome.
How to Turn Off Hardware Acceleration in Chrome?
To disable Hardware Acceleration in the Chrome browser, use these steps:-
Step 1. First, open the Chrome browser on your Windows 11 or 10 machine.
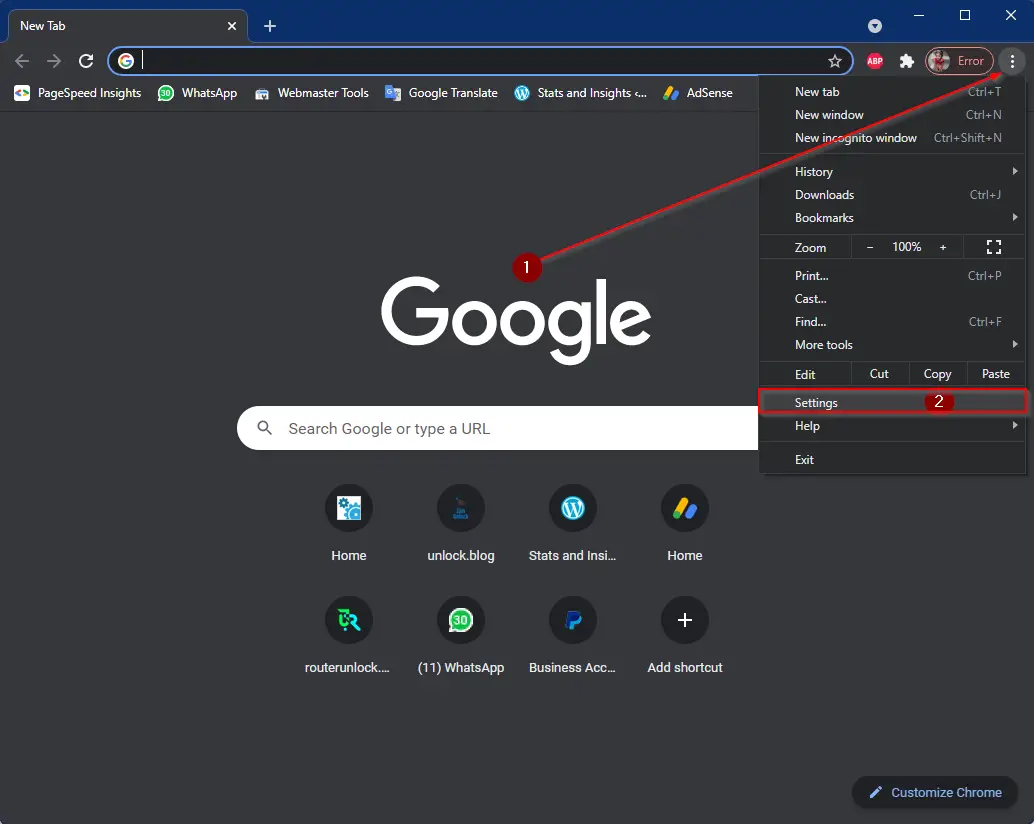
Step 2. Then, click on the horizontal ellipsis menu button in the top-right corner of Chrome and select the Settings option in the drop-down menu.
Step 3. When the Chrome Settings page appears on the screen, select the System tab in the left side menus.
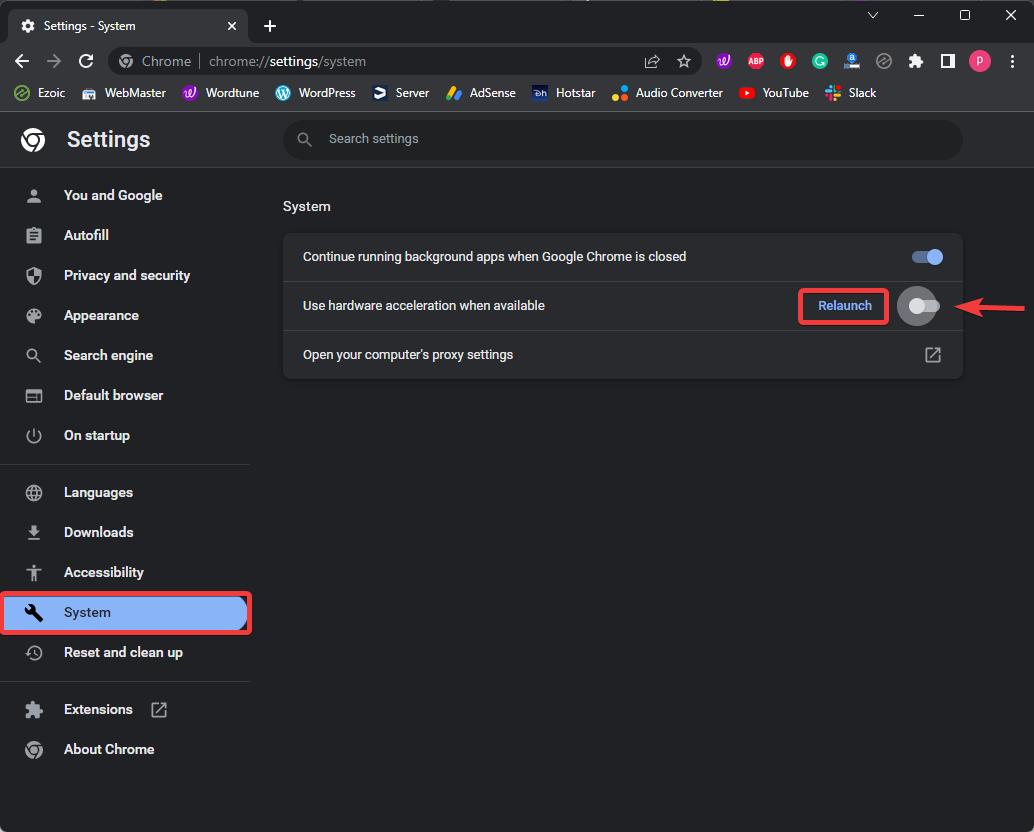
Step 4. On the right side pane, under the “System” section, turn off the “Use hardware acceleration when available” toggle switch.
Step 5. Finally, click the Relaunch button that appears before the toggle switch.
How to Turn On Hardware Acceleration in Chrome?
To enable Hardware Acceleration in the Chrome browser, use these steps:-
Step 1. First, open the Chrome browser on your Windows 11 or 10 machine.
Step 2. Then, click on the horizontal ellipsis menu button in the top-right corner of Chrome and select the Settings option in the drop-down menu.
Step 3. When the Chrome Settings page appears on the screen, select the System tab in the left side menu.
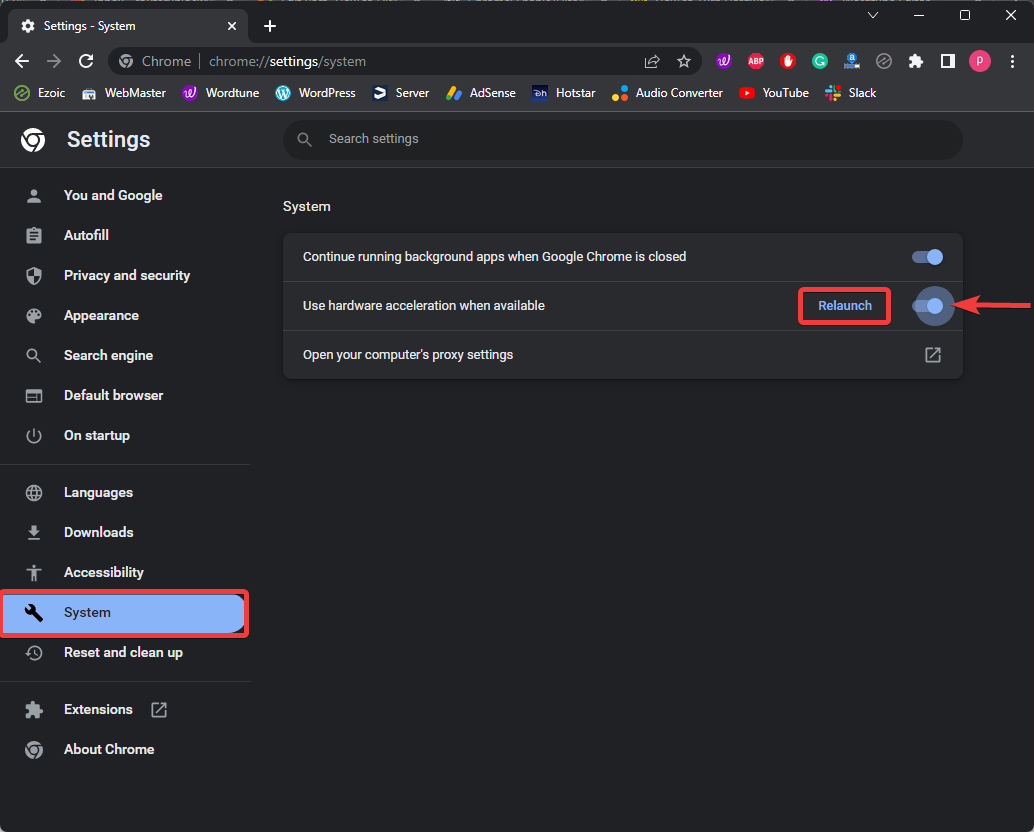
Step 4. On the right side pane, under the “System” section, turn on the “Use hardware acceleration when available” toggle switch.
Step 5. Finally, click the Relaunch button that appears before the toggle switch.
How to Enable or Disable Hardware Acceleration in Chrome using Registry Editor?
If you use Windows 11 or 10, you can also use the Registry Editor to turn on or off Hardware Acceleration in Chrome browser. Here are the steps.
Step 1. First, open Registry Editor.
Step 2. Next, browse to the following key in the left sidebar of Registry Editor:-
Computer\HKEY_LOCAL_MACHINE\SOFTWARE\Policies
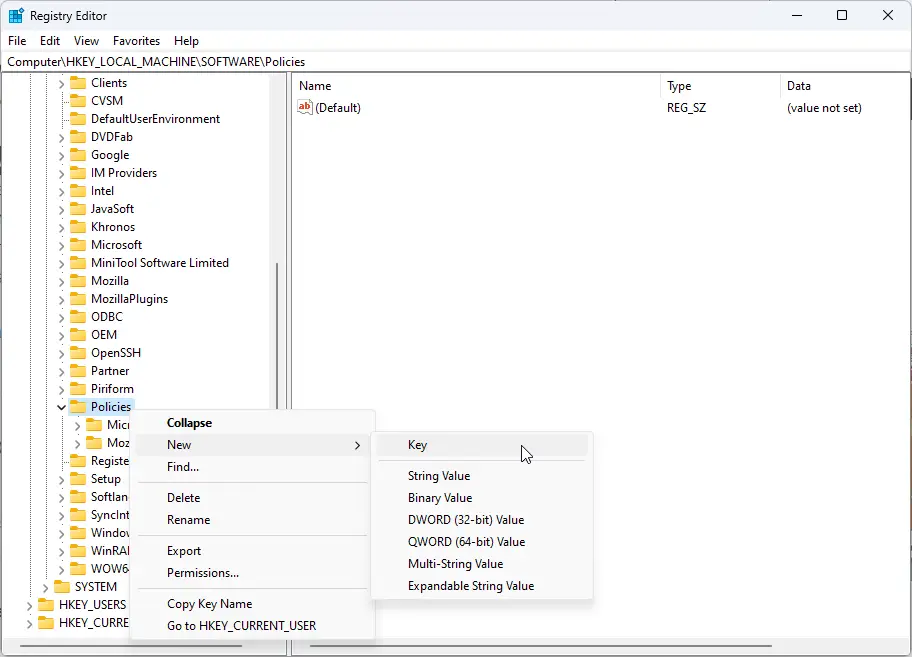
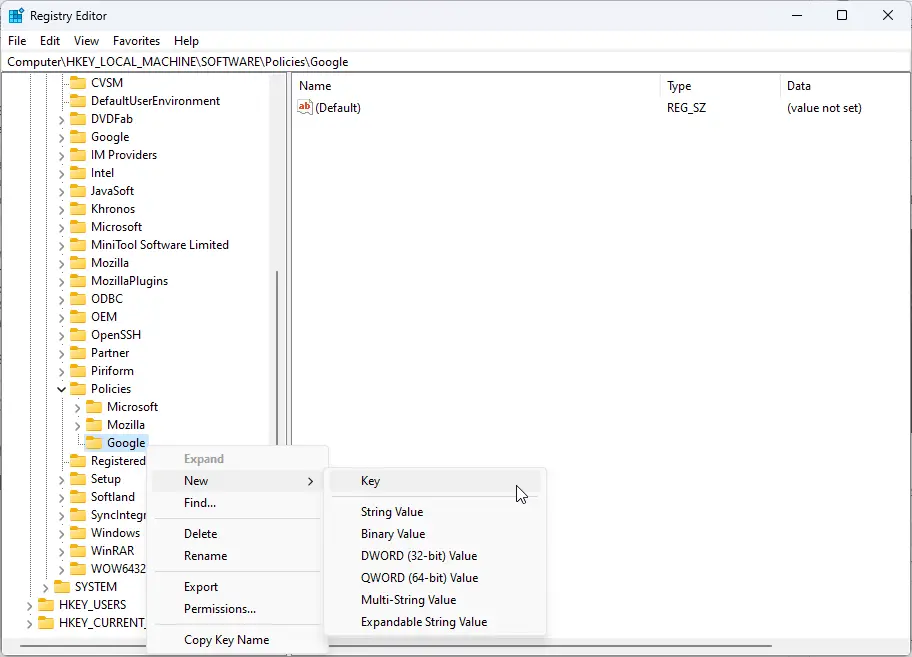
Step 3. Then, right-click on the Policies key and select New > Key.
Step 4. Name the newly created key as Google.
Step 5. Now, right-click on the Google key and select New > Key in the context menu.
Step 6. Name this key Chrome.
Step 7. After that, right-click on the Chrome key and select New > DWORD (32-bit) Value.
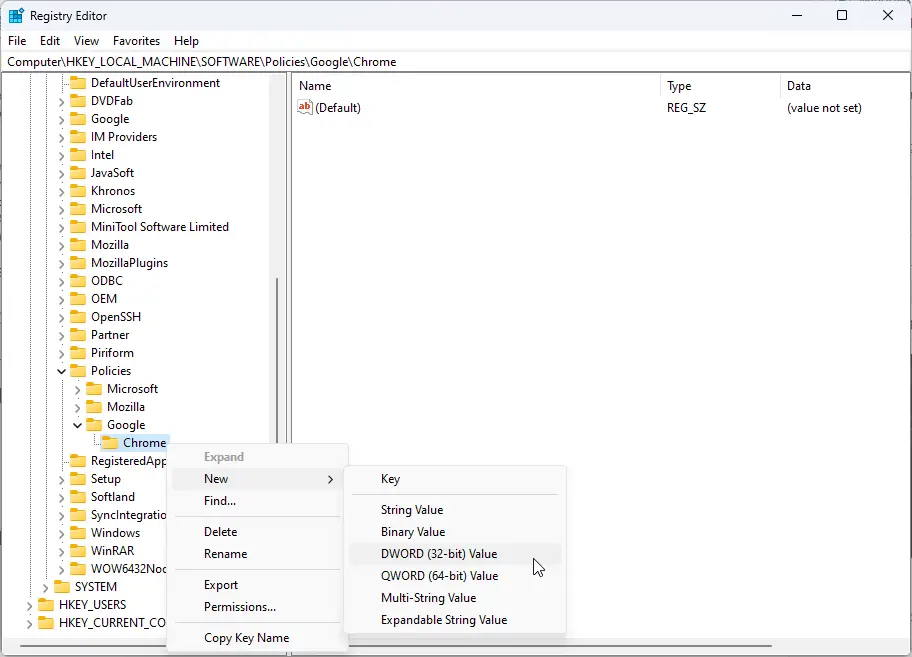
Step 8. Set the name to HardwareAccelerationModeEnabled.
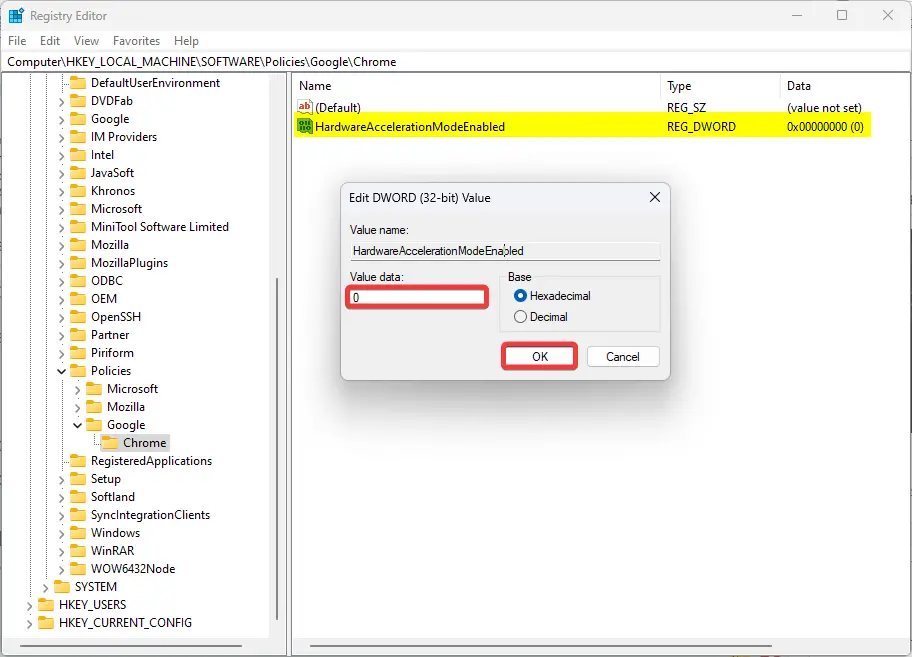
Step 9. Now, double-click on the HardwareAccelerationModeEnabled DWORD and set its “Value data” to the following:-
- 0 = To disable Hardware Acceleration in Chrome.
- 1 = To enable Hardware Acceleration in Chrome.
Step 10. Next, click the OK button.
Step 11. Finally, reboot your PC to apply the changes.
Conclusion
In conclusion, hardware acceleration is a feature in Google Chrome that can improve the browsing experience on your computer by using the GPU to speed up processes. However, it can also cause issues such as missing visual elements on some devices. If you’re experiencing these problems, disabling hardware acceleration may solve them. The steps to enable or disable hardware acceleration in Chrome are simple and can be done through the settings or the Registry Editor. By following the instructions in this article, you can easily turn on or off hardware acceleration in Chrome and enjoy a better browsing experience.