If your laptop keyboard is too small to type, the keyboard is broken, or due for some reason, you want to disable the laptop’s built-in keyboard on Windows 11, this gearupwindows article will guide you. Once you disable the laptop’s internal keyboard, you can connect an external keyboard to type fast.
There are several reasons why someone might want to disable the internal keyboard on their laptop running Windows 11:-
- External keyboard usage: If you prefer using an external keyboard with your laptop, you may want to disable the internal keyboard to avoid accidental keystrokes or conflicting inputs.
- Repair or replacement: If the internal keyboard is malfunctioning or needs replacement, you may want to disable it temporarily until it can be repaired or replaced.
- Security: Disabling the internal keyboard can help prevent unauthorized access to your laptop by disabling the built-in input device.
- Gaming: If you’re a gamer, you may prefer using a dedicated gaming keyboard instead of the laptop’s built-in keyboard. Disabling the internal keyboard can help prevent any accidental keystrokes while gaming.
- Cleaning: If you need to clean the laptop’s keyboard, disabling the internal keyboard can prevent any accidental input while cleaning.
In this post, we will walk through two methods that allow you to disable the laptop keyboard on Windows 11. These are the following:-
- Device Manager.
- Local Group Policy Editor.
How to Turn Off Laptop Internal Keyboard using Device Manager?
To disable the internal Keyboard using Device Manager, use the following steps:-
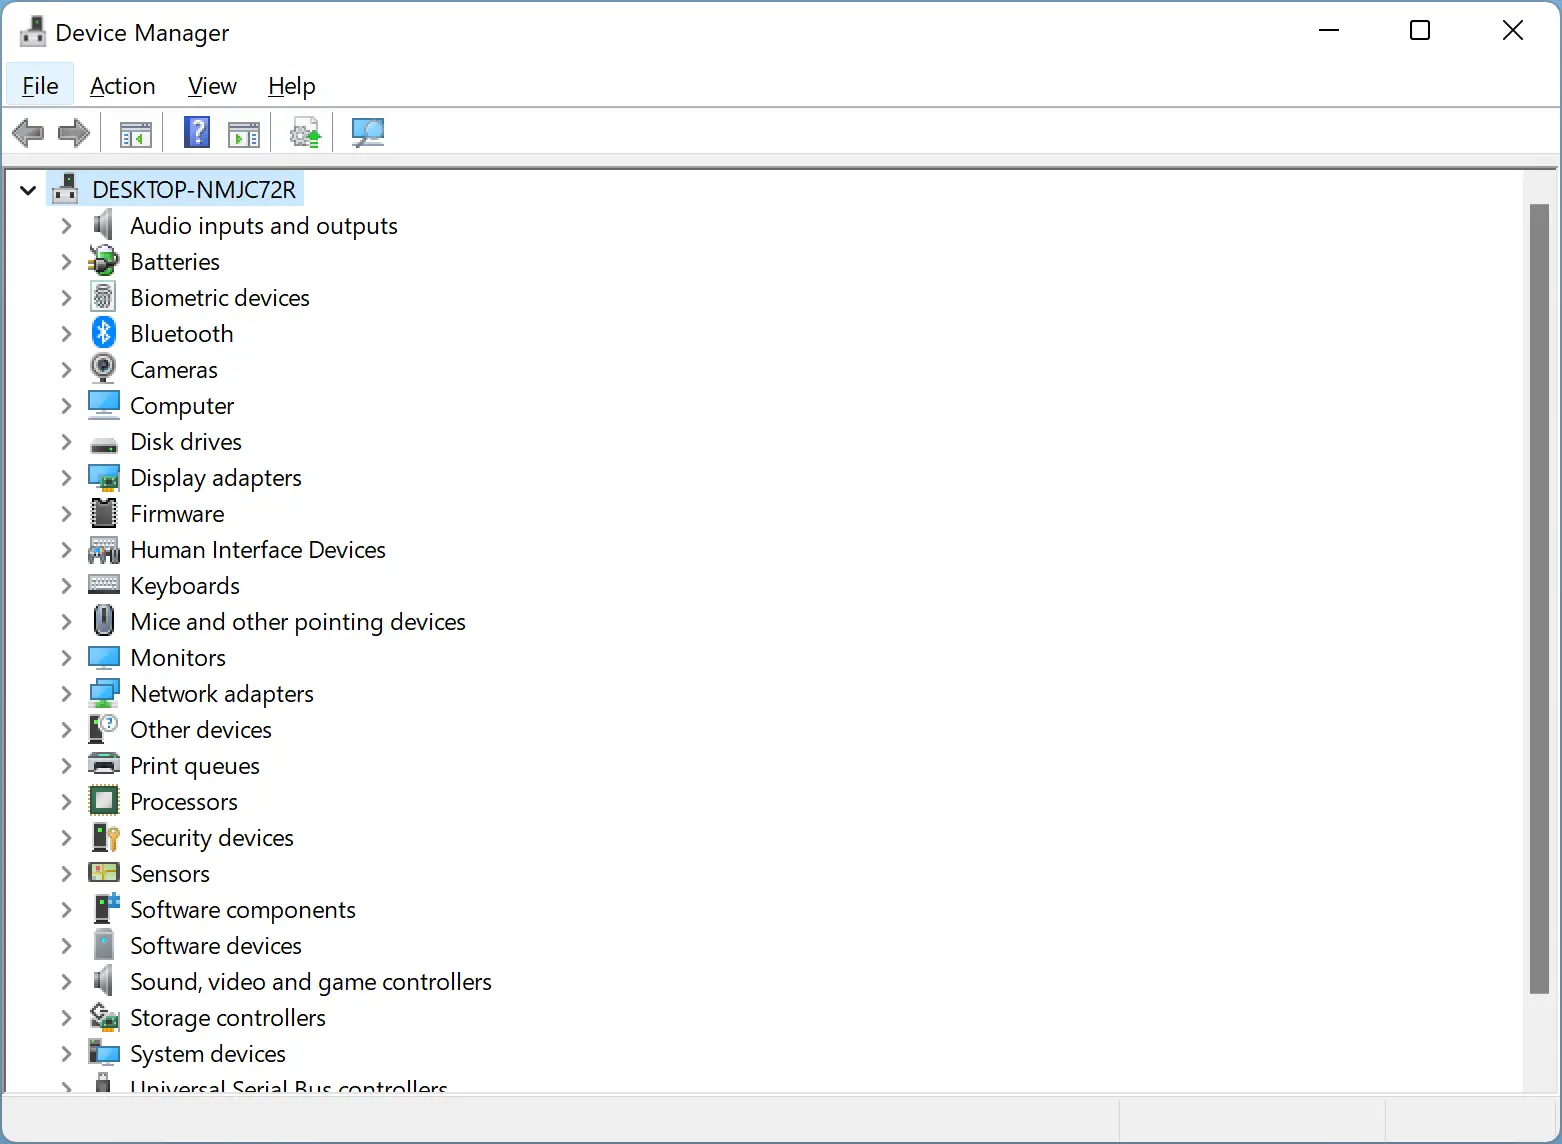
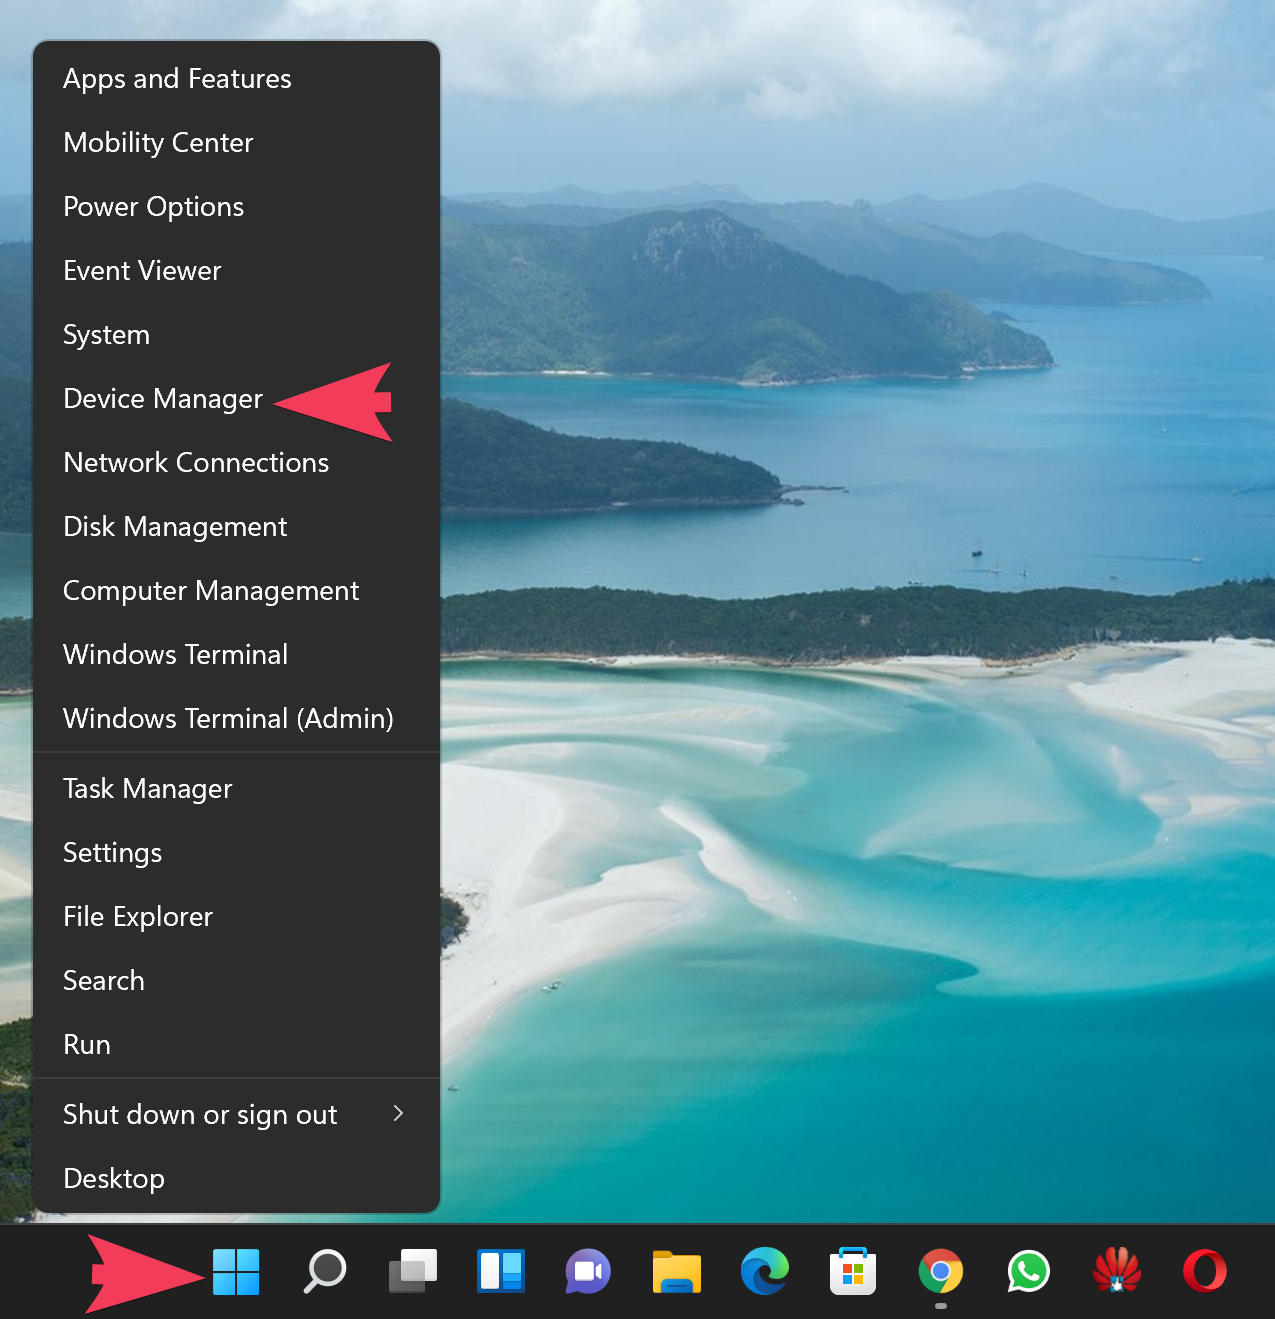
Step 1. First, open the Device Manager.
To do that, right-click on the Start button and select Device Manager.
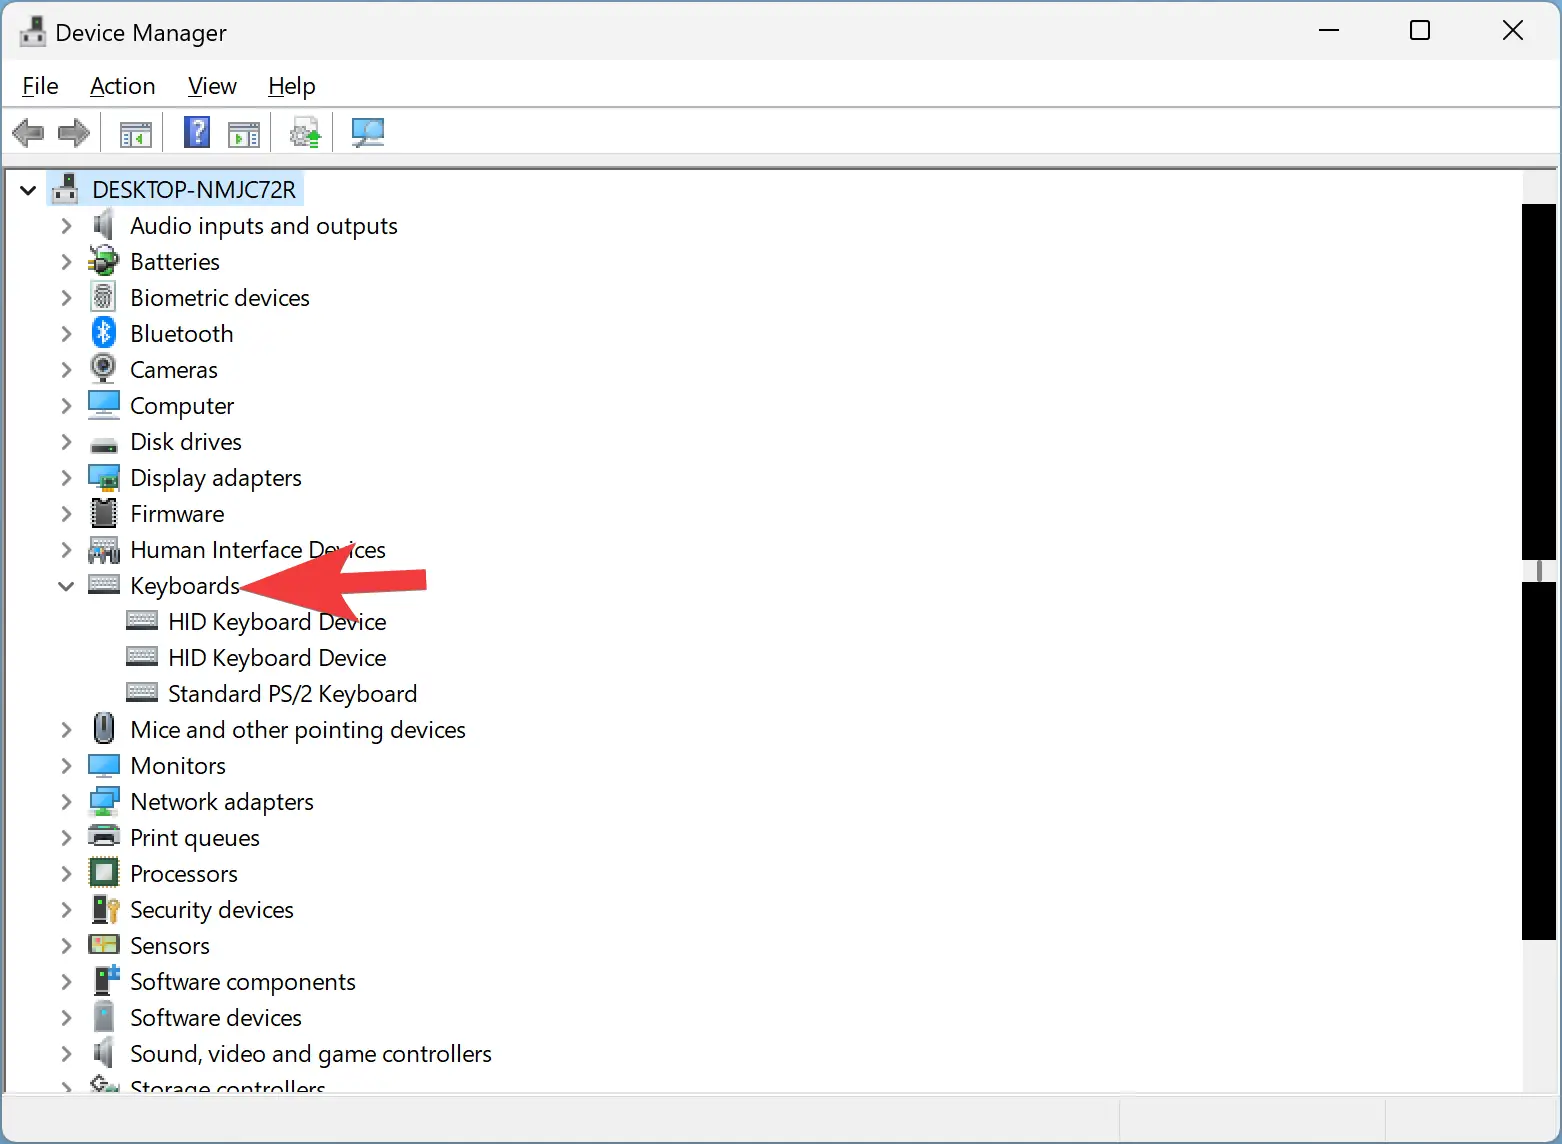
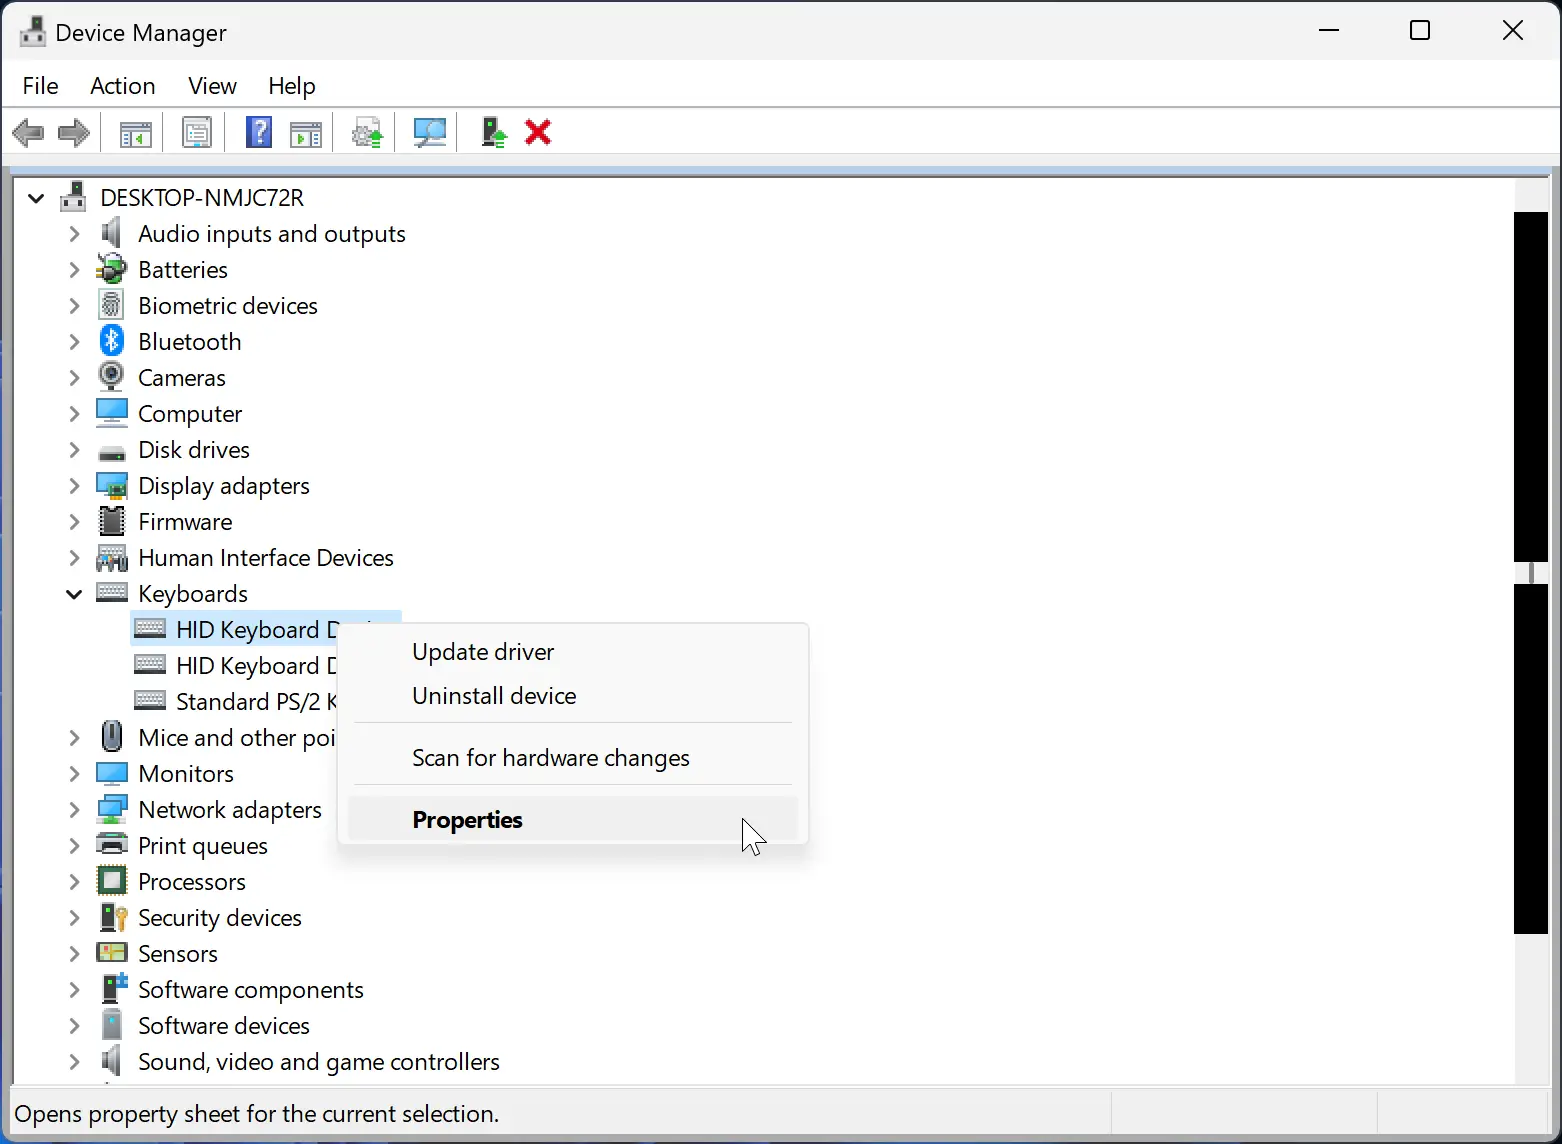
Step 2. When the Device Manager window appears on your computer, expand the Keyboards.
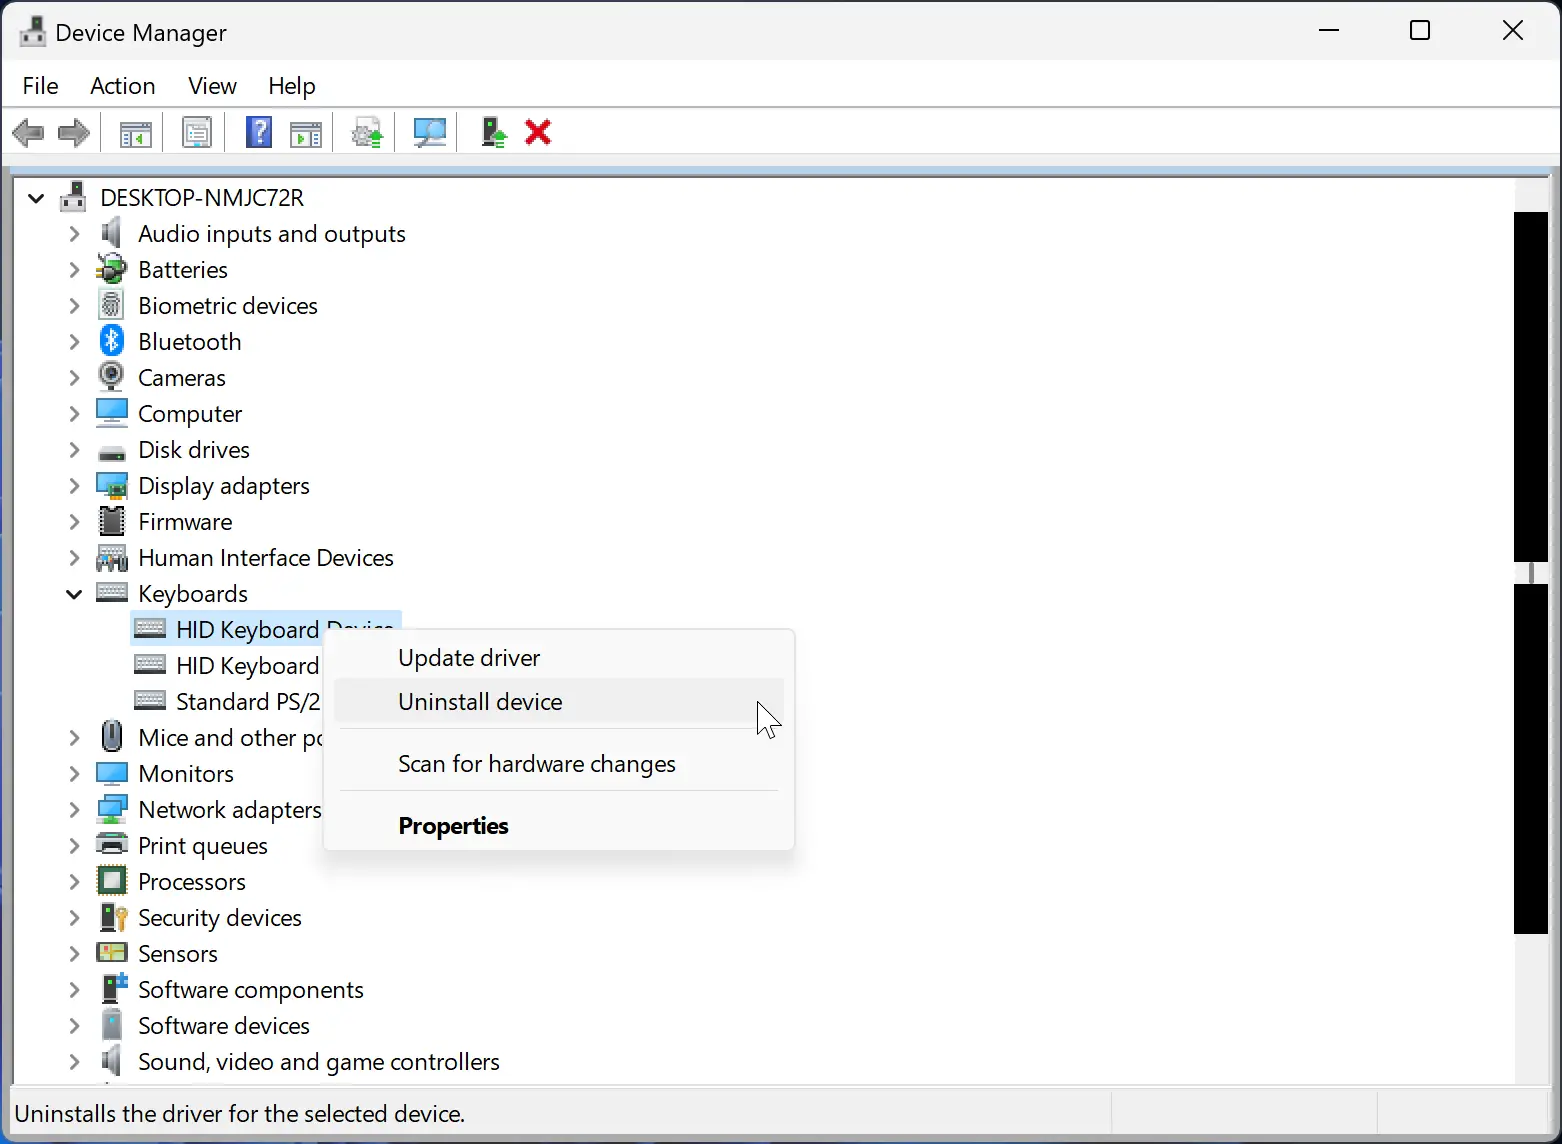
Step 3. Then, right-click on the internal Keyboard and choose the Disable option.
Quick Note: If you don’t find a Disable option in the right-click menu, click Uninstall device to disable the keyboard temporarily. That means when you’ll restart your laptop, Windows will again install the drivers, and your keyboard will start working.
How to Disable Laptop Internal Keyboard Using Group Policy?
Using the Local Group Policy Editor, you can apply a policy for your keyboard not to install the drivers. Using this method, you can block your Laptop keyboard from reinstalling the drivers when you restart your device.
Quick Note: Before proceeding with steps, ensure that gpedit.msc is only applicable to Windows 11 Pro and Enterprise edition devices. If you are using Windows 11 Home Edition, you’ll need to enable the Group Policy on your machine. After that, use the following steps:-
Step 1. Open the Device Manager.
Step 2. Then, expand the ‘Keyboards’ entry.
Step 3. Next, right-click on the internal Keyboard and select the Properties option.
Step 4. Then, switch to the Details tab in the Properties dialog.
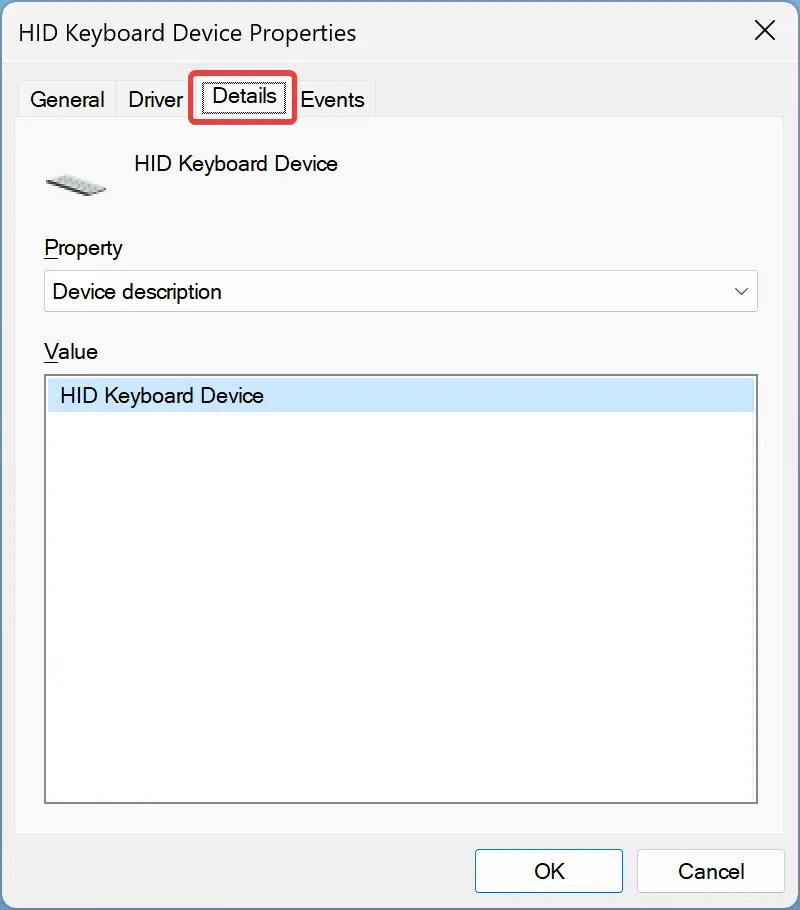
Step 5. After that, select Hardware Ids from the Property drop-down menu.

Step 6. In the Value area, right-click on the first entry and select the Copy option (paste it somewhere in Notepad).
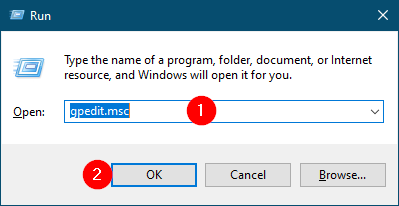
Step 7. Now, open the Run dialog box by pressing the Windows + R keys on the keyboard.
Step 8. Then, type gpedit.msc and click the OK button to open the Local Group Policy Editor window.
Step 9. In the Local Group Policy Editor window, navigate to the following path from the left sidebar:-
Computer Configuration > Administrative Templates > System > Device Installation > Device Installation Restrictions

Step 10. On the right side of the Device Installation Restrictions folder, double-click the policy “Prevent installation of devices that match any of these device instance IDs.”
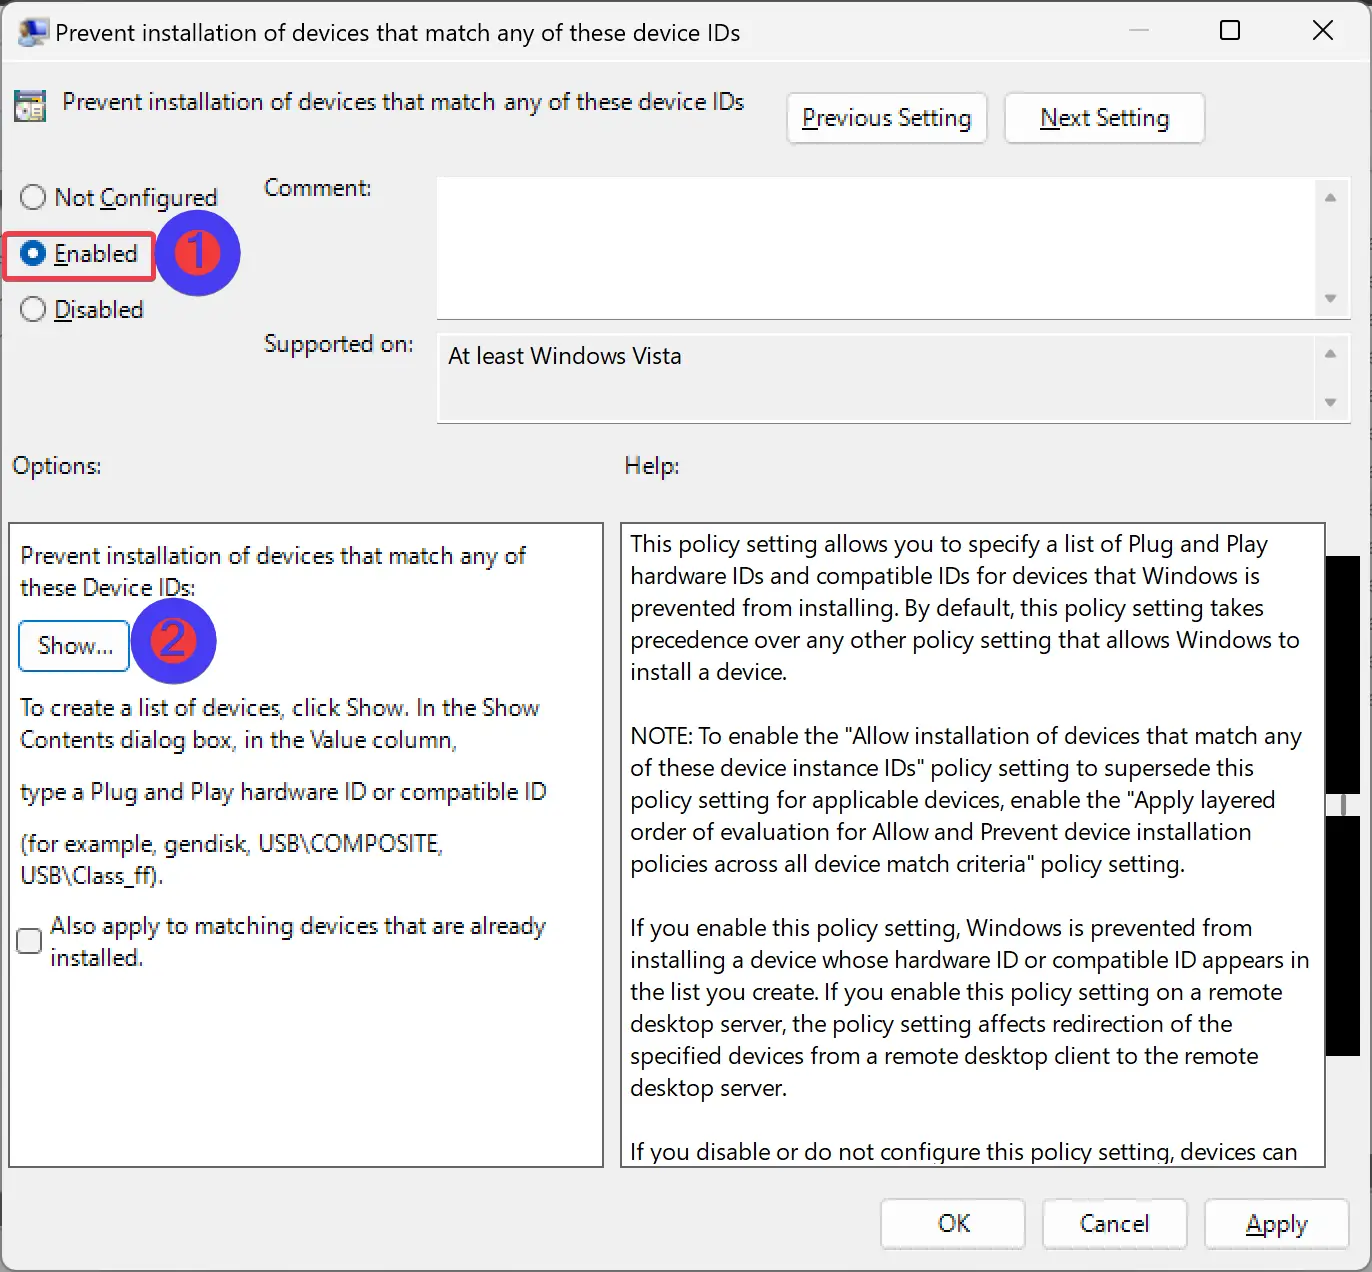
Step 11. Then, select the Enabled option.
Step 12. After that, click on the Show button under the Options section.
Step 13. In the “Show Contents” dialog box, under the Value column, double-click the space bar and paste the ID you have copied in Step 6.
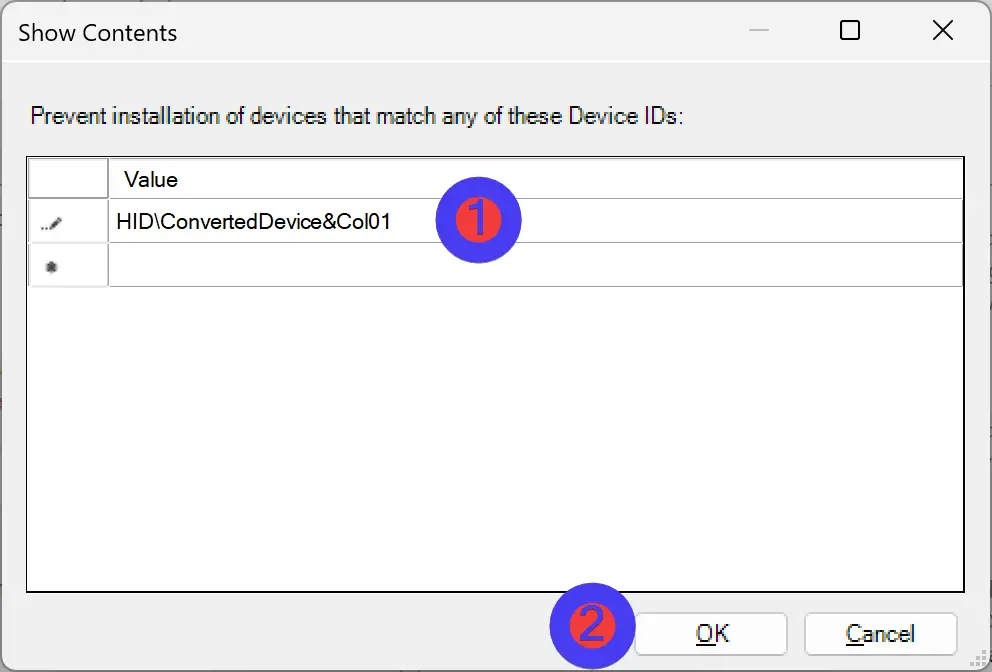
Step 14. Click OK.
Step 15. Click Apply.
Step 16. Click OK.
Step 17. Again, open the Device Manager.
Step 18. Expand the ‘Keyboards’ entry.
Step 19. Right-click on the internal Keyboard and select the Uninstall device option.
Step 20. Reboot your laptop.
Once you complete the above steps, your laptop’s built-in keyboard should now be disabled. Even when you restart your laptop, drivers for the keyboard will not be installed.
Conclusion
In conclusion, disabling the internal keyboard on a Windows 11 laptop can be useful for various reasons, such as using an external keyboard, repairing or replacing a malfunctioning keyboard, ensuring security, gaming, or cleaning. In this article, we have discussed two methods to disable the internal keyboard using Device Manager and Local Group Policy Editor. Both methods are easy to follow, and once the internal keyboard is disabled, an external keyboard can be used to type fast without any conflicting inputs. It is important to note that the Local Group Policy Editor is only applicable to Windows 11 Pro and Enterprise edition devices.
Thank thank thank you. I’ve tried so many techniques over the last few months and this is the only one that worked. I owe you a coffee
Thanks, Grata.