In some organizations or workplaces, USB drives or other removable storage devices may be restricted or blocked by the administrator. However, there are also situations where you may want to disable access to removable storage devices on your own personal computer, such as when you need to protect sensitive data from being copied to a USB drive. In this article, we will discuss how to enable or disable removable storage access on a Windows 11 or 10 computer using either the local group policy editor or Registry Editor.
How can I Disable Detachable Storage classes in Windows 11/10 Using Local Group Policy Editor?
To disable removable storage classes in Windows 11/10, with the help of the Group Policy Editor, follow these steps:-
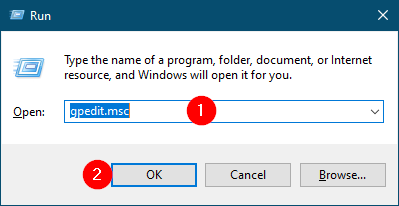
Step 1. Click or tap Windows + R to launch the Run prompt.
Step 2. Type gpedit.msc, then press the Enter button from the keyboard to open the Local Group Policy Editor window.
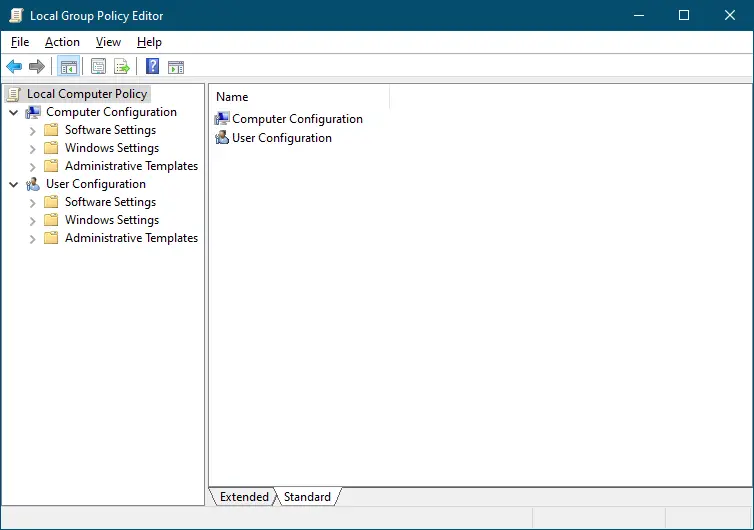
Step 3. Navigate to the following:-
Computer Configuration > Administrative Templates > System > Removable Storage Access
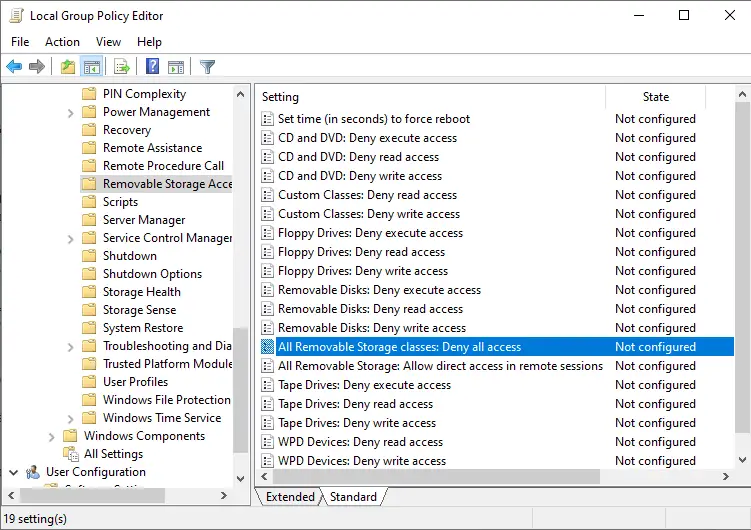
Step 4. On the Removable Storage Access, from the right-side pane, double-click on the policy name “All Removable Storage classes: Deny all access.”
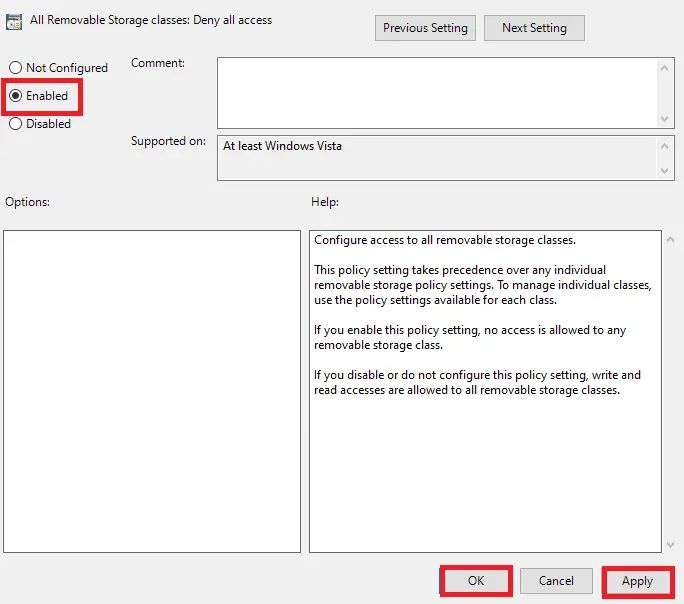
Step 5. Select the Enabled option, then click on the Apply and OK buttons to apply the changes.
Step 6. Finally, reboot the PC to make changes.
Once the above steps are completed, access to all removable storage devices and ports on your Windows 11/10 computer is discontinued.
How can I Enable Detachable Storage classes in Windows 11/10 using Group Policy?
If you change your mind and want to enable removable storage access in Windows 11/10, do the following steps:-
Step 1. Click or tap Windows + R to launch the Run prompt.
Step 2. Type gpedit.msc, then press the Enter button from the keyboard to open the Local Group Policy Editor window.
Step 3. Navigate to the following:-
Computer Configuration > Administrative Templates > System > Removable Storage Access
Step 4. On the Removable Storage Access, from the right-side pane, double-click on the policy name “All Removable Storage classes: Deny all access.”
Step 5. Select the Not Configured option, then click on the Apply and OK buttons to apply the changes.
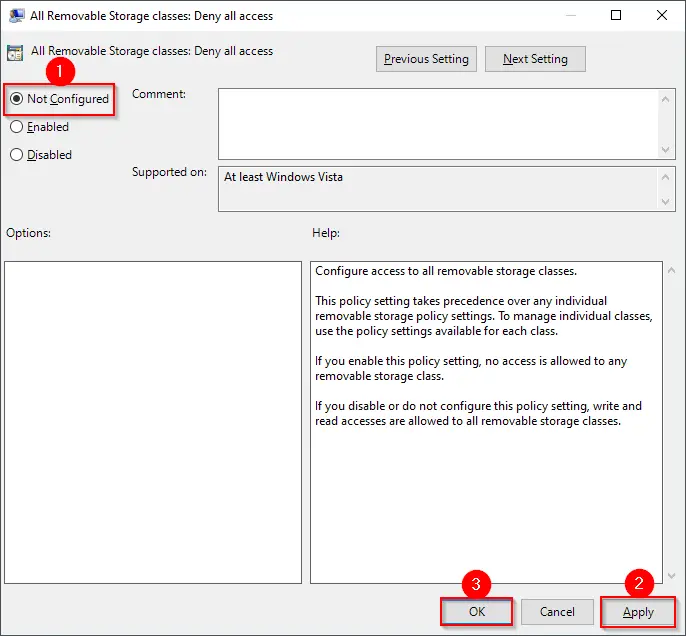
Step 6. Finally, restart the PC to make changes.
Once the above steps are completed, access to all removable storage devices and ports on your Windows 11/10 computer is enabled.
How to Turn On or Off Detachable Storage Access in Windows 11/10 through Registry Editor?
To enable or disable detachable storage access on your Windows 11/10 through Registry Editor, perform the following steps:-
Step 1. Open Registry Editor.
Step 2. When Registry Editor opens, navigate to the following path:-
Computer\HKEY_LOCAL_MACHINE\SOFTWARE\Policies\Microsoft\Windows
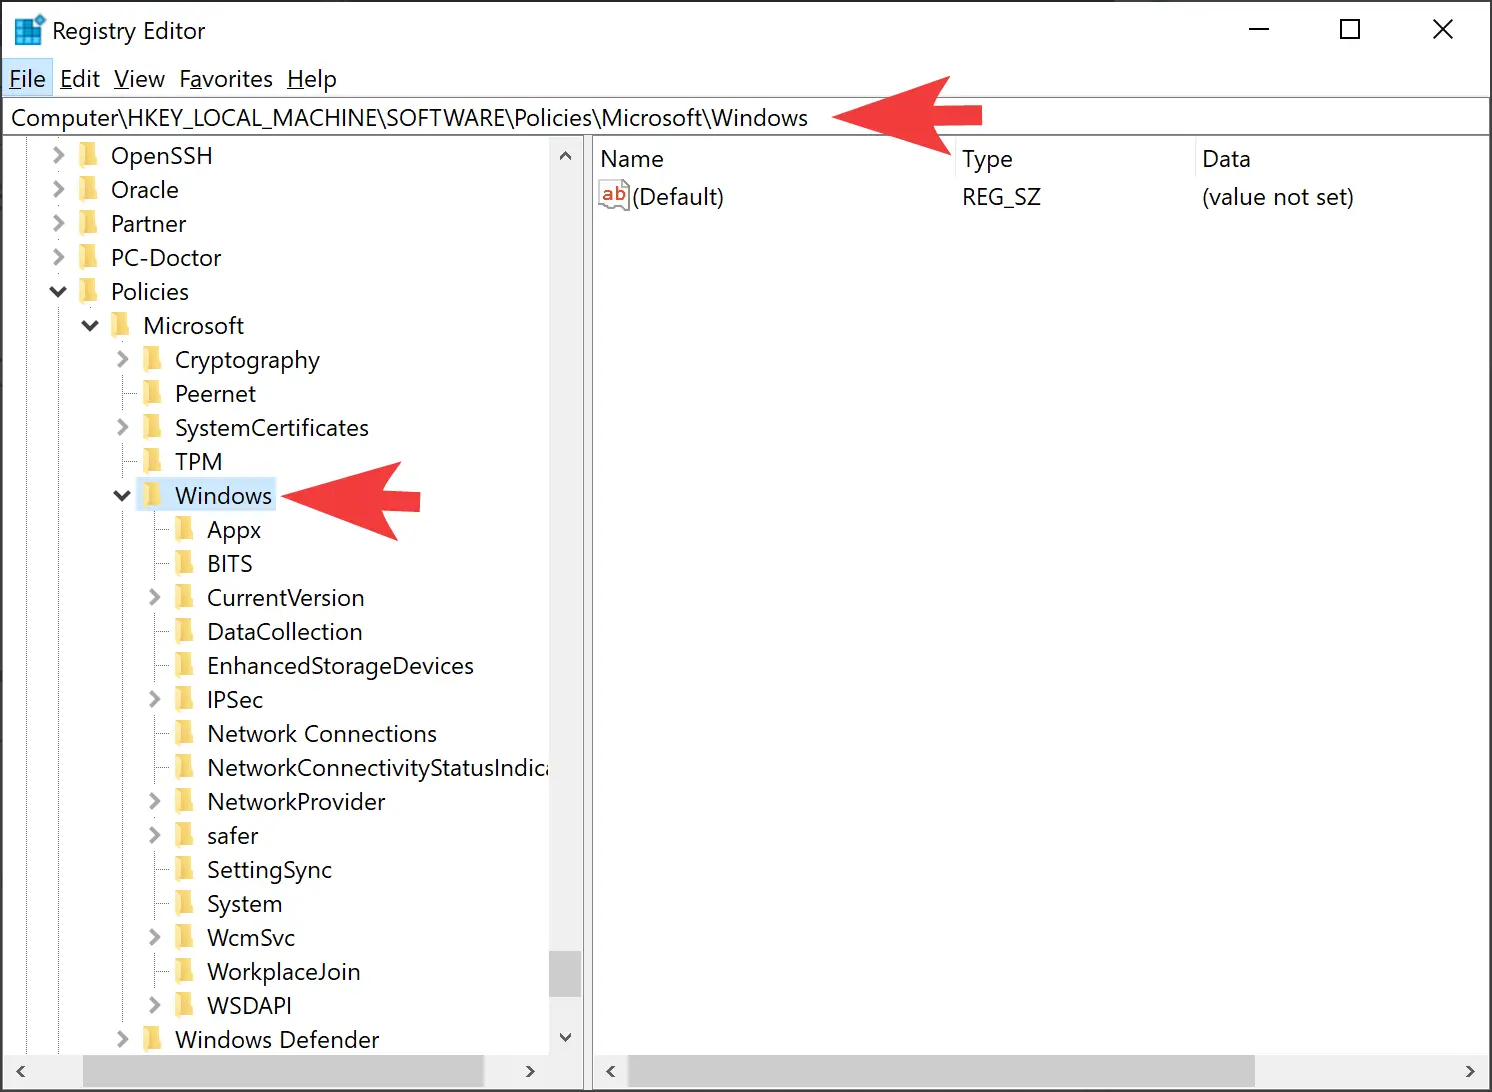
Step 3. Then, right-click the Windows key and select the New > Key option.
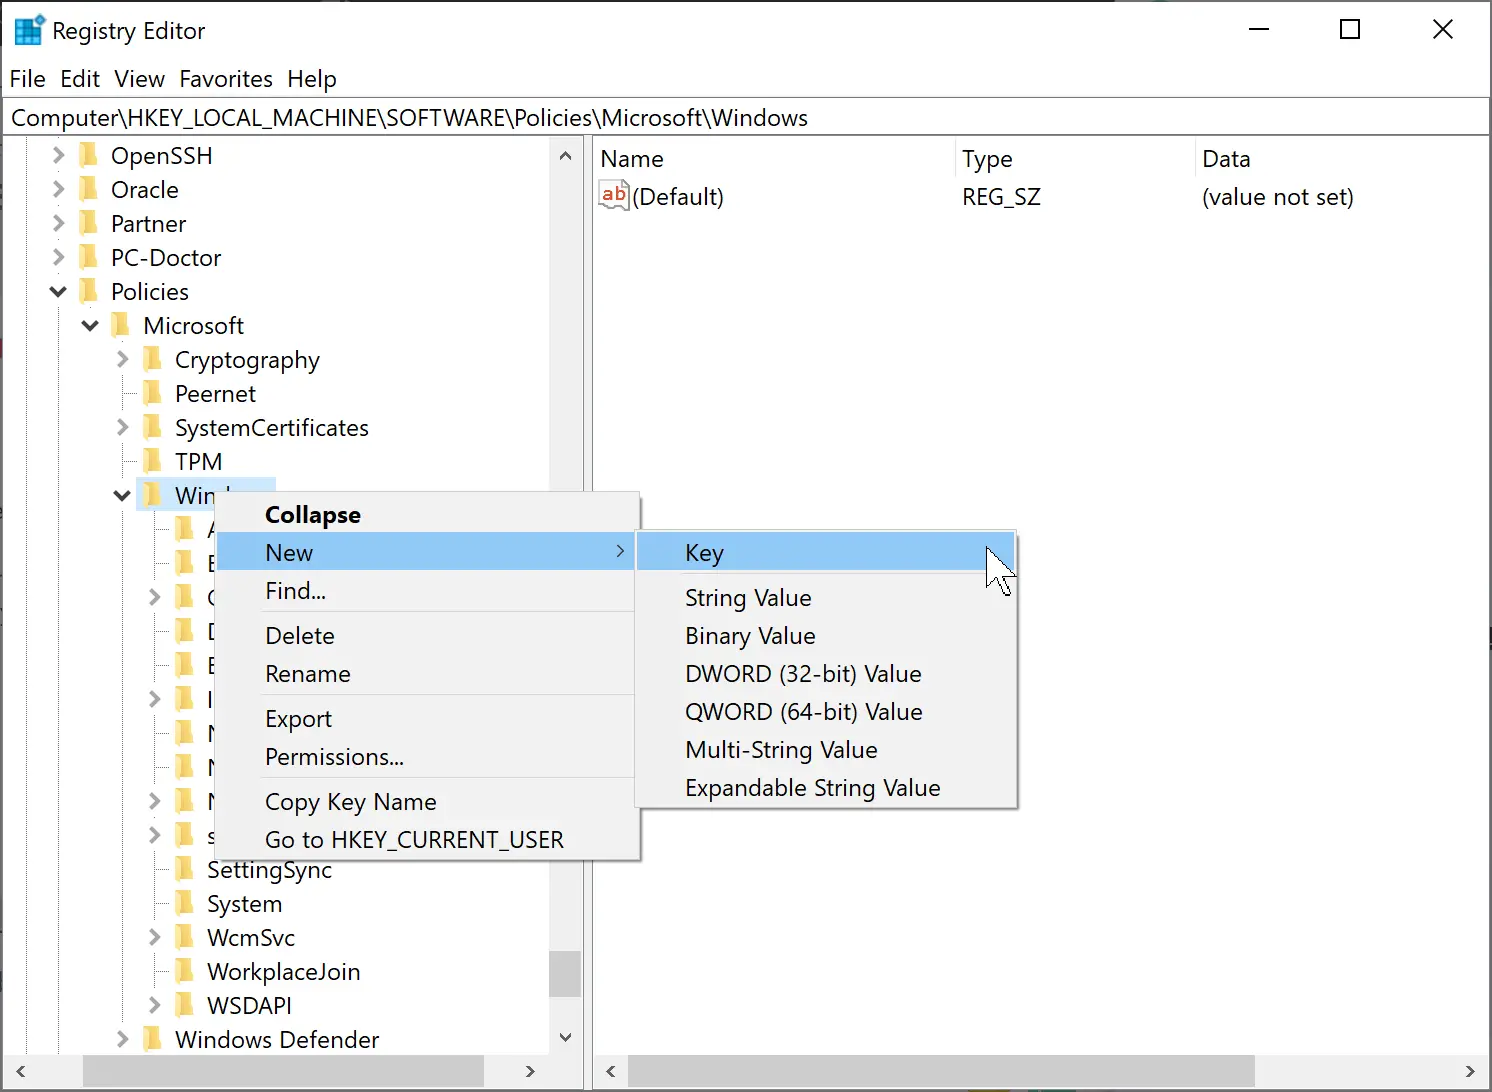
Step 4. Name the newly created key as RemovableStorageDevices.
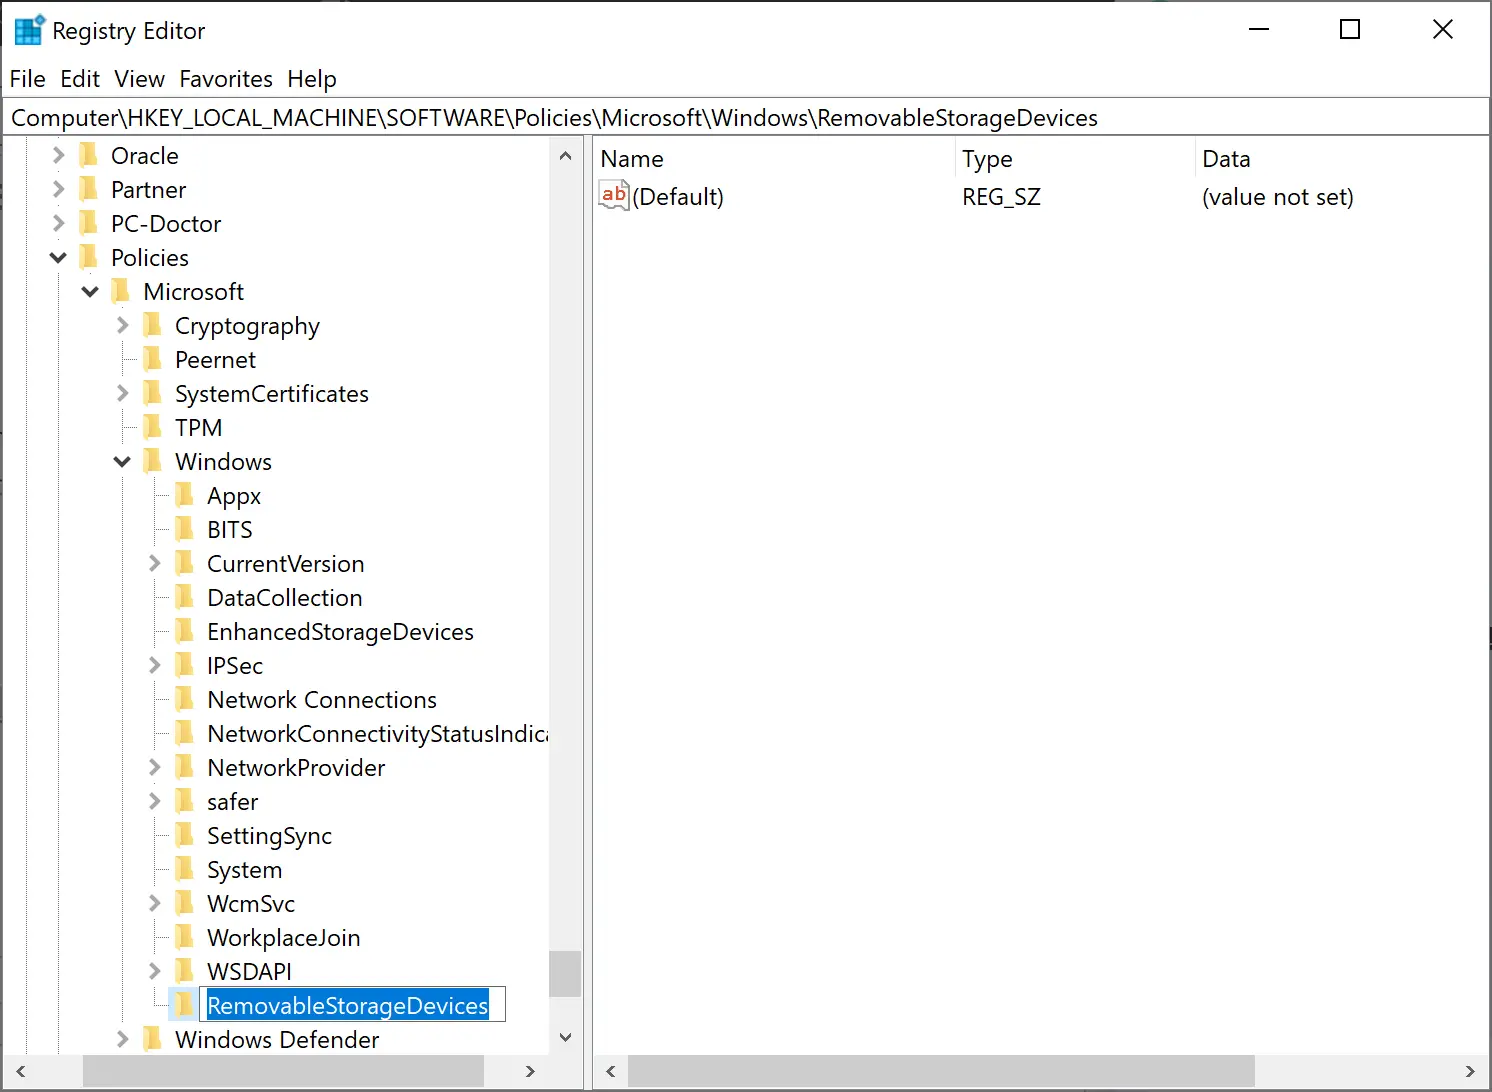
Step 5. After that, right-click on the newly created key RemovableStorageDevices and select the New > DWORD (32-bit) Value option.
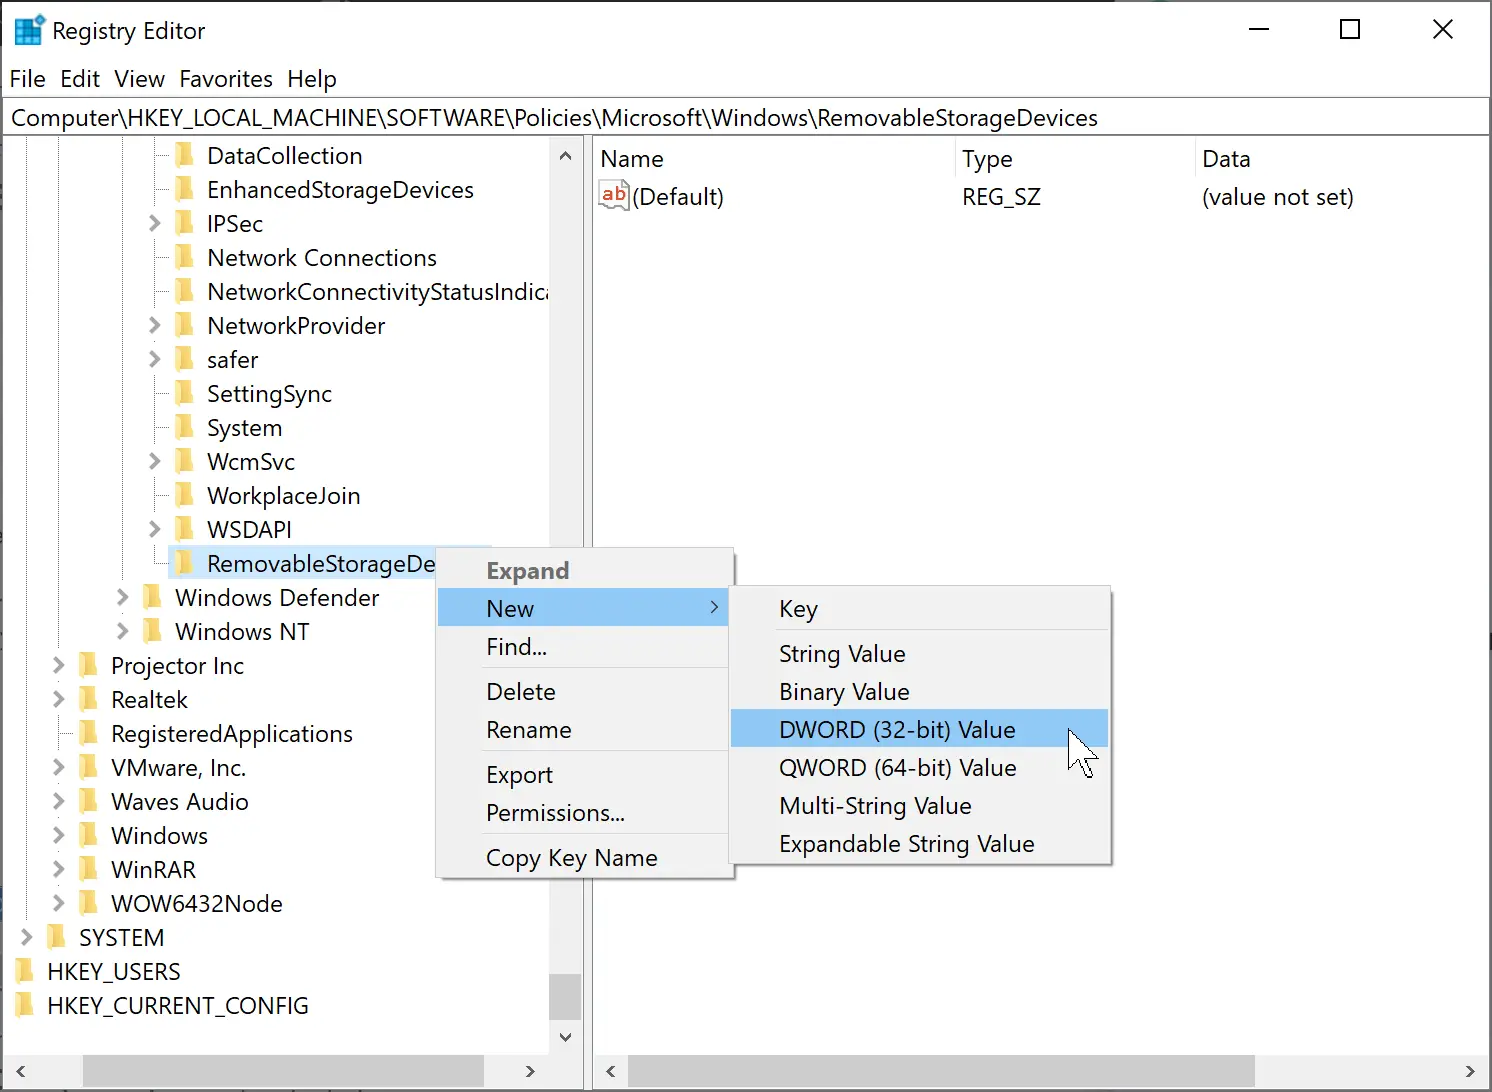
Step 6. Name the newly created REG_DWORD as Deny_All.

Step 7. Next, double-click on the newly created DWORD and set the value to the following:-
- 0 – Allow
- 1 – Disallow
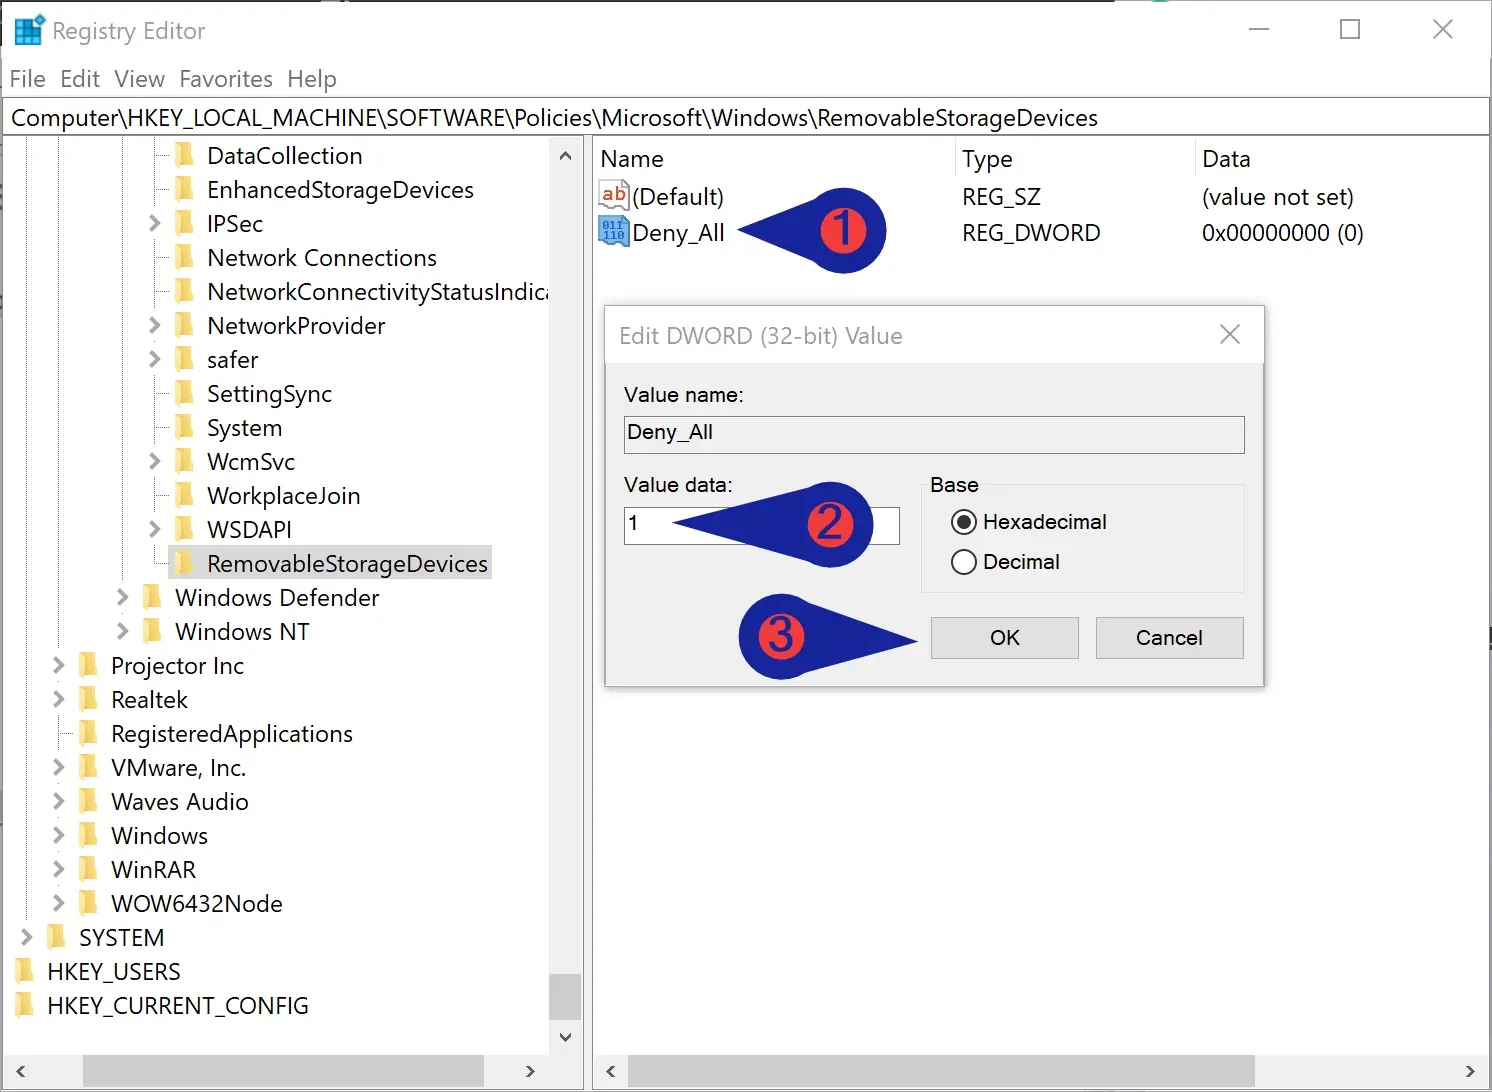
Step 8. Click the OK button.
Step 9. Finally, reboot your computer or laptop to apply the changes.
That’s it. Windows 11/10 will allow or disallow removable storage access, depending on your configuration.
Conclusion
In conclusion, managing removable storage access in Windows 11 or 10 is a useful way to protect sensitive data or prevent unauthorized use of USB devices. Using either the local group policy editor or the registry editor, you can easily enable or disable removable storage classes on your computer. Whether you are an individual user concerned about privacy or an organization administrator trying to protect corporate data, these steps can help you control your system’s removable storage access. Always remember to exercise caution when making changes to your computer’s settings and seek expert help if necessary.