Touchscreen inputs are helpful on tablets and 2-in-1 devices. But, it may produce trouble if you are familiar with the keyboard and mouse. The procedure for disabling a touchscreen in Windows 10 works the same way on all devices, including laptops, desktops, tablets, and 2-in-1 devices.
If your computer comes with touchscreen functionality, it will be enabled by default. However, there are some provisions to disable the touchscreen feature if you don’t need it. It will save battery power and some extra memory resources.
There may be some scenarios when you want to disable the touchscreen on a Windows 10 device, such as:-
- You have damaged the laptop LCD, and the touch screen interferes with your work.
- You want to boost the battery life of your system.
- You are more familiar with the keyboard and mouse, and the touchscreen feature is useless for you.
There are at least two methods to disable the Touch screen on a Windows 10 machine. These are the following:-
- Device Manager.
- Registry Editor.
In this gearupwindows article, we will review both procedures one by one. Here is how to do it.
How to Enable or Disable Touch Screen in Windows 10 using Device Manager?
To disable or turn off Touch Screen on Windows 10 using traditional Device Manager, use the following steps:-
Step 1. First, open the Device Manager (you can use Windows + X + M hotkey).
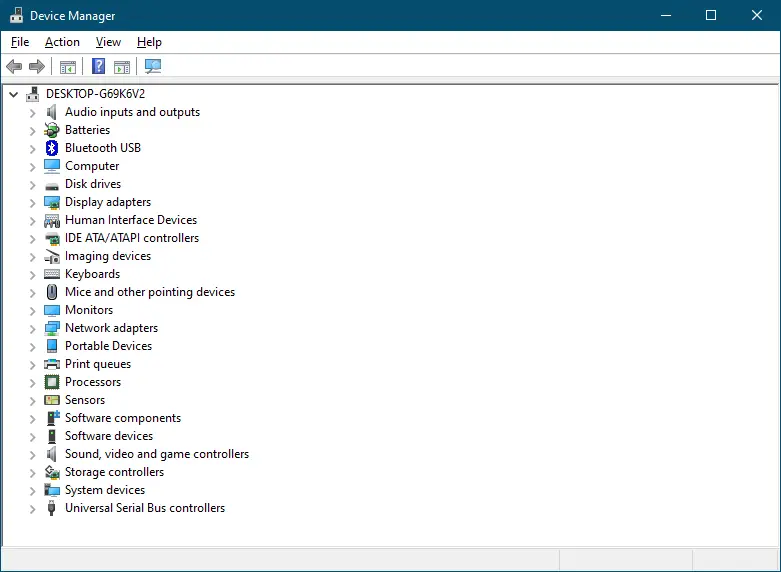
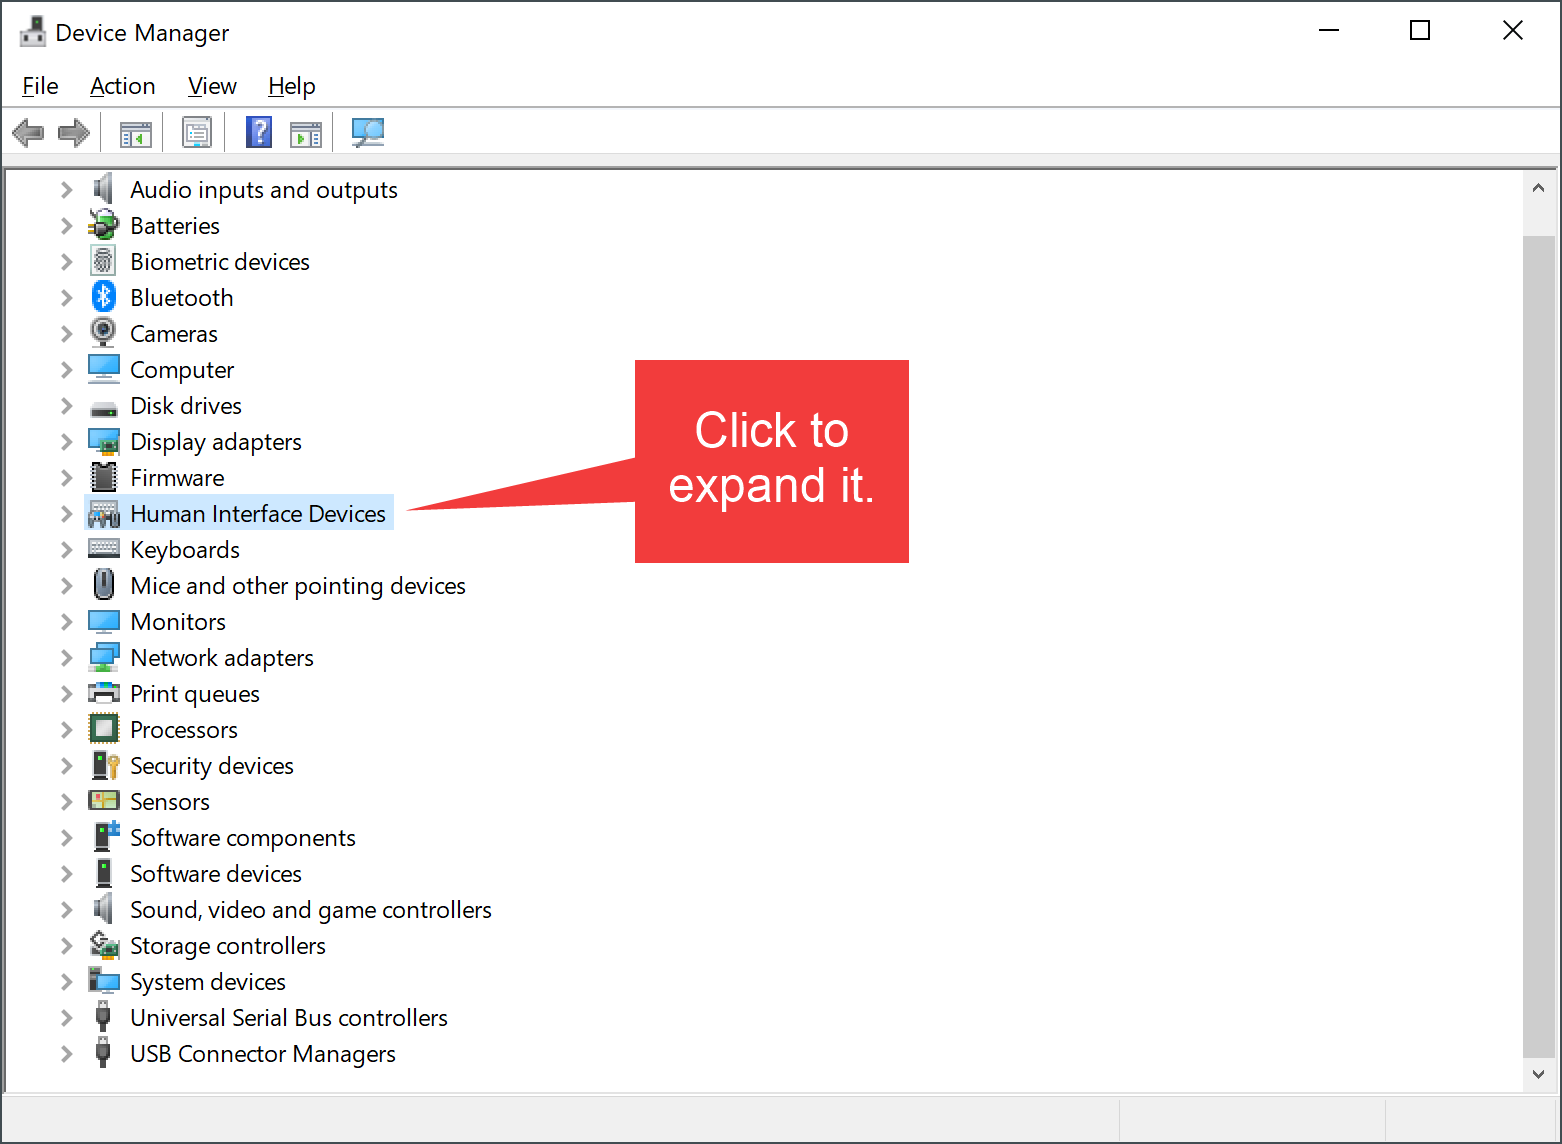
Step 2. Then, expand Human Interface Devices in the Device Manager window.
Step 3. After that, right-click the HID-compliant touch screen.
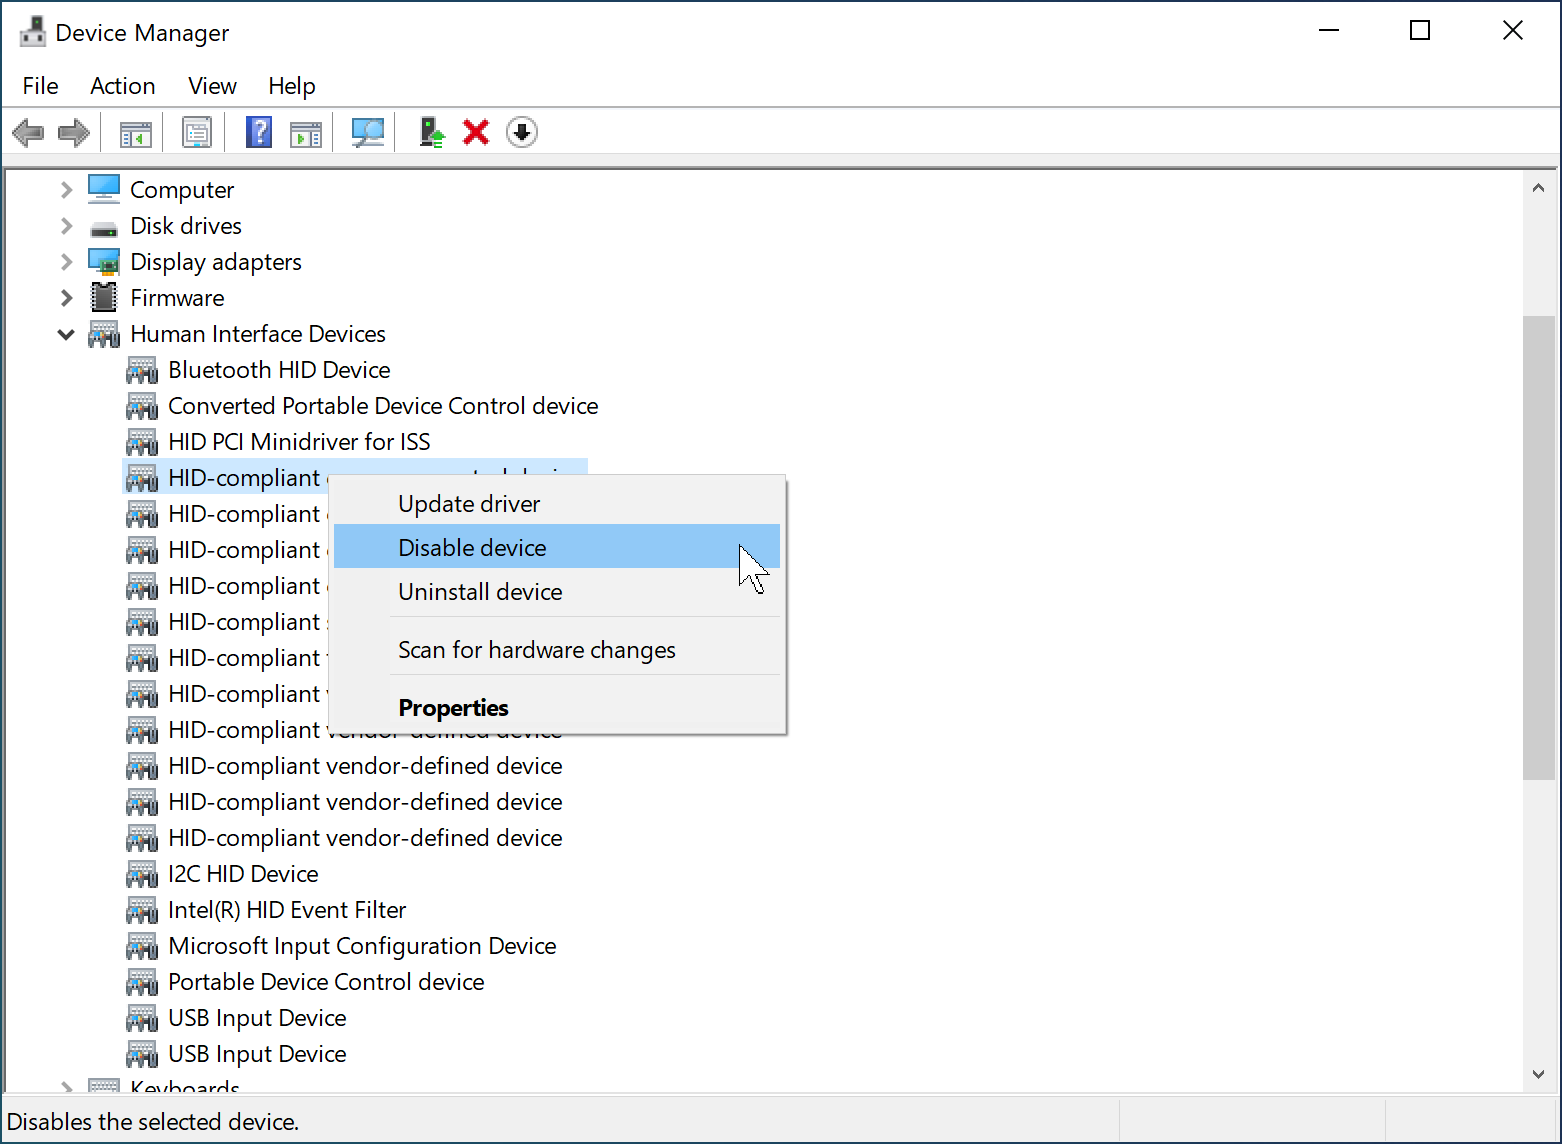
Step 4. Next, select the Disable device option in the right-click menu.
To enable the touch screen again on your Windows 10 device, you’ll need to repeat the above steps, and in step 4 above, select the Enable device option.
How to Turn On or Off Touch Screen in Windows 10 using Registry Editor?
To turn On or Off Touch Screen in Windows 10 using Registry Editor, do the following steps:-
Step 1. Open the Registry Editor.

Step 2. Then, navigate to the following path in the left sidebar of Windows 10 Registry:-
Computer\HKEY_CURRENT_USER\Software\Microsoft\Wisp\Touch
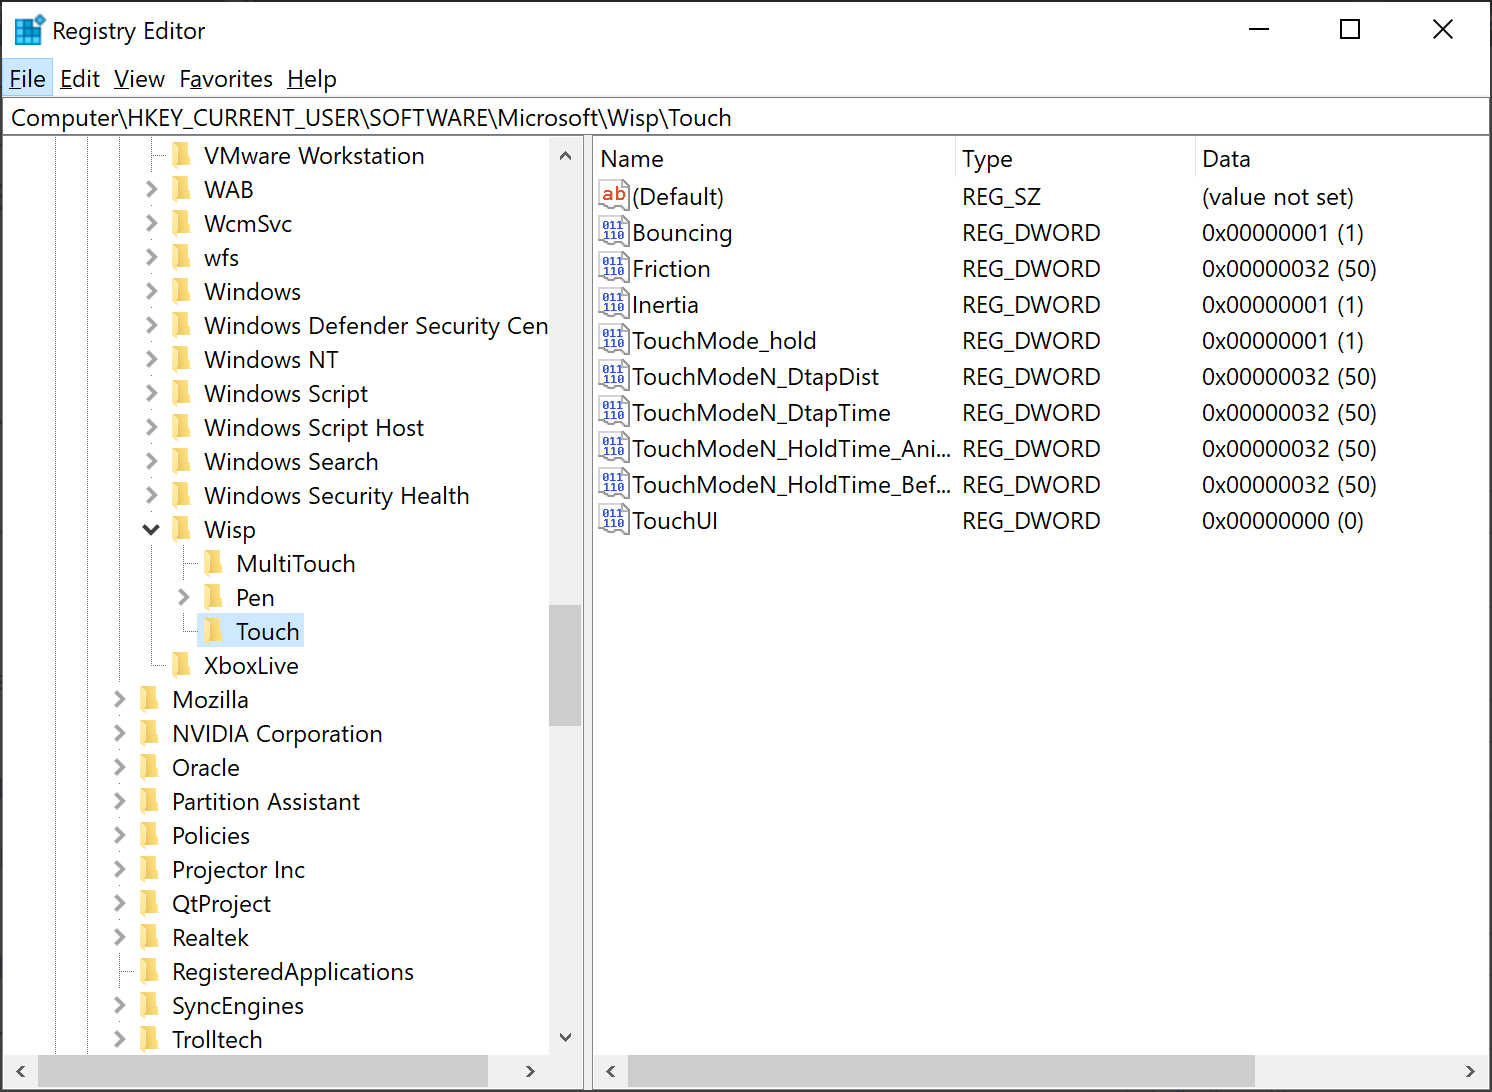
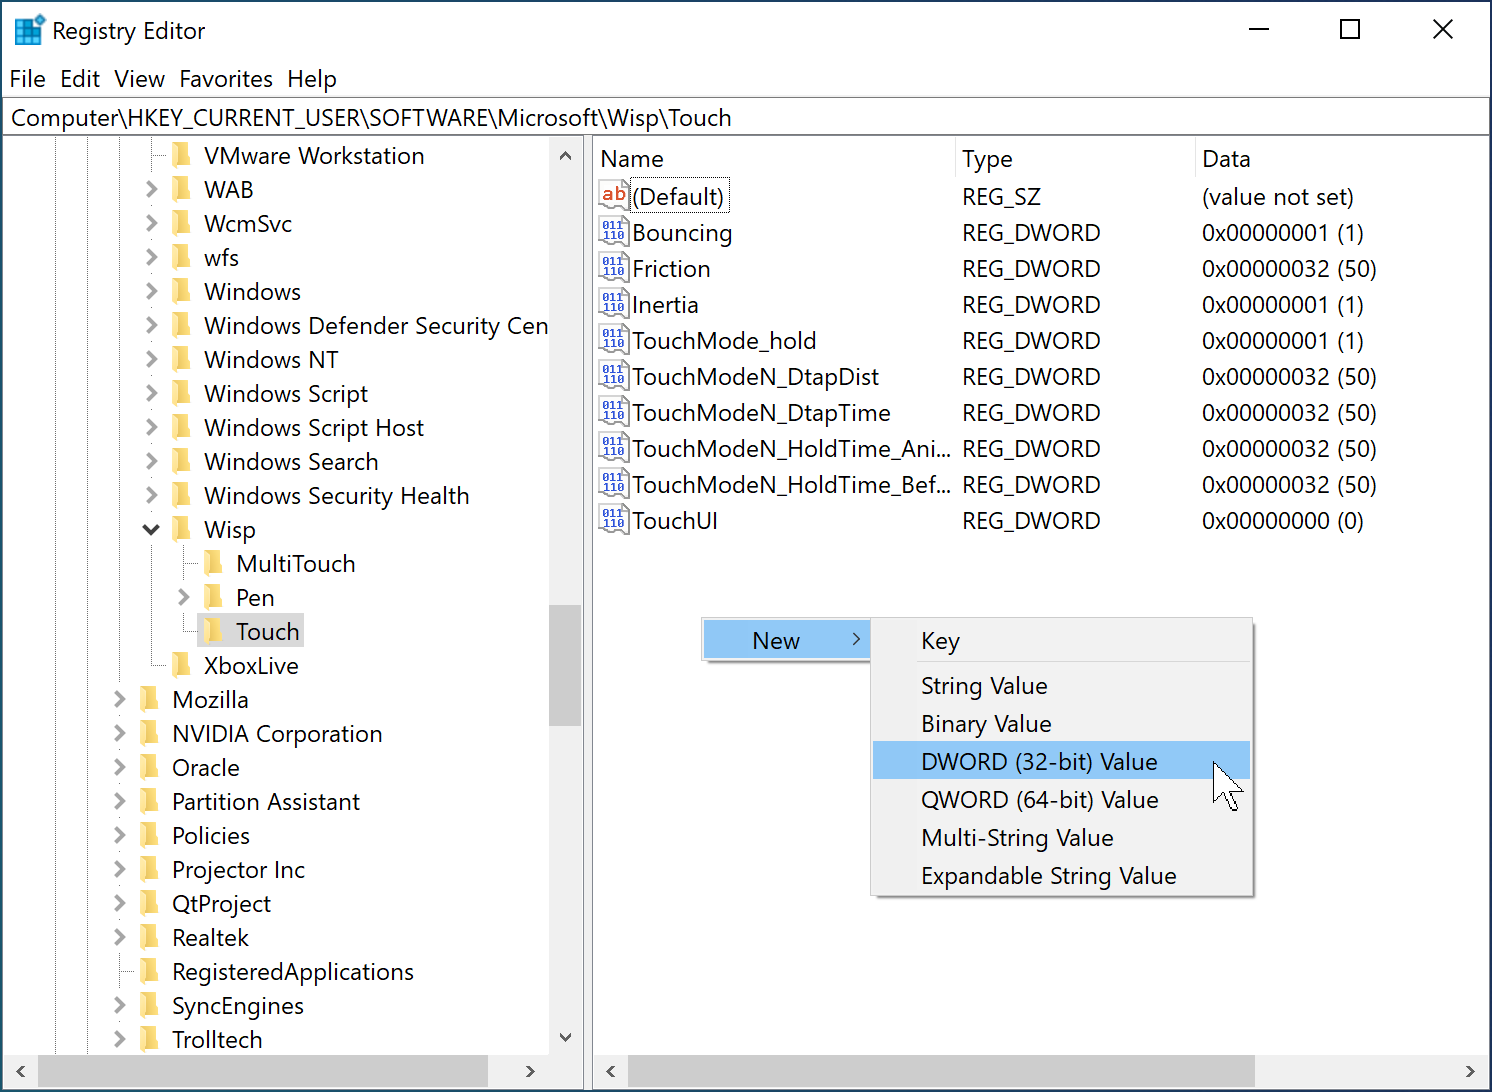
Step 3. Next, in the right-hand pane of the Touch folder, right-click on the free space and select New > DWORD (32-bit) Value.
Step 4. After that, name the newly created REG_DWORD as TouchGate.
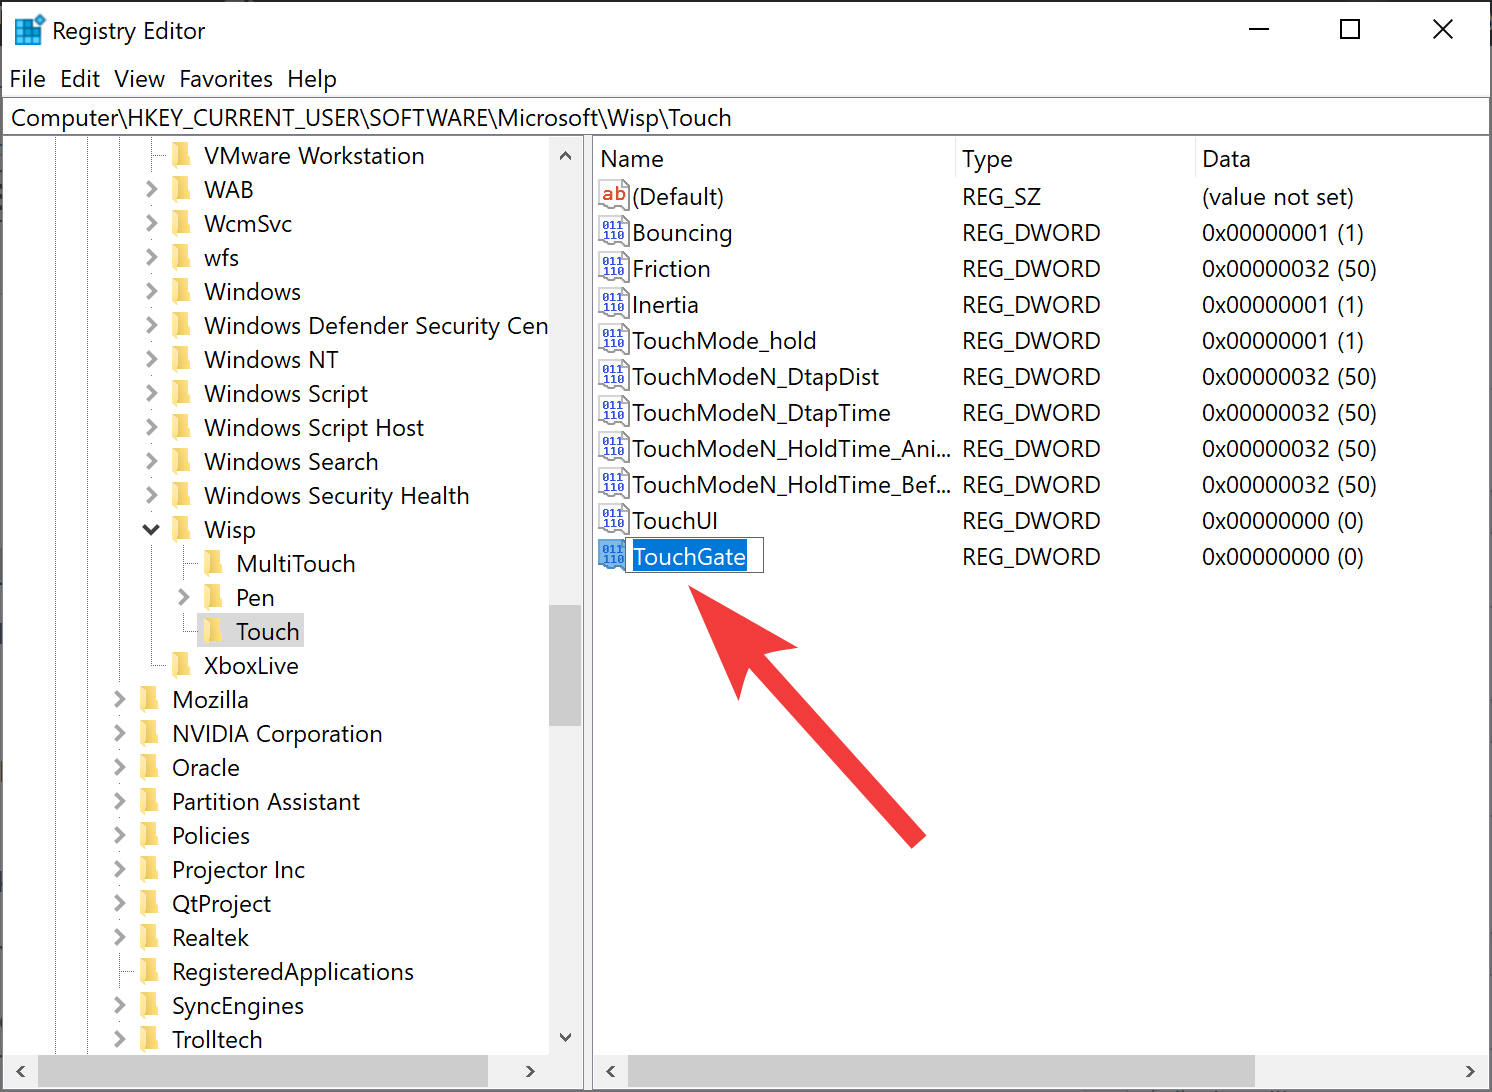
Step 5. When you’re done, double-click on the TouchGate REG_DWORD and set its Value data as 0.

Step 6. Then, hit the OK button.
Step 7. Finally, reboot your touch screen Windows 10 machine to apply the changes.
Once you complete the above steps, the touch screen will stop working on your Windows 10 laptop. If you want to re-enable the touch screen again, change the TouchGate value from 0 to 1 in step 5 above.
In case you are using a Microsoft Surface laptop and your touch screen is not working, you can follow this guide from Microsoft to troubleshoot your touch screen issues.
Conclusion
In conclusion, disabling the touchscreen feature on a Windows 10 device can be useful in certain scenarios, such as when you want to save battery power or if the touchscreen interferes with your work. There are two methods to disable the touchscreen feature, which are using the Device Manager and the Registry Editor. Both methods are easy to follow and can be completed in just a few steps. However, it is important to note that enabling or disabling the touch screen may impact the functionality of your device, and it’s always recommended to consult the manufacturer’s guidelines before making any changes to your device settings.