Windows 10 ships with many animation effects that give users a more attractive and user-friendly feel, such as fading effects when you maximize/minimize a window or open/close a menu.
These animations cost system resources, and your PC runs slower. However, Microsoft has provided options to disable these fancy visual effects such as windows and taskbar animations, box and mouse shadows, aero peek, etc. These visual effects are enabled by default on Windows 10, and they dominate a part of the system resources causing your device to run slower and impacting battery life, especially on older machines.
Suppose you have installed Windows 10 on an old computer or don’t have the proper hardware and want to take full advantage of the system resources. In that case, you should consider turning off visual animations to improve performance and speed up Windows 10.
In this gearupwindows article, we will guide you on turning off visual animations in Windows 10 to boost performance. You can use the Settings app, Control Panel, or System Properties to disable visual animations.
How to Turn off Visual Animations through Windows 10 Settings App?
To disable visual animations using Windows 10 Settings app, use these steps:-
Step 1. Open Settings.
To do that, you can use the Windows + I keyboard shortcut or right-click on the Start button and select Settings in the menu.
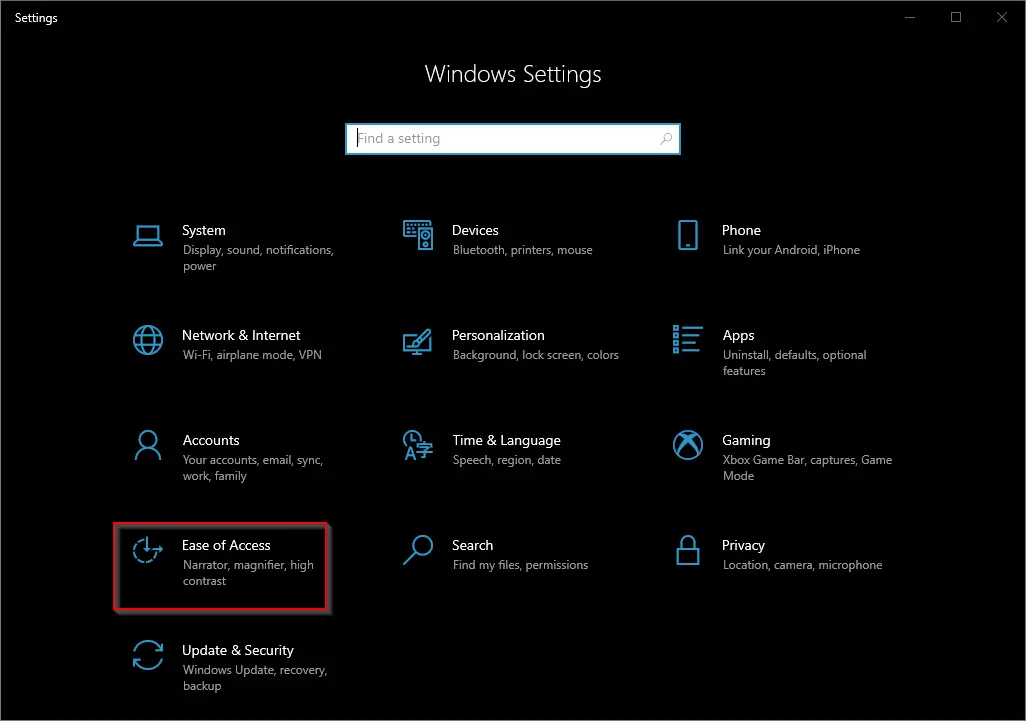
Step 2. Then, click on Ease of Access.
Step 3. Next, select the Display tab in the left sidebar.
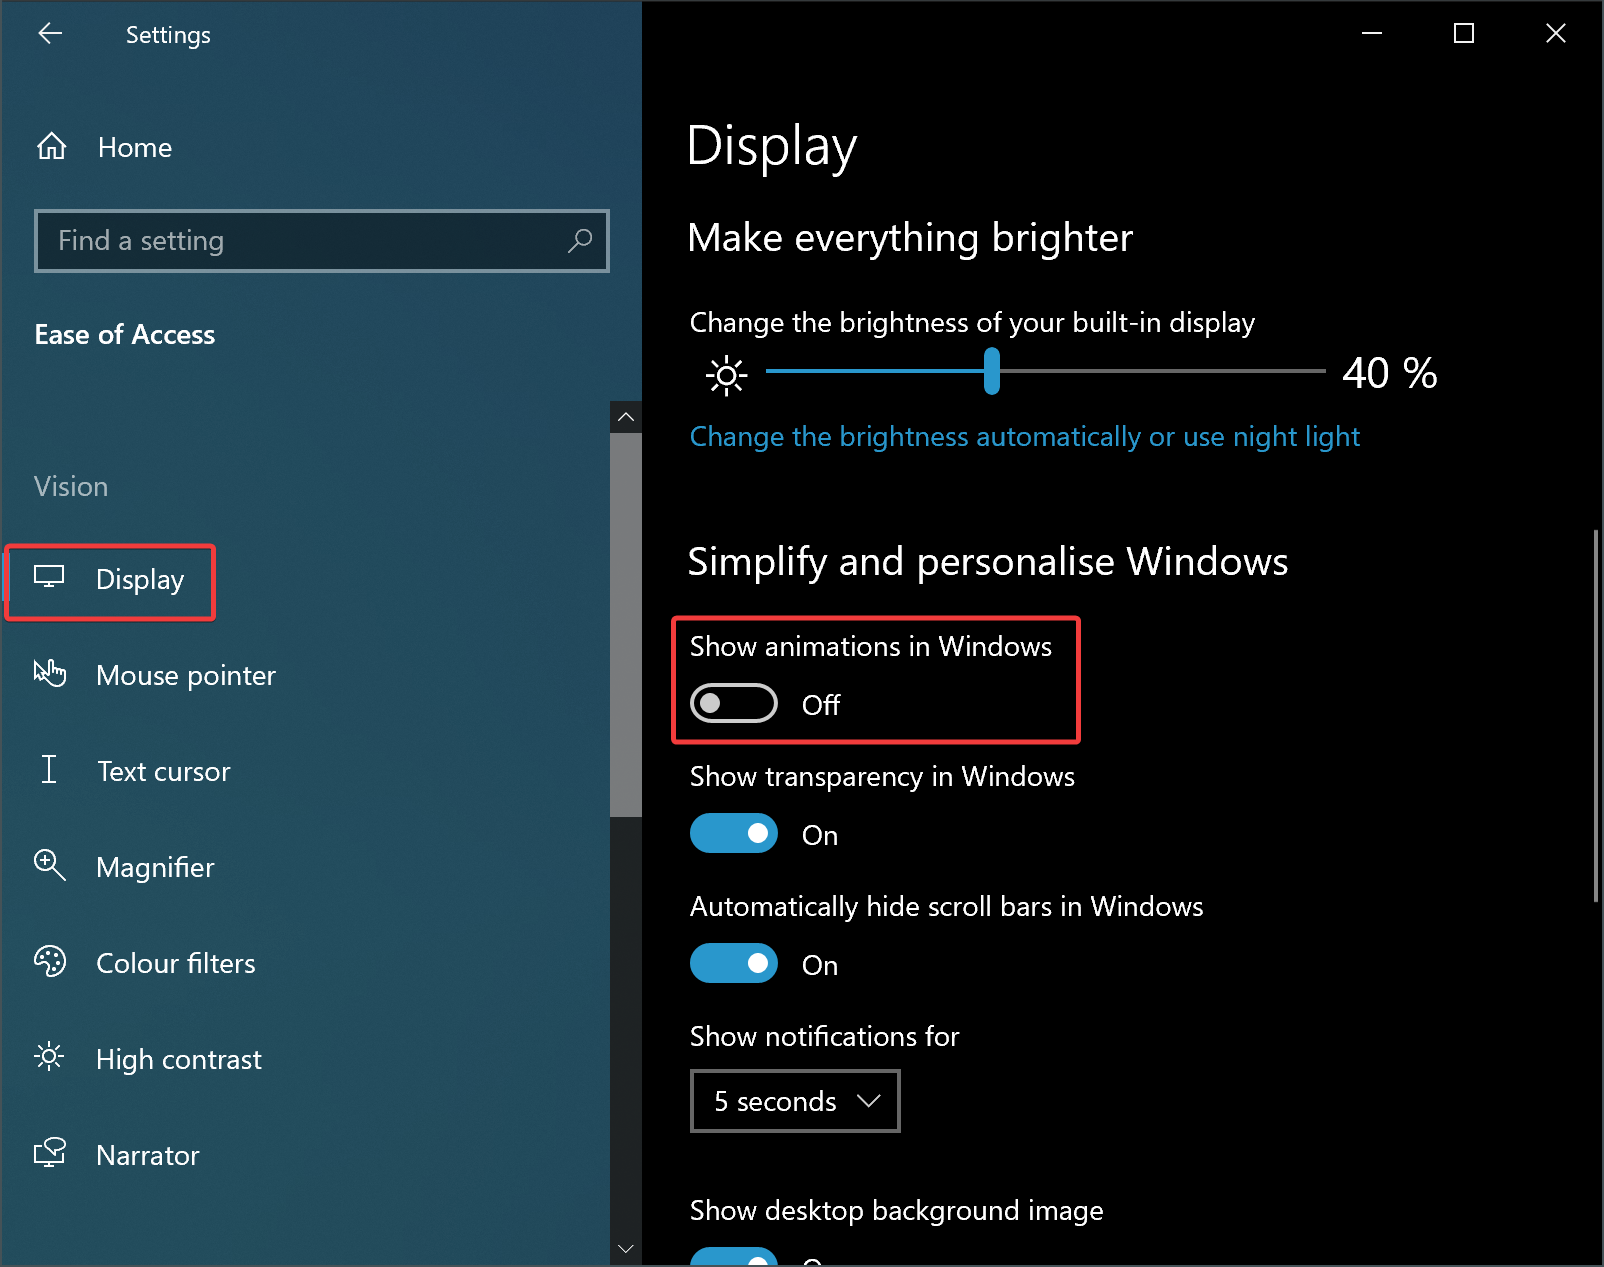
Step 4. On the right pane, scroll down to the “Simplify and personalize Windows” section and turn Off the toggle switch Show animations in Windows to disable the animations altogether.
How to Disable Visual Animations Using Control Panel?
To turn off visual animations in Windows 10 through Control Panel, use these steps:-
Step 1. First, open Control Panel.
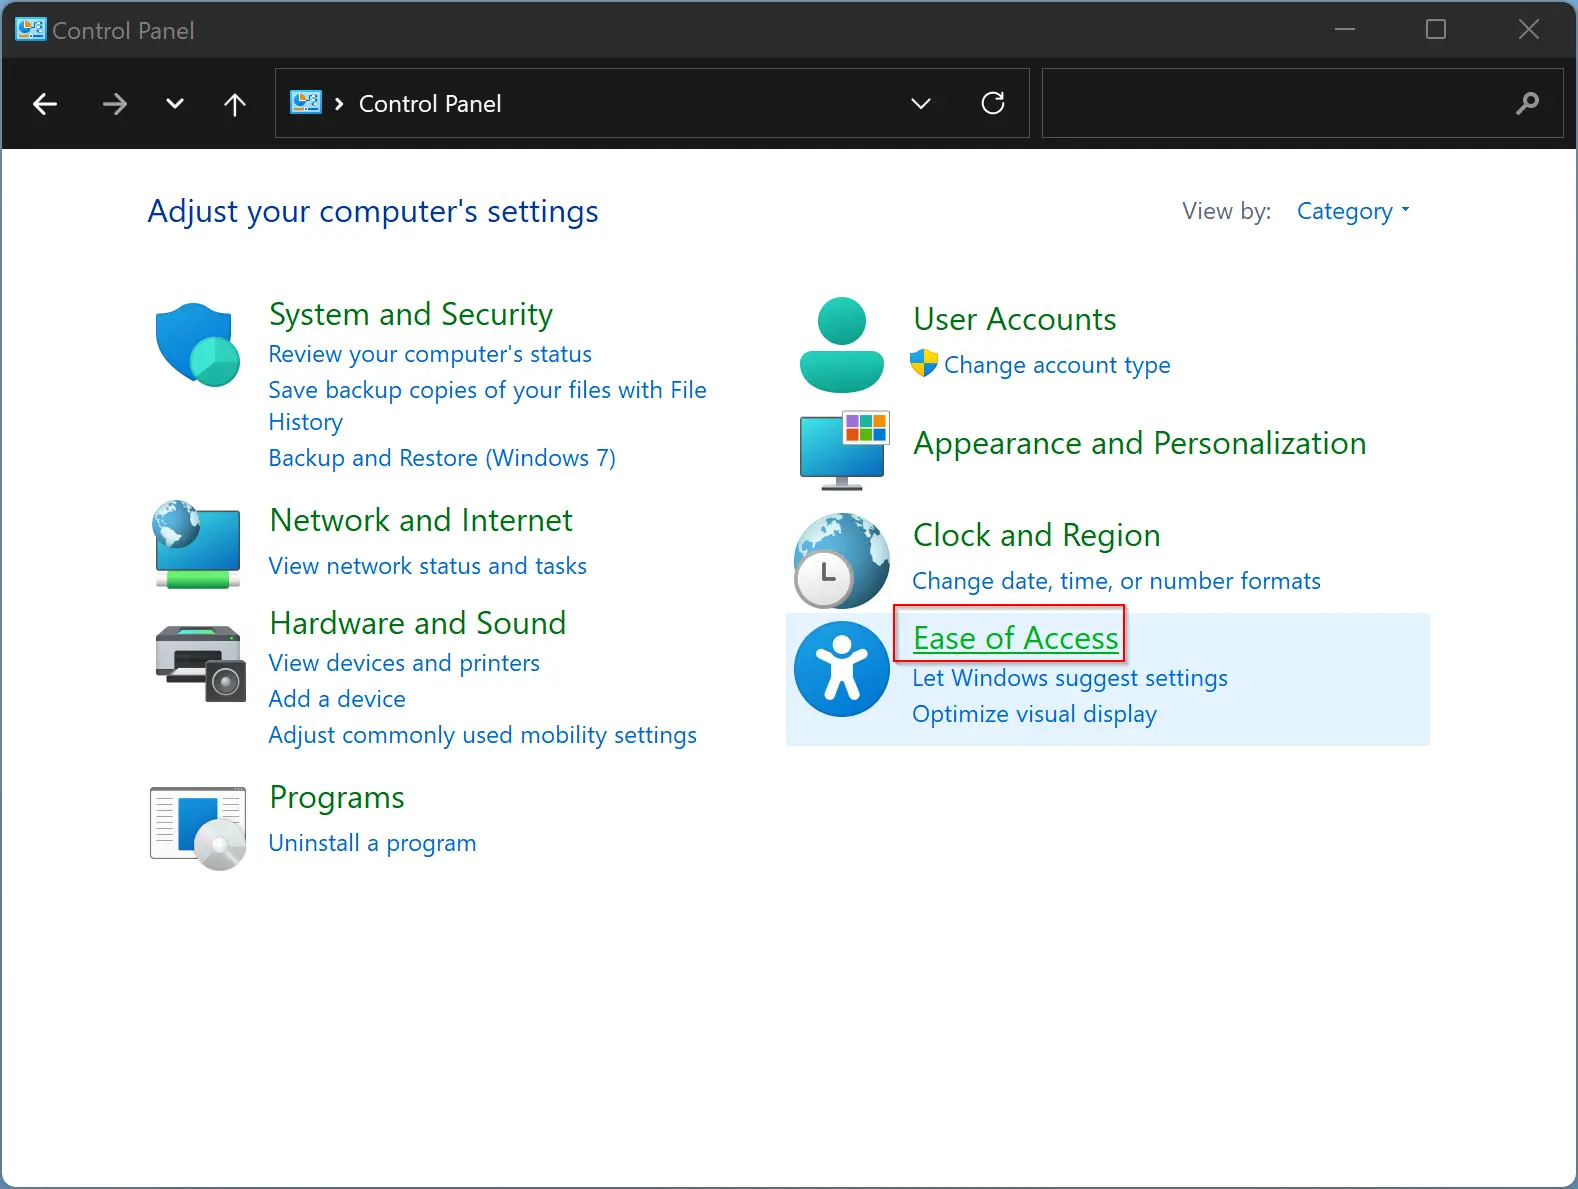
Step 2. Then, click on Ease of Access.
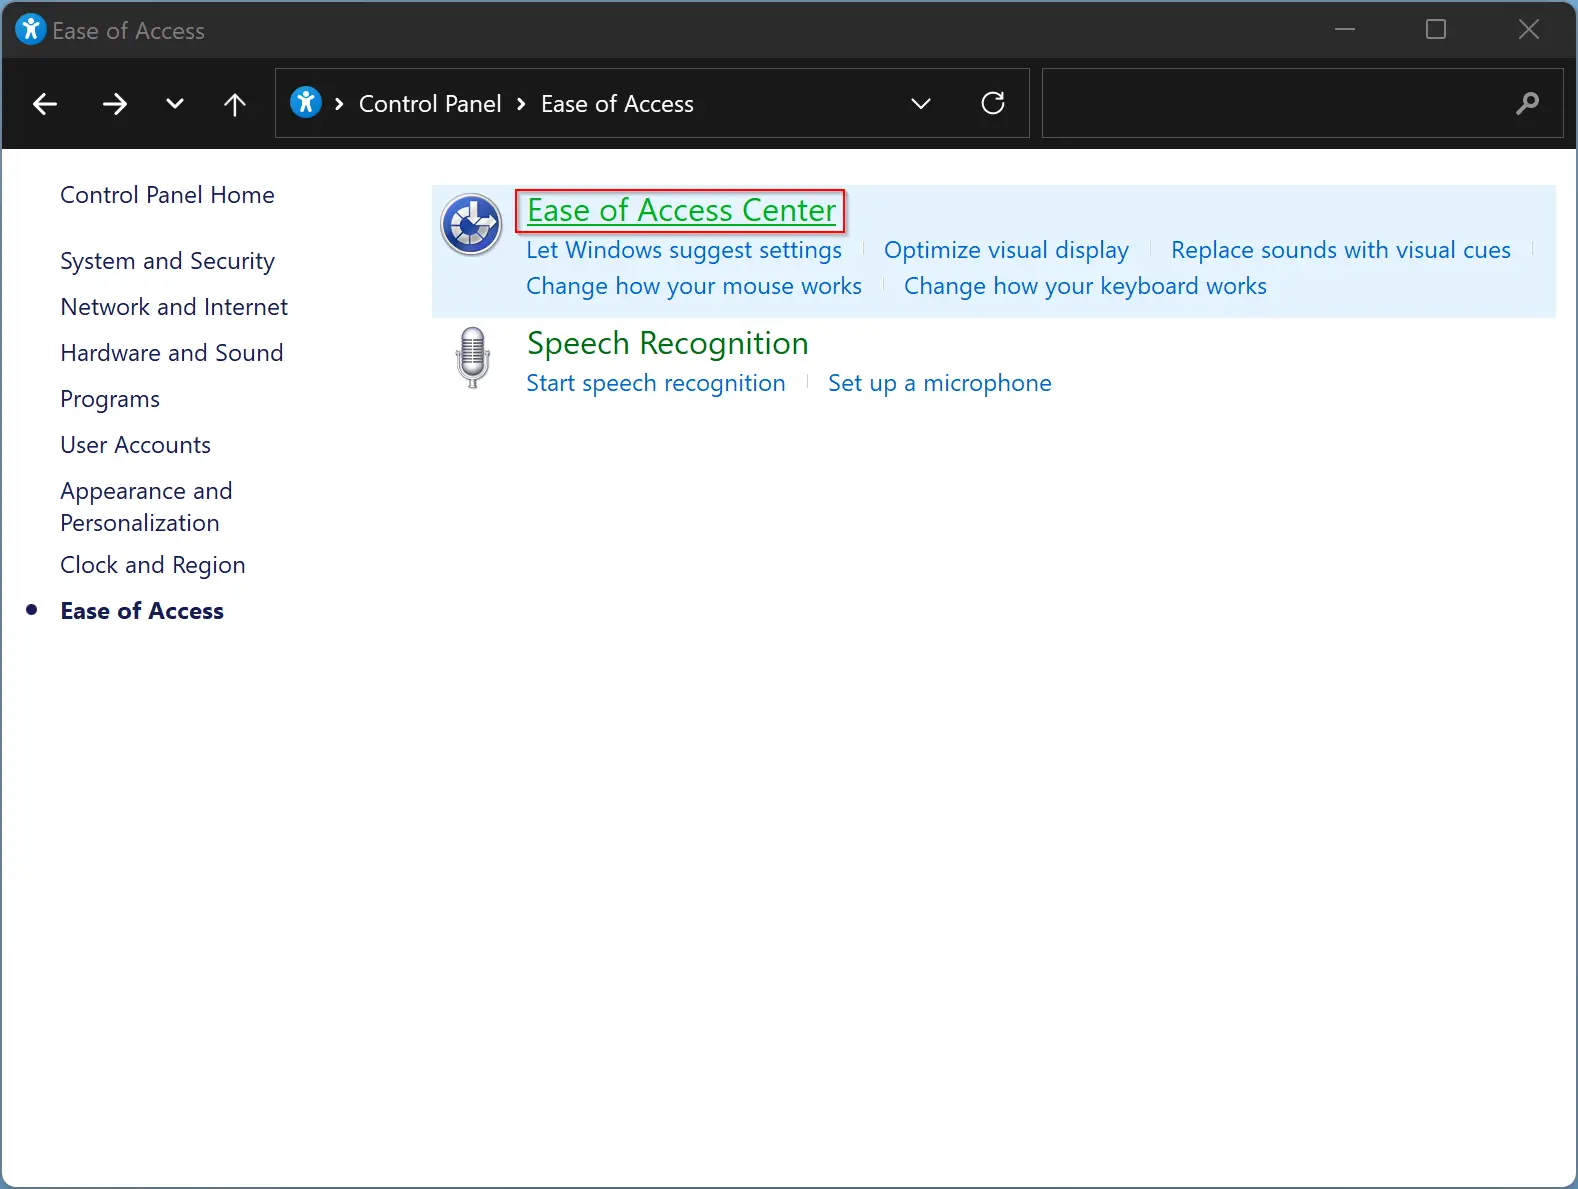
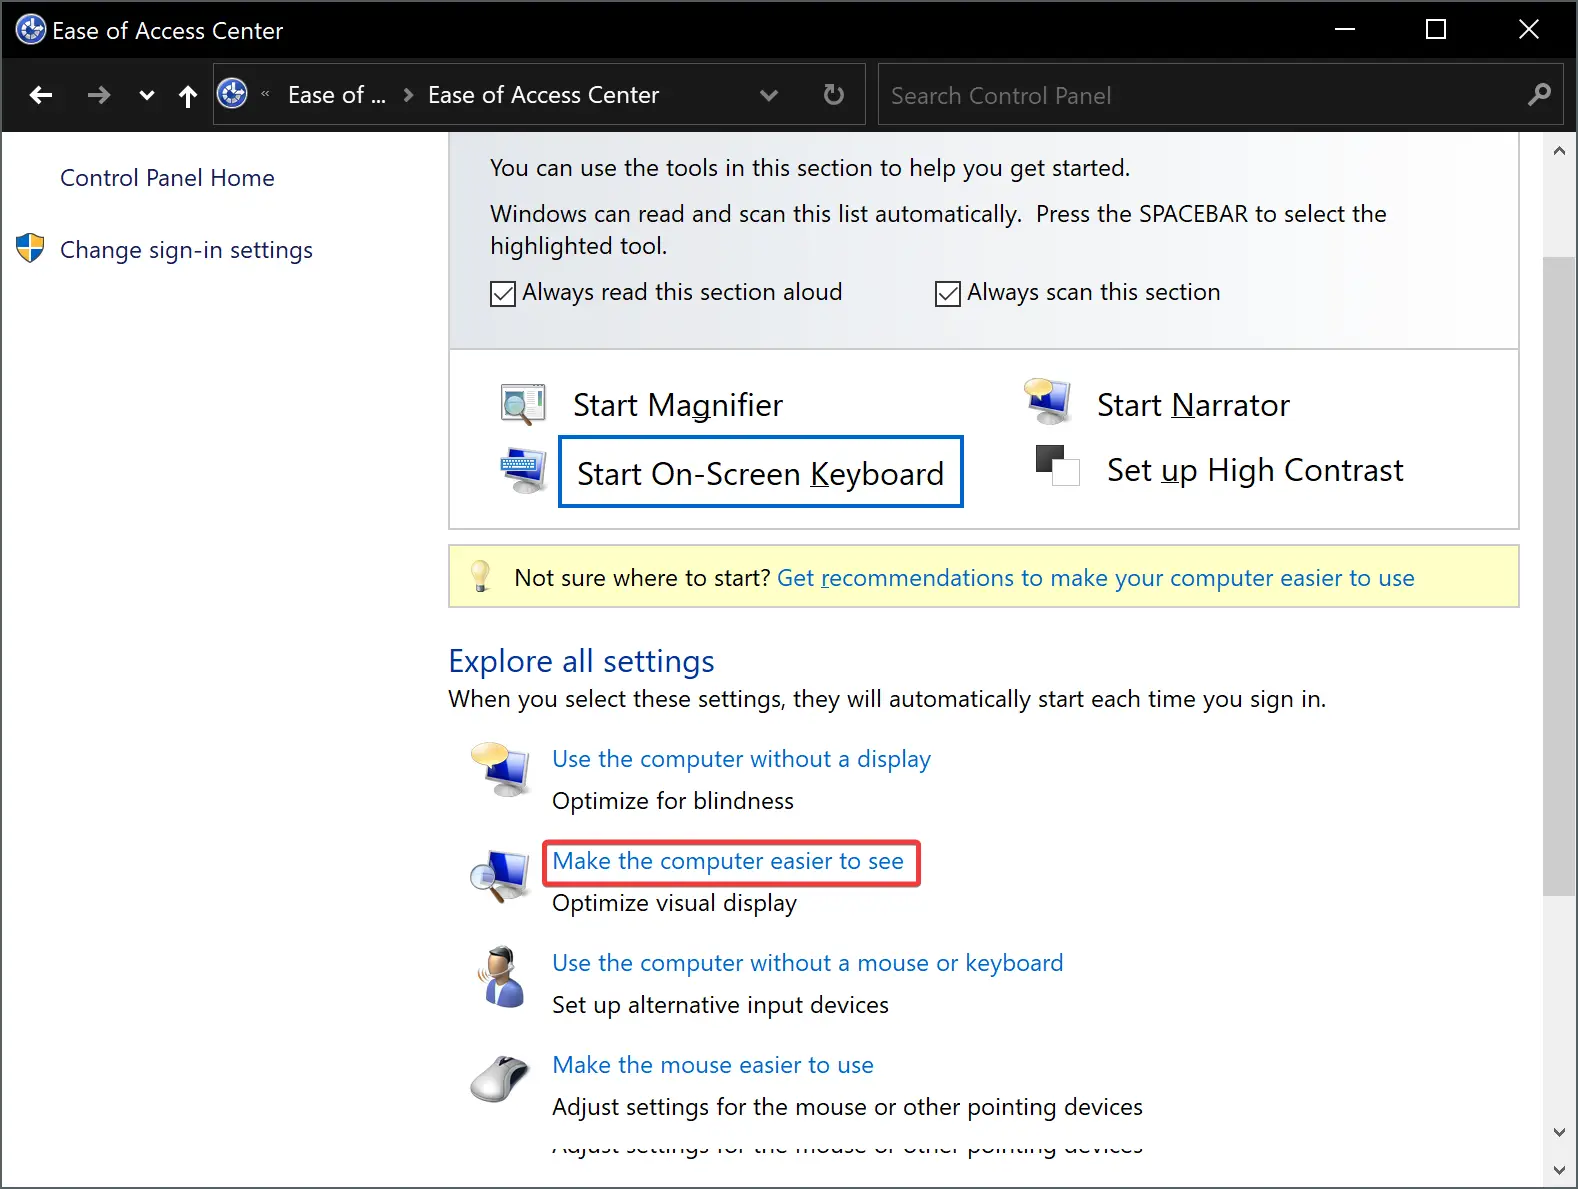
Step 3. Next, click on the Ease of Access Center.
Step 4. Now, scroll down to the “Explore all settings” section and click on the “Make the computer easier to see” option.
Step 5. In the following screen, check the checkbox “Turn off all unnecessary animations (when possible).”
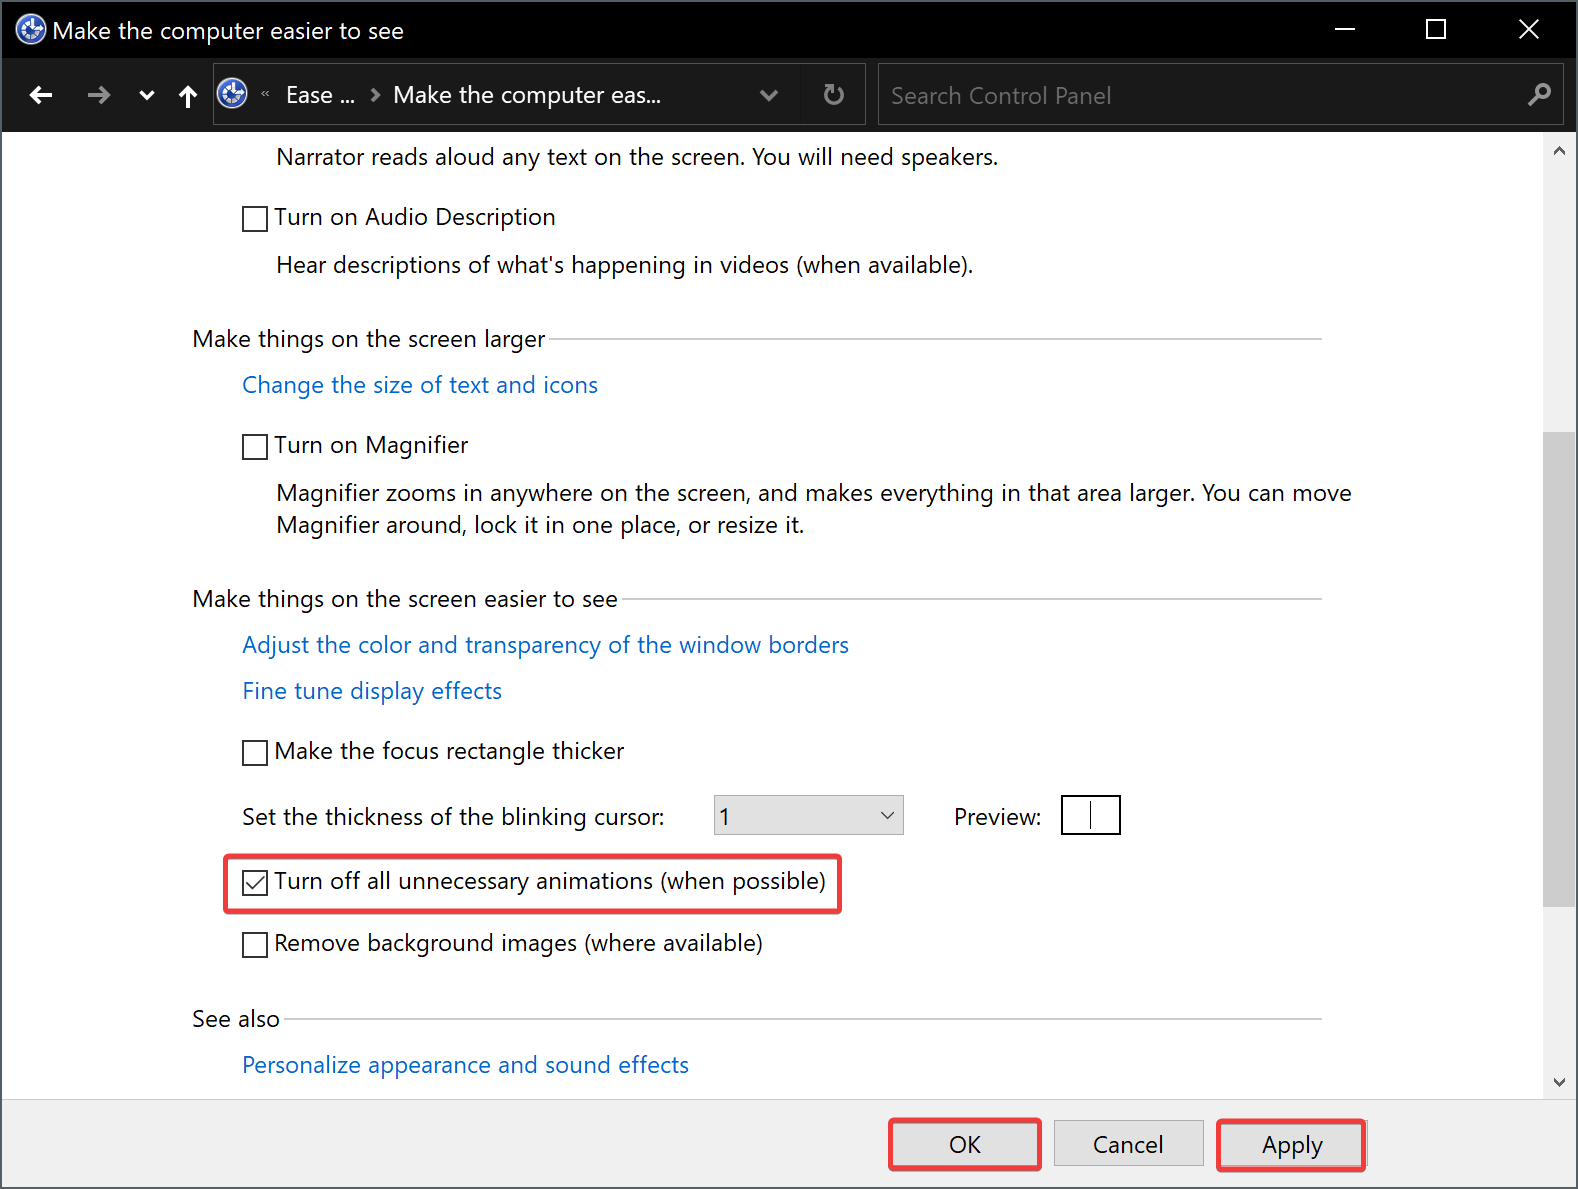
Step 6. Click the Apply button.
Step 7. Click the OK button.
How to Turn off Visual Animations using System Properties?
To disable visual animations on Windows 10 through System Properties, use these steps:-
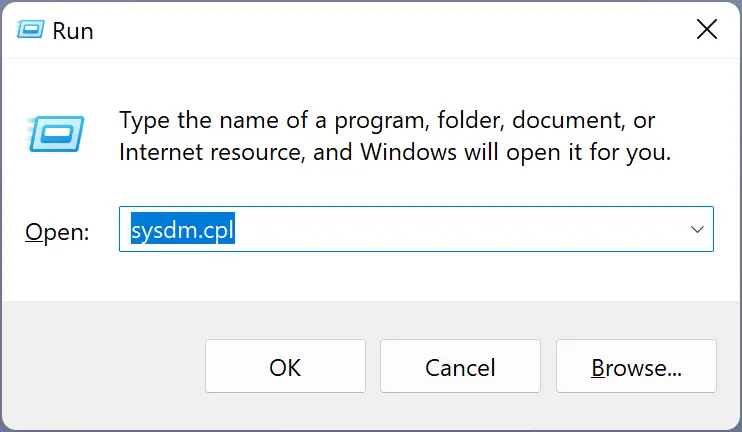
Step 1. Press the Windows + R keyboard shortcut to open the Run dialog.
Step 2. Then, type sysdm.cpl and hit the Enter key on the keyboard to open the System Properties window.
Step 3. After that, switch to the Advanced tab in System Properties window.
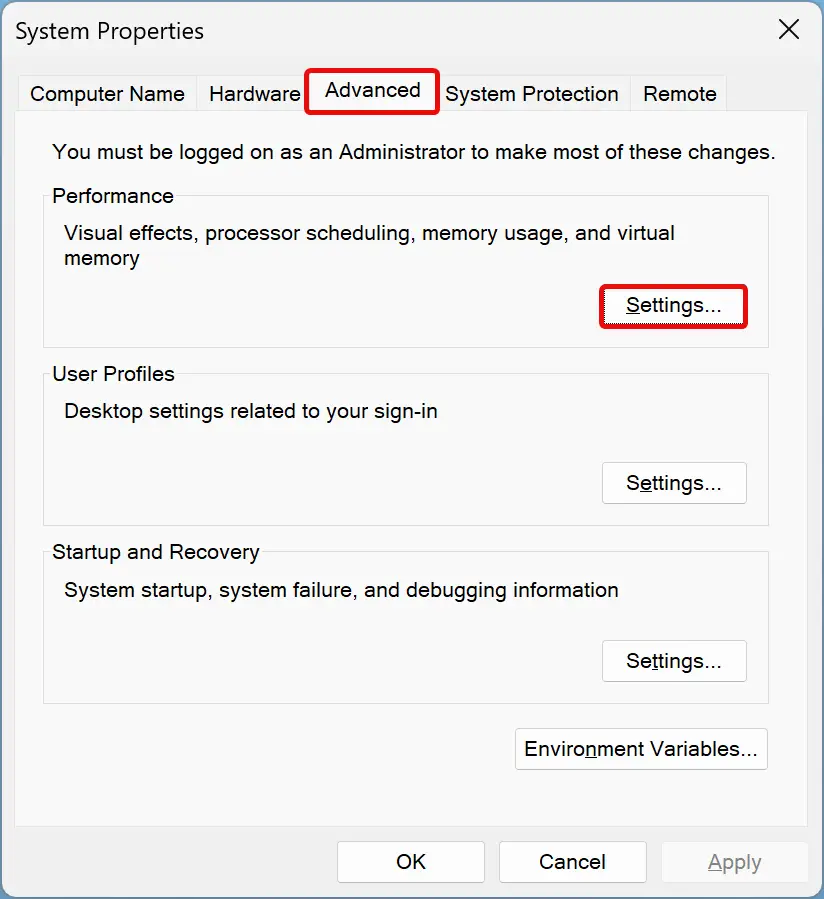
Step 4. Click on the Settings button under the Performance section to open Performance Options window.
Step 5. Switch to the Visual Effects tab in the Performance Options window and click the Adjust for best performance radio button.
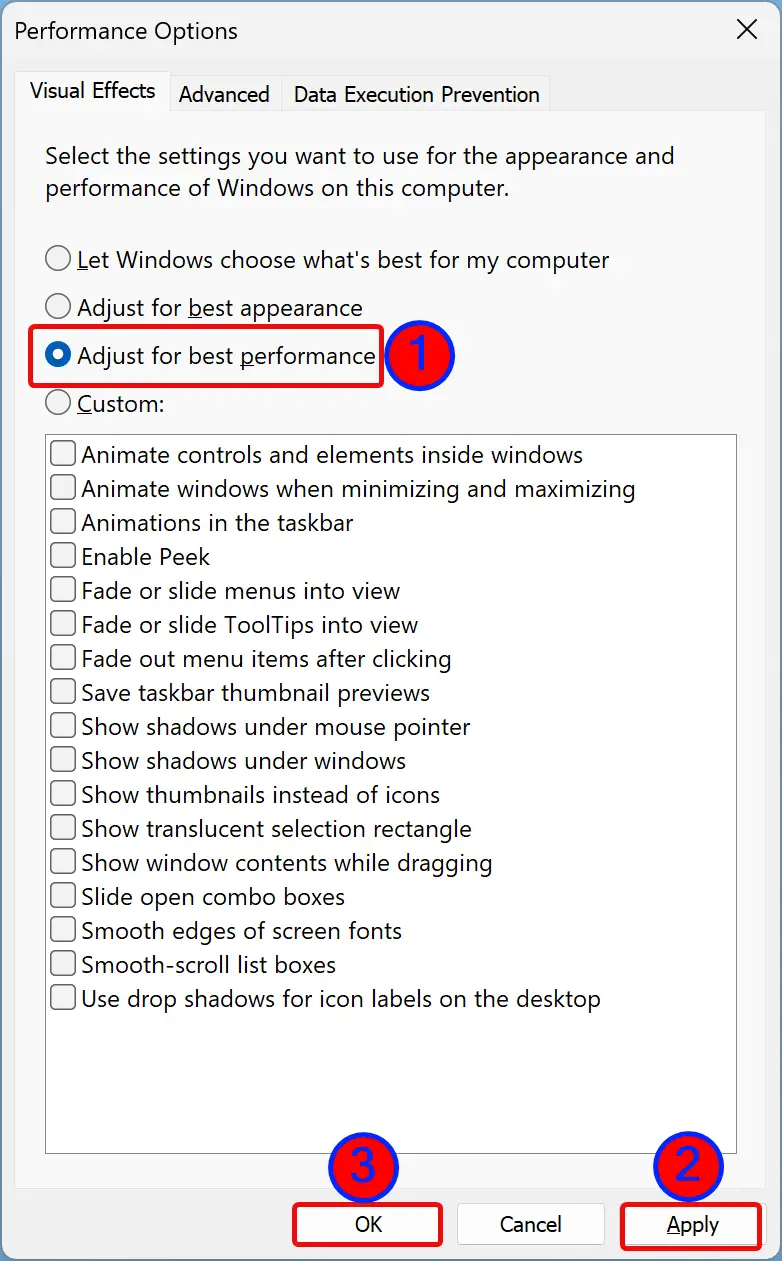
Step 6. Click the Apply button.
Step 7. Click the OK button.
Step 6. Click the OK button.
Once you complete the above steps, Windows 10 will disable all the effects and animations.
Conclusion
In conclusion, Windows 10 offers many animation effects to enhance the user experience, but these visual effects can slow down performance and impact battery life, especially on older machines. To improve the performance of your PC, you can disable these visual animations. We have provided three methods to disable visual animations in Windows 10: using the Settings app, Control Panel, or System Properties. By following these steps, you can turn off all visual animations and get a faster, smoother Windows 10 experience.