Microsoft uses a SmartScreen feature on Windows 11 and 10 operating systems to protect your computer from malware. Although it is a good feature and helps secure our system, many Windows users feel irritated when the Windows Defender SmartScreen warns the user from launching an unrecognized application by Microsoft Windows. They have to click the More info > Run Anyway option every time. The complete message on the screen is that Windows Defender SmartScreen prevented an unrecognized app from starting. Running this app might put your PC at risk.”
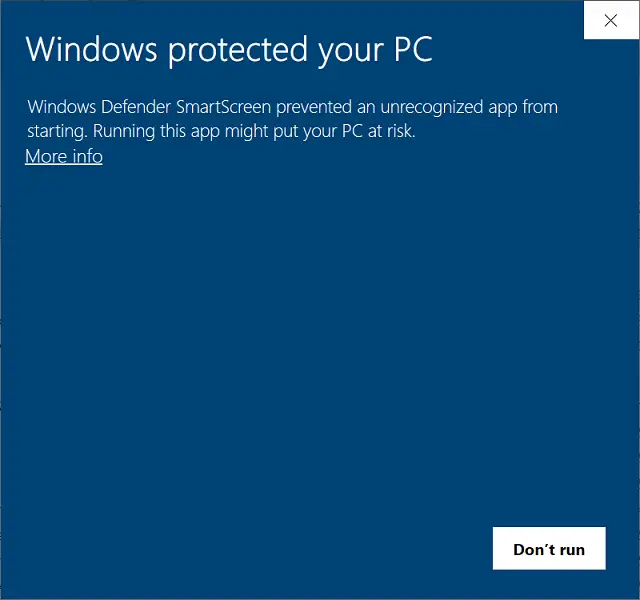
The SmartScreen is a built-in security filter that Windows uses to check every file you download and run against a unique database. If the file is unknown to the database, you will see a warning when you download and run such a file. Windows SmartScreen shows a nag screen with additional confirmation if you try to open it.
Windows SmartScreen guards your browser and computer by preventing you from downloading and running potentially malicious files and programs. While the idea behind Windows SmartScreen is good, there are some issues with it because it often generates false positives, even for safe apps. If the system cannot find any information about the program you try to run, it prevents it from opening by default. The same happens with an application that does not have digitally signed binaries.
Although it is a good feature, not everyone is happy with Microsoft scanning your computer and knowing what apps and files you are using. If you are one of those Windows users who are not satisfied with Windows Defender SmartScreen and want to disable it completely, this gearupwindows article will help you.
How to Disable the Windows Defender SmartScreen via Windows Security?
To turn off the Windows Defender SmartScreen using Windows Security, do the following:-
Step 1. Click the Start/Search button on the Taskbar and type Windows Security.

Step 2. Click the Windows Security to open it in the search results.
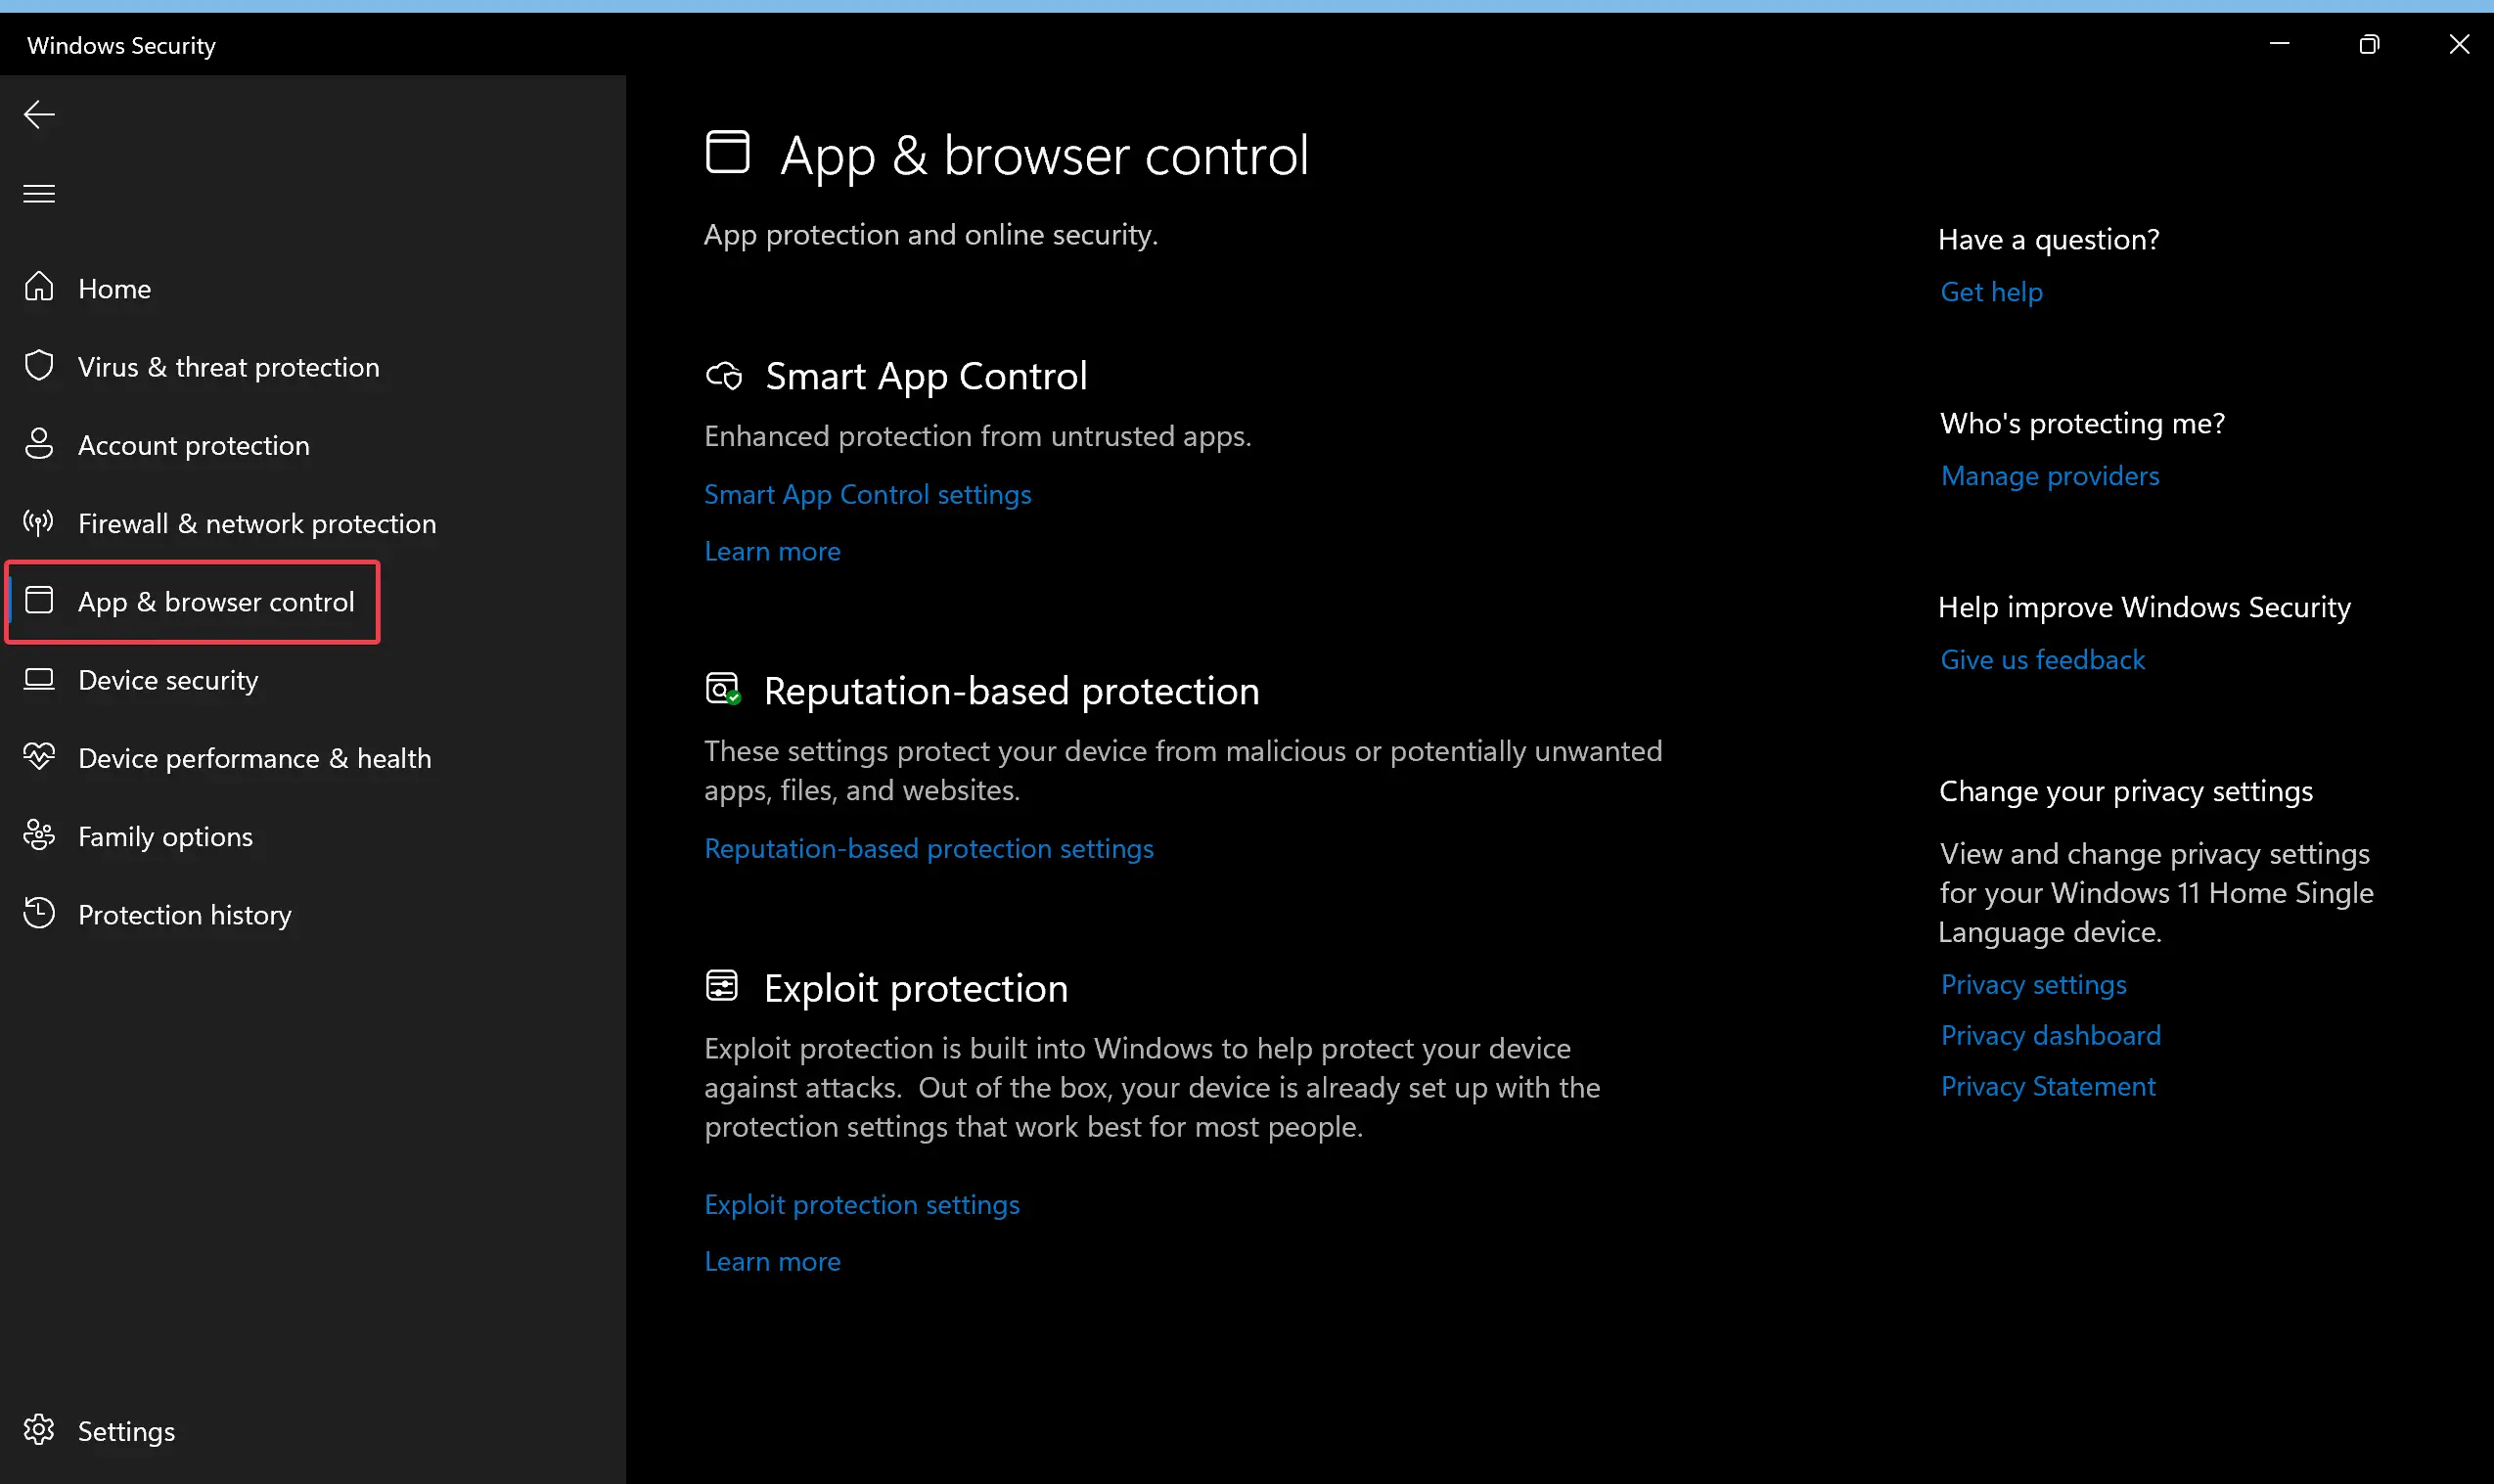
Step 3. Then, select App & browser control in the left sidebar of Windows Security.
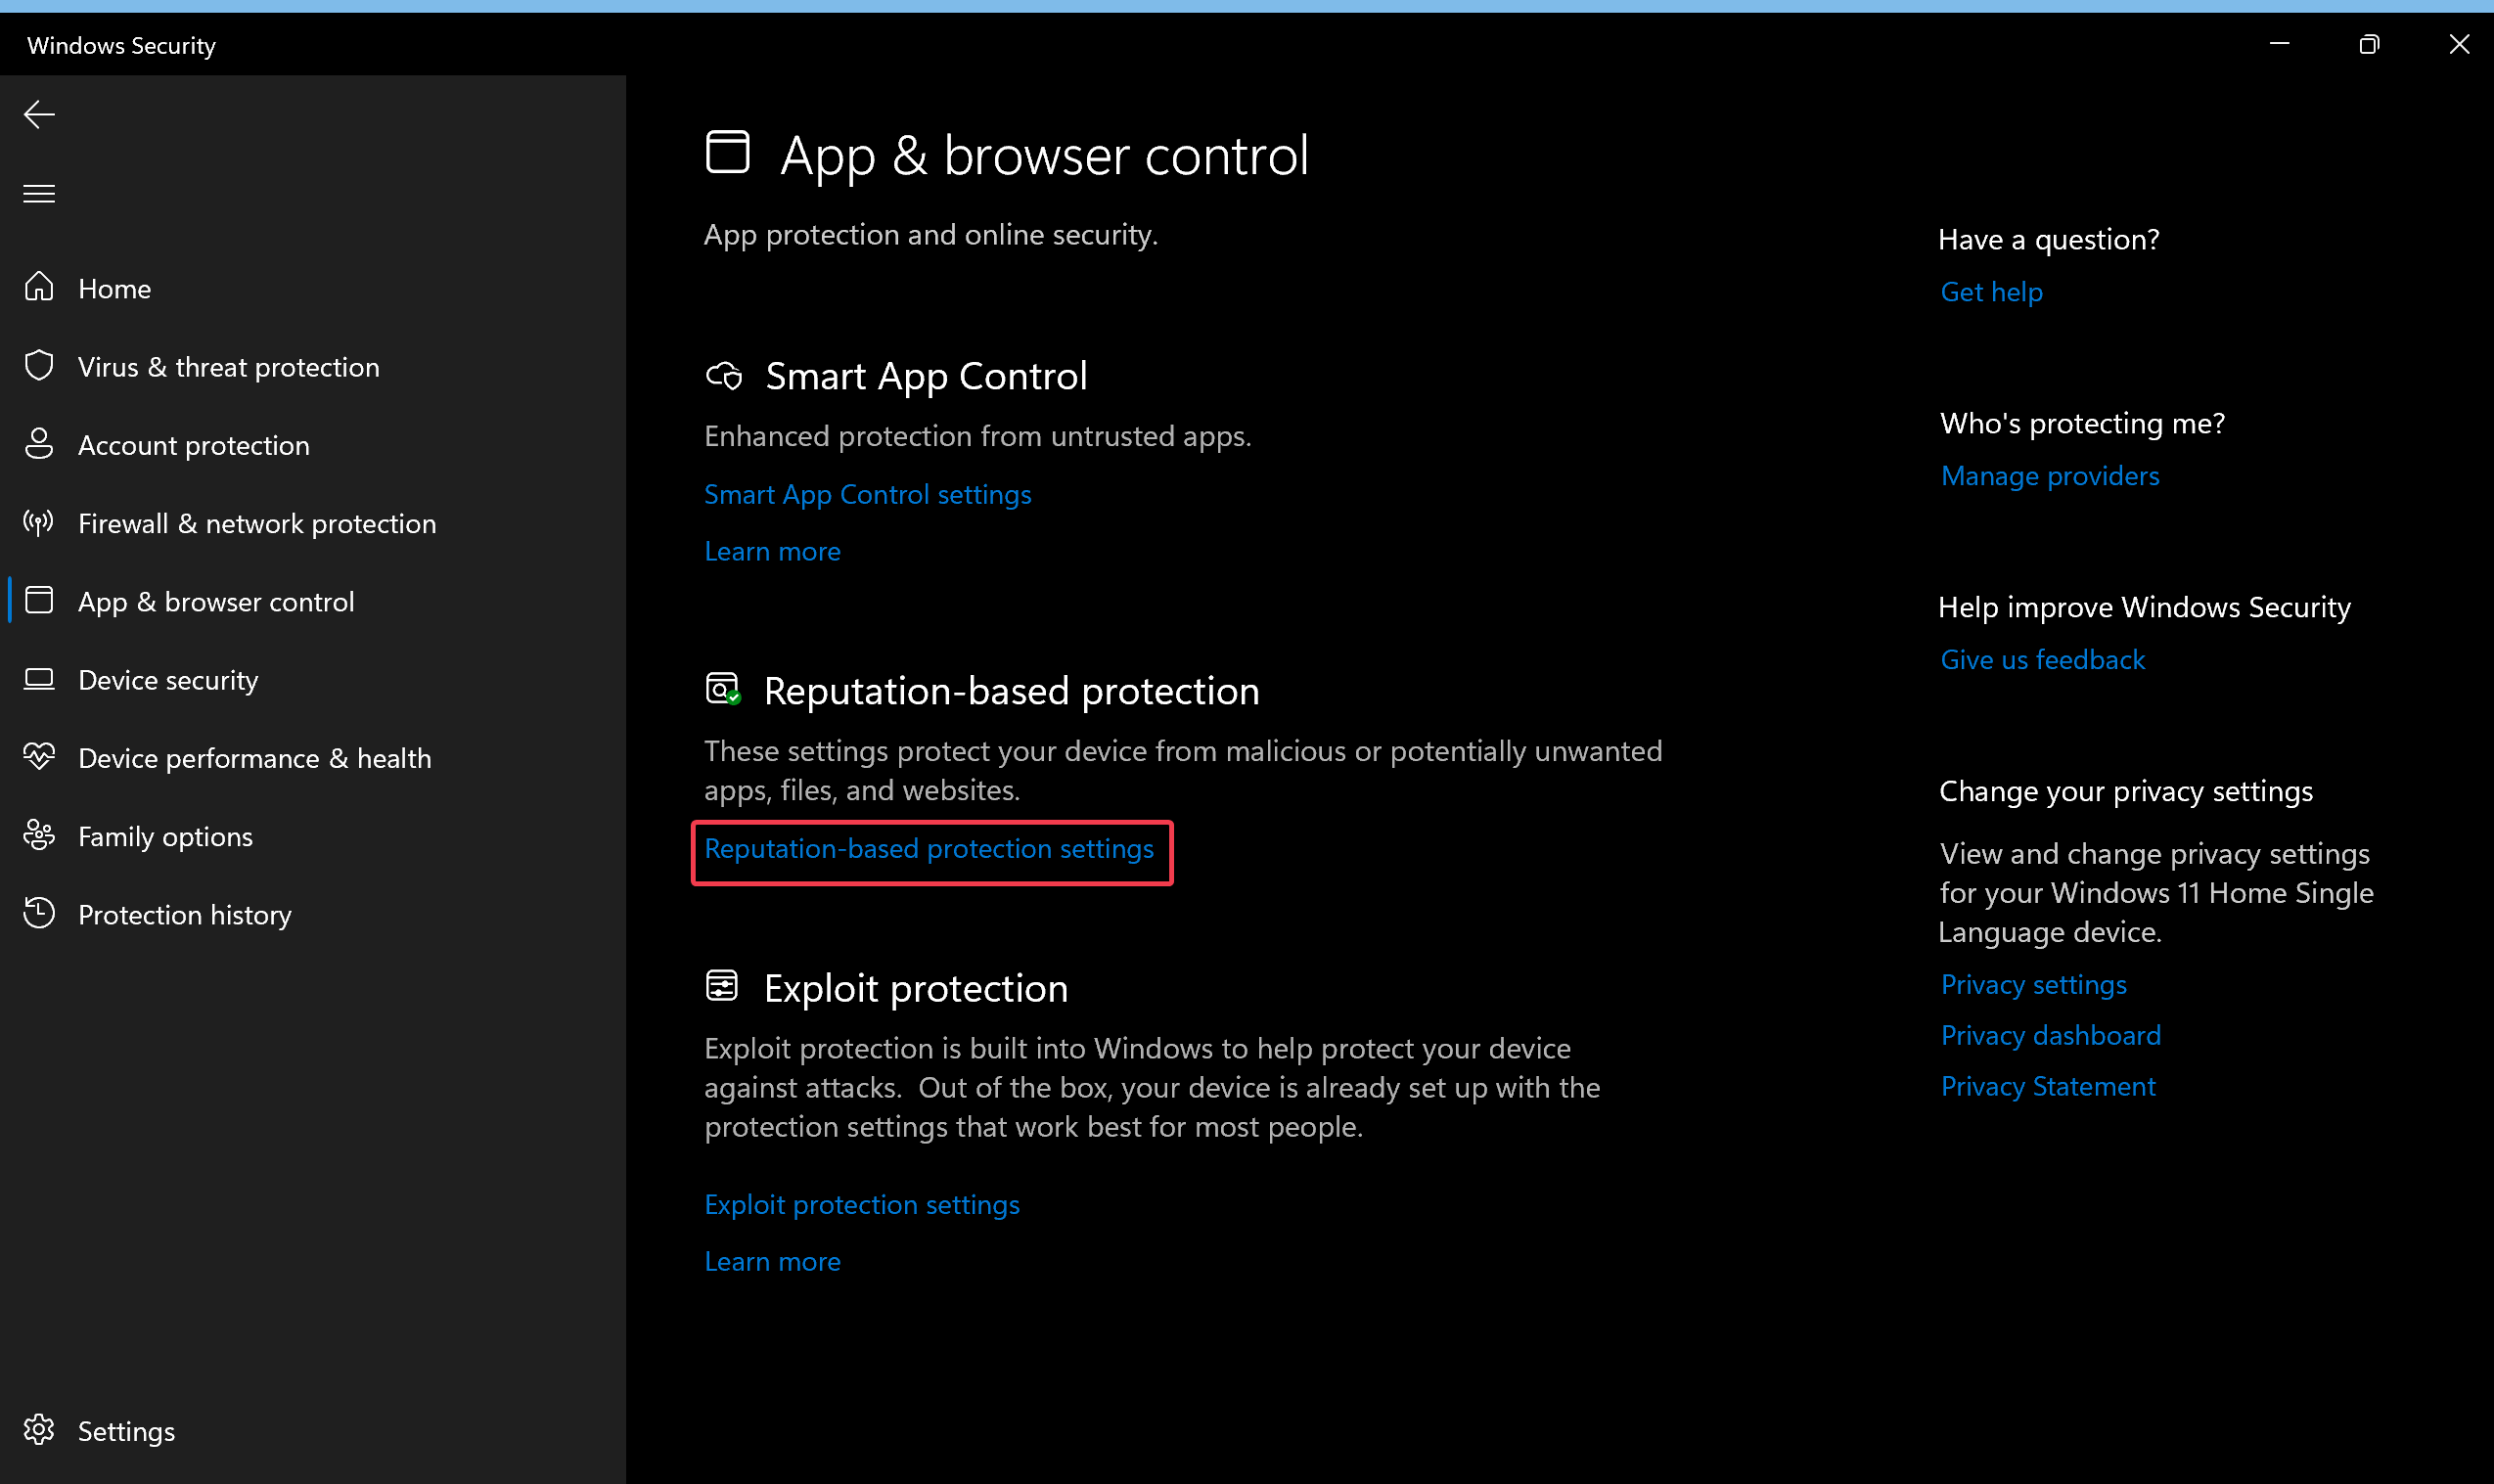
Step 4. On the right side, click the link Reputation-based protection settings under the Reputation-based Protection section.
Step 5. On the following screen, toggle Off the Check apps and files option to disable Windows Defender SmartScreen.
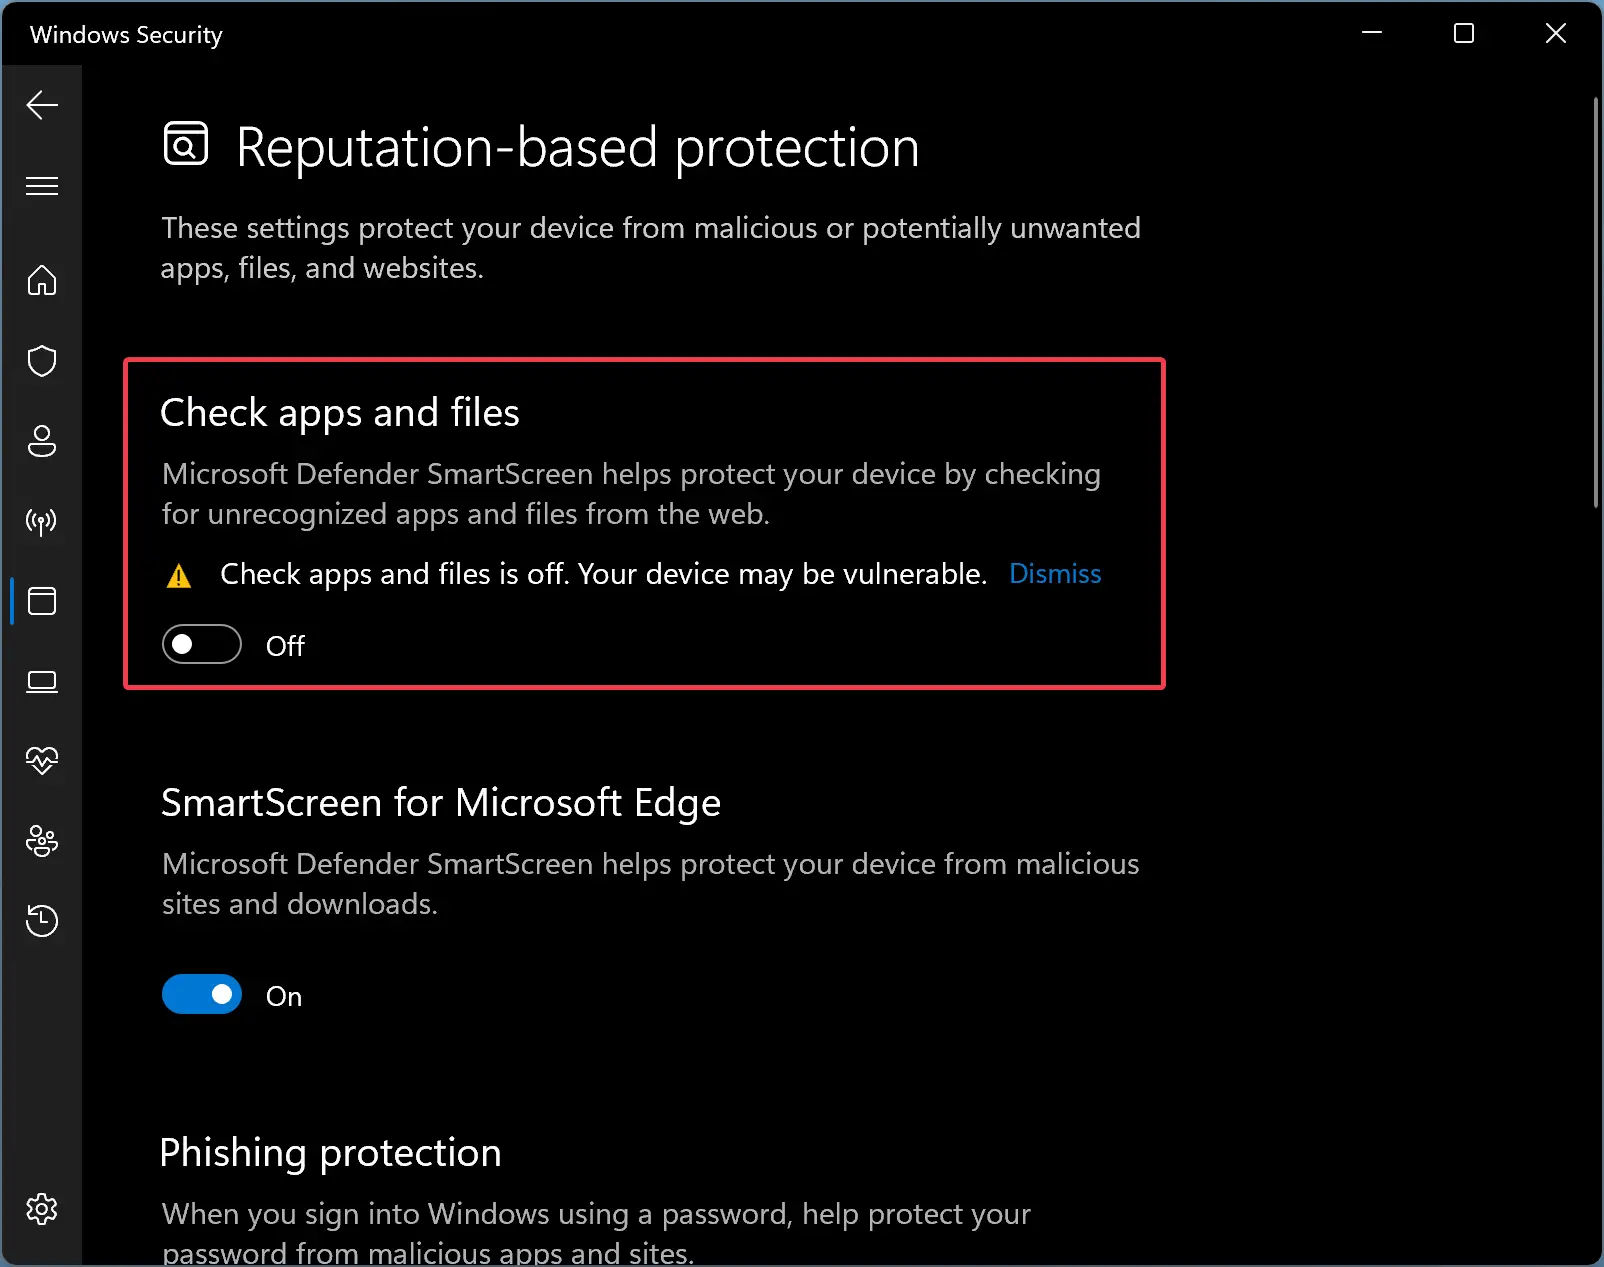
To enable the Windows Defender SmartScreen, you need to turn On the toggle switch “Check apps and files.”
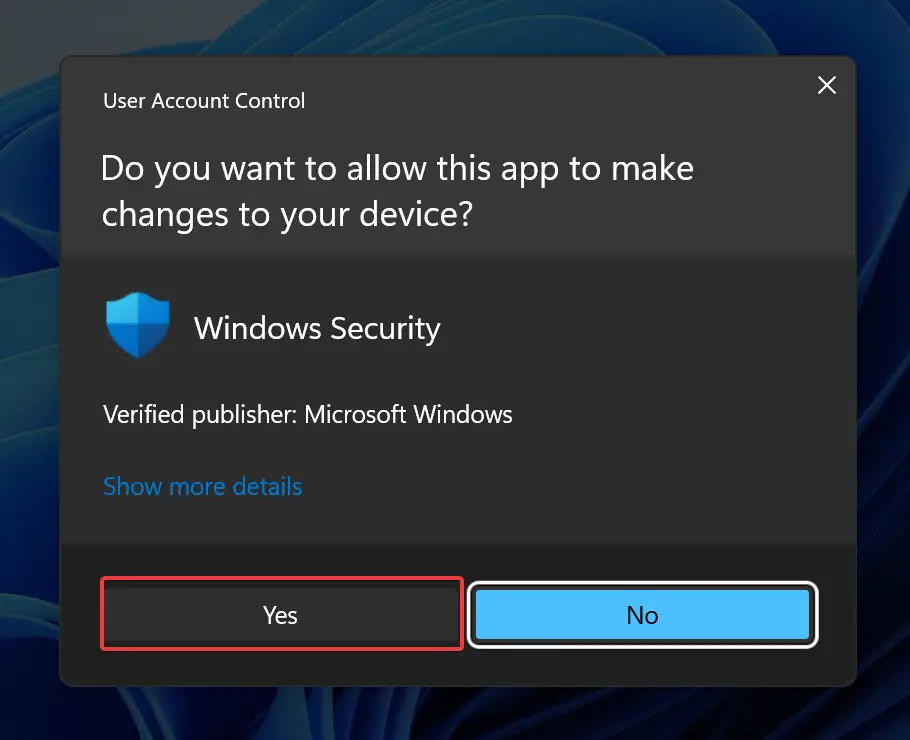
Click the Yes button if UAC prompts.
How to Turn Off the Windows Defender SmartScreen Using Local Group Policy Editor?
To turn off the Windows Defender SmartScreen using Local Group Policy Editor, do the following:-
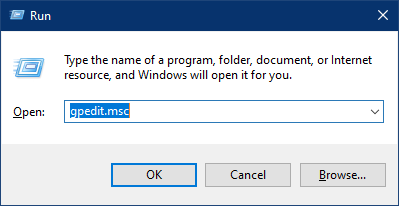
Step 1. Press Windows + R hotkey to open the Run command box.
Step 2. Then, type gpedit.msc in the Run box and press Enter key on the keyboard.
Step 3. When the Local Group Policy Editor window appears on your PC, navigate to the following path in the left sidebar:-
Computer Configuration > Administrative templates > Windows Components > File Explorer
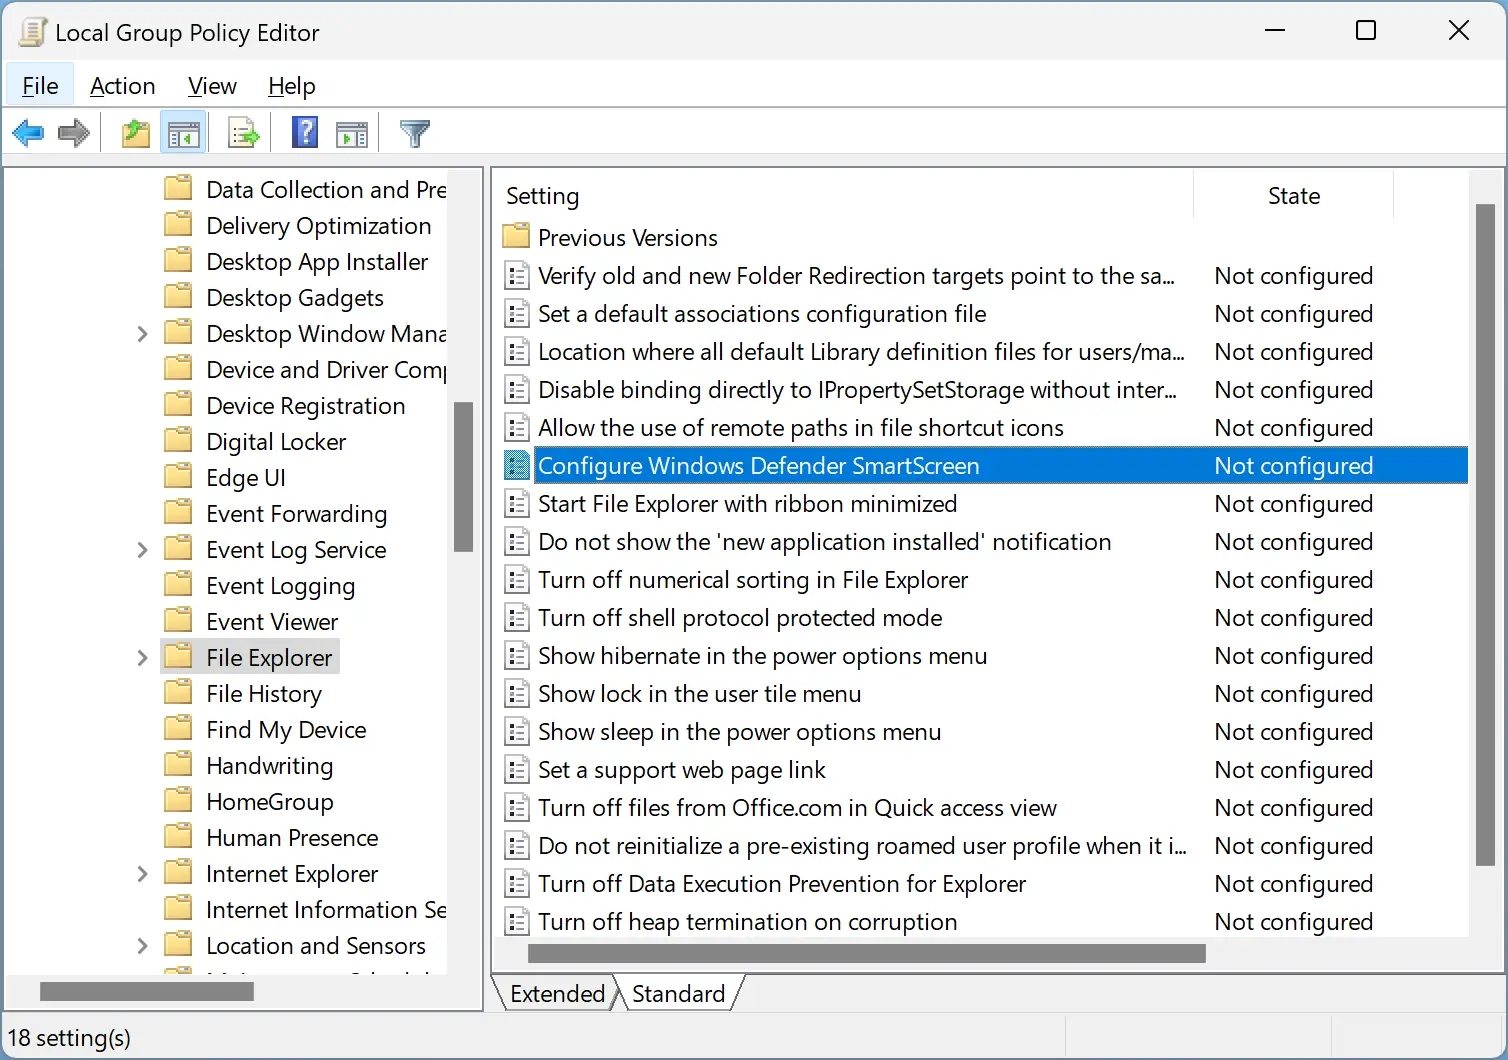
Step 4. On the right-hand side, double-click the policy name, Configure Windows Defender SmartScreen.
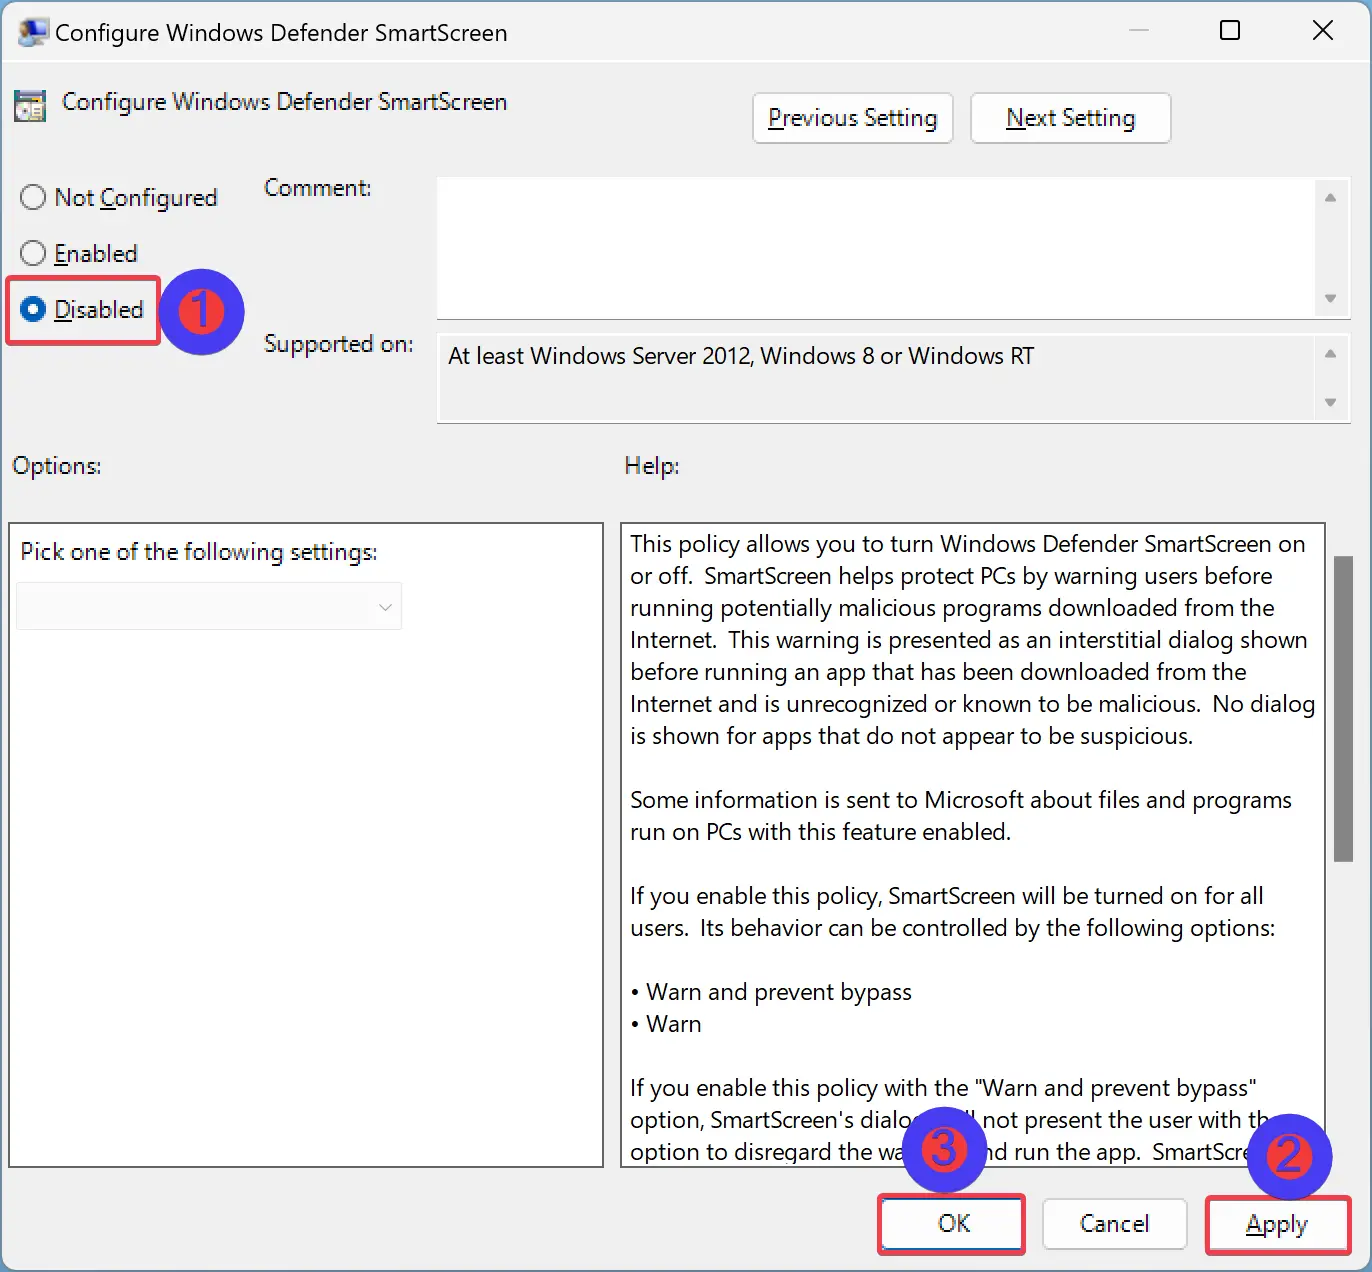
Step 5. Select Disabled.
Step 6. Click Apply.
Step 7. Click OK.
Step 8. Finally, reboot your computer for the effects to take place.
How to Disable the Windows Defender SmartScreen via Registry Editor?
To turn off the Windows Defender SmartScreen via Registry Editor, do the following:-
Step 1. Open the Registry Editor.
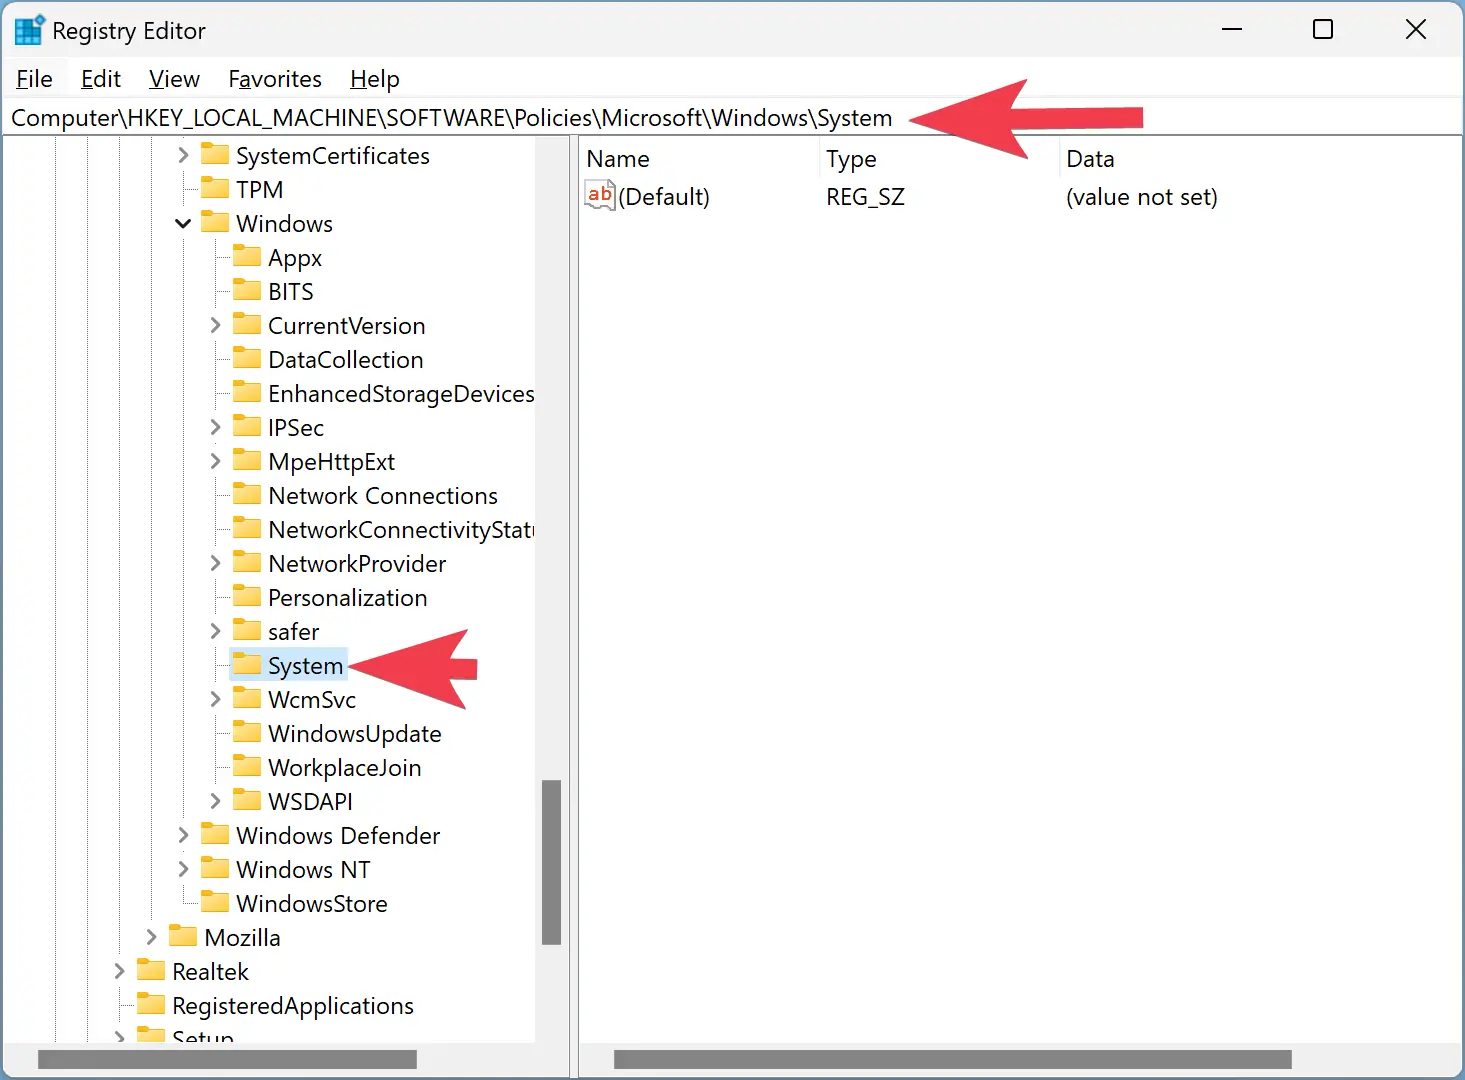
Step 2. When the Registry Editor window opens, copy and paste the following path in the address bar and hit Enter key to reach the System registry key:-
HKEY_LOCAL_MACHINE\SOFTWARE\Policies\Microsoft\Windows\System
Step 3. Then, right-click on the System folder and select New > DWORD (32-bit) Value in the context menu.
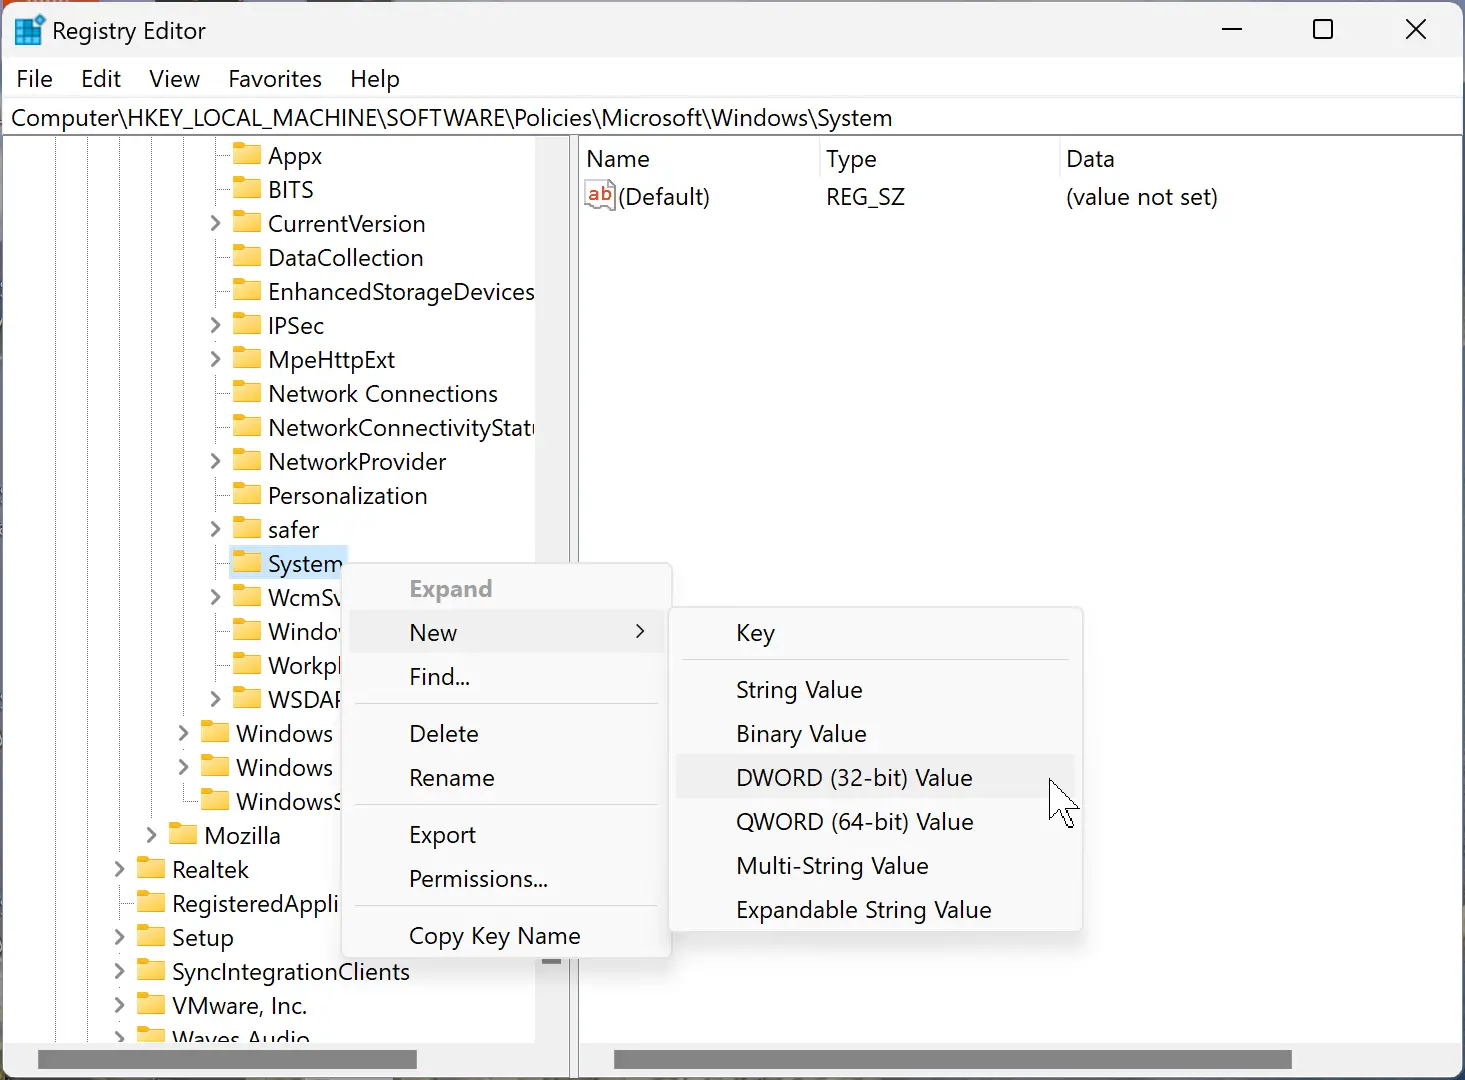
Step 4. Name the newly created REG_DWORD as EnableSmartScreen.
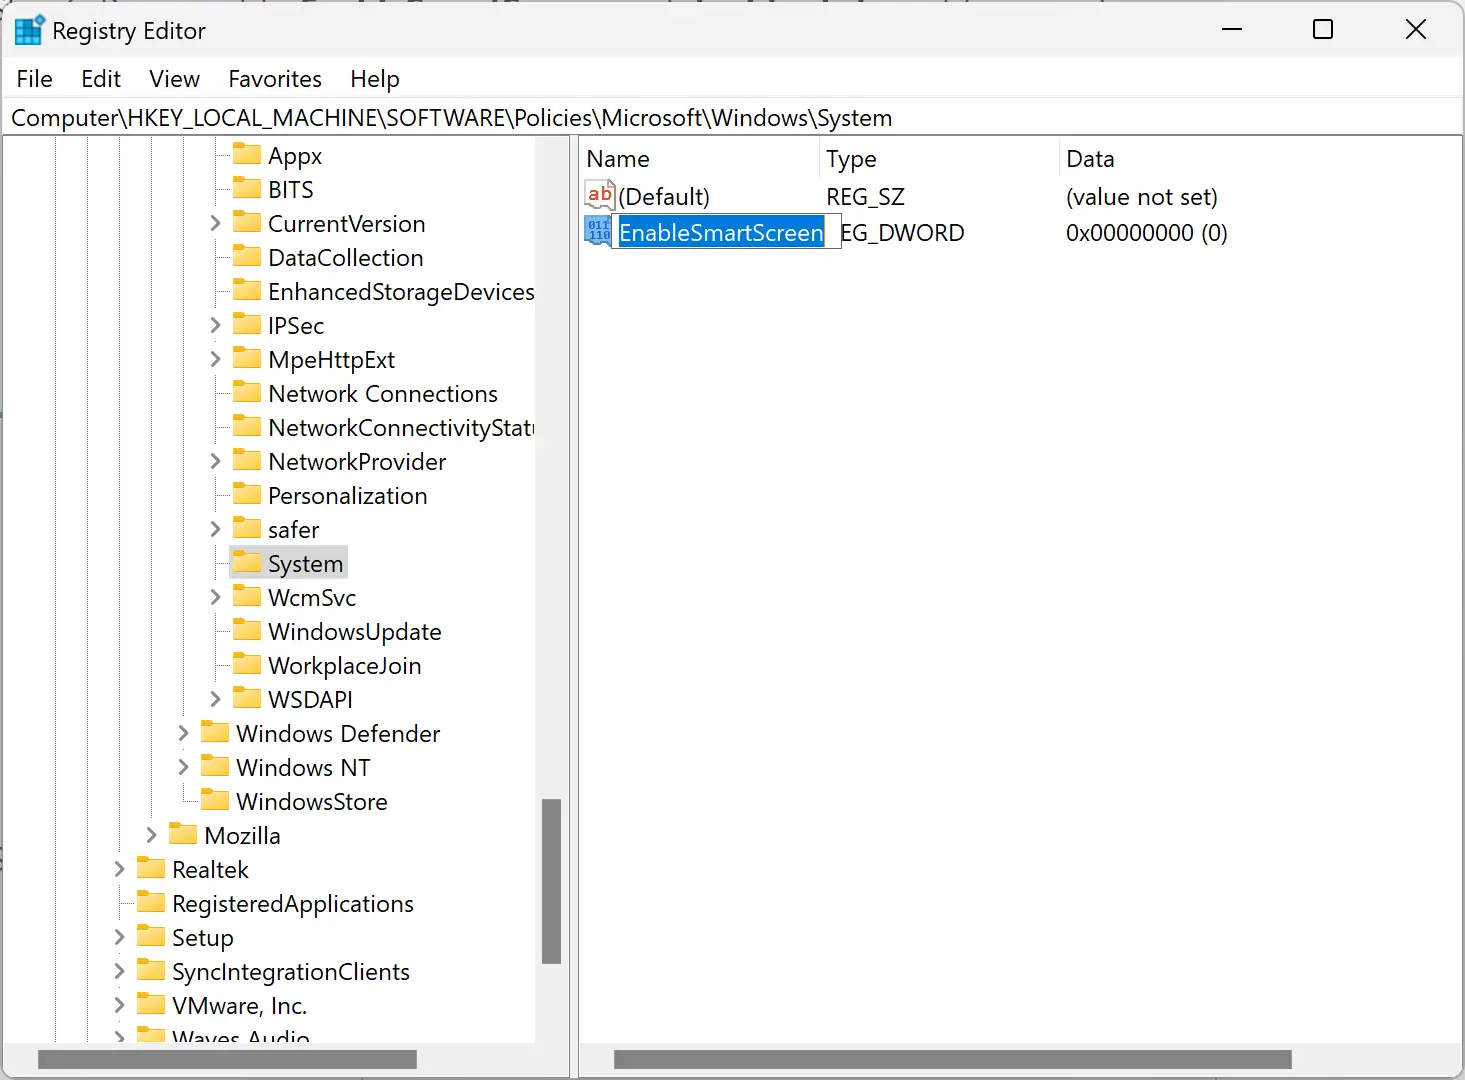
Step 5. Now, double-click on the EnableSmartScreen REG_DWORD and set its “Value data” to 0.
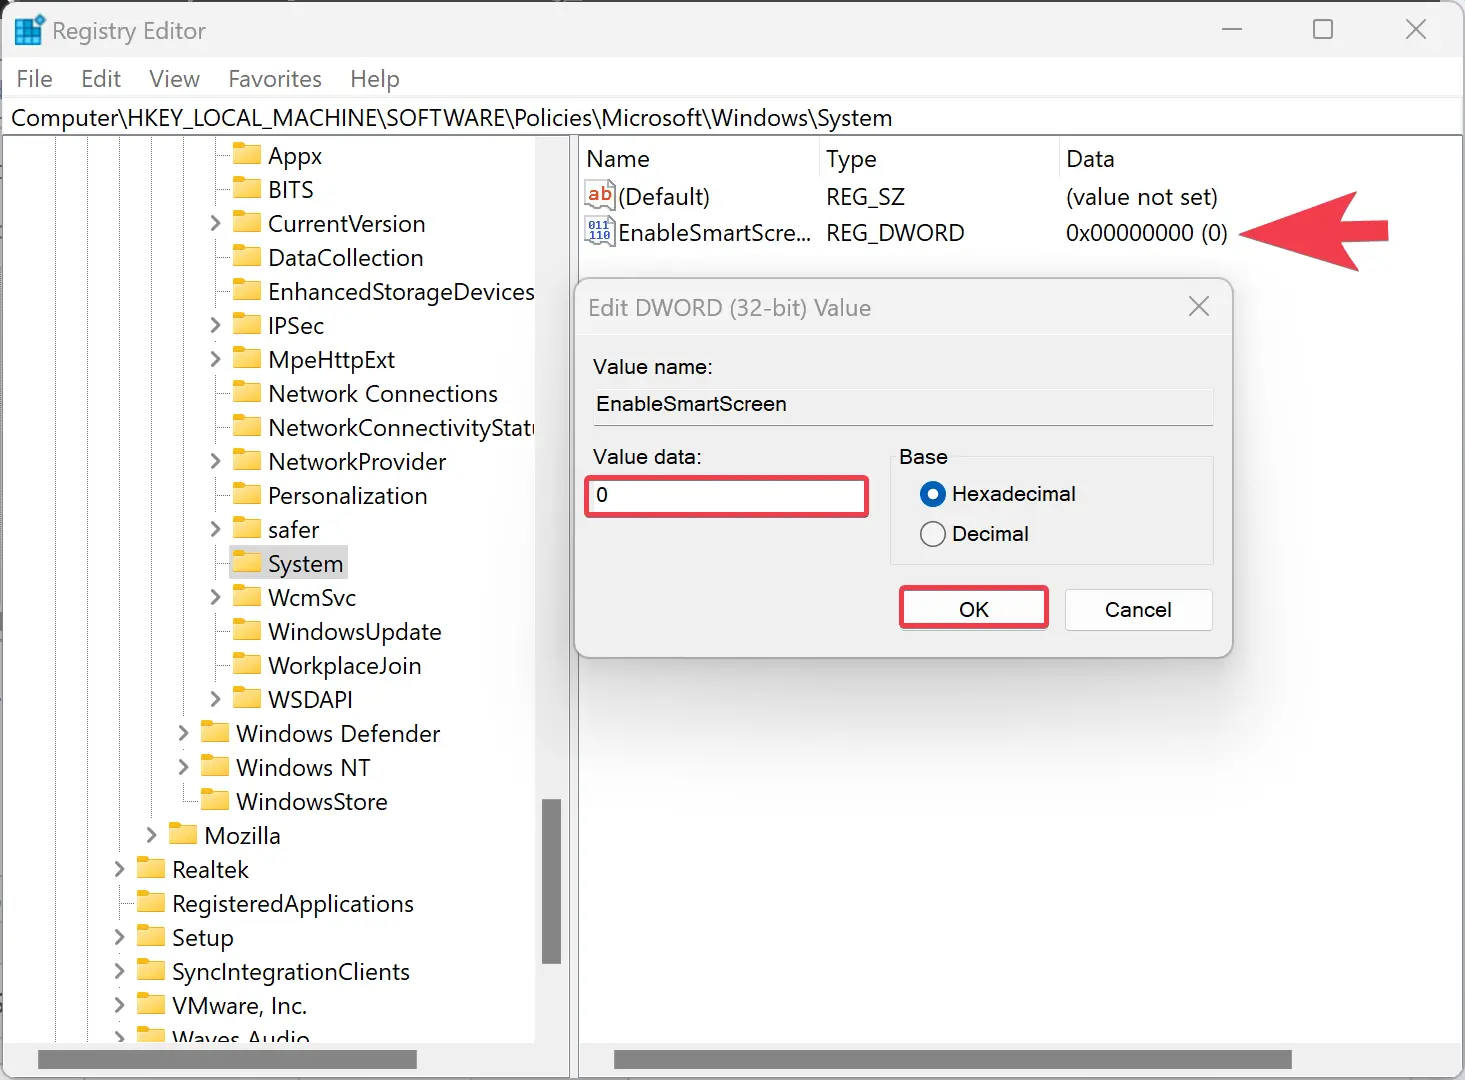
Step 6. Finally, reboot your computer to apply the changes.
That’s it. Now, Windows Defender SmartScreen in Windows 11 or 10 will be disabled.
To enable the Windows Defender SmartScreen in Windows 11 or 10 again, right-click on the EnableSmartScreen REG_DWORD and select the Delete option. When prompted, click the Yes button.
How to Disable SmartScreen for Microsoft Edge?
Windows 11/10 allows managing SmartScreen separately for the operating system and the Edge browser. If you want, you can disable Windows SmartScreen only for Microsoft Edge. To disable Windows SmartScreen in Microsoft Edge, do the following:-
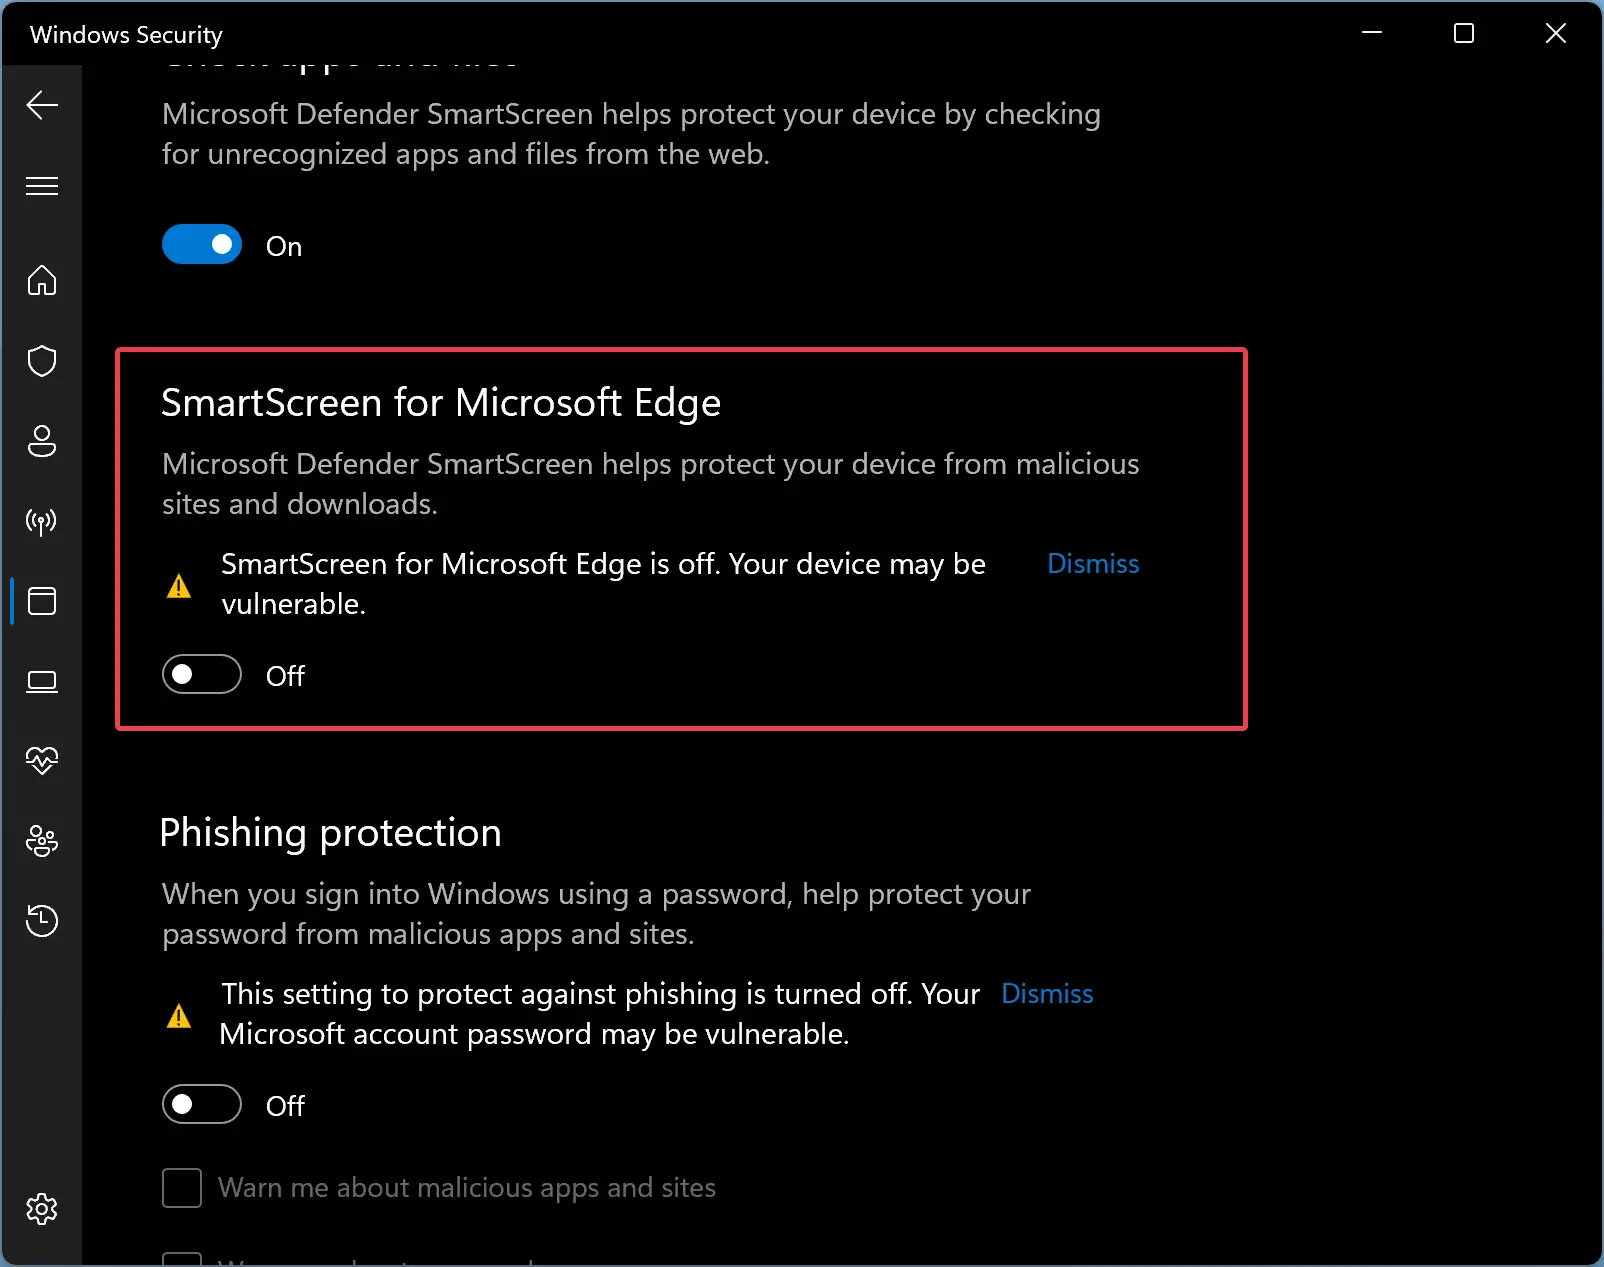
Step 1. Click the Start/Search button on the Taskbar and type Windows Security.
Step 2. Click the Windows Security to open it in the search results.
Step 3. Then, select App & browser control in the left sidebar of Windows Security.
Step 4. On the right side, click the link Reputation-based protection settings under the Reputation-based Protection section.
Step 5. On the following screen, toggle Off the SmartScreen for Microsoft Edge option to disable SmartScreen for Edge.
How to Disable SmartScreen for Microsoft Edge using Registry Editor?
To turn off SmartScreen for Microsoft Edge using Registry Editor, do the following:-
Step 1. Open the Registry Editor.
Step 2. When the Registry Editor window opens, copy and paste the following path in the address bar and hit Enter key to reach the SmartScreenEnabled registry key:-
HKEY_CURRENT_USER\Software\Microsoft\Edge\SmartScreenEnabled
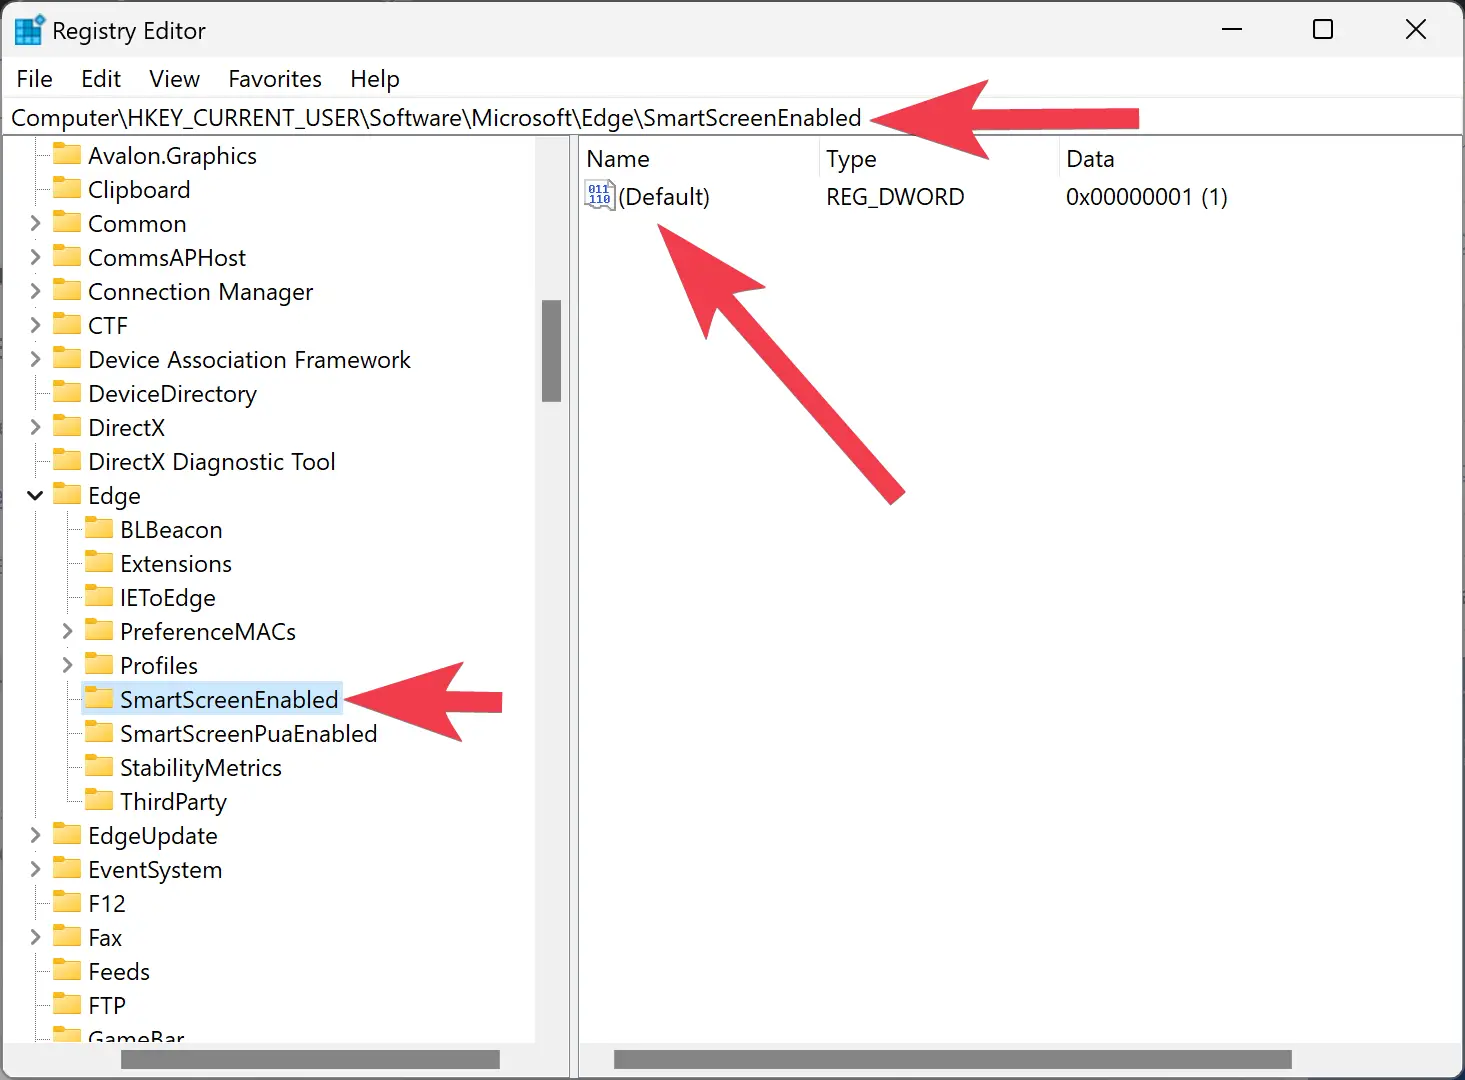
Step 3. On the right side of the window, double-click the (Default) and change its “Value data” from 1 to 0.
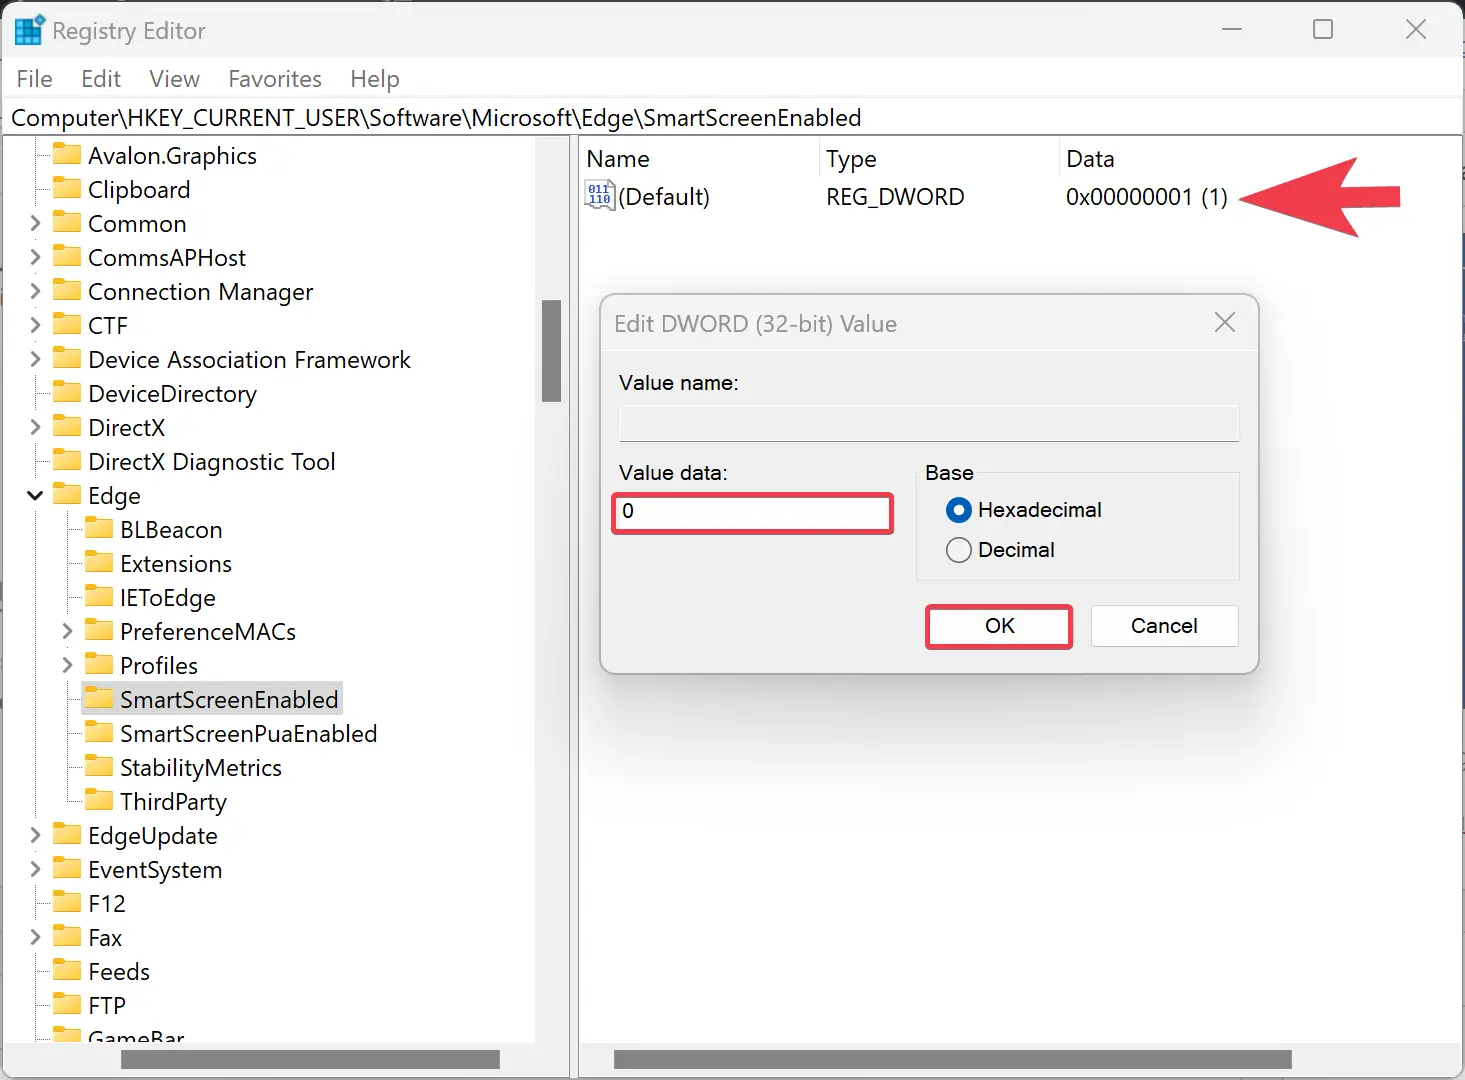
Step 4. Finally, restart your computer.
Conclusion
In conclusion, Windows Defender SmartScreen is a useful feature that helps protect your computer from malware and other security threats. However, some users may find it irritating, especially if it generates false positives or if they have concerns about privacy. If you are one of those users, there are several ways to disable SmartScreen, including using Windows Security, Local Group Policy Editor, or Registry Editor. You can also disable SmartScreen for Microsoft Edge separately if you prefer. Keep in mind that disabling SmartScreen can potentially put your computer at risk, so it is important to be cautious when downloading and running files from unknown sources.