All PC users are familiar with the built-in antivirus and antimalware security software, Microsoft Defender (Windows Security). Windows 11 also ships with this antivirus to protect your computer from viruses and malware. If you use a third-party antivirus to protect your computer, then you can turn off Windows Defender completely on your PC.
Microsoft has another antivirus to protect your computer from viruses and malware known as Microsoft Safety Scanner. It is a lesser-known application. Although it does not replace your antimalware application, you can use it when your PC is infected with viruses, and you are helpless. Just download this safety scanner on an external drive and then manually run it on the infected computer to find out and remove unwanted programs.
Microsoft Safety Scanner is a free scanning tool specially designed to find and remove malware from Windows computers. If you suspect that your computer is infected with malware or virus, you should download and use this tool to scan your PC and disinfect it.
The program will find the malware/virus on your PC and then remove them completely. You should note that this software is only available to use for 10 days after download, then it will expire itself. That means you should always download the latest version with the latest definition updates to scan your computer.
How to Download and Use Microsoft Safety Scanner in Windows 11?
Follow these steps to download and use Microsoft Safety Scanner in Windows 11:-
Step 1. If you suspect that your PC is infected, download Microsoft Safety Scanner (64-bit).
Step 2. When downloading is completed, double-click on the MSERT.exe file to open it.
Step 3. After launching the software, accept the license agreement by selecting “Accept all terms of the preceding license agreement.”
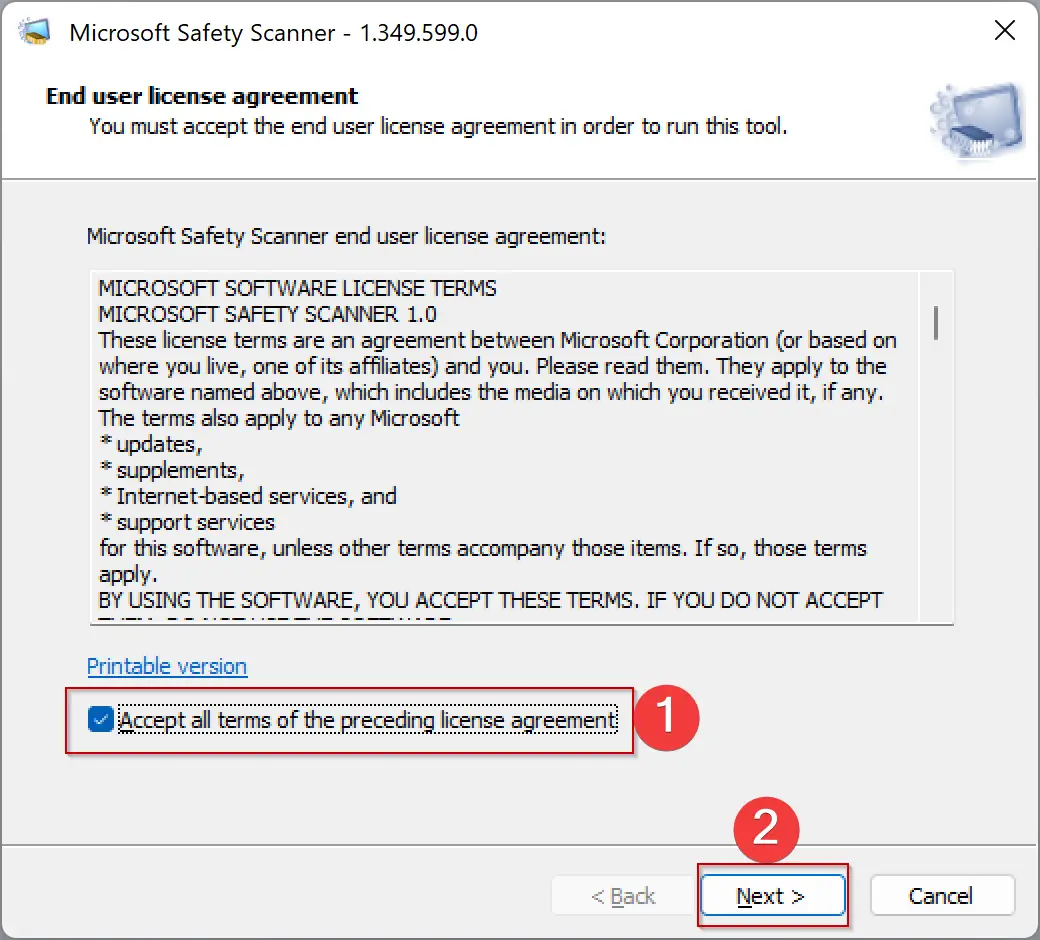
Step 4. Click Next.
Step 5. Again, Click Next.
Step 6. Now, you will see the following options:-
- Quick scan – Scans system areas most likely to contain viruses, spyware, and other potentially unwanted software. If such software is found, you may be prompted to run a full scan.
- Full scan – Scans the entire system. Note that this scan can take up to several hours on some computers.
- Customized scan – In addition to a quick scan, the tool will also scan the contents of a user-specified folder.
You may select Quick scan; if it does not help, then choose the Full scan option.
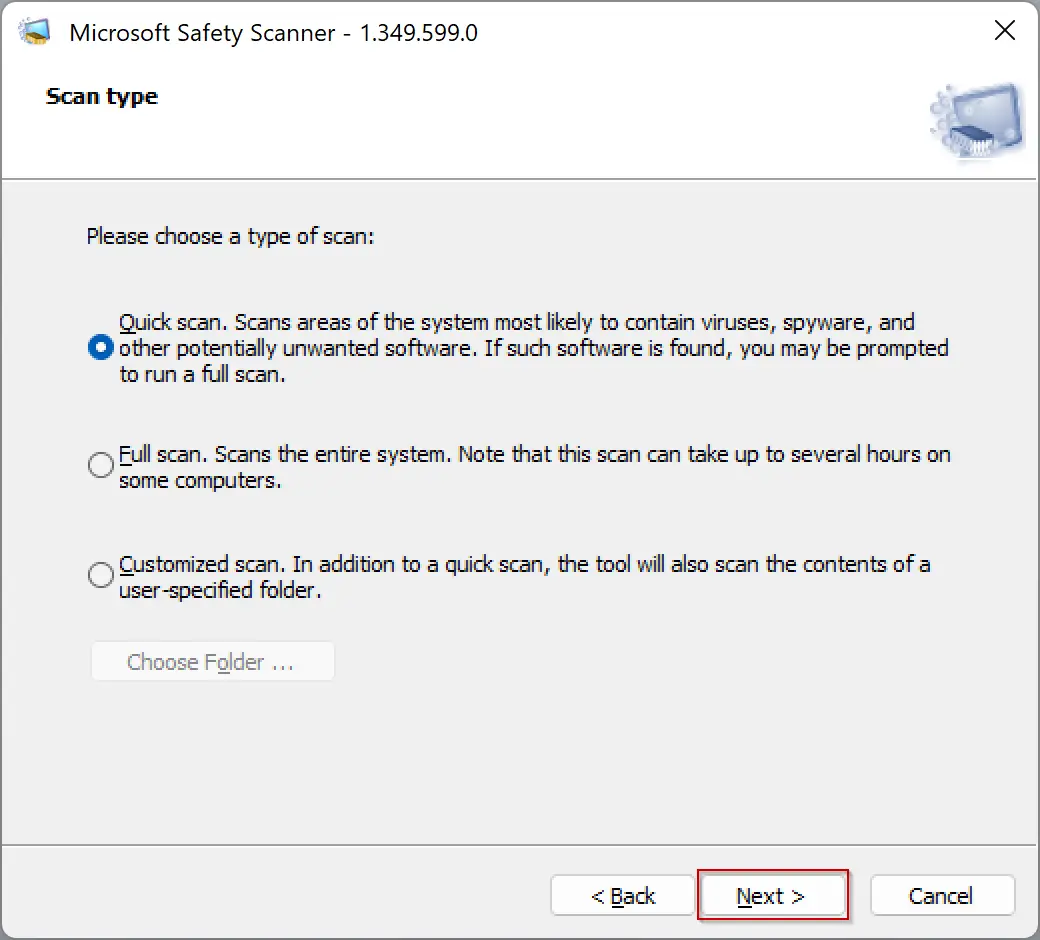
Step 7. After selecting the desired option, click Next.
Now, scanning will be started on your computer.
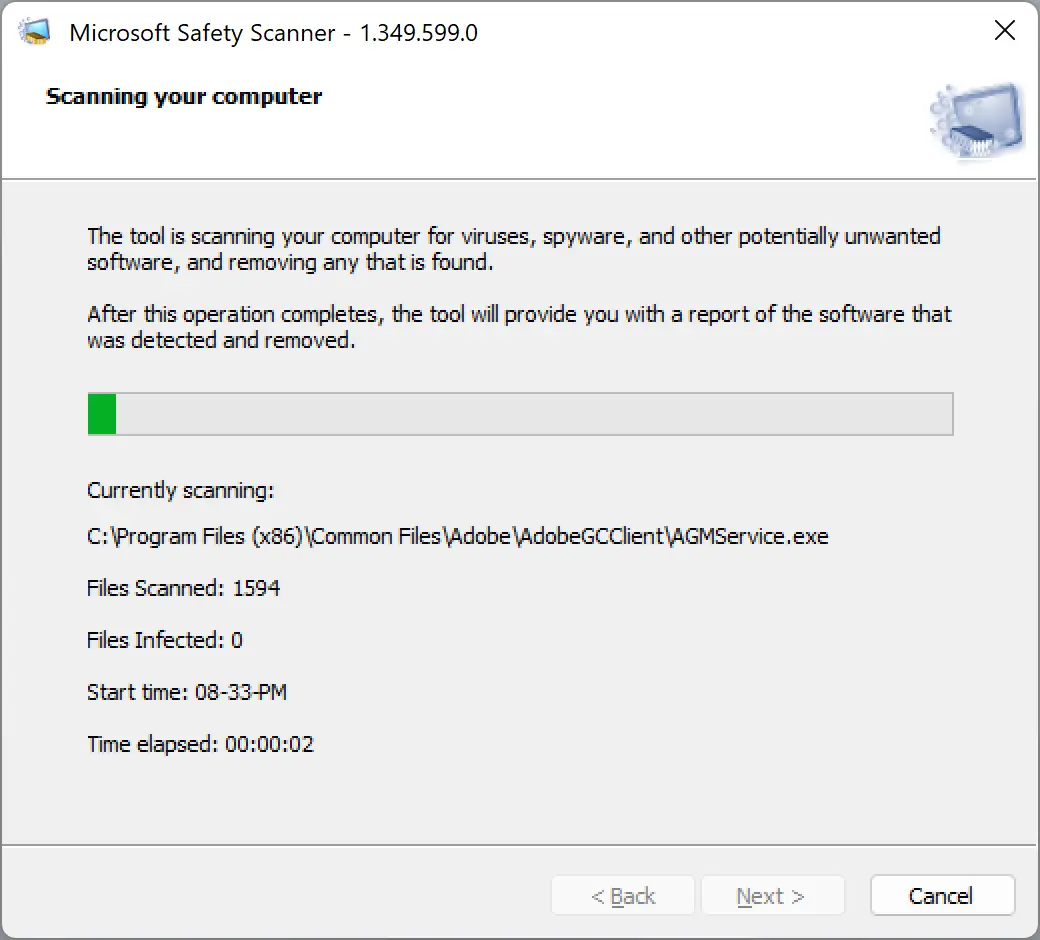
Depending upon you have chosen the option, it may take several minutes to scan your system. Once the scanning is completed, results are displayed on the screen. For detailed detection results, you can view the log at %SYSTEMROOT%\debug\msert.log.
Since this is a portable app, just delete the executable file (msert.exe) to remove this tool from your computer.
Good luck!