When you email a copy of your Word document or PowerPoint presentation to someone, and they don’t have a font installed, Microsoft Office shows that file with the default font instead. This unnecessarily messes up the whole layout and makes the document look completely different. So, to fix these issues, you can embed fonts into your documents.
Microsoft Office apps let you embed fonts in your Word documents and PowerPoint presentations. That way, if you share your file with someone else who doesn’t have the same fonts installed, the file’s fonts, layout, and styling won’t change, and special characters won’t turn into meaningless rectangles.
Additionally, embedding custom fonts into your document does help with the online conversion to pdf files. When you embed such custom fonts into the document, the online conversion tool may use these fonts.
Although Embed Fonts are helpful in many cases, this increases the size of the file. However, if someone opens that file, they will see it with its intended font. This feature is only available in the Windows versions of Microsoft Word, PowerPoint, and Publisher. This doesn’t work in the Mac, iPhone, iPad, Android, or web versions of Word or PowerPoint.
How to Embed Fonts in a Microsoft Word Document?
To Embed Fonts in an MS Word document, use these steps:-
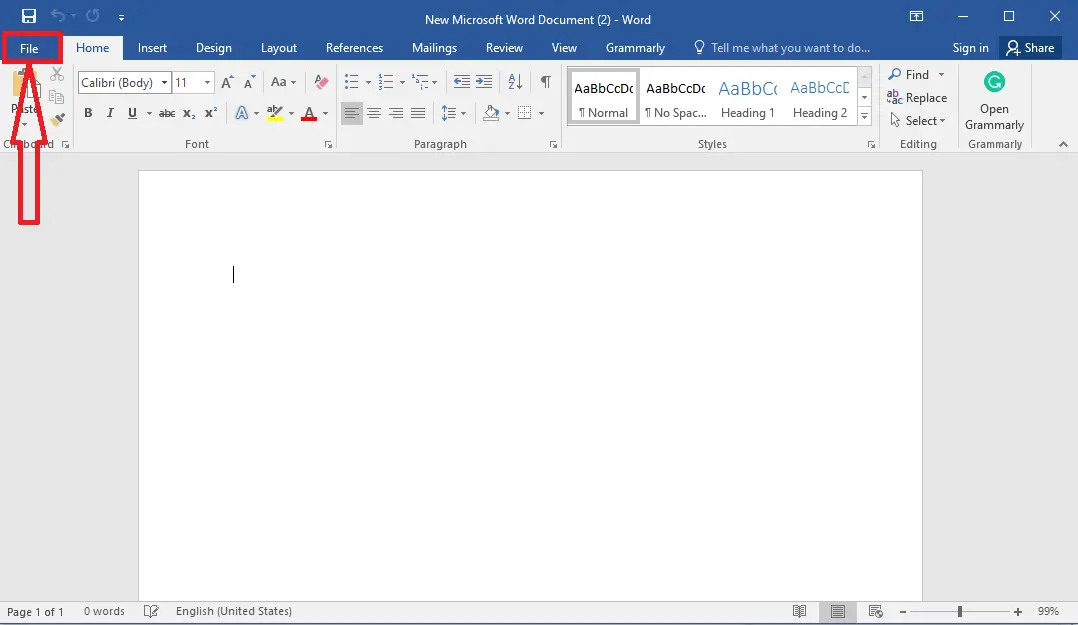
Step 1. Open your Word document.
Step 2. Click the File menu.
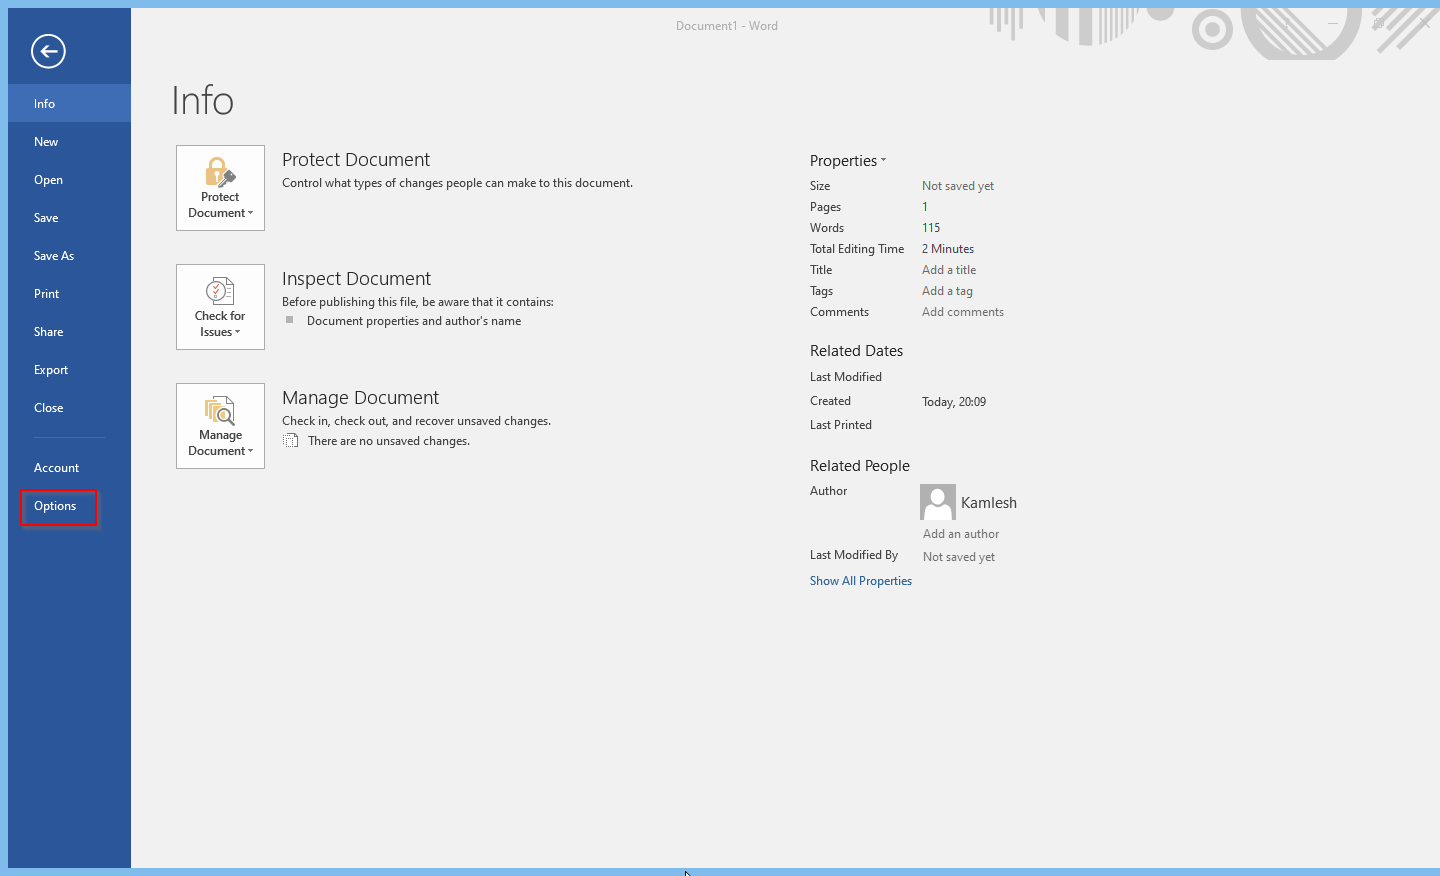
Step 3. Select Options in the left sidebar.
Step 4. When the Word Options panel opens, click on the Save tab.
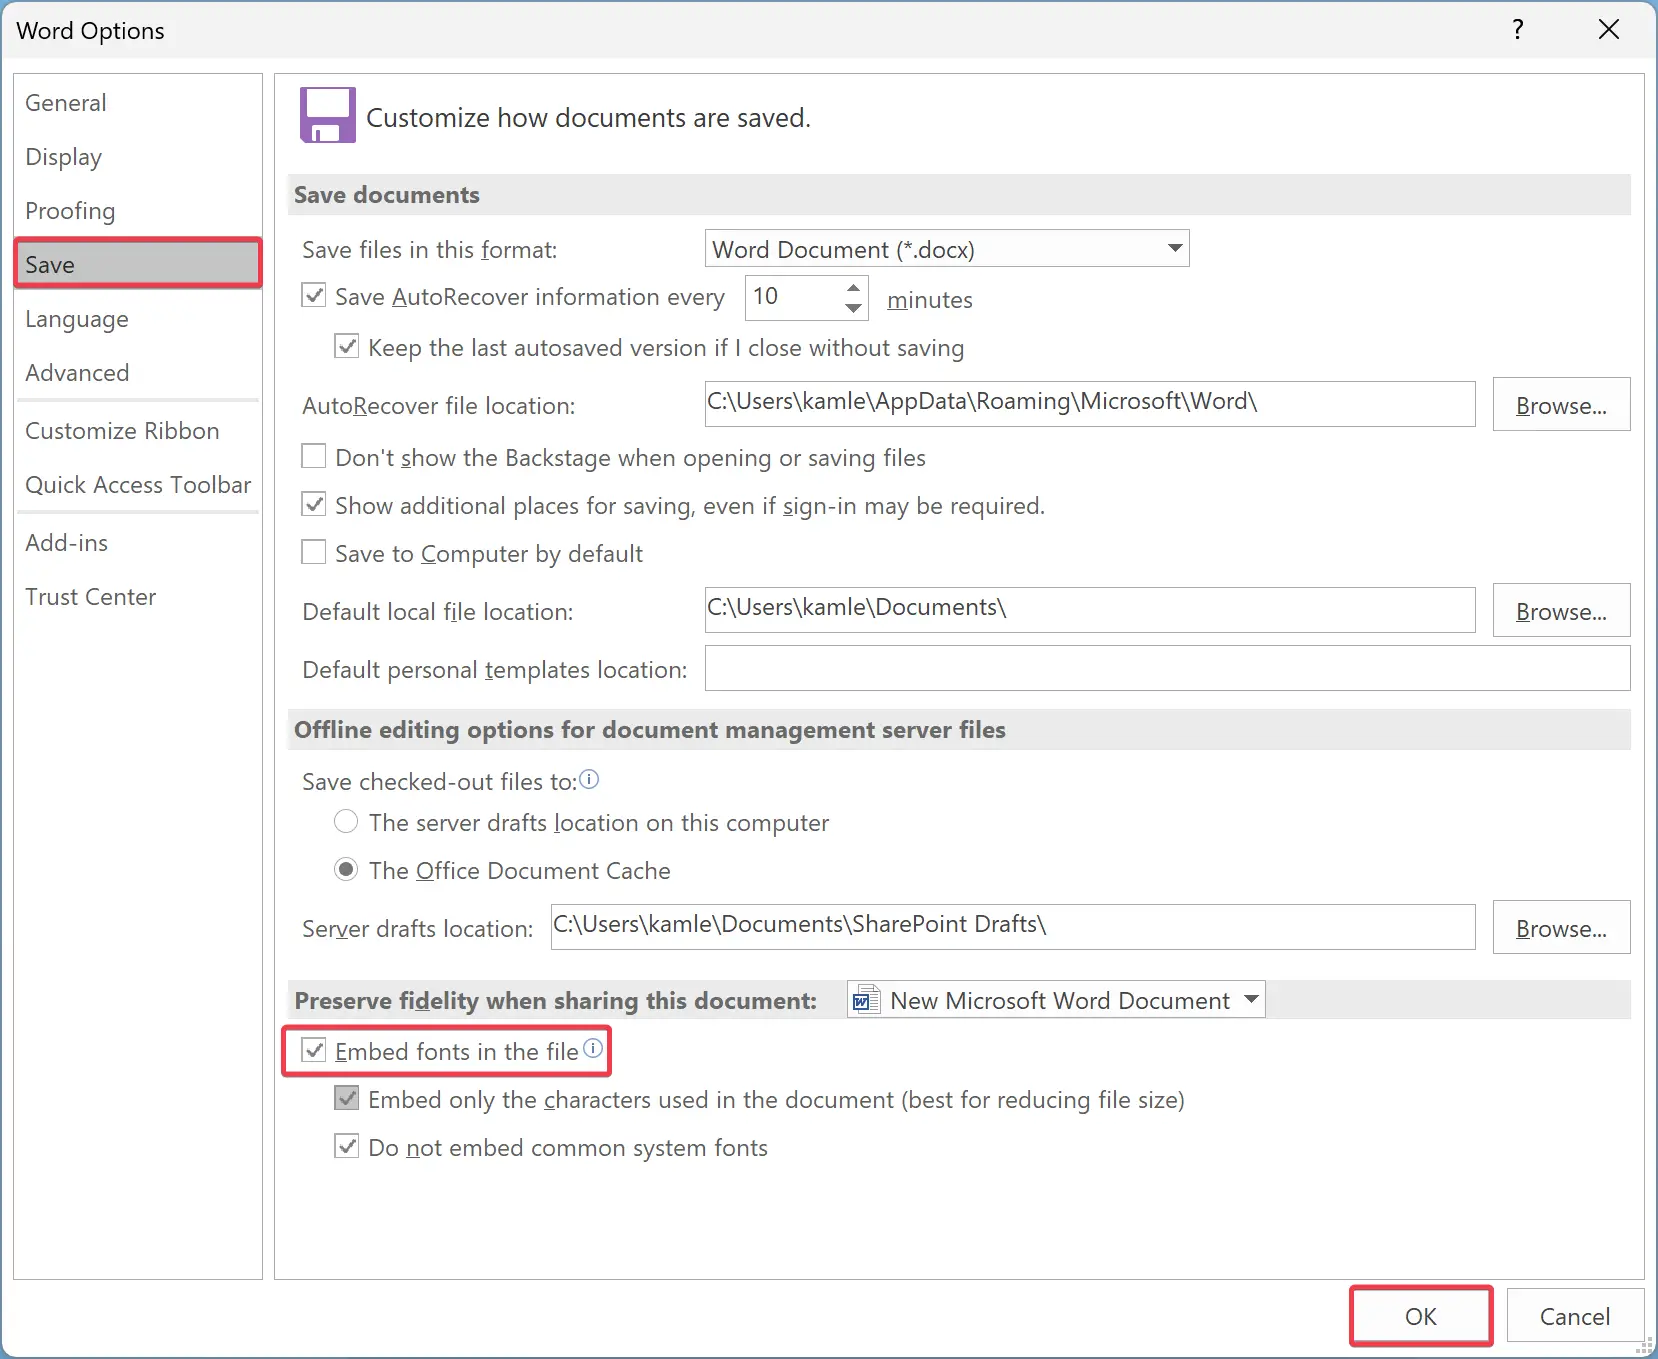
Step 5. Under the “Preserve fidelity when sharing this document,” check the Embed fonts in the file option.
To reduce the resulting document’s file size, you can also check the “Embed only the characters used in the document (best for reducing file size)” and “Do not embed common system fonts” options.
Sep 6. Click the OK button.
Step 7. Save your file.
Once you complete the above steps, the fonts you used in the document will be embedded into the file.
Quick Note: Above mentioned settings will not affect other Word documents on your PC. That means you must repeat the Embedding Fonts steps in other Word documents if you want.
How to Embed Fonts in a Microsoft PowerPoint Presentation?
To Embed Fonts in an MS PowerPoint presentation, use these steps:-
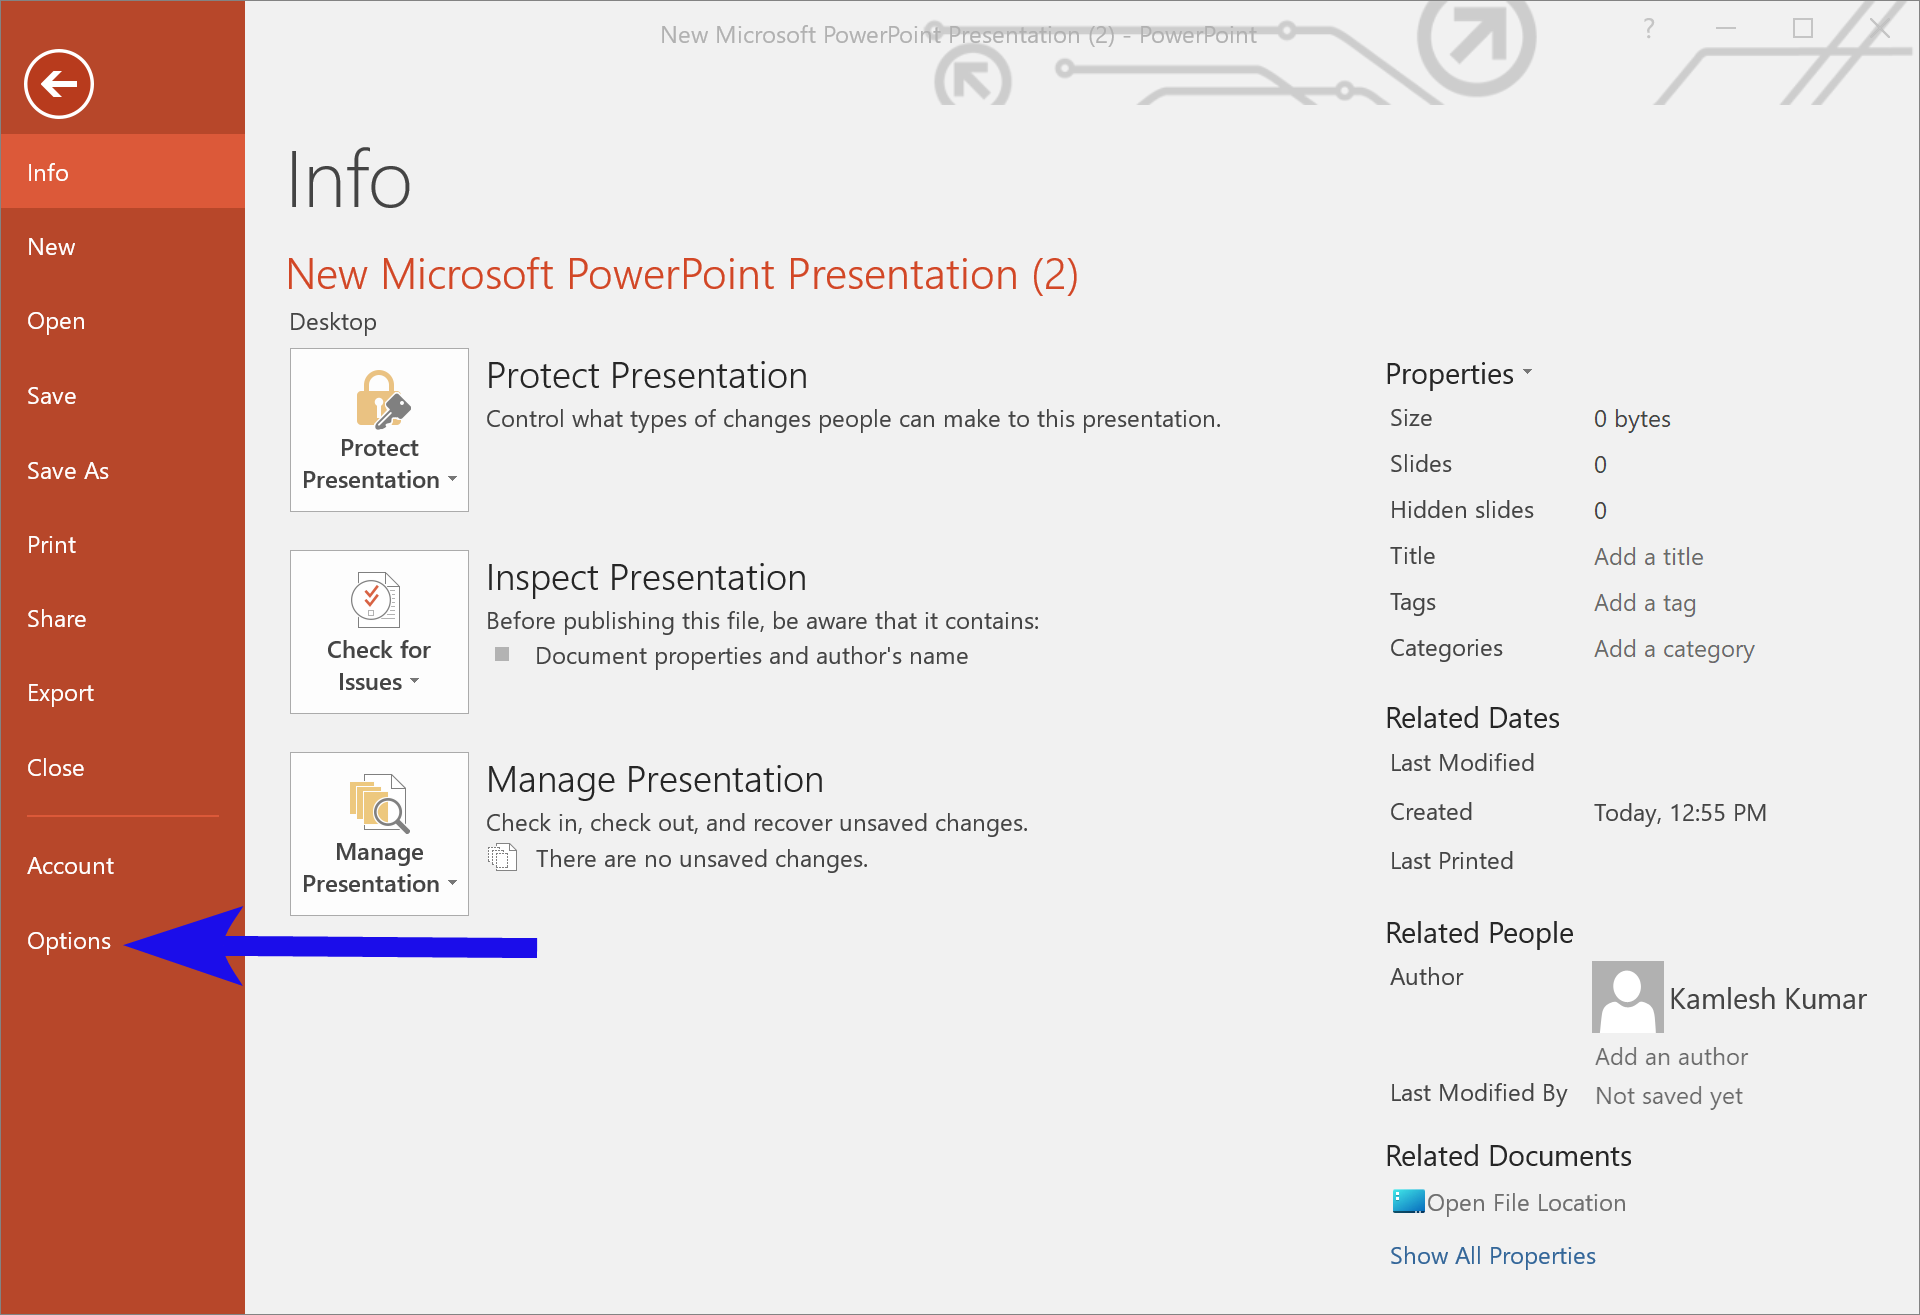
Step 1. Open your Microsoft PowerPoint Presentation.
Step 2. Click the File menu.
Step 3. Select Options in the left sidebar.
Step 4. In the PowerPoint Options pane, switch to the Save tab in the left sidebar.
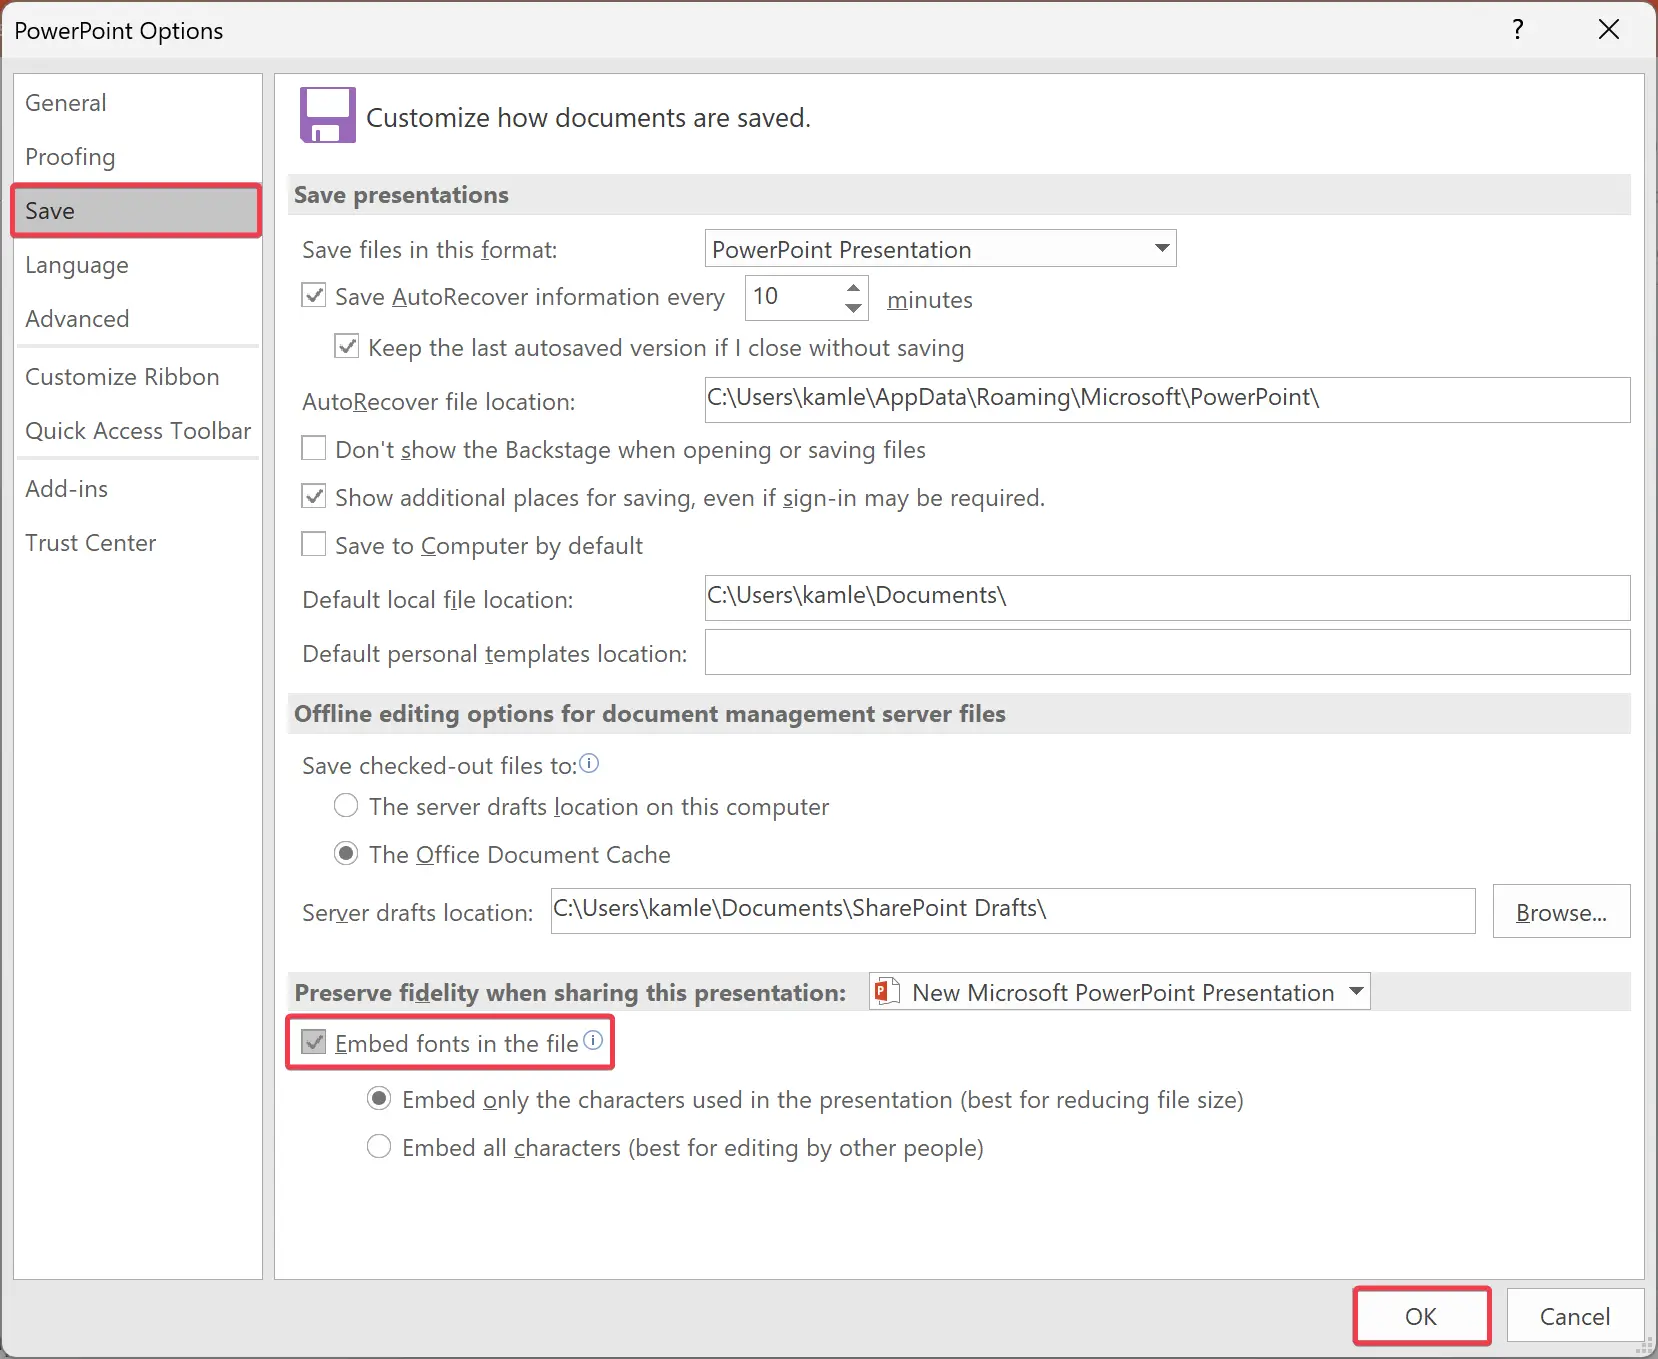
Step 5. Under the “Preserve fidelity when sharing this presentation” section, check the checkbox Embed fonts in the file.
Step 6. Optionally, select the “Embed only the characters used in the presentation (best for reducing file size)” or “Embed all characters (best for editing by other people)” option.
Step 7. Click OK.
Step 8. Finally, save your presentation.
Once you complete the above steps, the fonts you used in the PowerPoint will be embedded into the file.
Quick Note: Above mentioned settings will not affect other PowerPoint Presentations on your PC. If needed, you must repeat the Embedding Fonts steps in other PowerPoint Presentations.
Conclusion
In conclusion, embedding fonts in your Word documents and PowerPoint presentations is a simple and effective way to ensure that the intended font, layout, and styling of your files remain intact, regardless of whether the recipient has the necessary fonts installed. This feature is only available in the Windows versions of Microsoft Office apps and can be easily enabled by checking the appropriate option in the Save tab of the Word Options or PowerPoint Options pane. While embedding fonts may increase the file size, it can be reduced by selecting the option to embed only the characters used in the document or presentation. By following the steps outlined above, you can easily embed fonts in your files and ensure that they are viewed exactly as you intended.