Brave browser is a privacy-focused browser that allows users to surf the web while maintaining online anonymity. One of the features that make Brave browser stand out from other browsers is its built-in Tor integration, which makes it easy for users to enable and use the Tor network. By enabling Tor in Brave browser, users can access the internet through an encrypted and anonymous network, ensuring their online activity remains private.
Enabling and using Tor in the Brave browser is a straightforward process that can be completed in a few simple steps. Once enabled, the browser will create a new window that connects to the Tor network. This window will allow you to browse the internet with enhanced privacy and security features, as well as access .onion sites. In this article, we will provide you with a step-by-step guide on how to enable and use Tor in the Brave browser so that you can enjoy a safer and more private browsing experience.
What is Tor in Brave browser?
Tor (The Onion Router) is a network designed to provide users with anonymity and privacy online. When you use Tor in Brave browser, your internet traffic is routed through a series of nodes, making it more difficult for anyone to trace your online activity back to you. The Tor network achieves this by encrypting and bouncing your internet traffic through several nodes, making it difficult to track where the data is coming from or going to.
Enabling Tor in the Brave browser allows you to use the Tor network without having to download and install the standalone Tor browser. This makes it easy for users to browse the internet anonymously and securely. Additionally, Brave browser with Tor enabled provides users access to .onion sites, which are websites only accessible through the Tor network. These sites are typically used for anonymous communication and can include marketplaces, forums, and other types of websites.
How to Enable and Use Tor in Brave browser?
Enabling and using Tor in the Brave browser is a simple process. Follow the steps below to enable Tor in the Brave browser:-
Step 1. Open Brave browser on your computer.
Step 2. Click on the hamburger menu icon (three lines) in the top-right corner of the browser window.
Step 3. From the dropdown menu, click on “Settings.”
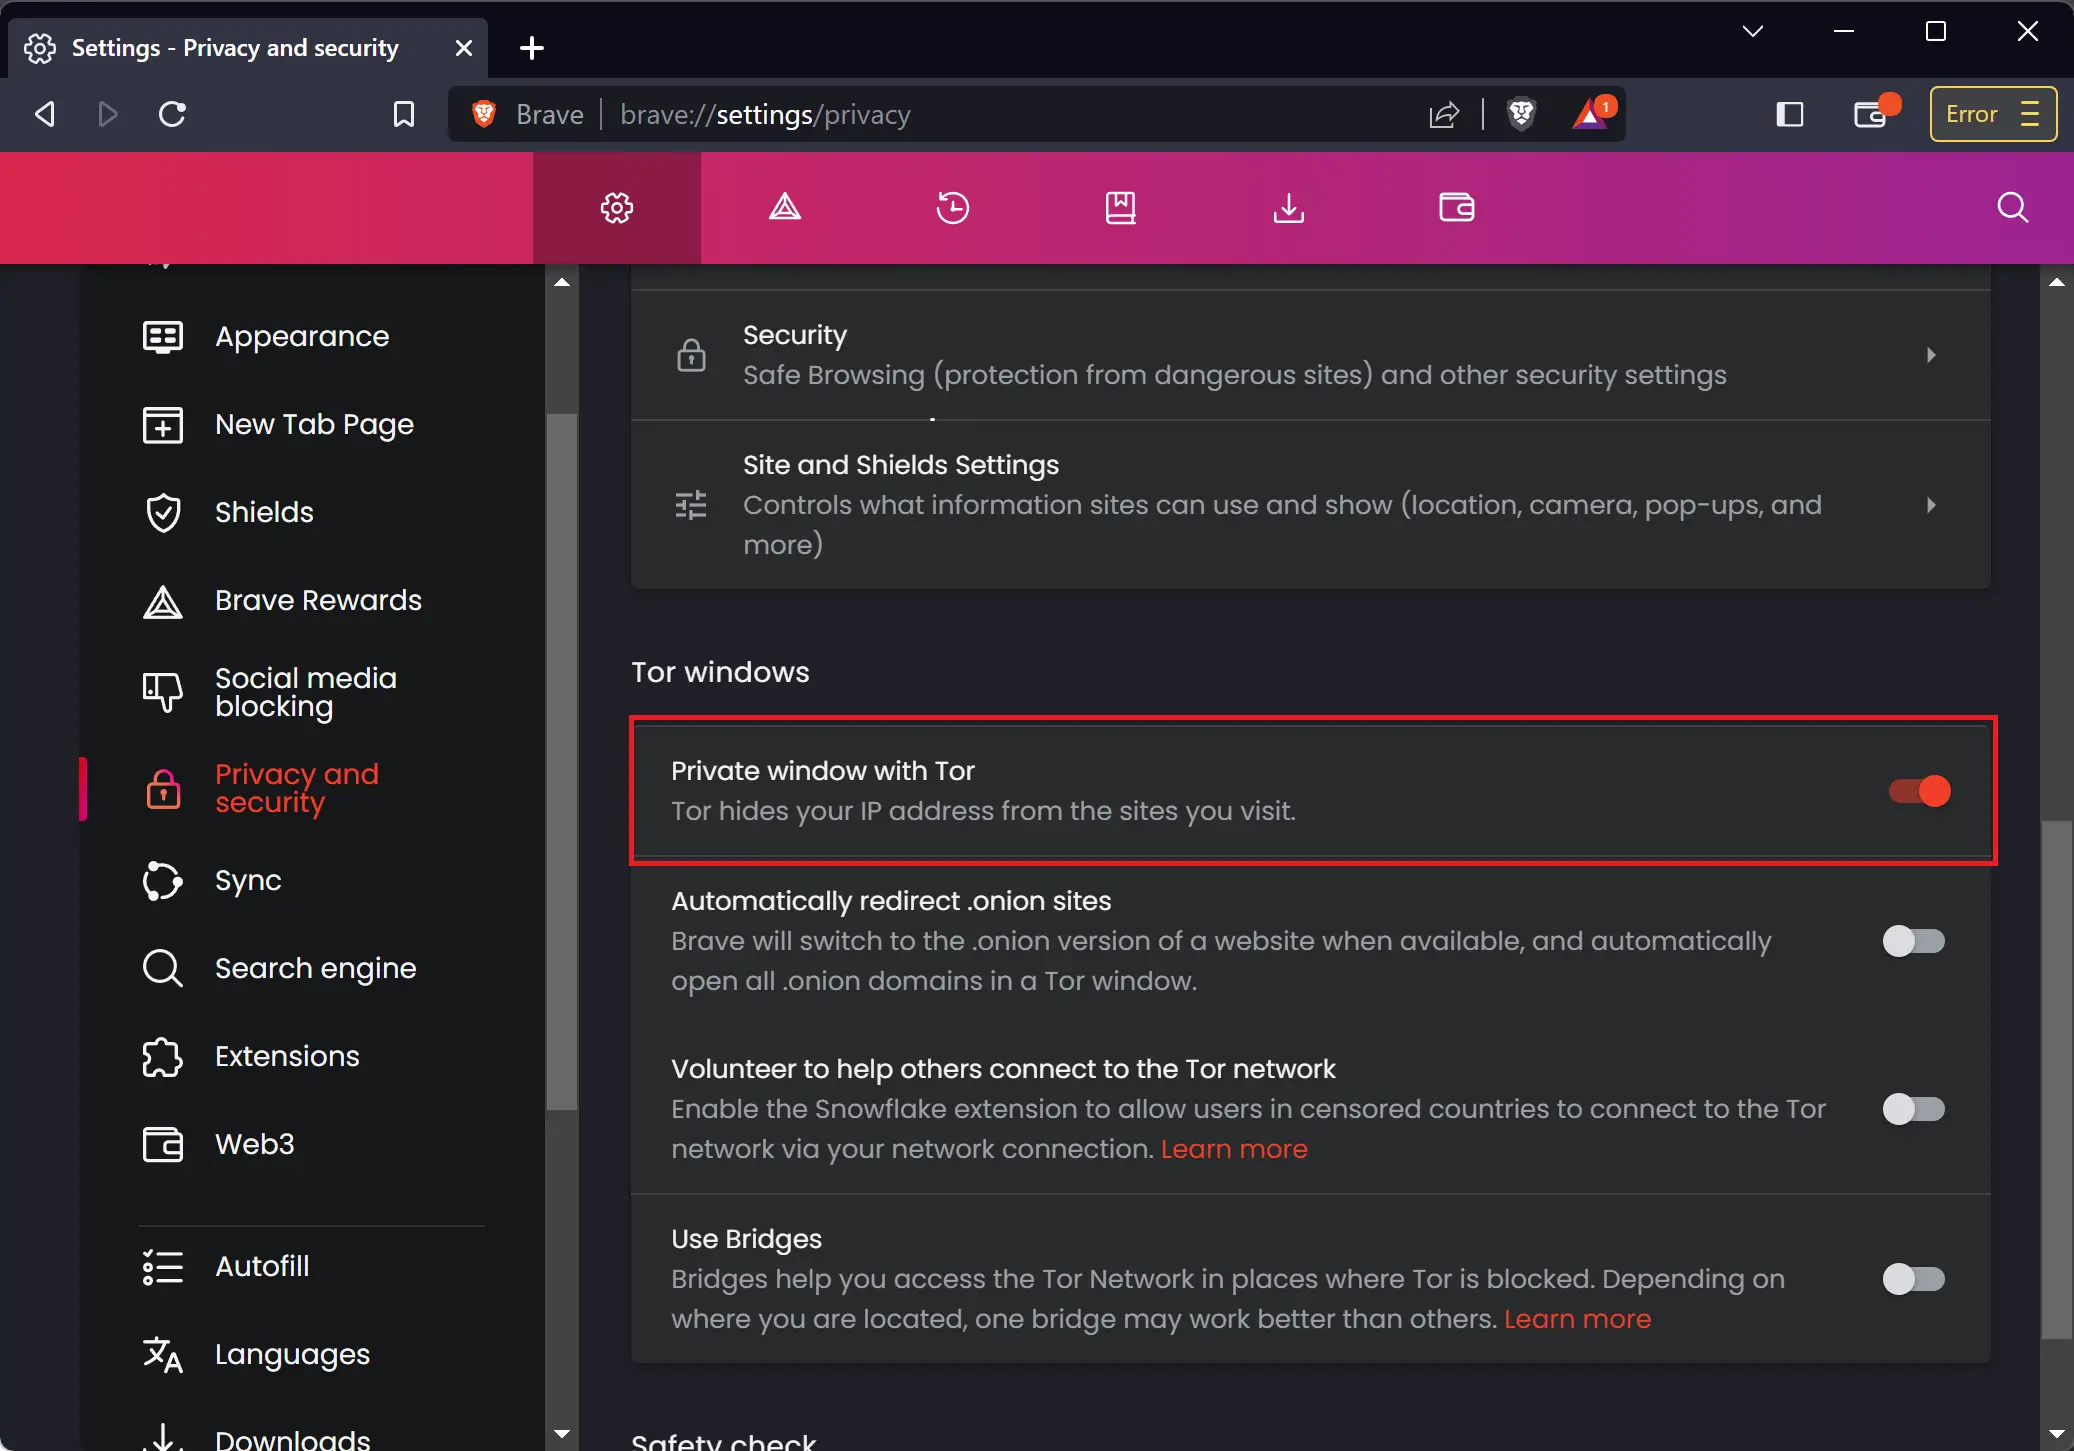
Step 4. In the Settings menu, click “Privacy & Security” in the left sidebar.
Step 5. Scroll down to the “Tor windows” section and toggle on the switch “Private window with Tor” to enable Tor.
Once you enable Tor, you can open a new private window will the Tor network by clicking on the hamburger menu and selecting the New private window with Tor option or pressing the keyboard shortcut Alt+Shift+N. You can now use the Brave browser with Tor enabled.
Note that when Tor is enabled, your browsing history, cookies, and other data will be automatically cleared when you close the Tor window.
How to Enable Tor in Brave browser using Windows Registry?
Here are the step-by-step instructions for turning on Tor in Brave browser using Registry:-
Step 1. Press Windows + R keyboard shortcut to open the Run dialog box.
Step 2. Then, type regedit and click OK.
Step 3. Click Yes on the UAC prompt if prompted.
Step 4. Navigate to the following key in the left sidebar of Registry Editor:-
HKEY_LOCAL_MACHINE\SOFTWARE\Policies\BraveSoftware\Brave
Note: If the BraveSoftware key does not exist under the Policies folder, create it by right-clicking on Policies and selecting the New > Key option, and naming it as BraveSoftware. Then, right-click on BraveSoftware and select New > Key option and set the name as Brave.
Step 5. Now, right-click on the right side of the Brave key and select New > DWORD (32-bit) Value.
Step 6. Name the new REG_DWORD as TorDisabled.
Step 7. By default, it will have Value data of 0; this means Tor is enabled in the Brave browser.
Step 8. Close the Registry Editor.
Step 9. Restart your computer to apply the changes.
To disable Tor, follow the same steps and set the Value data of the TorDisabled DWORD value to 1.