By default, Windows 11 and 10’s lock screen times out and switches off the monitor after just a minute of inactivity. When you need to enter your PC, you’ll have to type in the user account password to access your desktop. If you use Windows 11 and want to increase the lock screen time, you can do it through the Settings app. But, if you’re going to decrease the time from one minute to a few seconds, you will not find any option in the Control Panel or Settings app. Also, whatever lock screen timeout you set is applicable for that user account only you are making changes to. That means other user accounts on your PC will be unaffected.
If you or another user account of your computer forget to lock the PC, anyone can steal the data who have access to your PC. To secure your PC from prying eyes, you can apply a policy using the Local Security Policy (secpol.msc). The guidelines you apply through “secpol.msc,” are applicable to all user accounts on your computer.
Note: Local Security Policy is not a part of Windows 11/10 Home edition. If you need, you can enable Local Security Policy (secpol.msc) using a script.
How to Enable Auto Lock in Windows 11/10 PC for All Users after Inactivity?
To turn on Auto Lock in Windows 11/10 PC for All Users after inactivity, use these steps:-
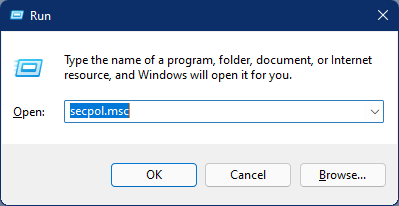
Step 1. Use the Windows + R keys combination to open the Run command box.
Step 2. In the Run box, type secpol.msc and hit Enter from the keyboard to open the Local Security Policy window.
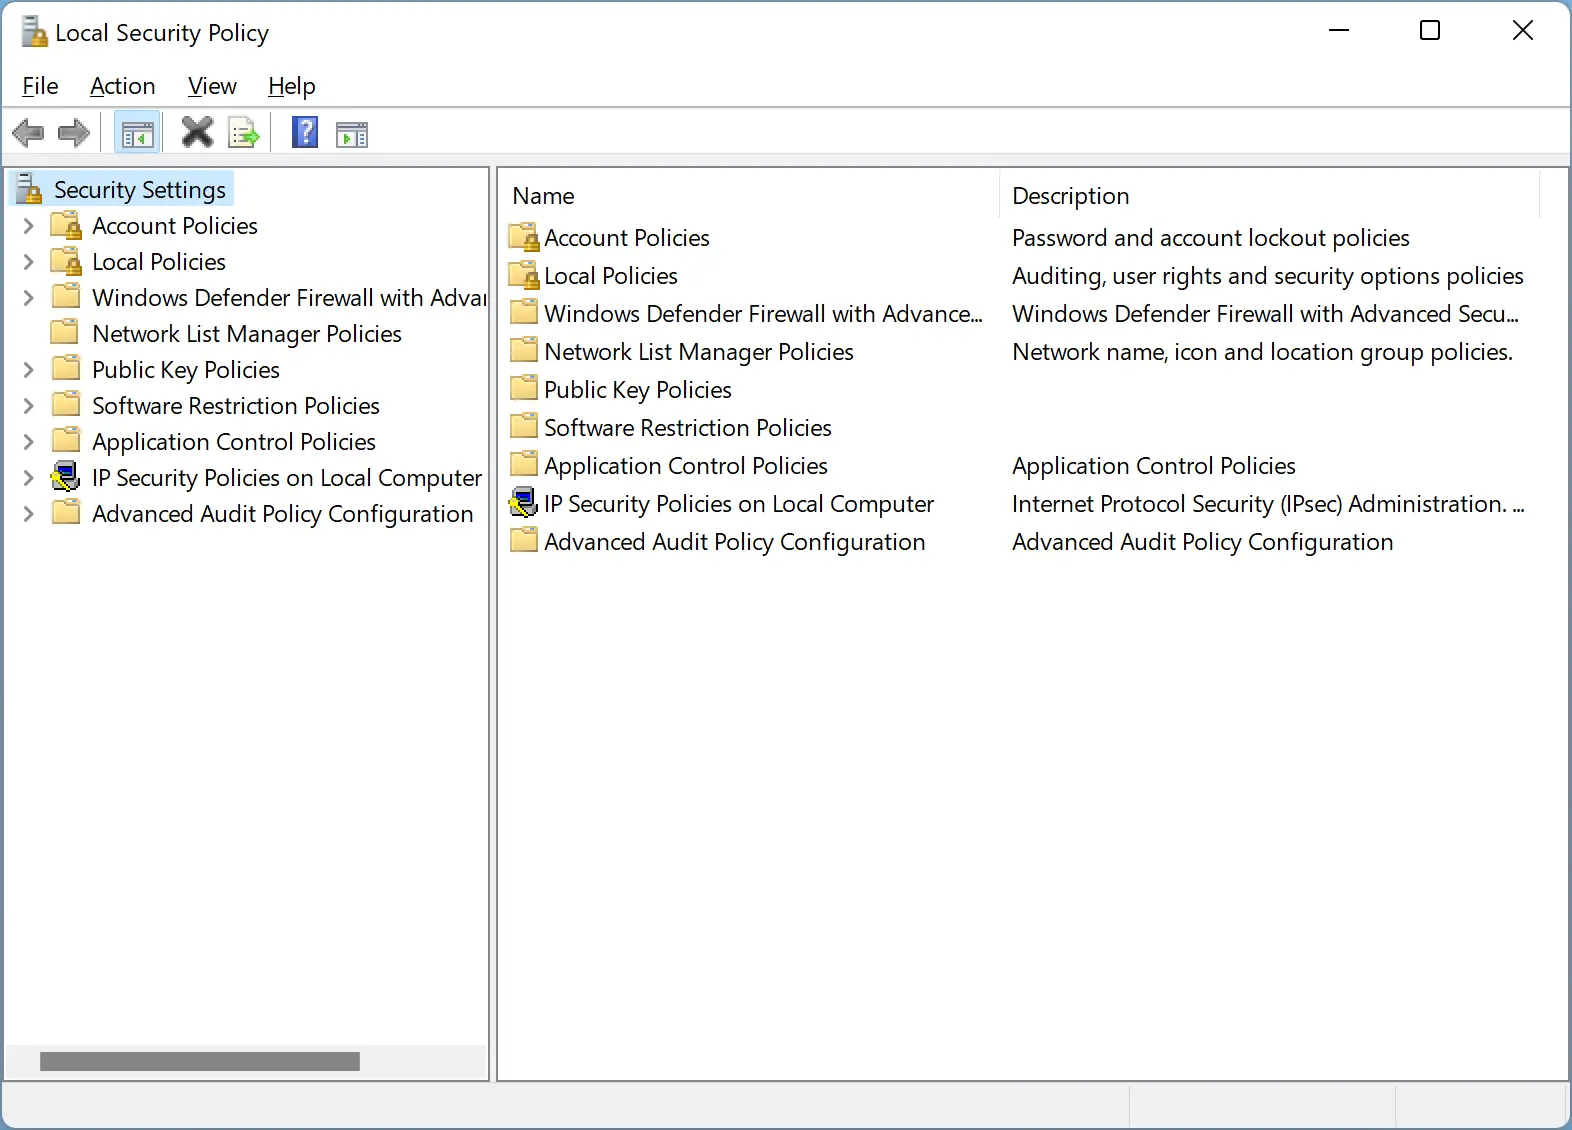
Step 3. Navigate to the following path from the left sidebar when the Local Security Policy window opens:-
Local Policies > Security Options
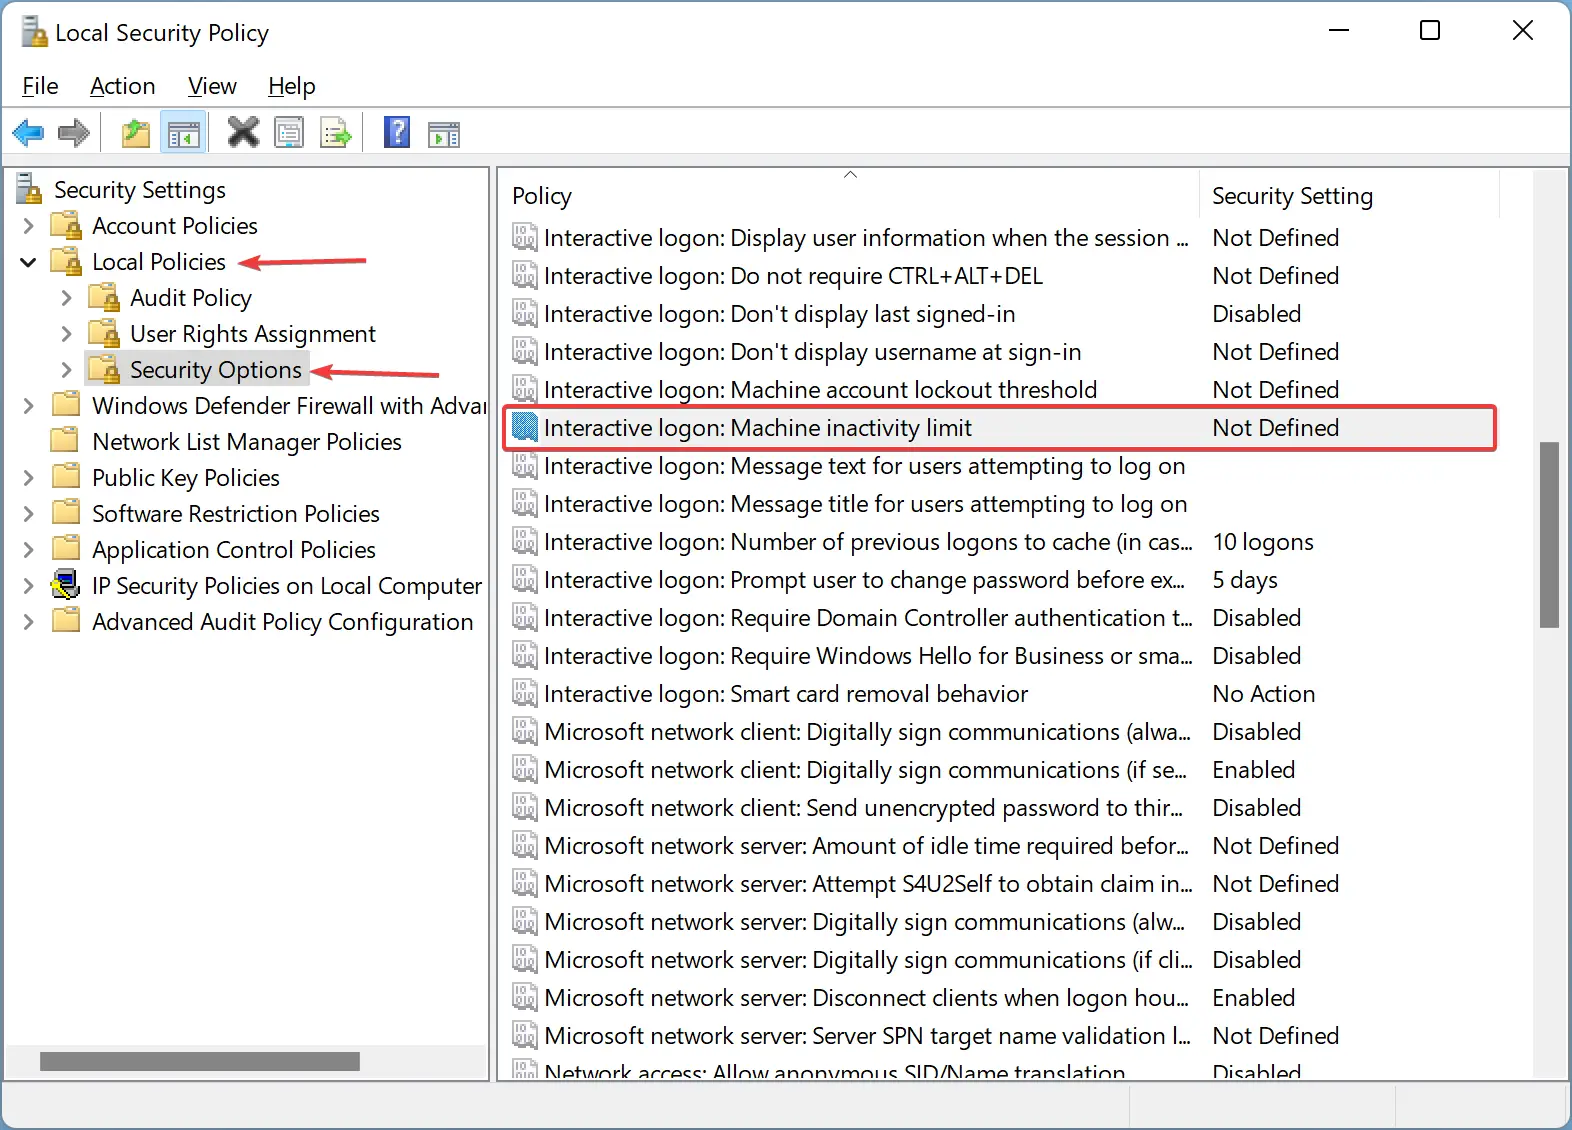
Step 4. On the right side pane of the “Security Options” folder, look for the policy name “Interactive logon: Machine inactivity limit.” Then double-click on this policy to configure its settings.
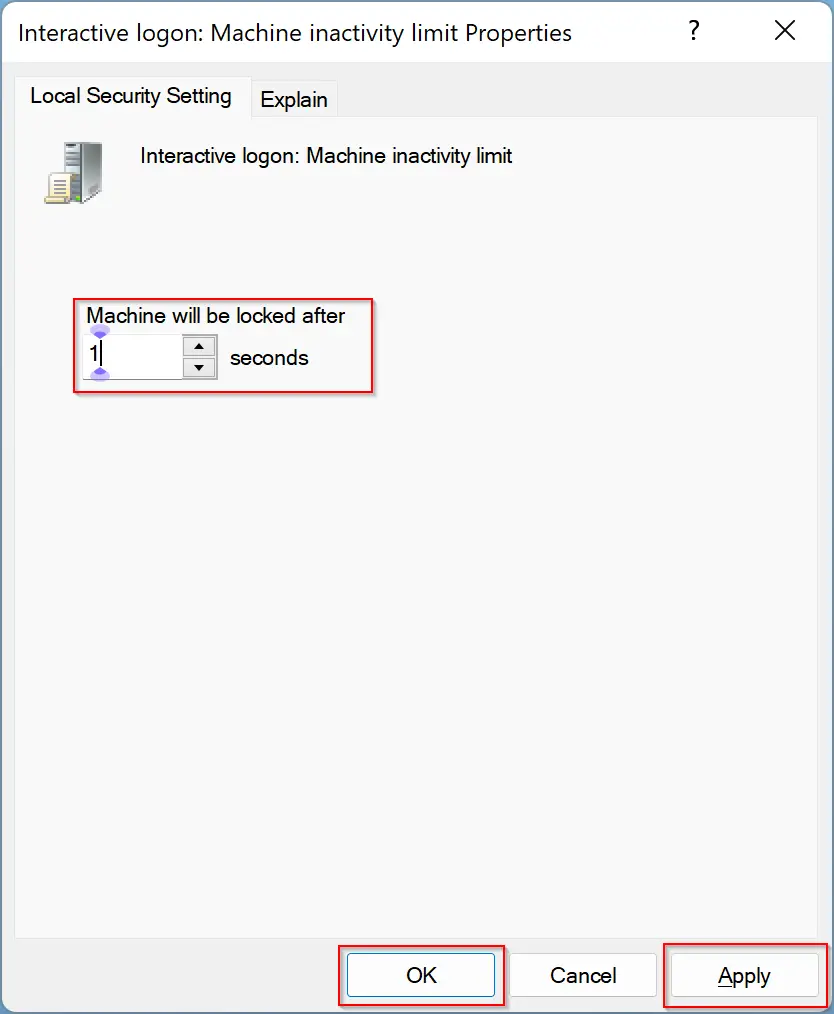
Step 5. Set the desired inactivity time in seconds from “0” to “599940” seconds under “Machine will be locked after.” If you set the time as “0” seconds, the policy is turned off, and your PC will never lock after any inactivity.
Step 6. Click Apply.
Step 7. Click OK.
Step 8. Reboot your computer now.
After restarting your computer, the policy is applied to your PC. The computer screen will automatically lock when it has been idle for the specified inactivity limit. You’ll need to enter your password to unlock it.
How to Enable Auto-Lock in Windows 11/10 PC after Inactivity using Registry Editor?
To turn on Auto-Lock in Windows 11/10 PC after inactivity using Registry Editor, do these steps:-
Step 1. Open the Registry Editor.
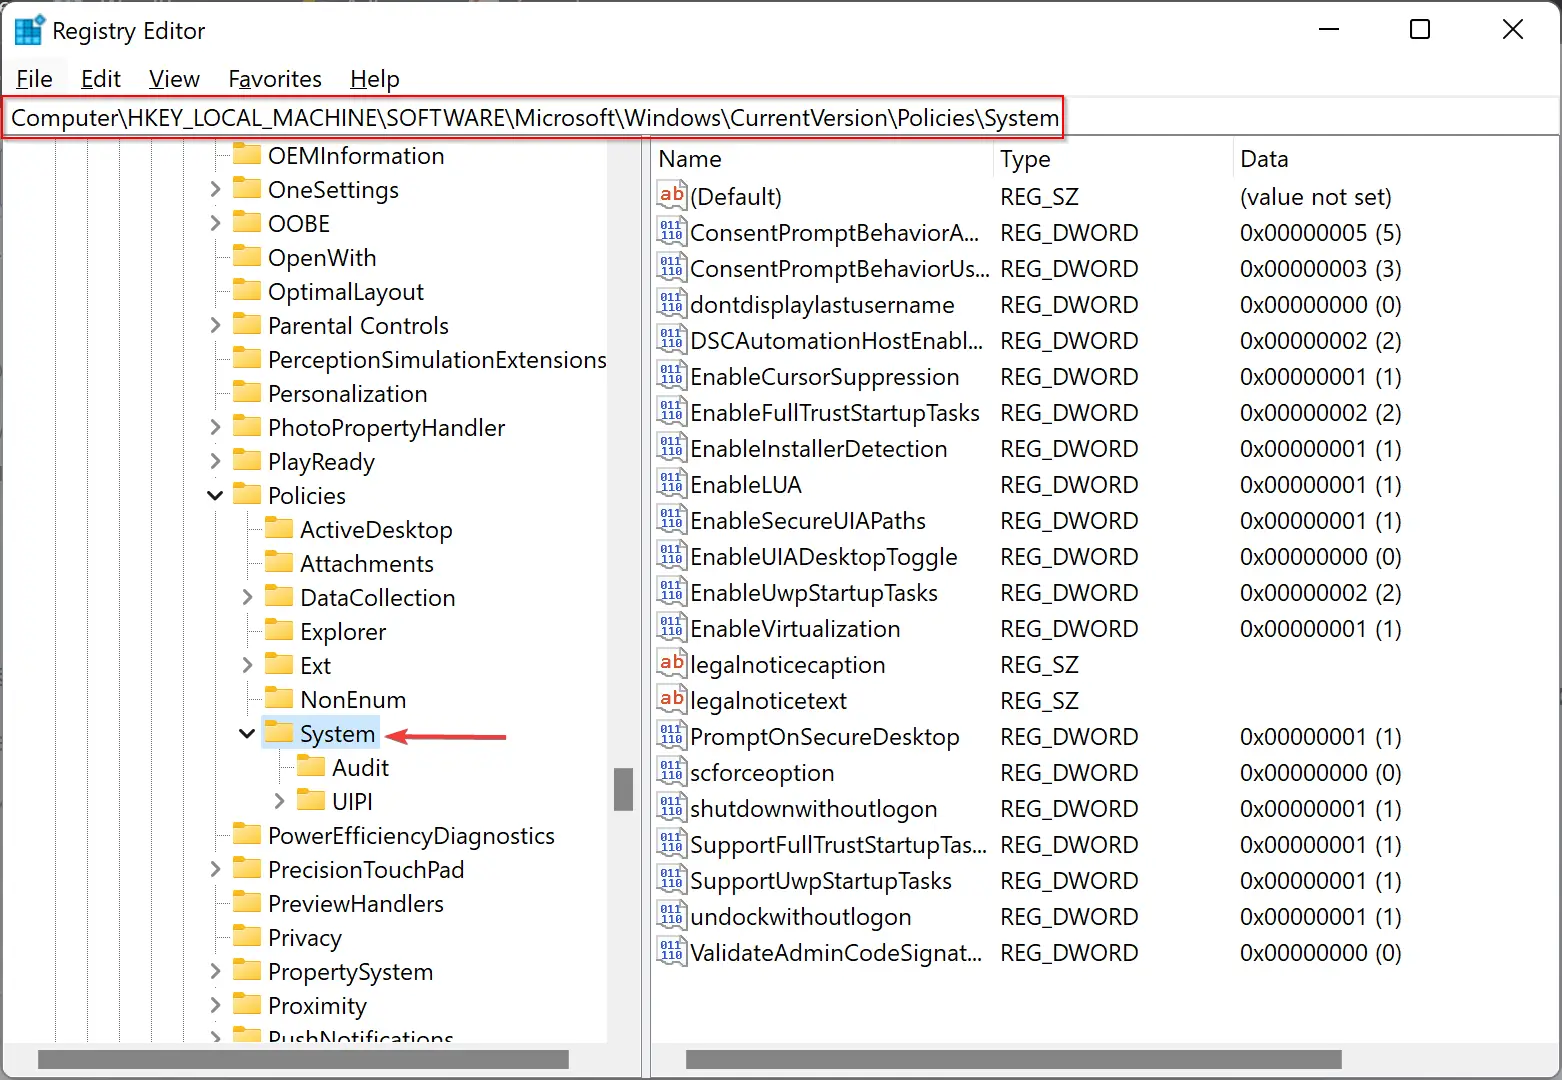
Step 2. Navigate to the following key from the left sidebar when the Registry Editor window opens:-
Computer\HKEY_LOCAL_MACHINE\SOFTWARE\Microsoft\Windows\CurrentVersion\Policies\System
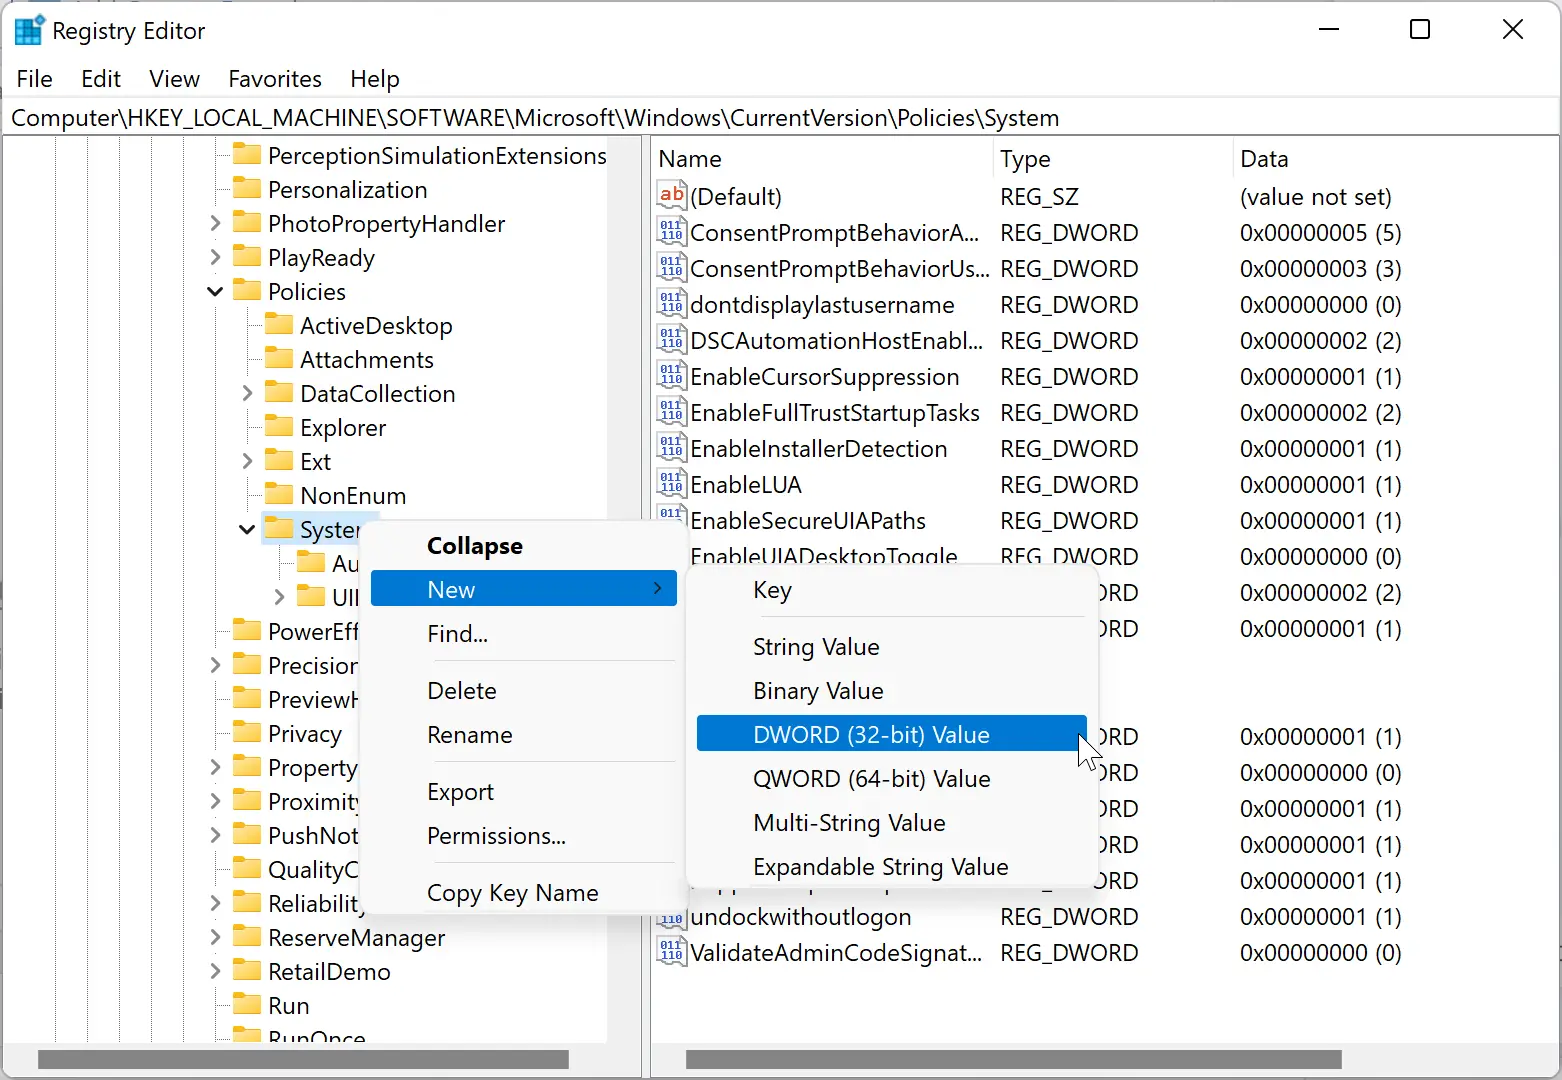
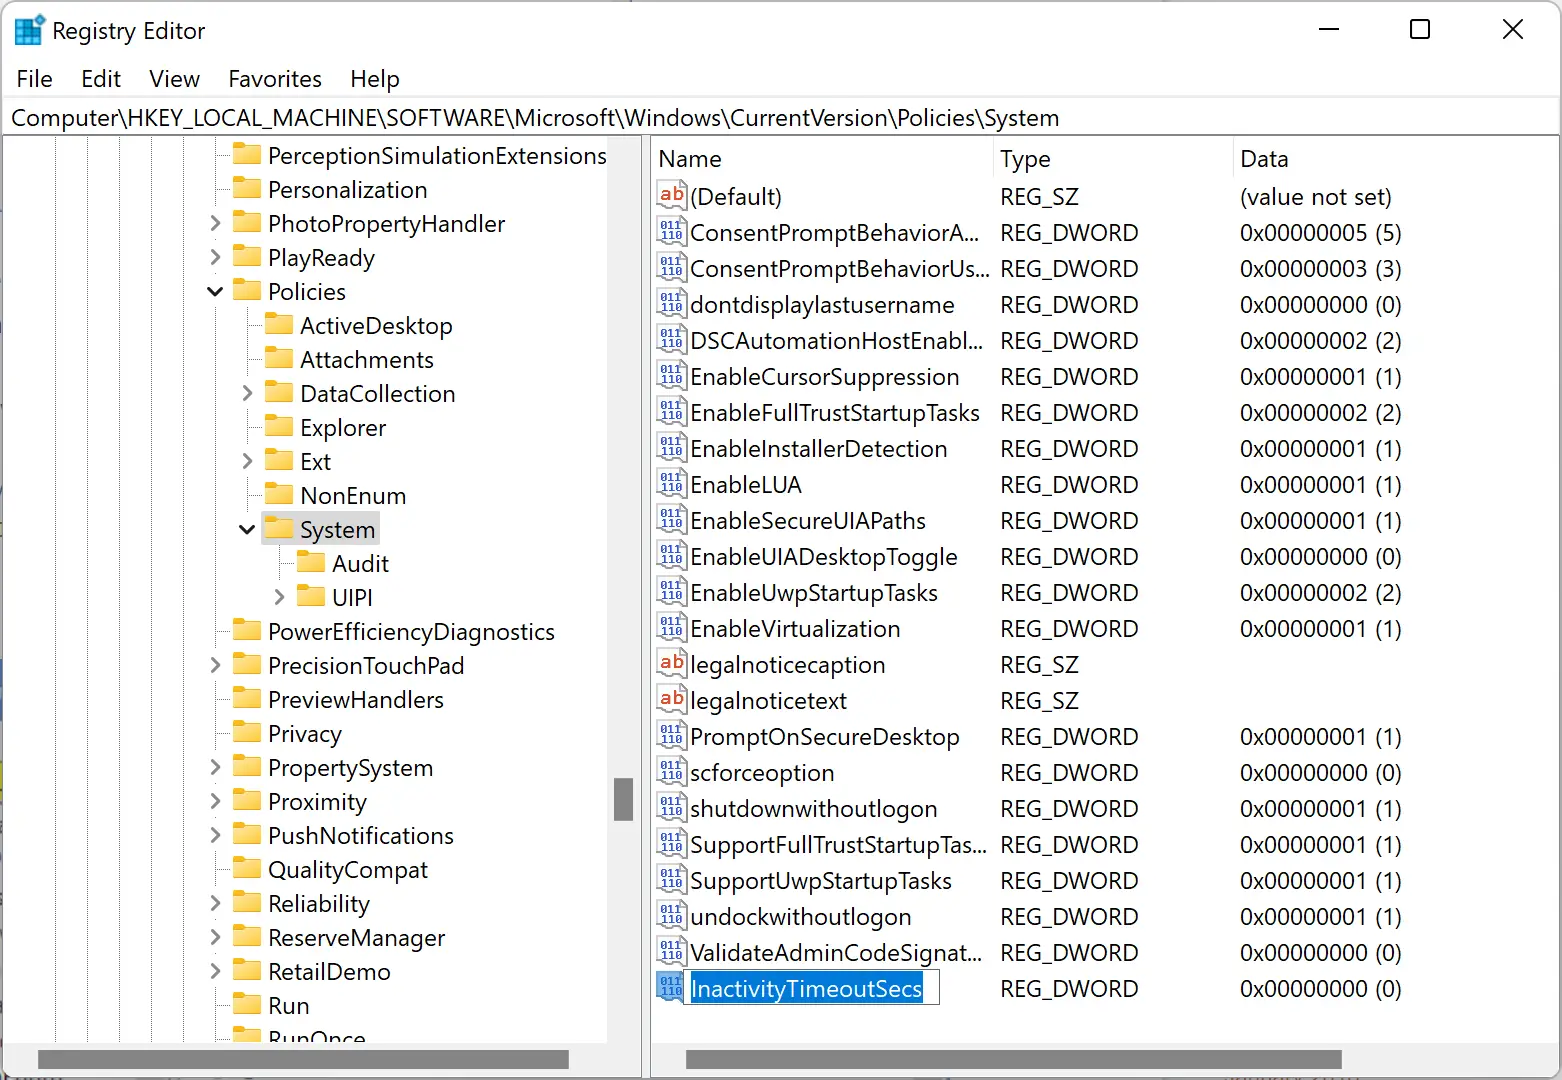
Step 3. Then, right-click the “System” folder, and select New > DWORD (32-bit) Value. Name it as InactivityTimeoutSecs.
Step 4. After that, double-click on the “InactivityTimeoutSecs” to modify its value. Select base as “Decimal” in the pop-up window and enter the amount of idle time before Windows 11/10 locks the screen. For example, if you want Windows to auto-lock your PC after “10” minutes of inactivity, then set the value to “600.”
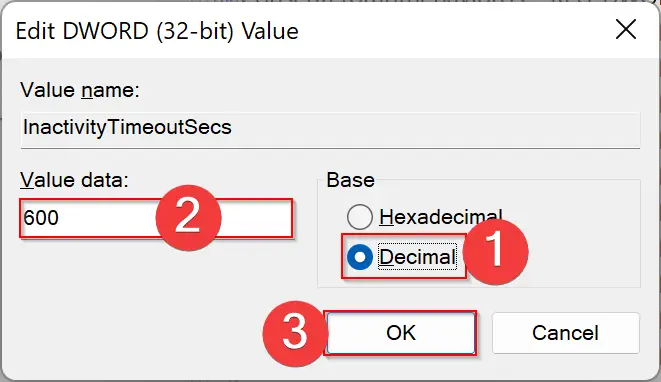
Step 5. Click OK.
Step 6. Close the registry editor and reboot your computer to apply the changes.
Conclusion
In conclusion, securing your computer from unauthorized access is vital, and one way to achieve this is by enabling auto-lock after a specified inactivity time. Windows 11 and 10 provide users with various options to customize the lock screen timeout, but changing this setting only applies to the user account making the change. To apply the policy to all user accounts, you can use the Local Security Policy (secpol.msc) or the Registry Editor. While the Local Security Policy is not available in the Home edition, it can be enabled using a script. By following the steps outlined above, users can increase or decrease the lock screen timeout to suit their preferences, thereby ensuring that their computer remains secure from prying eyes.