In this digital age, ensuring the security of your personal data while browsing the web has become more crucial than ever. Microsoft Edge, the popular web browser, offers a convenient feature called Automatic HTTPS that enhances your browsing safety by prioritizing secure connections. By enabling this feature, you can protect your sensitive information from prying eyes and potential threats. In this user-friendly guide, we will walk you through the steps to enable Automatic HTTPS in Microsoft Edge, empowering you to browse with confidence.
What is Automatic HTTPS?
Automatic HTTPS is a feature in web browsers, including Microsoft Edge, that prioritizes secure connections while browsing the internet. It ensures that websites are loaded using the HTTPS protocol instead of the less secure HTTP. With Automatic HTTPS enabled, the data transmission between your browser and the websites you visit is encrypted, protecting your sensitive information from potential interception by hackers or cybercriminals. By automatically switching to HTTPS, this feature enhances your online security and safeguards your personal data, providing you with a safer browsing experience.
How to Enable Automatic HTTPS in Microsoft Edge?
Follow these steps to turn on Automatic HTTPS in Microsoft Edge:-
Step 1. Before we dive into the configuration, it’s important to ensure that you have the latest version of Microsoft Edge installed on your device. Keeping your browser up to date guarantees access to the latest security features and enhancements.
Step 2. Open Microsoft Edge and type “edge://settings/privacy” in the address bar. Press Enter to access the privacy settings specifically.
Step 3. Scroll down the settings page until you find the “Security” section. Within this section, you will spot the option labeled “Automatically switch to more secure connections with Automatic HTTPS.”
Step 4. Toggle the switch next to “Automatically switch to more secure connections with Automatic HTTPS” to the “On” position. By enabling this feature, Microsoft Edge will prioritize loading websites using the HTTPS protocol, which encrypts the data transmission between your browser and the websites you visit.
Step 5. Microsoft Edge offers two options for Automatic HTTPS behavior. The default option is “Switch to HTTPS only on websites likely to support HTTPS.” This setting ensures that Edge will automatically upgrade your connection to HTTPS if the website supports it. It provides a balance between security and compatibility.
However, if you prefer a more stringent approach, you can choose the “Always switch from HTTP to HTTPS” option. This setting will only connect to websites that support the HTTPS protocol. If a website doesn’t have HTTPS enabled, Edge will refuse the connection and display an error message. Keep in mind that you may encounter the “Hmmm… can’t reach this page” error more frequently with this option enabled.
Troubleshooting
In some cases, the Automatic HTTPS option may not be readily available in Edge’s settings. Don’t worry; you can still enable it by following these additional steps:-
Step 1. In the address bar, type “edge://flags/#edge-automatic-https” and hit Enter. This will take you to the flags page.
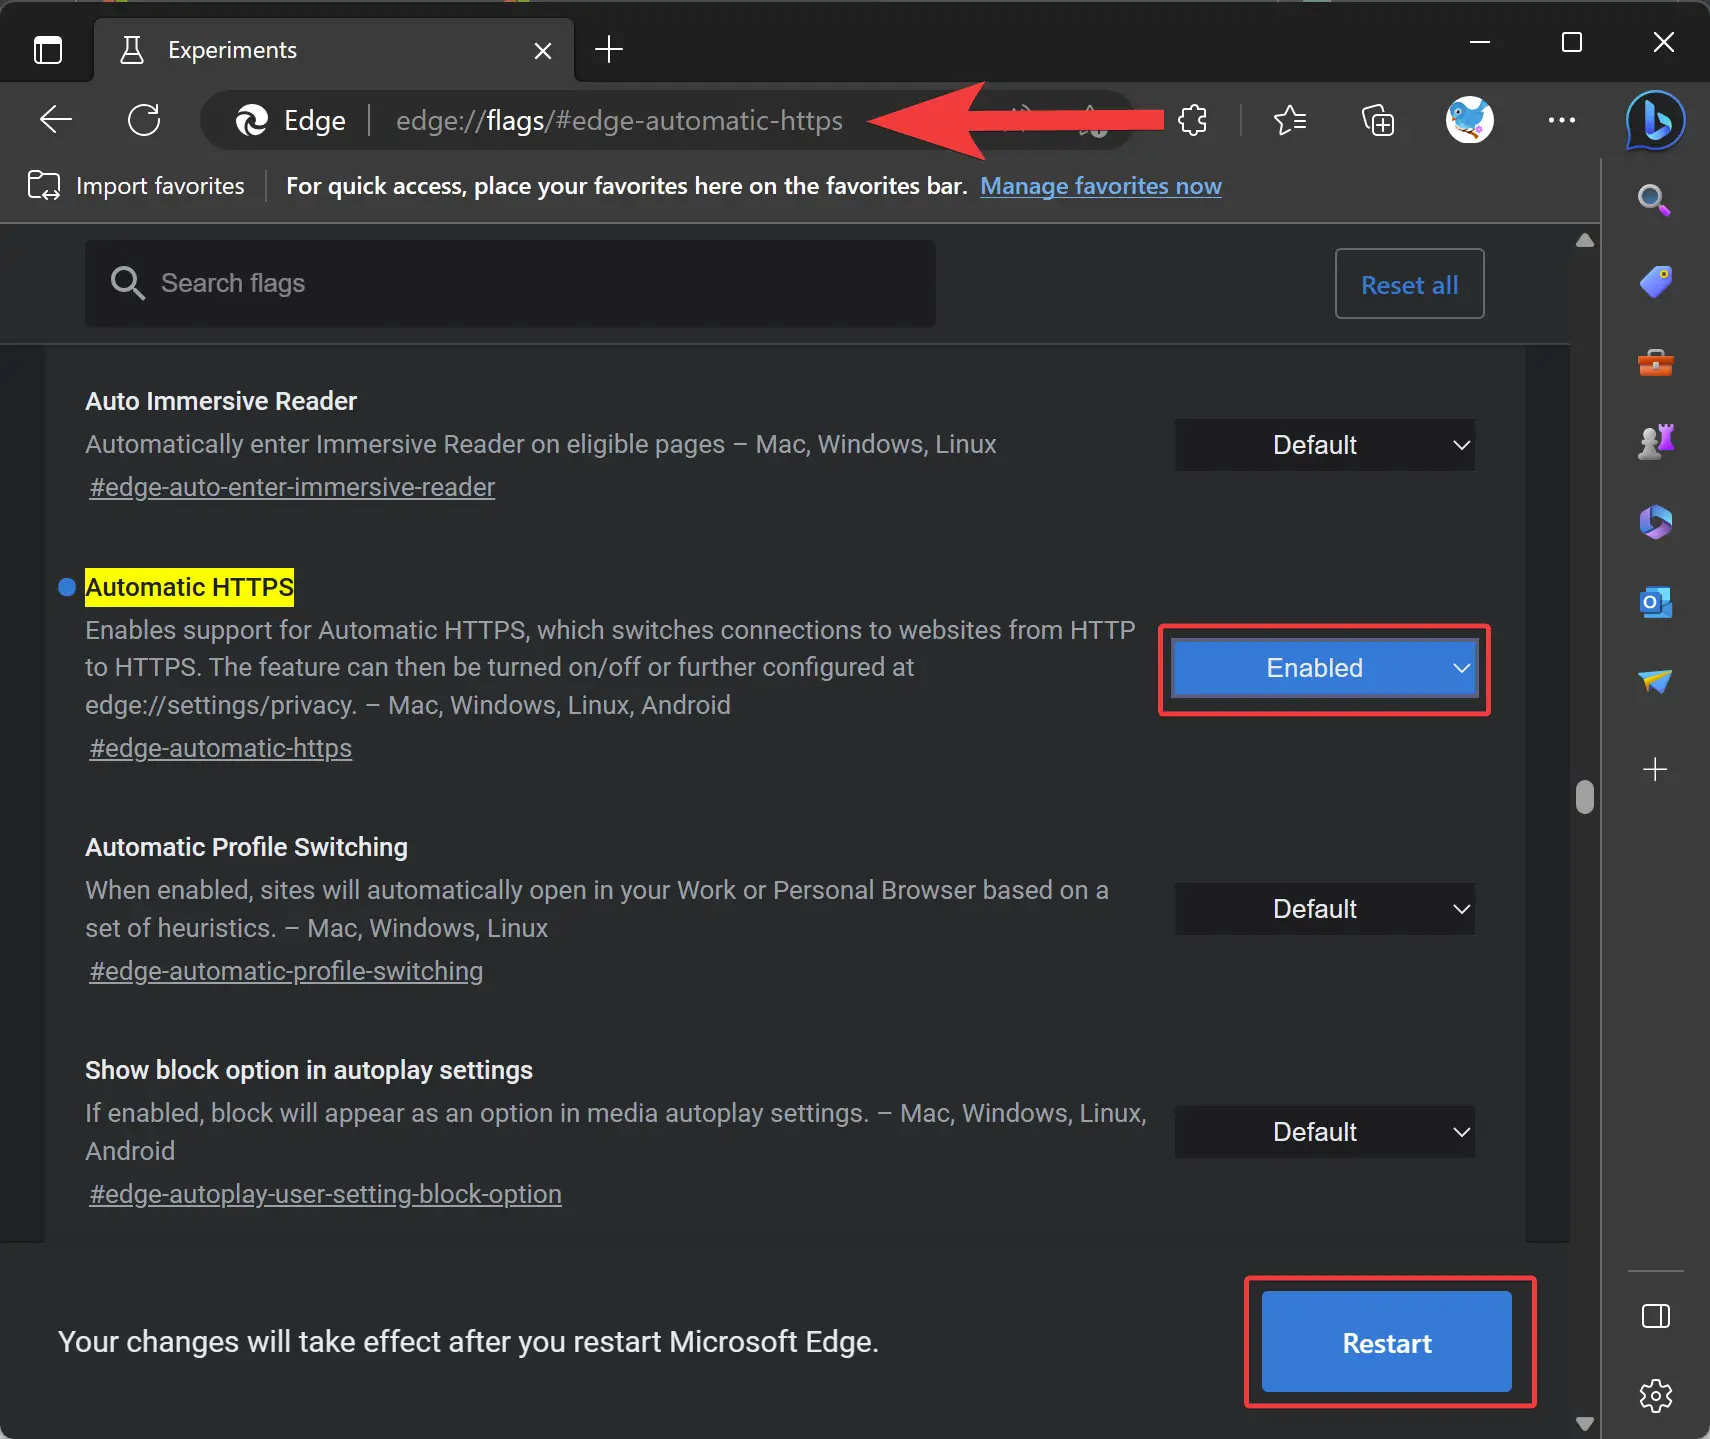
Step 2. Locate the “Automatic HTTPS” option and set the dropdown menu to “Enabled.”
Step 3. Click on the Restart button to restart Microsoft Edge for the changes to take effect.
Conclusion
Congratulations! You have successfully enabled Automatic HTTPS in Microsoft Edge, bolstering your browsing security and protecting your personal data. By prioritizing secure connections and encrypting your data transmission, Microsoft Edge helps you stay one step ahead of potential threats. Remember to keep your browser up to date to benefit from the latest security enhancements. Now you can browse the web with peace of mind, knowing that your online activities are safeguarded by Automatic HTTPS in Microsoft Edge. Stay safe, and enjoy your secure browsing experience!