Windows 11 22H2 includes a new feature known as “Do Not Disturb.” This silence notification banner on the desktop and help you concentrate without breaking your workflow. You can also configure the “Do Not Disturb” feature to automatically enable the Notifications settings, control priority, and more.
Earlier it was known as “Focus assist,” but in Windows 11 version 22H2, Microsoft changed the name, tweaked the interface, and added new settings.
In this gearupwindows article, you will learn about enabling, disabling, and scheduling “Do Not Disturb” in Windows 11 to Stop Notifications.
How to Turn On Do Not Disturb on Windows 11 Settings?
To enable the “Do not disturb” on Windows 11, use these steps:-
Step 1. First, open Settings.
Step 2. Then, select the System category in the left sidebar.

Step 3. On the right sidebar, click on the Notifications tab.
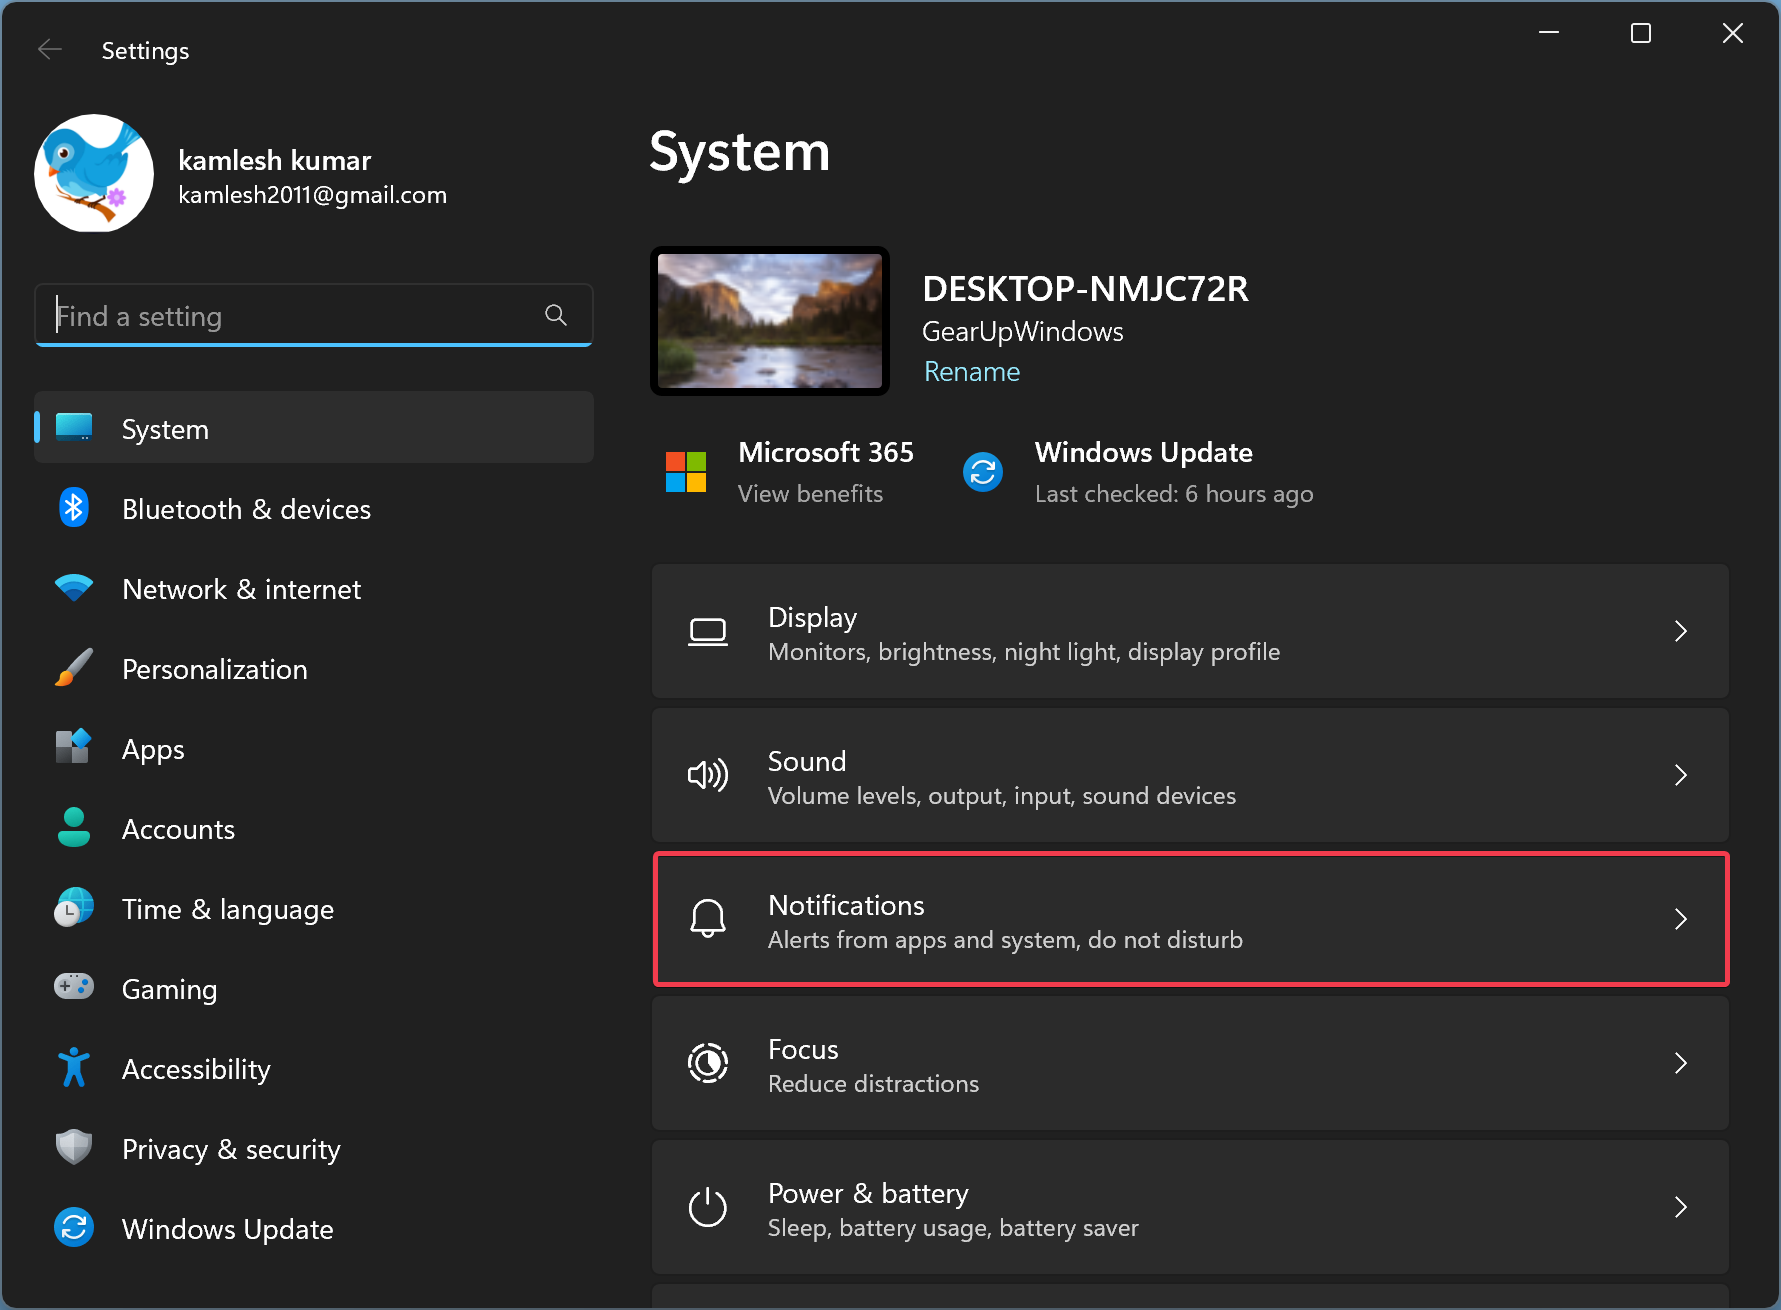
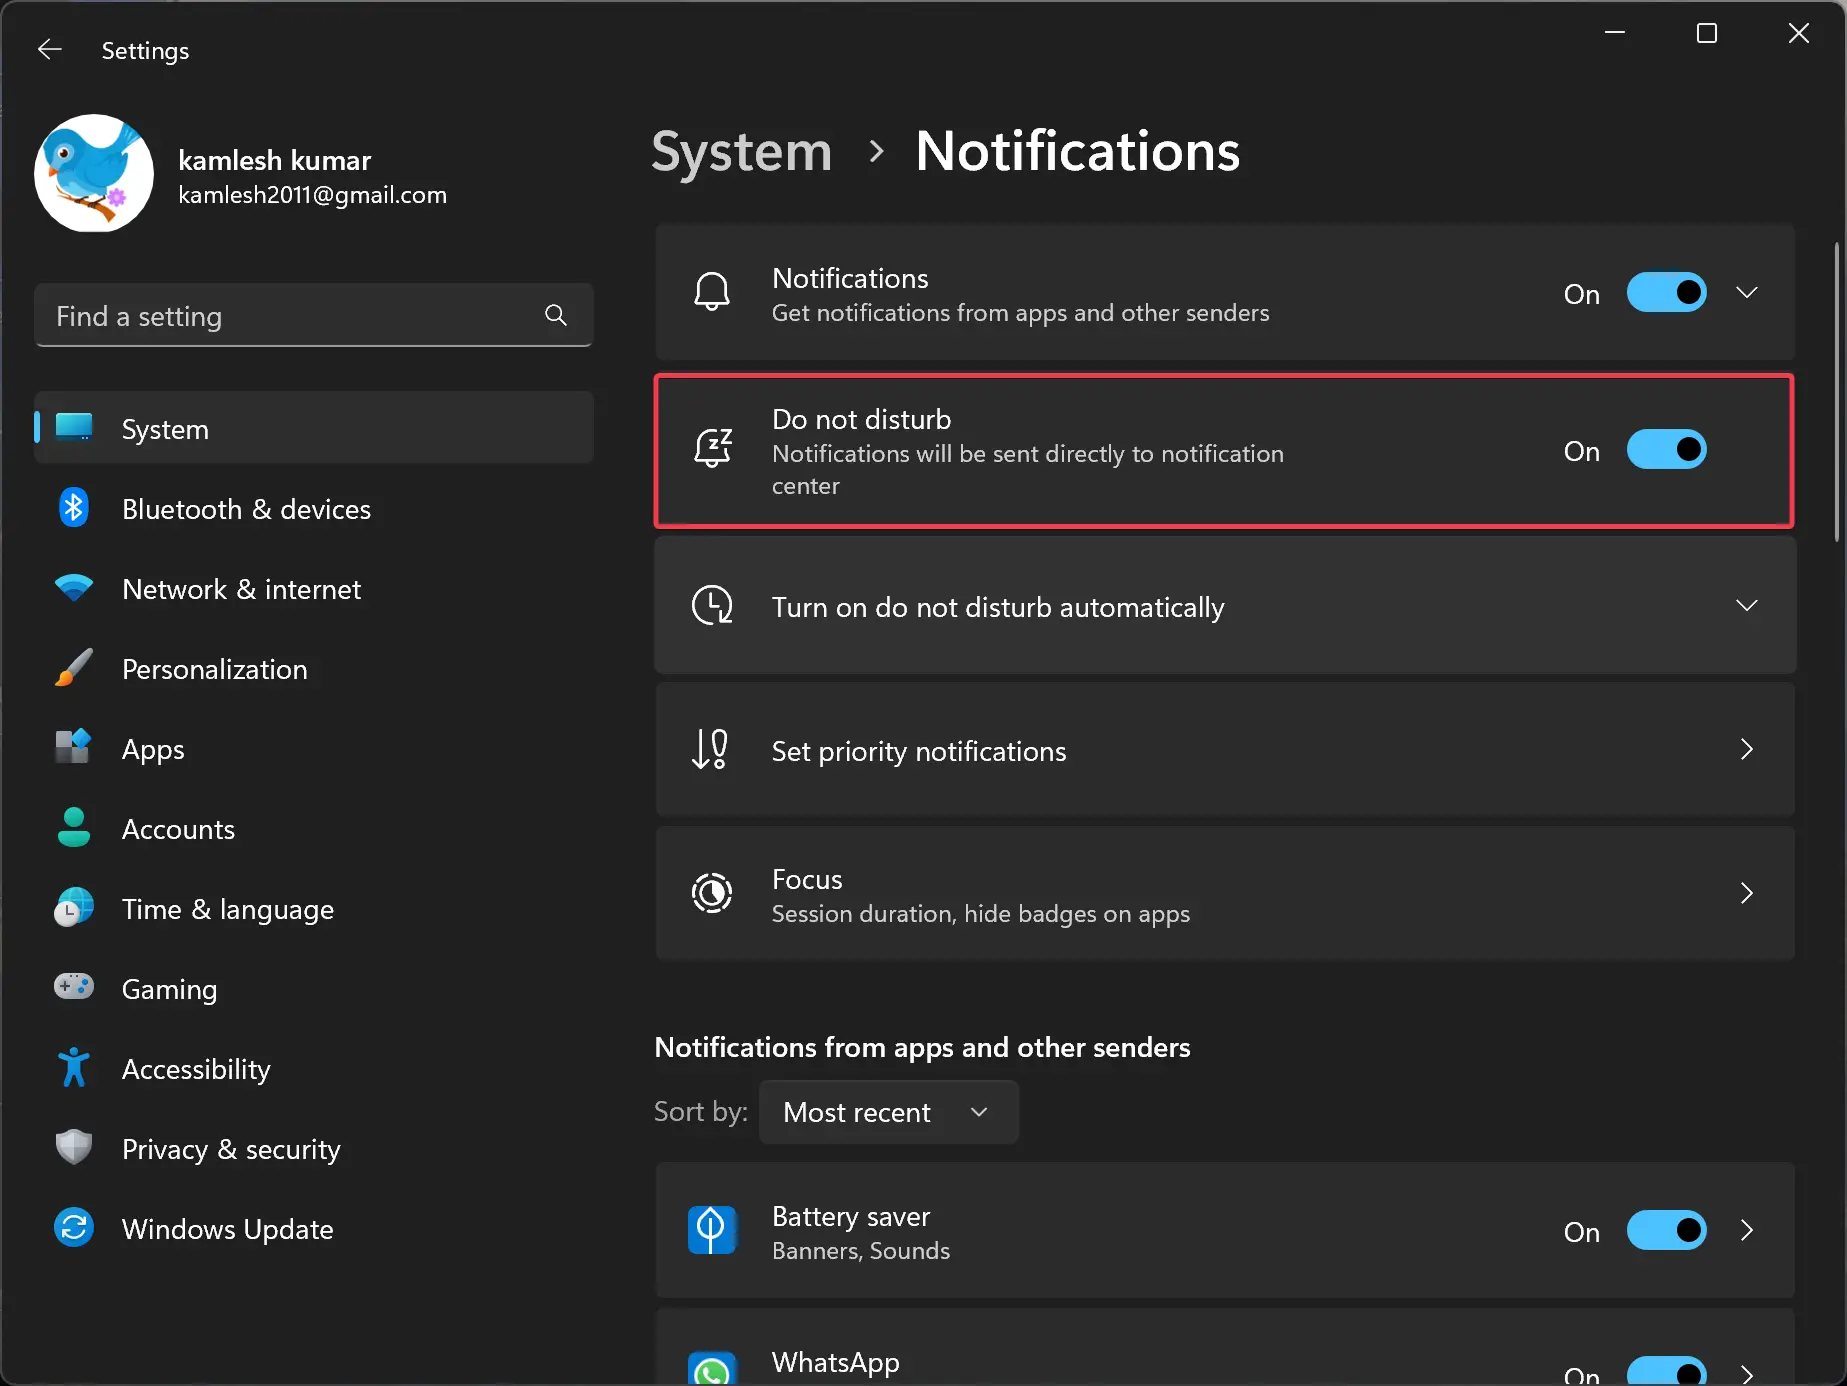
Step 4. Finally, turn On the “Do not disturb” toggle switch to stop distraction on Windows 11.
Once you complete the above steps, Windows 11 will silence all notification banners. However, if you need, you can find the missed notification in Notification Center (Windows + N).
How to Enable or Disable Do Not Disturb in Notification Center?
To turn on “Do not disturb” in Notification Center, use these steps:-
Step 1. Open the Notification Center by clicking on the date and time on the taskbar.
Step 2. Click the Bell icon in the top-right corner.
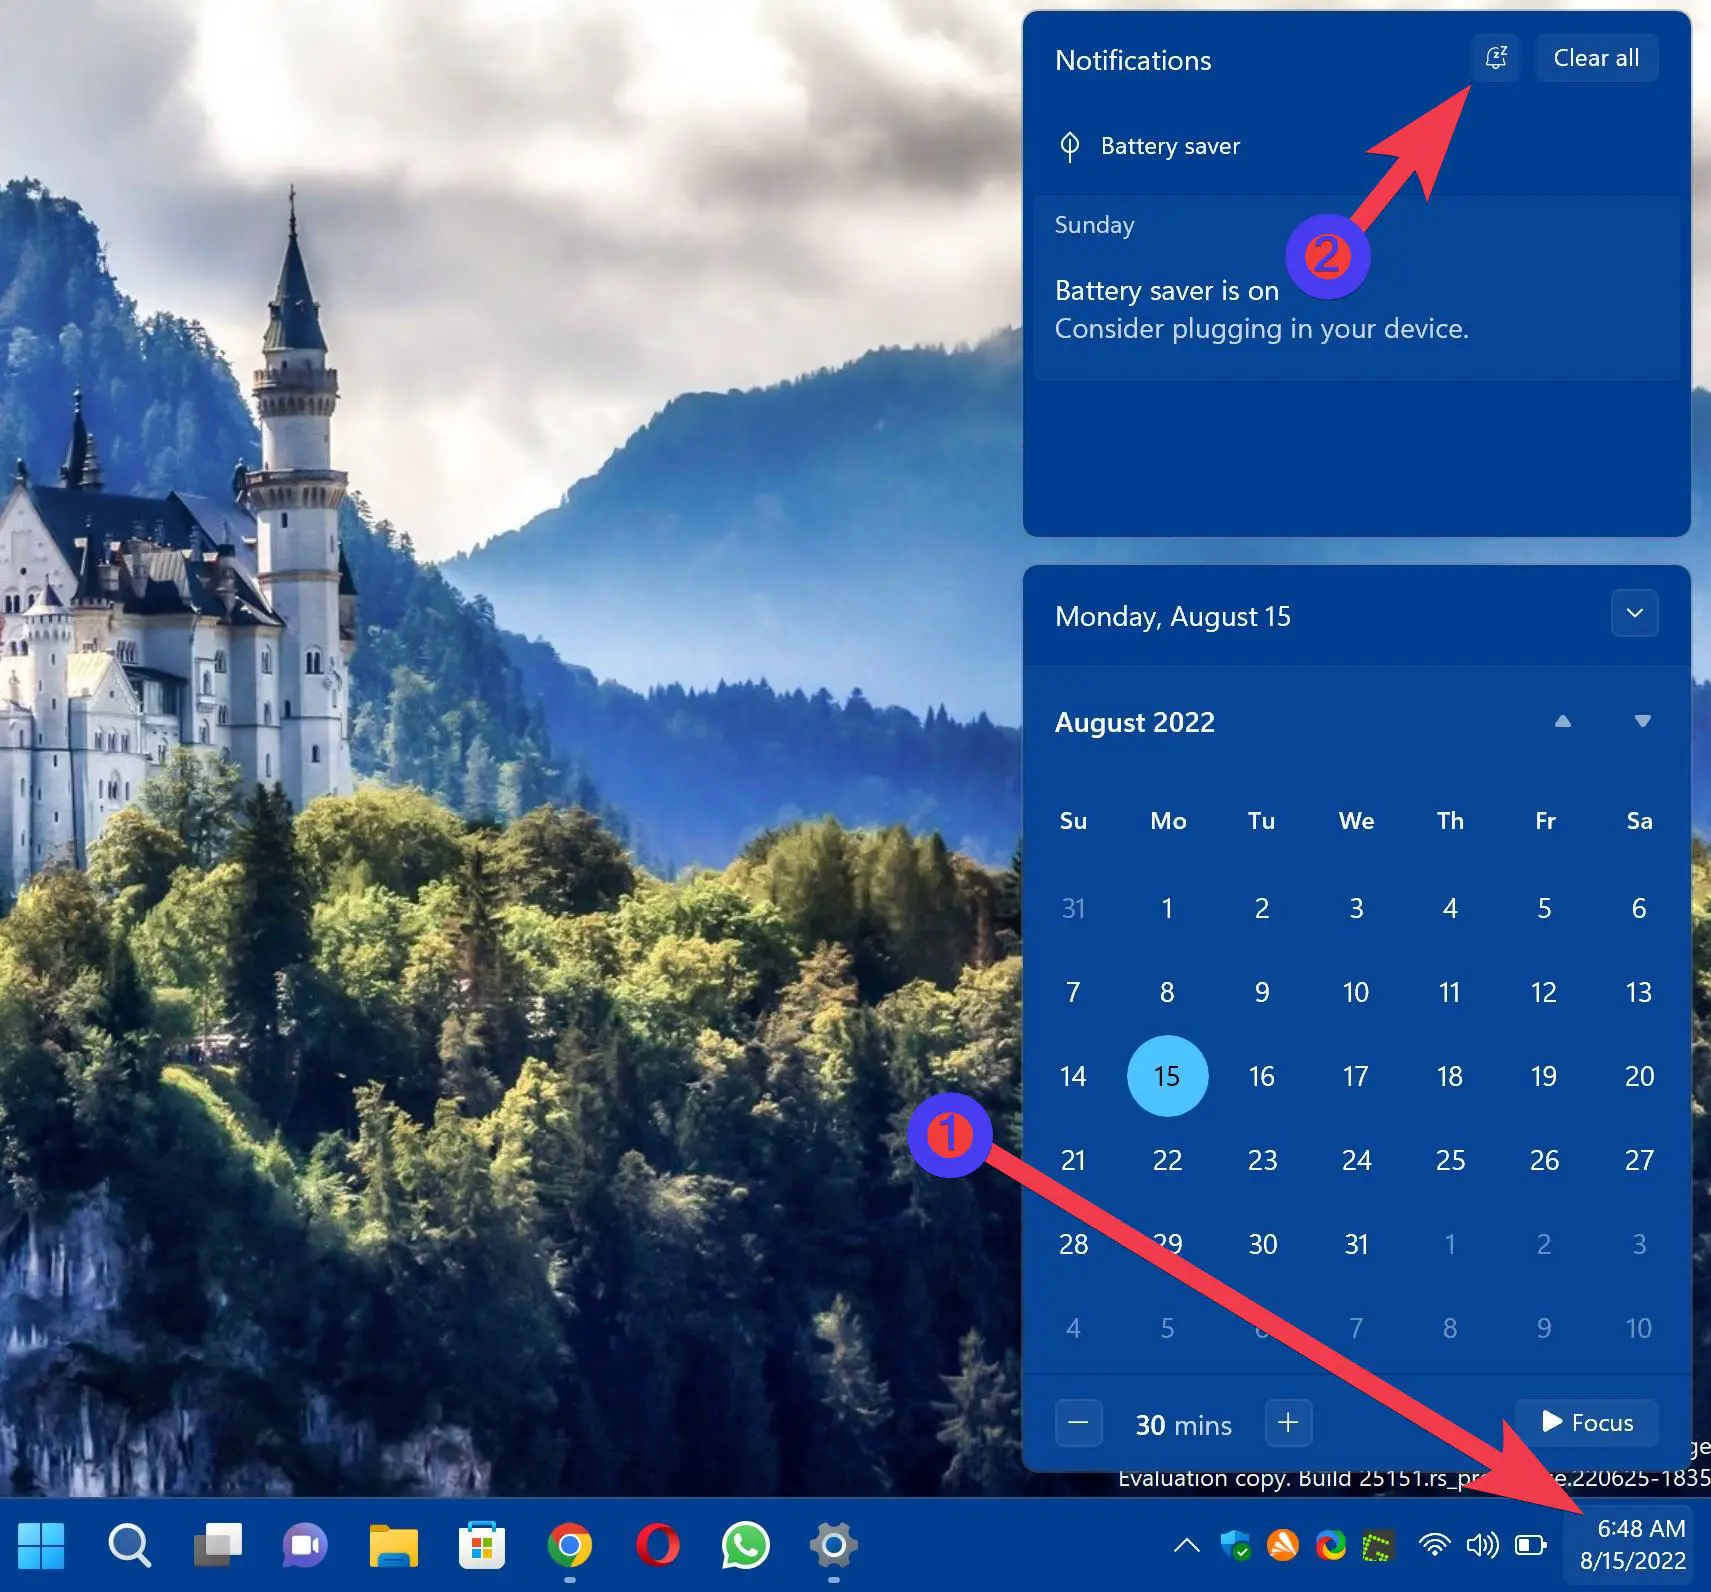
Once you use the above steps, the “Do not disturb” mode is enabled on your PC. Clicking the same Bell icon, you can turn off “Do not disturb” mode.
How to Turn Off Do Not Disturb on Windows 11 Settings?
To disable the “Do not disturb” mode on Windows 11 Settings, use these steps:-
Step 1. First, open Settings.
Step 2. Then, select the System category in the left sidebar.
Step 3. On the right sidebar, click on the Notifications tab.
Step 4. At last, turn Off the “Do not disturb” toggle switch to stop distraction on Windows 11.
Once you complete the above steps, notifications and sounds will resume.
How to Schedule Do Not Disturb on Windows 11?
If you want to stop notifications each day for a specific period, you can schedule “Do not disturb” on your Windows 11 machine.
To schedule “Do not disturb” in Windows 11, use these steps:-
Step 1. First, open Settings.
Step 2. Then, select the System category in the left sidebar.
Step 3. On the right sidebar, click on the Notifications tab.
Step 4. Turn On the “Do not disturb” toggle switch.
Step 5. Then, click the “Turn on do not disturb automatically” tile to expand it.
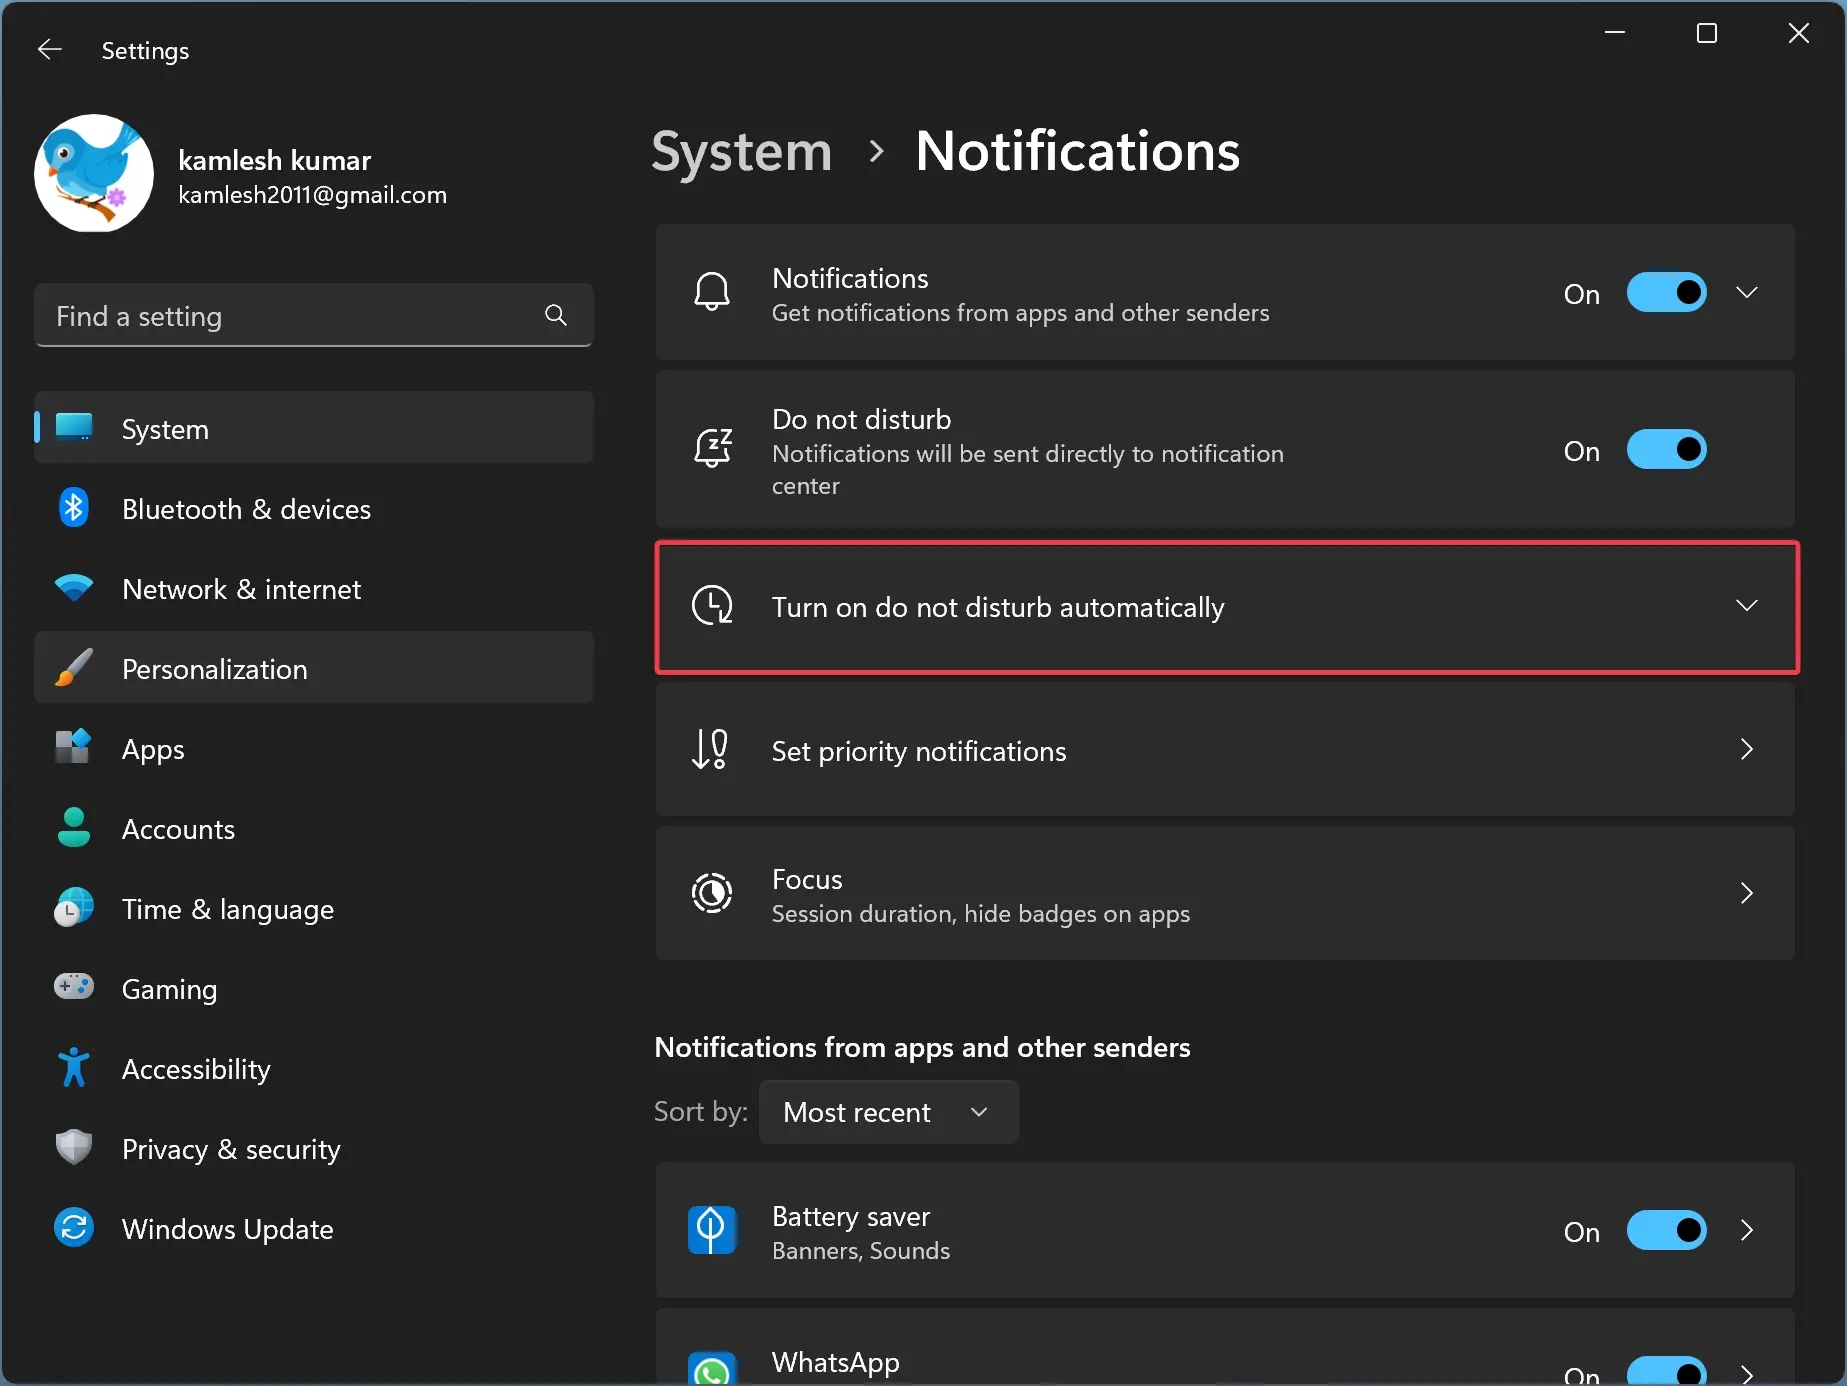
Step 6. Check the checkbox “During these times.”
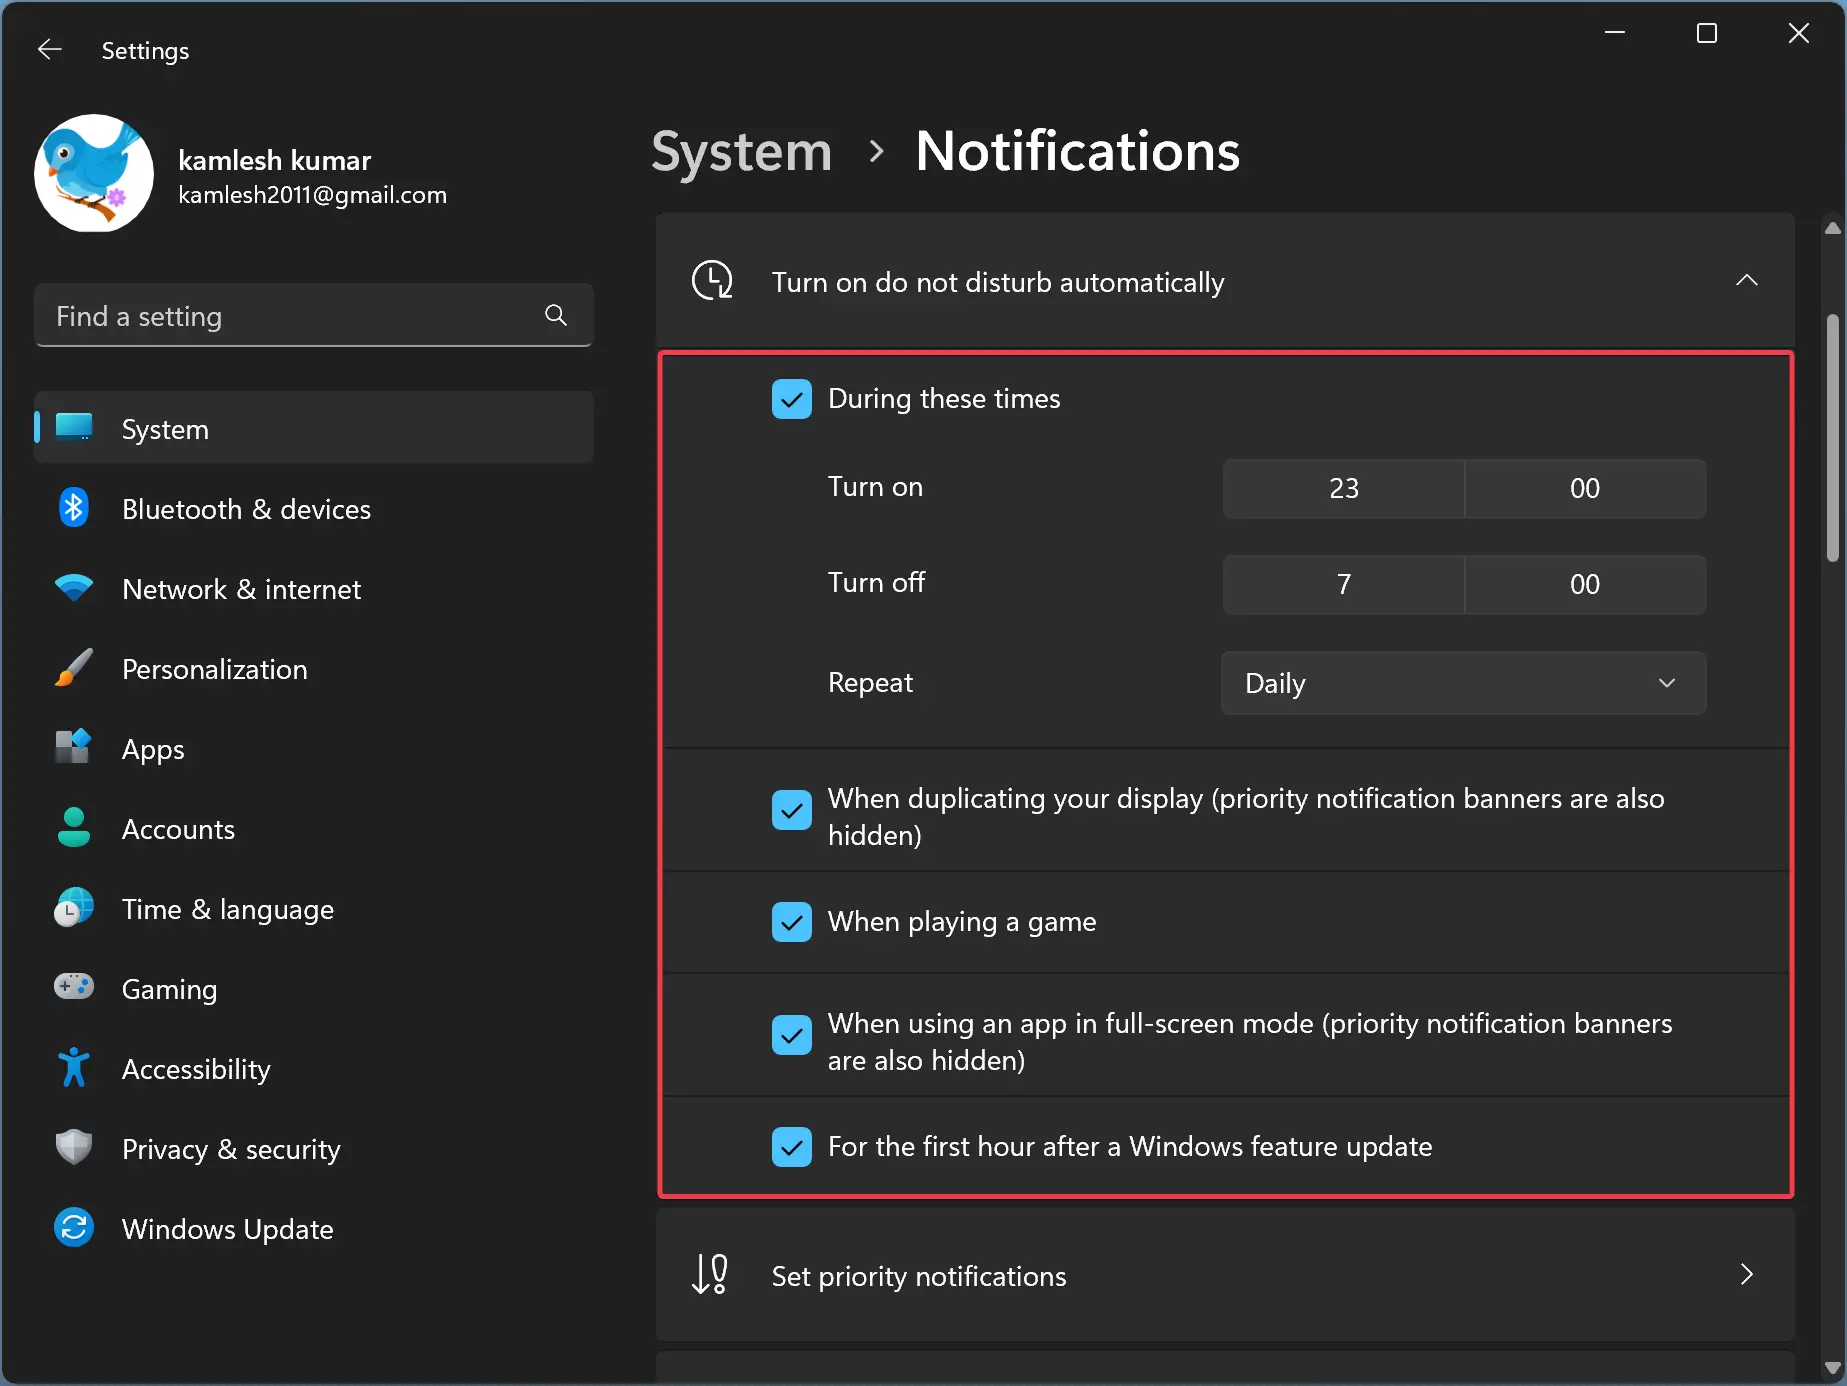
Step 7. Set the “Turn on” and “Turn off” times to silence notifications.
Step 8. In the “Repeat” drop-down menu, you can choose “Daily,” “Weekends,” or “Weekdays.”
Apart from that, here you also decide whether to stop notifications banners at certain times, such as:-
- When duplicating your display (priority notification banners are also hidden).
- When playing a game.
- When using an app in full-screen mode (priority notification banners are also hidden).
- For the first hour after a Windows feature update.
Once you complete the above steps, the “Do not disturb” feature will enable and disable automatically, depending on your configuration.
Conclusion
In conclusion, the “Do Not Disturb” feature in Windows 11 22H2 is a great addition to the operating system for those who want to focus on their work without getting distracted by notifications. With this feature, users can easily silence all notification banners on their desktop and even schedule it to turn on and off at specific times automatically. This feature was previously known as “Focus Assist” and has been improved with a new name and new settings. By following the simple steps outlined in this article, users can easily enable or disable the “Do Not Disturb” feature in Windows 11 and control their notifications and distractions.